Tag Archives: crafts

Bloggy-Love-Thursday

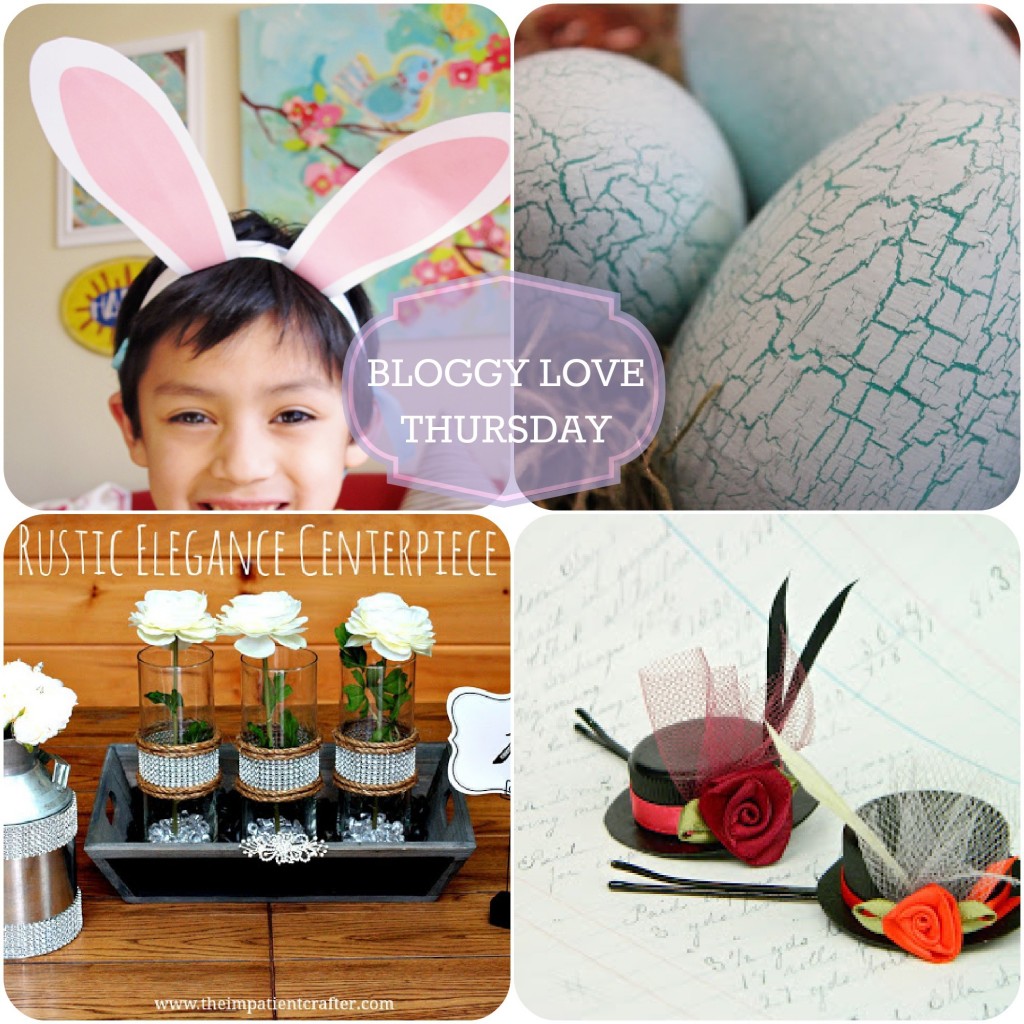
I am super excited to share with you something that will be taking place EVERY THURSDAY!  What is BLOGGY LOVE THURSDAY?
It is the one day of the week where me and four of my friends will showcase each other’s crafts! If there is something you would like to showcase send me an email [email protected]. You never know when something of yours will show up on here! Let’s get started on today’s wonderful crafts.

Cathie Filian always puts a smile on my face. Check out these epic crackle eggs she made!http://cathiefilian.blogspot.com/2013/03/diy-crackle-finish-easter-eggs.html

Margot Potter is a bloggy queen, did you know that? If you don’t believe me you can check this out….She made a stunning “rustic elegance centerpiece”…http://www.theimpatientcrafter.com/2013/03/diy-rustic-elegance-centerpiece.html

Claudine hellmuth: artist + illustrator …Well there is not much to say except TALENTED.. If you love illustrations then she is the person you need to stalk! She has a free download on her site, click the link below to get to it… All I will say is it’s “Bunny-licious”.
http://claudinehellmuth.blogspot.com/2013/03/free-easter-bunny-ears-printable.html

Mark Montano is going to rule the world one day. Maybe I can be his assistant or something. I can’t wait to make these “Tiny Hat” bobby pins that he put up yesterday on his blog! Can you imagine these in your hair! OMG!
http://markmontanoblogs.blogspot.com/2013/03/How-to-make-tiny-hats.html


I hope you enjoyed bloggy Thursday!

jaderbomb

Happy Thursday Jaderbugs! I am sitting here listening to all of my amazing songs on my computer, thinking about what it would be like if I could fly! You know what I mean right? The kind of flying that fairies and little bugs do. Somehow it seems like it would be easy and so very whimsical. Unfortunately I am not flying, but I am blogging. I guess it’s the closest thing to flying I can do. I promise to let you know if I ever learn how to fly… Maybe I will even do a tutorial on it, hehe.

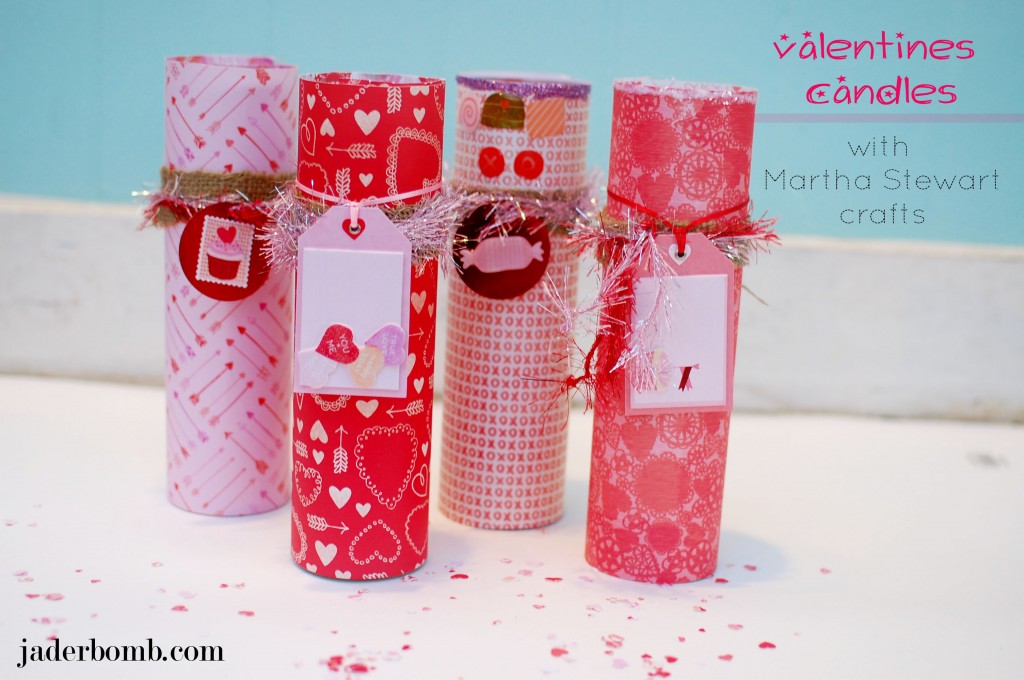
On to the awesome craft I am sharing today. I am so excited to share with you a new project I am doing with Martha Stewart Crafts. It’s called #12monthsofmartha & #marthastewartcrafts <——(this is the hashtag you can use if you repin this or want to see other’s who are a part of this project)

I am super giddy about it and I think you will too. Each month I will be sharing with you new items from the Martha Stewart crafts line that is brand spanking new~

So yes! You will be seeing things that are not yet in the stores… Today we are learning how to “cover” up a pillar candle to give it a new spicy look.

You can find all of her products at Michael’s Arts and Crafts, Jo-Anns Fabrics & Crafts and Amazon.com.

valentines-candles-martha-stewart


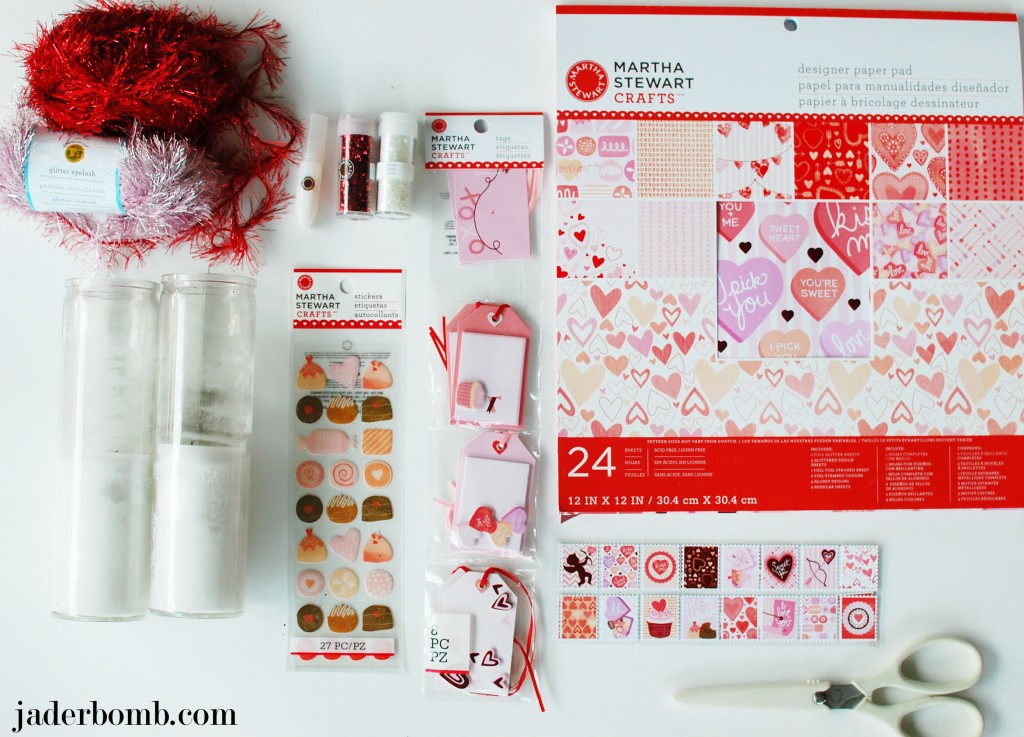
INGREDIENTS:
*Martha Stewart Designer Paper
*Scissors
*Glitter
*Yarn
*Twine
*Candles
*Stickers
*Labels

If you want to purchase any of the items I used in this tutorial click on the links and booyah! It’s that easy.


valentines-candles-martha-stewart

Are you getting excited!

valentines-candles-martha-stewart

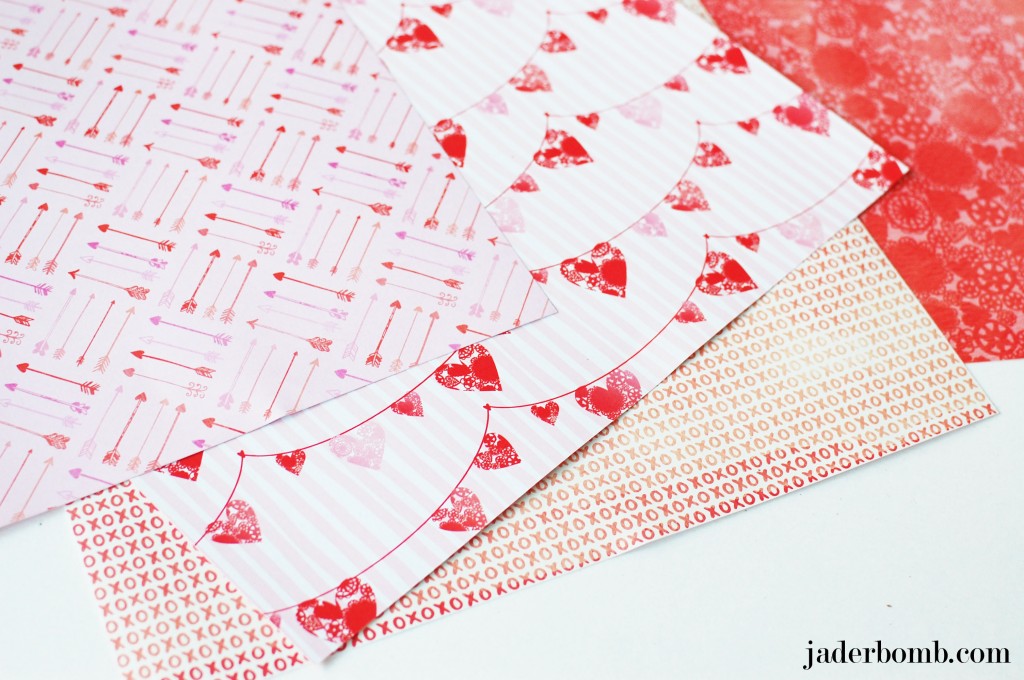
I am loving this beautiful designer paper! I love the designs on both sides of the paper. You can never go wrong with this pack of paper.

valentines-candles-martha-stewart

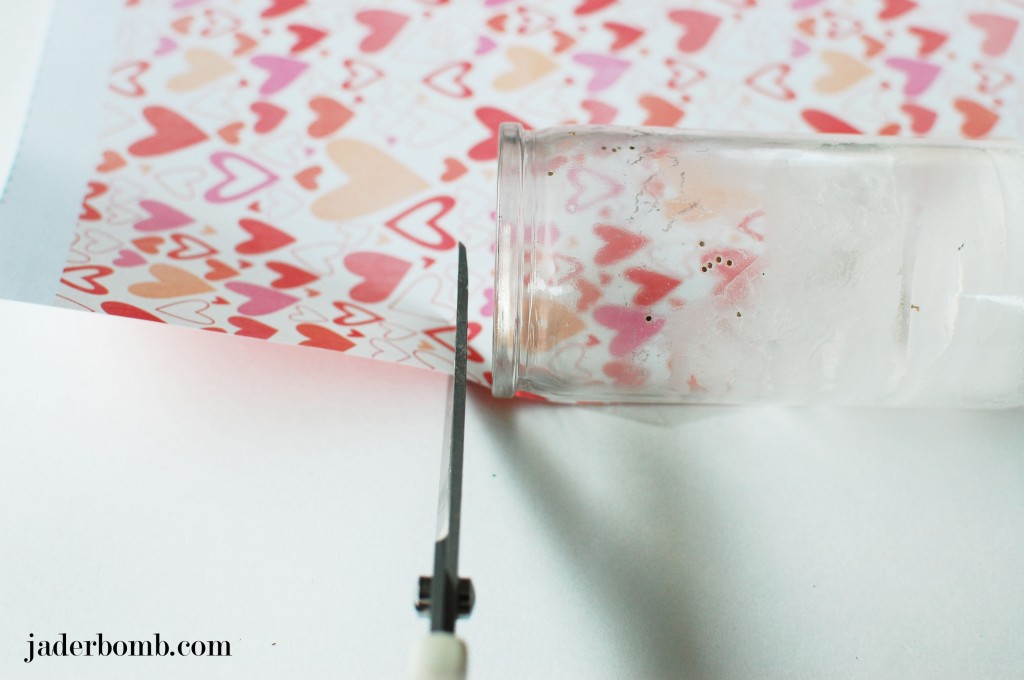
The first thing you will do is lay a piece of paper down on a flat surface. Place the candle on top of the paper, then cut whatever hangs over the edge of the candle.

valentines-candles-martha-stewart

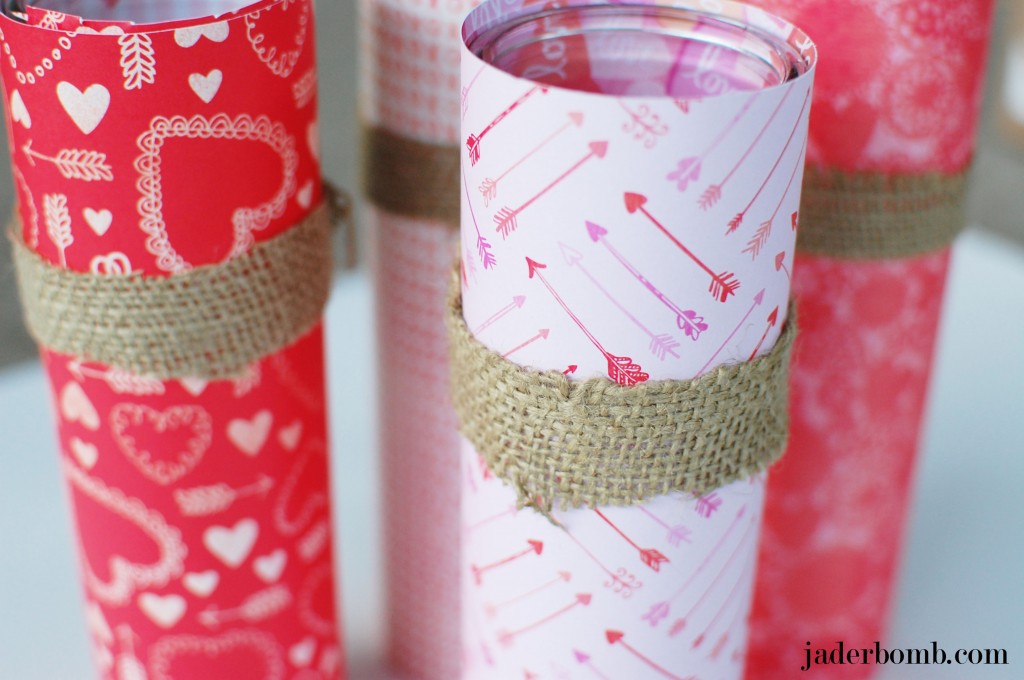
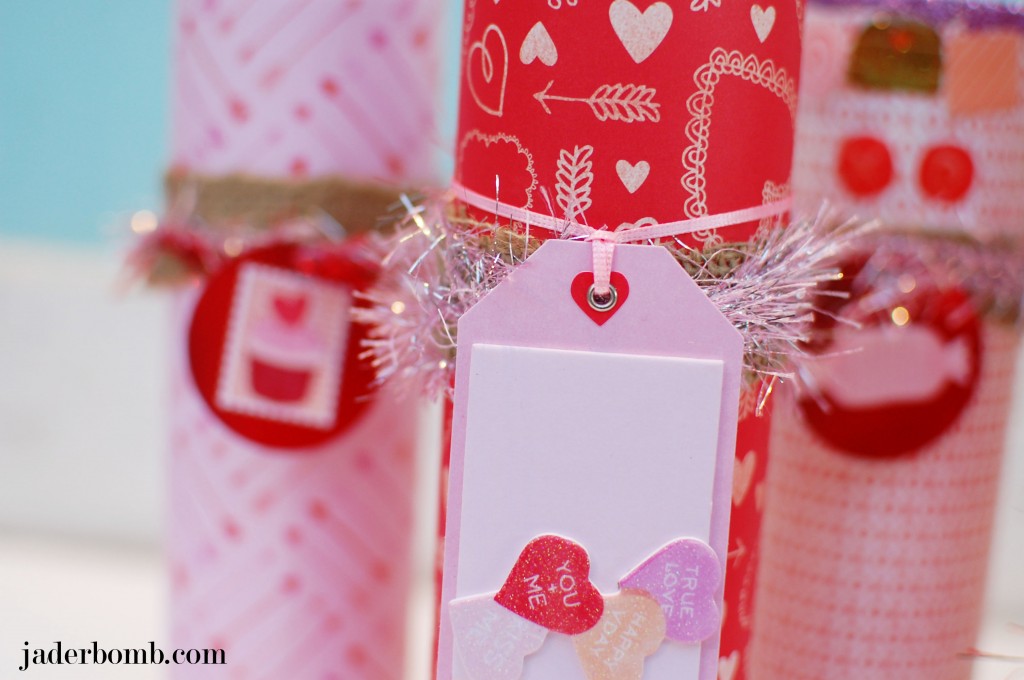
When you are done wrapping all of your candles it will look like a sleeve. I love dressing up candles, especially like this. I cut a few thin pieces of burlap and wrapped them around the top edge.

valentines-candles-martha-stewart

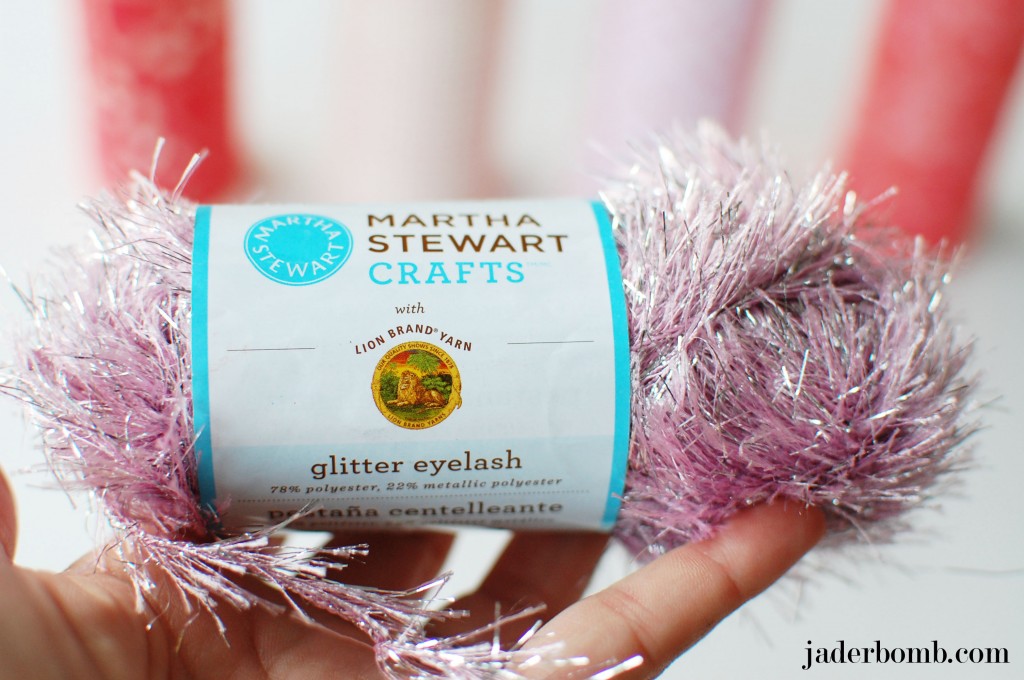
HEAVEN. That is all I will say about this glitter eyelash yarn. I can’t wait to show you Saturday what else I made with this. I am telling you, it’s some magical stuff.

valentines-candles-martha-stewart

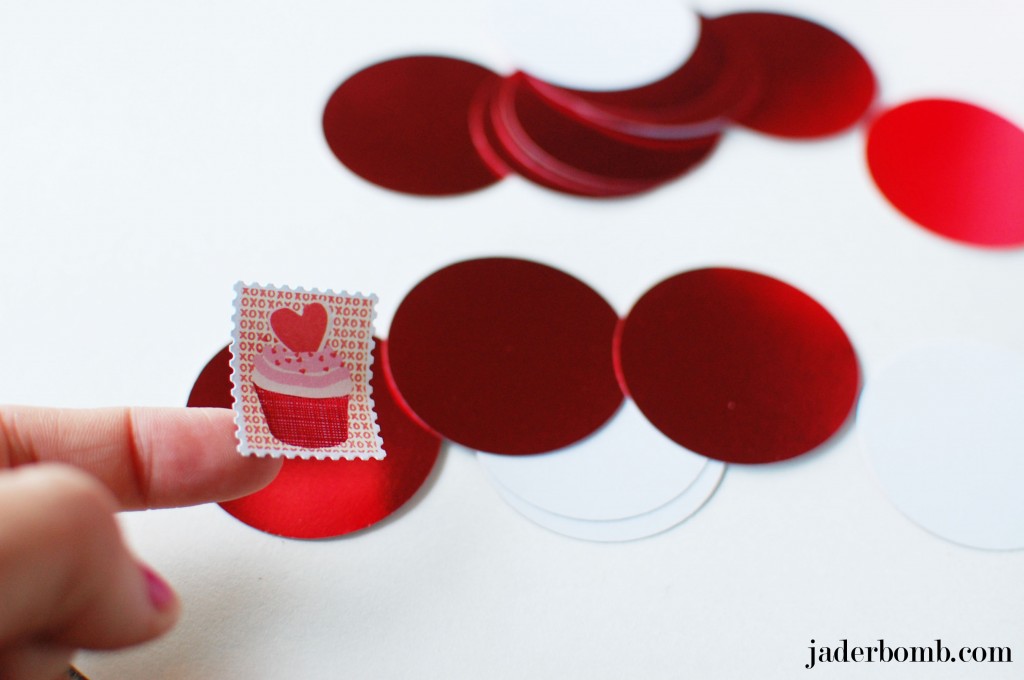
To decorate my candles I used a 2 inch circle punch to get these circles. This paper is from the Martha Stewart collection. Grab one of these cute stickers and place right smack in the middle of a circle. Are you loving how these stickers look like vintage stamps?

valentines-candles-martha-stewart

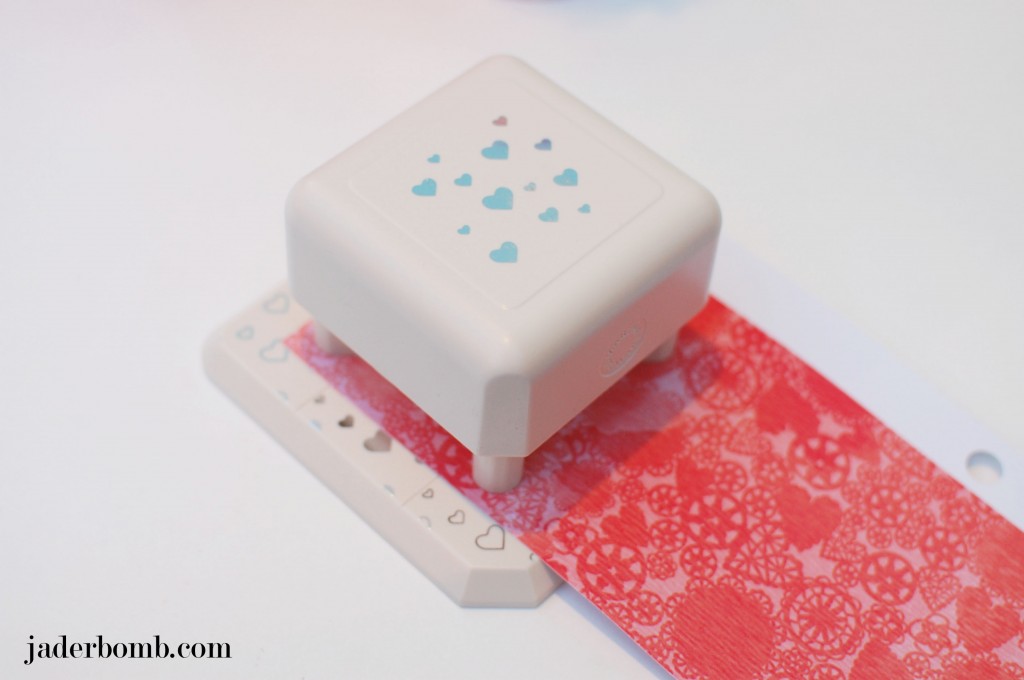
I am in love with this paper punch. It’s called “Heartbeat punch all over the page. ” They have magnets on the top part of the punch and the base. This makes it super easy when trying to line everything up the correct way. If you have the punch in the wrong spot the magnets will not connect. So you really can’t mess up!

valentines-candles-martha-stewart

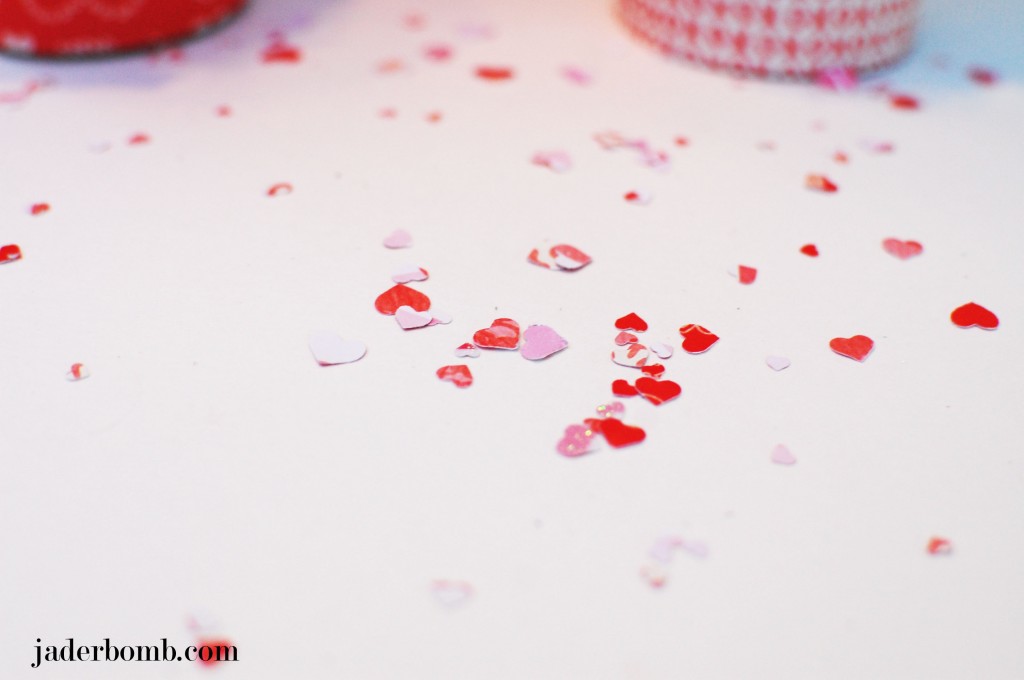
This is what you will have hidden under the paper punch. Perfect to decorate a table with.

valentines-candles-martha-stewart

I am super pleased with all of these products and I am sure you will be too, once you get your hands on them! Make sure to check out all of her line HERE. See you in the next post!

jaderbomb

Valentines Tube Candles


If you are looking for a easy way to decorate for Valentines day then look no further because I have an affordable tutorial for you using pink Christmas ornaments. I think  it’s hard to decorate for each holiday for the simple fact that it can get pretty expensive. Remember supermarket sweep? I used to love that show. When I am in the craft store just browsing I always go strait to the sale isles. Why? Because there is no way I will spend the full price on things when I will end up change the whole appearance anyway. So back to supermarket sweep, I always pretend I am on that show and will give myself 10 minutes in those isles, NO matter how many isles there are. Being crafty sometimes means thinking on your toes and usually you think of how you can use an item within the first 5 seconds of looking at it. Trust that first thought. It’s usually the best one.

I love after Christmas sales, especially when things are 80% off. I try to not go until it’s that low. I figure if something good is already gone I will never know, haha. Plus I  tell myself that whatever is left it’s up to me to use it in another creative way. That’s exactly what I did with the ornaments in this craft. The box was originally 5.00 and I paid .50 for them. I think that is a good deal! I bought big ones and small ones. You never know when you will need extra balls.
(insert quirky smirk and head shaking)

Valentine-Heart-Wreath

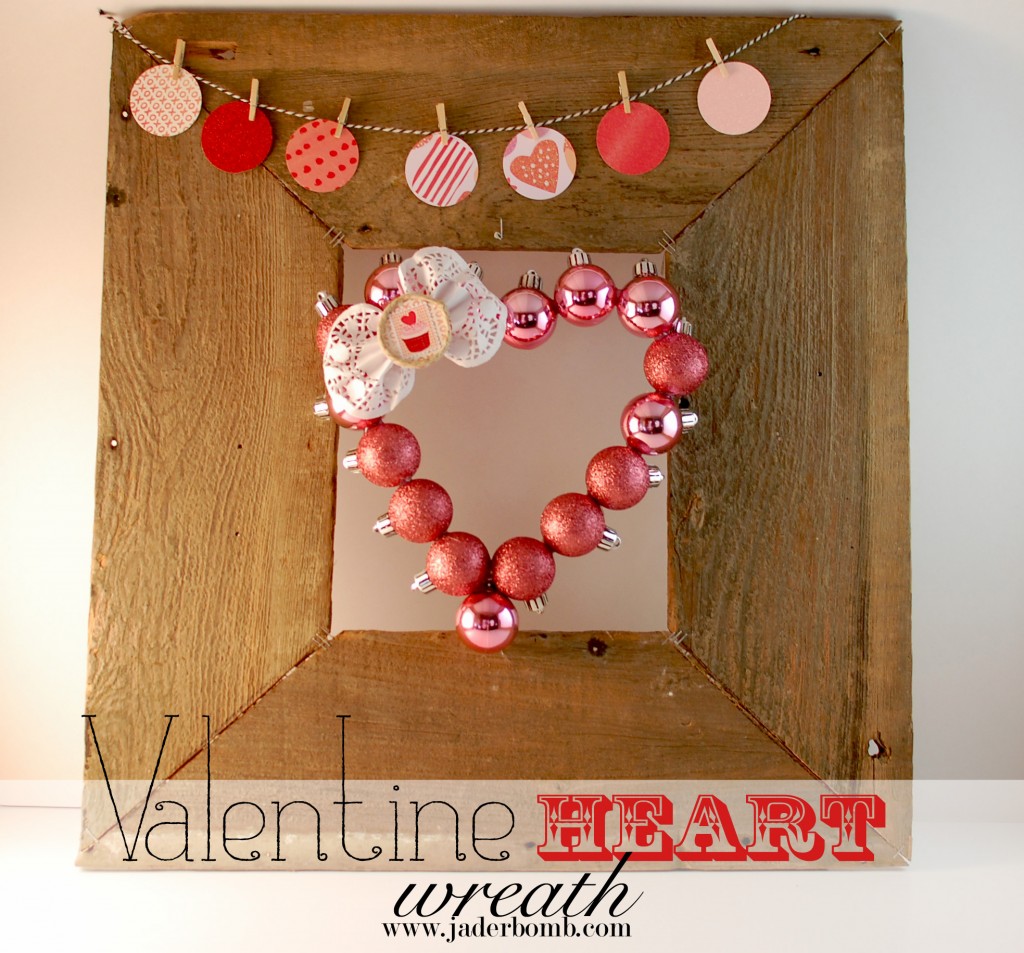
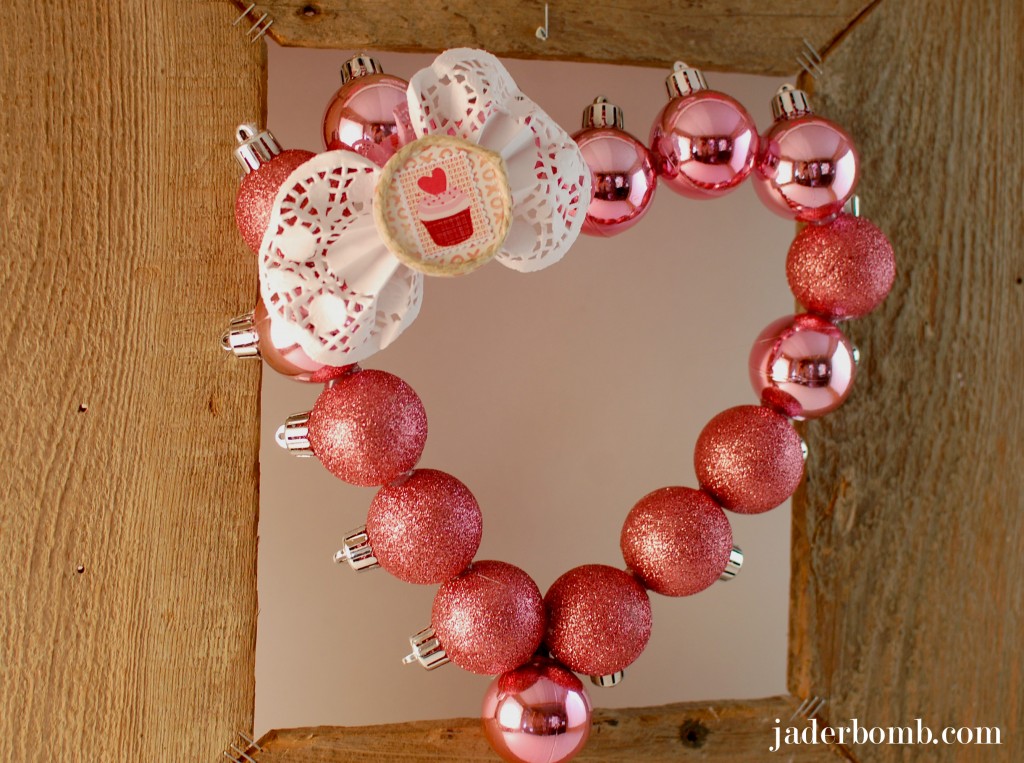
Isn’t this wreath so cute!

jaderbomb

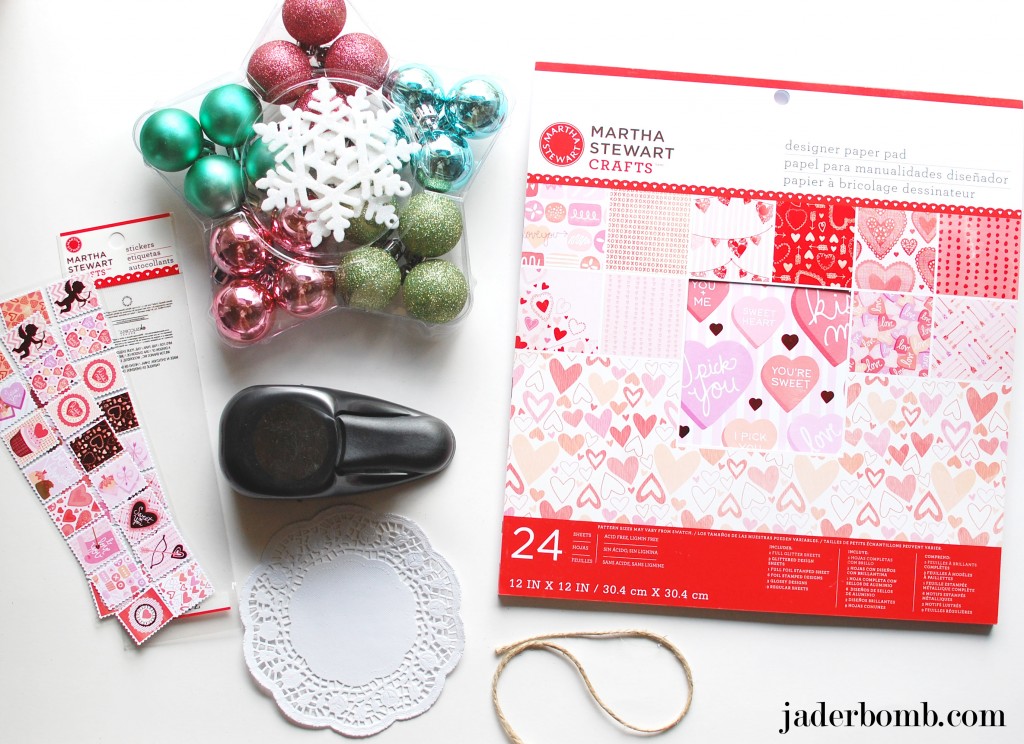
*Christmas Balls
*Martha Stewart Designer Paper Pad
*Circle Punch
Doily
*Martha Stewart Stickers
Twine

You can order all the items above from one spot, just click on the link.

Valentine-Heart-Wreath

Are you swooning over everything I used? I love anything glittery and pink, it always puts me in a fabu-loso mood.

Valentine-Heart-Wreath

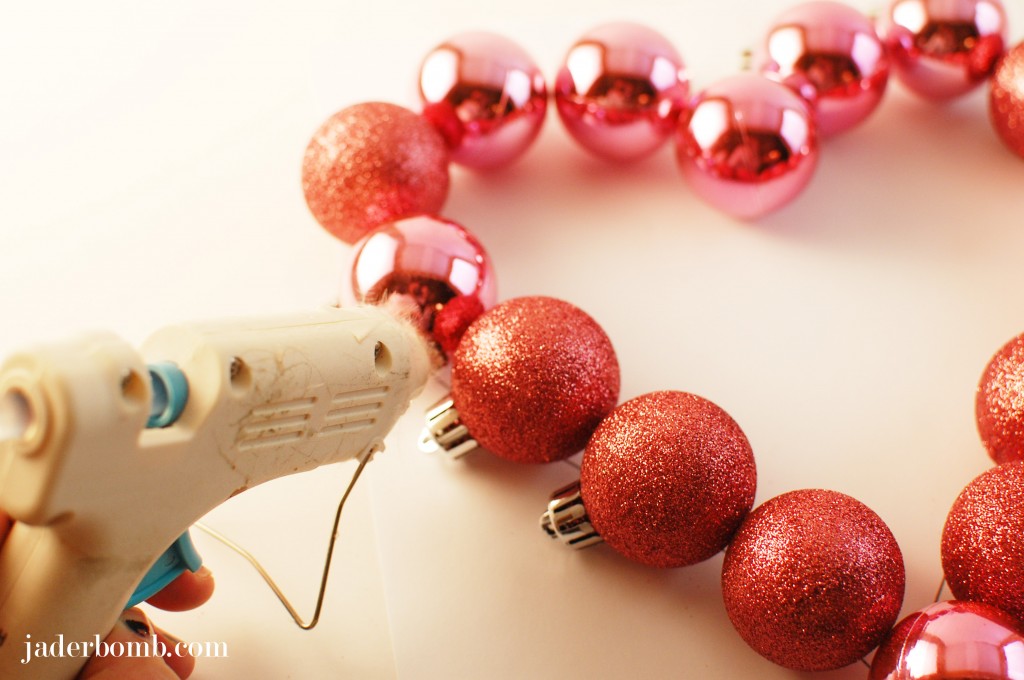
K, the first thing you will do is get a piece of paper and draw out a heart or print one. You can click HERE to download the one I used. Glue each one together. Wait till the glue is dry before you move on to the next spot.

Valentine-Heart-Wreath

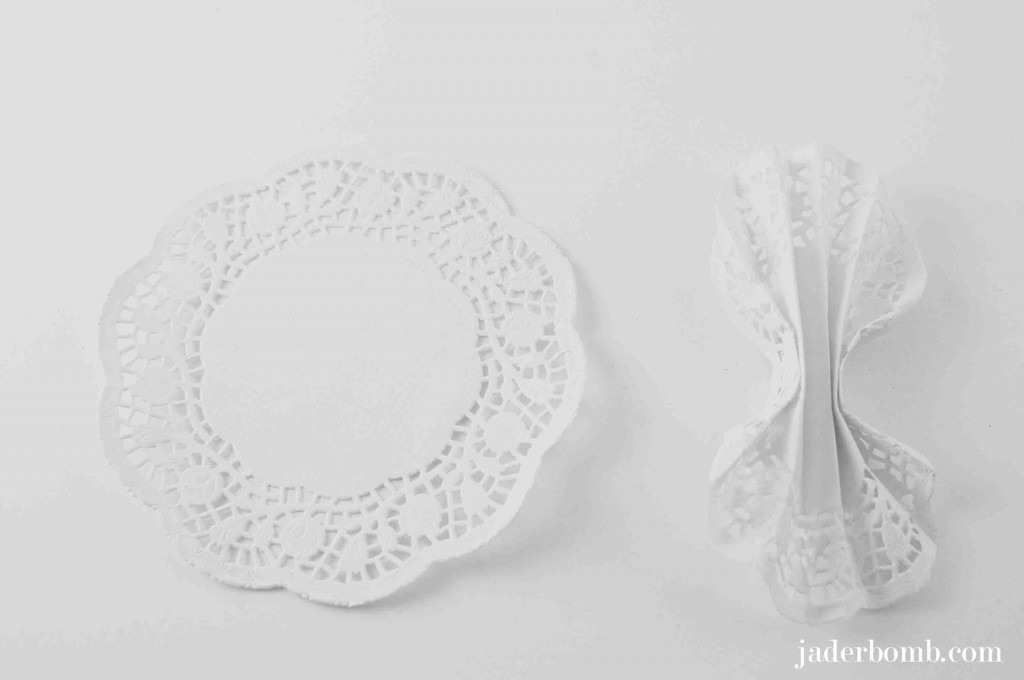
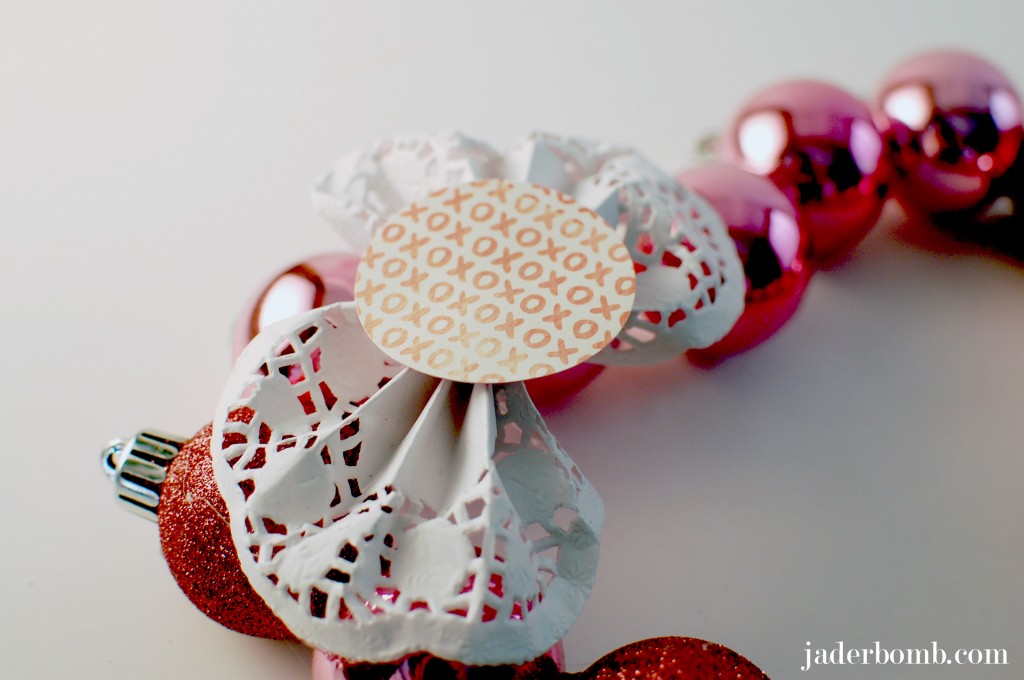
I bought these paper doilies from Freds in the birthday party isle. For a pack of 24 it was $1.00. Booyah, you know I grabbed all 45. Fold a doily like an accordion then set to the side.

Valentine-Heart-Wreath

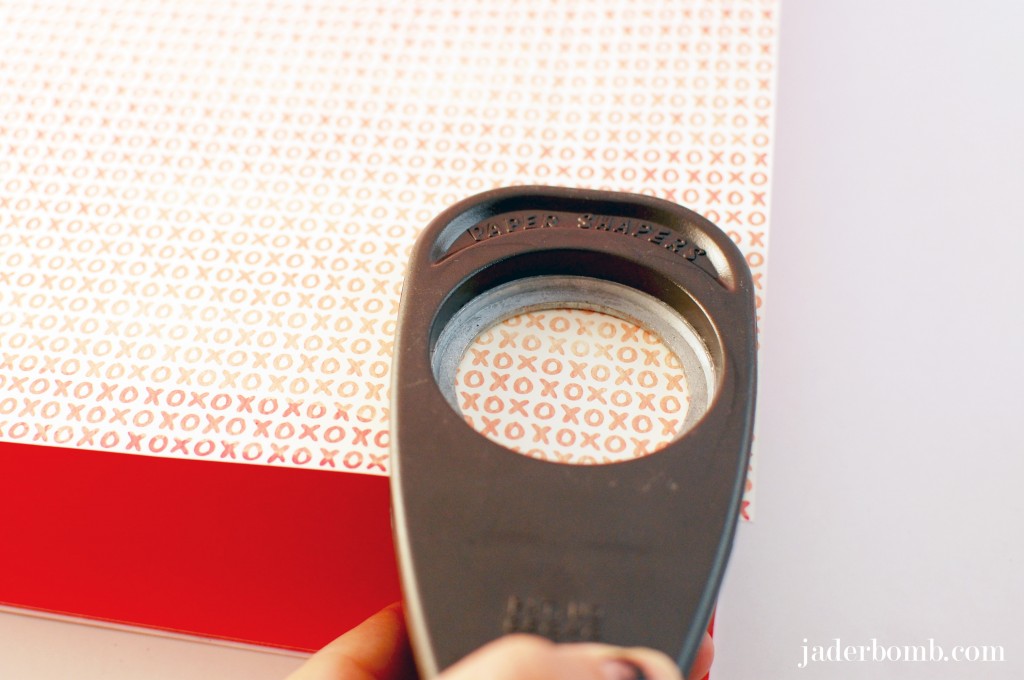
Punch out a circle. I swear when you do one you will want to keep on, it’s addicting.

Valentine-Heart-Wreath

Now is the time you will glue your paper doily onto your wreath, wherever you want to put it. Add your punch out in the middle of doily.

Valentine-Heart-Wreath

I wrapped a little twine around my punch out then placed a cute cupcake sticker in the middle.

Valentine-Heart-Wreath

So it’s that simple. What I like the most about this is I can keep a fun pink heart up all year round. I hope you enjoyed learning how to make a heart wreath out of ornaments. What is your favorite holiday to decorate for? I’d love to know, let me know in the comment section.

Wanna check out more of my Valentines tutorials? Click HERE.

jaderbomb

Quote of the day:
No matter how many times you may spray paint, change wheels , clean , or customize a car to look different . It will always be the same. Same goes for people. Our appearances , actions and age may change .. But we will always be the same

Well what a day it has been already! Wait, it’s only 8:39 in the morning. Pfft. Does that ever happen to you? You wake up early and you have done more in the wee hours of the morning than a FULL day’s work. I actually love mornings like that because it makes for a great afternoon nap, hehe.

I couldn’t wait to show you this post because it was so much fun to make it. I love to spray paint EVERYTHING in my life. Depending in my “phase” I am going through. This is a little different than your normal spray painting. It’s “glass spray painting”. When I was sent this from Martha Stewart Crafts I was like… ERR MY GERRDDD, really! Just like your normal spray painting, it can leak and leave spots… only if you don’t practice before. It only took me about a minute before I figured out the pressure and how much comes out in one spray. I have not tried to OMBRE anything yet but I will, don’t cha worry.
Let’s get started!

You can click on the pictures to make them bigger if you like!

spray paint glass

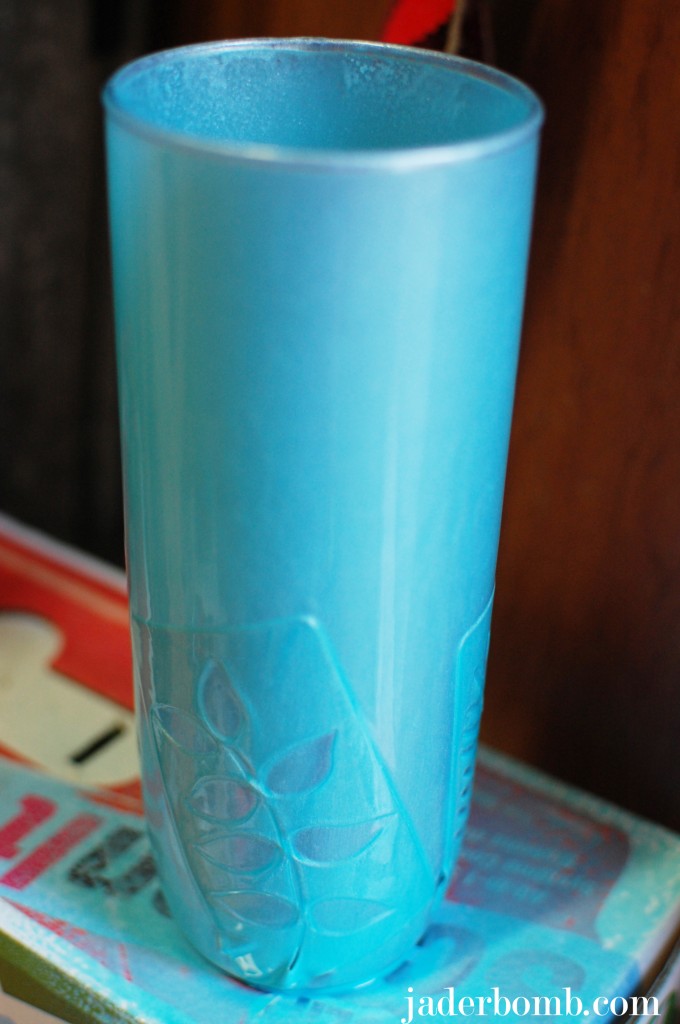
Up above is what we will be making today!

INGREDIENTS:

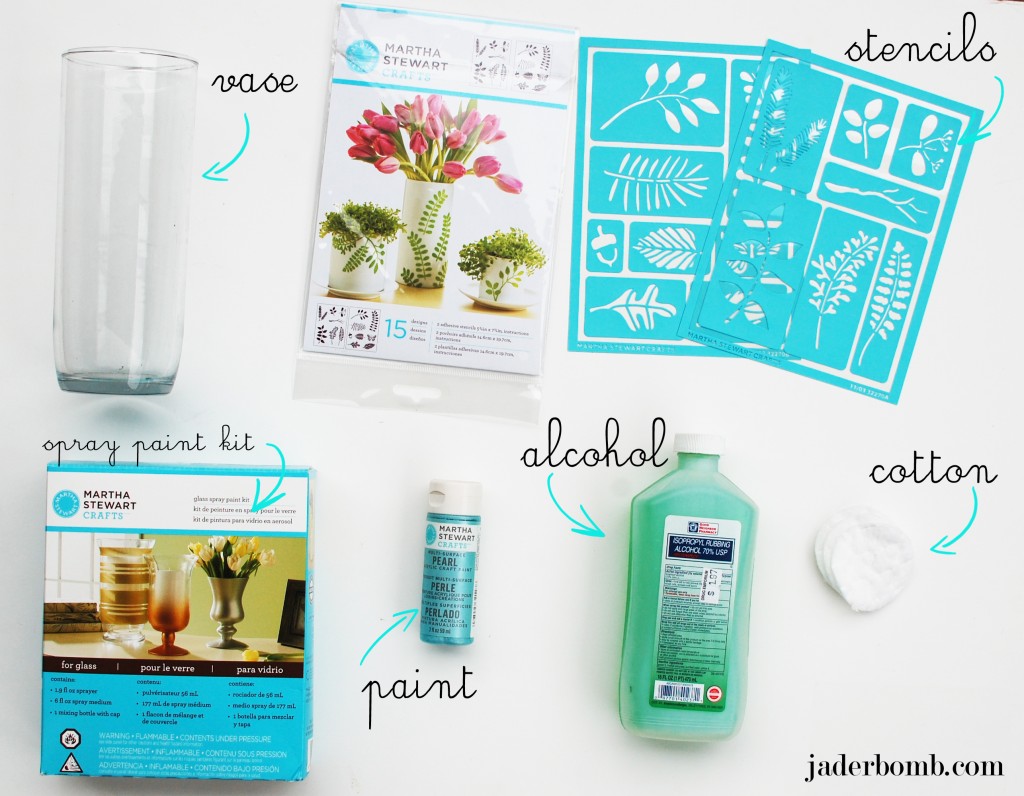
*Vase
*Martha Stewart Spray Paint Kit
* Alcohol
*Cotton
*Adhesive stencils from Martha Stewart, I used the one called LEAVES
*Martha Stewart Pearl Paint

FYI: You can purchase all of the materials from one spot by clicking on the links in the ingredients.  
spray_painted_vase_jaderbomb

If you are painting on glass it’s important to use a gloss, metallic, or pearl paint. It works the best. Most of the other ingredients you may have floating around your house. Let’s get it started, y’all.
spray_painted_vase_jaderbomb

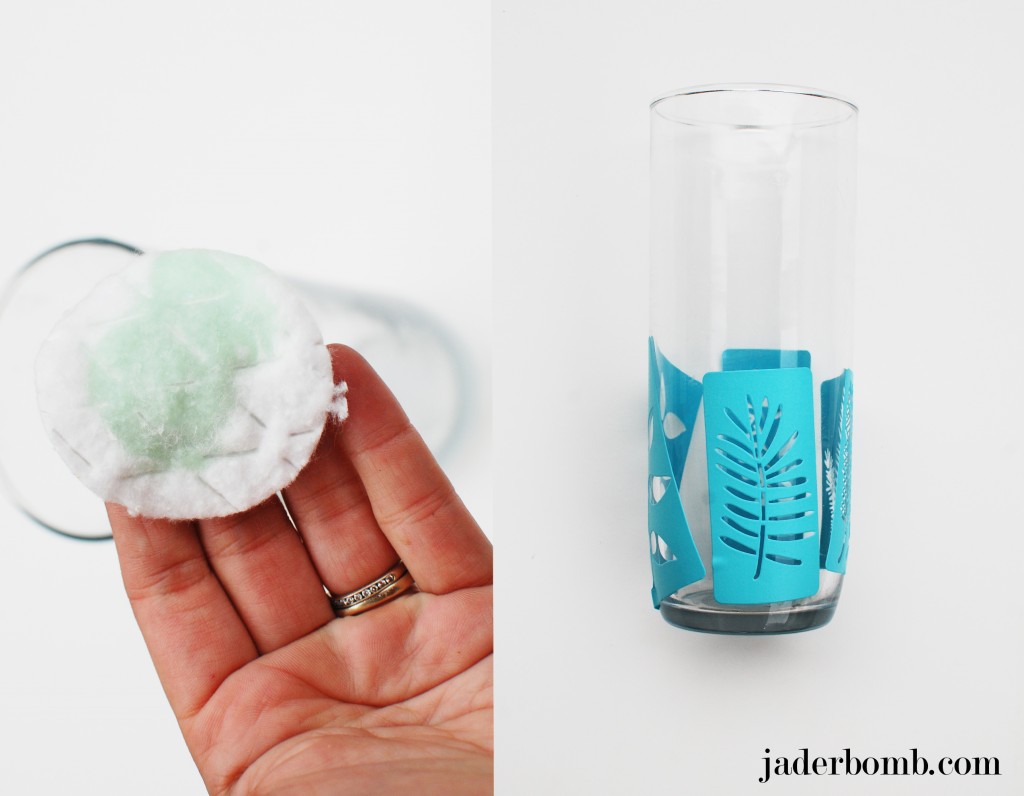
The first thing you will do is clean off your glass with alcohol and let it air dry. This will get off any oil residue that may be on the glass. Once it is completely dry stick your adhesive labels where you want them.
spray_painted_vase_jaderbomb

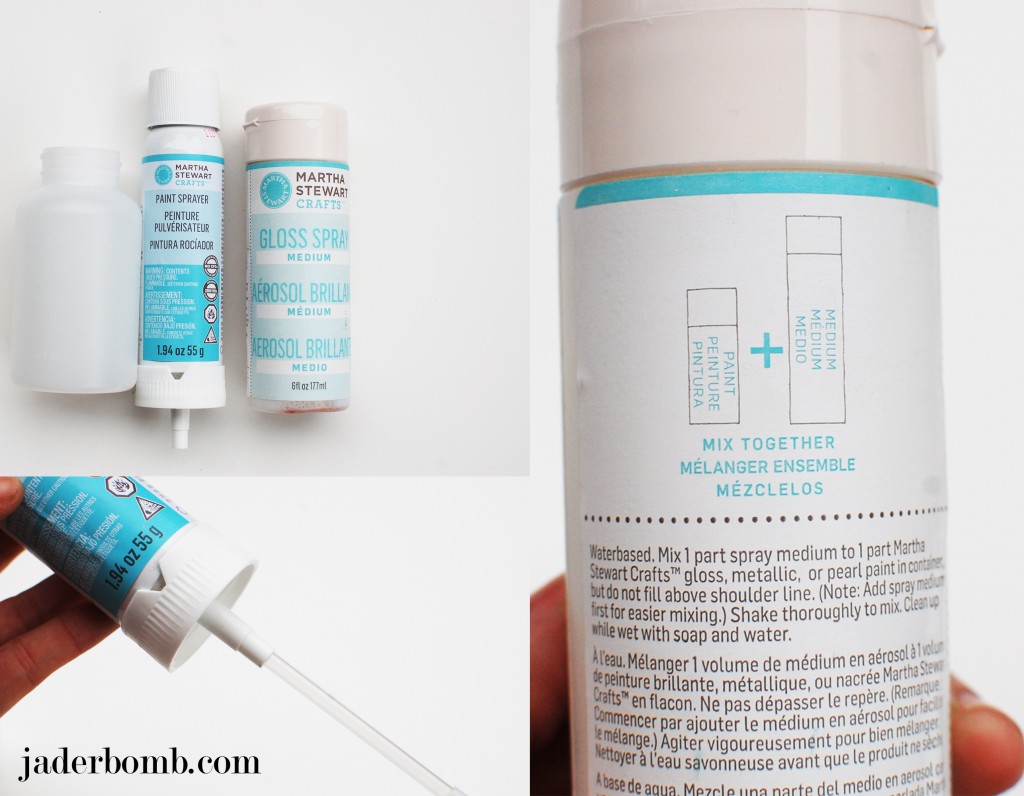
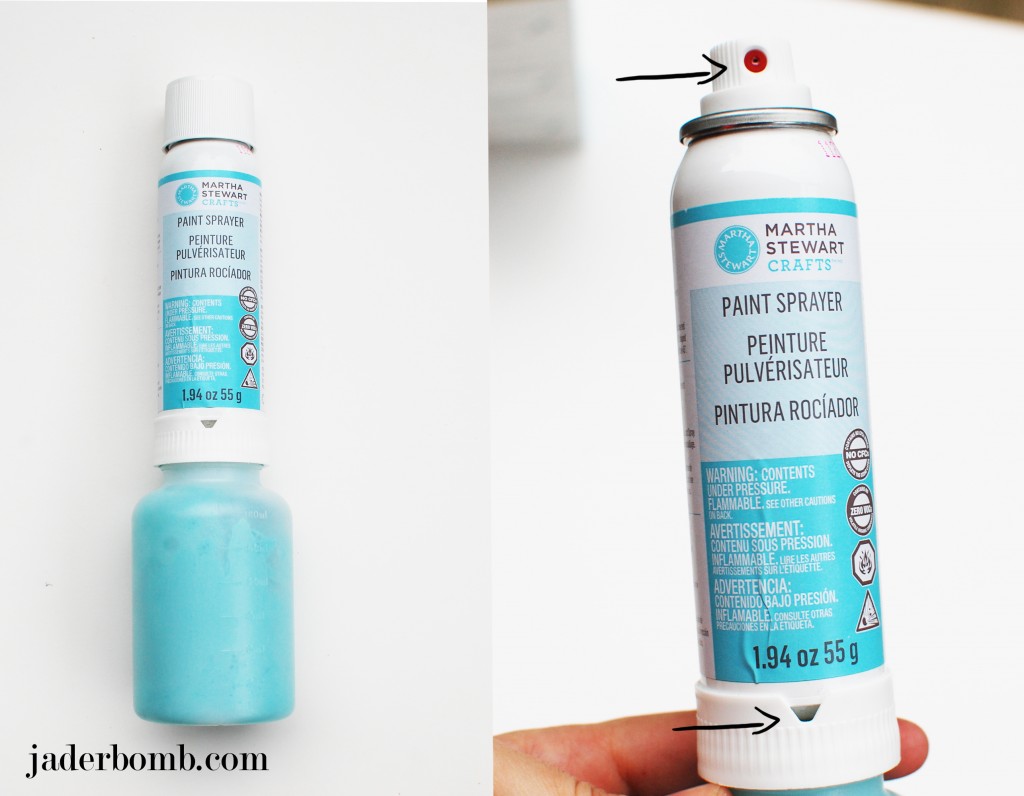
When you get your kit it will come with a few things. The first thing you will need to do is take the clear plastic tube and connect it to the bottom of the spray can. I put a picture above so you can visually see what I mean. Next we will mix our paint in the container. Notice on the back of the gloss spray medium it says to mix 1 part medium to 1 part gloss, metallic, or pearl paint. They have lines on the container so you can measure correctly. Lightly swirl the paint and medium (BEFORE) you attach but do NOT shake. You don’t want to create bubbles inside.
spray_painted_vase_jaderbomb

You will now just screw the container onto the spray can. The most IMPORTANT thing ever is to line up the  red nozzle with the little opening at the bottom of the can. If this is not lined up it will not spray.
spray_painted_vase_jaderbomb

Make sure you are in a well ventilated spot before you start spraying. You want to add a light coat and let it dry, repeat until you are happy with the look. I coated mine as much as I could. I didn’t want to see through the vase at all.  If you notice on my stencils they have the image that is cut out and around it it looks like a rectangle. The reason why I spray painted it this way is because I knew I wanted to see the water in some spots so I created a blocked print with the stencil.
spray_painted_vase_jaderbomb

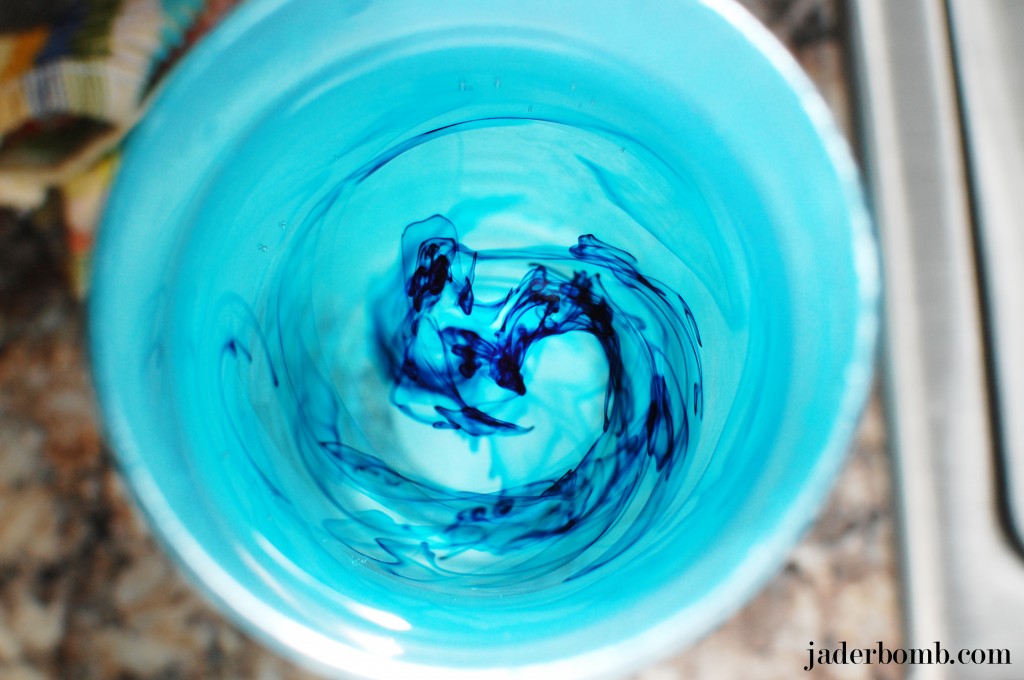
When I was done I added water, then a little food coloring ( to spice up my water) then added some pretty tulips. You can add any color you want which makes it super fun. If you stick this baby in a window you will just stare at it for about 16 minutes strait. Fa REEL!
Remember these tulips?

Well, I hope you enjoy this tutorial as much as I did! Huge glitterbomb hugs from me to you!

jaderbomb.com

 
Quote of the day:
“We must go and see for ourselves.” -Jacques Cousteau
 
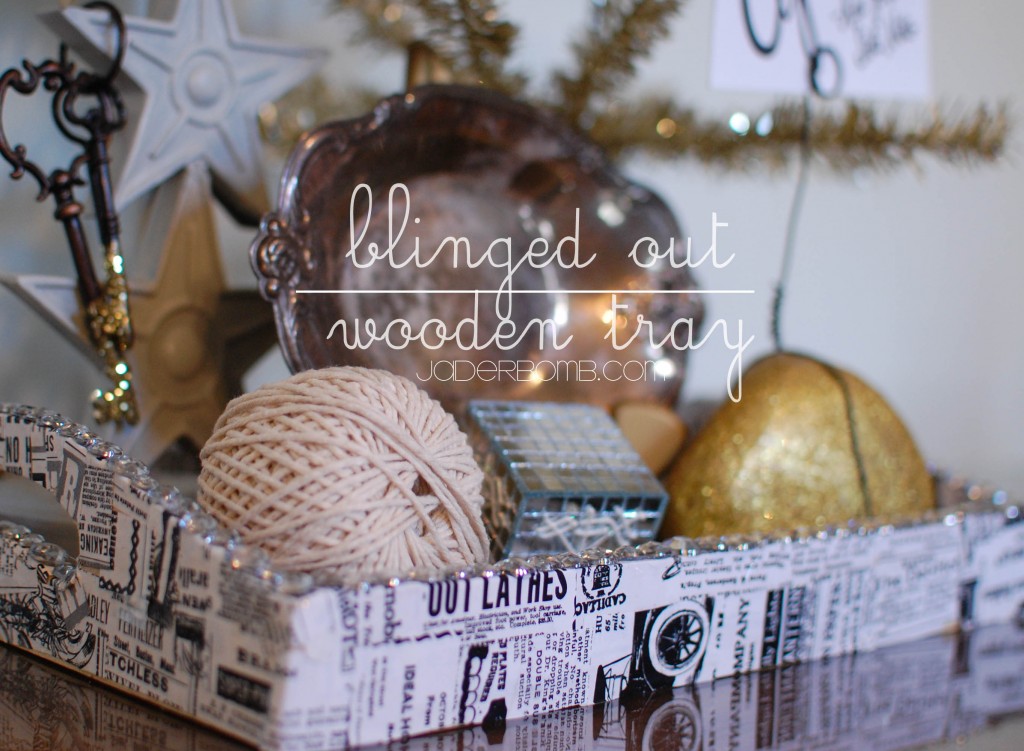
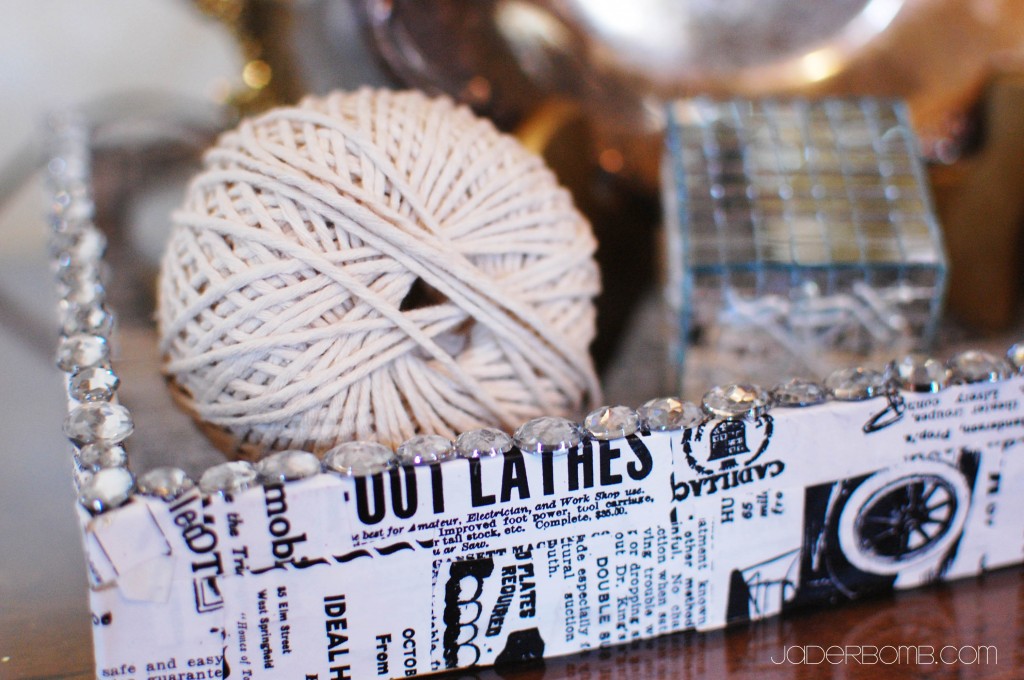
Wow! what an amazing year it has been. To start off the new year I have a cute last minute New Year’s treat for ya! I always love decorating around a holiday so New Year’s is full o’bling and I love that. Today I will show you how to turn a 3dollor wooden tray into pure bliss. Let’s get started!
How To Decoupage a Wooden Tray

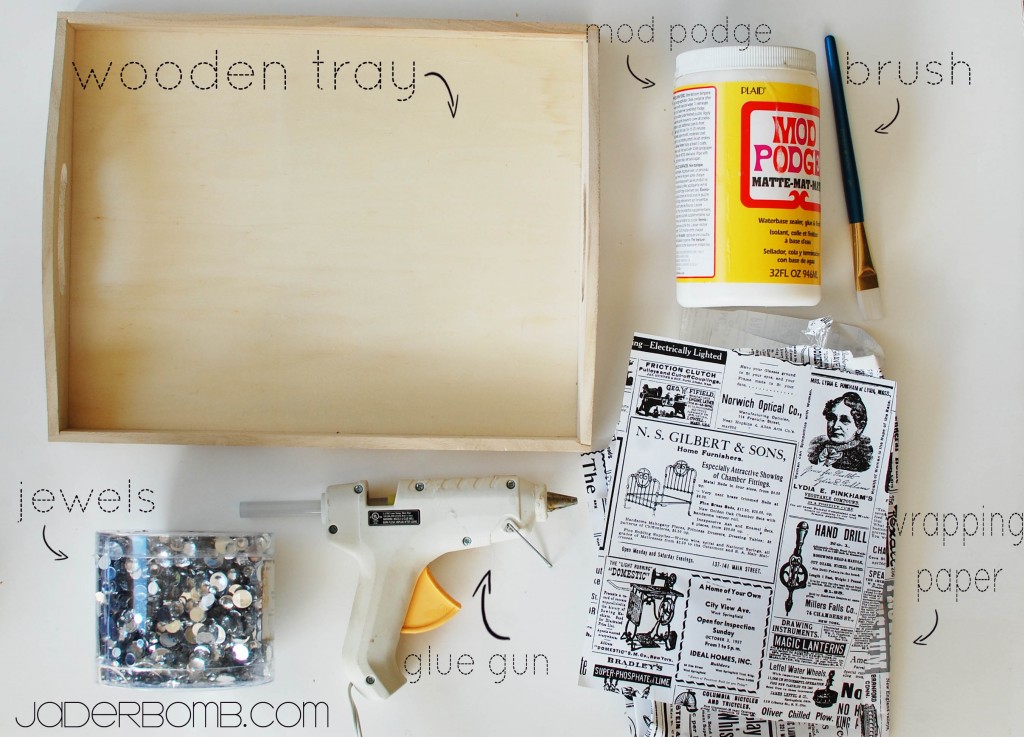
Ingredients:

*Wooden Tray
*Mod Podge
*Brush
*Jewels
*Wrapping Paper
*Glue Gun

How To Decoupage a Wooden Tray

How To Decoupage a Wooden Tray

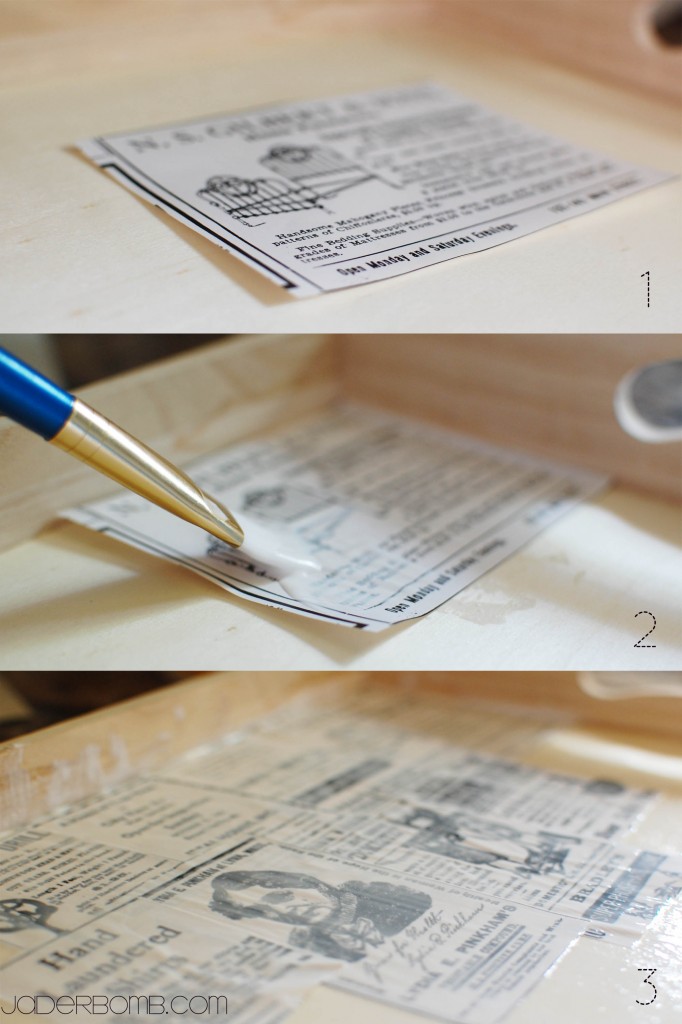
You will continue to Mod Podge until the entire tray is covered. Don’t worry if this is your first time using Mod Podge. It looks Matte when you paint it on but dries clear. Thanks goodness! This is why I use this on the “daily”.

How To Decoupage a Wooden Tray

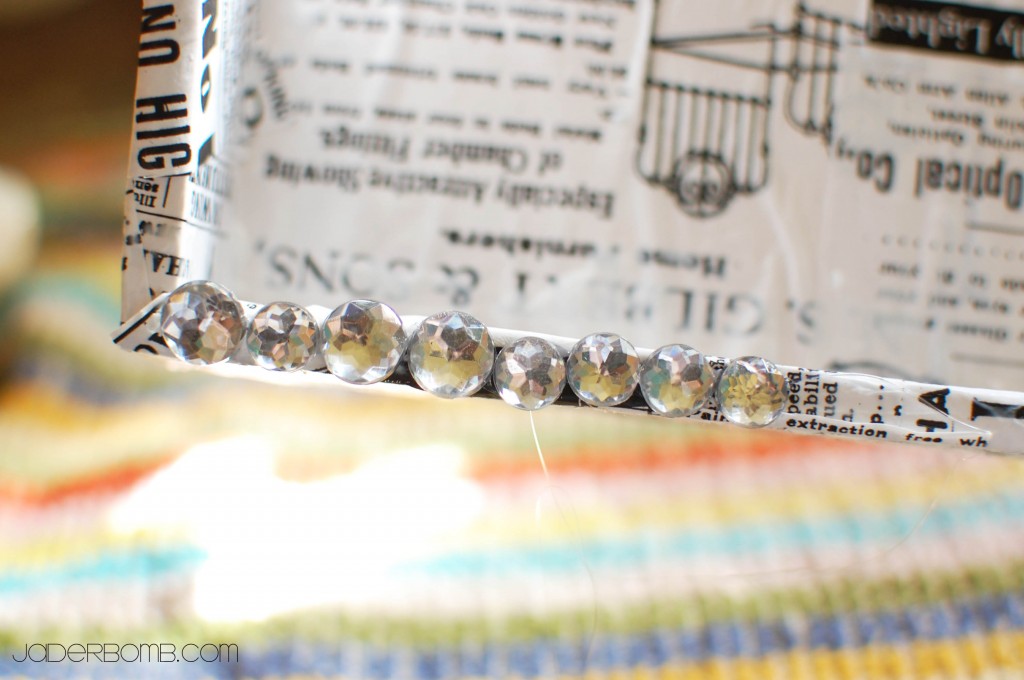
Once you have it all covered with your material you are using and it’s dry you can start gluing on your jewels.

I just make a line of hot glue then place my jewels down. Don’t do a super long line because it dries pretty fast.

How To Decoupage a Wooden Tray

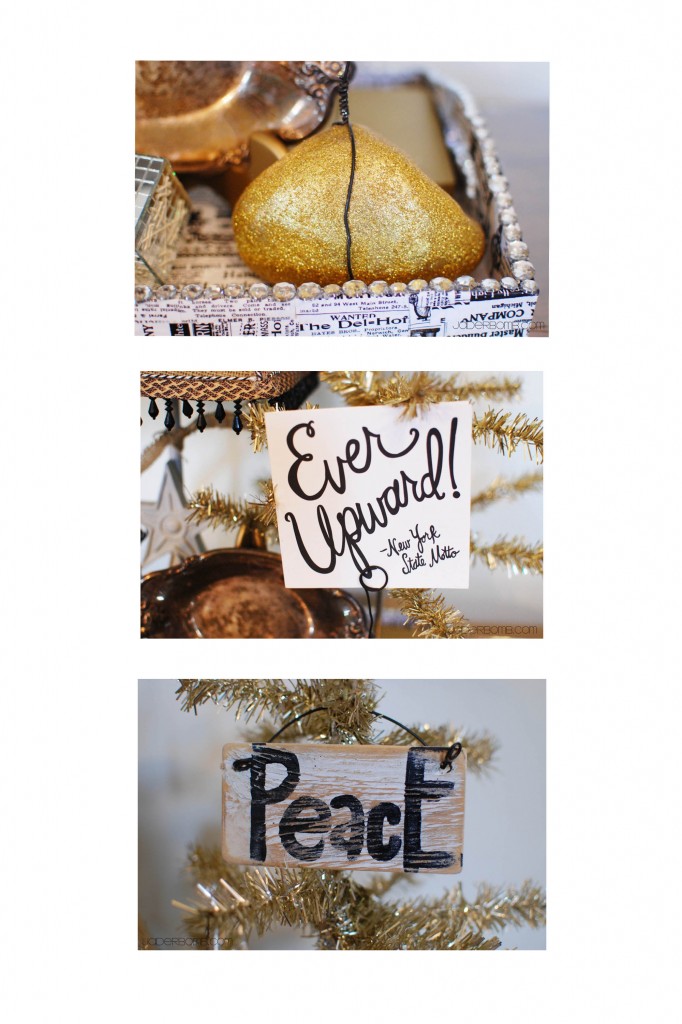
This is what it will look like when you are done. I think it’s gorgeous and the good thing is it’s super affordable! You can make these for someone and give it to them as a gift! 
How To Decoupage a Wooden Tray

Here are a few ornaments I put in my tray. I hope you enjoyed this tutorial. Can’t wait to see ya in the next post!

Don’t forget to make it a DIY kinda day!


DSC_00028

Happy Saturday Jaderbugs! I slept SOOOO good and my coffee is SOOOO good right now! I have a few new things lined up to post  but none are 100% complete! So I thought this would be the best time to post a few crafts from last summer. A little old school for ya this morning!

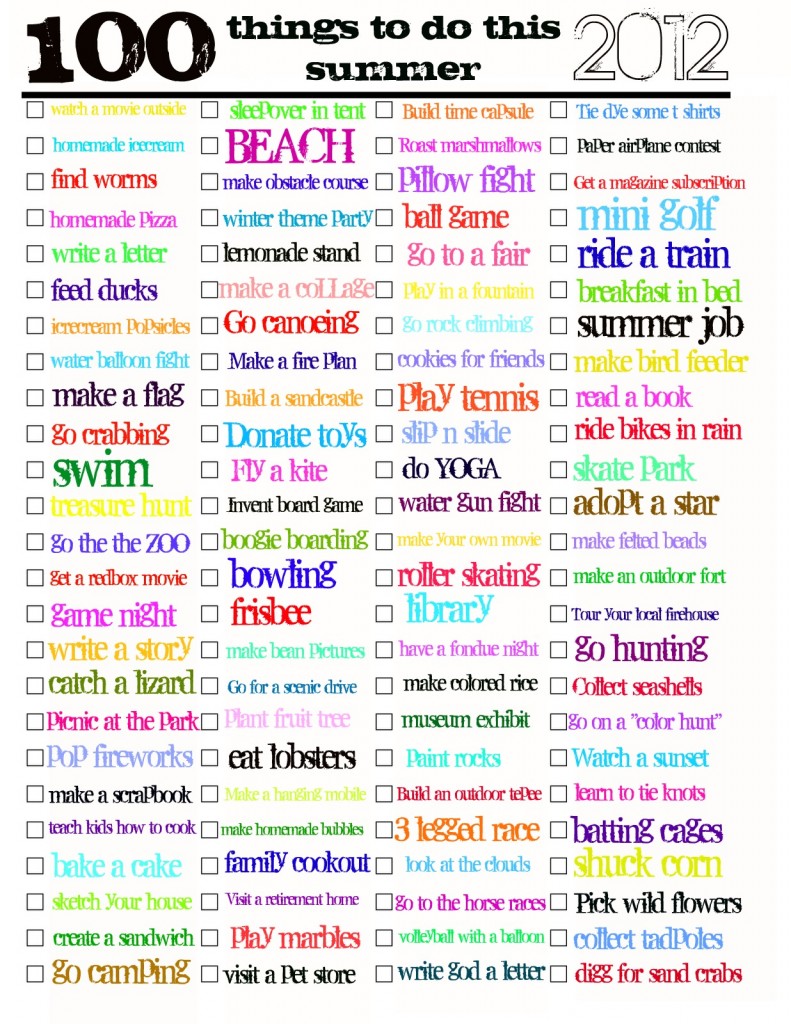
This is NOT from last summer but I want you to get it if you have not yet! It’s the greatest checkoff list ever. Put this up on your fridge and watch in excitement as your little kids get to check off things your family does together! You could even have a 100 day’s of Summer journal! Write a little bit about each thing you check off!

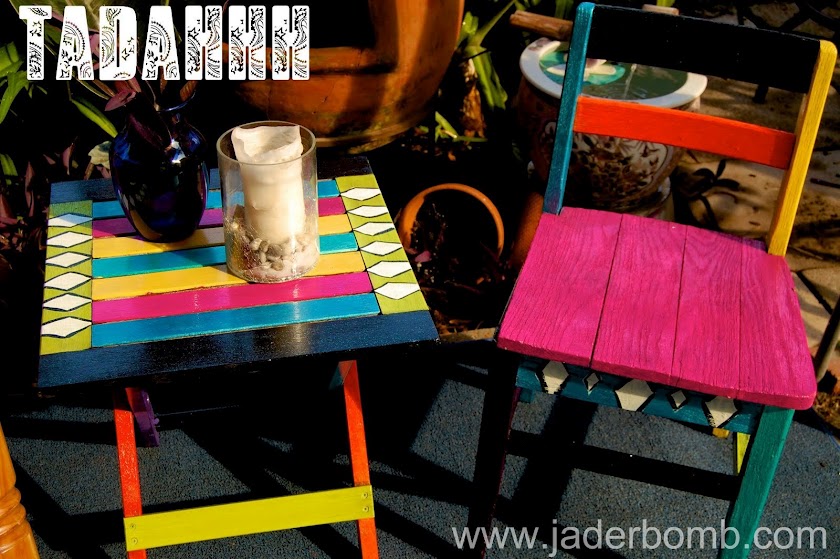
Have some old furniture lying around? Does it look old and frumpy? I’ve got the solution! Get over to your local craft store, or Walmart and get some .99 bottles of acrylic paint! Watch the magic happen!

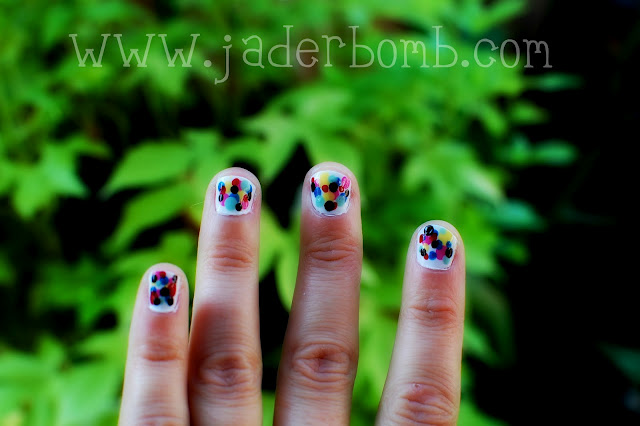
Remember the movie UP? I do! It is prolly my favorite! What a fun way to brighten up your day! Paint your nails like balloons. Every time you look down you will think of the movie and it will put a smile on your face!

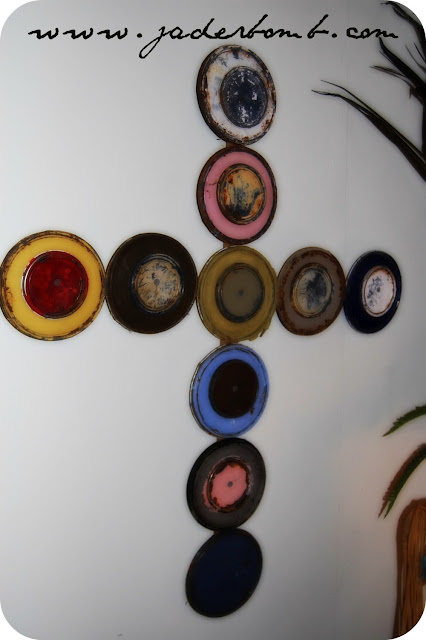
If you are like me then you might have TON’S of paint cans laying around. No worries! Check out what I created!

Want to reuse your old Era or Gain bottle? Check out this fun craft that I made!

I hope you enjoyed me bringing back a few crafts I did a WHOLE year ago! Happy Weekend Jaderbugs!