Tag Archives: diy

sponsored postComing to you live from my messy studio with a major quack announcement. There is a new tape out on the loose! That’s right, a new decorative tape called DECO TAPE.

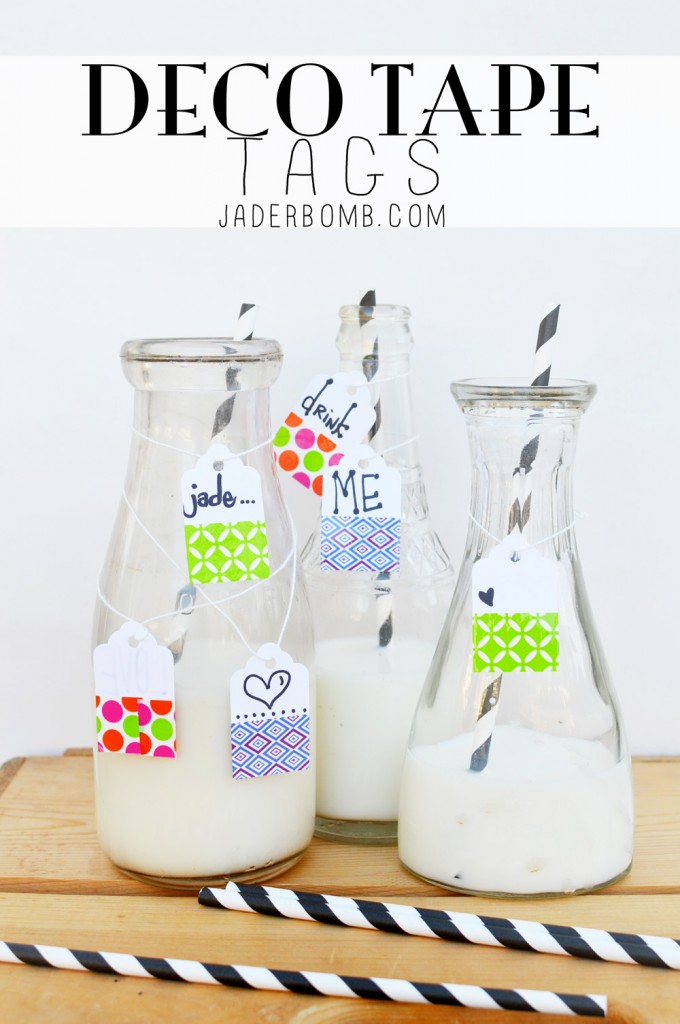
It’s fierce, it’s bold and it will dress up everything in your life. Why be drabby when you can be “duck tape savvy”… (yes I just made that up)

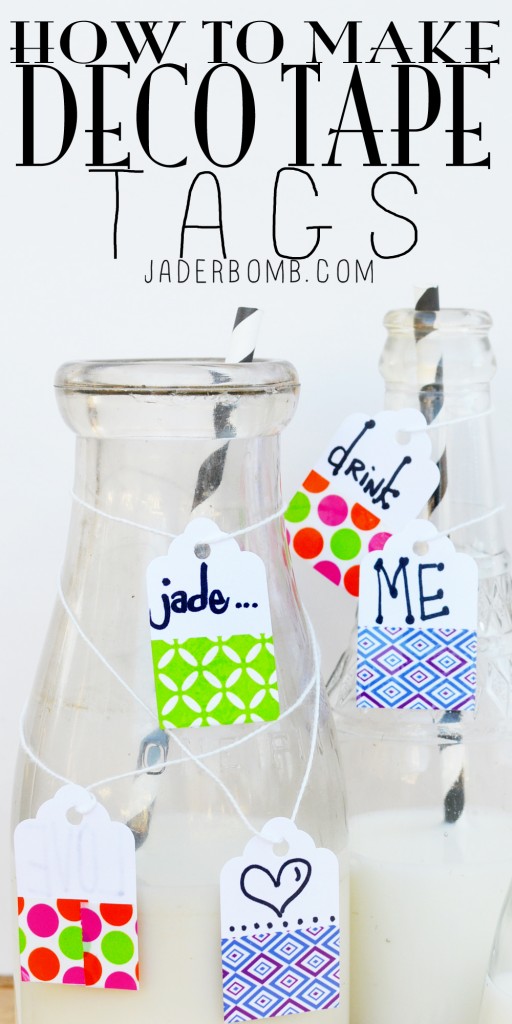
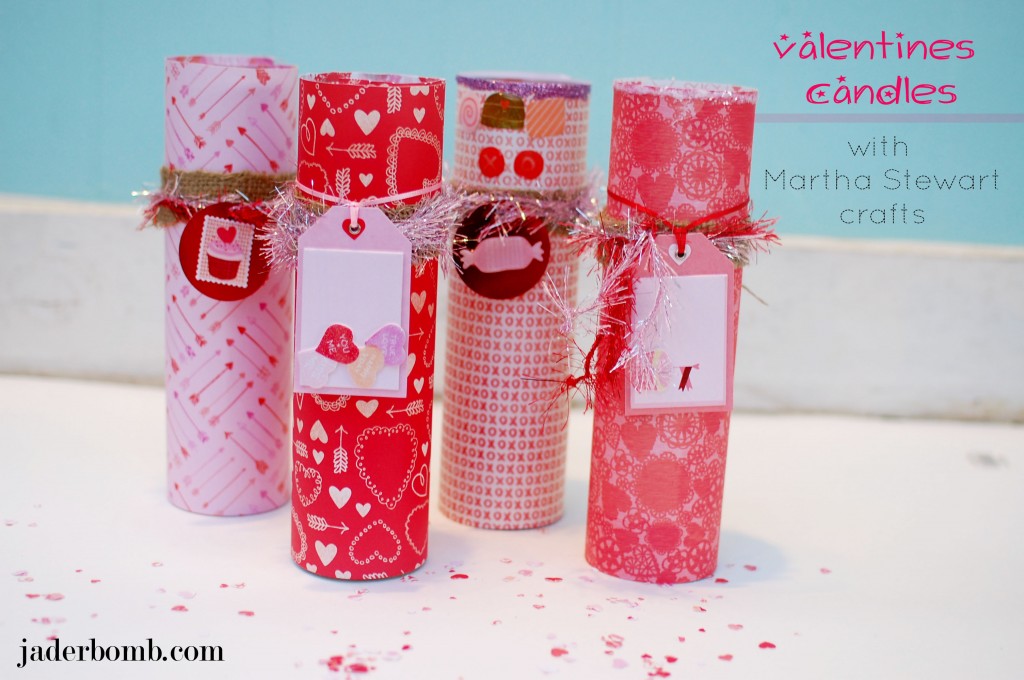
Today I will show you how to transform plain tags into ones that scream “LOOK AT ME”…

DUCK TAPE TUTORIALS
YOUWILLNEED
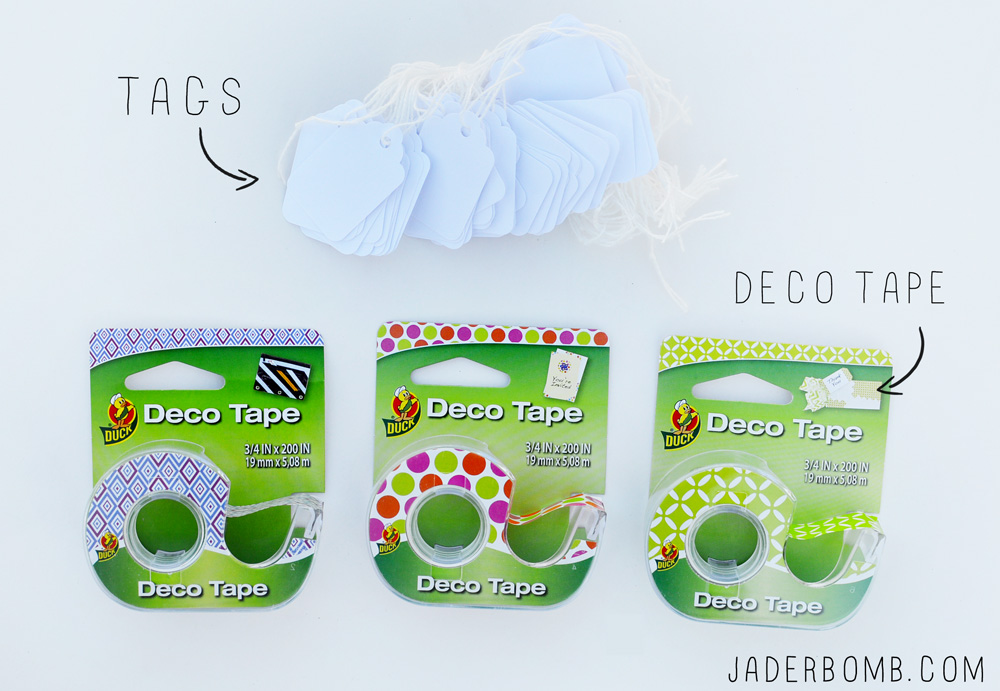
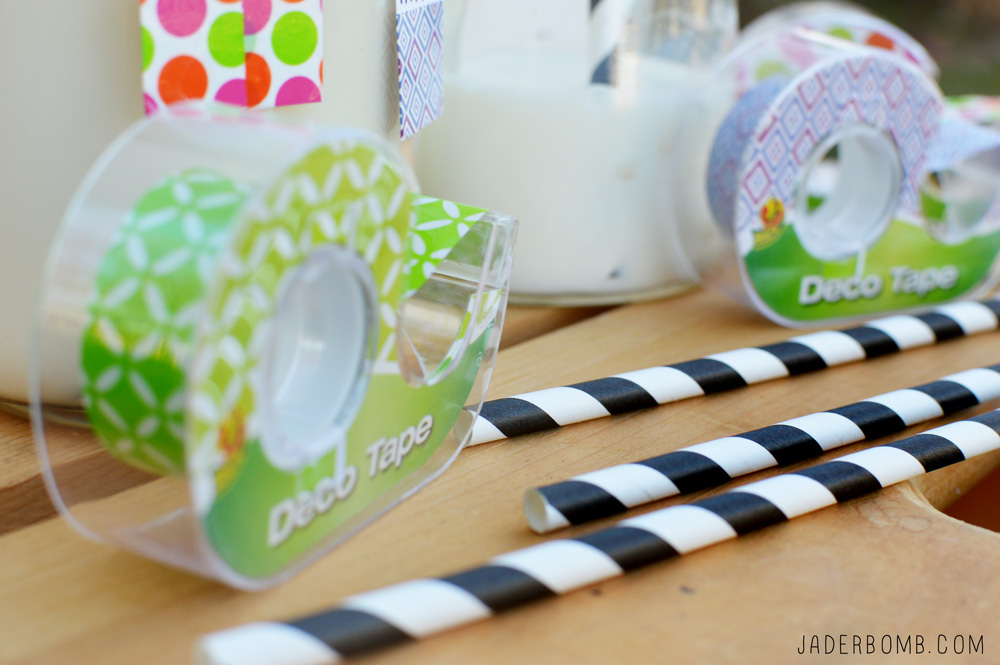
Labels or Tags | Deco Tape

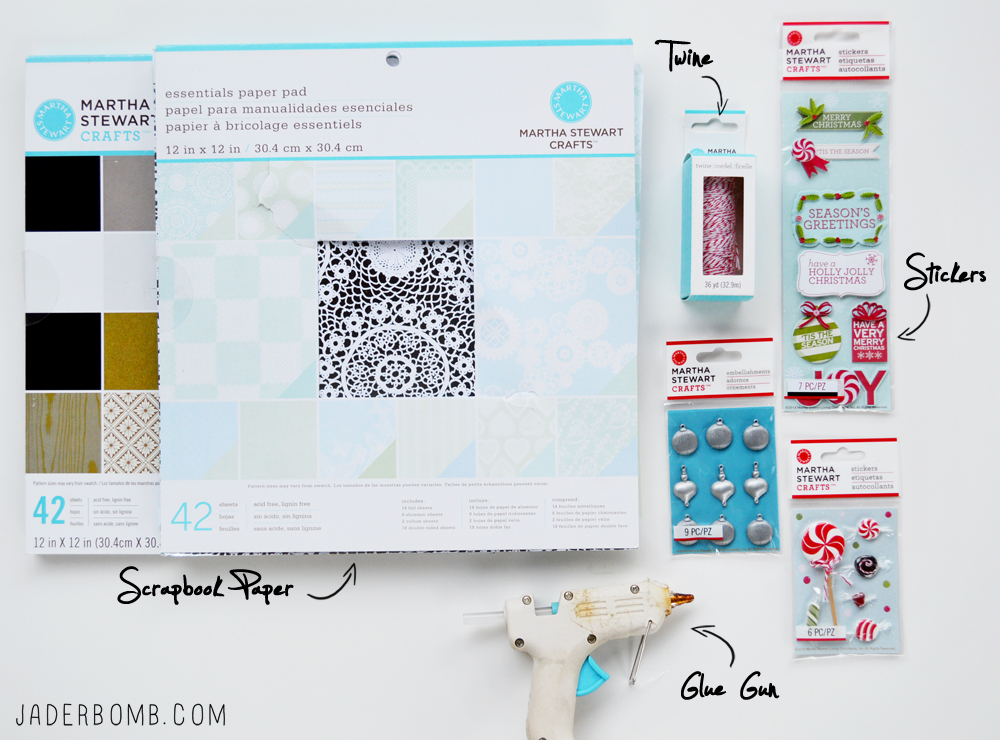
This tape comes in 4 different designs. You can use this tape to dress up anything from stationery to a phone case!

DUCK TAPE DECO TAPE 
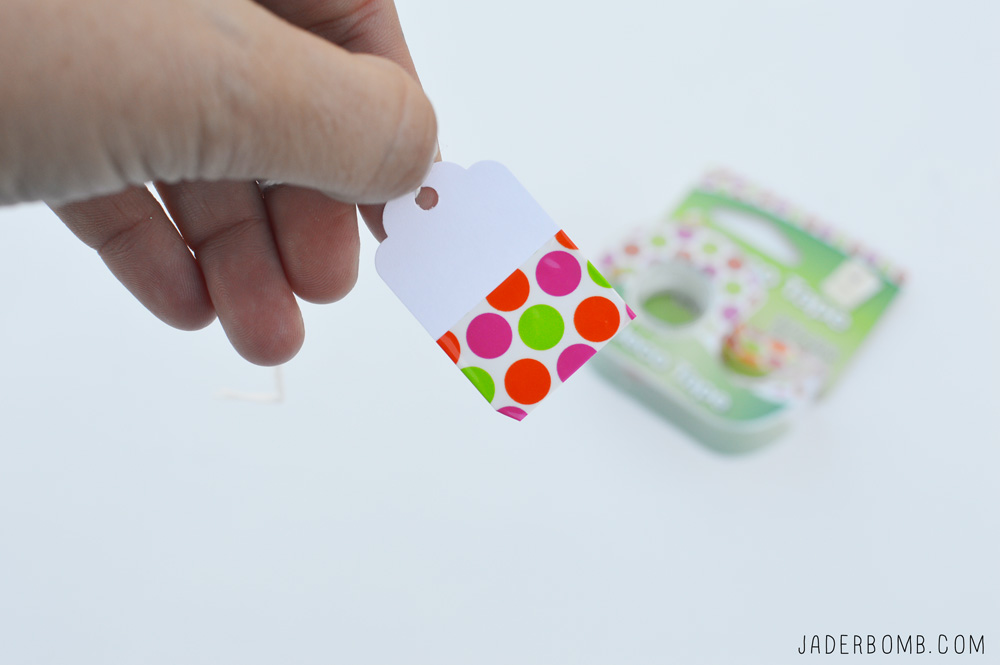
You simply tear a piece off and wrap it around the bottom portion of the tag. I tore a long piece to make sure it wrapped around the back completely then I cut the excess off with scissors. DECORATE WITH DUCK TAPE HOW TO MAKE WASHI TAPE LABELS

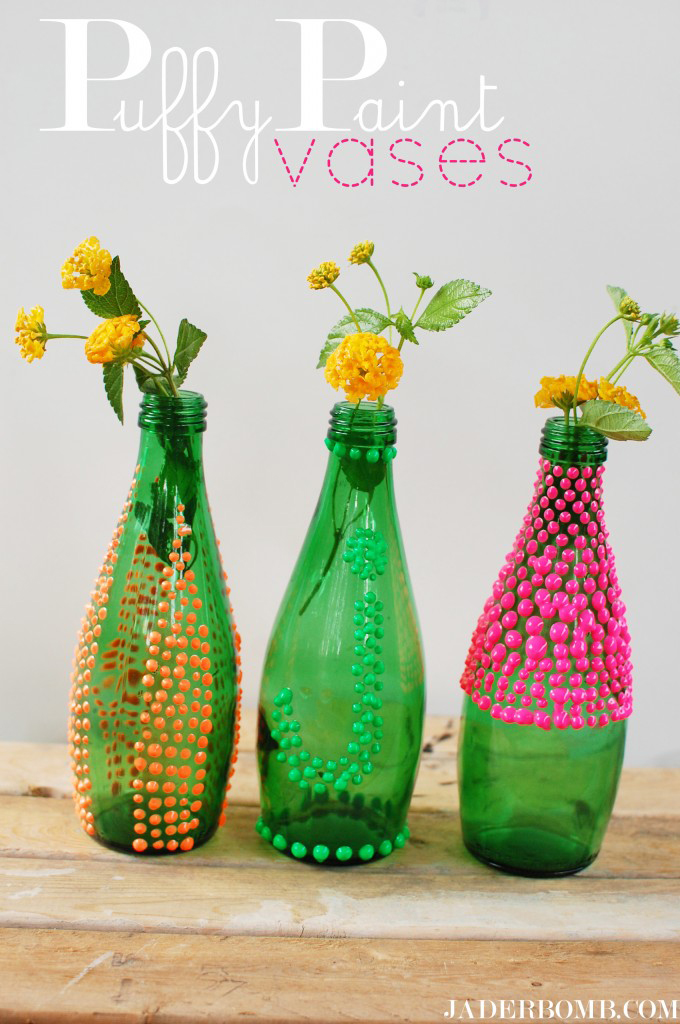
You could use these for gifts, a special table setting, bottles or invitations. Endless ideas I tell ya!EASY DIY LABELSDUCK TAPE CRAFTSDECO TAPE TUTORIALS PINTEREST DUCK TAPE TAGS


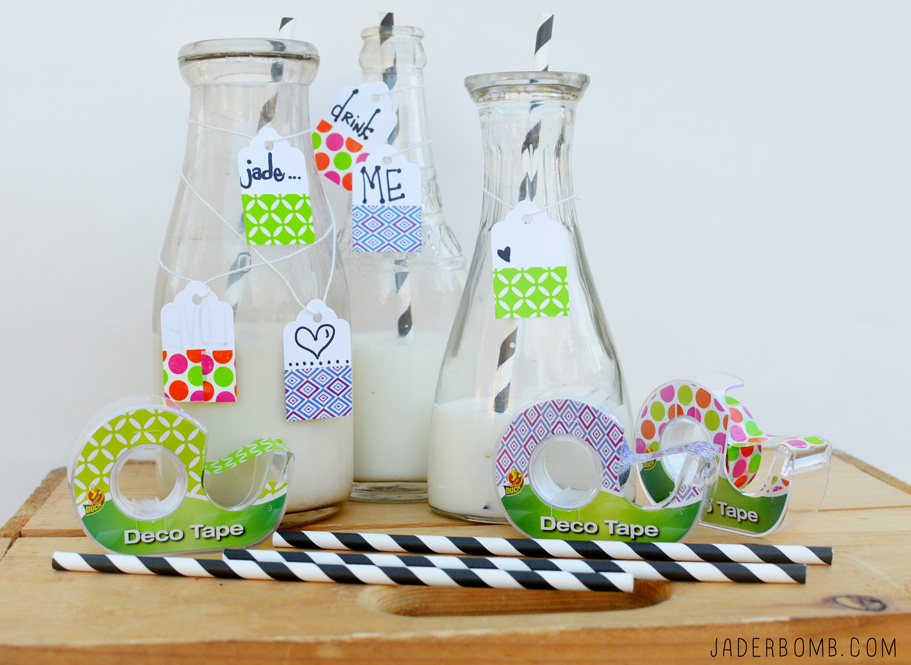
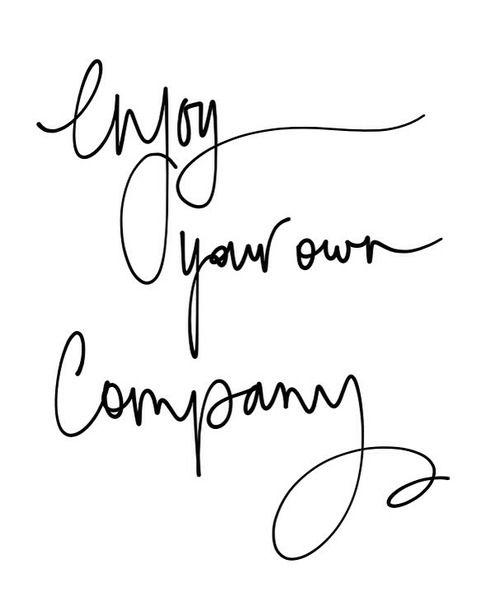
One thing you could do is have a tape party! Have tables filled with blank supplies and let your friends go buck wild with this tape. Make sure you tag DUCK TAPE and they might share it on Facebook or Twitter! I added a fun quote for you to think about. HUGE GLITTERY HUGS!

38cc77ccaec6f4aeb02b184995125114

I hope you enjoyed this tutorial. What would you make with your tape?
jaderbomb

Today it is all about mugs. I don’t know about you but I somehow collect way too many mugs and what happens is I never can decide which one I actually want to drink out of. I guess just like the clothes I wear I believe my coffee cup defines what kind of mood I am in or want to be in.

What? You don’t think so? Shoots, maybe I am just a nut case but at least I am a nutcase than could throw a banging coffee party. Remember my coffee party I did for Martha? You know you could always use these printables for a banging party too!

“I like light green, sometimes red is fun to look at, not a fan of yellow, unless it’s in a rainbow or on a coffee mug or on a happy face.”
-Chris Kattan

PINTERESTMUGSYOUWILLNEED*Glass Paint 
*Mugs
*Daubers
*Adhesive Stencils
*Brush and Stencil Cleaner
How to Stencil Mugs 
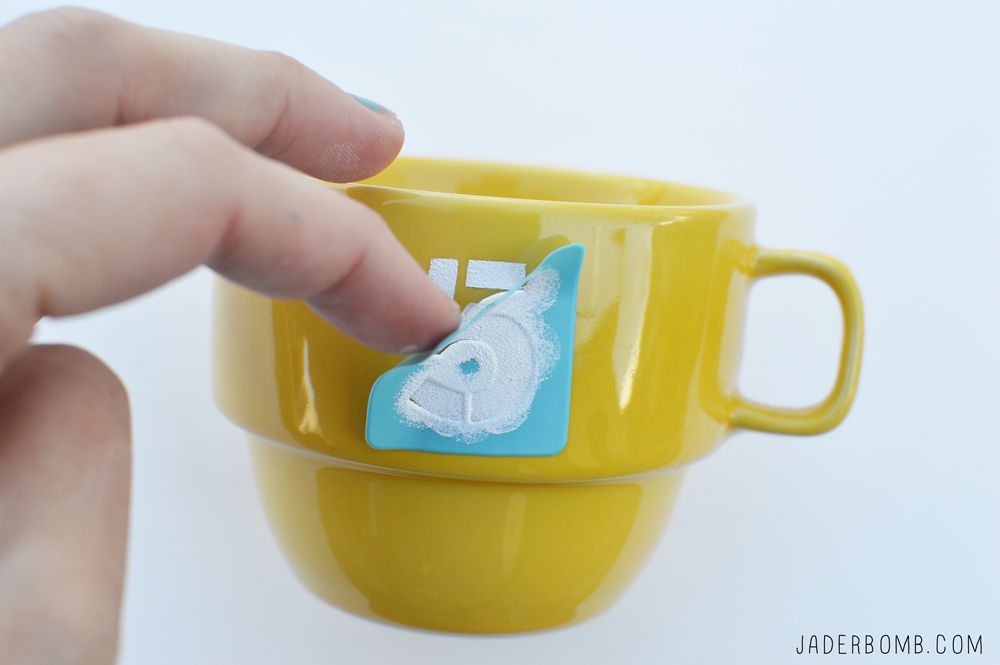
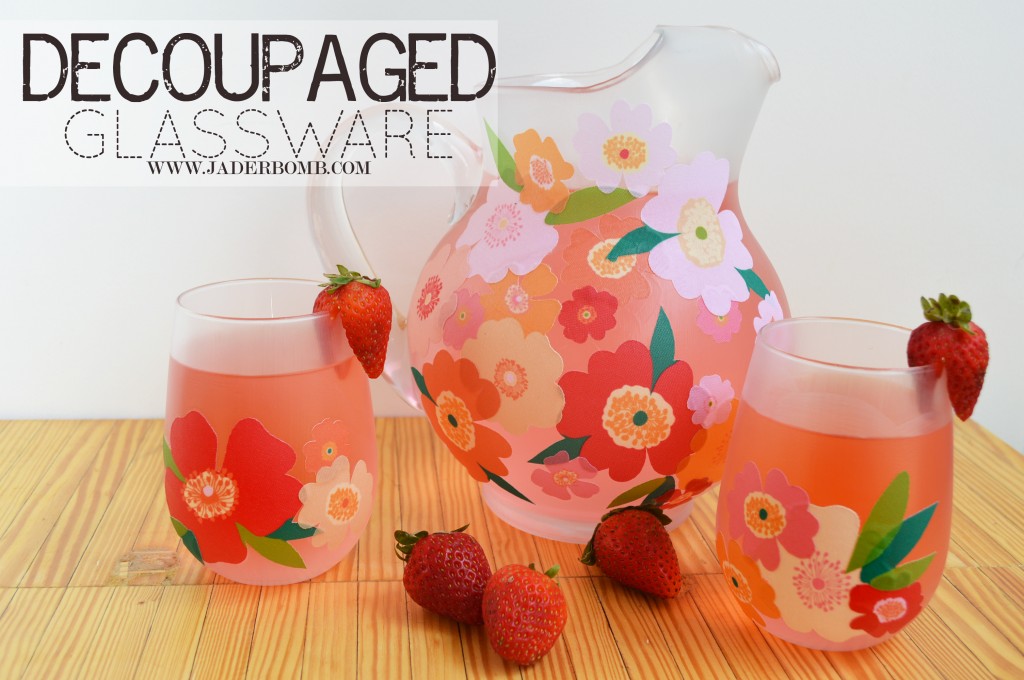
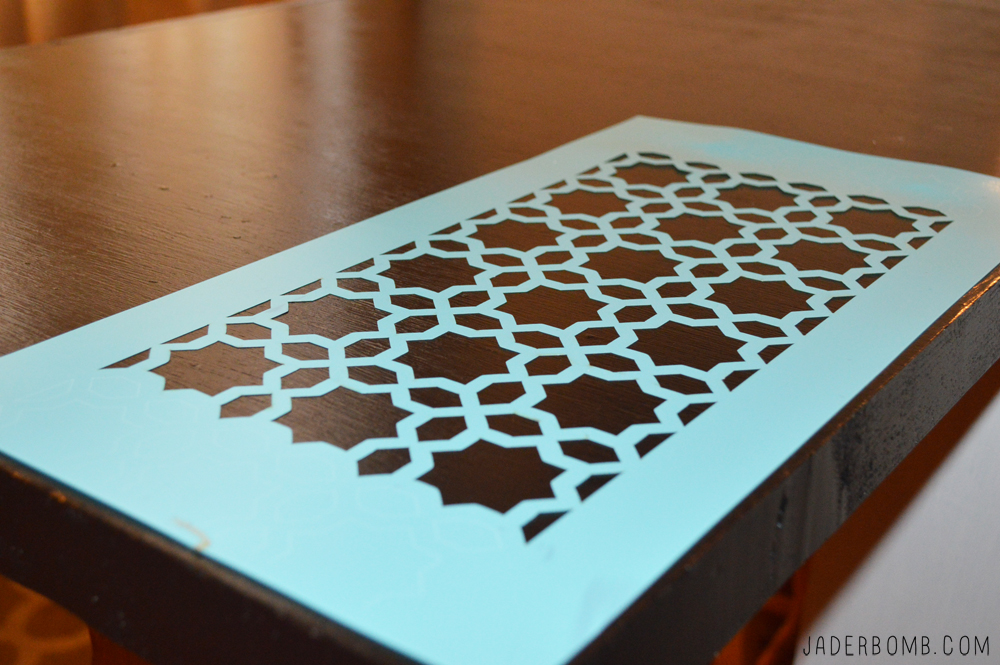
The great thing about Martha Stewart’s stencils is the fact that they have a nice adhesive backing to them. This is good because they will not budge when you paint on them. martha stewart adhesive stencils

Start by placing them on the mugs wherever you want. Don’t worry, if you mess up you can remove them and reapply them where you want. numbered mugs diy
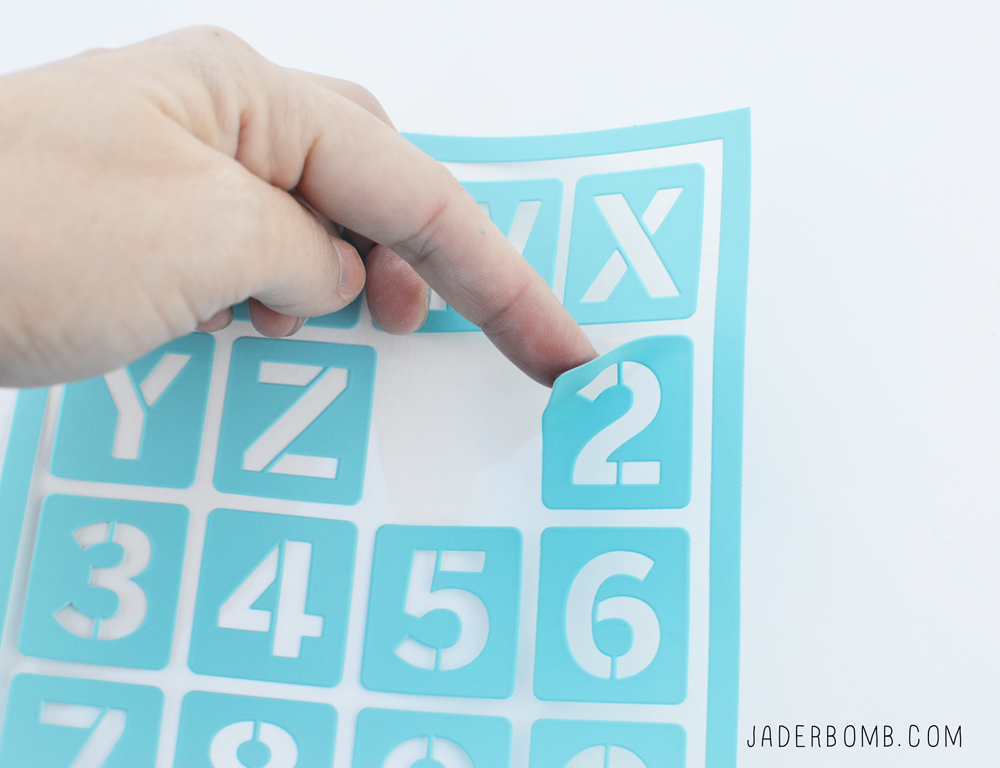
Once your stencil is secure squirt a little bit of glass paint inside of your stencil. how to write on glass
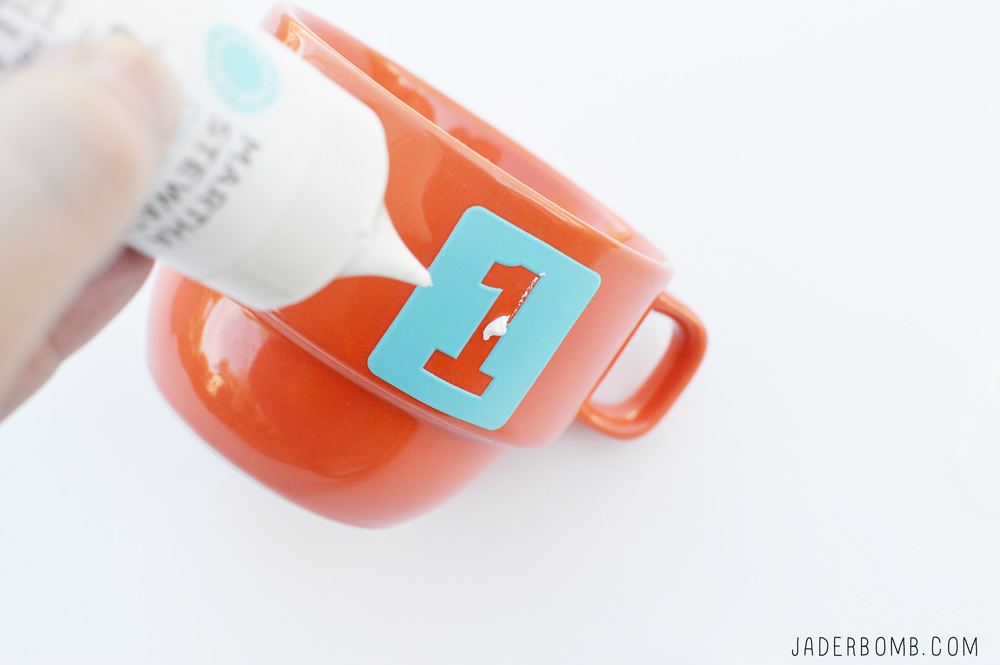
I love using daubers because they distribute the paint nice and even through out the stencil. They also help prevent bleeds since you are apply in an up and down motion. martha stewart dauber
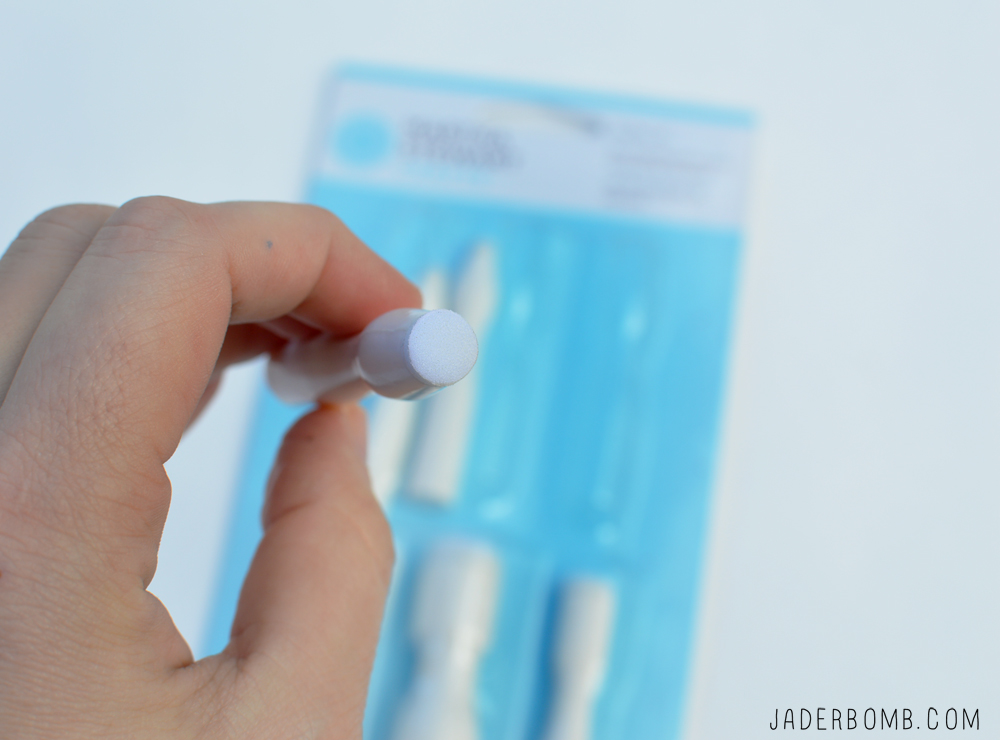
Apply one even coat and re-apply a second coat 10 minutes later. If you want a really opaque look add a third coat. how to stamp glass

Before your paint dries pull off your stencil and place it in a bowl of water.
how to paint glass

Take them out of the water when you are done and place them on a paper towel. Grab another paper towel and apply a little stencil cleaner to it. Gently rub the stencil and the paint will come off. how to clean stencilsmartha steawart stencils
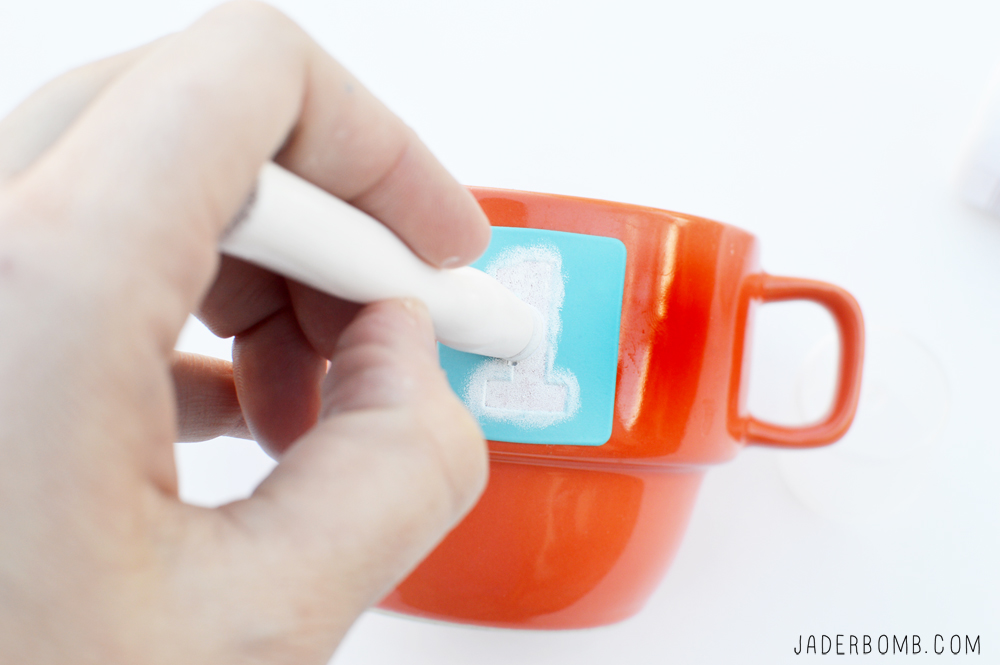
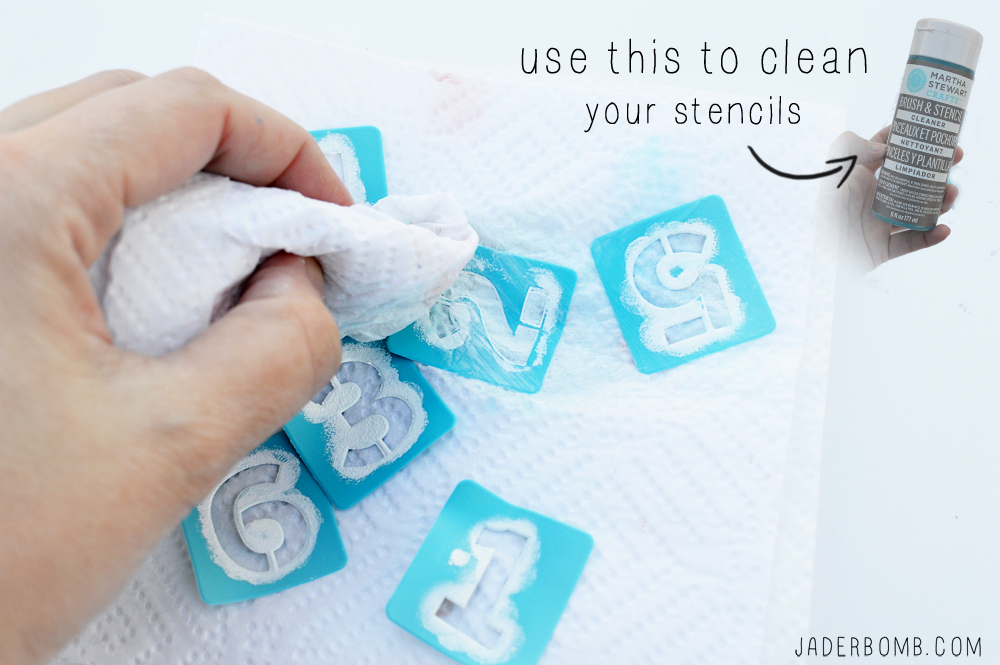
Allow them to dry over night and if you want lock in the paint you can bake them in the oven. The directions to doing that is on the bottle. numbered mugs
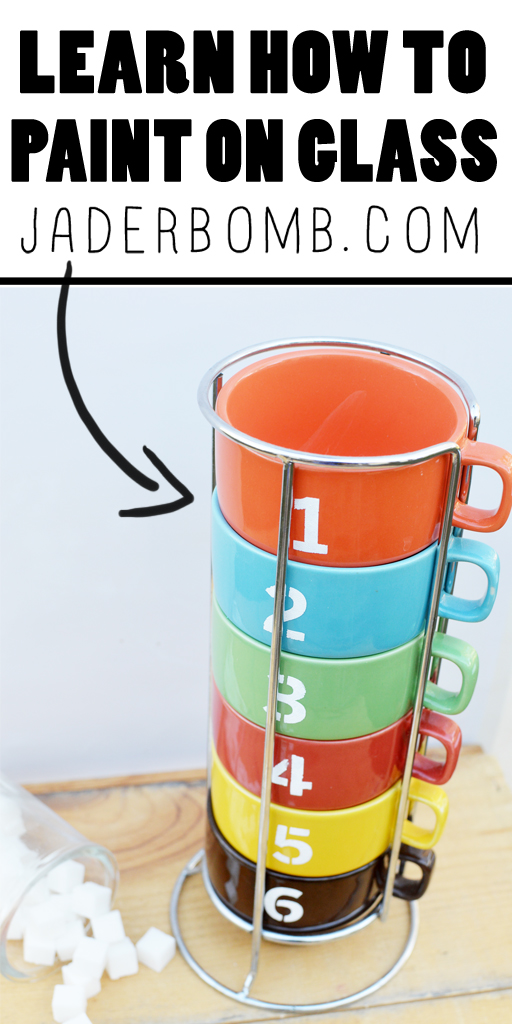
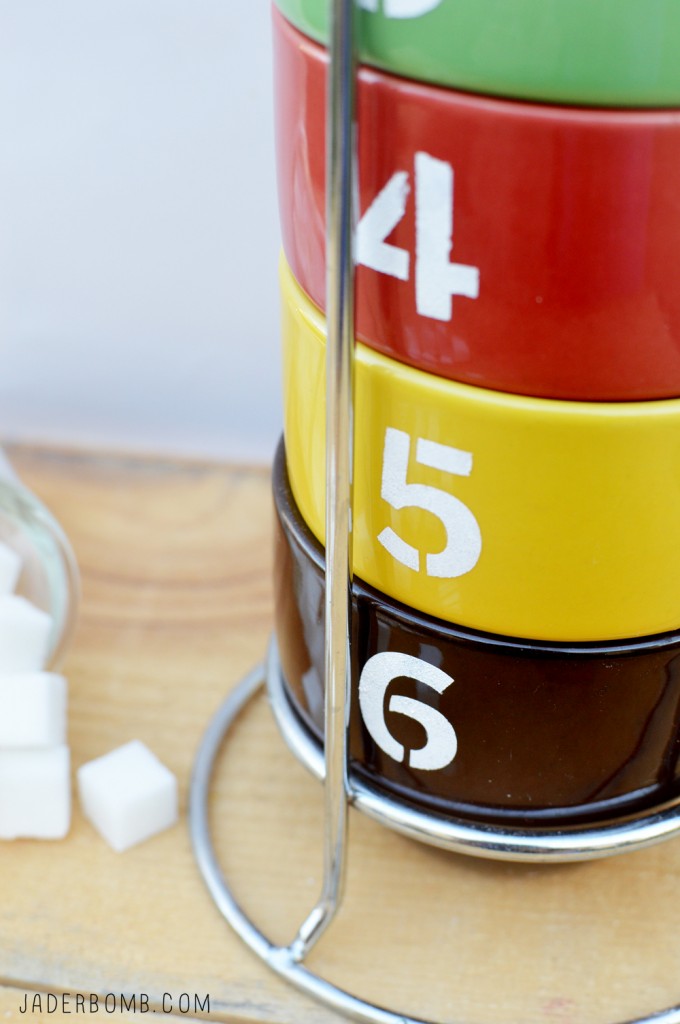
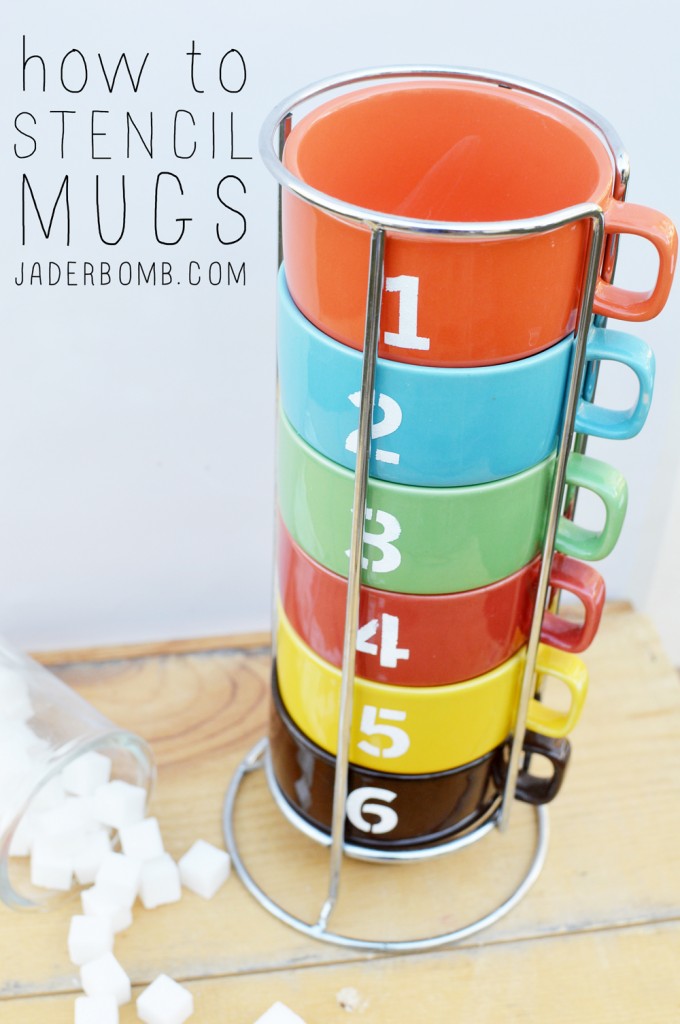
I hope you enjoyed this easy and fun DIY tutorial. I mean, you can put numbers on your mugs so you can count how many cups you drink in a day right!
ending

Yep it’s already time to start the crafty love making! Today I am sharing 10 Great Valentines Ideas. I love pink, red and gold so this is the perfect time to pretend to be a 10 year old girl again in my pretty pink room!

No, I never had a pink room but it’s never too late right! I put together 10 fabulous and easy ideas for this lovely day. I am sure there is something in here you could use, if not all of them. ENJOY!
PINTEREST-LOGOpretty-painted-wooden-letters-680x1024

Geometric XO Letters
These are so easy to make and you can really bling it out with your favorite colors.

RAINBOW-CUPCAKE-BANNER

Cup Cake Banner
These were a hit on Pinterest and super cute. Now don’t do like me and try to eat them.
DSC_0060-1024x822

Olive for YOU – FREE PRINTABLE
When I made this it was a hit and I kept it up for a year in my house. It’s so lovable.
yyy-1024x768

How to make Homemade Envelopes and Boxes
Why buy a box when you can make your own with your favorite paper!

2-731x1024

Happily Ever After – FREE PRINTABLE
Who doesn’t want a Happily Ever After? RIGHT!

DSC_0036-1024x680

Valentine Tube Candles
Why buy expensive candles when you can turn dollar candles into this!

diybathscrub

Bath Salts
Give your loved one a scrub in the tubby tub with this load of awesomeness!

DSC_01781-1024x953

Valentine Heart Wreath
Who doesn’t love a good ole interchangeable wreath.

DSC_0018-1

Food Pom Pom
Wanna turn those boring cupcakes into work’s of art? Just stick these babies in them an VOILA!

DSC_0440-1024x680

Watercolor Flags
This is a great craft to do with you kids.

10-great-valentines-ideas.jpg-1024x1024

I hope you enjoyed these Valentine Ideas.
WHICH ONE IS YOUR FAVORITE!

ending1

Today I am sharing something that makes me smile from ear to ear. My top 10 DIY Posts of 2013! HOLY COW, 2013 is OVER! I can’t even believe it’s over already. I honestly remember 2000 happening last week and now 14 years later.

This past year was by far my BEST year ever with so many things. I graduated college, my blog GREW (WHOA IT GREW), I came OUT on my blog, I started working with some GREAT brands, my site got HACKED (thanks Max for fixing that because I got to finally design my site the way I wanted) and my son who is almost 14 (WHAT) is happy and healthy! I am so thankful to the UNIVERSE for everything. She really does listen. When you manifest good things, good things come. I never imagined the success that would come along with a little blog I started almost 4 years ago. I could go on for day’s but I think this might sum everything up for you.

THANK YOU! 2014 has already started extremely well and I can’t wait to announce tom just one thing super exciting! Lot’s of FUN things to tell you but I have to wait till I get permission for each of them! Are you on your toes yet? Top 10 DIY Posts of 2013 - WWW.JADERBOMB.COM

Top 10 DIY Posts of 2013 - WWW.JADERBOMB.COM

How to Cut Glass

Top 10 DIY Posts of 2013 - WWW.JADERBOMB.COM

How to make Faux Milk Glass

Top 10 DIY Posts of 2013 - WWW.JADERBOMB.COM

Diy Ring around the Rose Bracelet or Neclace 

Top 10 DIY Posts of 2013 - WWW.JADERBOMB.COM

How to make a Reed Diffuser

Top 10 DIY Posts of 2013 - WWW.JADERBOMB.COM

How to Decoupage on Glass

Top 10 DIY Posts of 2013 - WWW.JADERBOMB.COM

Homemade Laundry Soap

Top 10 DIY Posts of 2013 - WWW.JADERBOMB.COM

Puff Paint Vases

Top 10 DIY Posts of 2013 - WWW.JADERBOMB.COM

How to make a Dream Catcher Mobile 

Top 10 DIY Posts of 2013 - WWW.JADERBOMB.COM

How to Organize Your Space 

Top 10 DIY Posts of 2013 - WWW.JADERBOMB.COM

Top 10 DIY Posts of 2013 - WWW.JADERBOMB.COM

I love all of you so much and thanks for making JADERBOMB what it is. It’s all because of you and I am forever GRATEFUL and THANKFUL. I hope to see all of you in 2014!

ending1

Remember a while back when I posted this picture below? Remember how stressed I was trying to figure out what to do with this odd little piece of wood? I received ton’s of advice on what I should and shouldn’t do. So much advice that I got completely distracted all over again and could not make up my mind.

Like, who else freaks out about stuff like this? I feel like I need a stump to sit on and “think” when I have to make design decisions. After staying up many nights (not really) I finally decided to trust my bestie Martha. She always knows what do to. Come see what I ended up doing.

Learn how to Stenci - www.jaderbomb.com

Initially I painted the wood with black chalk paint. I wanted a whimsical space where I could write positive notes on. Yeah, not so much once it was there.

It’s obvious I love anything with chalk. Check out what I did to my fridge. I also made some rad chalk labels. In today’s project you will learn how to Stencil.

I used Martha Stewarts Geometric Patterns Laser Cut Stencils. They are super easy to use and affordable, at a low price of $16.99. I like things like this because it will not break the bank and you can always paint over it when you get tired of looking at it.

“Use stencils to create beautiful painted designs on fabric, wood, glass and other surfaces. Contains 3 laser cut stencils 8 3/4in x 16 3/4in, 12 designs, and instructions”.

Correct way to use stencils - JaderbombYou will simply lay the stencil down on any surface, grab a sponge and lightly sponge on top of the stencil. I am very ocd so after every application I would wash the stencil and pat it dry. When you move onto the the next section just take one row and lay it on top of the last one you painted.

This will line up the stencil pattern. Once you are done stenciling your entire surface, let it dry for 24 hours. When dry apply a layer of Mod Podge on top. Let it dry completely and apply a second coat.
How to mod podge wood - JADERBOMB

Ways to use Mod Podge - JaderbombMartha Stewart Stencils - JaderbombStenciling Projects - JaderbombDIY Kitchen Projects - Jaderbomb
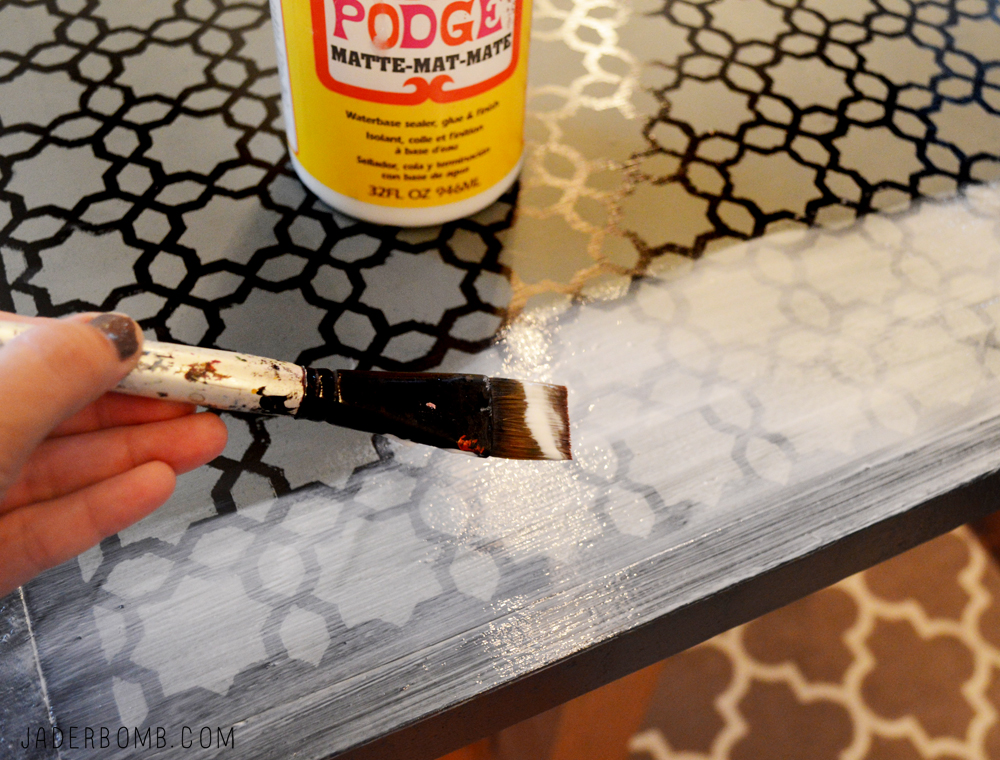
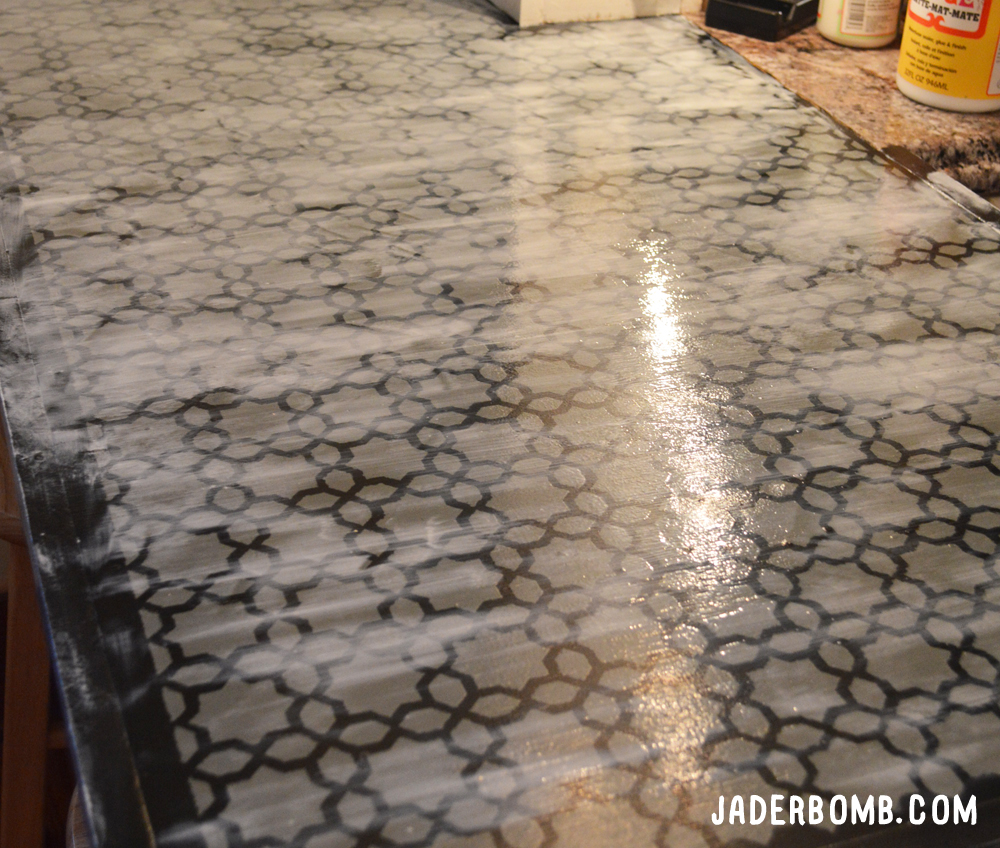
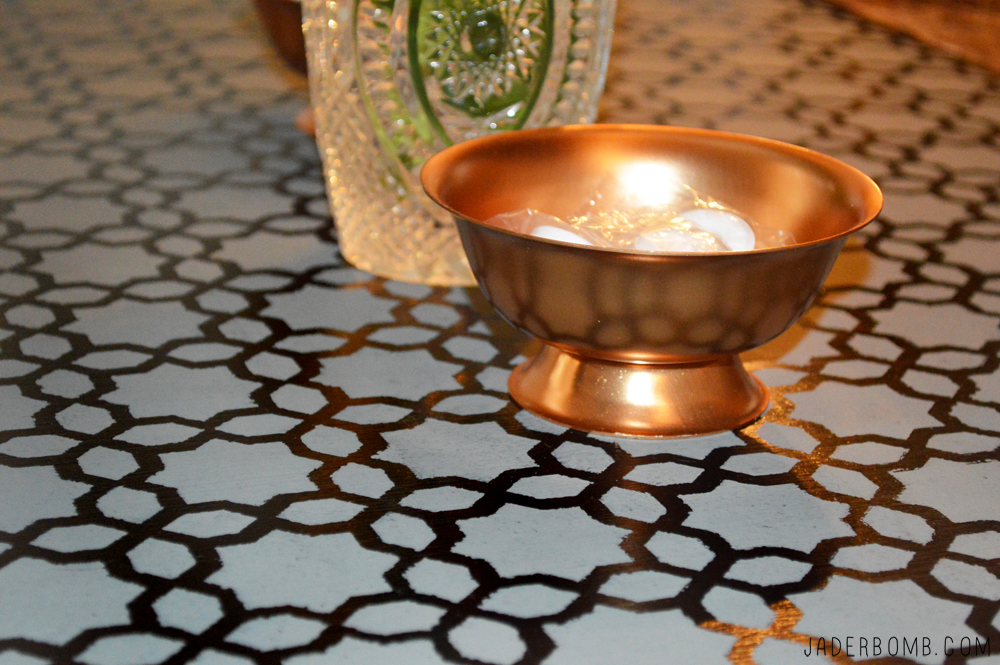
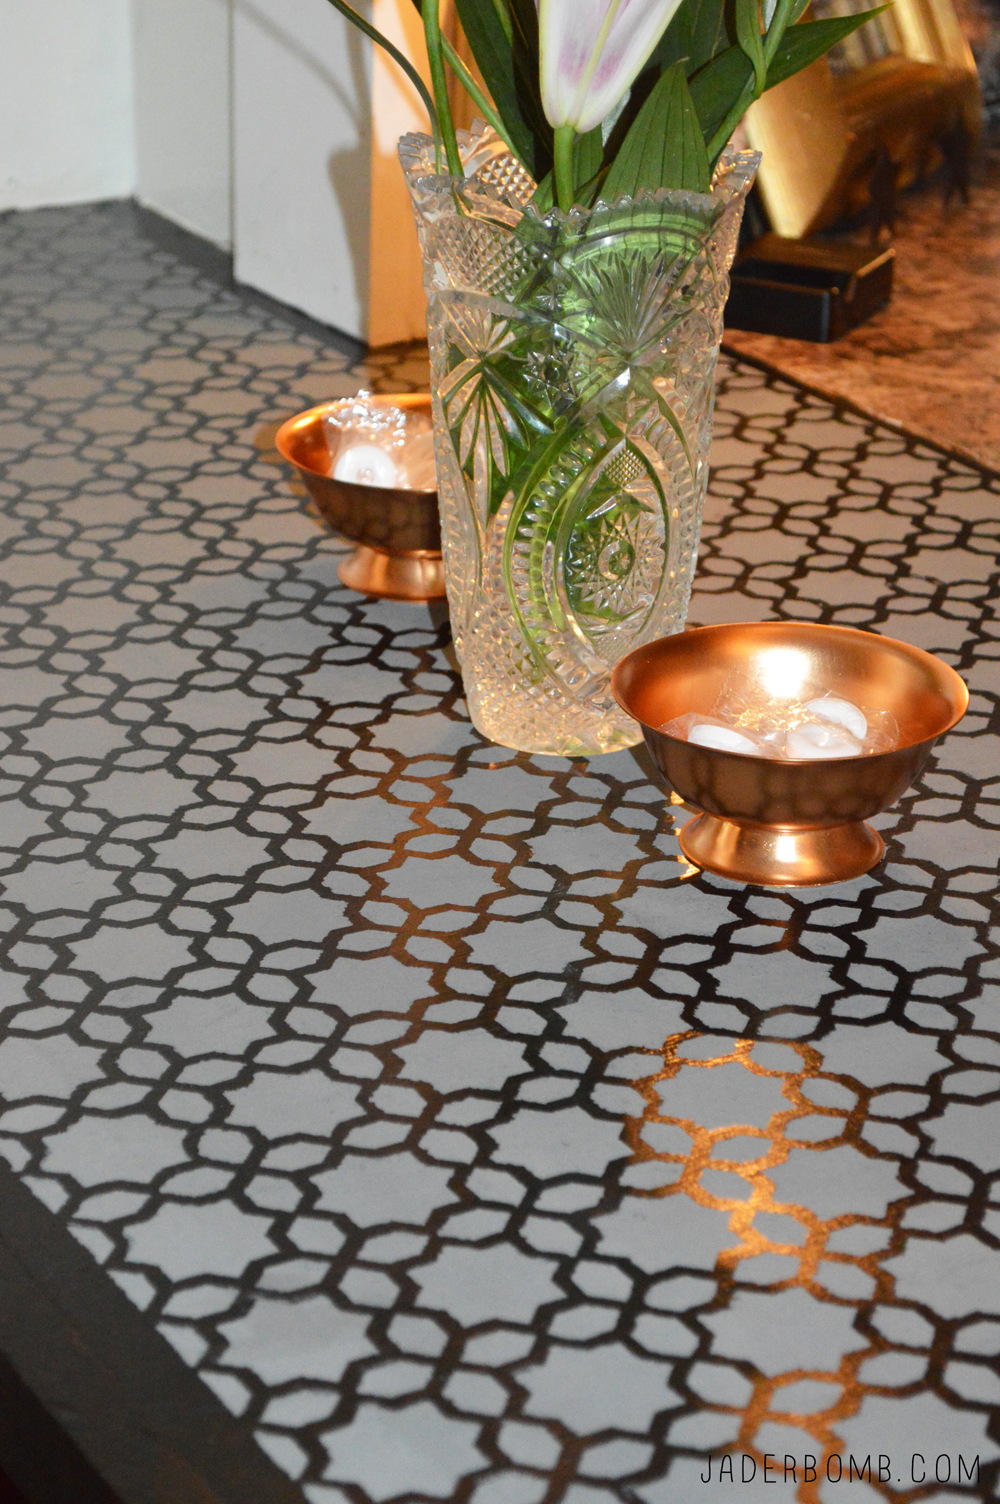
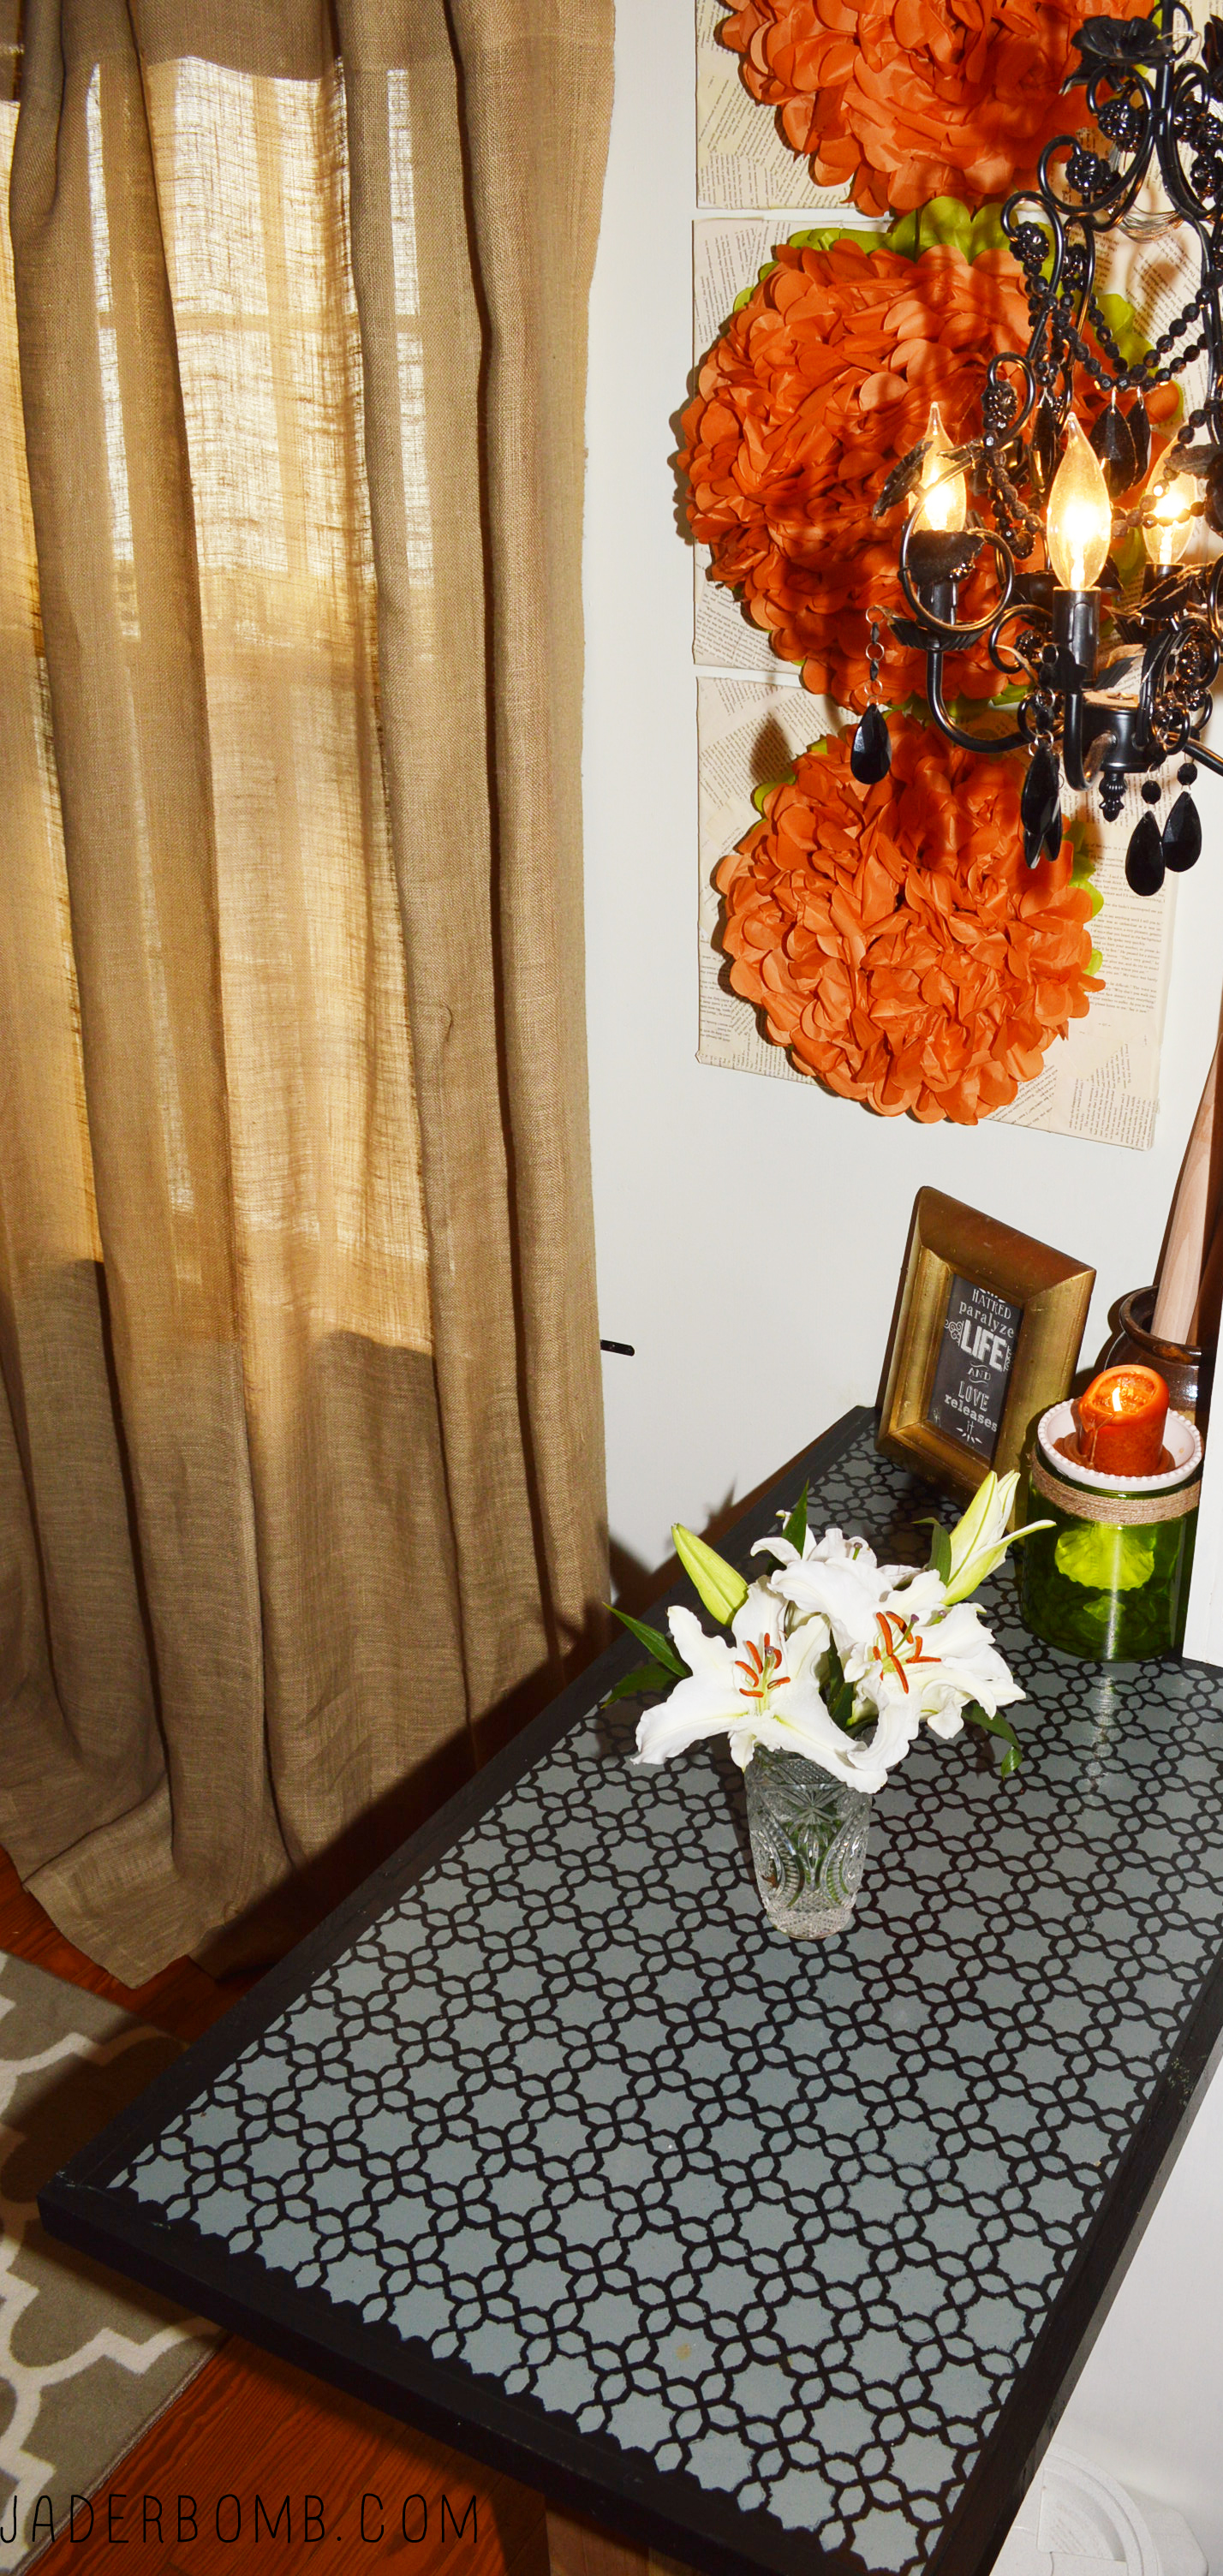
I am pretty sure you are gooing and gahhing looking at these pictures. I mean, this is something I am doing temporarily until I finish the kitchen. It does add pizazz to the space if I must say so myself. Easy Kitchen Makeover - Jaderbomb
I hope you enjoyed this tutorial and found it helpful. Make sure to let me know in the comments if you have any questions or if you want to share your experience with stenciling. I love to hear your thoughts! See you in the next post.

ending1

ST_12_months_of_Martha_Logo-1How to make a Paper Cone

What’s better than Popcorn? Getting Popcorn in a paper cone, y’all!

Now before you flip out with excitement I will need you to put on your Christmas shirt and grab a movie. Preferably UP. Wait, did you see my post I did yesterday on the I love to create website? Check it out Here.

Let’s get started because I am eating all of the popcorn. YOUWILLNEEDMartha Stewart Craft Paper | Baker’s Twine (optional) | Christmas Stickers | Glue Gun | Love
DIY SNACK CONTAINERS
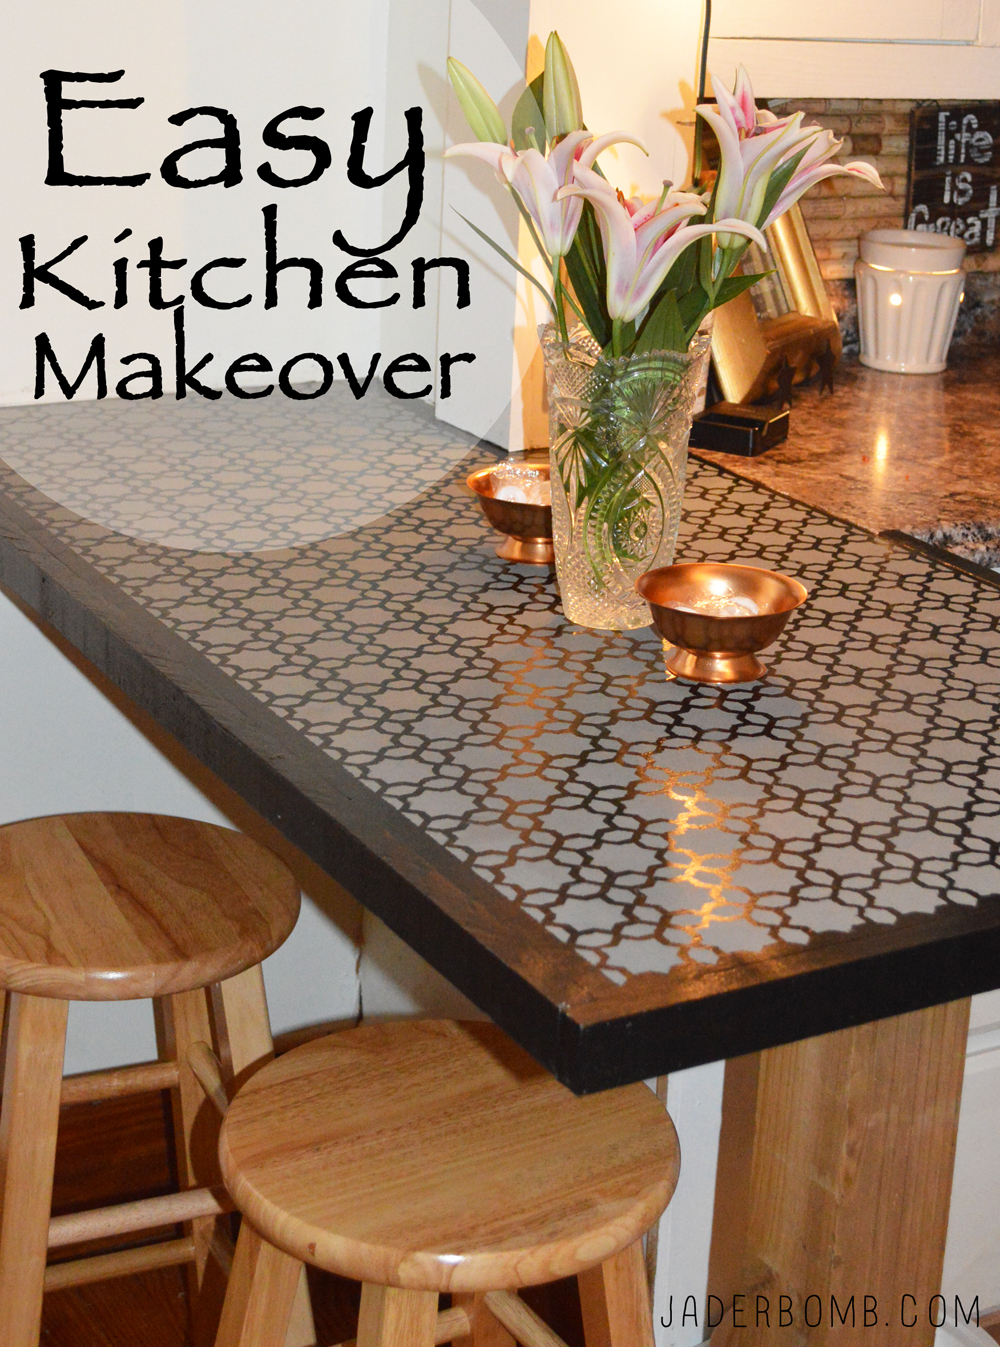
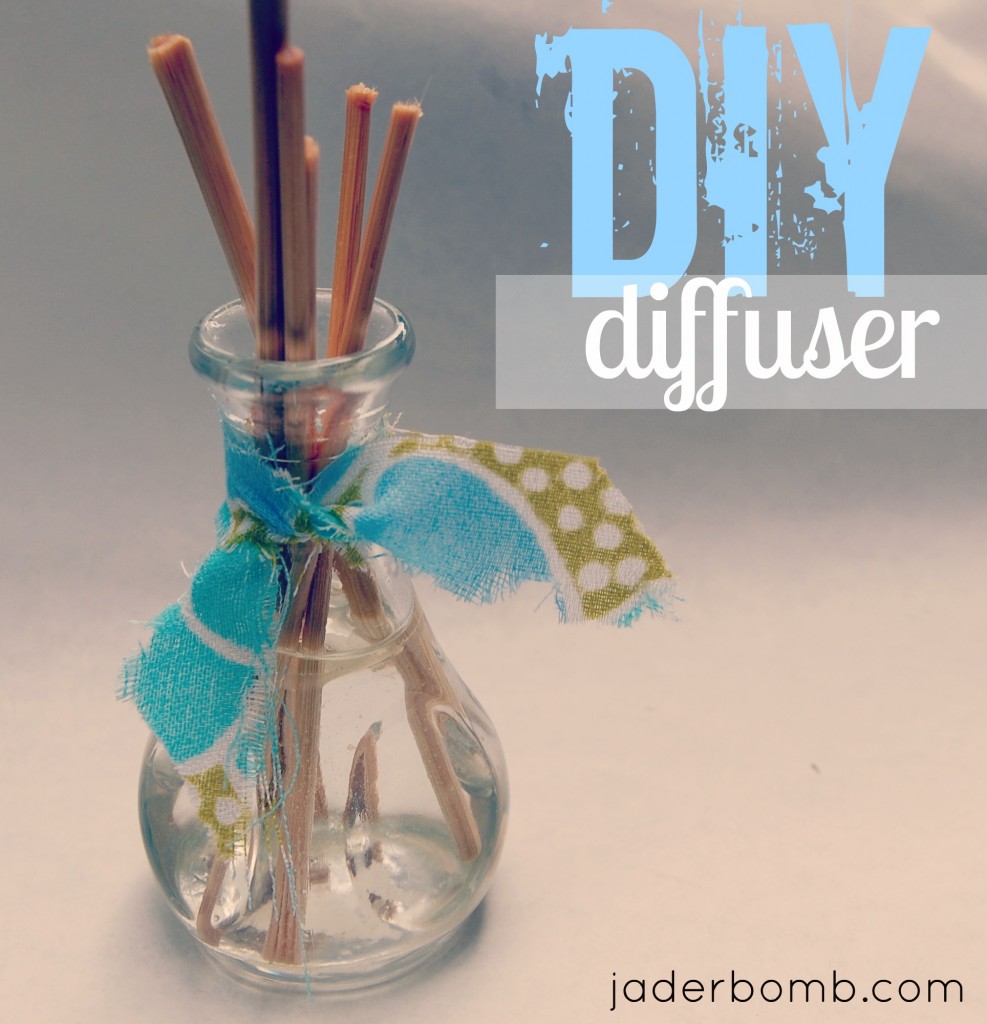
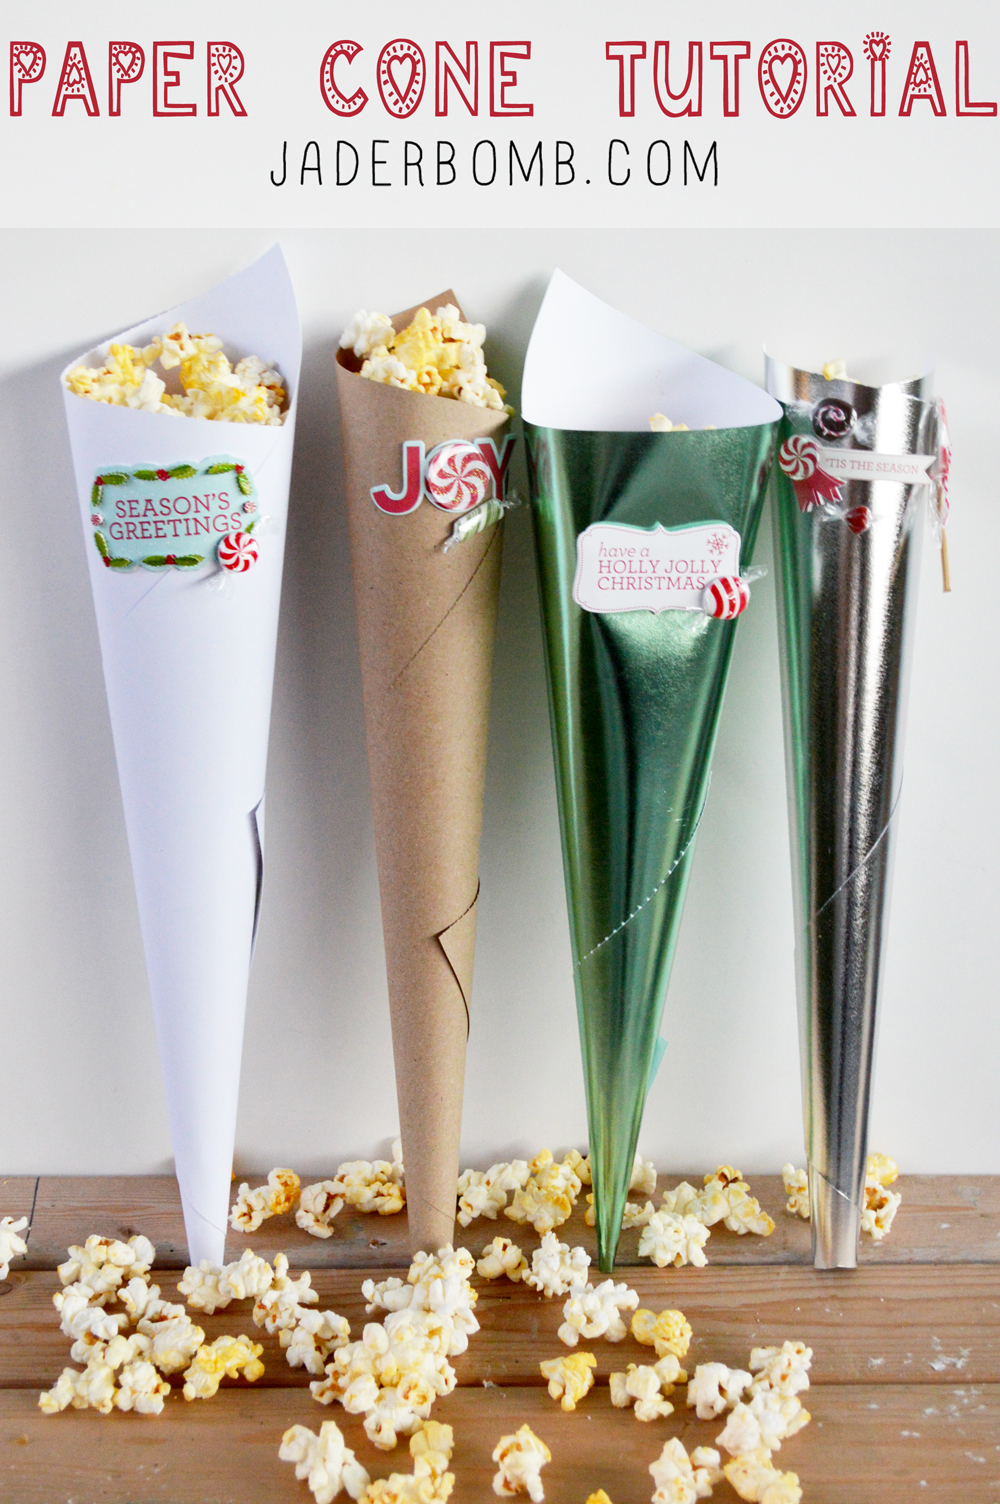
The first thing you will do is lay a sheet of paper out flat and start rolling from one corner to the next. It might feel awkward at first but you will get the hang of it. howtomakeapapercone
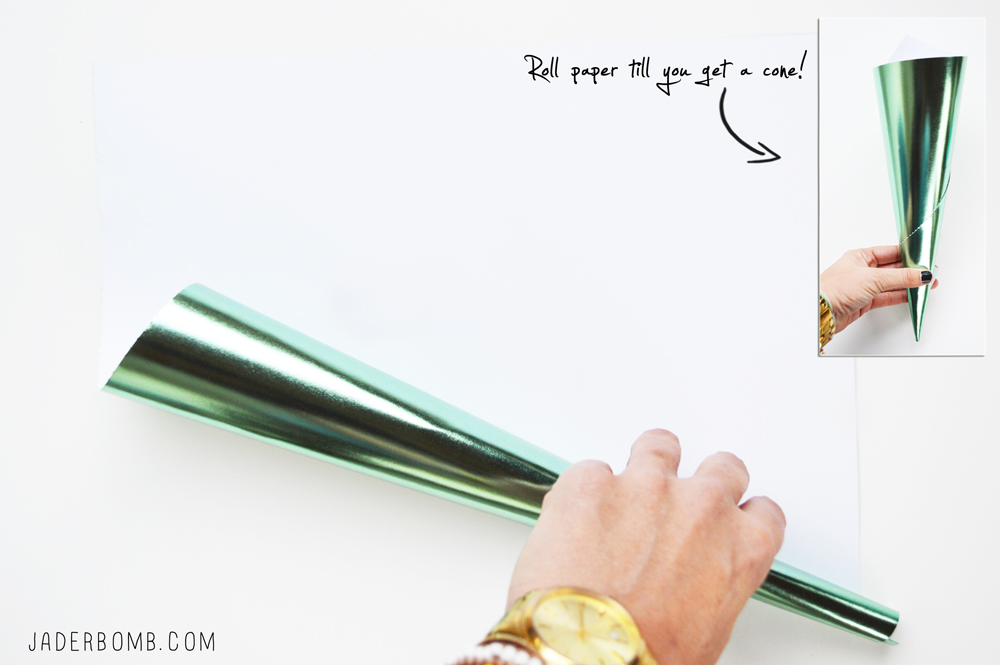
It will start to look like this on the end. With a little practice (maybe a minor heart attack) you will get a nice pointed tip.

Whatever you do, don’t ask me how how many times I threw that sheet of paper down on the ground while walking away like a mad little kid <——– teehee. make a paper cone snack containers
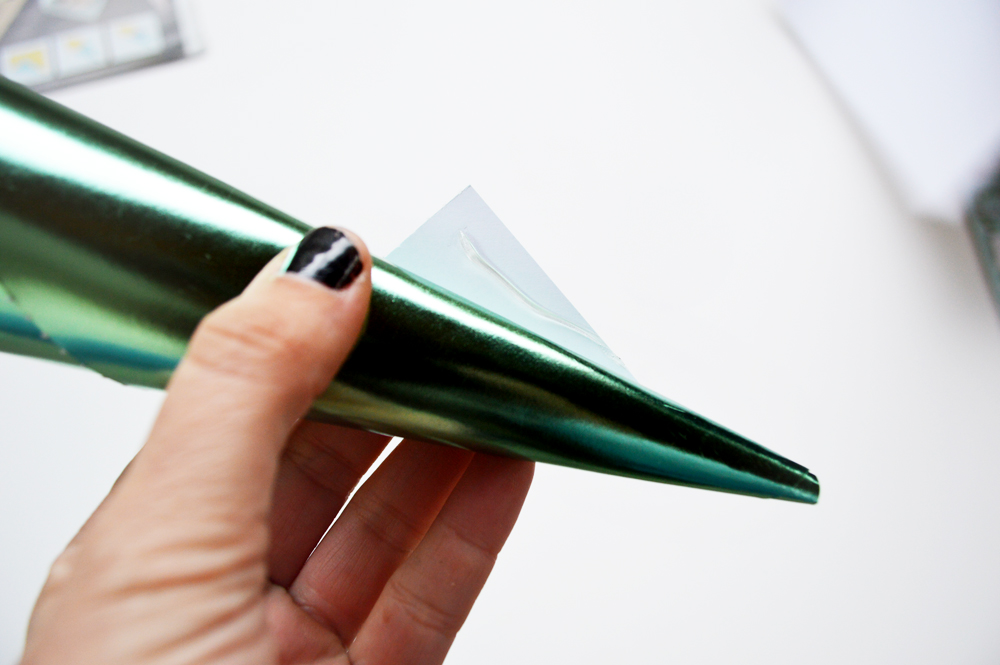
When you are done rolling your paper you will have this little piece of paper hanging off of the top. Don’t worry it’s supposed to be there. If it’s big enough you can fold it down and clip it with a button or something. You can use a hole puncher and attach with baker’s twine also. paper containerI used Martha’s new stickers on my paper cones. I love how they add just enough to the cones. marthastewart peppermint stickerspopcorn holder paper cone
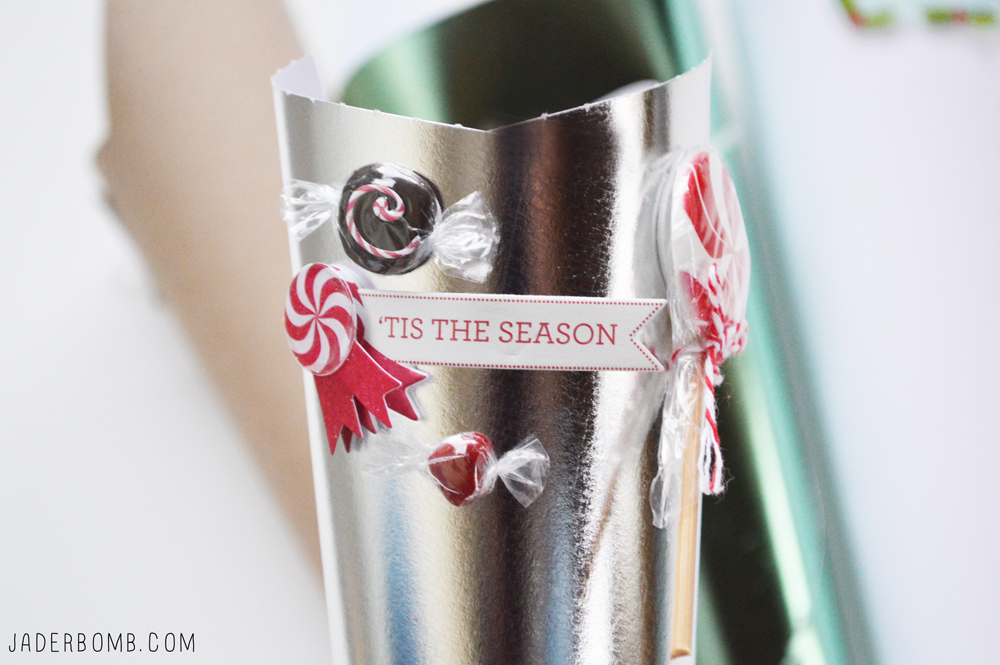
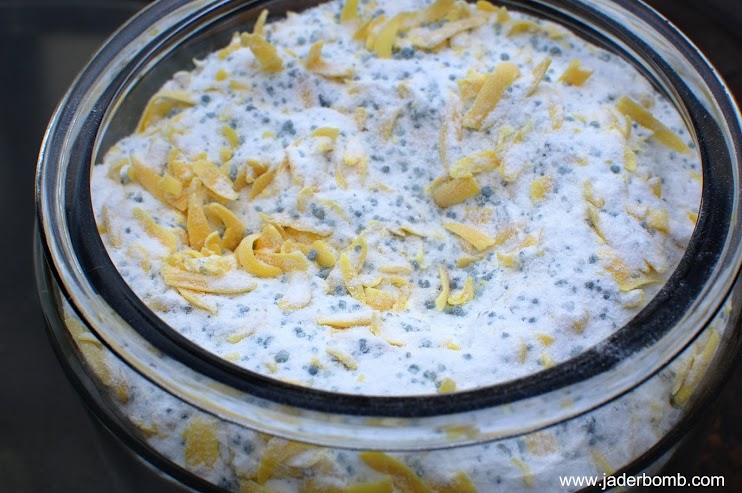
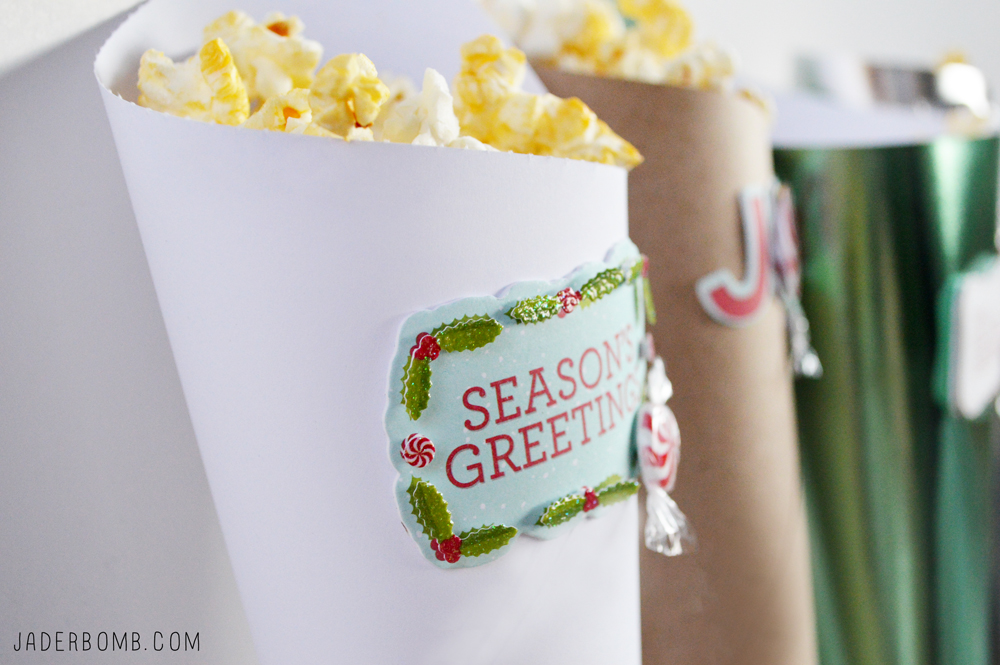
You can fill these with anything your little heart desires. I wanted to hand out popcorn to my family and thought that would be the perfect filling. diy paper conesdiypaper cone craft
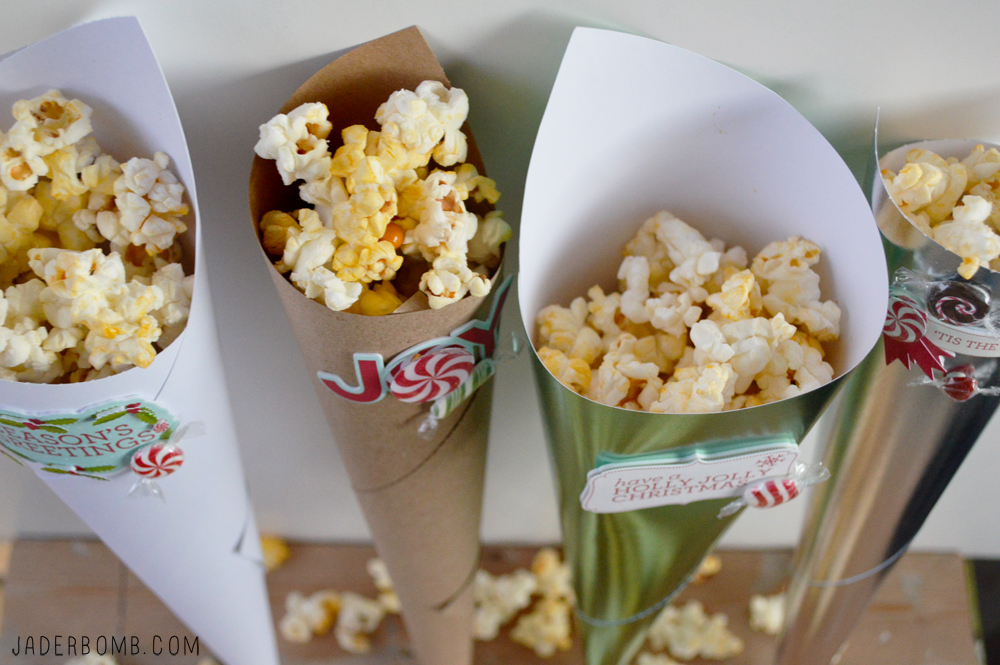
Disclosure:  I’m part of the 12 Months of Martha program. What does that mean? Well, my stop mom “Martha” sends me a box of yummy goodies each month and in return I create fun tutorials just like the one today for you.

Happy Holiday’s from my little golden heart to yours! What will you fill your cones with?

jade