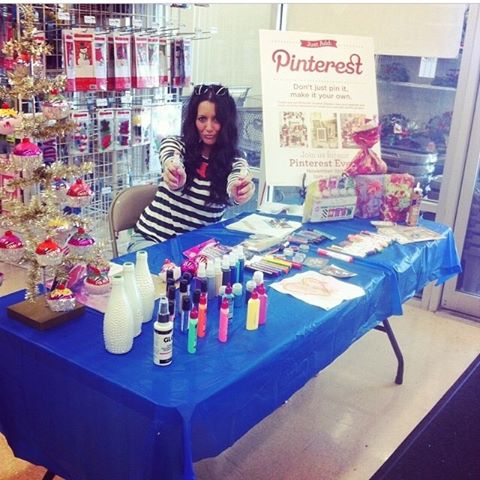
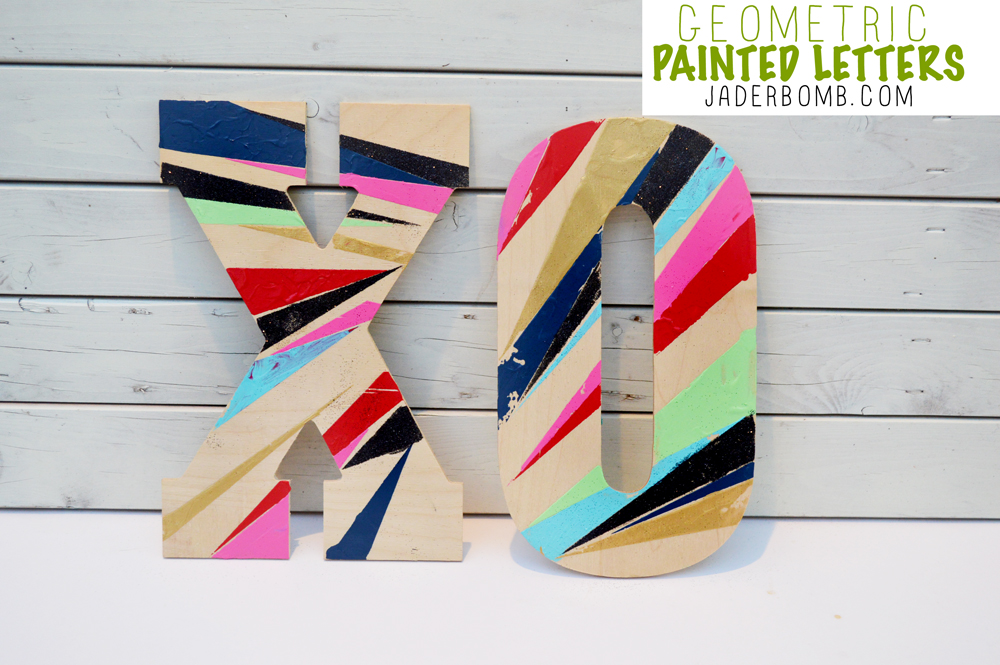
Wooden Letters make are special because you can create any word or saying with them. I always keep these in stock, especially for the holiday’s!
I think there will be an overload soon of these suckers so beware. You surely have to have fun and design them to reflect your personal space or personality.
Do I create things for a space ever, you ask? NO. I create AWESOME things and then my space has to work around them. (teehee). Let’s get started. 
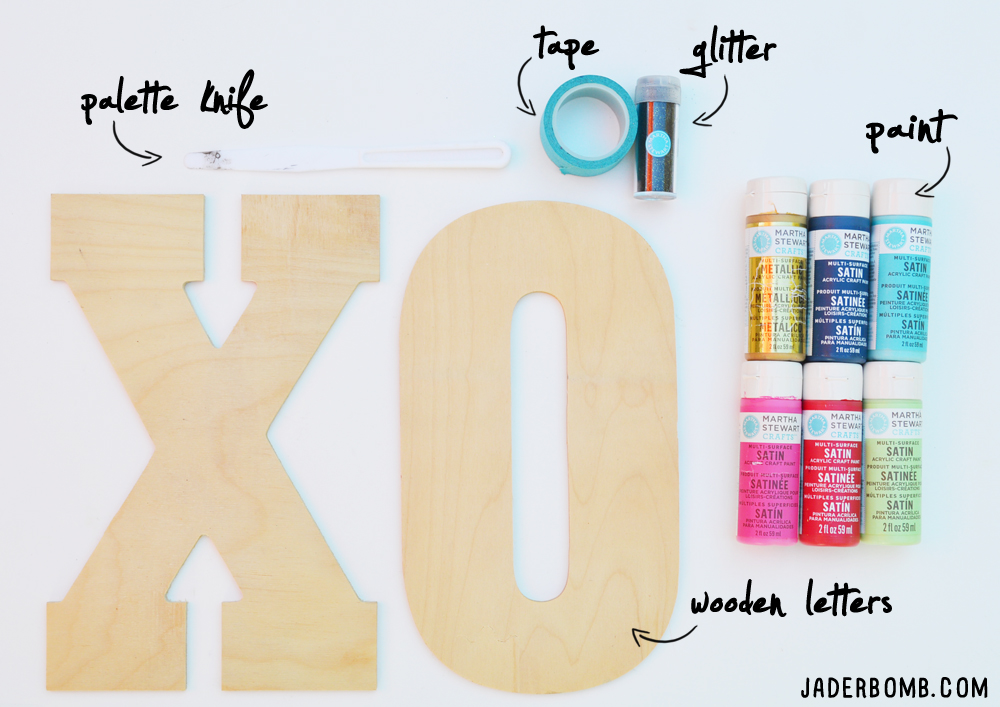
Wooden Letters | Palette Knife | Tape | Glitter | Craft Paint
You can purchase all of these items from ONE spot by clicking on the links above. (P.S. These are affiliate links, so thanks for helping me buy more glitter)
The first thing you will do is tape off sections of your wooden letter like below. You can create small spaces or big spaces. Totally up to you. 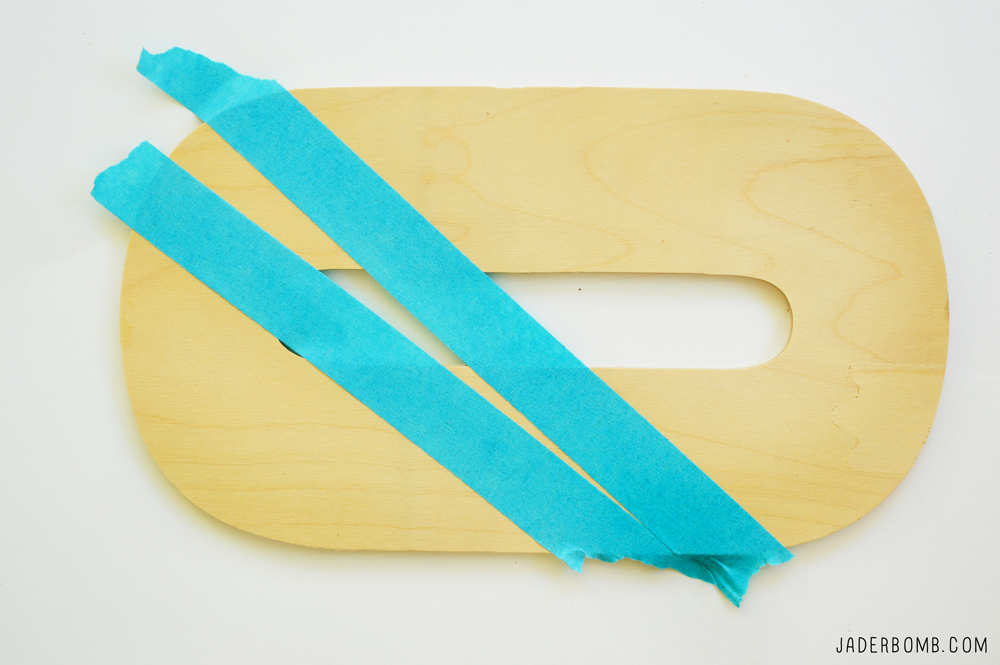
I like to mask off my entire letter before I start. 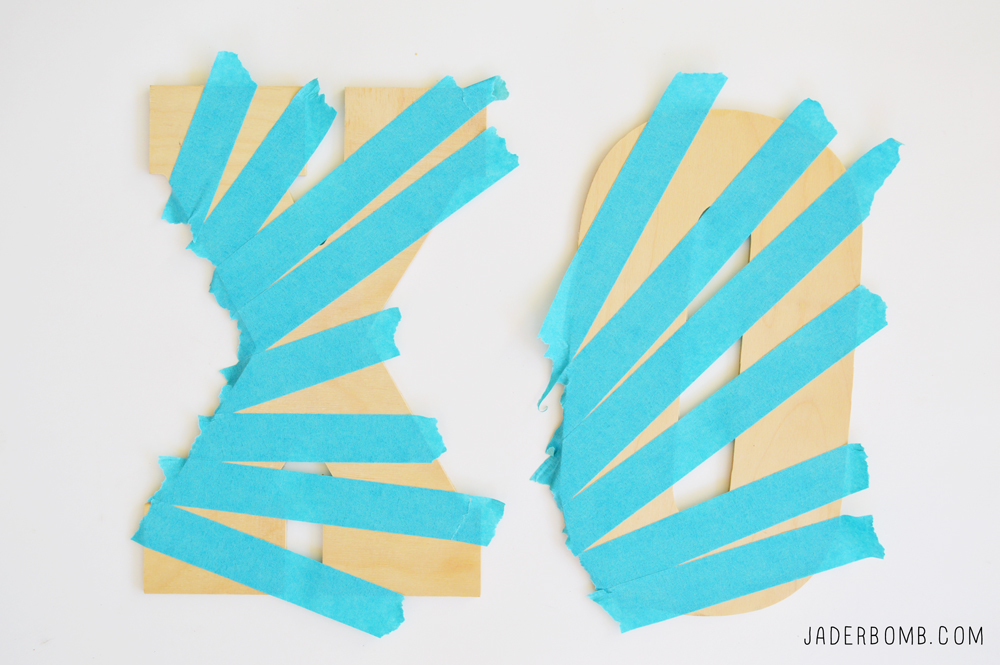
I will be applying paint using a palette knife. 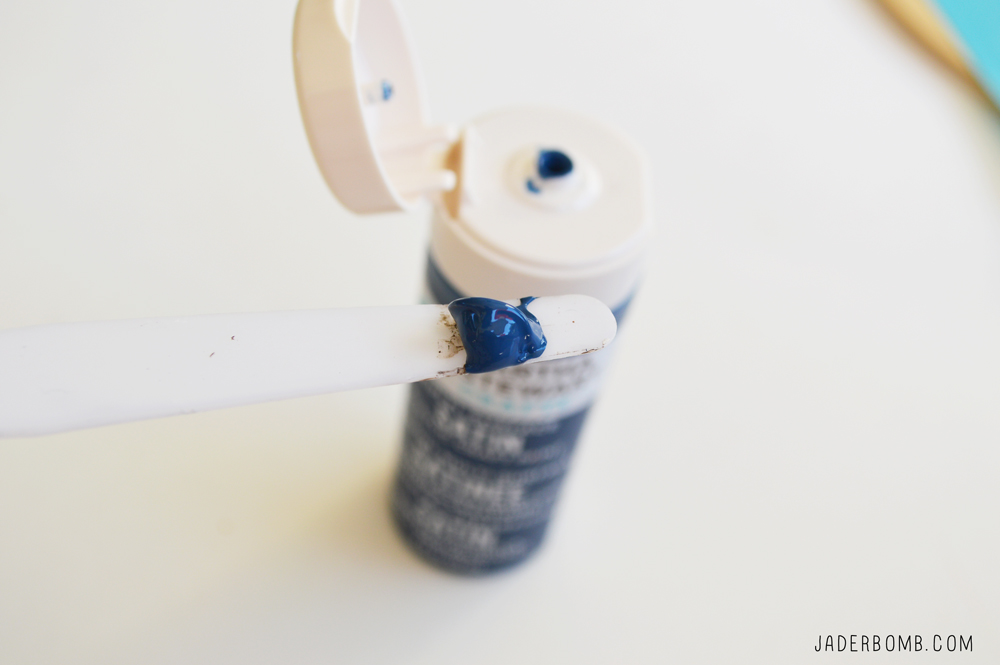
You will apply a thick layer of paint on the wooden letter. This will add great texture to them in the end. 
After you apply your first color move on the the next one. 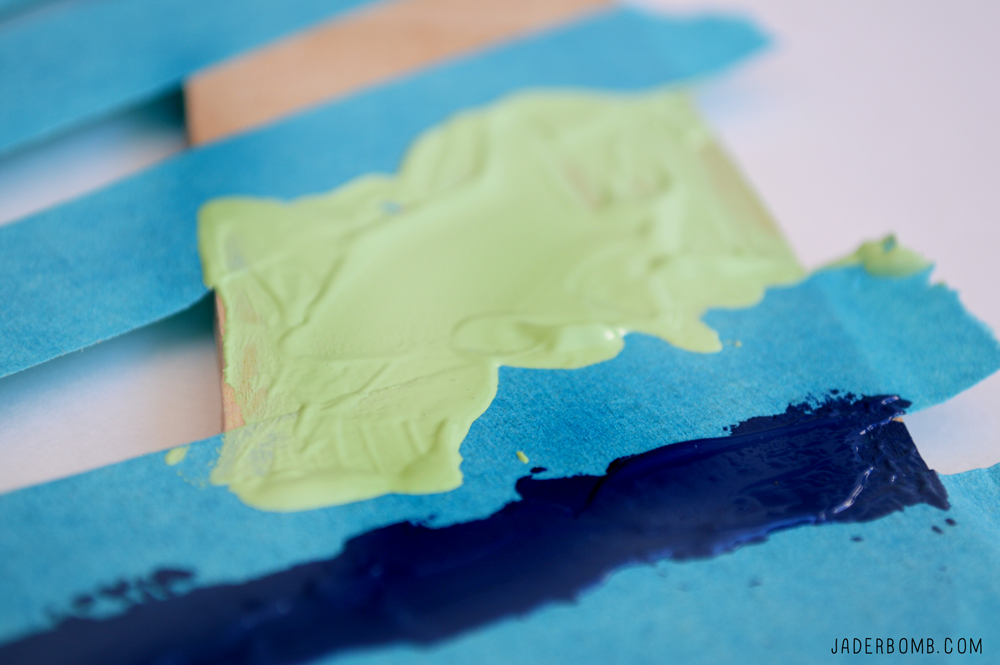
I take off the tape as soon as I move onto the next section. When you take the tape off while the paint is still wet it gives you a fine, crisp line!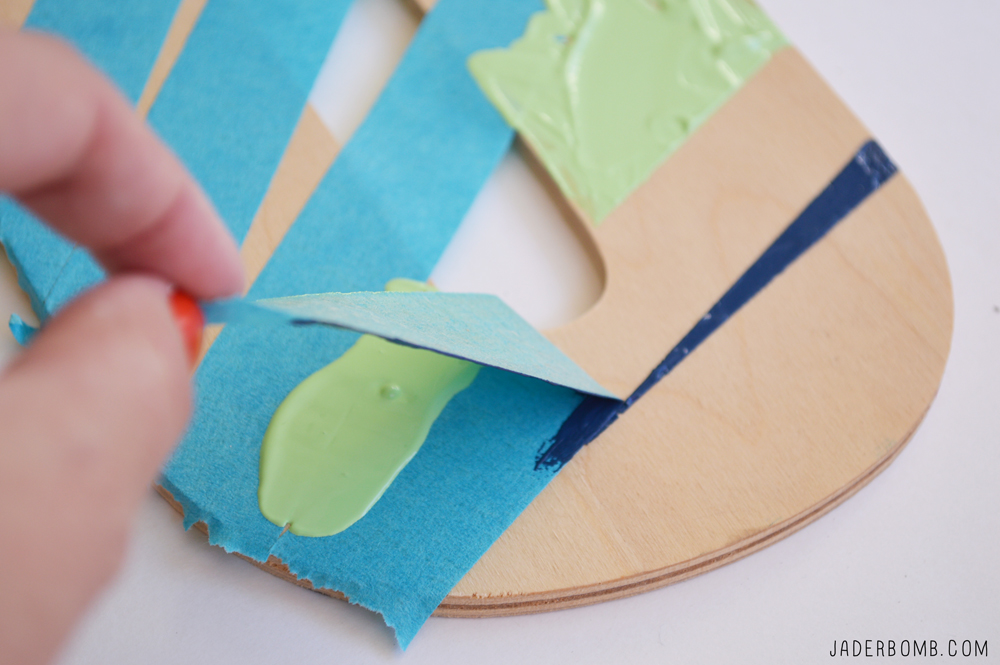 How cute are these babies. You see those black sections…That is black glitter! Once your paint is completely dry tape off a little section, put a little Mod Podge then sprinkle with glitter of choice. VOILA!
I hope you enjoyed this fun tutorial! What colors will you use for your letters?


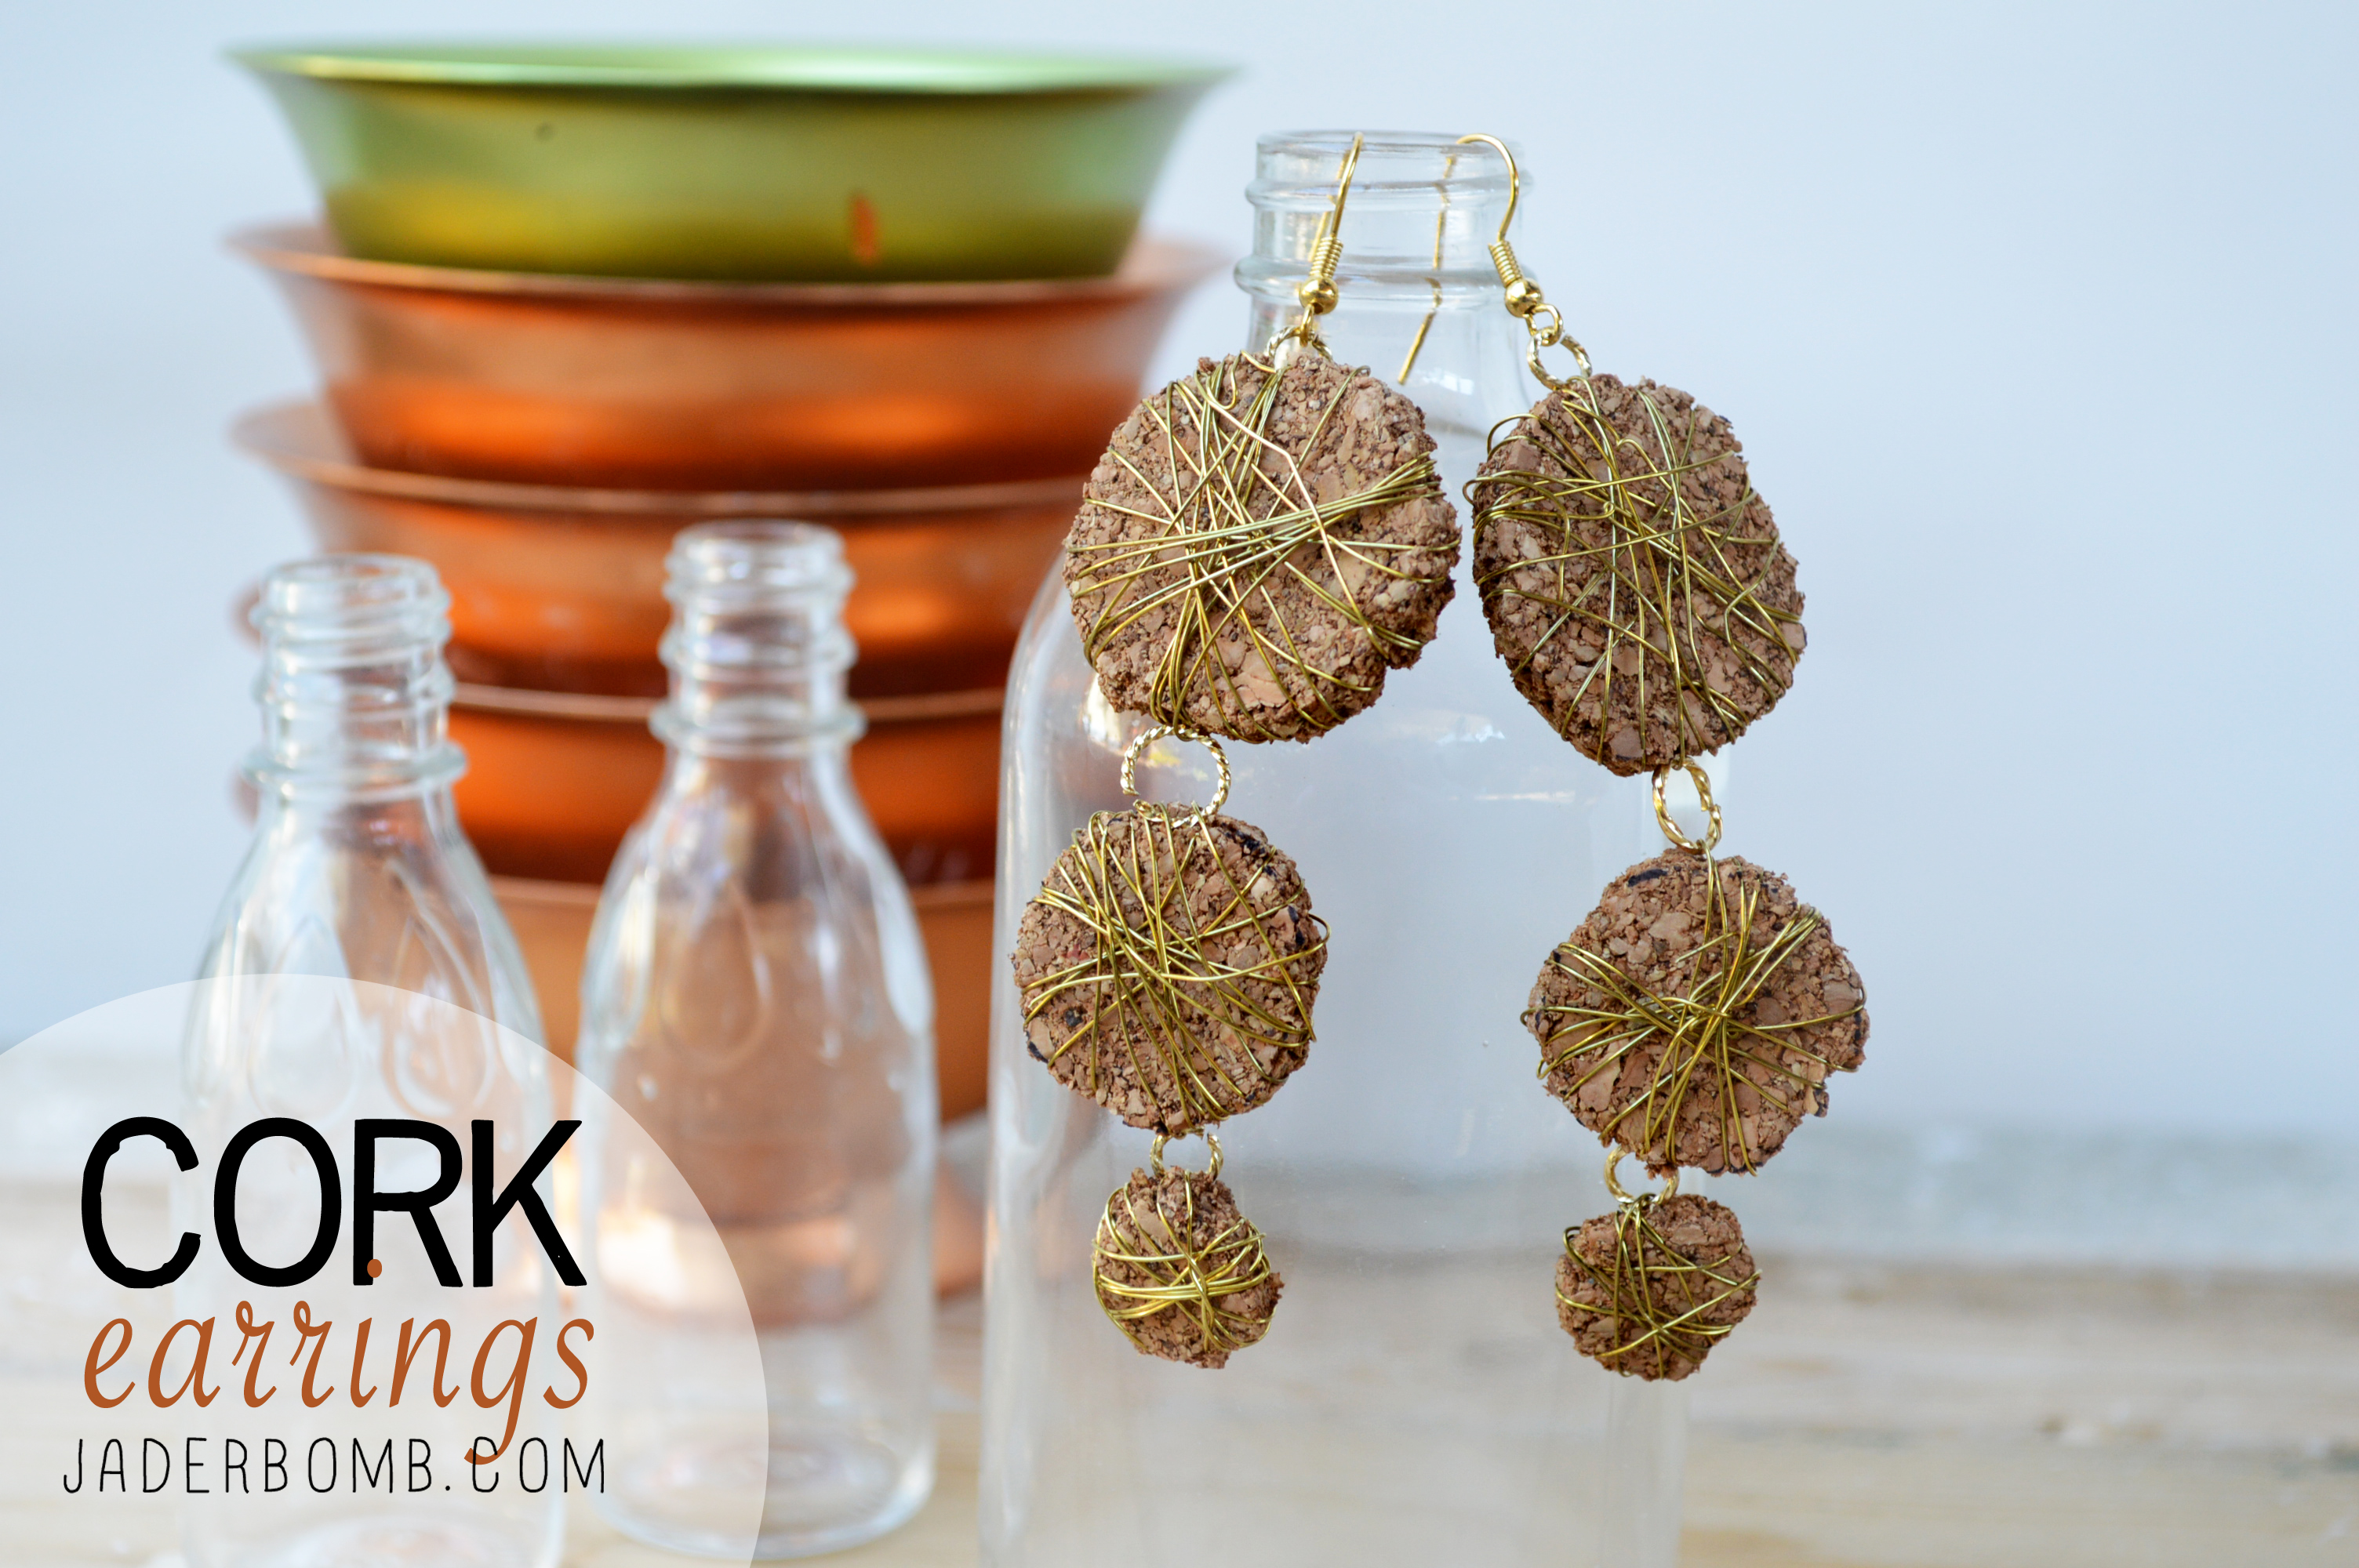
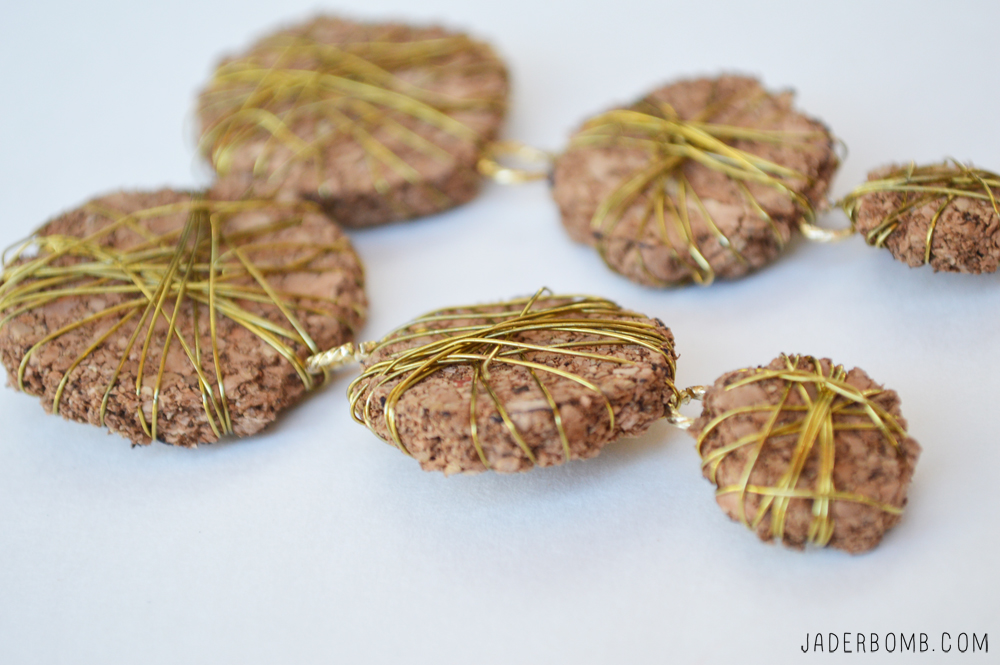
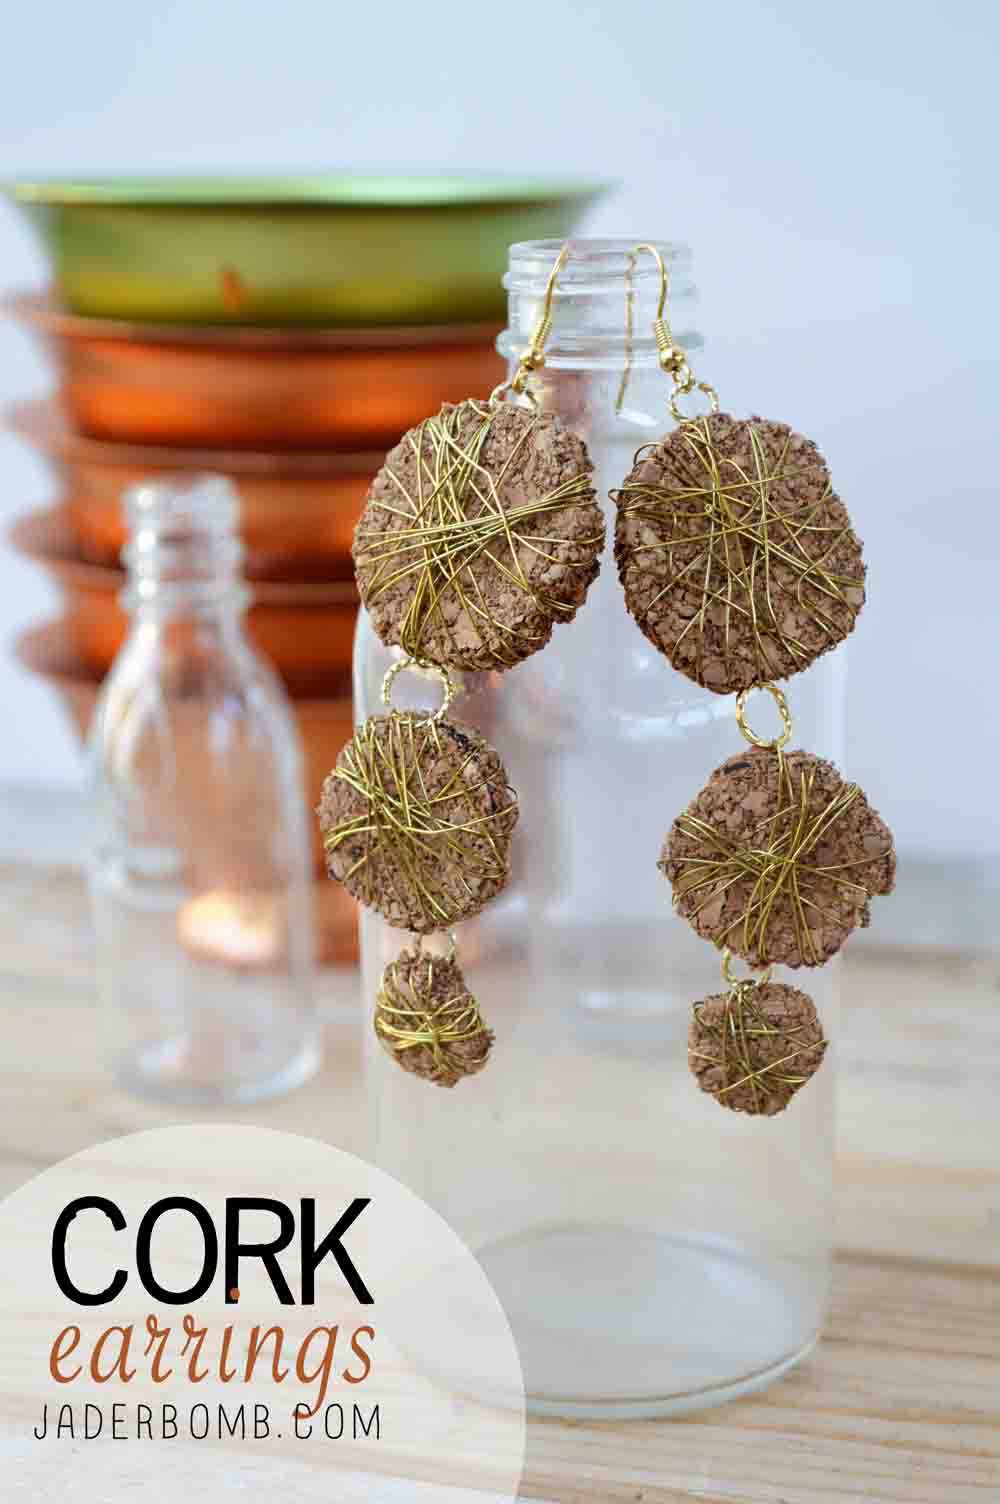
 Cork Boards | Pliers | Scissors | Glitter and Paint bottles (to trace with) | Wire | Findings | Pencil
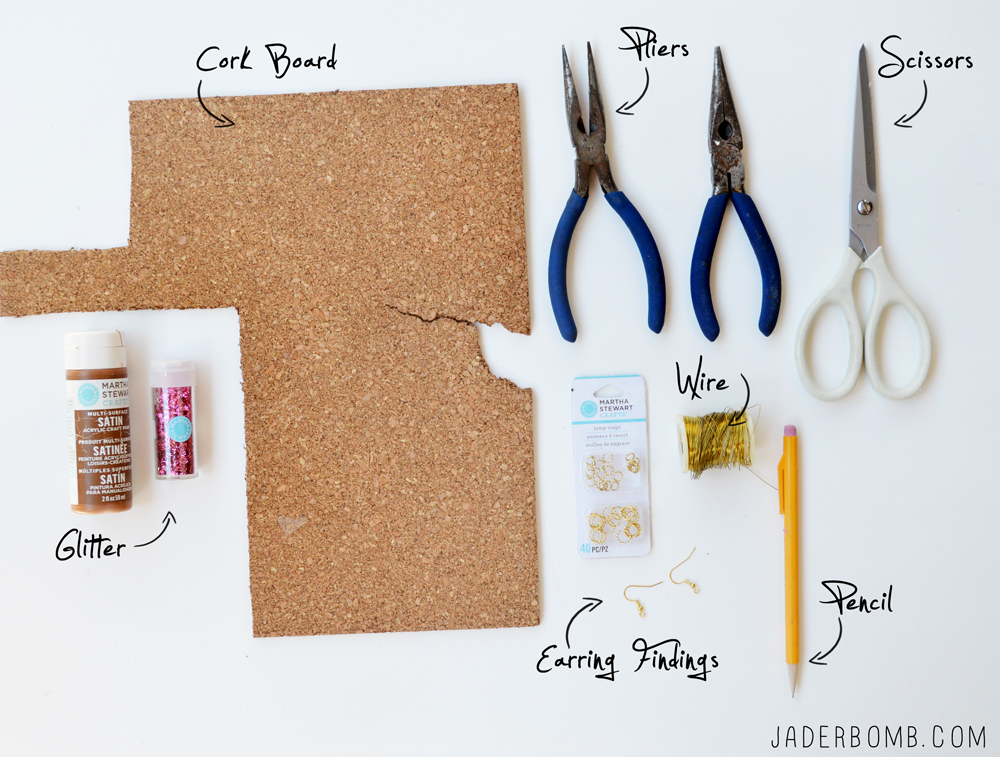
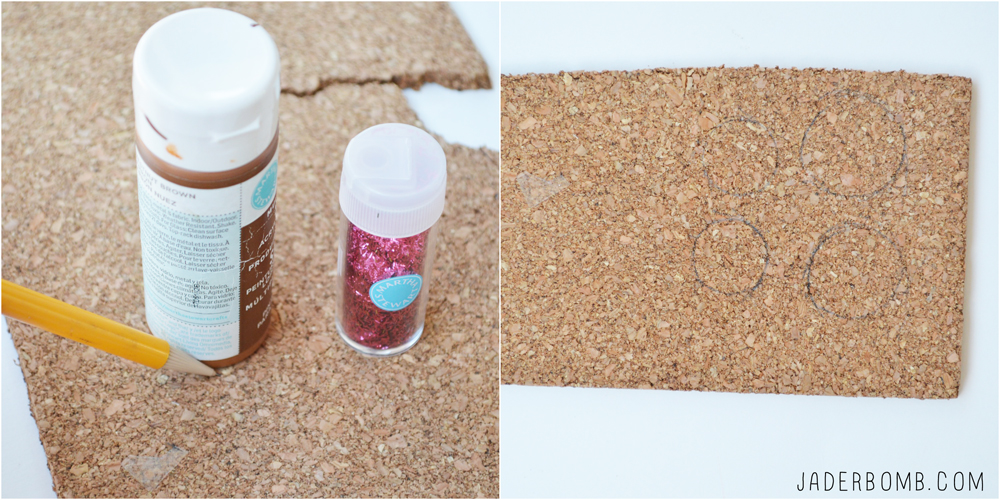
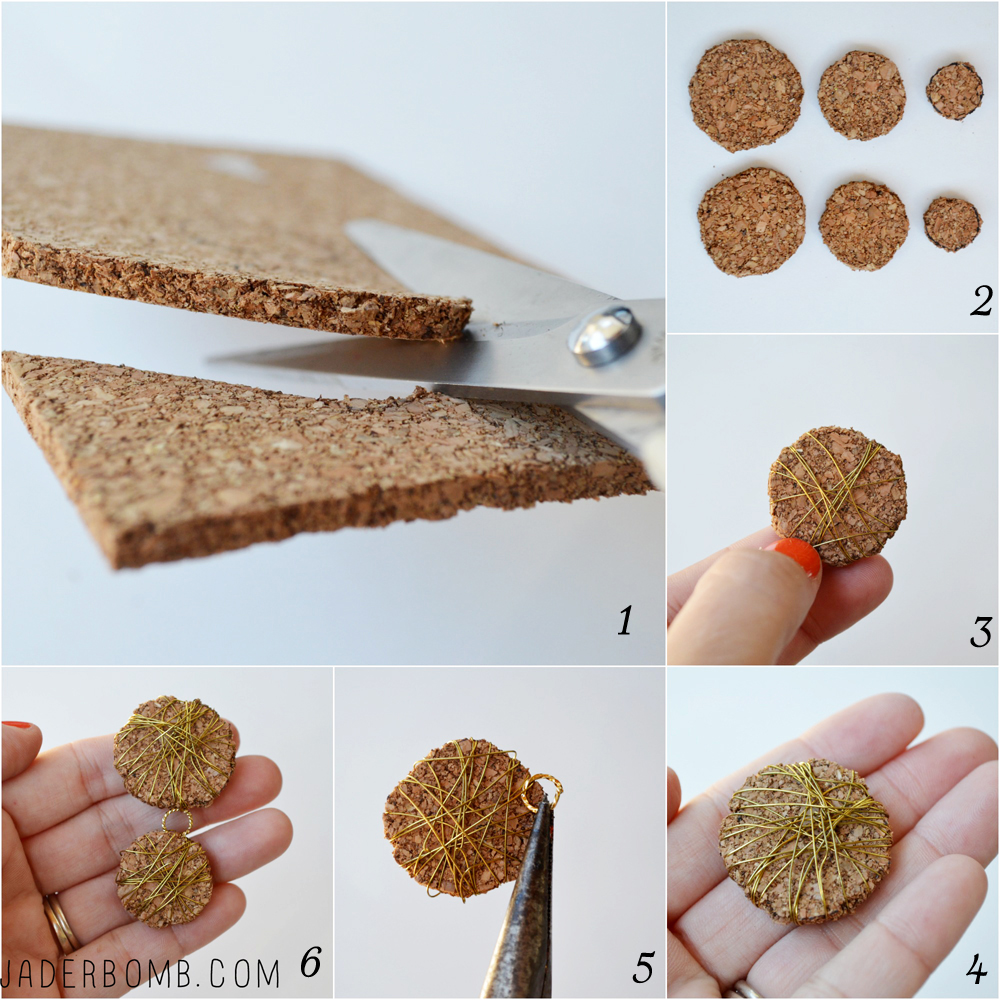 1. Grab a good pair of scissors and cut your cork.