Tag Archives: jaderbomb

  Stencils R’ Us… Have you ever wanted to yarn bomb something.  I see trees wrapped in delicious yarn on the internet however I have never seen one in person. Maybe one day! What I will show you today is how to “yarnbomb” an outline of a stencil. My good friend Ed Roth has a stencil line that is UH-MAZING. His company is called Stencil 1. When I received his book and stencils in the mail I remember screaming in my car when I saw this large deer head stencil. My friend Ben was with me when they came in and he tried to secretly take it, epic fail. I originally wanted to take this stencil and trace it on a canvas until I realized that was the “normal” thing to do. There is nothing normal about me…

So, put on your yarn belt because it’s going to be a fun ride.

yarnbomb-stencil1-jaderbomb


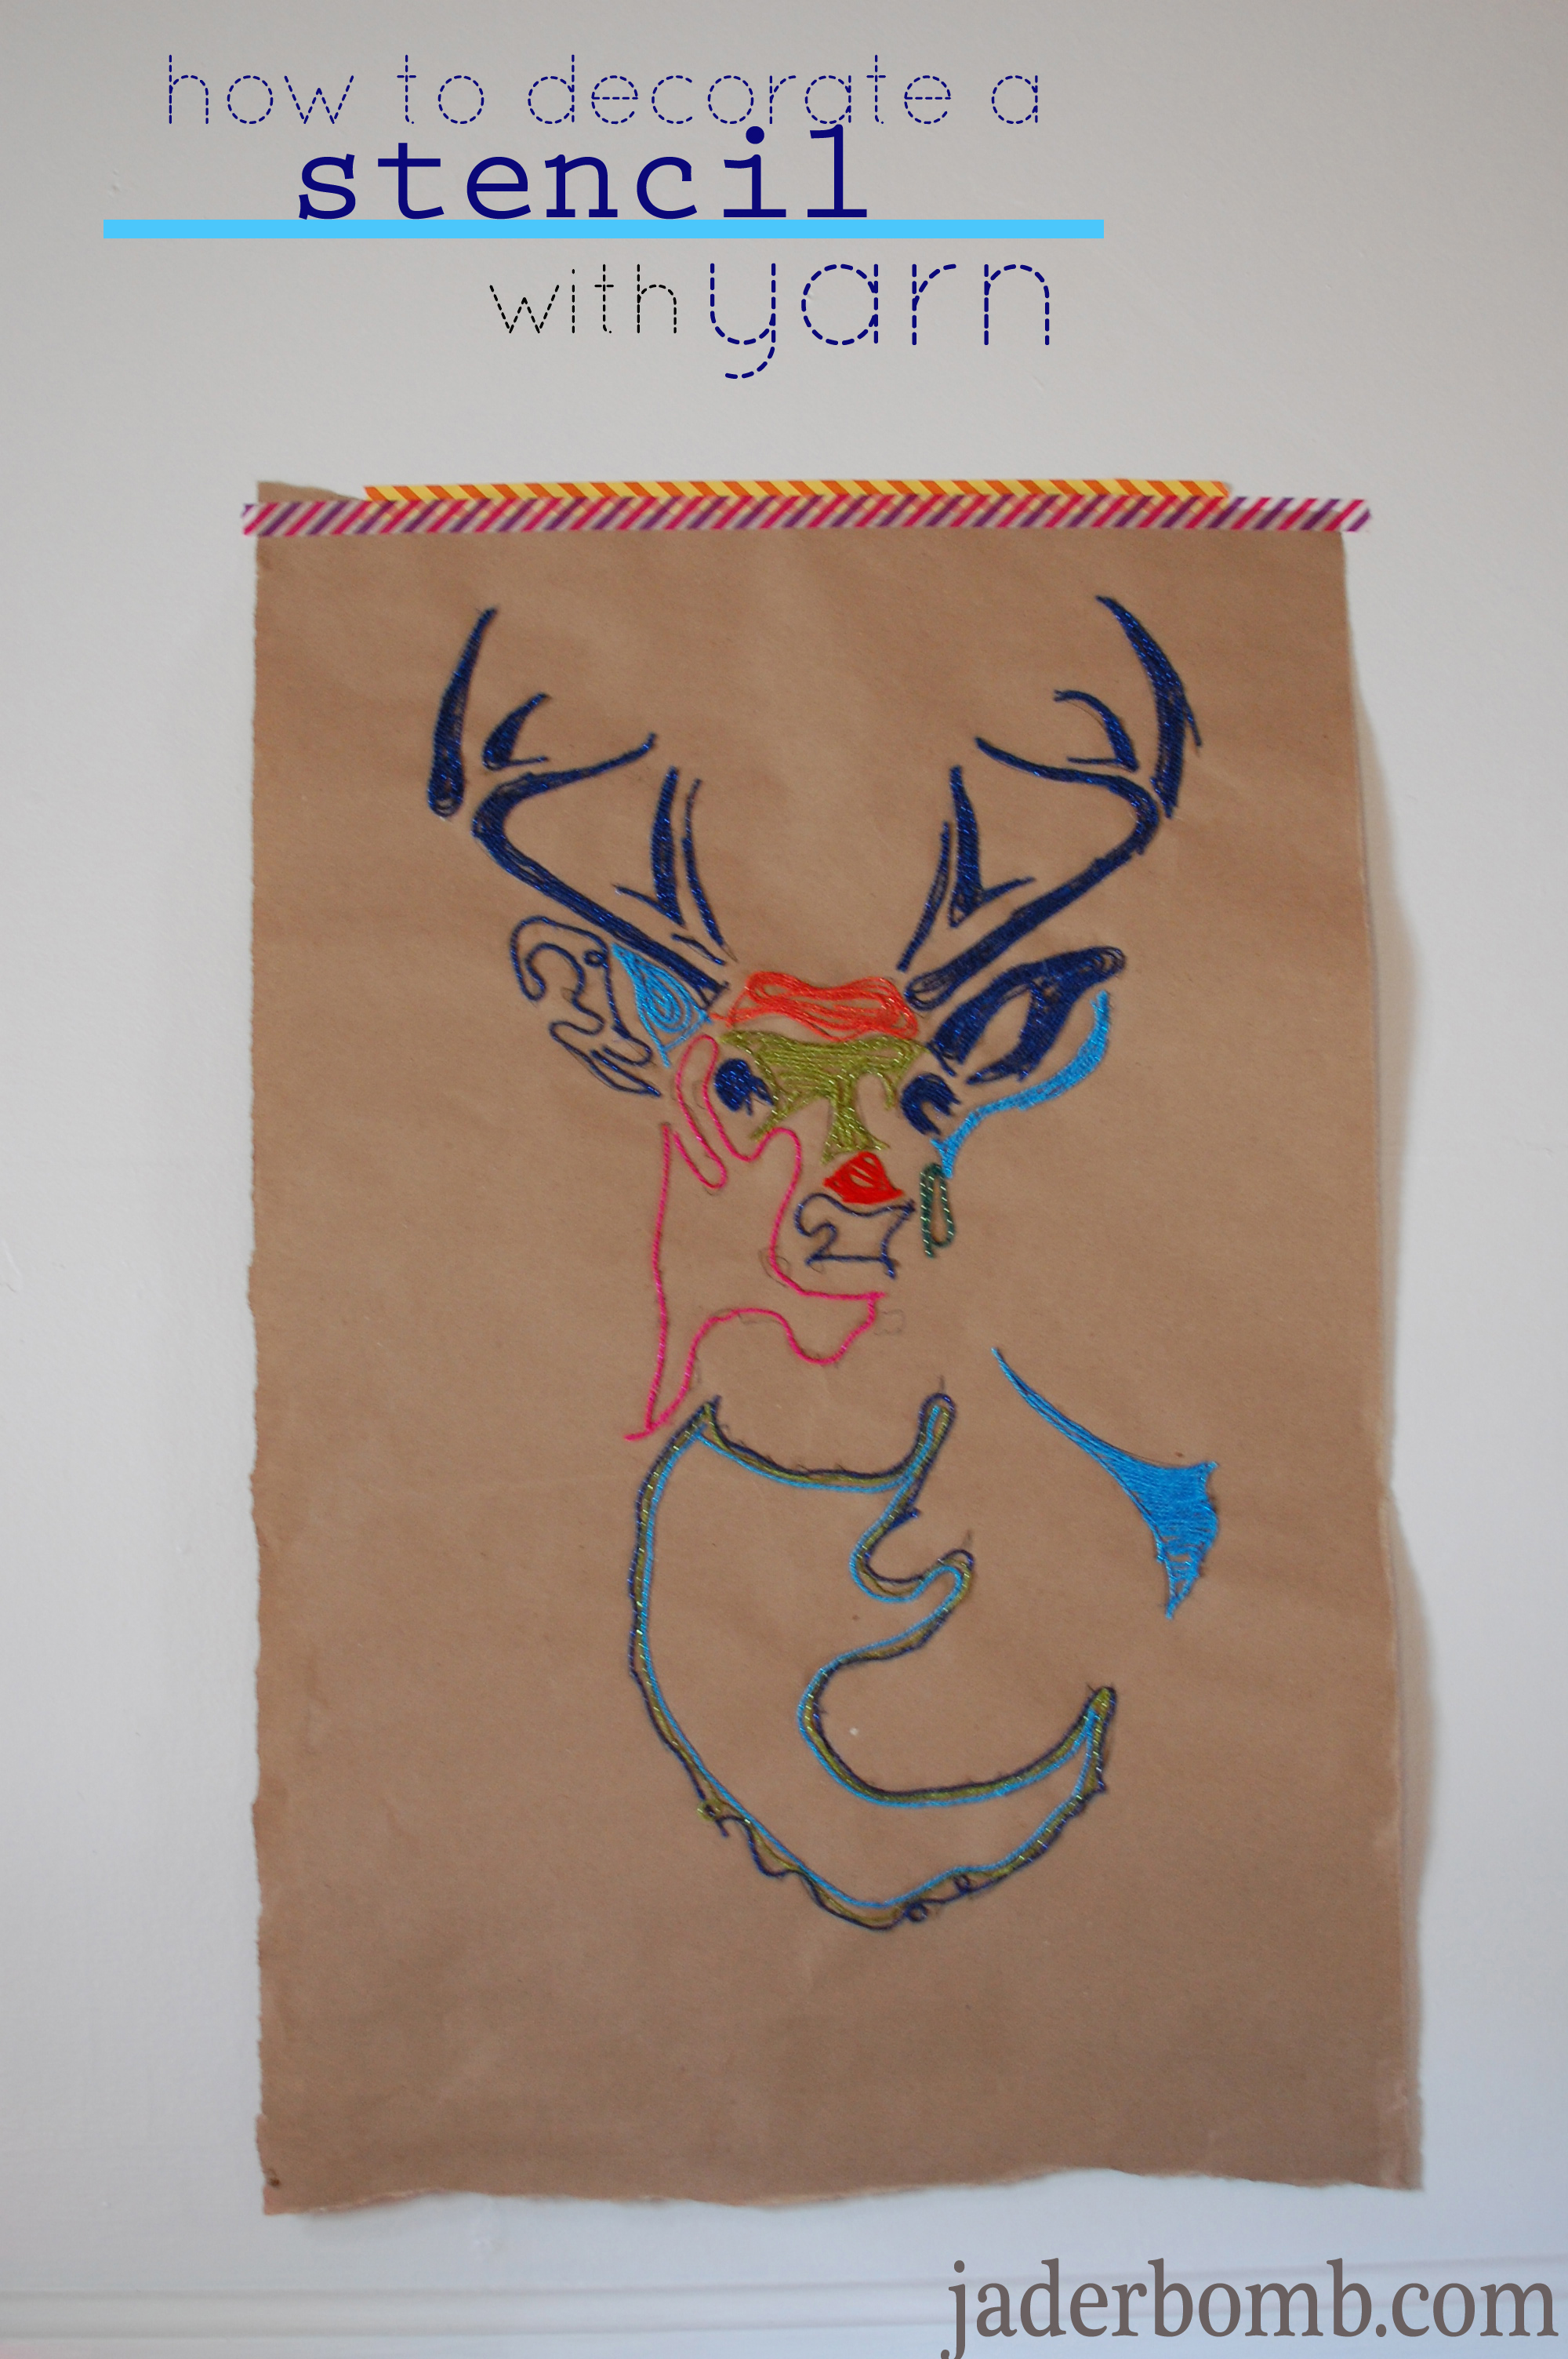
I am so happy with the way it came out. I looks like it did in my head, but better. There is something so modern and chic about it. Let’s get started.

yarnbomb-stencil1-jaderbomb

jaderbomb

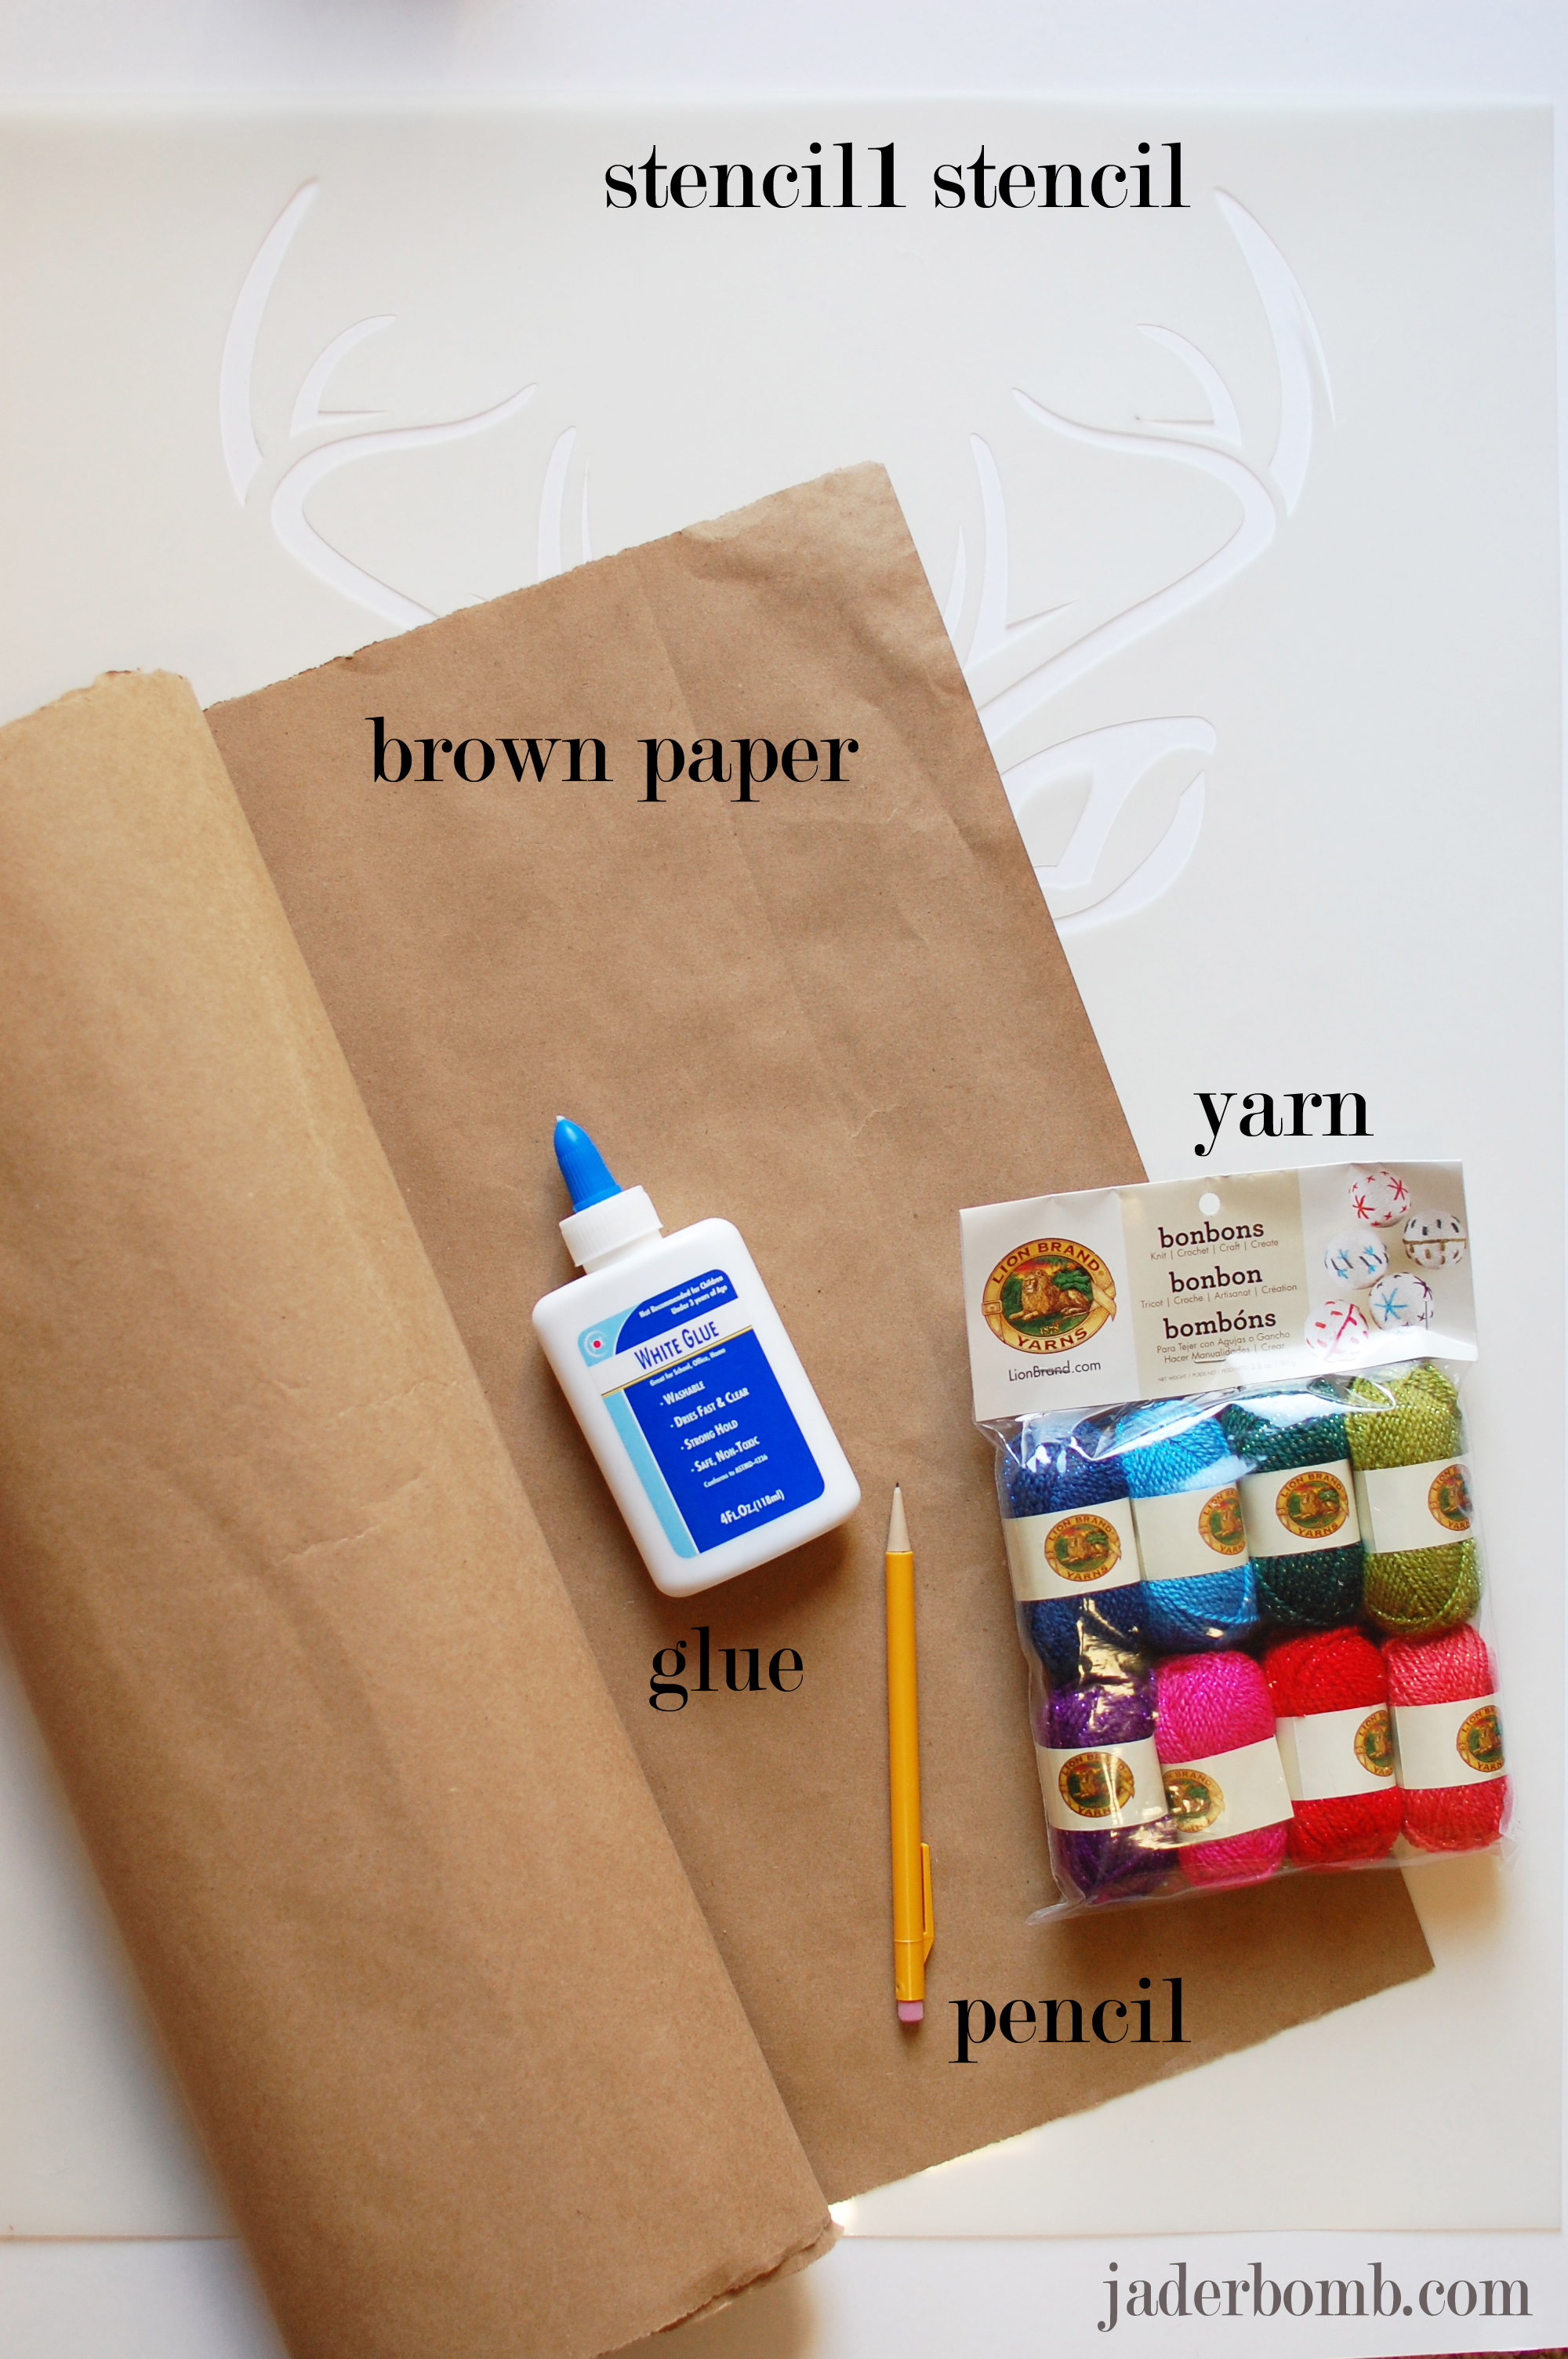
*Stencil 1 Stencil “Large Antlered Deer 24×24”
*Brown Kraft Paper (this came with the stencil-Recycle)
*Glue
*Pencil
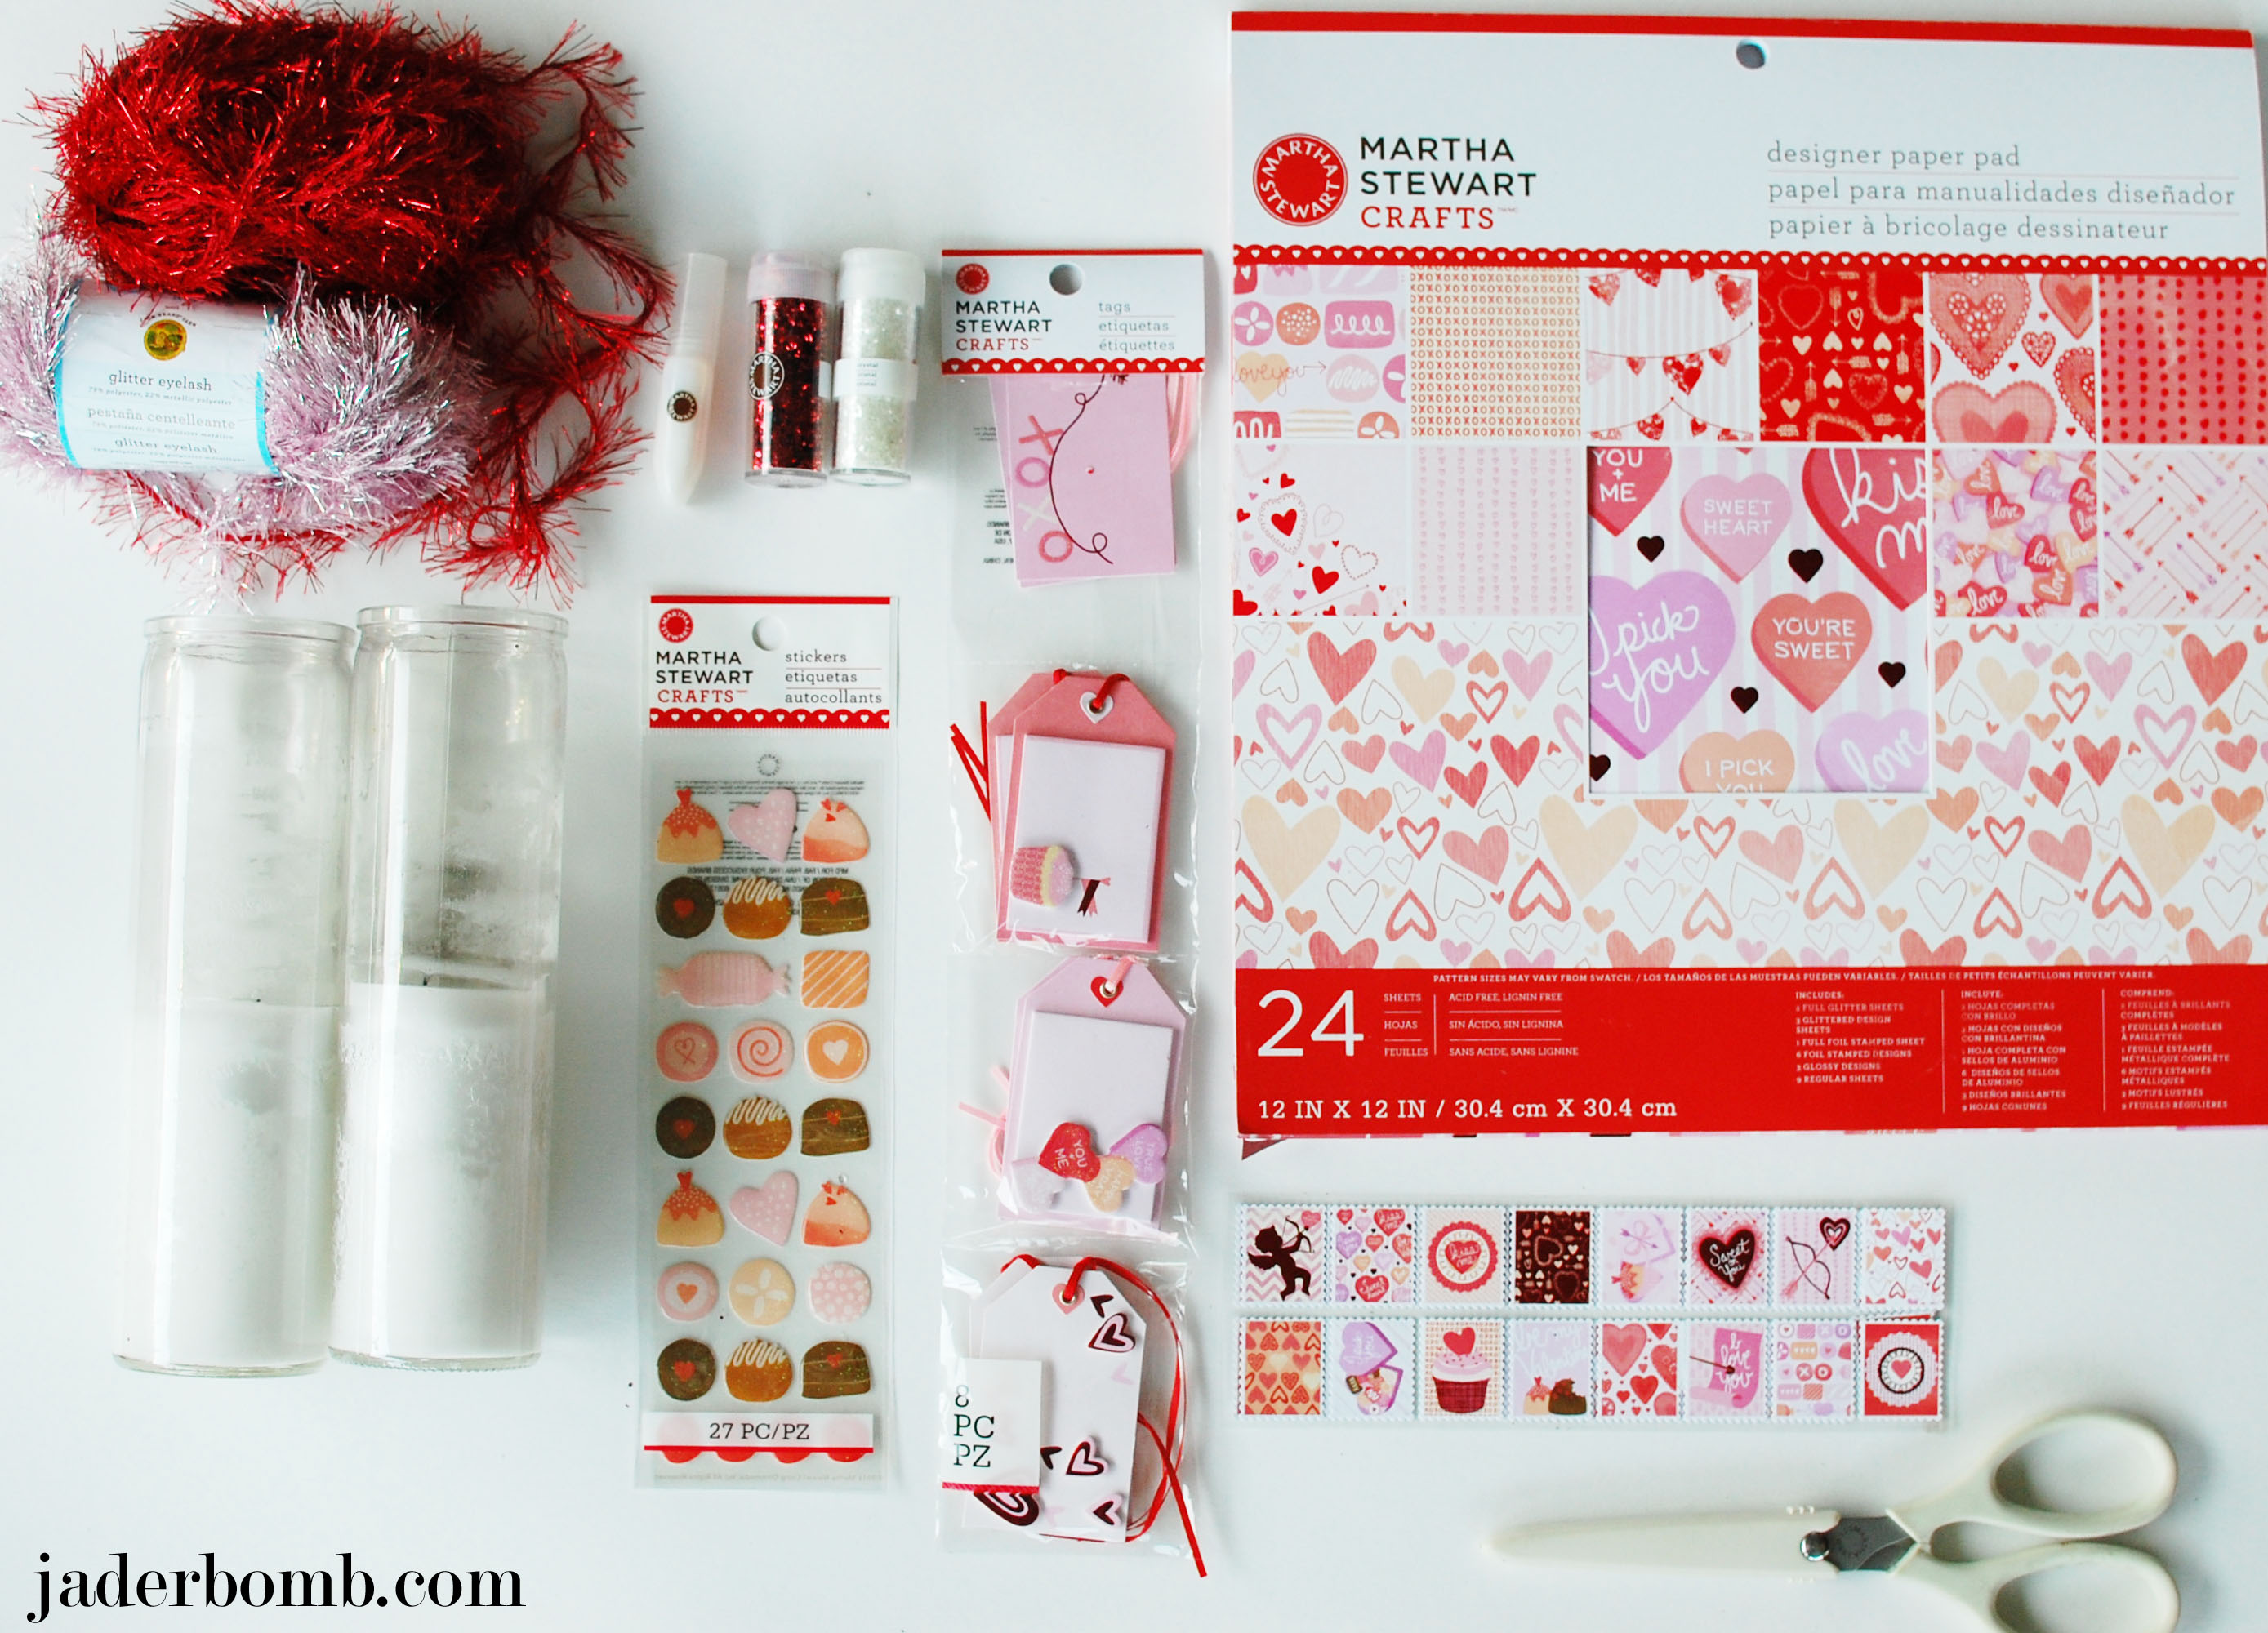
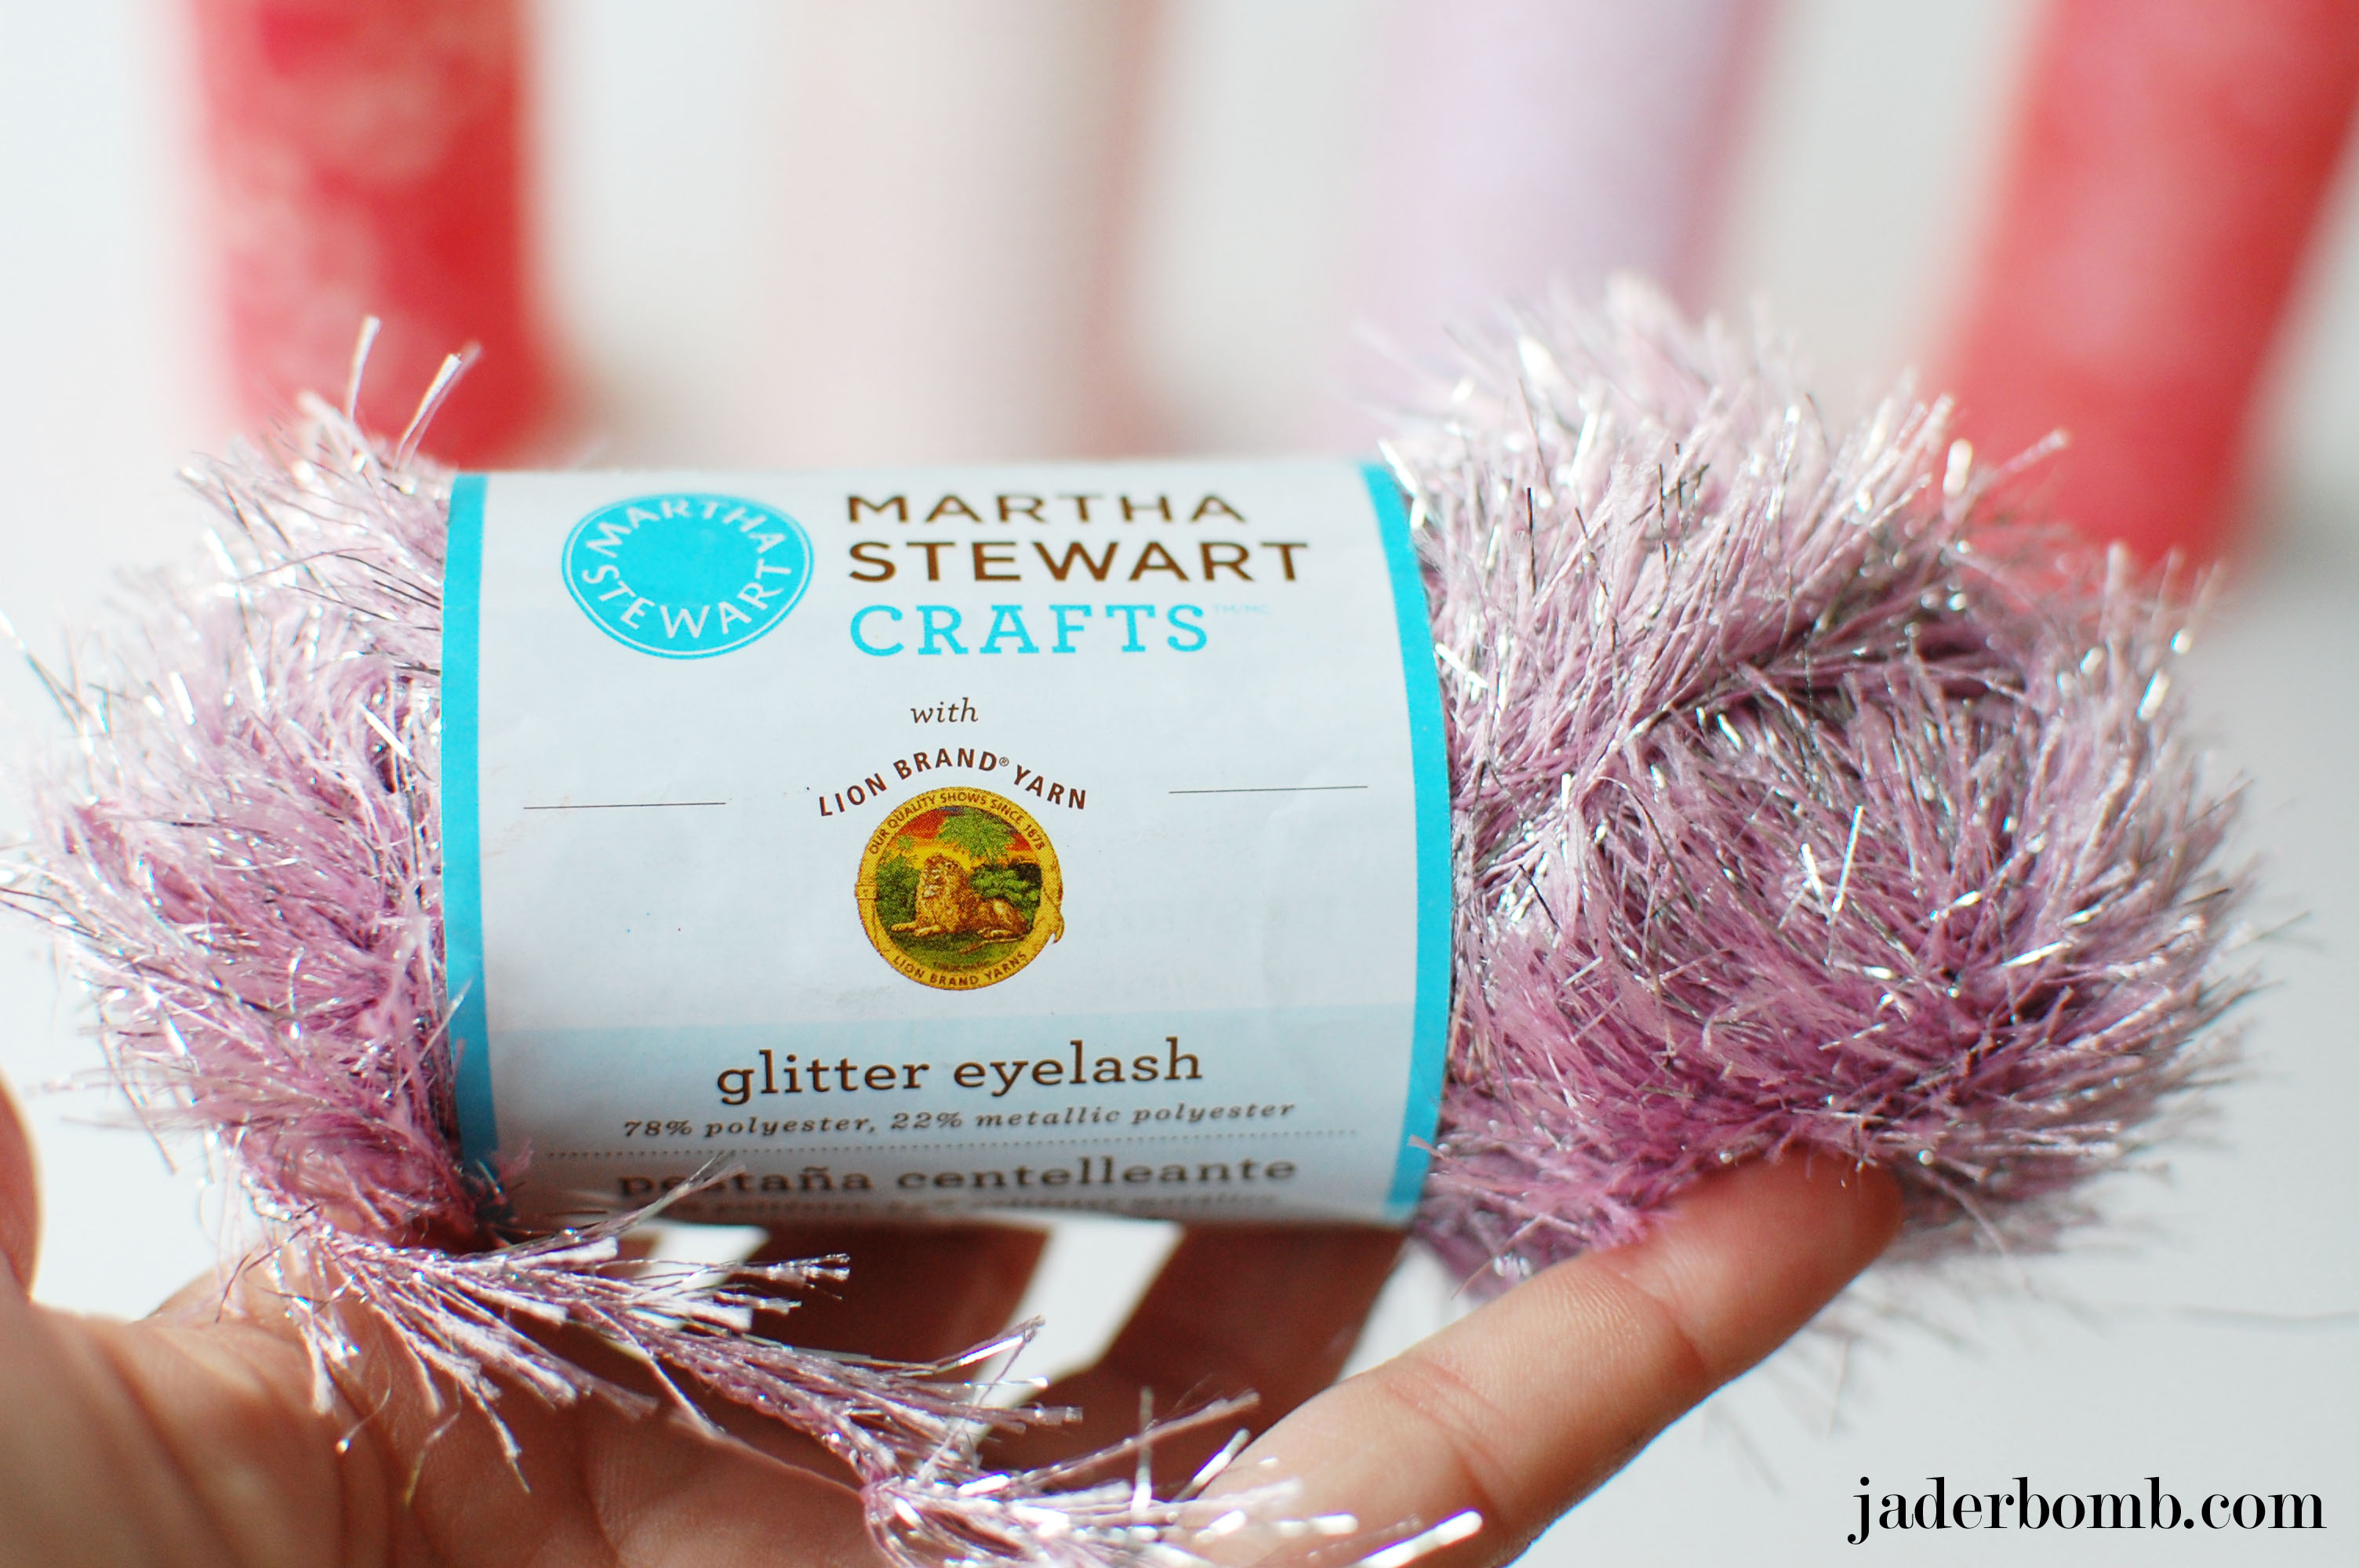
*Lion Brand BonBon Yarn
*Lana Del Ray Paradise Soundtrack to put you in the zone

Click on links above to order from one spot.

yarnbomb-stencil1-jaderbomb

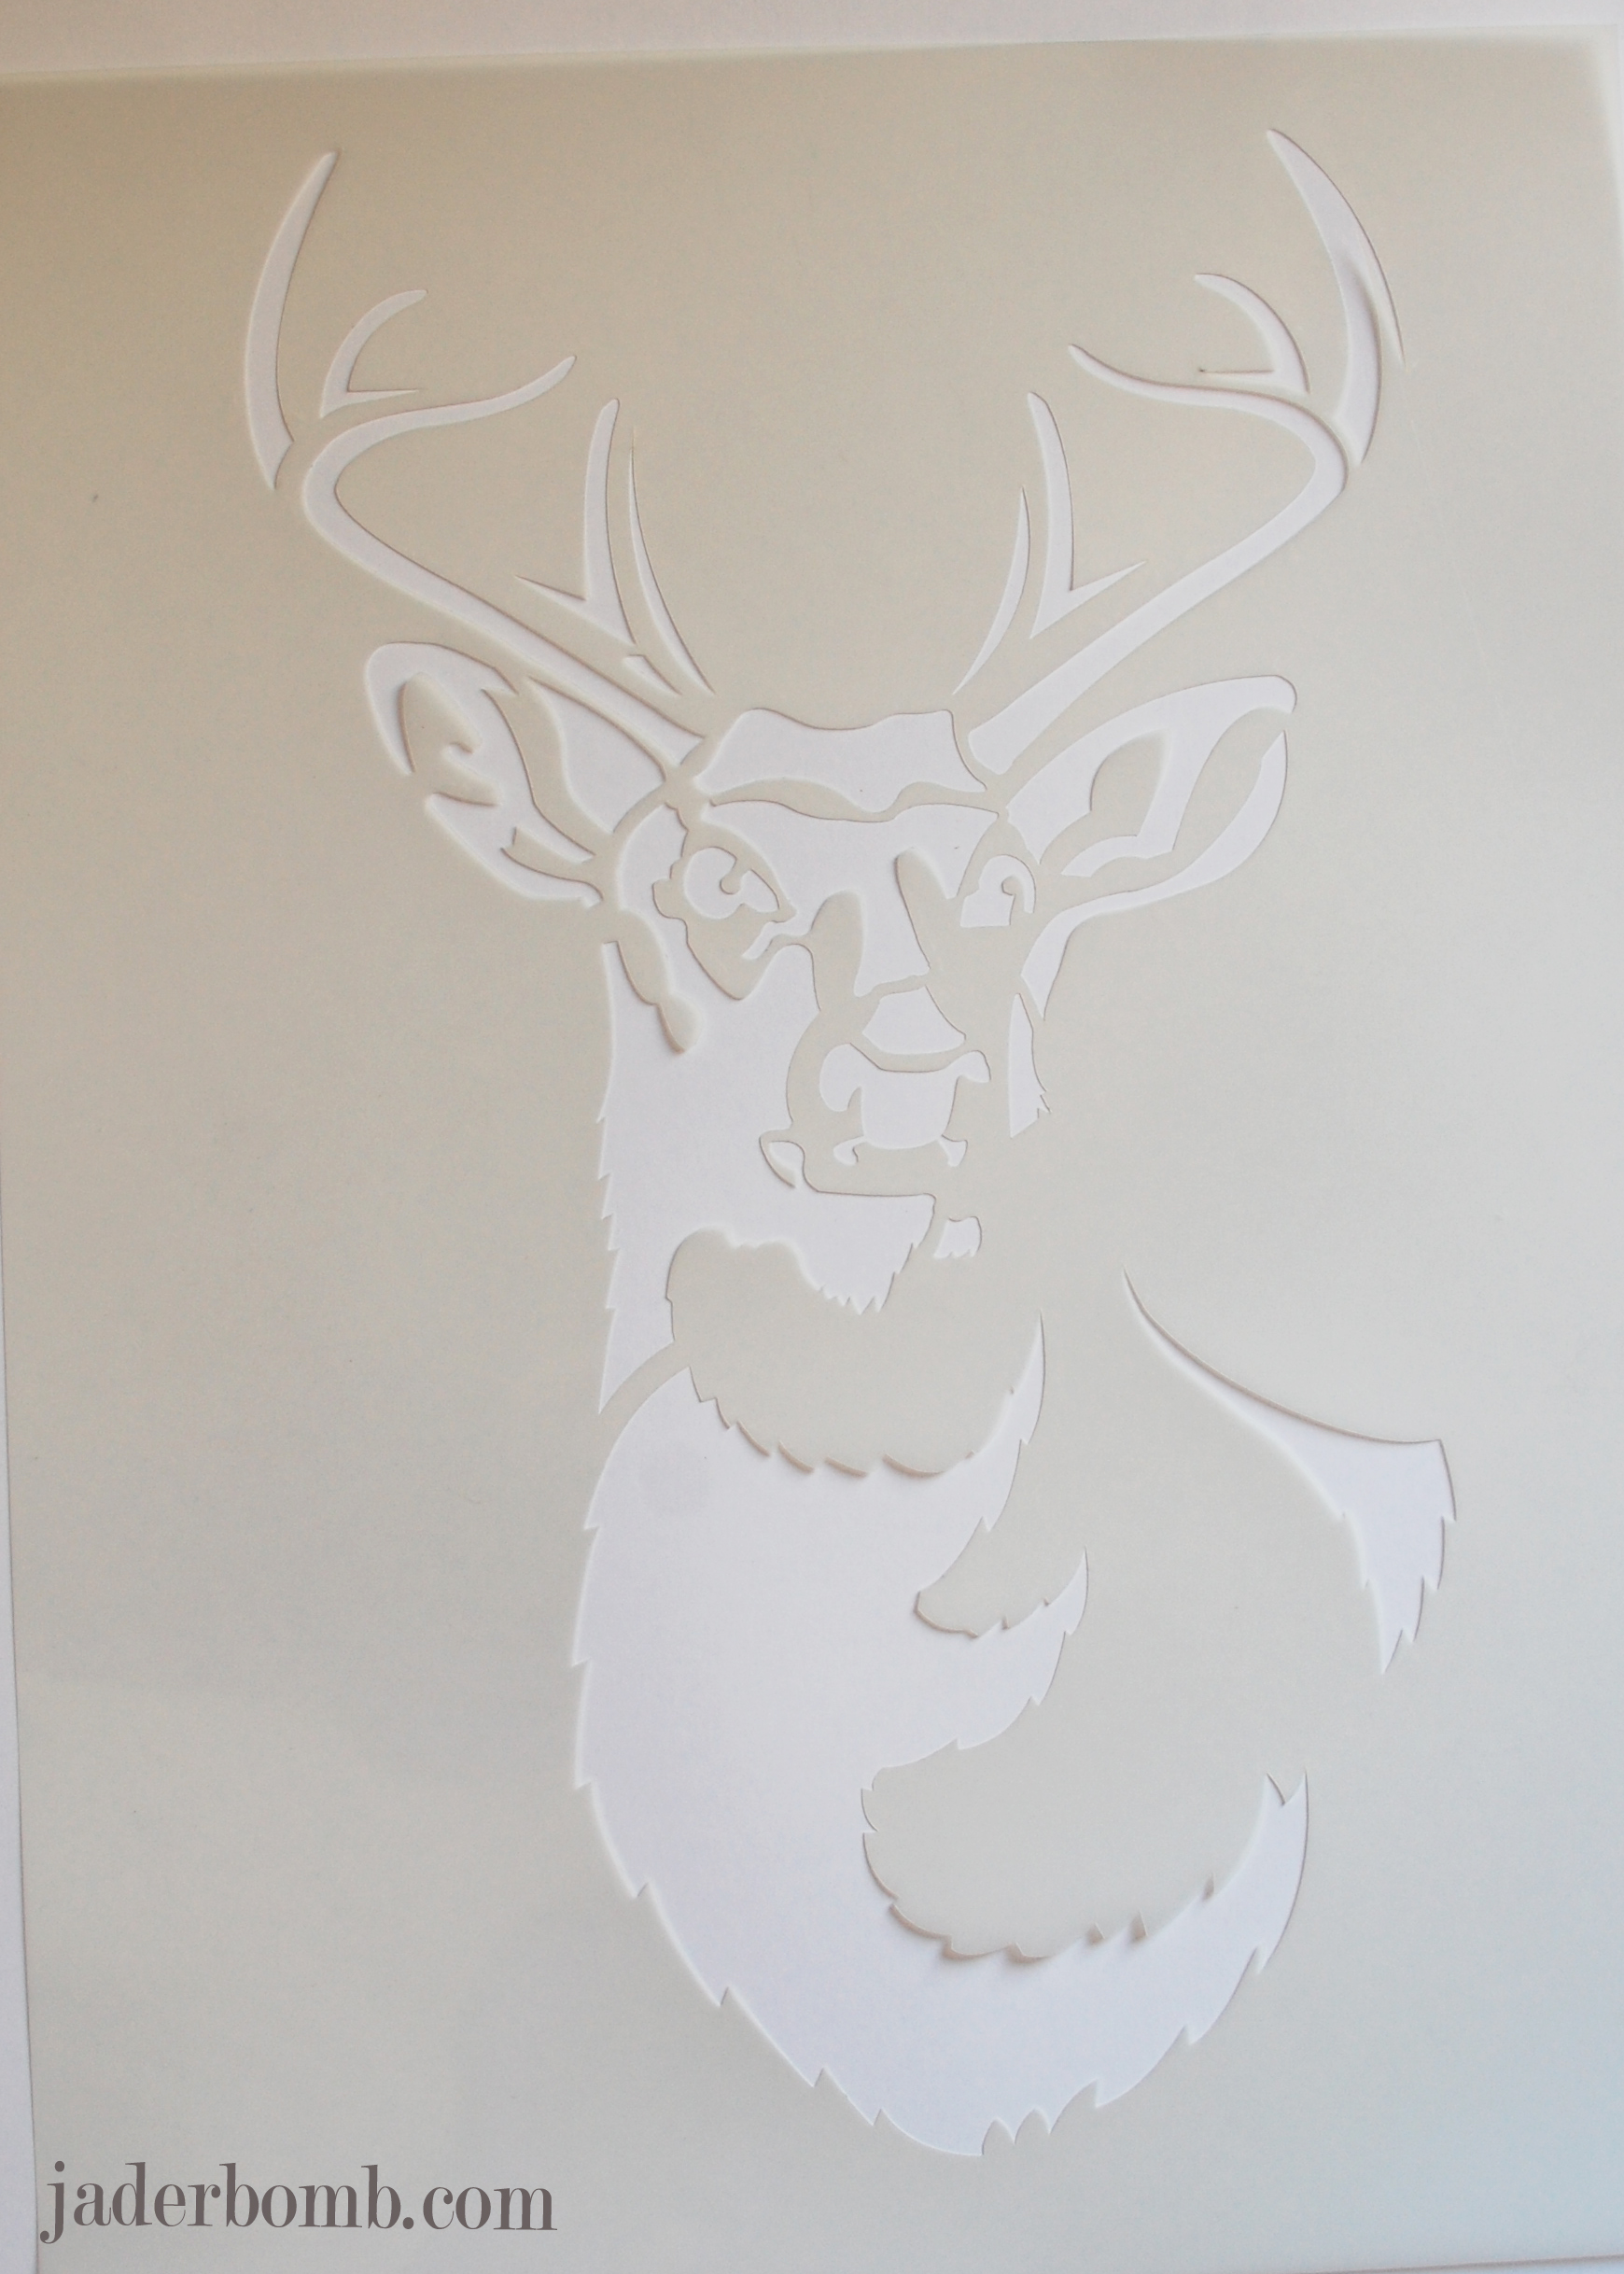
The first thing you will do is lay out your stencil for a little while until it is completely flat. These stencils are made from a sturdy material and the thickness of the stencil is perfect.  Surely worth every penny.

yarnbomb-stencil1-jaderbomb

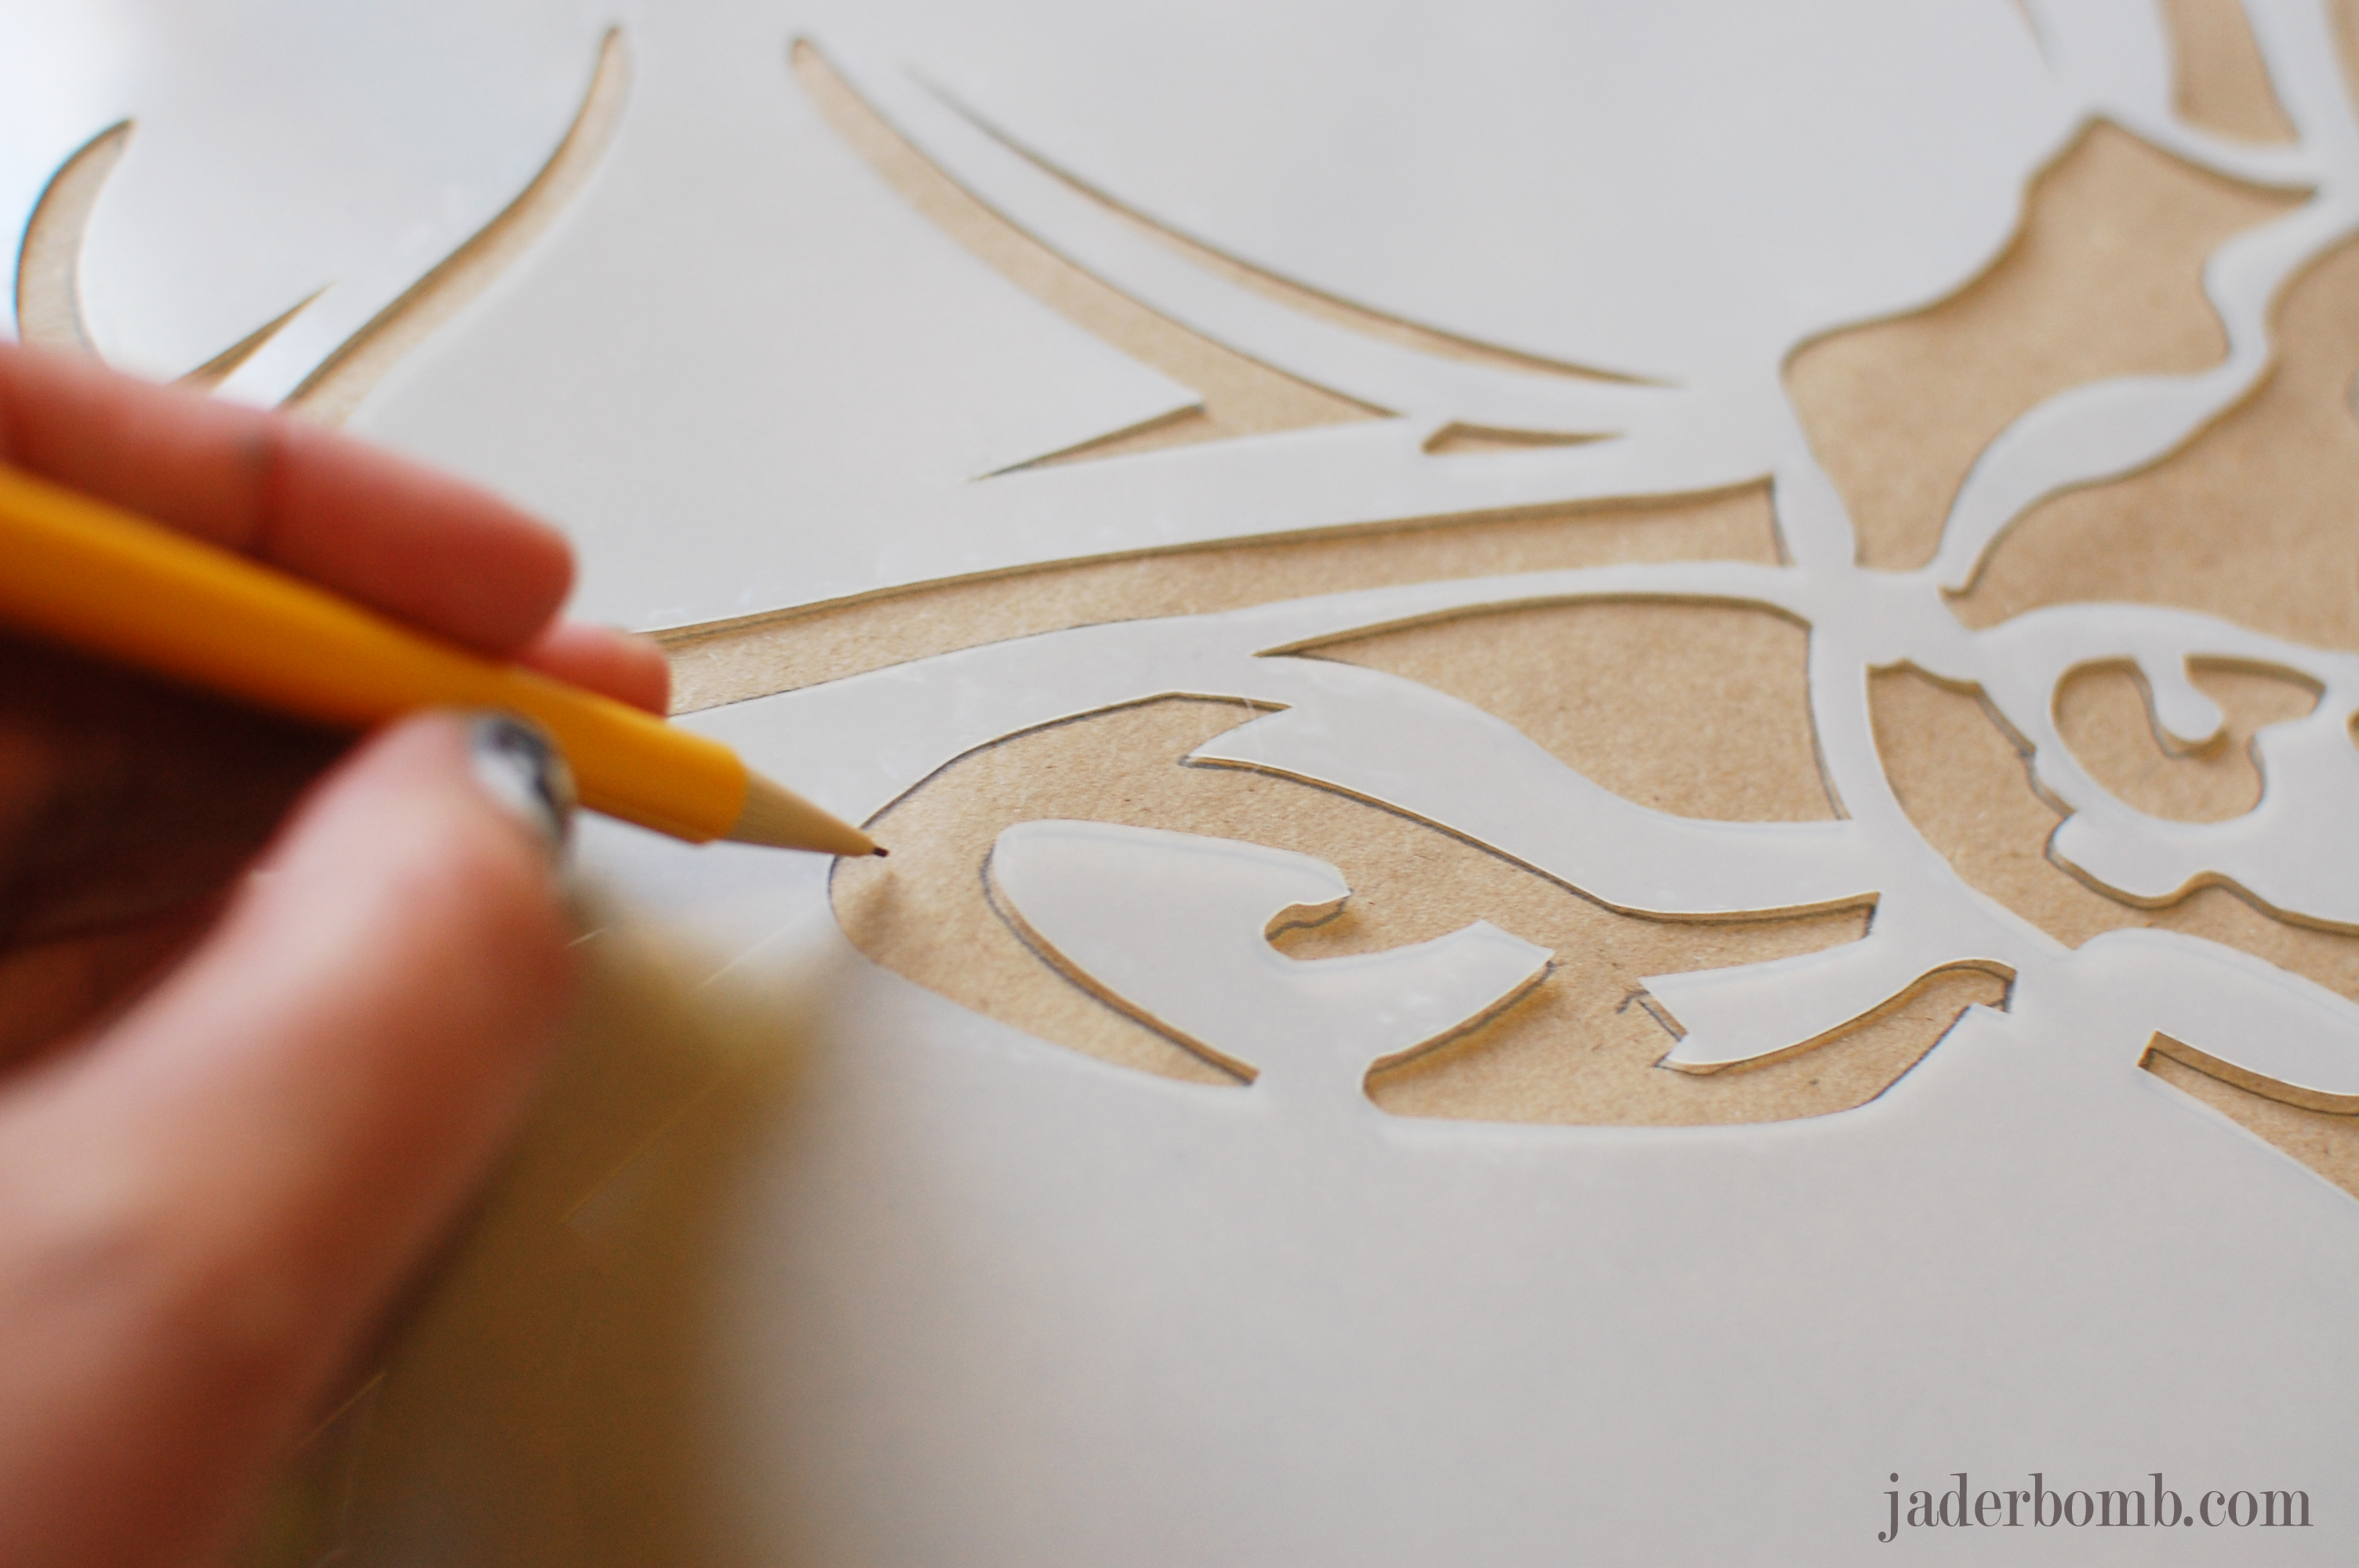
Tape it to your brown kraft paper and start tracing. Don’t rush this part.

yarnbomb-stencil1-jaderbomb

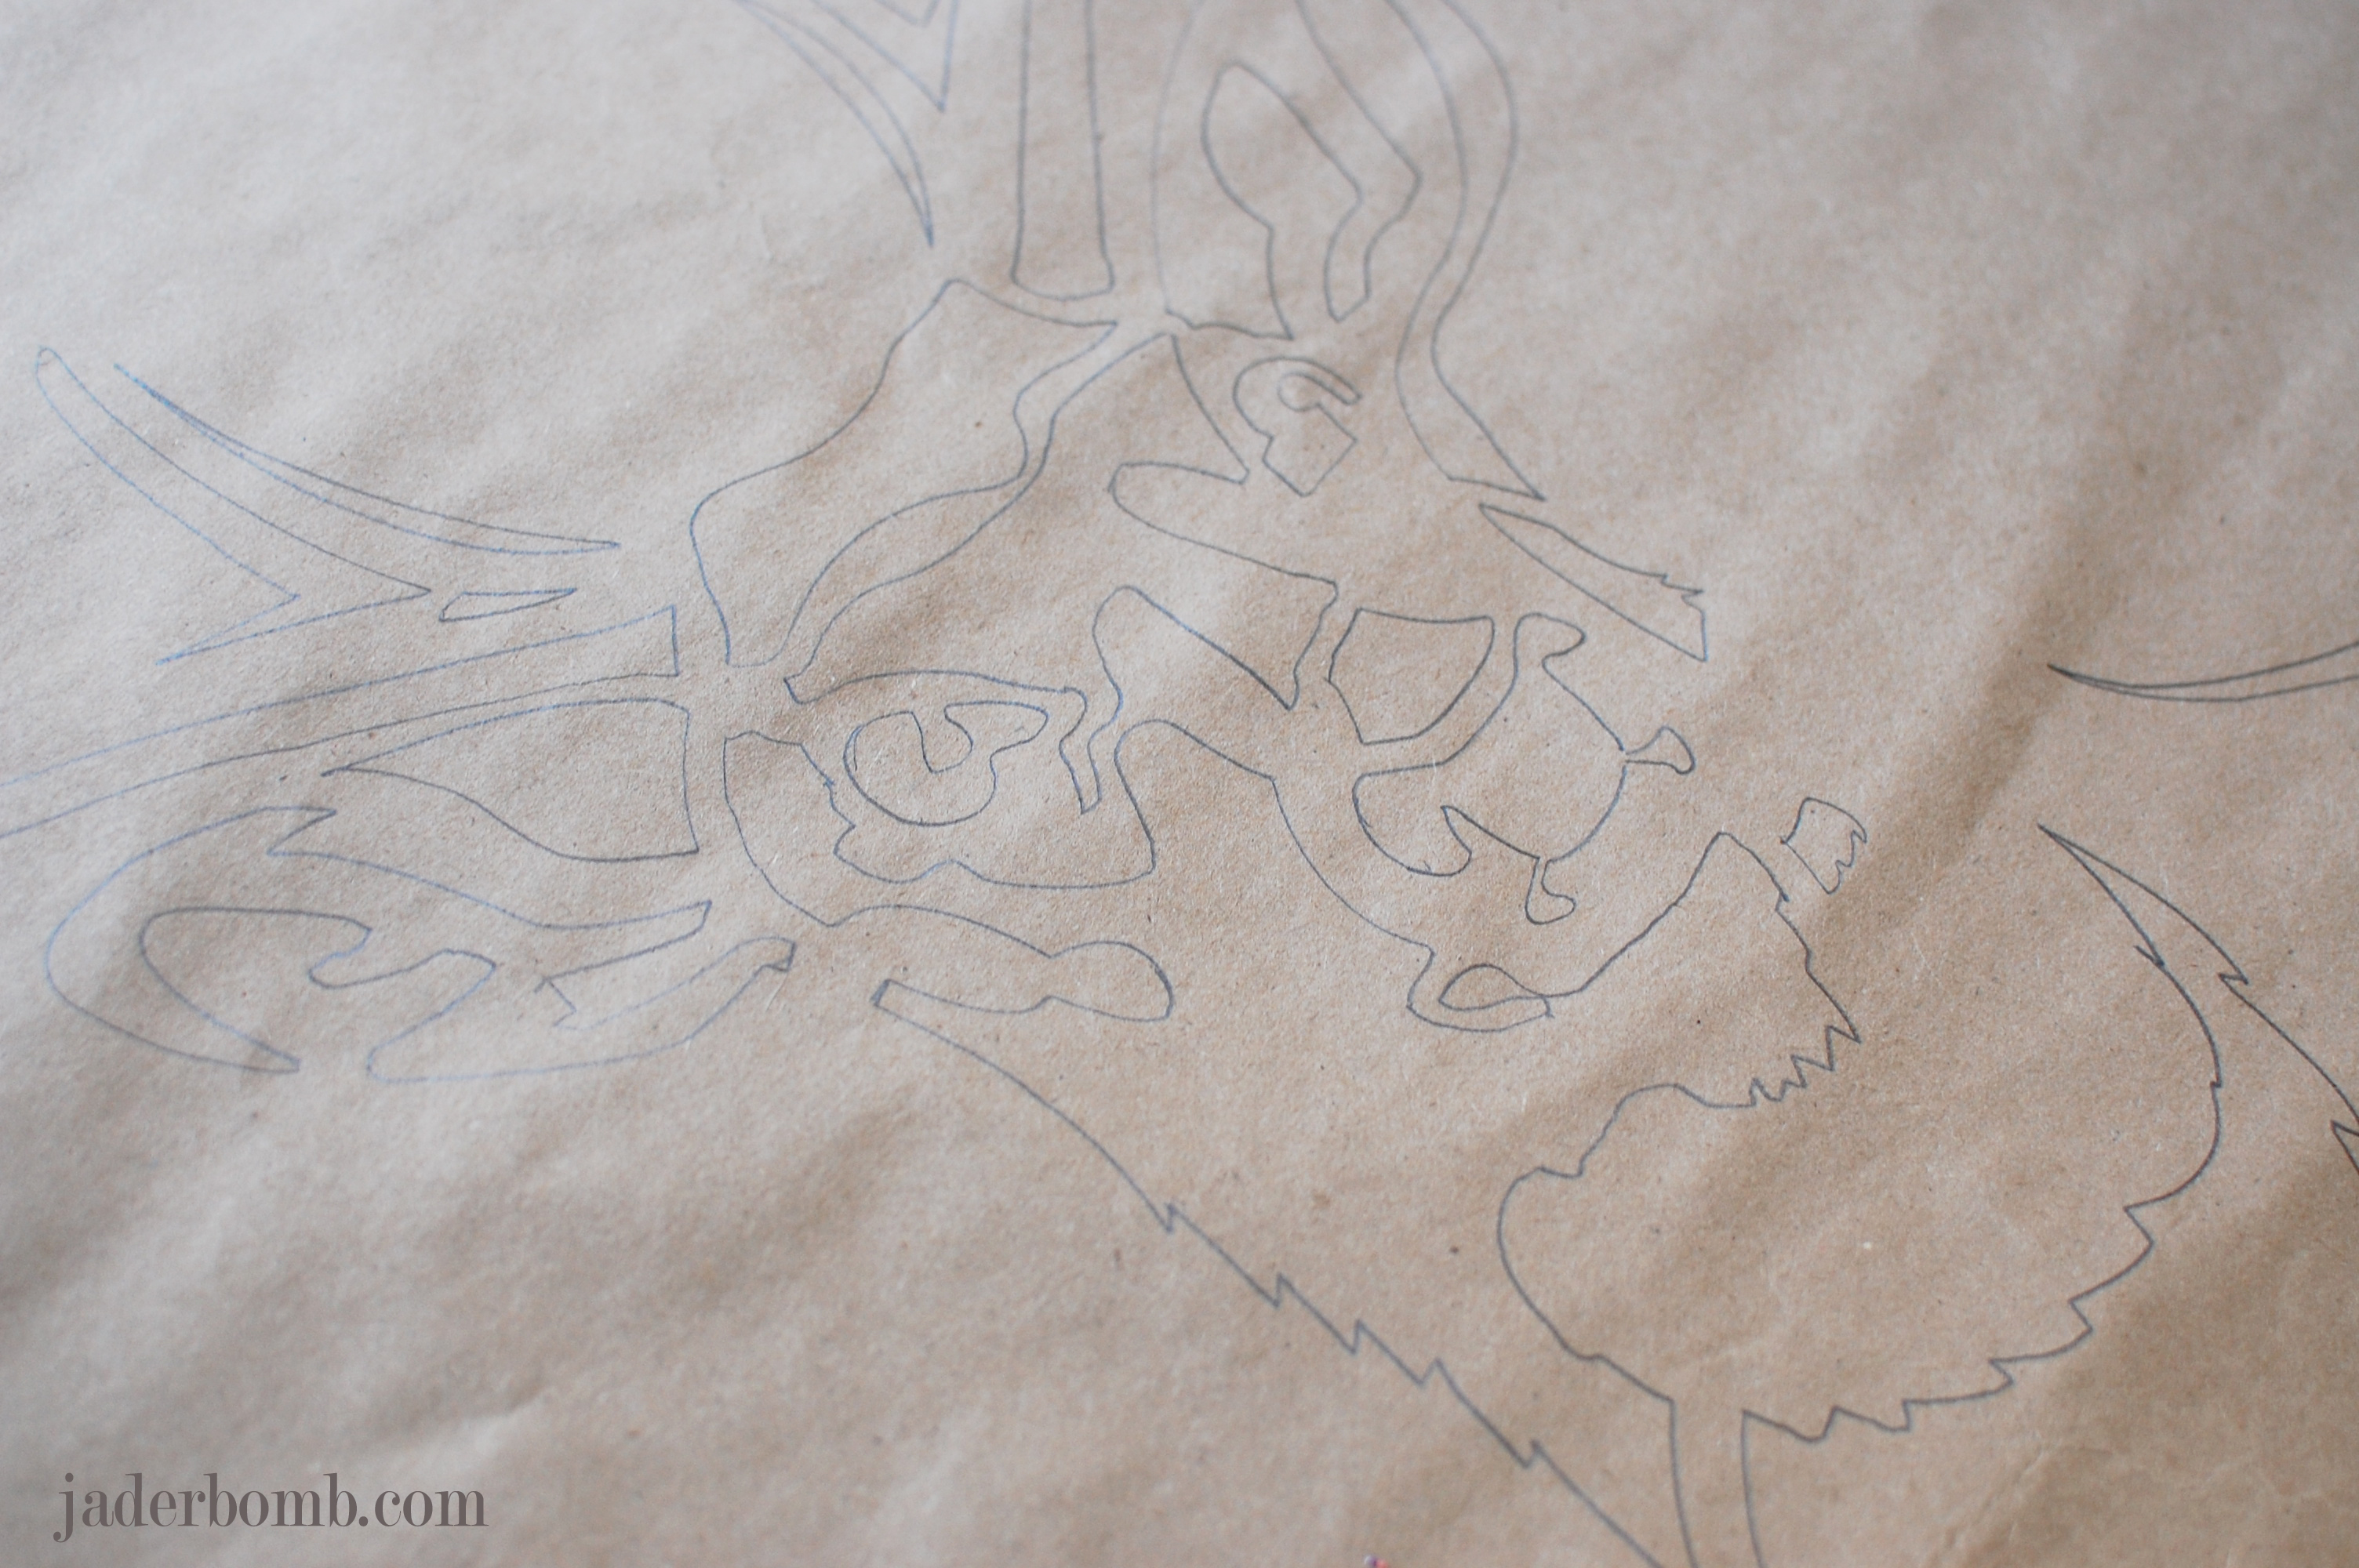
It will look like this when you are done tracing.

yarnbomb-stencil1-jaderbomb

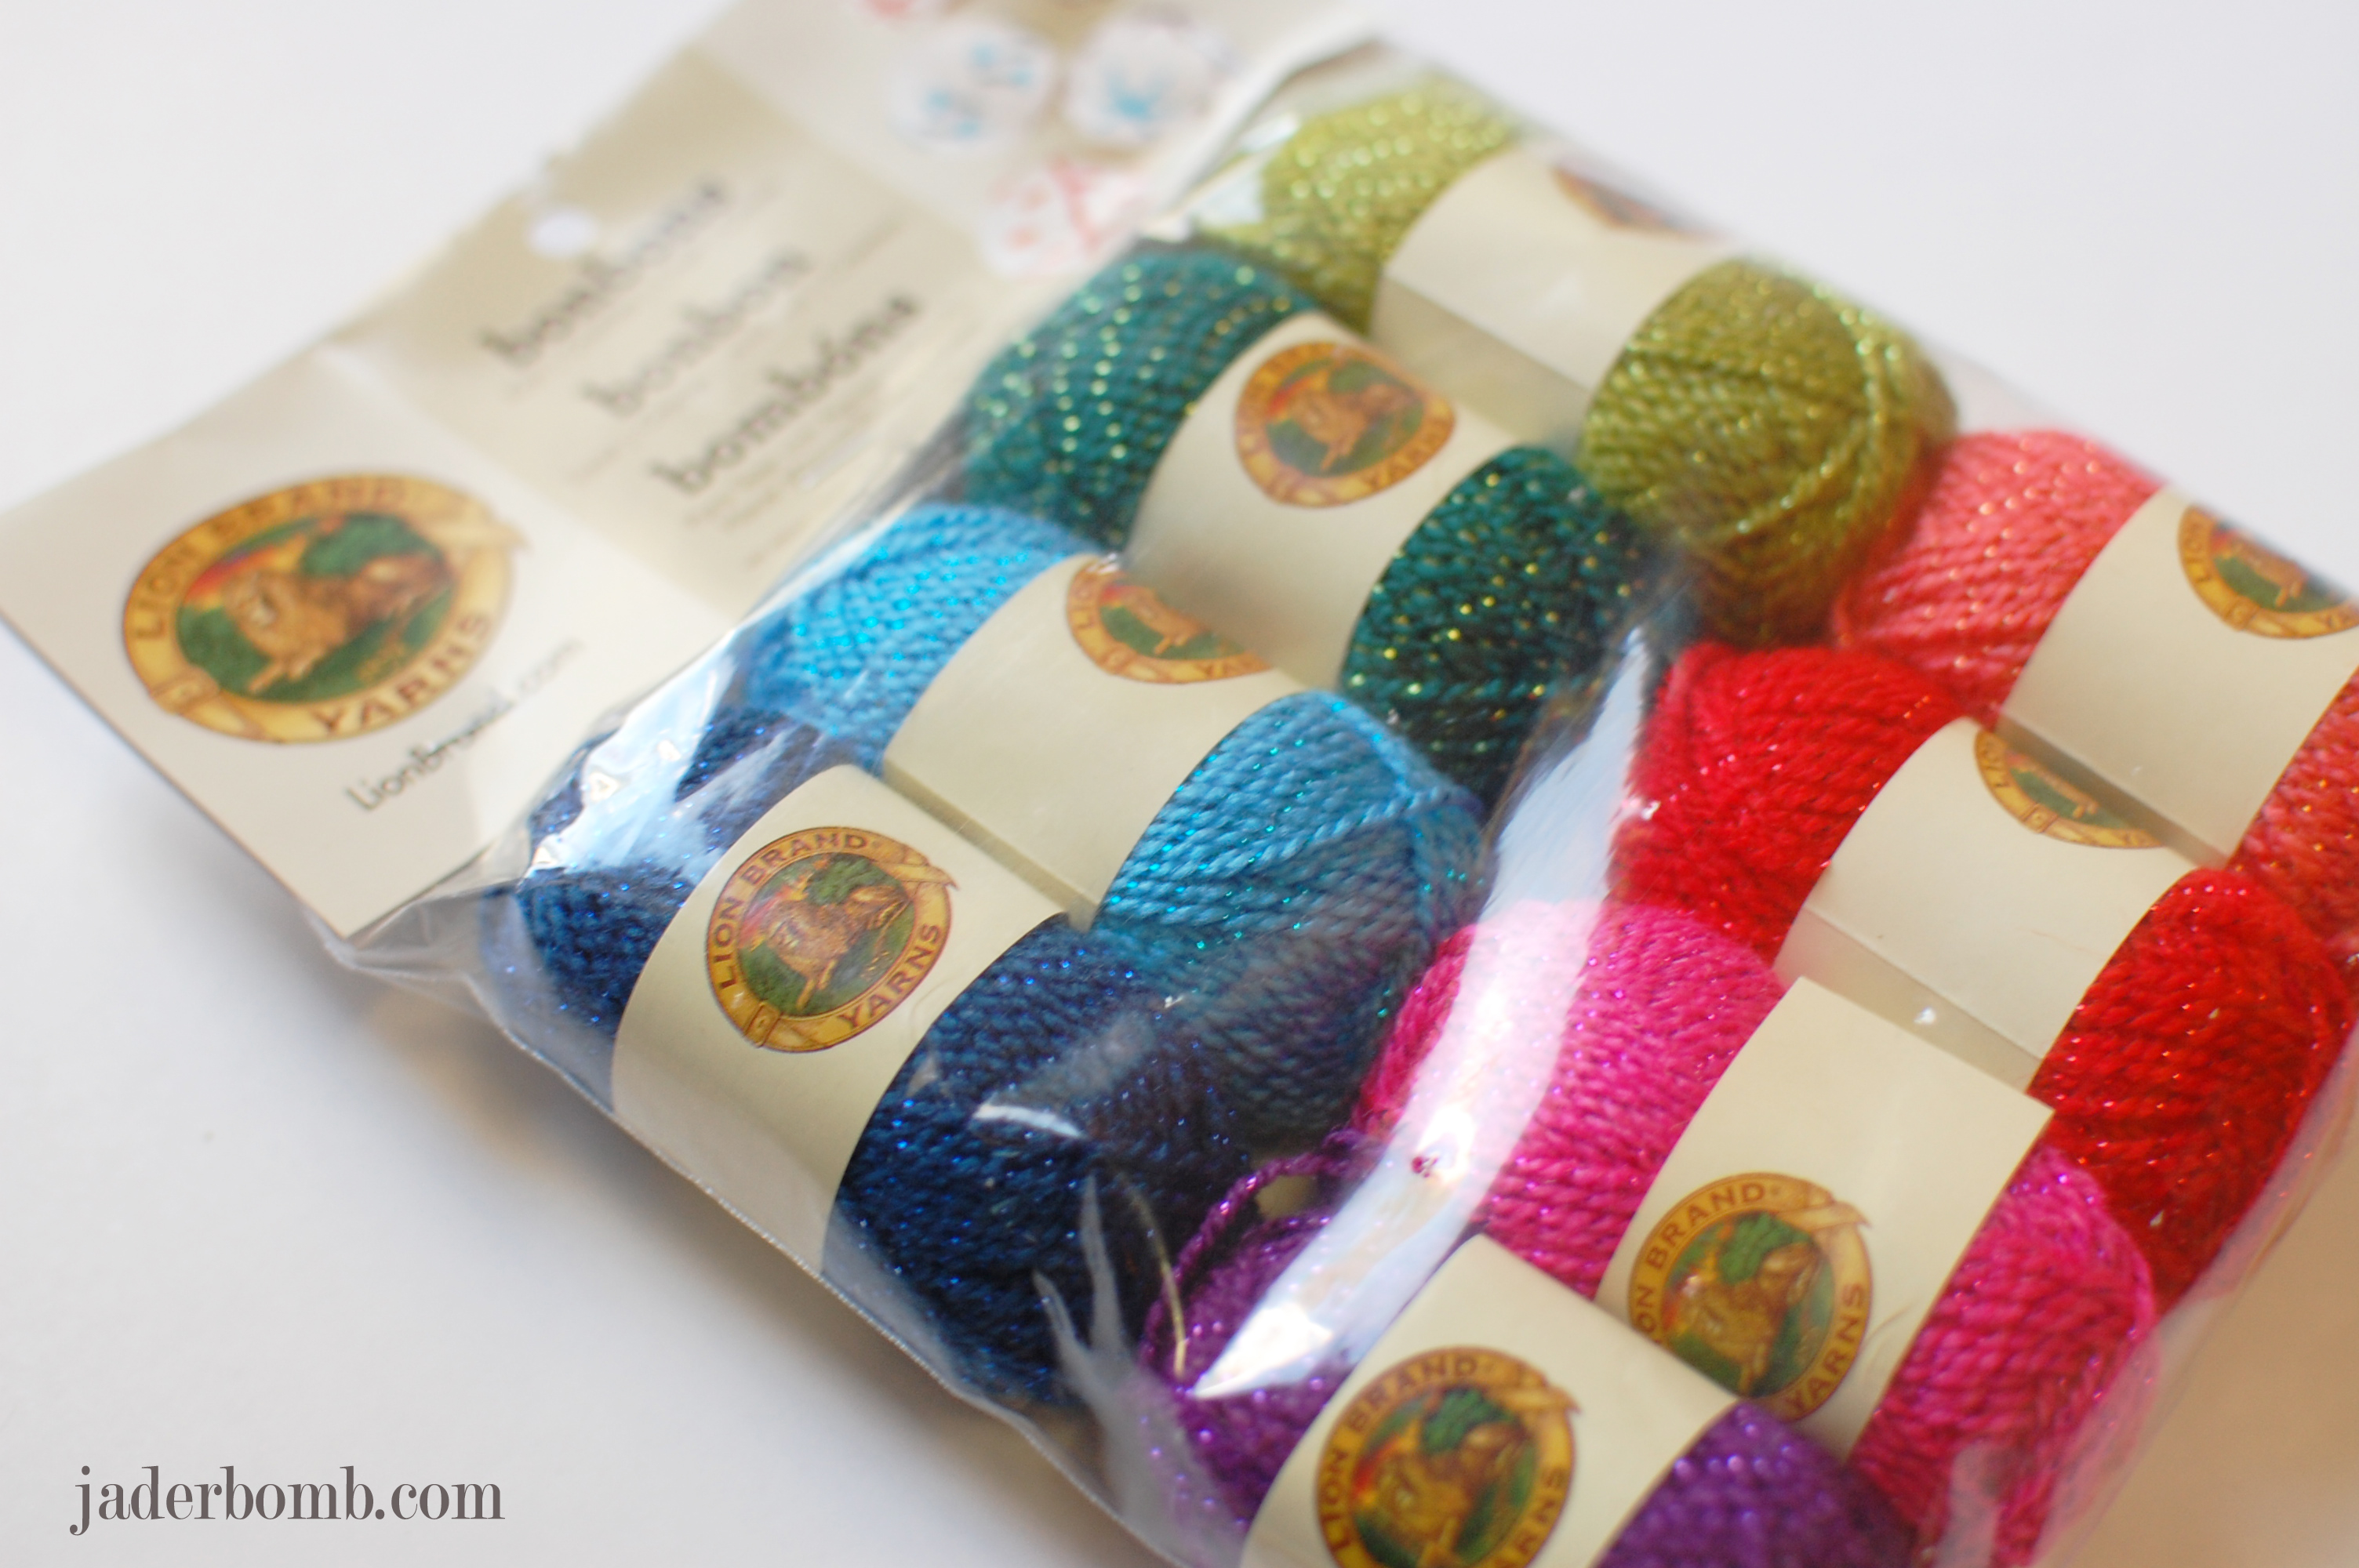
I got this pack of yarn from Lion Brand Yarns and I felt this was the perfect time to break them out of the package. The quality of the yarn is soft and delicate. There is a hint of shimmer in the yarn which is so smart. For those who love glitter this will give you your fix and those who might not love glitter this is a way to add it to your life without the mess.

yarnbomb-stencil1-jaderbomb

Start by outlining a section of the stencil with your glue.

yarnbomb-stencil1-jaderbomb

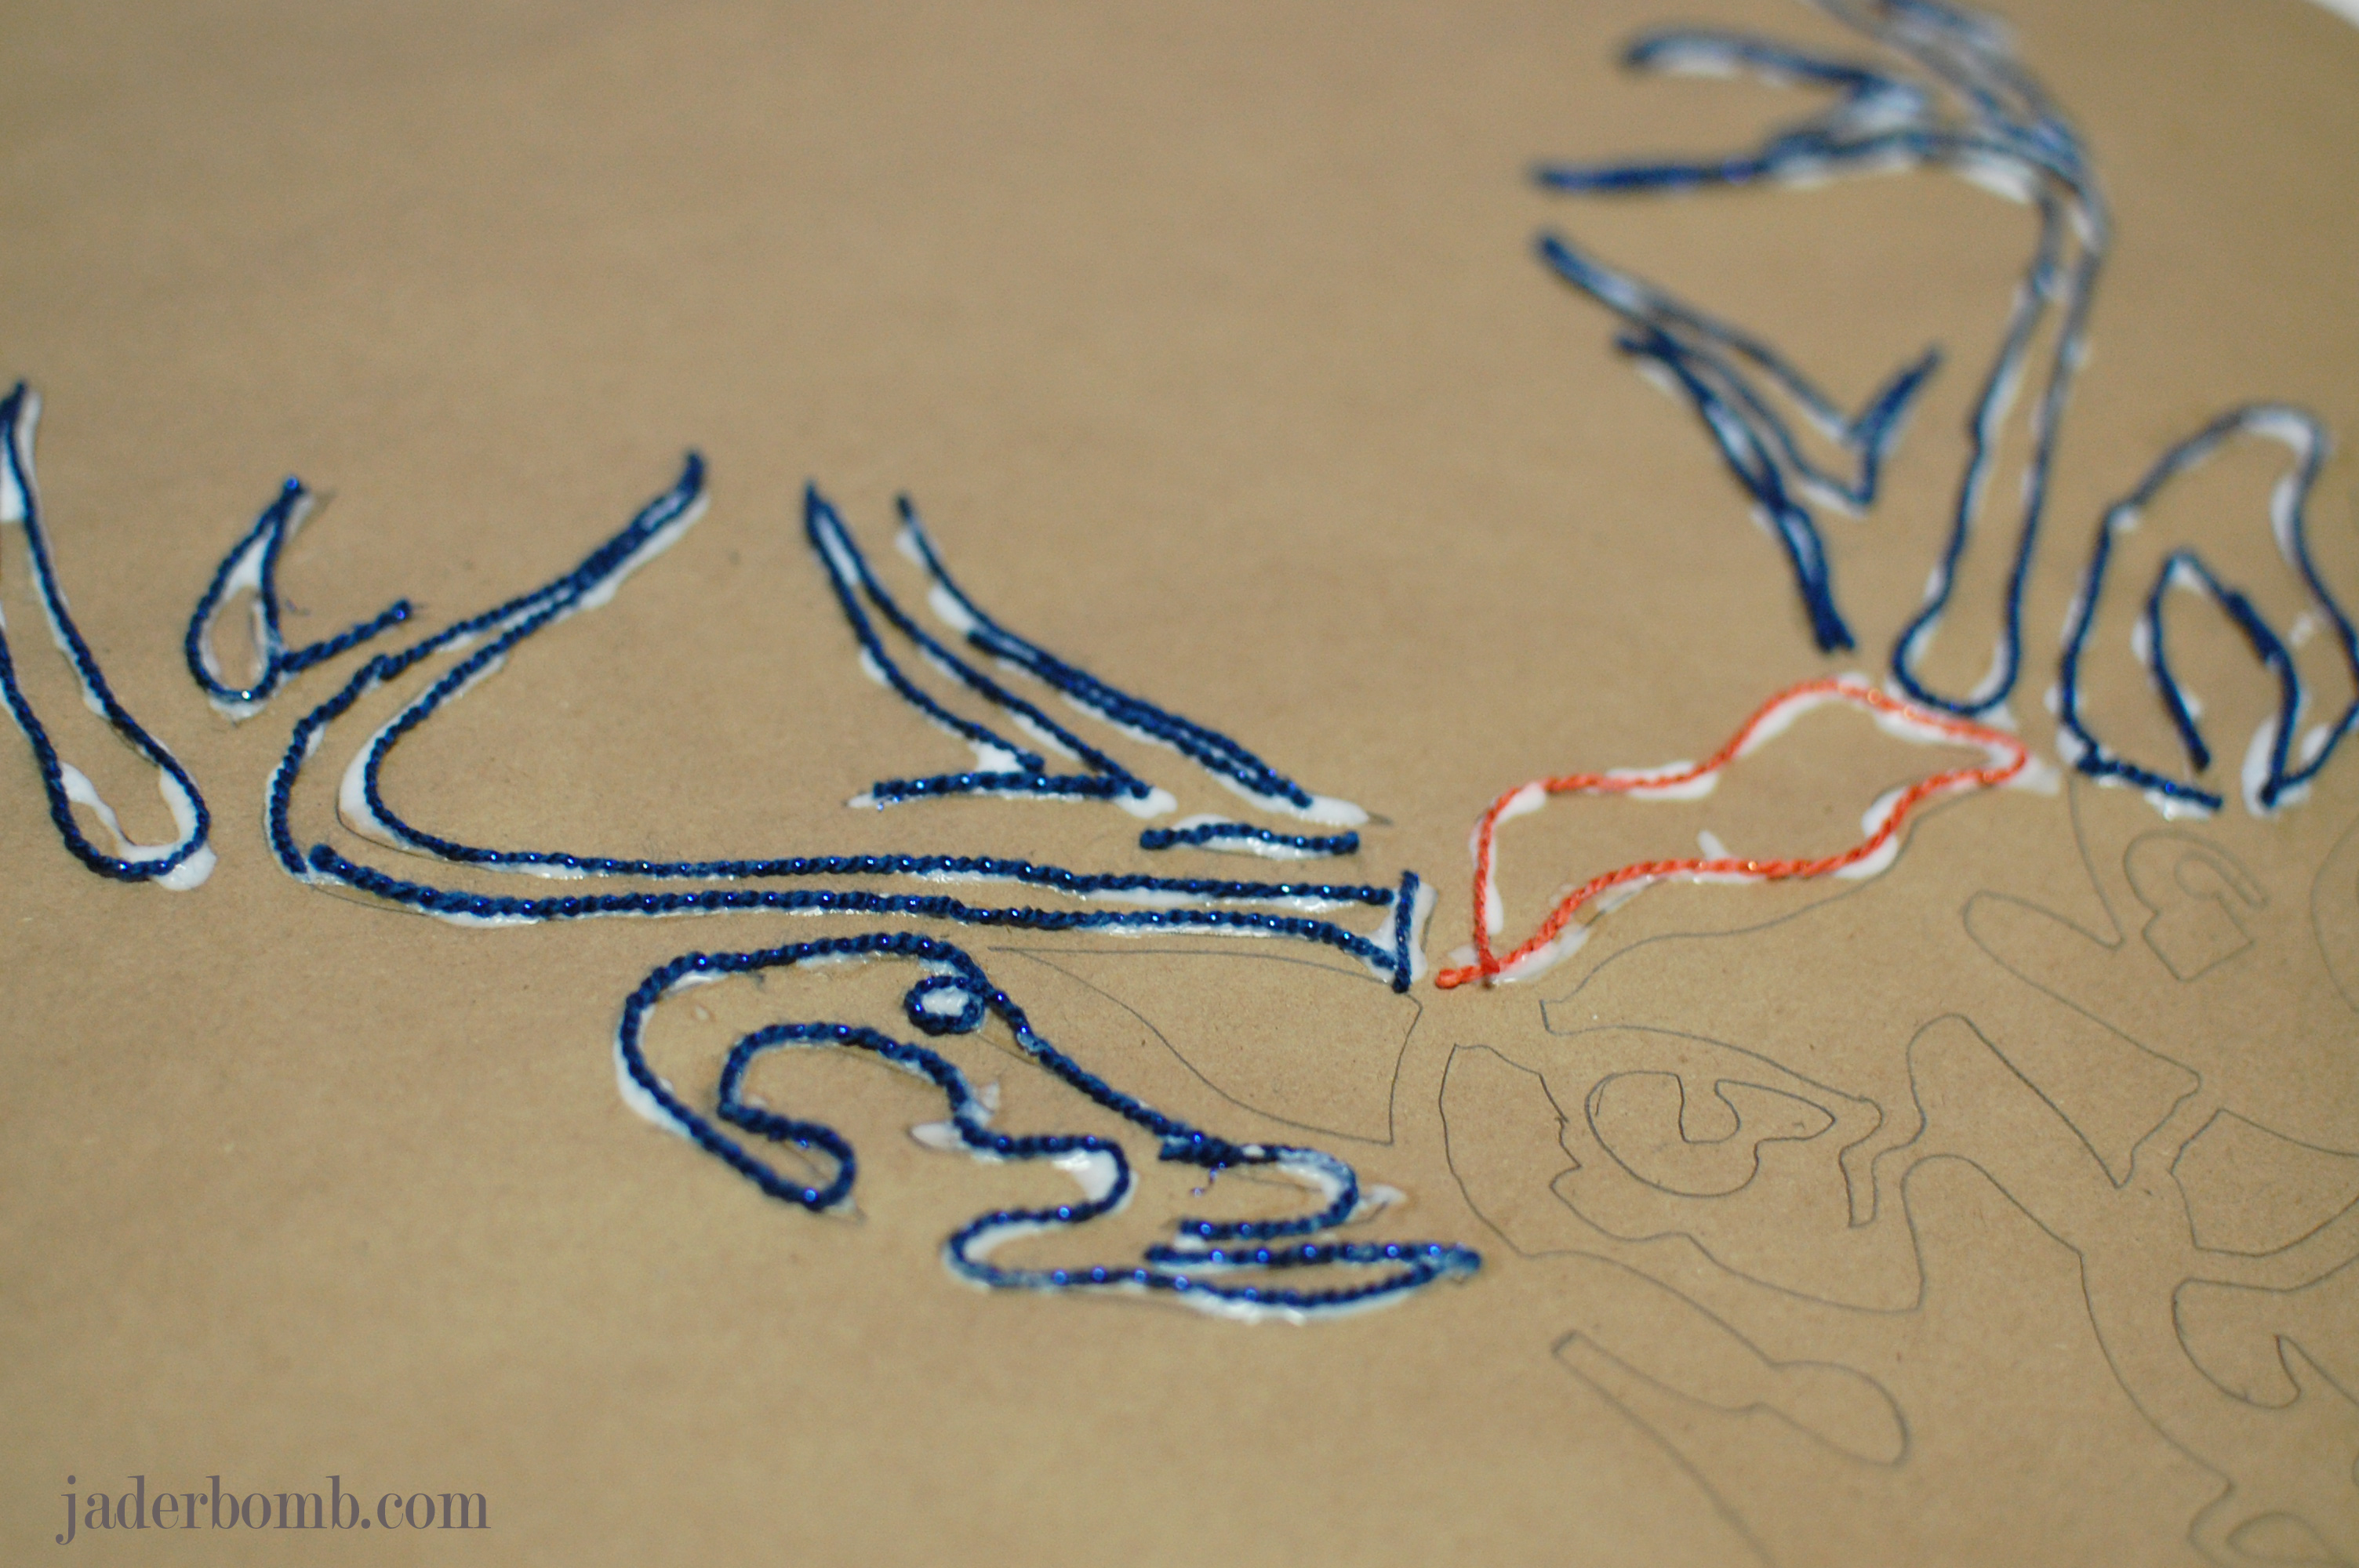
Next you will gently place the yarn right on top of the glue. Initially the glue will be white but when it is fully dry it will be translucent.

yarnbomb-stencil1-jaderbomb

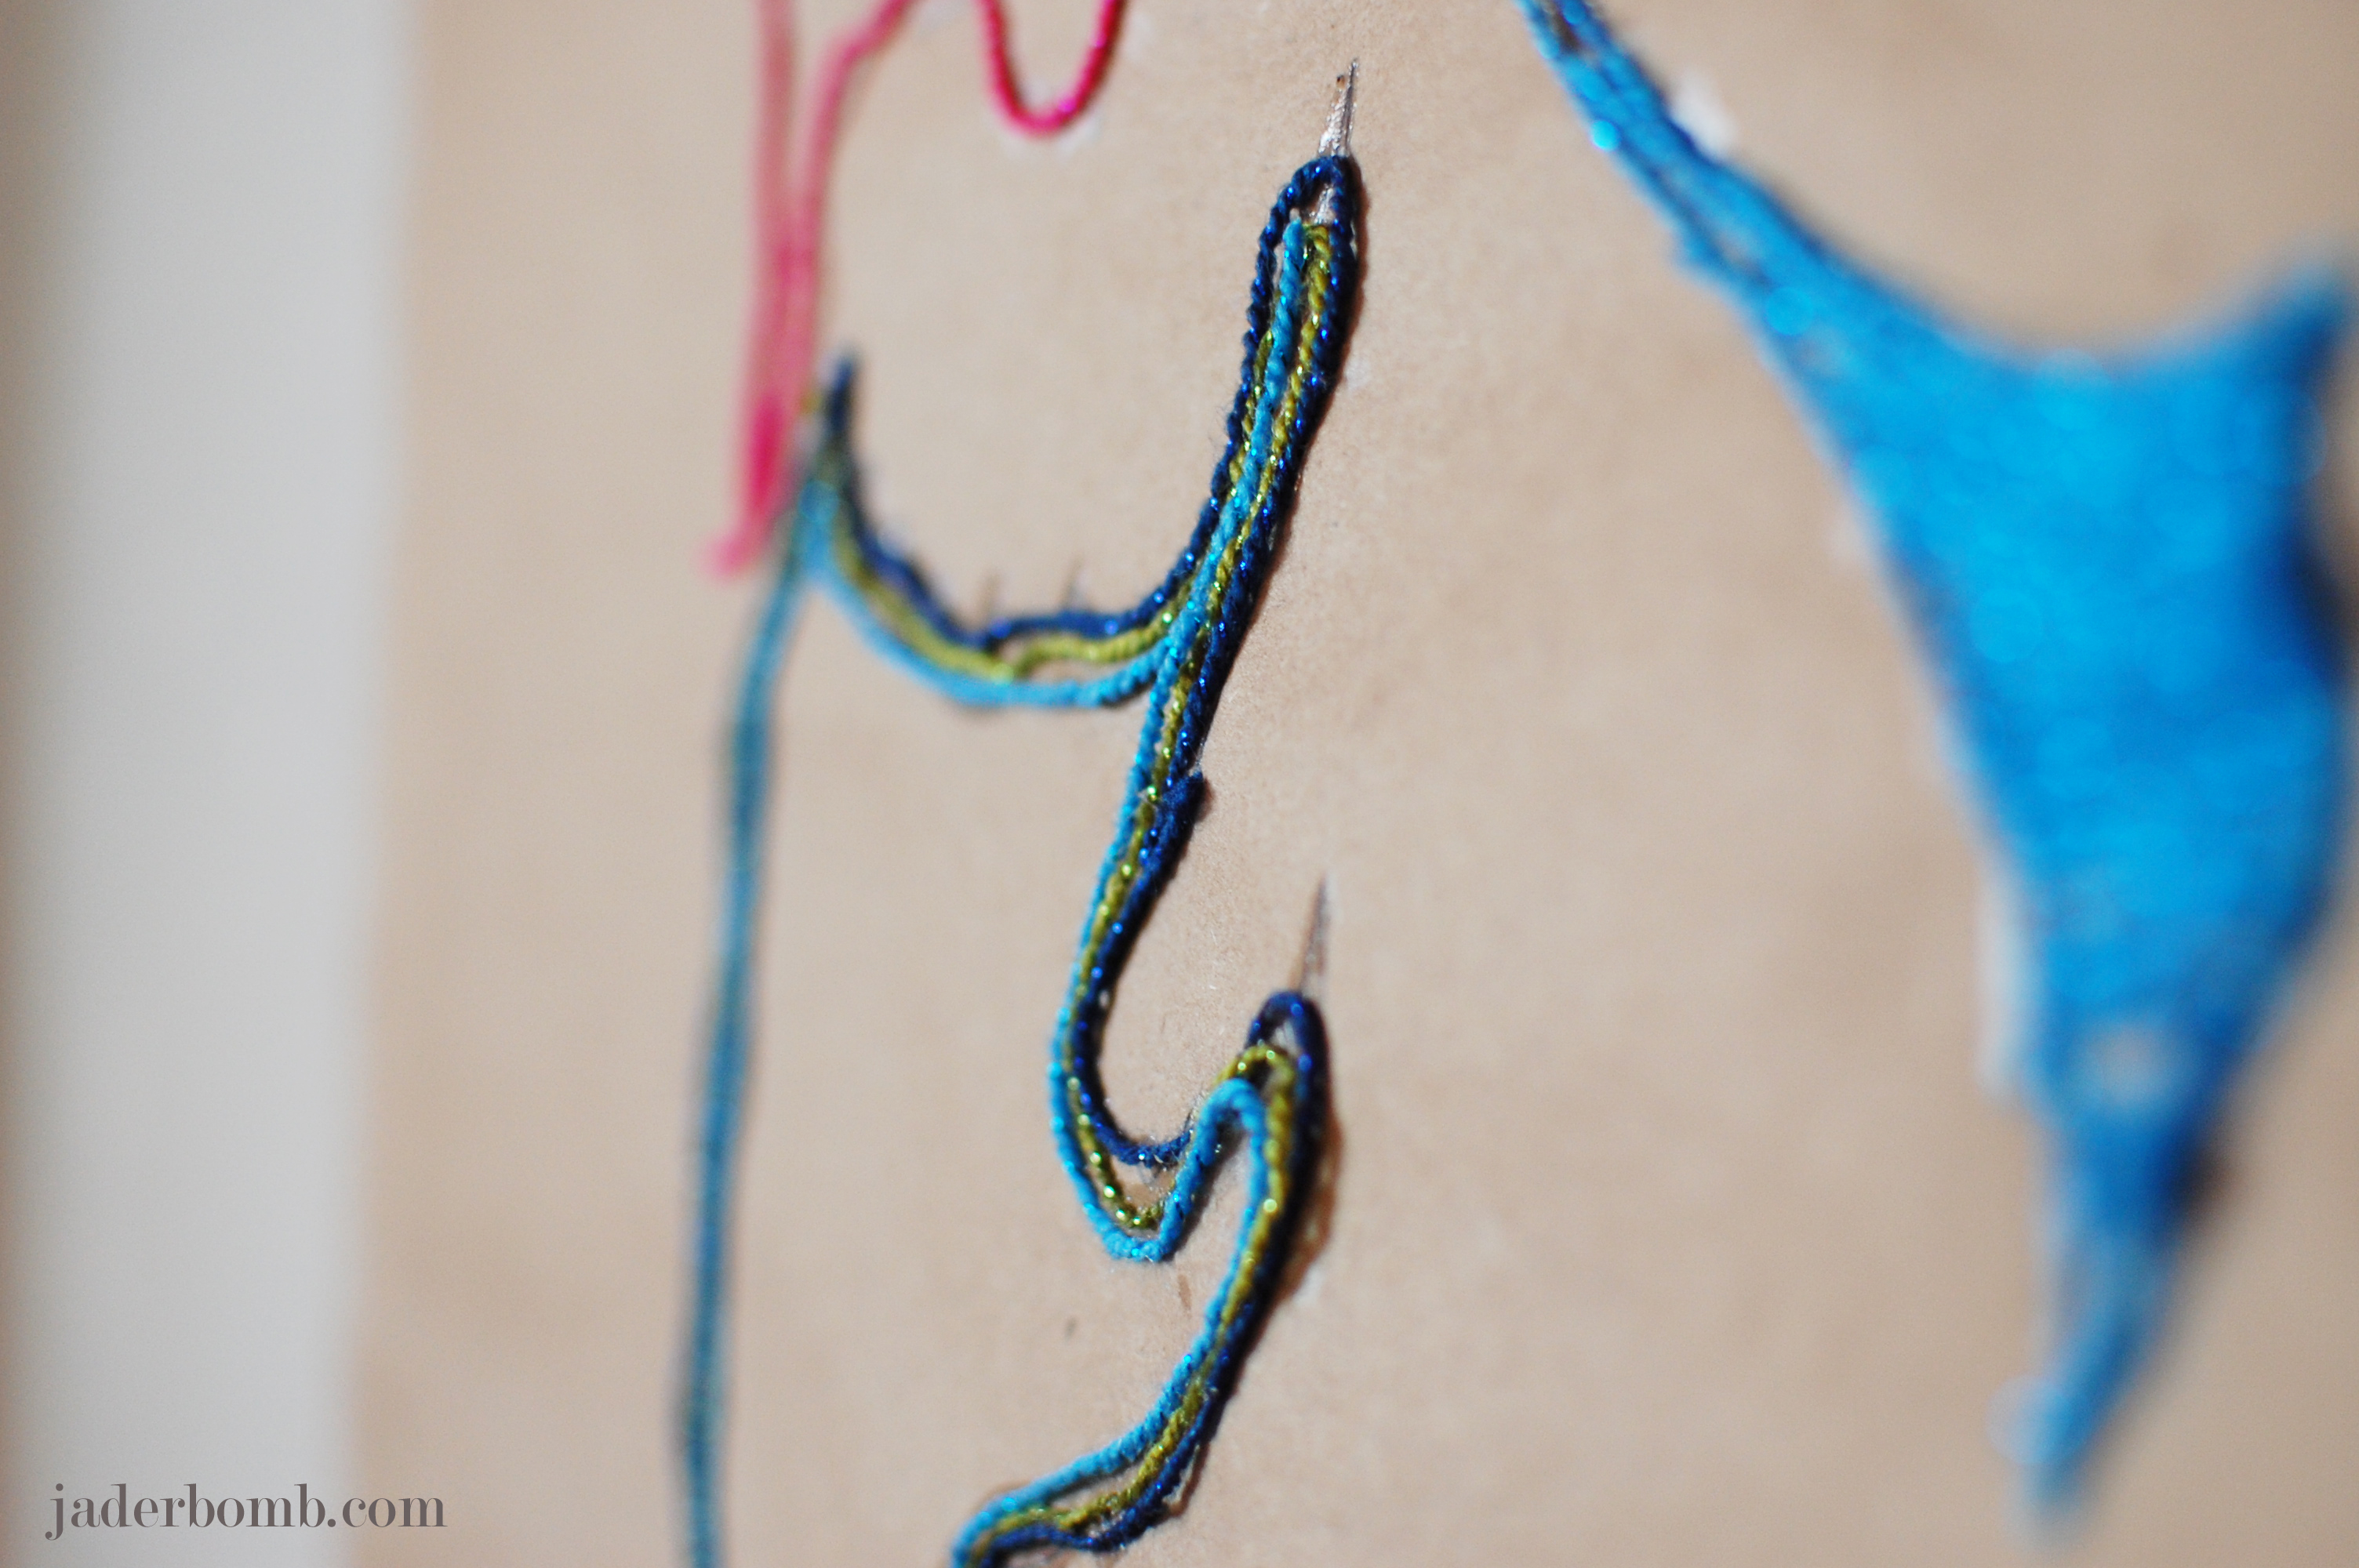
See! This is the part where you decorate your deer head in your own way. I wanted to fill some sections in and leave some empty. It sorta represented absence to me.

yarnbomb-stencil1-jaderbomb

I am showing you this picture because I want you to see how the glue looks before it is dry. Don’t let this step freak you out. When you are done set aside and allow to dry completely. You will be left with a fabulous shabby chic art piece.

Ed-Roth-Stencil1-Jaderbomb

I am so proud to call Ed my friend. He is so talented and I promise you will see his name around very soon, in BIG places. This is one of his books. Yes, I said “one” of his books. I was so impressed when I saw the inside because it is a book unlike any I have ever seen. It has stencils in it along with instructions on how to use and take care of your stencils. You can order this book HERE.

Ed-Roth-Stencil1-Jaderbomb

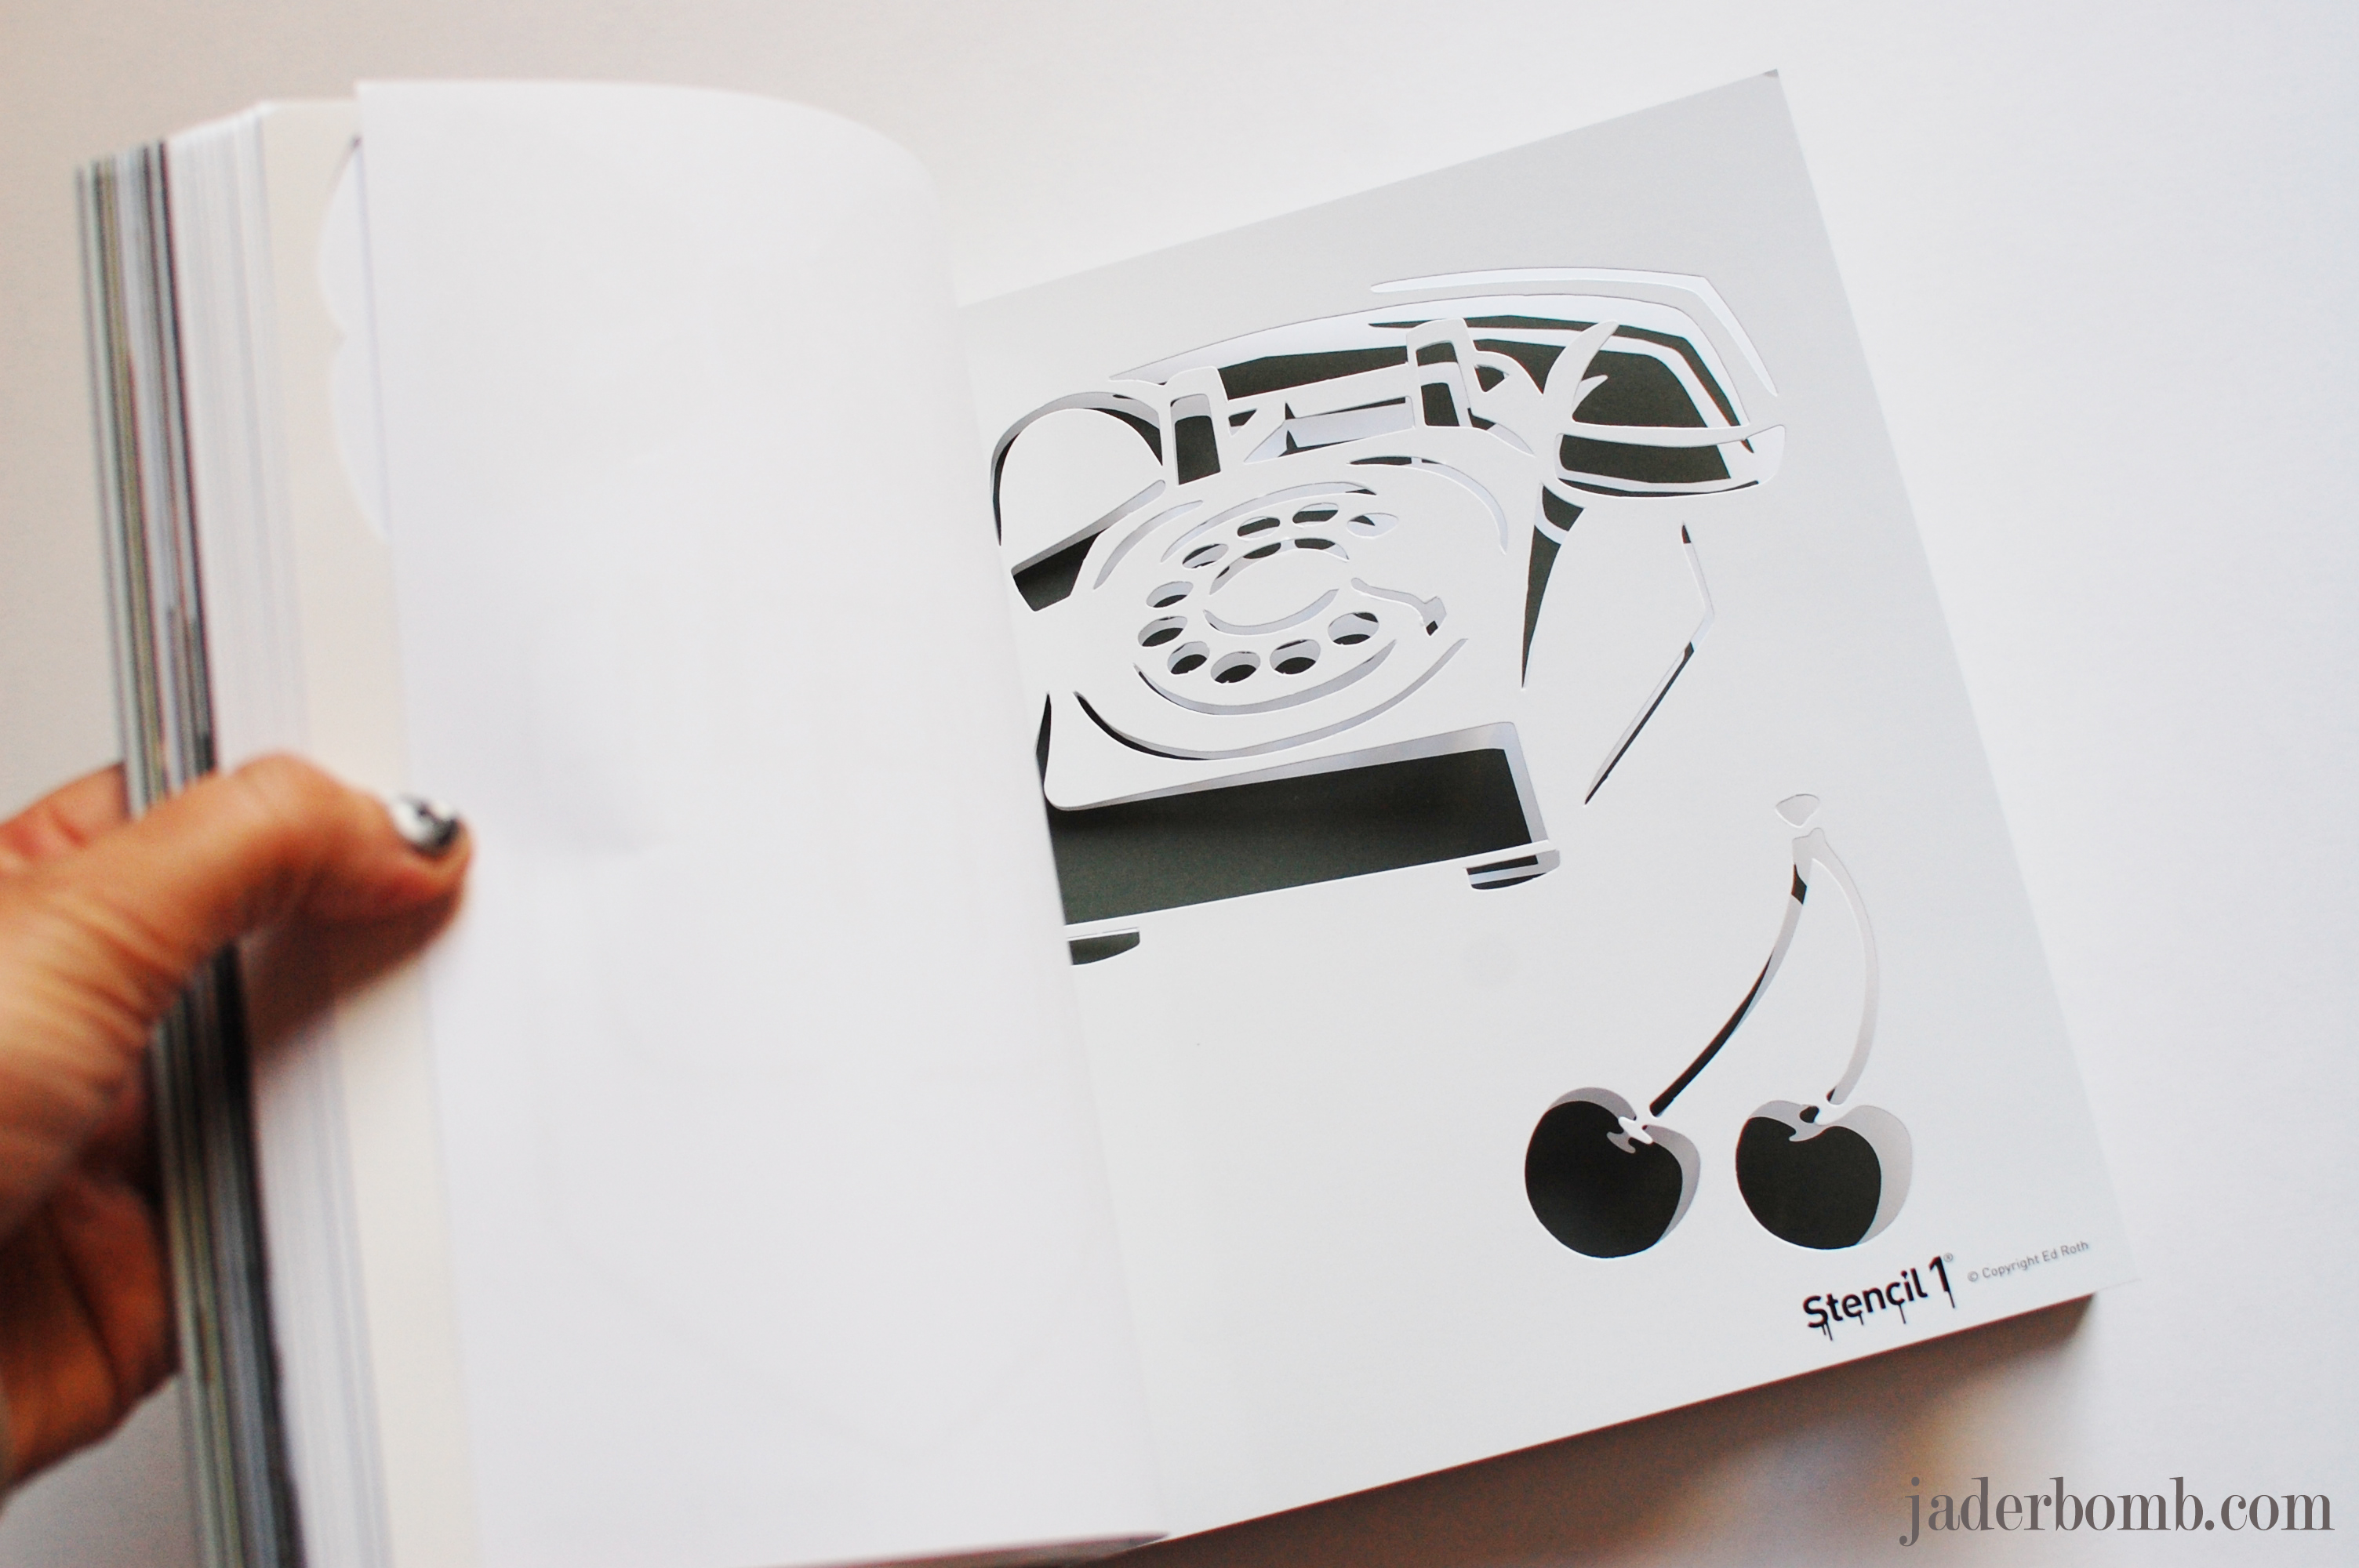
This is just one of the stencils in his book. He has the best retro images I tell ya.

Ed-Roth-Stencil1-Jaderbomb

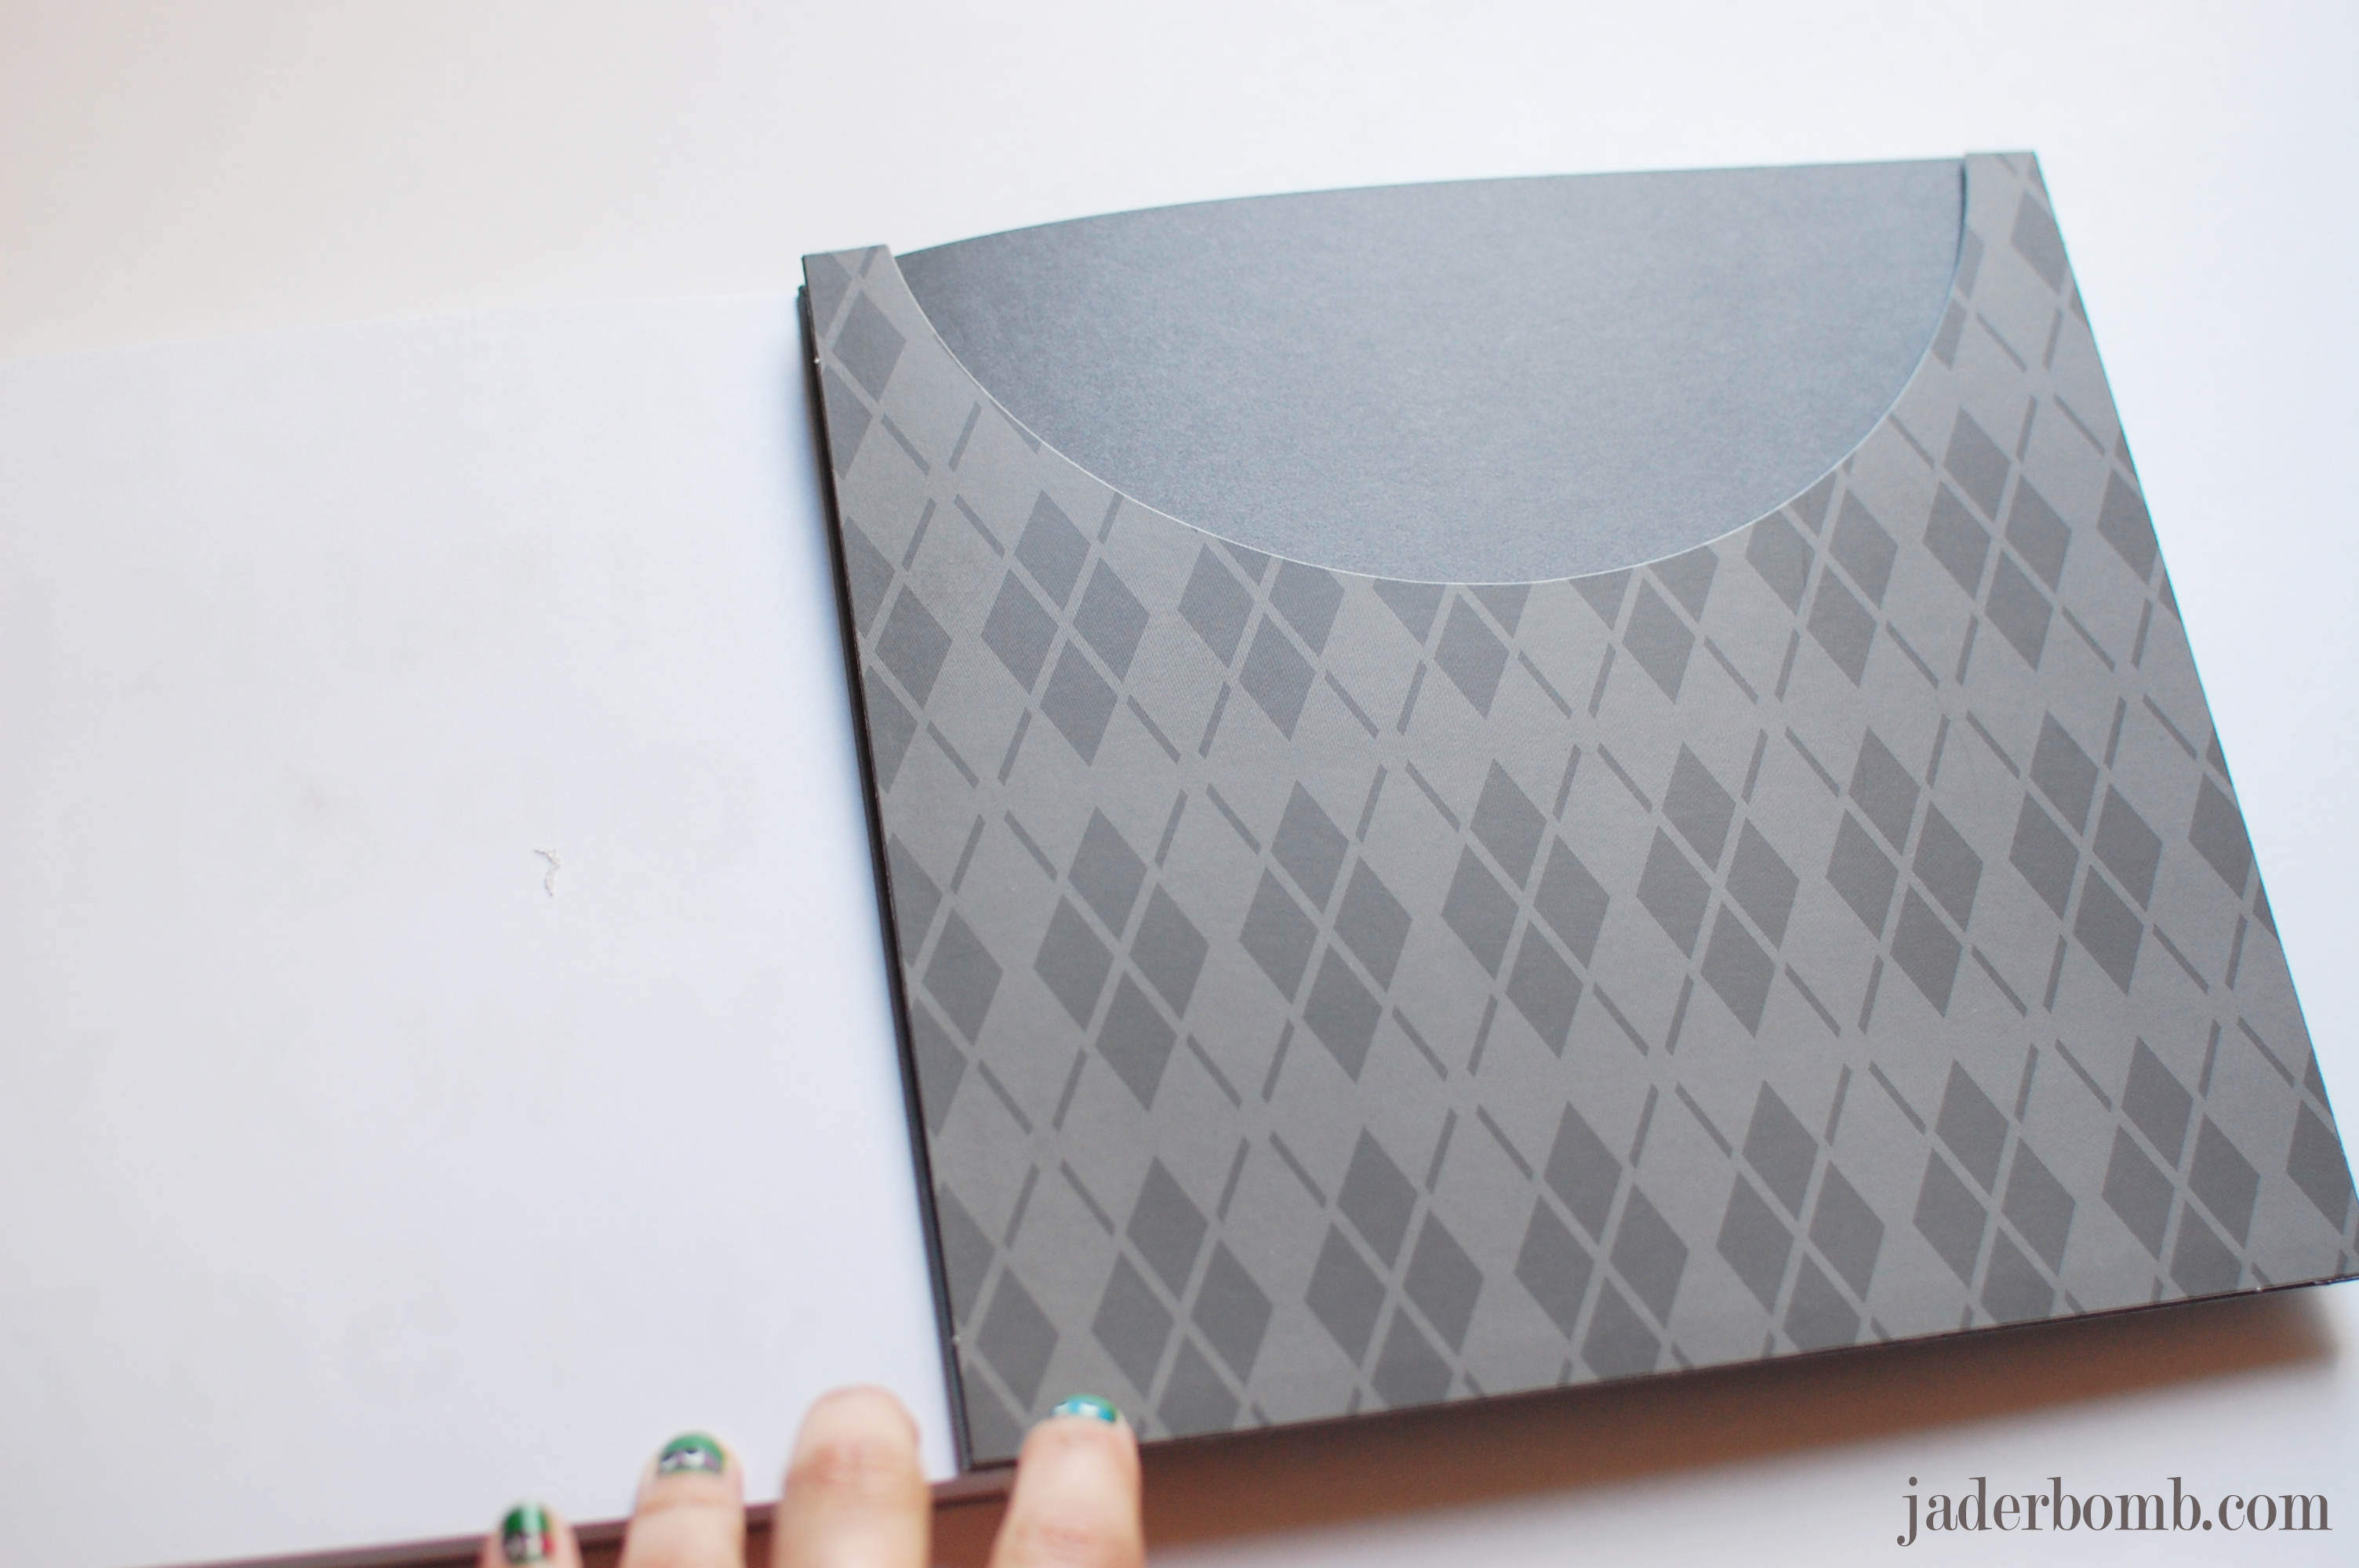
My favorite part is this folder in the back. He is so smart. So when you use a stencil in the book you place it in the folder when you are done so you will not ever loose it.

Ed-Roth-Stencil1-Jaderbomb

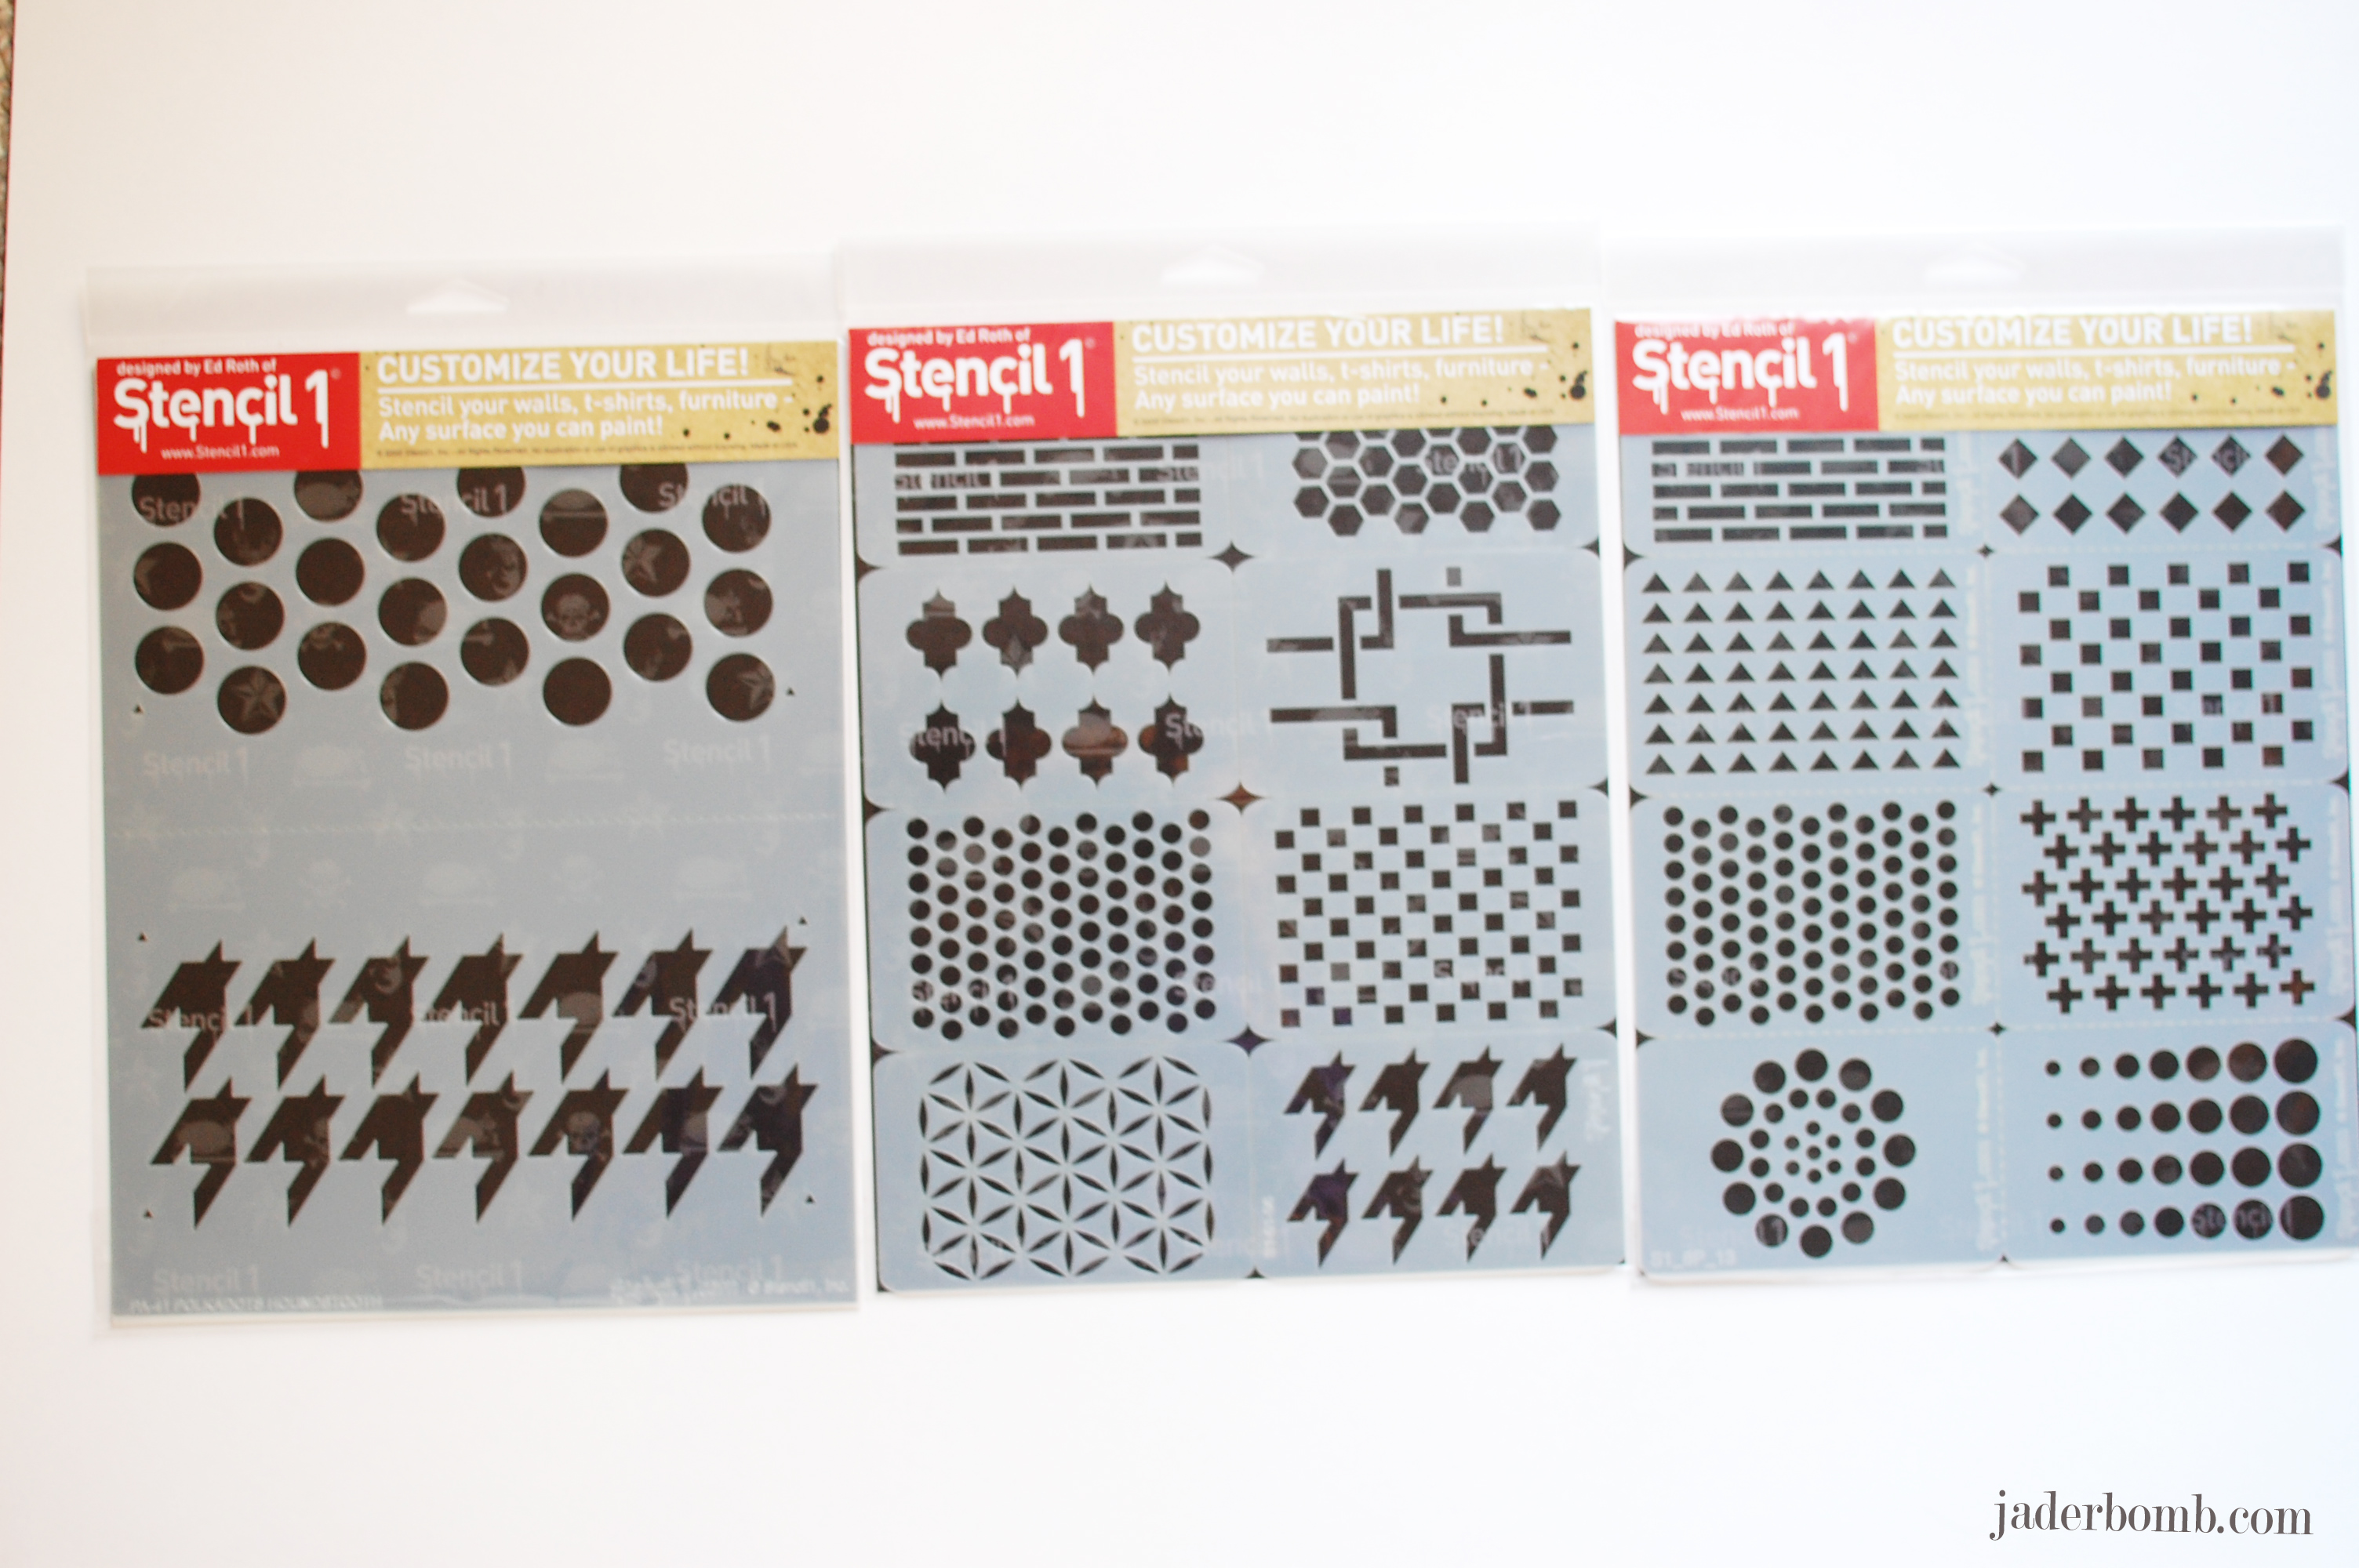
These are other packages of his stencils. You can see all of them HERE.

Ed-Roth-Stencil1-Jaderbomb

I can’t’ wait to show you the other projects I am working on with his stencils.

I hope you enjoyed this tutorial!

jaderbomb

This post is brought to you by Ed Roth’s stencil line Stencil 1. I received product for this post. All opinions expressed are 100% mine. You can check out Stencil 1’s line here.

 It’s almost Valentines day and sometimes the reality is we spend too much money on presentation. I wanted to show you a last minute idea that could save you a lot of money..plus it’s super fun. I always need last minute boxes and envelopes so I promise this will come in handy after Valentines day. Let’s get started!

homemade-boxes-envelopes-marthastewart

Keep in mind I will be showing you how to make a homemade box and an envelope with products from the MARTHA STEWART CRAFTS line.

you will need

*MARTHA STEWART SCORING BOARD
*TAPE
*SCISSORS 
*MARTHA STEWART YARN
*MARTHA STEWART DESIGNER PAPER
*LOVE

(FYI: You can order all of the supplies I used in one place by clicking on the links)

homemade-boxes-envelopes-marthastewart

Ready!

homemade-boxes-envelopes-marthastewart

The first thing we will make is a simple envelope. The reason I am showing this is because sometimes you want to write a personal note to someone and you might not have an envelope on you. I personally love this because I can make an envelope with any paper I have in my studio. I want to point out when you purchase this scoring board it comes with a plastic template to make envelopes with different dimensions on it.

Start by choosing what size you want your final size envelope to be then follow the size directions that go with that particular envelope. It shows you what size A should be and B.

homemade-boxes-envelopes-marthastewart

I always score my two sides first, which will be A. If you are using thick paper you can apply a decent amount of pressure. If you use thin paper make sure you don’t press too hard. It will absolutely cut right through the paper and we surely don’t want that!

homemade-boxes-envelopes-marthastewart

This is what it will look like when you finish your sides. Bend them a little in the crease.

homemade-boxes-envelopes-marthastewart

Continue to the other sides, which will be B. When done fold in the crease.

homemade-boxes-envelopes-marthastewart

Take your “A” sides and fold them in, then fold your bottom “B” side on top of the two sides. Forgive my ugly tape I used. I didn’t have any more double sided tape but you get the idea! If you were to use double sided tape you would place the tape underneath the last fold.

homemade-boxes-envelopes-marthastewart

Tadahhh! Is it not the cutest thing ever! Now you can give someone you love (or don’t love) a special envelope… teeeehehehe

On to the box.

homemade-boxes-envelopes-marthastewart

You will create the box the same way as you did the envelope. The only thing is that triangle template with the sizes for the envelopes will not be on the scoring board. I just didn’t take it off for the picture. If you look closely at the top of the picture you will see a sticker with the sizes for the boxes. So like the envelope you will choose your final size you want the box to be then follow the size directions for that box!

homemade-boxes-envelopes-marthastewart

After you score your “bottom” part of the box you will cut the right middle square out. Don’t forget to cut the one on the opposite side, which would be the one all the way to the left in the middle. This is not something you have to do but it will make it easier to fold up the box in the end.

homemade-boxes-envelopes-marthastewart

You will fold each side upward and you will notice they will naturally go in the correct position. Use some tape to secure the sides. Above is what it should look like. This is just the bottom part of the box but on the sticker it will tell you where to score the paper for the top and bottom of the box.

homemade-boxes-envelopes-marthastewart

And this my dear is what it will look like. I embellished them with a little yarn and that’s it! Martha Stewart also has some pretty amazing labels which will dress them up also.

I hope you enjoyed learning how to make these as much as I enjoyed showing you. See ya in the next post.

jaderbomb

Happy Thursday Jaderbugs! I am sitting here listening to all of my amazing songs on my computer, thinking about what it would be like if I could fly! You know what I mean right? The kind of flying that fairies and little bugs do. Somehow it seems like it would be easy and so very whimsical. Unfortunately I am not flying, but I am blogging. I guess it’s the closest thing to flying I can do. I promise to let you know if I ever learn how to fly… Maybe I will even do a tutorial on it, hehe.

On to the awesome craft I am sharing today. I am so excited to share with you a new project I am doing with Martha Stewart Crafts. It’s called #12monthsofmartha & #marthastewartcrafts <——(this is the hashtag you can use if you repin this or want to see other’s who are a part of this project)

I am super giddy about it and I think you will too. Each month I will be sharing with you new items from the Martha Stewart crafts line that is brand spanking new~

So yes! You will be seeing things that are not yet in the stores… Today we are learning how to “cover” up a pillar candle to give it a new spicy look.

You can find all of her products at Michael’s Arts and Crafts, Jo-Anns Fabrics & Crafts and Amazon.com.

valentines-candles-martha-stewart


INGREDIENTS:
*Martha Stewart Designer Paper
*Scissors
*Glitter
*Yarn
*Twine
*Candles
*Stickers
*Labels

If you want to purchase any of the items I used in this tutorial click on the links and booyah! It’s that easy.


valentines-candles-martha-stewart

Are you getting excited!

valentines-candles-martha-stewart

I am loving this beautiful designer paper! I love the designs on both sides of the paper. You can never go wrong with this pack of paper.

valentines-candles-martha-stewart

The first thing you will do is lay a piece of paper down on a flat surface. Place the candle on top of the paper, then cut whatever hangs over the edge of the candle.

valentines-candles-martha-stewart

When you are done wrapping all of your candles it will look like a sleeve. I love dressing up candles, especially like this. I cut a few thin pieces of burlap and wrapped them around the top edge.

valentines-candles-martha-stewart

HEAVEN. That is all I will say about this glitter eyelash yarn. I can’t wait to show you Saturday what else I made with this. I am telling you, it’s some magical stuff.

valentines-candles-martha-stewart

To decorate my candles I used a 2 inch circle punch to get these circles. This paper is from the Martha Stewart collection. Grab one of these cute stickers and place right smack in the middle of a circle. Are you loving how these stickers look like vintage stamps?

valentines-candles-martha-stewart

I am in love with this paper punch. It’s called “Heartbeat punch all over the page. ” They have magnets on the top part of the punch and the base. This makes it super easy when trying to line everything up the correct way. If you have the punch in the wrong spot the magnets will not connect. So you really can’t mess up!

valentines-candles-martha-stewart

This is what you will have hidden under the paper punch. Perfect to decorate a table with.

valentines-candles-martha-stewart

I am super pleased with all of these products and I am sure you will be too, once you get your hands on them! Make sure to check out all of her line HERE. See you in the next post!

jaderbomb

Valentines Tube Candles

Mardi-Gras-Crafts

So, it’s  that time of year where you can let your feathers out and get loose. Mardi Gras is pretty big here where I live in the South. I don’t mean big like Willy Wonka’s chocolate factory, bigger. It’s what we look forward to all year long. Lot’s of fun things come along with Mardi Gras like parade’s practically every night, ton’s of bead throwing, ton’s of getting hit in the head with beads, people enjoying the “drinks” that Louisiana has to offer, balls, more balls (and I am talking about the fannn-cayyyy) balls where you wear pretty dresses, not the balls in the play ground at McDonalds.

I scanned my favorite sites to gather 12 great tutorials/projects for you. If you don’t celebrate Mardi Gras where you live you can bring it to life with everything in this post.

Don’t forget to say “THROW ME SUMTHIN MISTER” when you scream for your beads! Check out my last two Mardi Gras posts HERE and HERE.


jaderbomb

*I will be posting a fun Martha Stewart valentines craft later tonight.
* Check out my friend’s sewing machine post HERE, I am in it!
* Congrats to the Baltimore Ravens for winning the Super Bowl!
*Mardi Gras is in 8 day’s people, 8 days!

Being a kid can be a pretty big deal and getting your your child to listen can be a bigger deal. Every kid is completely different which means each will have different incentives that work and don’t work. Trust me, I have tried many and I think I found one that is fun, interactive and does it’s job. I think being a parent sometimes we think we know it all when sometimes what we are missing is one thing. Listening to our children. Don’t get me wrong, it can be hard at times. Waking up each day, rushing to get out of the door, work, school, every day afternoon activities, cooking supper and getting ready for bed is enough on it’s own. Dealing with a child who might not listen, talks back or whatever else on top of your daily regime can make you feel like you want to pull all of your hair out. The key is finding that button on your kid.

I don’t know what you do to get your child to listen, but I think when you start giving things like gifts and money you could possibly send them the wrong message. See I am not a professional. I have a 12 year old who is amazing, bright, fun & energetic. There are times when he get’s punished and things get taken from him because he is a normal 12 year old boy.
But with all that comes along with having kids I wouldn’t trade all of up’s and down’s for anything in the world. I get to teach my son right from wrong, good from bad, fake from real, how to be a nice person, how not to be selfish and so much more. It’s my favorite thing about my life. I get to see this little mini me ( and boy is he just like me) grow up into a beautiful young man.

get your child to listen

So, back to this post. I wanted to share with you what works in our house. We keep a jar out filled with marshmallows. If something get’s taken away he can earn it back by filling up the empty jar with marshmallows. Wanna know the best treat? When he is done filling the jar up, the marshmallows are his to keep. I am not sure if that is what he looks forward to or getting back what he was punished from!

All I am saying is it’s fun. Make it a fun activity for you kid. Every time they do something kind, nice, use their manners, do things with out being told or anything else positive then you can tell them to add however many marshmallows that you think they earned! Believe it or not, it works!

P.S. You can use anything you would like to fill the jar up. I like marshmallows because you can see progress fairly quick. Don’t forget kids are impatient, if something takes to long to happen they will get distracted.


How-To-Get-Your-Child-To-Listen


I hope you have a great day and see you tomorrow in the next post!

What do you so in your home to get your kids to listen?

jaderbomb

jaderbomb

* I started a new website and the only hint I will tell you is it’s going to be fun for everyone
*I will be doing a Mardi Gras round up post Tuesday
*I was featured on 30 minute crafts
*My latest post for FAVE CRAFTS is up HERE.


If you are looking for a easy way to decorate for Valentines day then look no further because I have an affordable tutorial for you using pink Christmas ornaments. I think  it’s hard to decorate for each holiday for the simple fact that it can get pretty expensive. Remember supermarket sweep? I used to love that show. When I am in the craft store just browsing I always go strait to the sale isles. Why? Because there is no way I will spend the full price on things when I will end up change the whole appearance anyway. So back to supermarket sweep, I always pretend I am on that show and will give myself 10 minutes in those isles, NO matter how many isles there are. Being crafty sometimes means thinking on your toes and usually you think of how you can use an item within the first 5 seconds of looking at it. Trust that first thought. It’s usually the best one.

I love after Christmas sales, especially when things are 80% off. I try to not go until it’s that low. I figure if something good is already gone I will never know, haha. Plus I  tell myself that whatever is left it’s up to me to use it in another creative way. That’s exactly what I did with the ornaments in this craft. The box was originally 5.00 and I paid .50 for them. I think that is a good deal! I bought big ones and small ones. You never know when you will need extra balls.
(insert quirky smirk and head shaking)

Valentine-Heart-Wreath

Isn’t this wreath so cute!

jaderbomb

*Christmas Balls
*Martha Stewart Designer Paper Pad
*Circle Punch
Doily
*Martha Stewart Stickers
Twine

You can order all the items above from one spot, just click on the link.

Valentine-Heart-Wreath

Are you swooning over everything I used? I love anything glittery and pink, it always puts me in a fabu-loso mood.

Valentine-Heart-Wreath

K, the first thing you will do is get a piece of paper and draw out a heart or print one. You can click HERE to download the one I used. Glue each one together. Wait till the glue is dry before you move on to the next spot.

Valentine-Heart-Wreath

I bought these paper doilies from Freds in the birthday party isle. For a pack of 24 it was $1.00. Booyah, you know I grabbed all 45. Fold a doily like an accordion then set to the side.

Valentine-Heart-Wreath

Punch out a circle. I swear when you do one you will want to keep on, it’s addicting.

Valentine-Heart-Wreath

Now is the time you will glue your paper doily onto your wreath, wherever you want to put it. Add your punch out in the middle of doily.

Valentine-Heart-Wreath

I wrapped a little twine around my punch out then placed a cute cupcake sticker in the middle.

Valentine-Heart-Wreath

So it’s that simple. What I like the most about this is I can keep a fun pink heart up all year round. I hope you enjoyed learning how to make a heart wreath out of ornaments. What is your favorite holiday to decorate for? I’d love to know, let me know in the comment section.

Wanna check out more of my Valentines tutorials? Click HERE.

jaderbomb