I love getting cards in the mail. It’s not often that happens because we have so much technology. BUT, what if you changed that! Once a month you should make ONE card and send it to someone special. That’s not hard right? Once I show you this tutorial you might end up doing 5 cards a month because it’s super chic, contemporary and cute.
Good news is this weekend is MOTHER’S DAY! What a perfect time to make a special card for your your mum!
Use paper that makes you smile. If you know who you are sending it to you could even design the card completely around them!
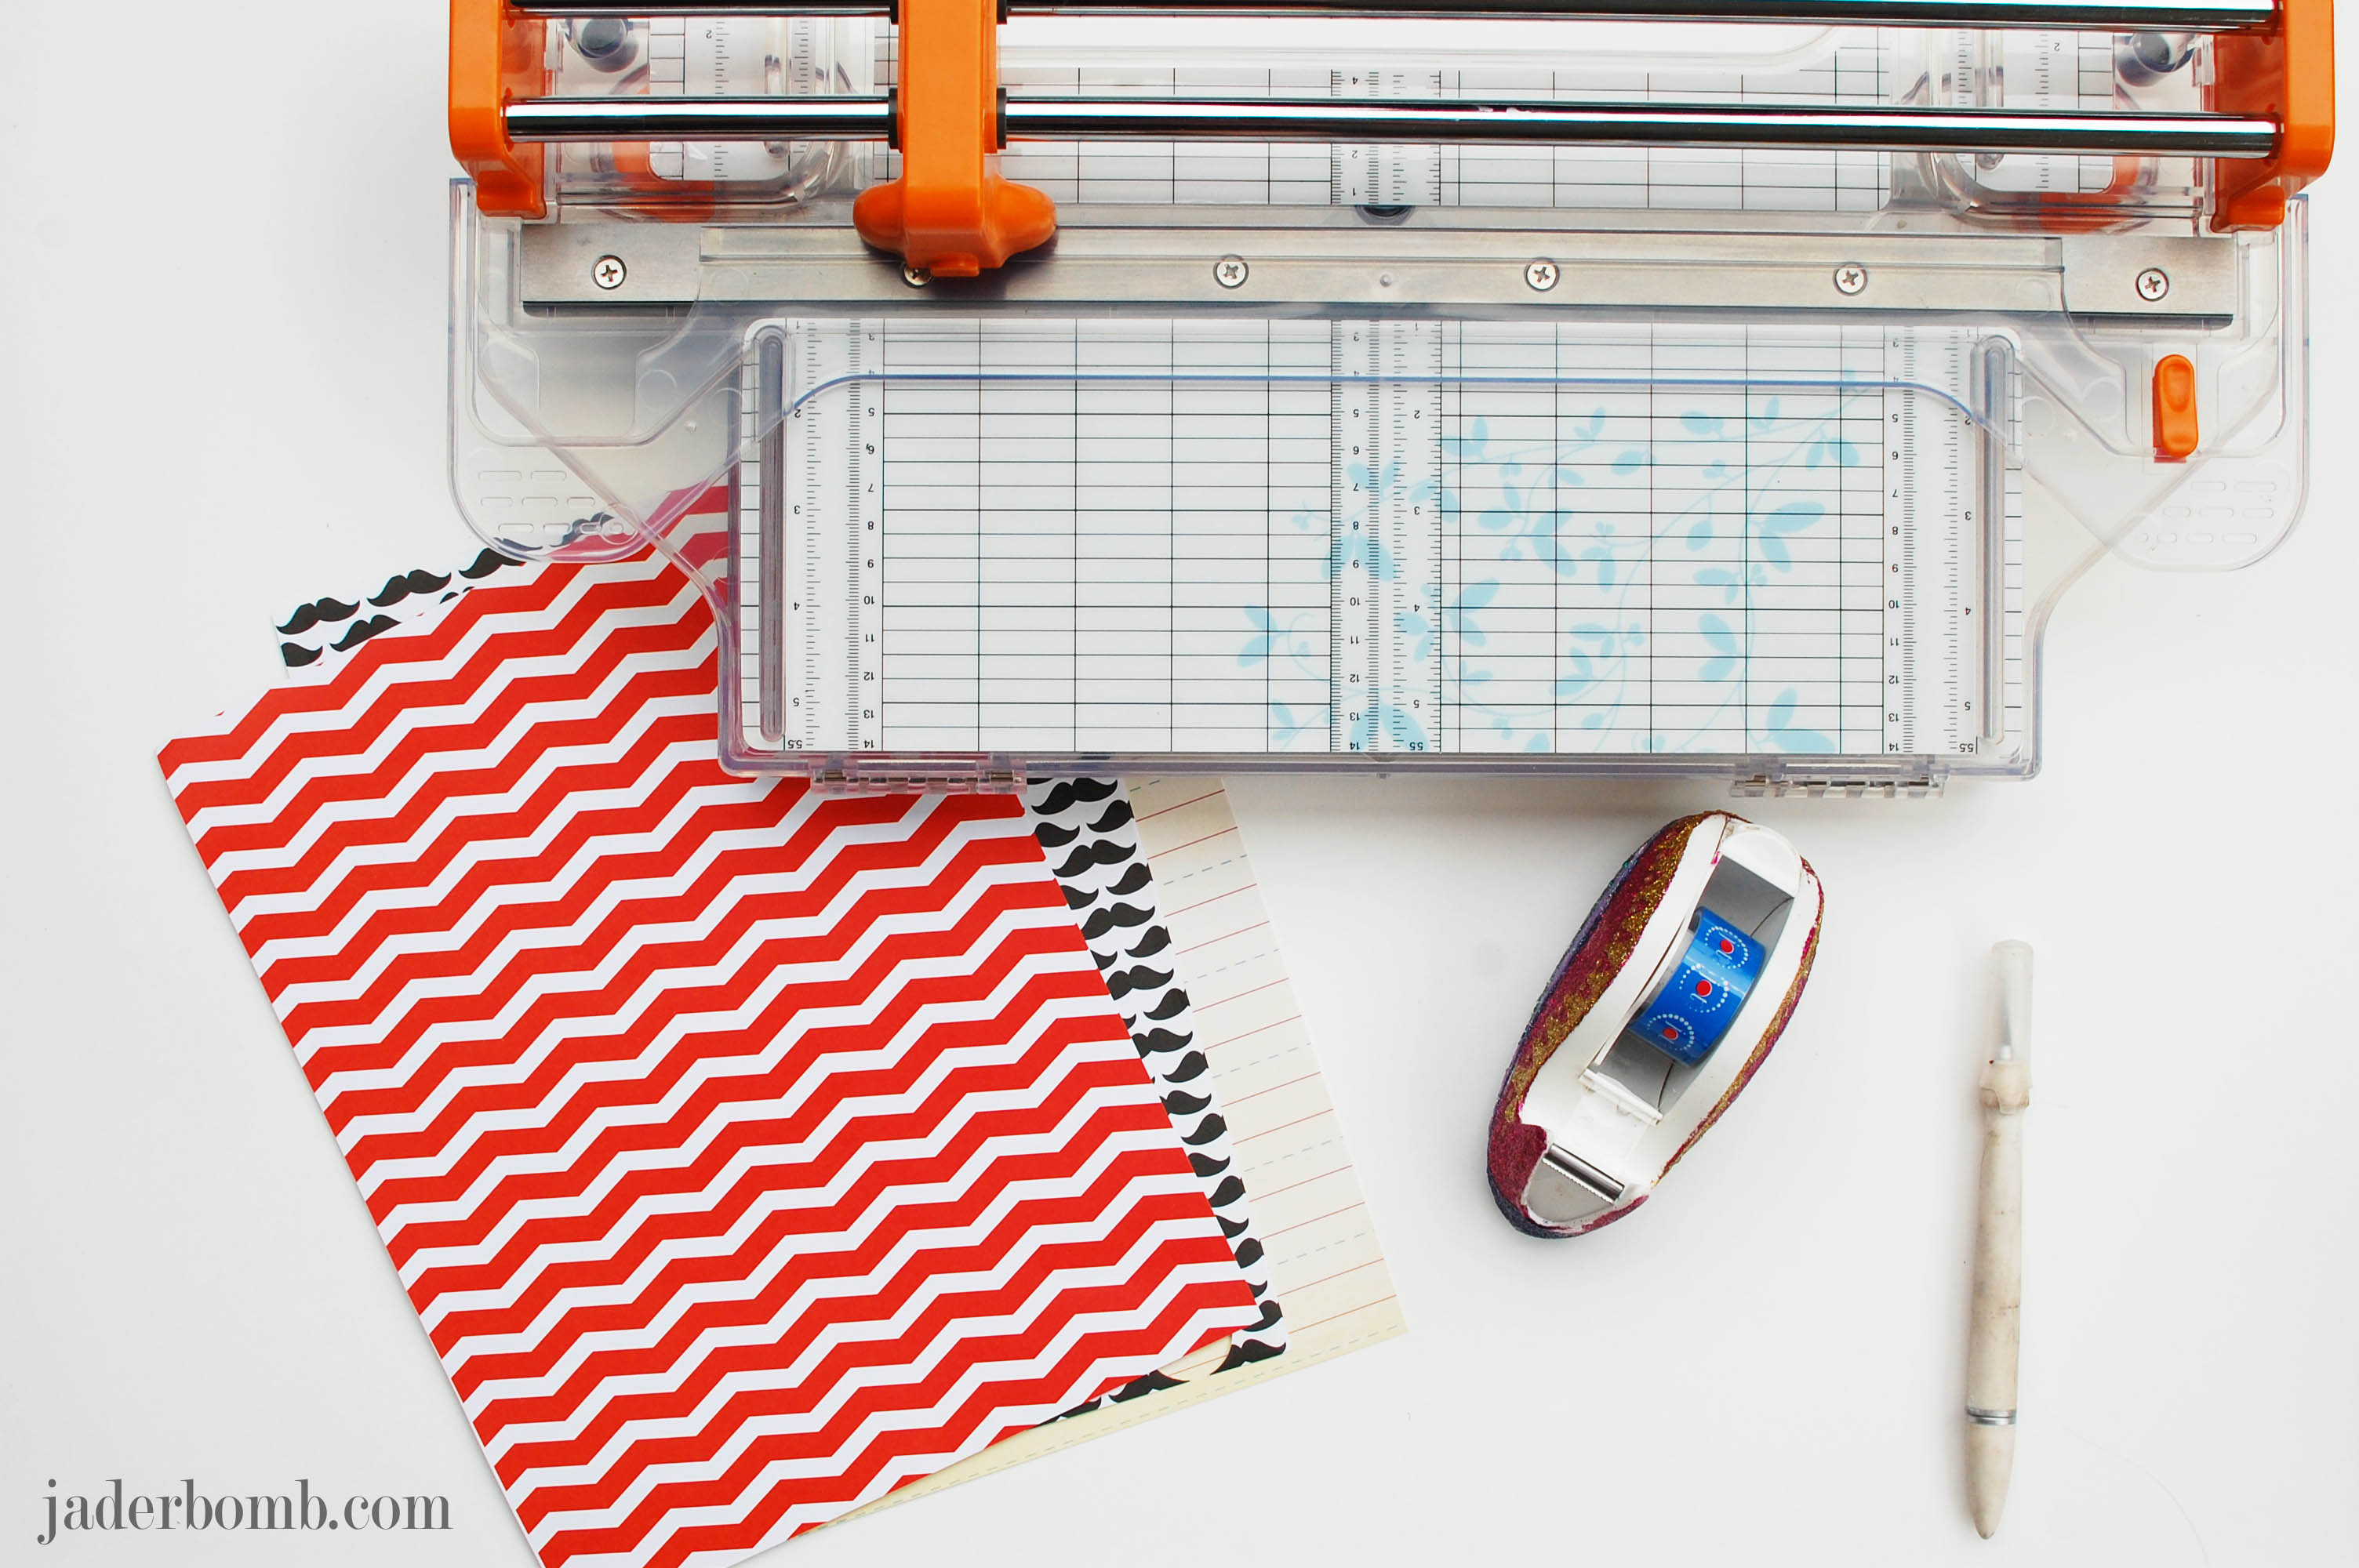
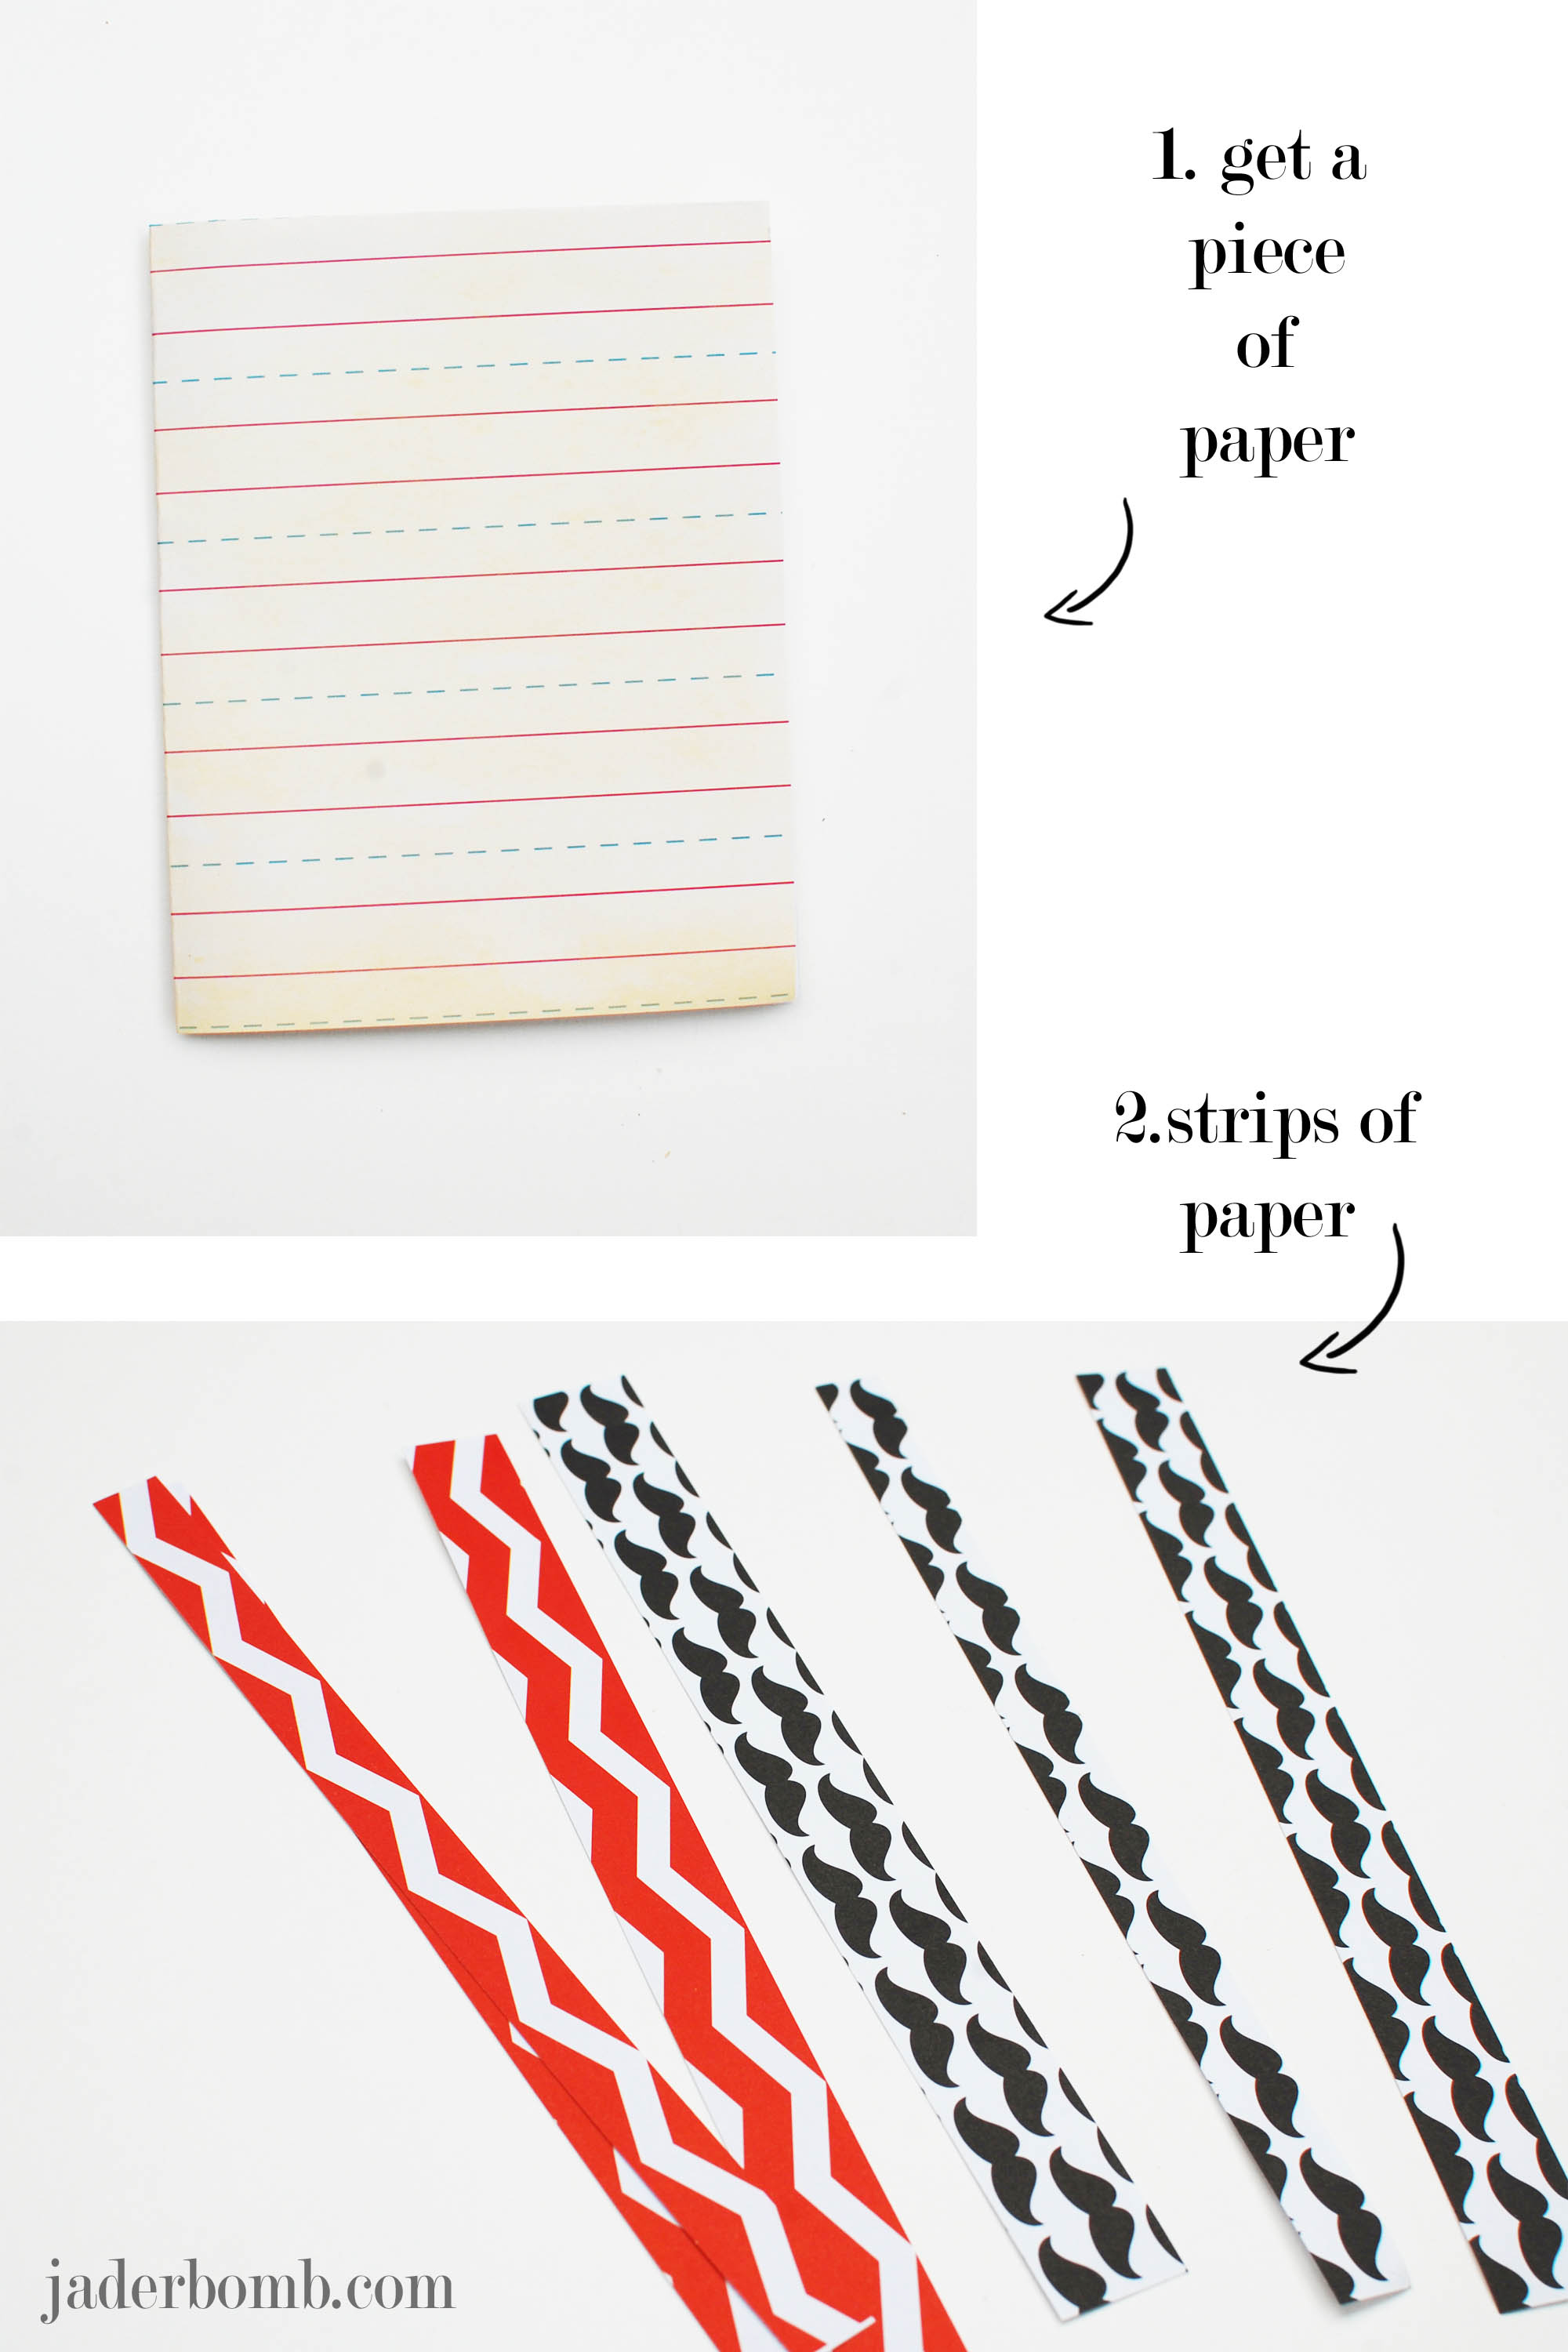
Get the paper that you want to use for the card. I used a piece of paper that looks like a notebook. I did this because I wanted it to look neat when I wrote inside. Simply fold your sheet of paper (8×10) in half, then fold it again in half.
Use your cutter and cut different size strips.
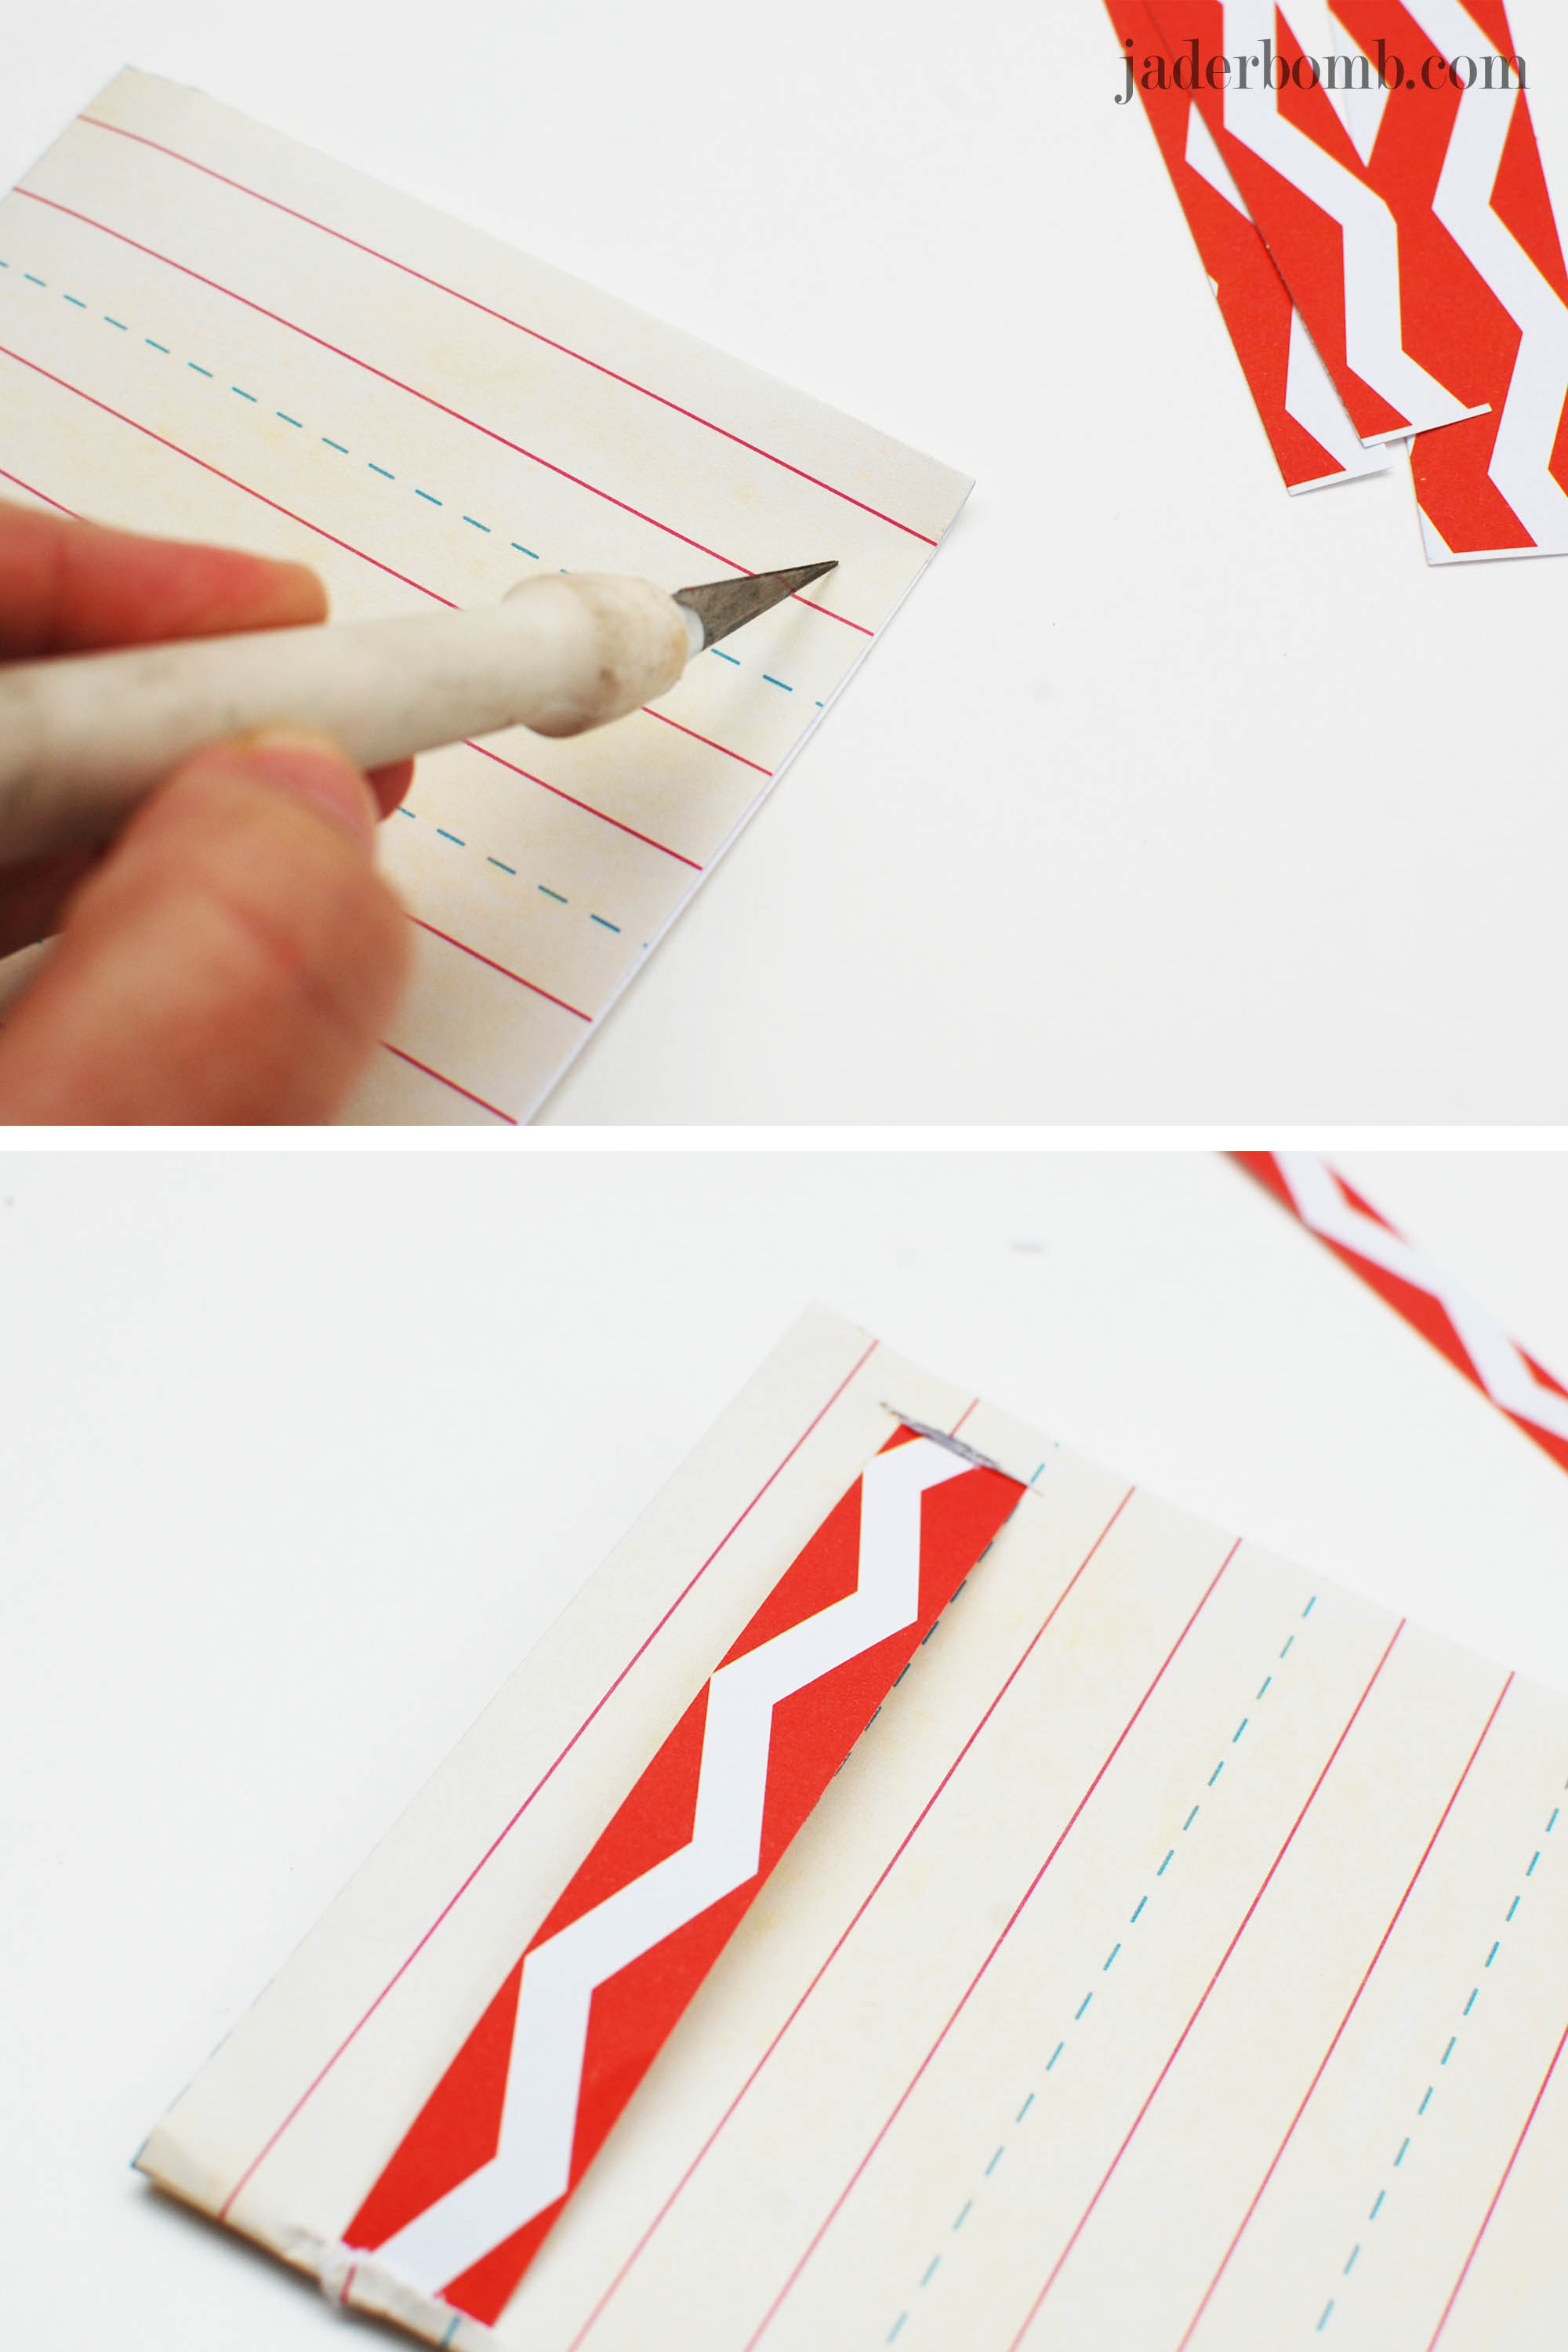
Start by making a small incision with your craft knife to the end of your paper. You want to be careful when doing this because you don’t want to cut a strip too big. You will slide your strips of paper through the slits then tape the back. I love this project because you can be super creative and overlap your paper as much as you like.
I made an abstract initial, a T. I then added different strips along the top to dress it up. Don’t be afraid to create a beautiful abstract card. Enjoy! I hope in return you will get a card in the mail, it’s super fun and brings you back to how things used to be.
See ya in the next post!
* I am now working with YaYa Club Clothing Company as their Social Media Manager. Make sure you check out their Facebook page HERE because we will soon be doing ton’s of awesome giveaways!
*If you are not sure how to use the Fiskar’s trimmer check out my review and tutorial HERE.
*Don’t forget this Sunday is Mother’s day! Not sure what to get you Mum check out this cool candle you can make her HERE.
*Other important dates coming up
May 18 is Armed Forces Day
May 24 is Victoria Day
May 27 is Memorial Day
Happy Tuesday Jaderbugs! I am super stoked about this week. I am finishing up on something HUGE and although I can’t tell you now, I promise to share in about a week. I know, I know… You are probably shaking your head at me right!
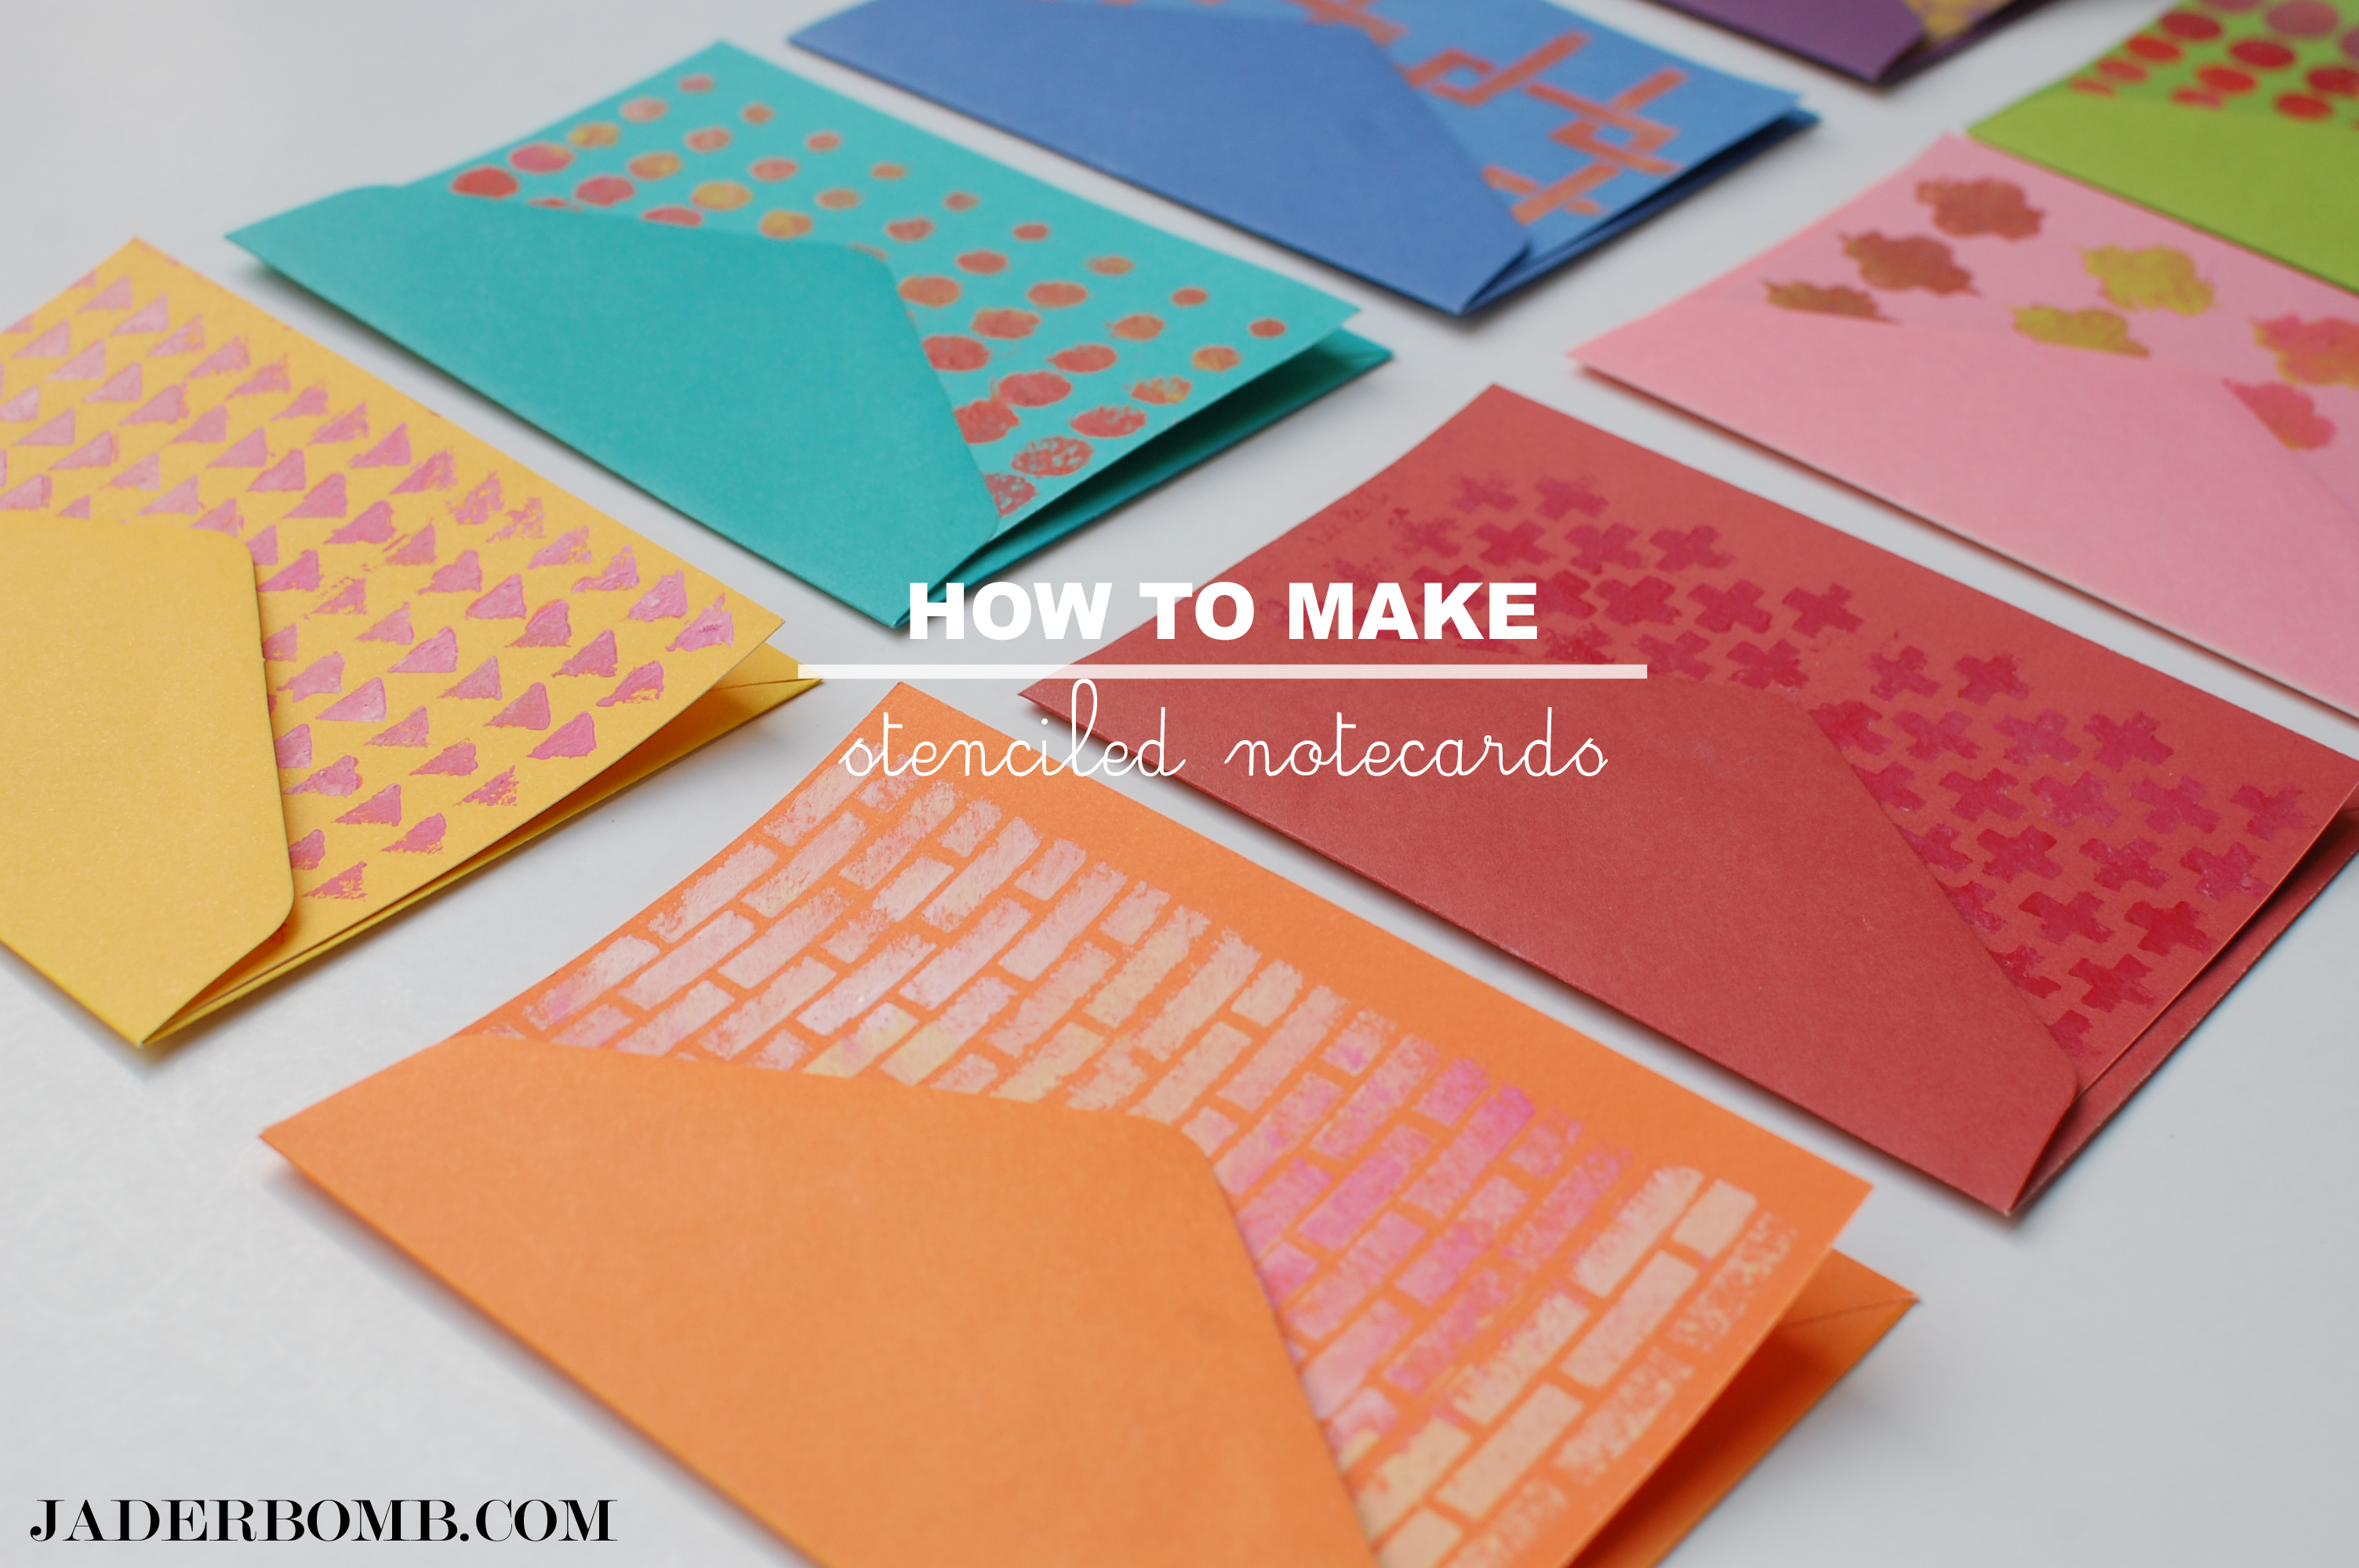
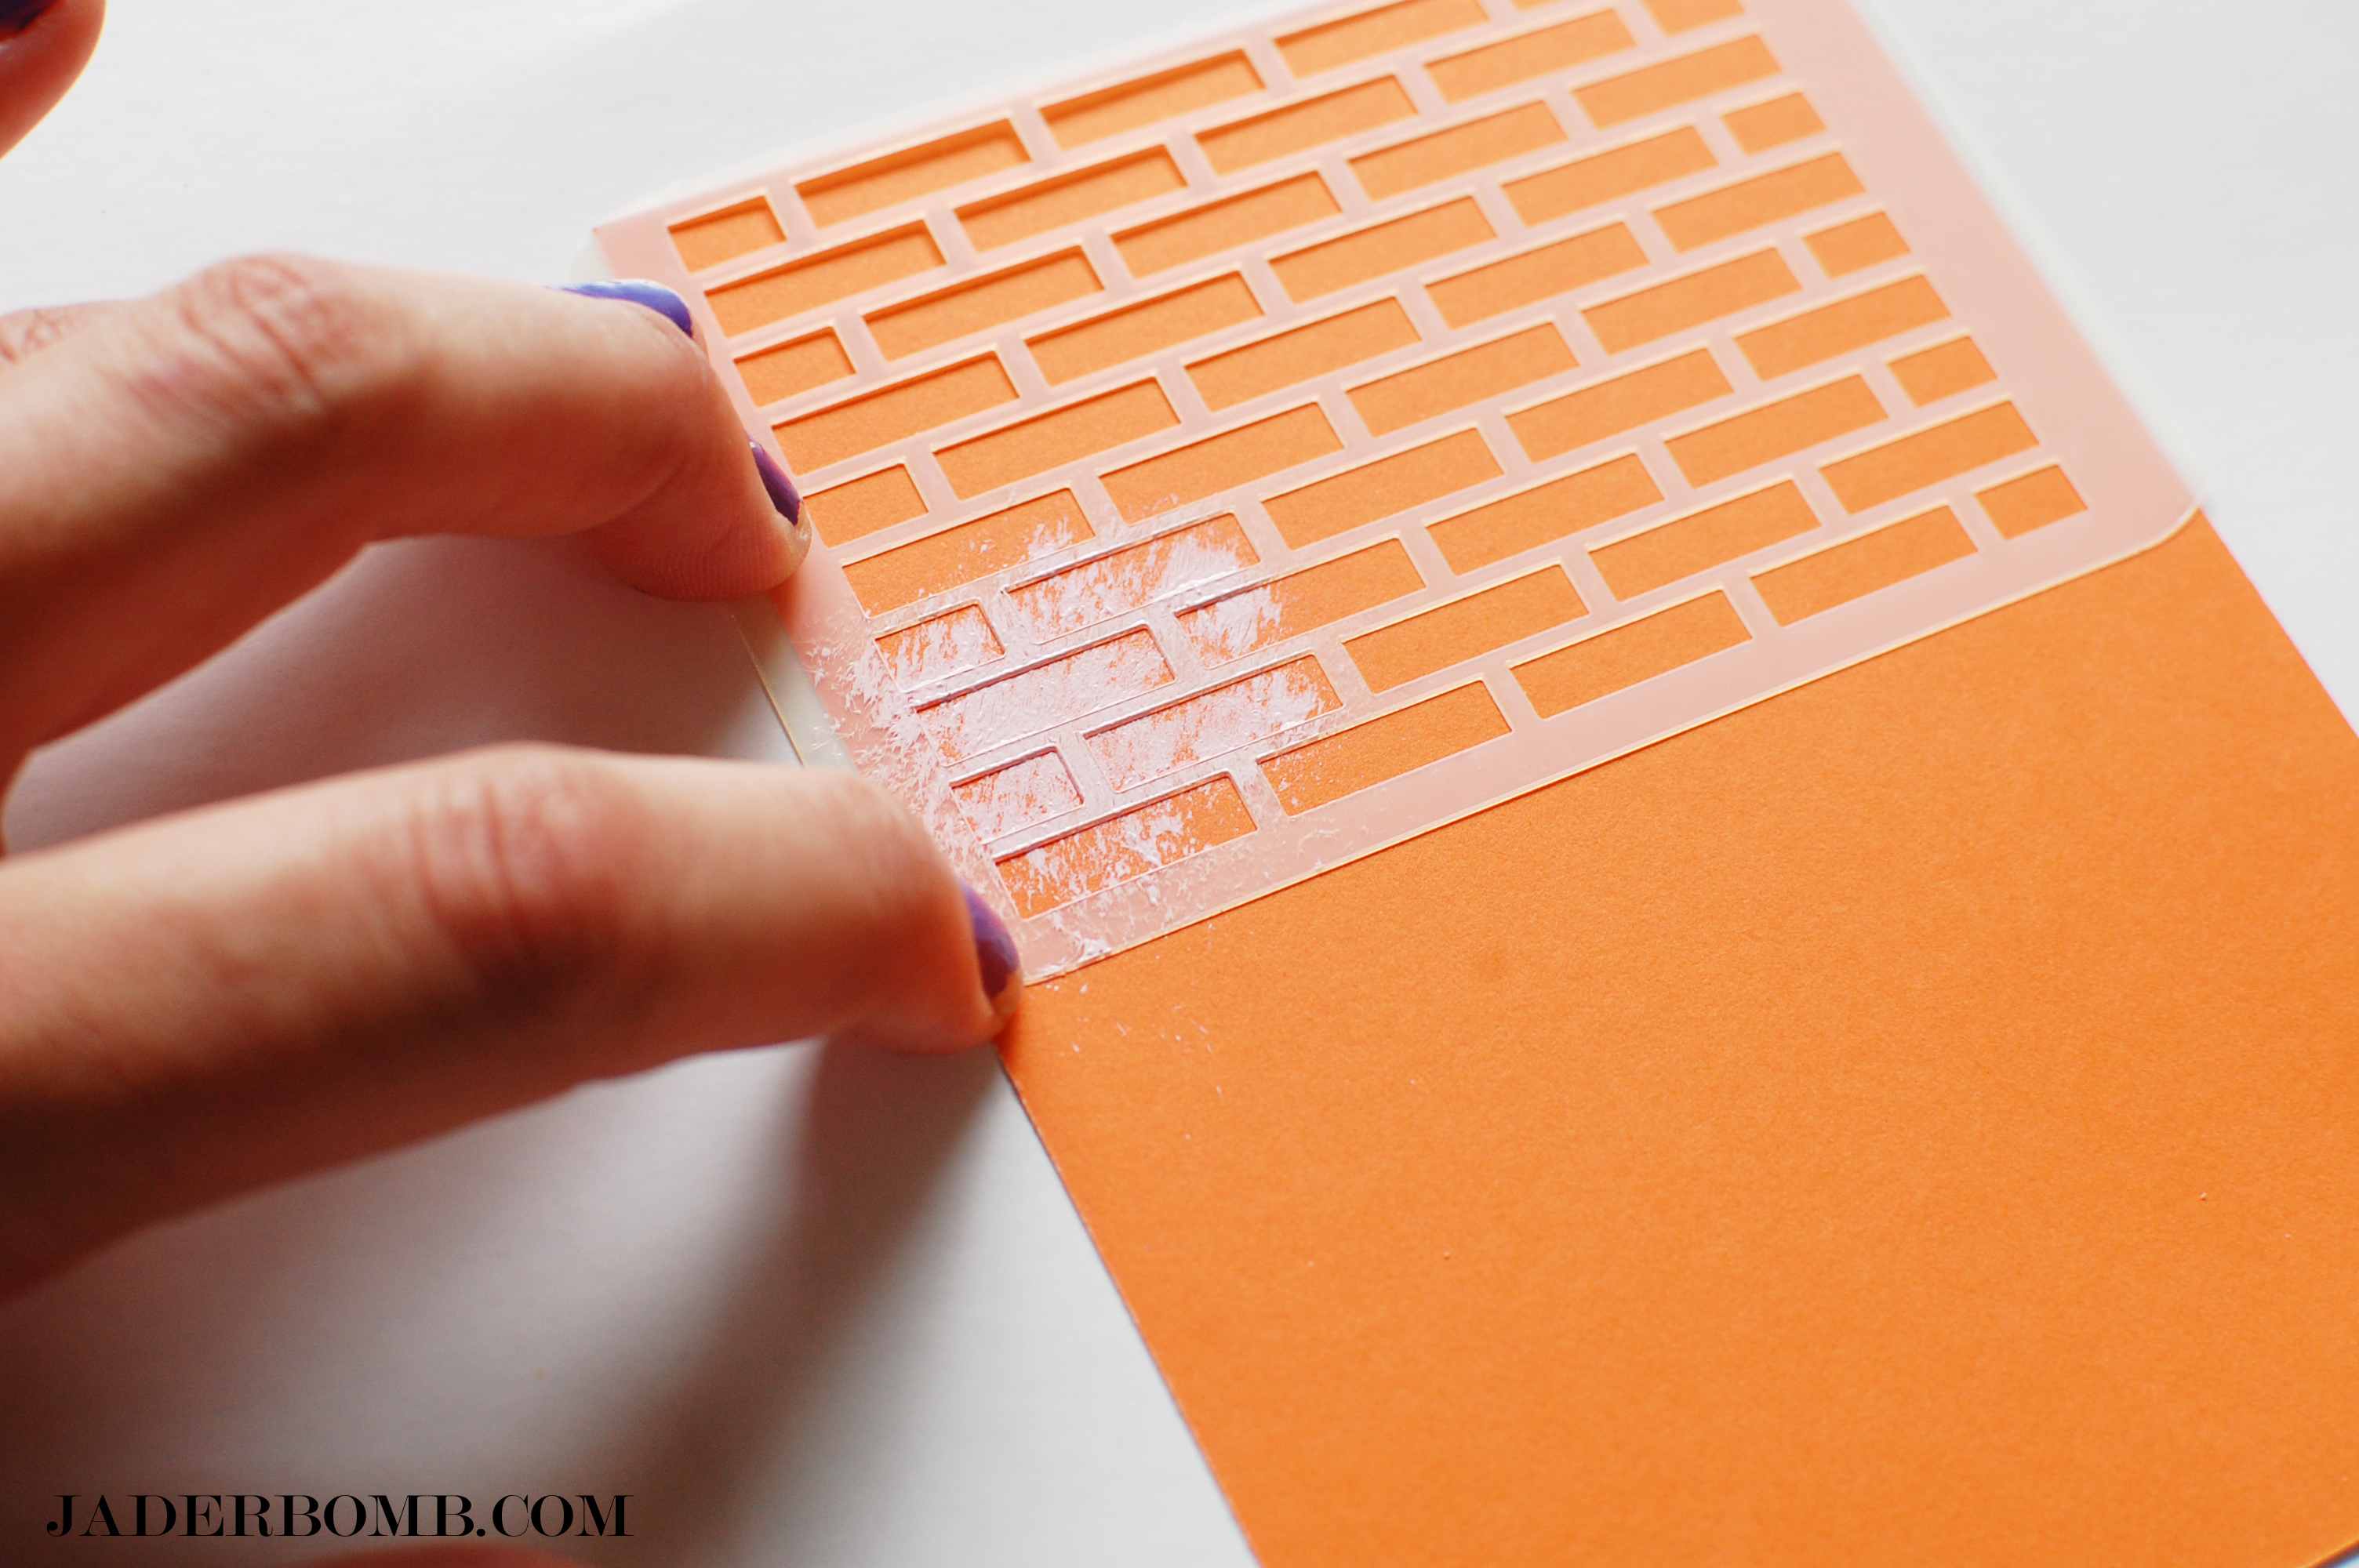
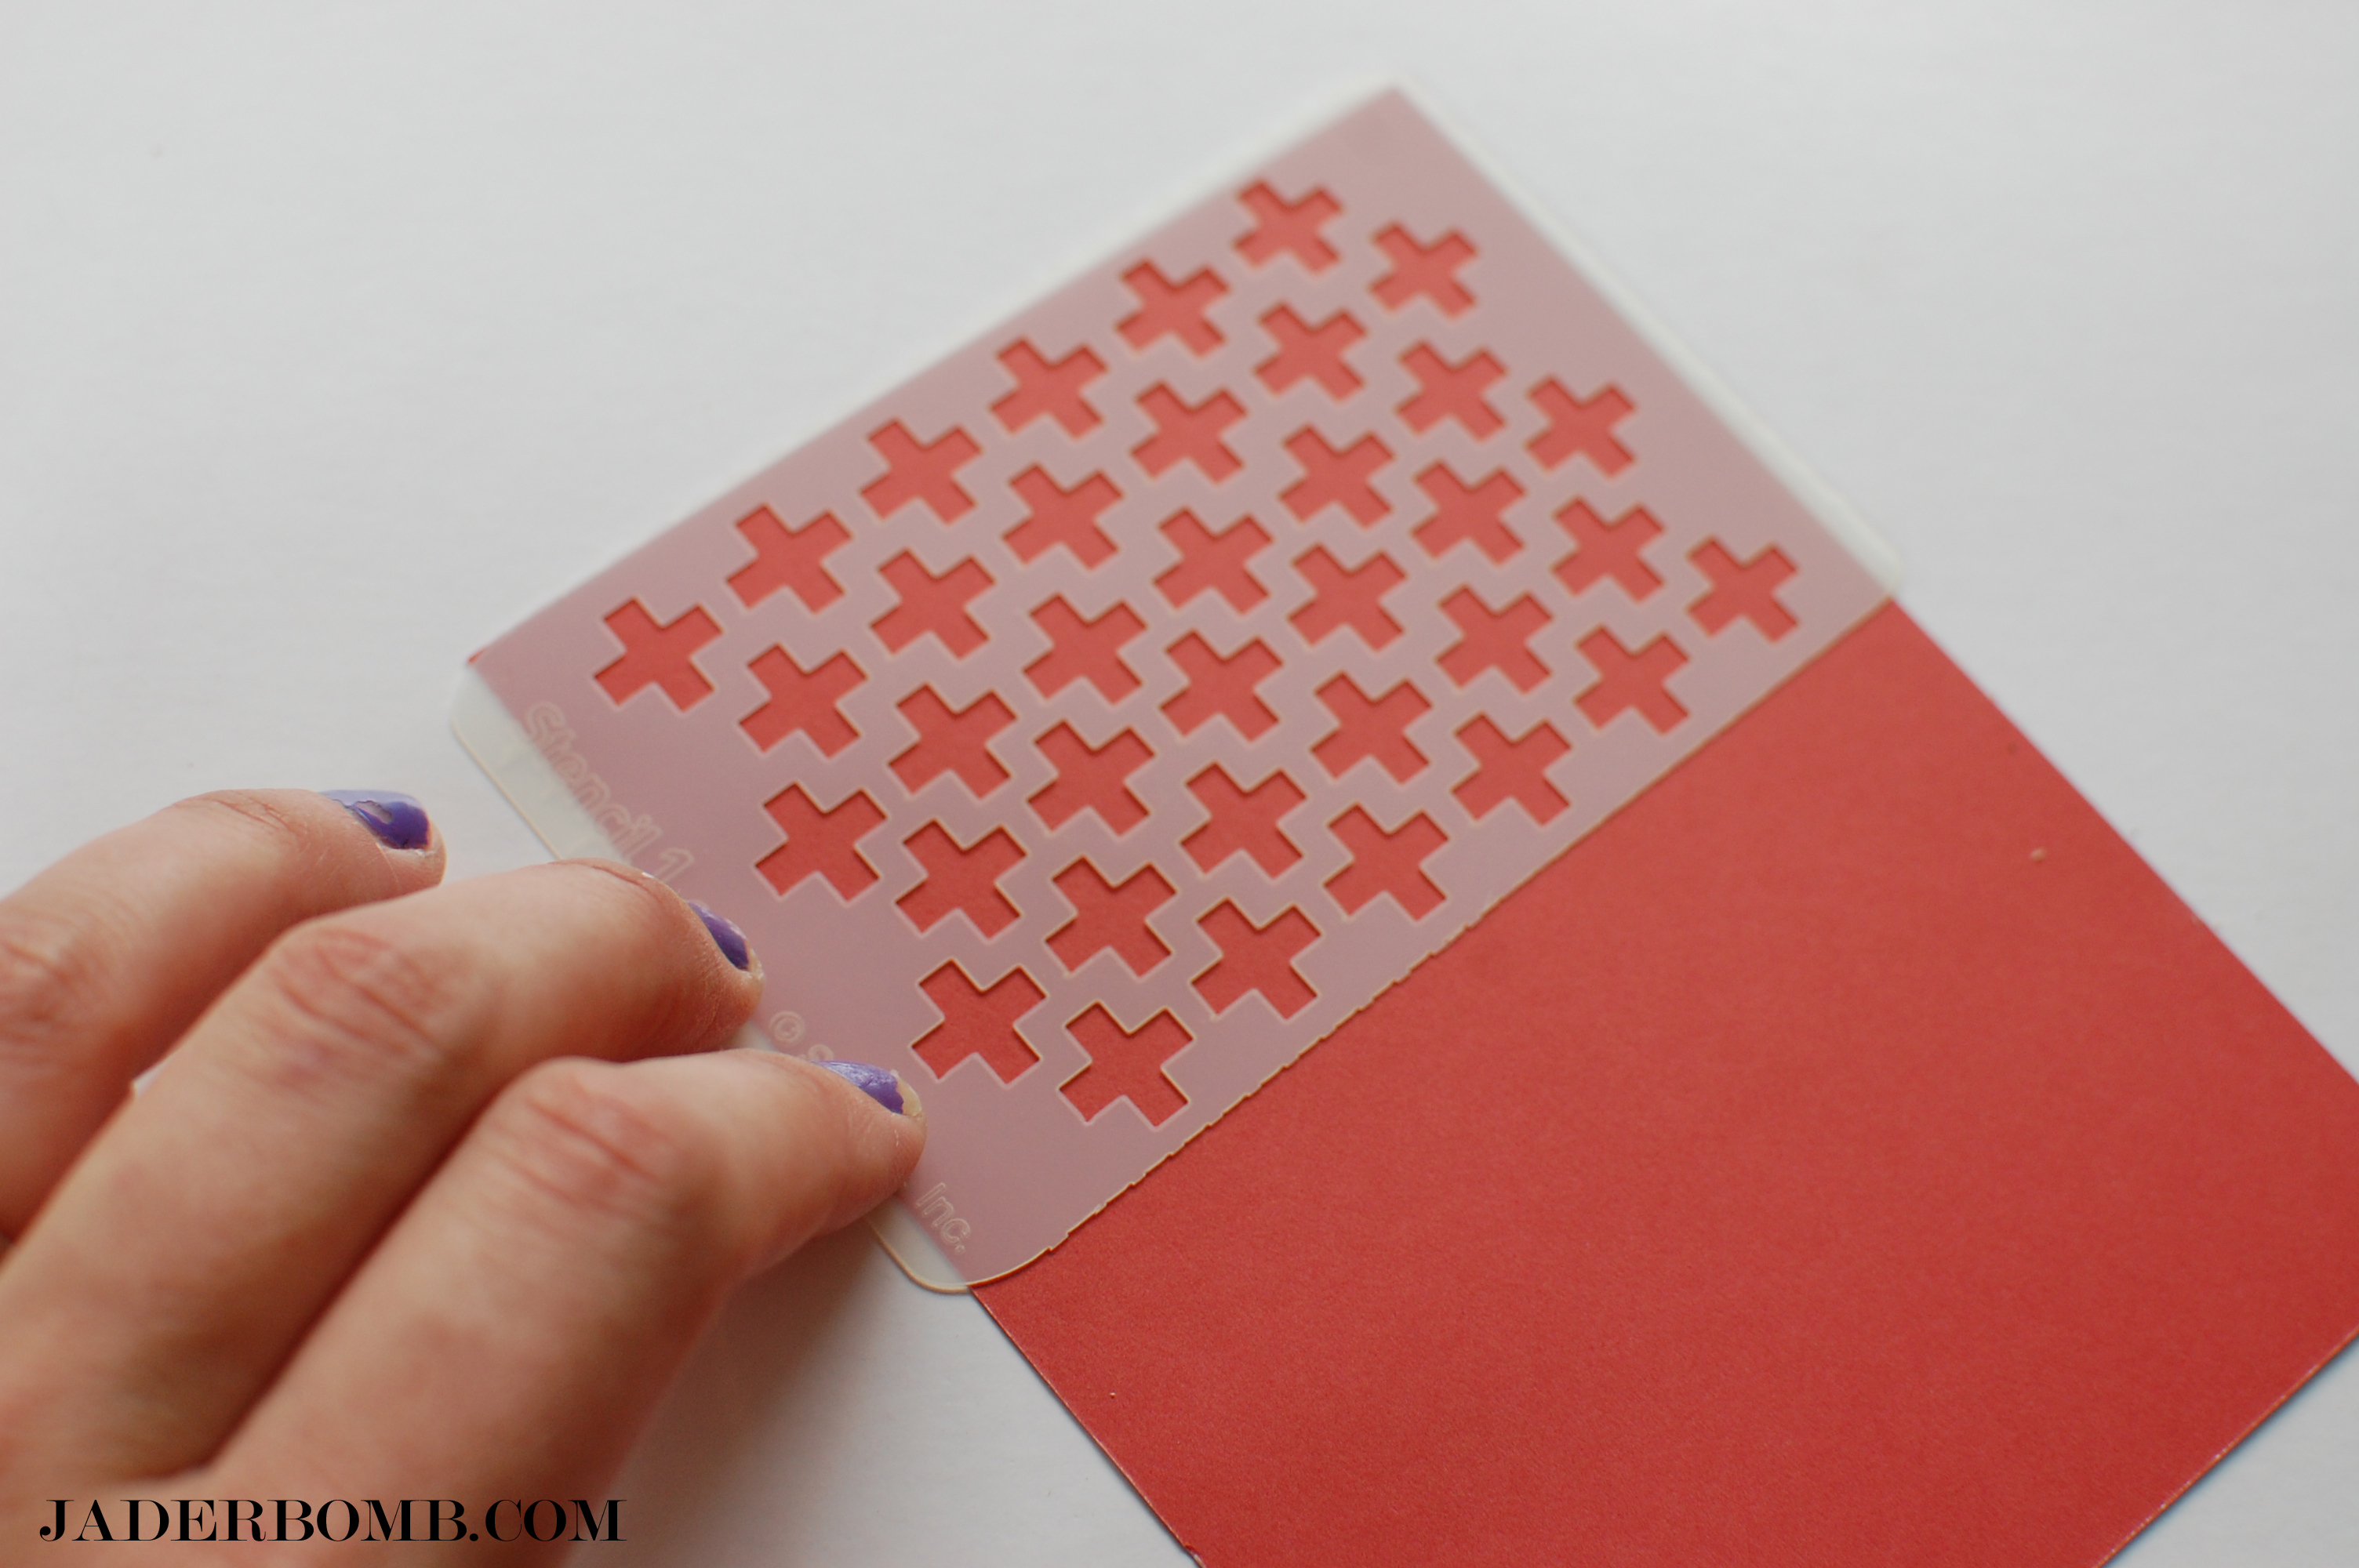
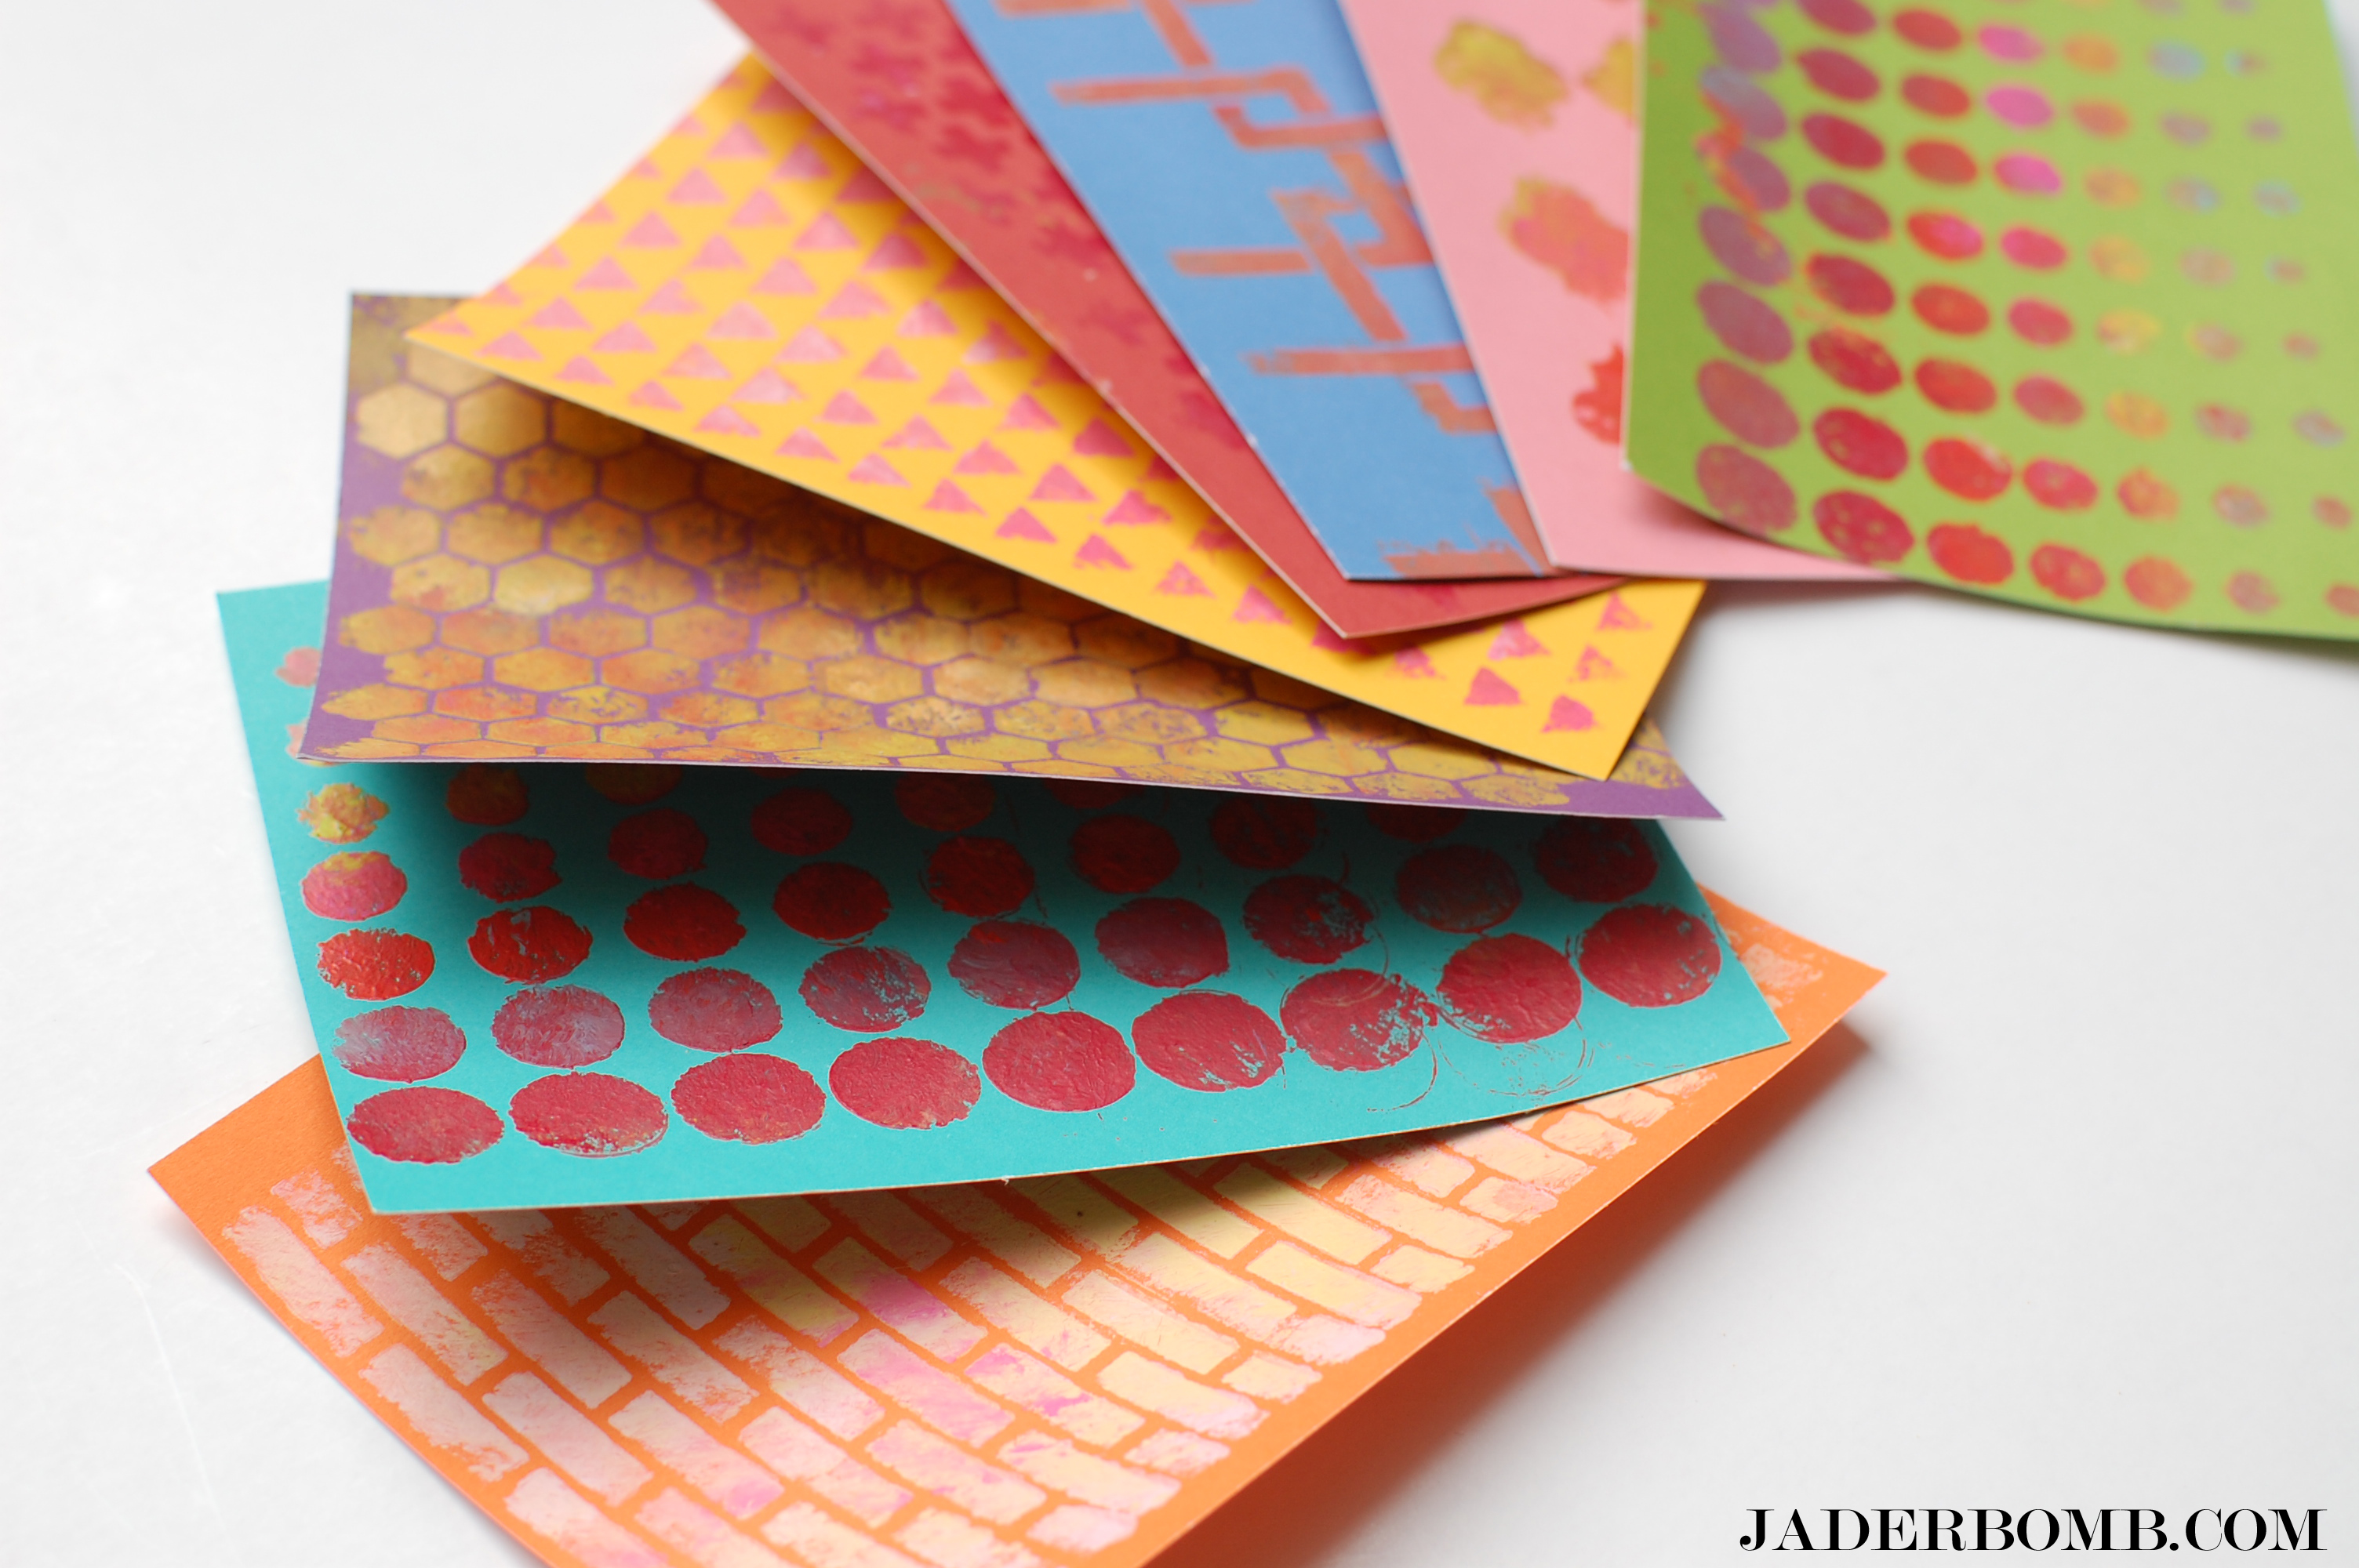
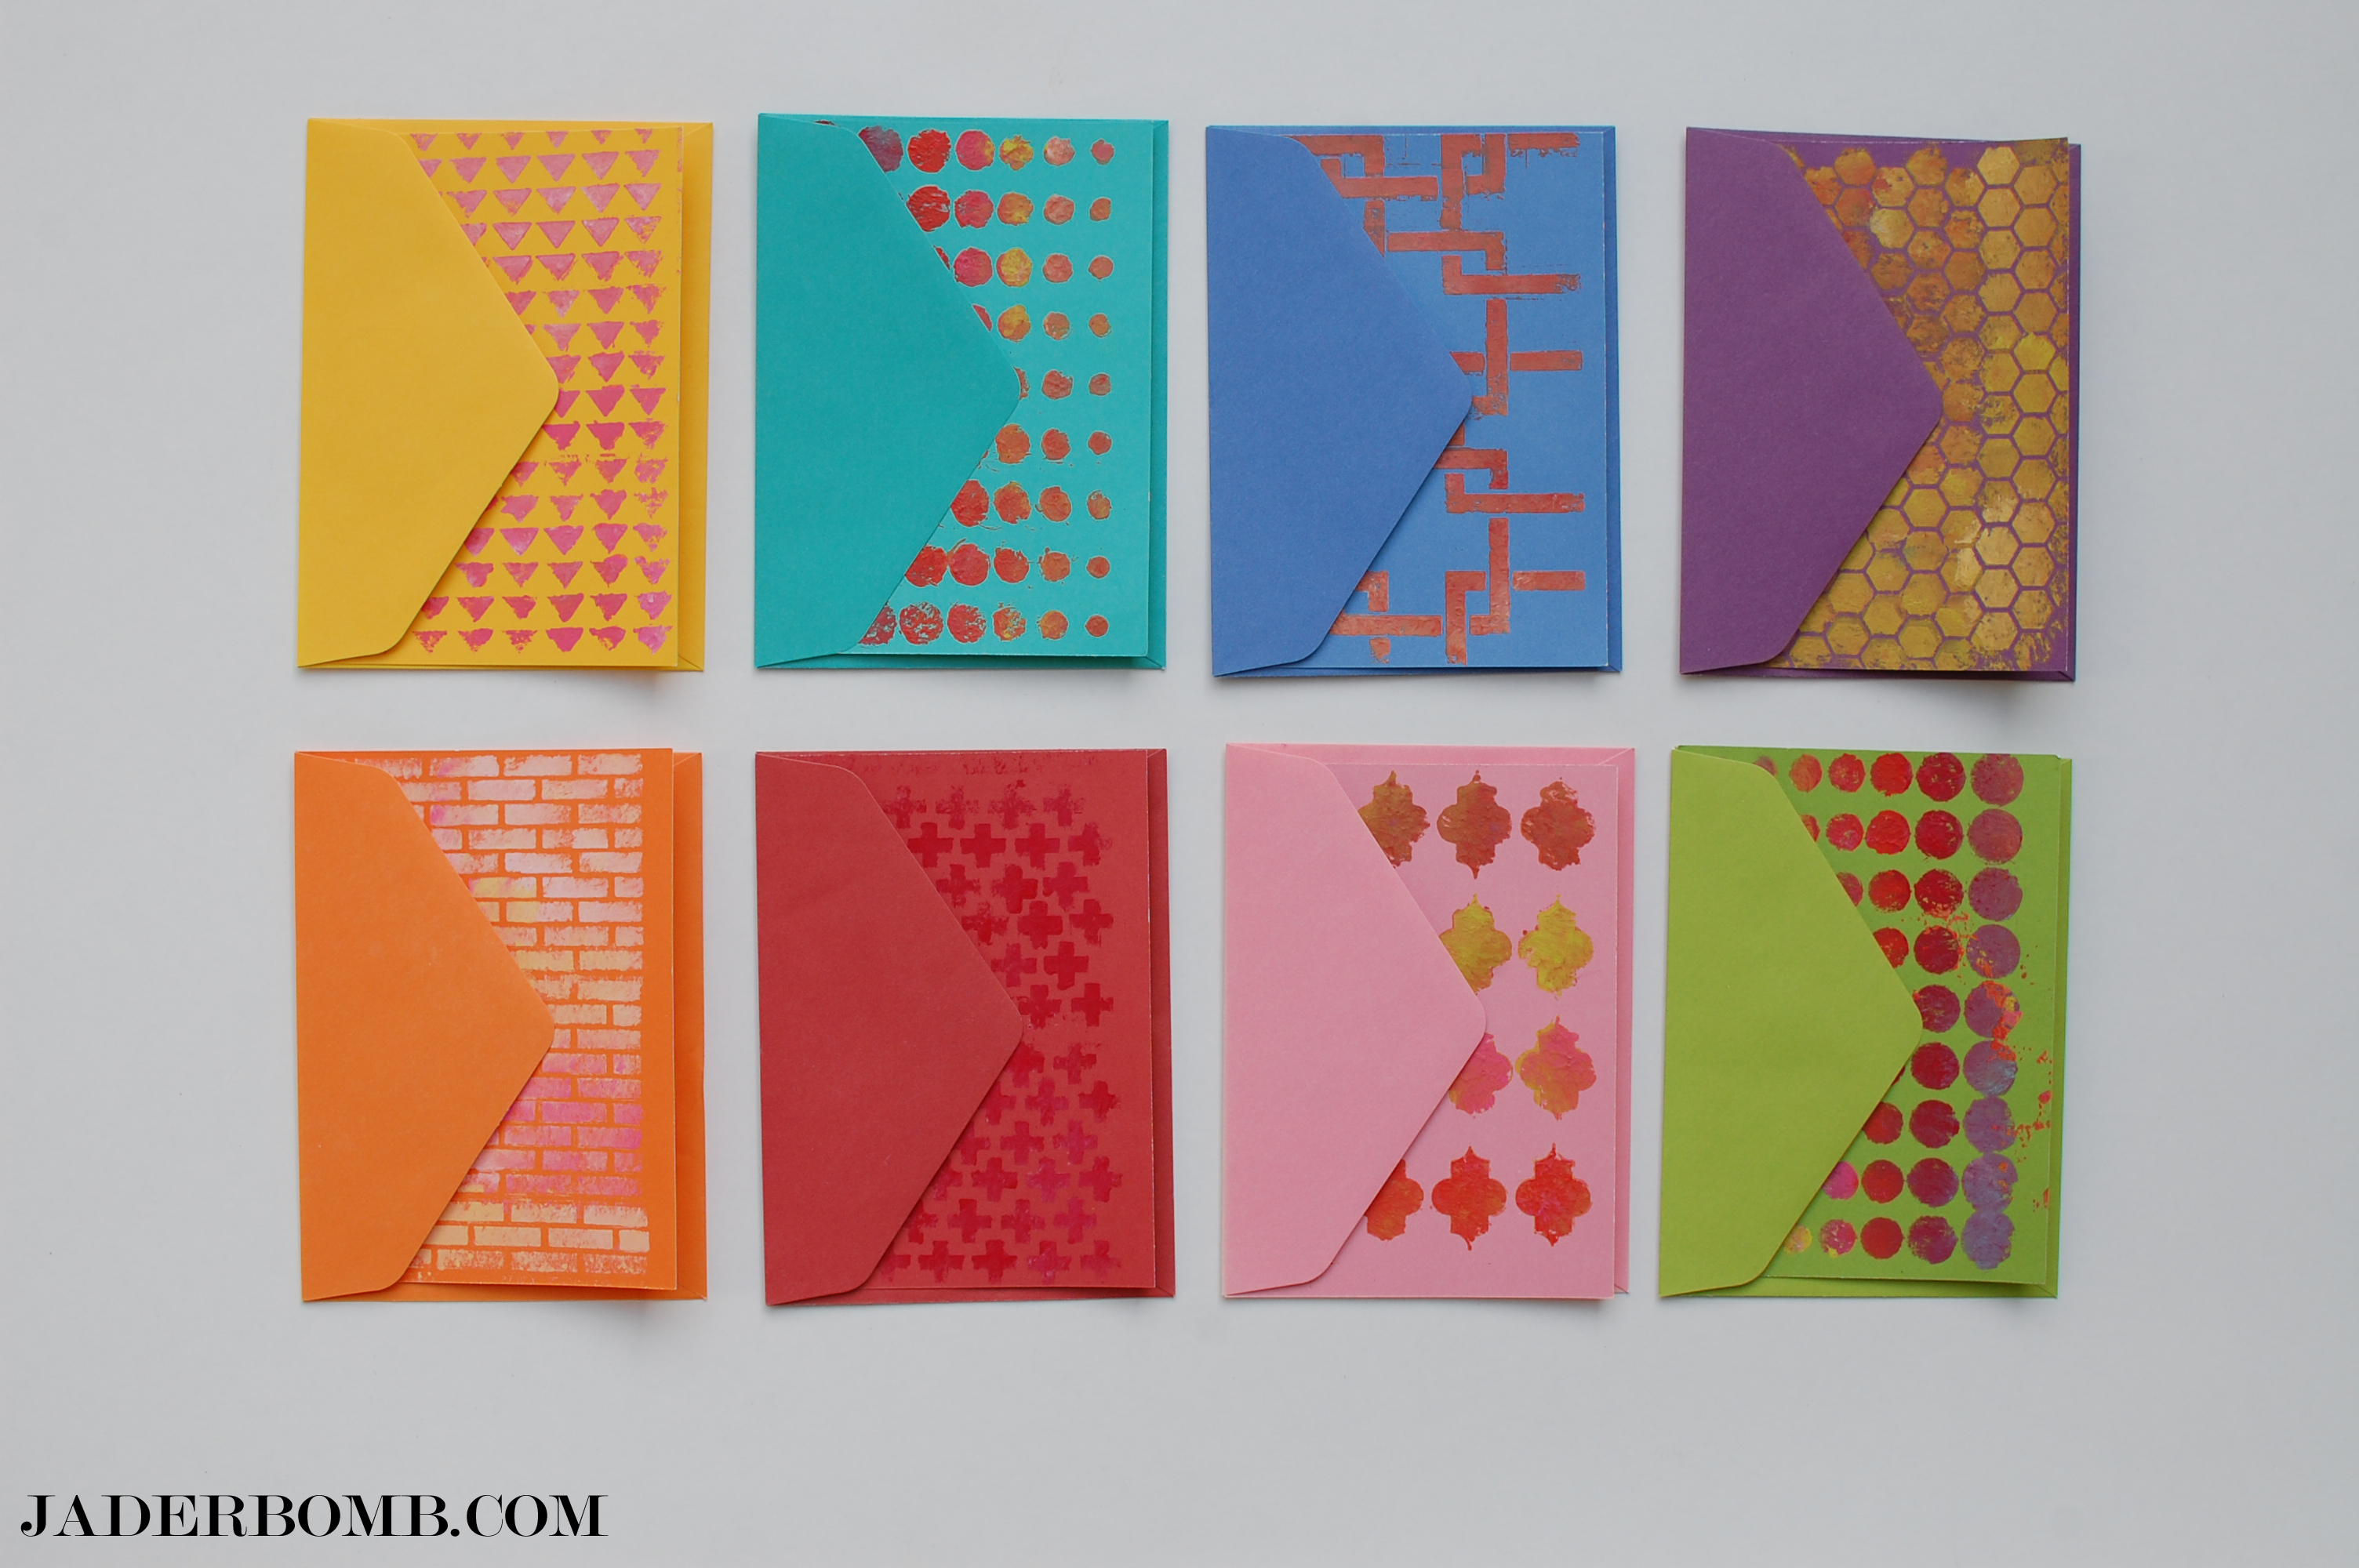
My good friend Ed Roth designed all of the stencils that I used today. I always look at his stencils and try to figure out what I love the most about them. I finally figured it out. It’s the simplicity of them. So many people think stencils have to be super detailed (don’t get me wrong he has a lot of perfectly detailed stencils) but you get what I mean. It’s the simplicity and repetition of shapes that attracts me the most to his stencils. I have been wondering what I would make with his small stencils and lemme tell you I figured it out. Since I am always mailing notes to friends I figured it would be much better if they opened an envelope to a hand crafted note card. RIGHT!
If you are thinking on the save wave path as me then let’s hurry and get on the stencil train…..or stencil ride…or whatever ride, cause it’s time to do stenciled notecards.
Don’t you love how detailed they are! I just know I will make someone smile with them!
Start by placing the stencil on top of the note card. Gently press one side of the stencil to make sure it does not move.
You can use any stencil you want for this project. When you move to the next section of the note card place the top line of the stencil on the last one that you painted. This will give you consistency overall.
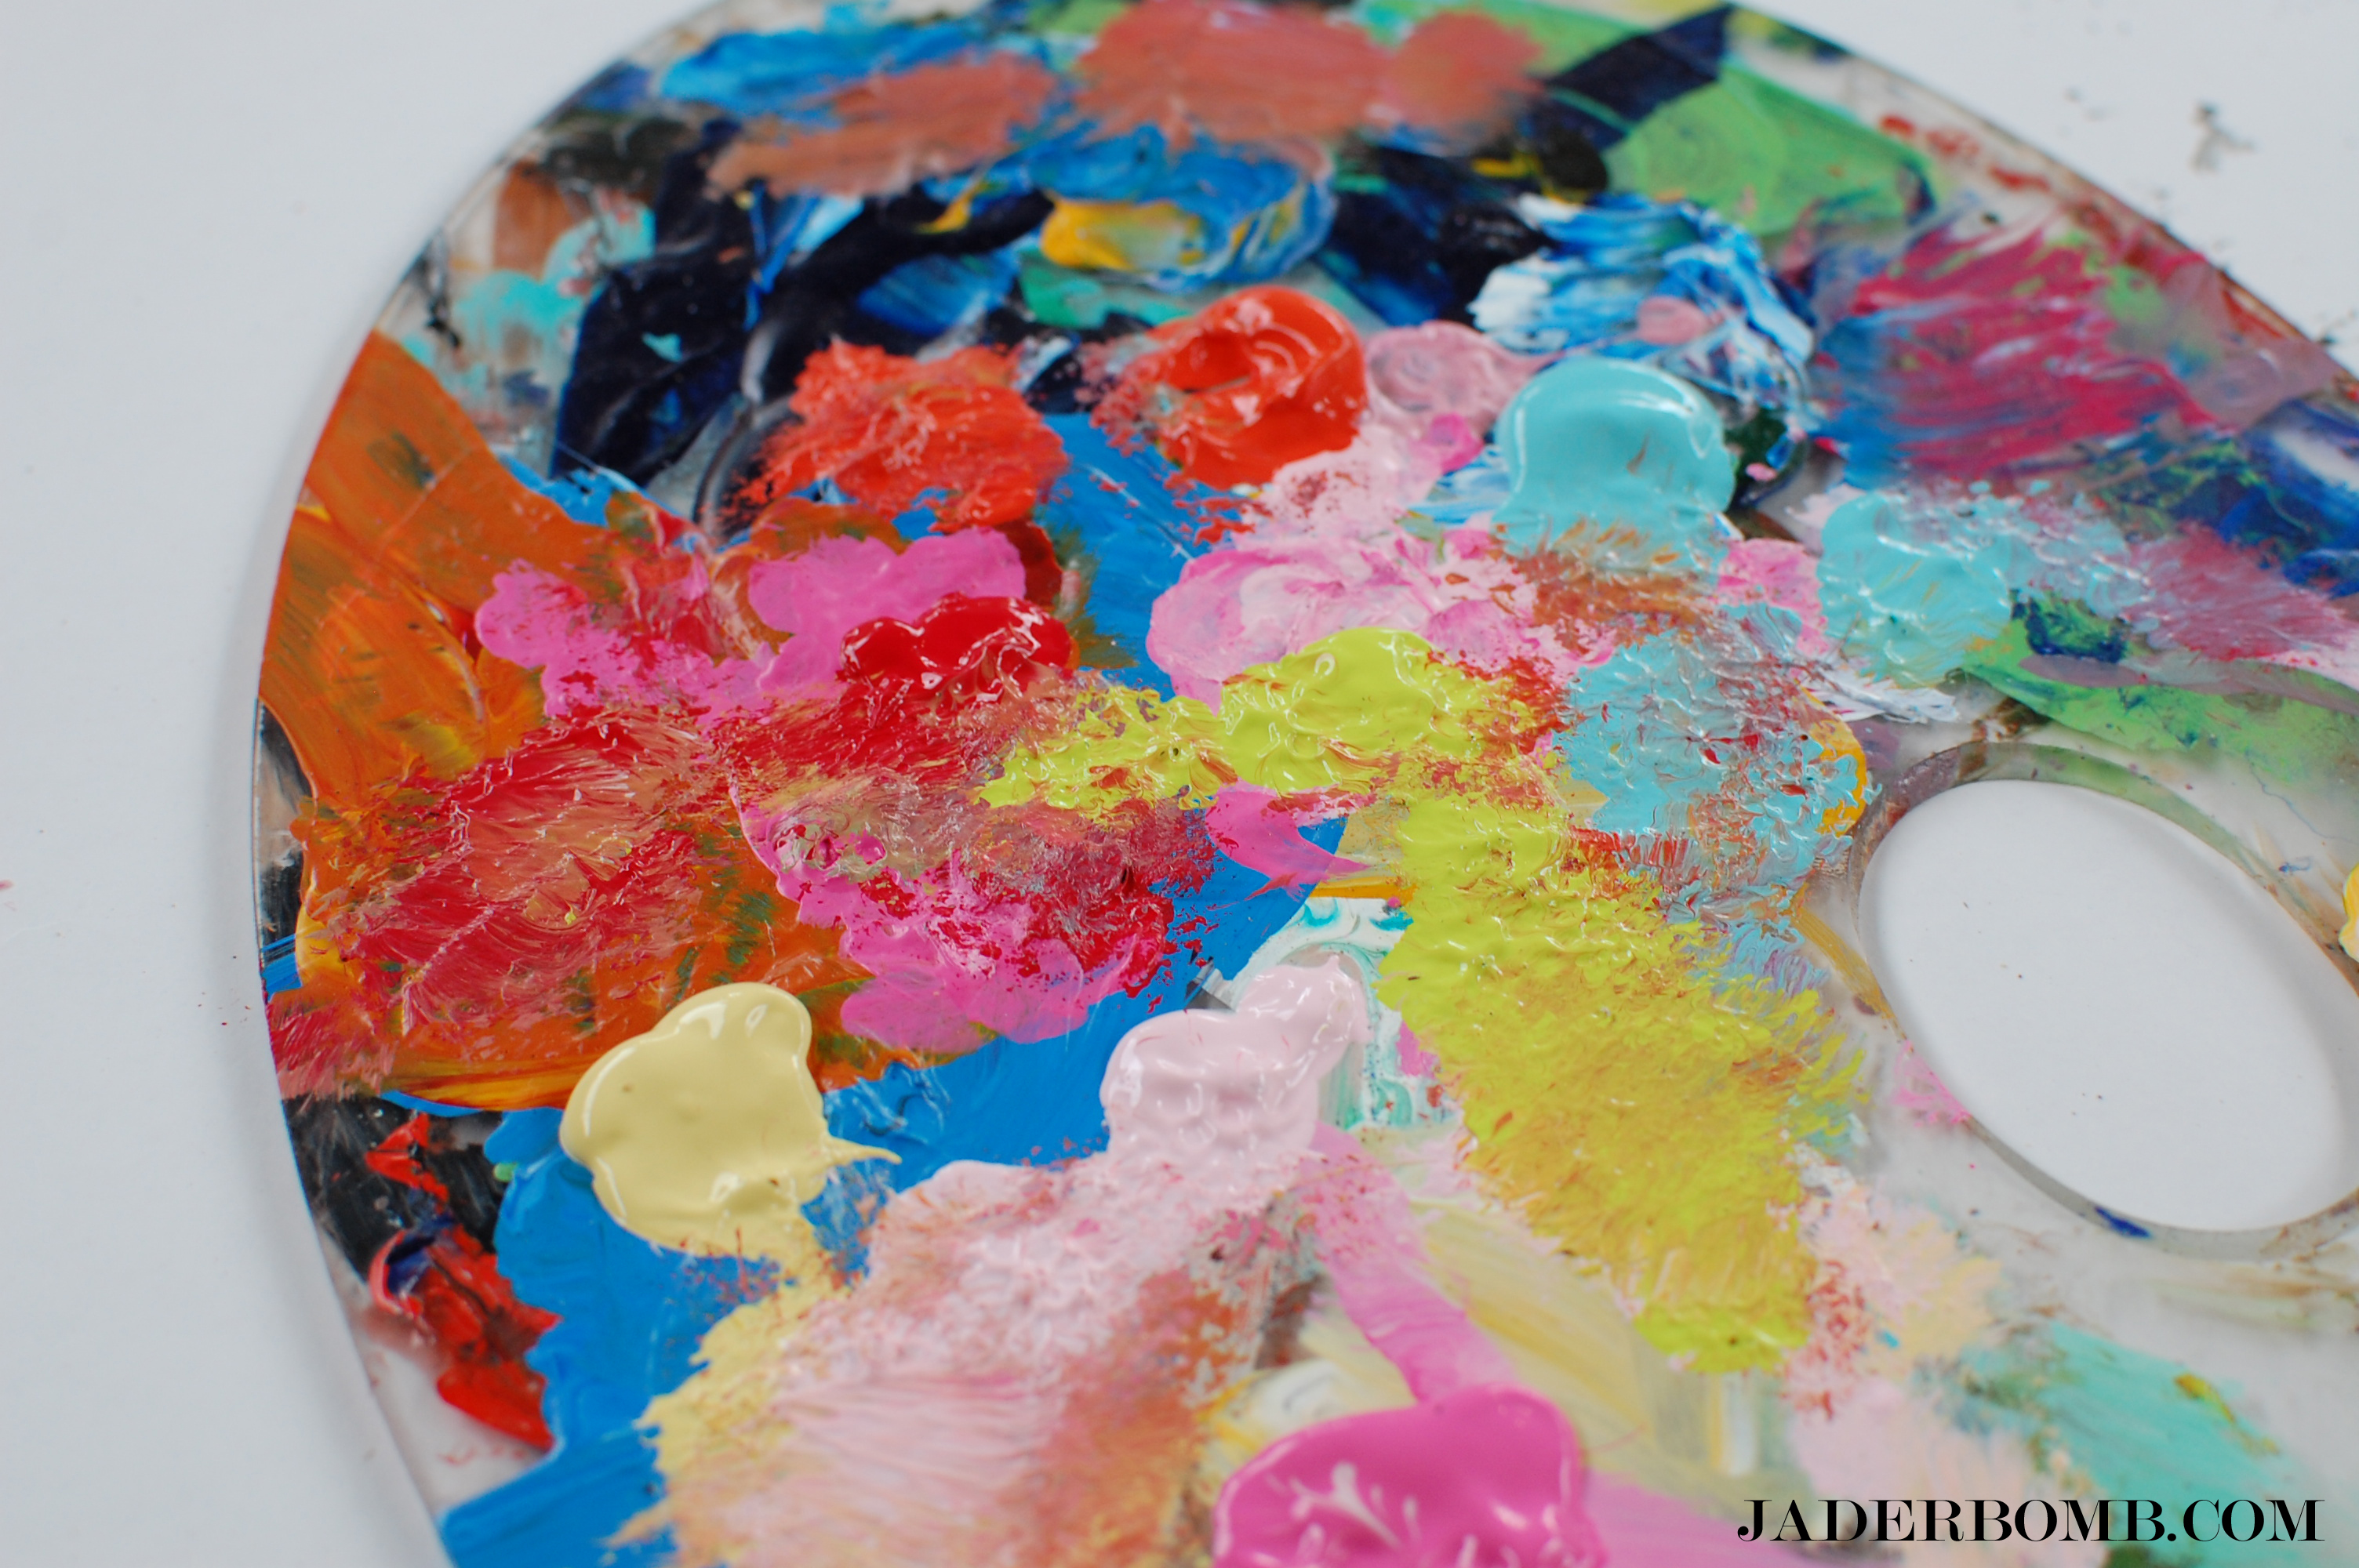
I put a little squirt of each color I am using on my pallet. I love the way dried paint looks.
Make sure to dab in multiple colors when doing one card. You can add a few colors to make it pop.
If you want you can even stencil the envelope!
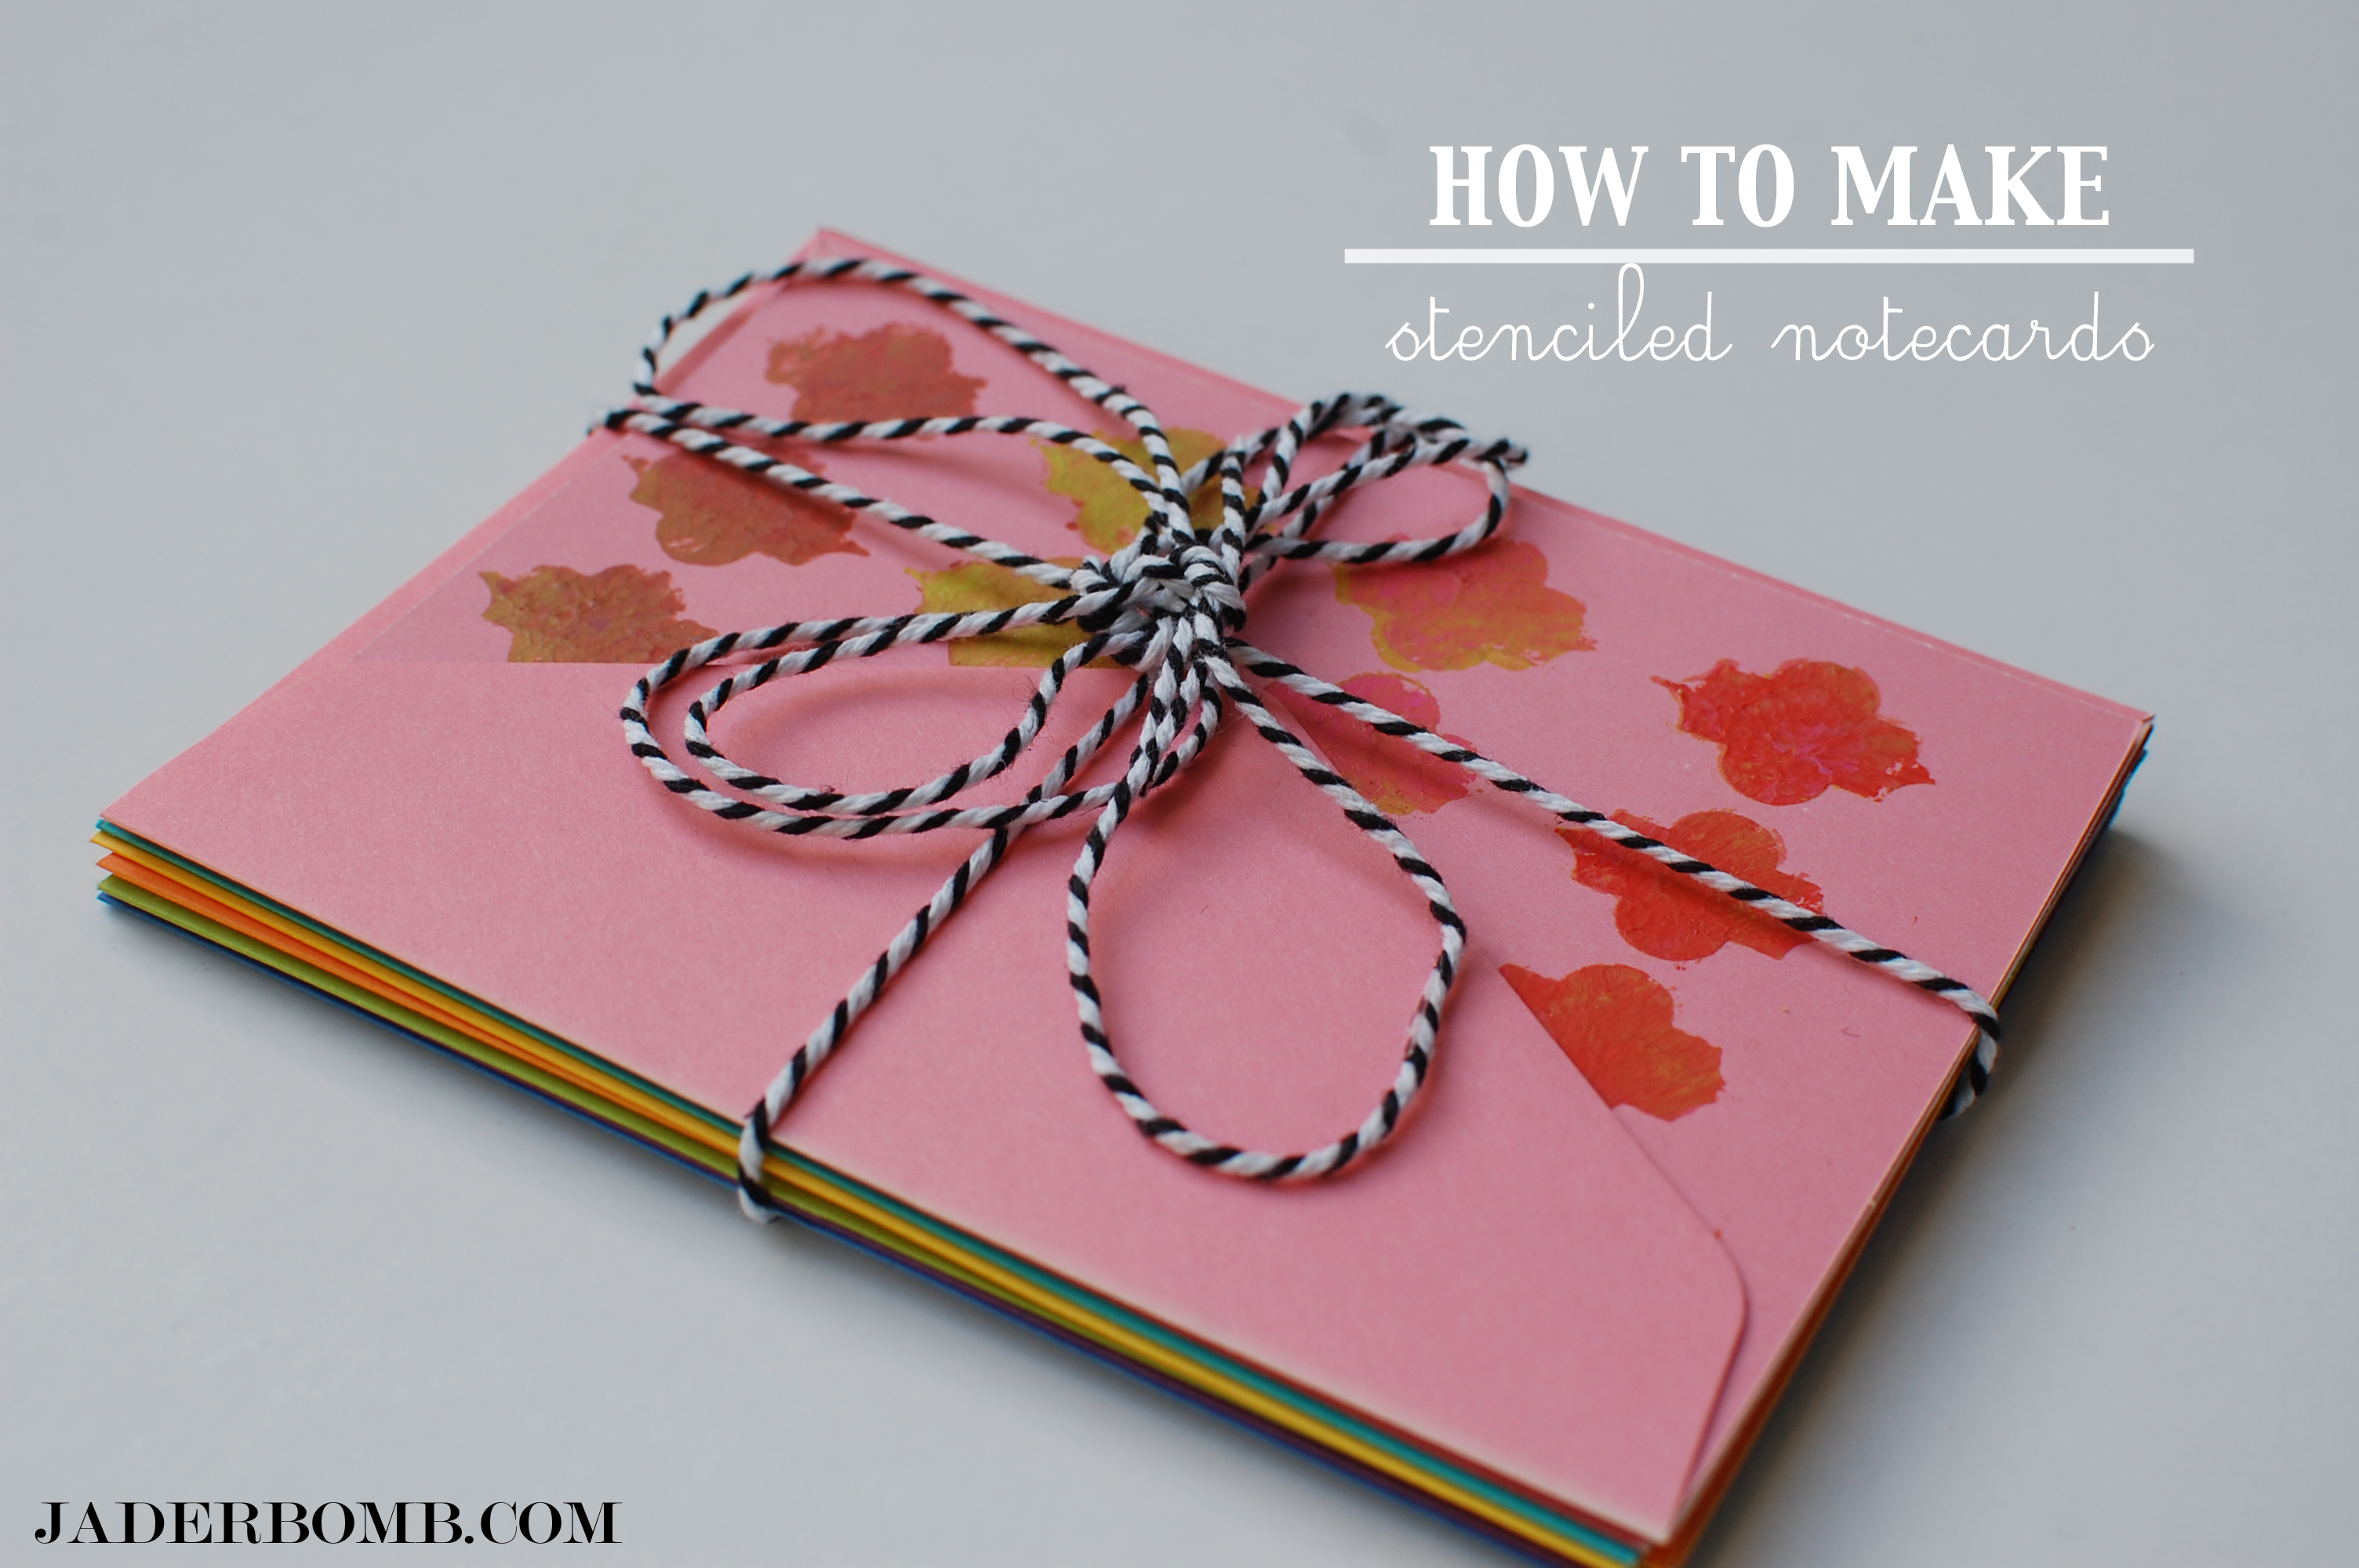
I hope you enjoyed this crafterooo boo boo! Now off to get some other crafts done. Don’t forget to find me here! Let me know in the comments what color notecard is your favorite. I’d LOVE to know!
Oh HAPPY day Jaderbugs! I have this post I am working on featuring 5-10 homemade crafts you can make to decorate your Christmas tree with. That will be coming up this week but I wanted to share a few of my favorite ones with you now. I love making things that fill those empty spots in my Christmas tree. You know? Those spots that are screaming for love and affection? This year is the FIRST year we ever got a real tree. It was so much fun going through the entire process. Lil one had fun picking it out. The one thing I didn’t realize is that you can’t BEND the branches like a fake tree.
HAHA.
Do you know what this means? HUGE spots that need love and affection. I tried sticking ornaments in those lonely spots but it was just not working. Our living room tree’s theme is GOLD, WHITE and a pop of red. I thought why not add a little bit’O candy in the tree and that is where this idea came from. I didn’t want to go out and buy candy ornaments because they are super duper expensive and I just don’t like throwing away money like that. I hope you enjoy this craft because they turned out SO cute. Just think you can do silver ones and put bright fun paper around them. I love this because you can be creative and add paper on them that you personally love.
Stay tuned because I have THREE trees in the house this year so you will be seeing some fun ways to decorate a tree. Did I mention each room has a different theme? Eh…. I know. I have OCD.
Let’s get started:
You can click on any of the ingredient links to purchase these items in ONE spot.
The first thing I want to tell you is this Mylar Paper is GOLD and SILVER. This is what it looks like right from the package. You can see that there will be a crease from where it was folded.
If you flip the paper over it will be silver. I didn’t know this until I bought it. I think this is great because you can choose this side if you don’t want GOLD.
The first thing I did was lay my cardboard roll on the edge of tissue, roll it over so see where I need to cut. The goal is to have no cardboard showing.
Once you cut it it will look like the picture below. It will be too “long” so you will need to cut the strip in half. I used the crease that was already showing as a guideline.
Once you cut it wrap your roll with the tissue paper and secure with tape. I like to use double stick tape so I can “hide” the tape from the human eye. It actually just looks a little better this way.
Get a piece of twine and tie it around the ends of the roll. This will give us that CANDY look. Are they not so cute? I planned on leaving them just like this but I really wanted them to pop.
Soooo. I added red and white chevron paper around them.
This is what they will look like once you are done! I hope you enjoyed this tutorial… Make sure and post yours on my facebook page so I can share with my readers. I love seeing your take on one of my crafts.
Don’t forget to make it a DIY kinda day,
Quote of the Day: TOMORROW IS ANOTHER DAY -American Proverb
Hey Jaderbugs! I am so excited to share today’s tutorial with you because it’s that time of year to put them to good use. This tutorial is for a live google chat that I will be doing today with Karen from The Graphics Fairy and Gina from The Shabby Creek Cottage. I will be streaming the Google chat LIVE so make sure and come back later! If you want to read a little more about what us three musketeers are up to click HERE.
If you need any of these items just click the work and it will take you to a link to purchase them.
The first thing you will do is lay your spoon down onto concrete. I like to use concrete because when you hit the spoon with the hammer you get little indention’s from the cement onto the spoon. Trust me this will work in your favor later. I hit a few times with the spoon faced own and then flip it over and repeat the exact thing. It kinda is a stress reliever, haha!
This is what it will start to look like once you start hitting it. The goal is to get it completely flat.
Once your spoon is flattened out you will grab your steel letters. You can get these at most hardware stores and they are NOT expensive. Maybe 15 bucks or less. Make sure your letter is facing the right direction, position the stamp on the spoon and hit the top real hard with the hammer. I hold it really tight so I can hit it about 2-3 times. This just imprints the letter better but you don’t have to do this.
Since we are doing Thanksgiving Place Cards you can now personalize each spoon with a person’s name, nick name or the party name. You can do whatever you want at this point. Fun right!
After you stamp them take them to a spot that is well ventilated. Grab whatever spray paint color you want and we will spray these babies. If you notice one of these looks like we antiqued it already. The reason why I am showing you this right now is because you might actually like the way it looks at this stage. If you want to know how I got the antique look on the the “Give Thanks” spoon scroll down a bit and you can see how I did it .
If you are spray painting them this is what they will look like with a quick coat on them. I don’t like to cover them 100% only because I will be rubbing some of the paint off. When it’s thicker it will be a litter harder to remove and it usually peels when it’s too thick.
After you spray them you will let them sit for maybe 10-15 minutes. It just depends on how thick your paint is. If it’s not thick it will take 5 min to dry. Grab a little piece of sand paper and lightly rub the surface. I usually rub a little harder in some spots to remove more. When we age the spoons this will look great!
This is what they should look like after you rub them with sand paper. I honestly don’t know the number of the sand paper I used because it’s all I had. If it’s really course you will rub a little softer.
Next we will squirt a little drop of brown paint onto our spoon . Grab a paper town and start rubbing this brown all over the spoon. At first it will look like it’s covering the whole spoon but just keep rubbing until you are happy with the darkness or lightness of the color. You want to make sure you get the paint in the letters though. This is what gave that antique look in the spoon I showed you earlier. The good news is, if you rub too much of the brown off you can always add more.
You also don’t have to use BROWN. Just make sure it’s a darker color than your spoon color. I like brown’s and black’s because it ages them.
This is what my spoons looked like after I applied the brown paint. I put a little gold paint on top which you can’t really see unless you are looking at it in person.
Next we will get the cardboard roll from our paper towel roll and cut them like I did below.
Grab a sheet of paper with words on it. You can get this from an old book, a new book, newspaper, magazine or a letter.
Tear pieces of it and start putting it on with your Mod Podge. If you have never used Mod Podge it will go on opaque but when it dries it will be translucent. That is my favorite thing about Mod Podge. I am using the SPARKLE one today to add a little flavor to these babies.
Grab your fabric and cut a few strips like this.
The width should be smaller than the piece of cardboard. Start applying your fabric with your Sparkle Mod Podge.
The other good thing about Mod Podge is when it dries it kinda stiffens your surface which in our case today is nice! Below is what they will look like when they are completely dry. Pretayyyy ayy!
Get a little piece of your rope, twine, or whatever string you are using. Tie it around the middle and make a small bow.
That’s it everyone! It’s that simple. What I really love about this craft is when your guests leave they can take the spoon with them as a keepsake.
See you in the next post with glitter and glue sticks,
Quote of the day: “When rungs were missing, I learned to jump.” -William Warfield
Today I found myself stuck in YouTube. Looking at some of my old Halloween favorites. It’s kinda crazy to think a movie can take you back in time. I remember watching Practical Magic, circa 1998 over and over. Hocus Pocus is an all time favorite. I am especially happy right now with ABC Family playing the 13 nights of Halloween. We cook egg sandwiches at night and all watch tv in the kitchen. Kinda like a country cozy moment. It’s sometimes odd to think that I watch the same shows with my own family now. Lil one loves when we all watch movies together!
So earlier today when I STARTED this post I put in Julie and Julia. Almost two hours later I realized I didn’t type anything but I sure finished that dang movie! I remember when Martha Stewart’s The Family Room wrote a post about me. They compared my “Martha Countdown” to Julie and Julia but with glitter and a glue gun. . Maybe that is why I feel so happy when I watch that movie.
This here is my vision of what a “Charlie Brown” chevron pumpkin would look like. See, when I think of Charlie Brown not only do I think of a chevron pumpkin but I also think of PRIMARY colors. There ya have it Jaderbugs!
My video inspiration comes from this AMAZING video that Sesame Street made. It says it all plus it has a good beat! Enjoy
{{tipyrooo: play the video while sifting through the post, it’s sure to make you tap your foot}}
P.S. You can click on any of the links (up above) to order these ingredients.
Let’s get started making our chevron pumpkin!
The first thing I do is brush on a little Mod Podge then start placing my tissue squares on top of it. After the tissue is applied I pass my brush over it again, with a little Mod Podge. Remember, if you don’t have the pre cut squares you can use ANY tissue paper you have. I just keep these babies stocked in my studio because they really come in handy. You can get them from Michael’s or any craft store.
Keep in mind that video I posted. When you place the blue tissue over the yellow you will get shades of green. Red and Yellow will give you orange. You could keep going with the colors and get some really beautiful shades like I did HERE.
I went all the way around the top of the pumpkin first with the blue. I continued down with the yellow then red. Notice how I placed the yellow pieces of tissue paper. It’s important you get an organic chevron shape. Be creative too! If you don’t want to do the design have fun with it and make it your own. You will be surprised when you see all of the amazing colors the tissue make once you start layering them.
Gotta run, see ya in the next post!
{p.s. stay tuned for my string pumpkin and homemade washi tape this week}
Quote of the day: “The universe is not hostile, nor yet is it friendly. It is simply indifferent.” -John H. Holmes
I hope everyone had a good day today! I know I was supposed to post this last night but I had a major set back. I have been suffering from the worst ear ache ever! I don’t know if you have ever had a bad ear ache but it’s not fun. It kinda feels like someone is trying to pull a tooth out of your mouth with no medicine, BUT on the other hand thank goodness for family doctors who can call in meds over the phone for ya! Phew, I feel much better now. (insert a dazed and confused jaderbomb sitting at the computer, haha)
Since everyone is already jumping on the Christmas wagon I figured I would too. I get a lot feedback on my printable’s so I could not wait to post this sucker! I love writing notes to people, writing down recipes, making a fun grocery list or making fun scrapbook pages. What is this printable good for?
ALL OF THE ABOVE AND MORE JADERBUGS!
I made a few colors for you in case you would like to print them out, put a picture on it then frame it! These are so cute, right.
You can either save the picture to your desktop and print it out that way or right below the picture you will find a link to the full sized PDF. This is an 8×10 print but you can scale it down if you want.


