Tag Archives: t shirt crafts

Quote of the day:
“Glad we are still alive to enjoy this pillow tutorial” -jaderbomb

Oh what a happy day! I had so much fun making this pillow and I know you will too. It’s obvious I love doing crafts that an adult or child could do by themselves or possibly together. I think there is something special that happens when you craft with your little ones. Trust me, they remember it!  I can’t tell you the last time I Tie Dyed something. I didn’t want to make a “shirt” because that is what everyone does. Making a basic tie dyed pillow sounded like the thing that would put a smile on my face!

Let’s get started with our Tie-Dyed Pillow.

Tie-Dyed-Pillows-By-Jaderbomb.com

This is what you will end up making. I like our bed to be completely white but every now and then it’s fun to give it a PUNCH of color!

Tie-Dyed-Pillows-By-Jaderbomb.com

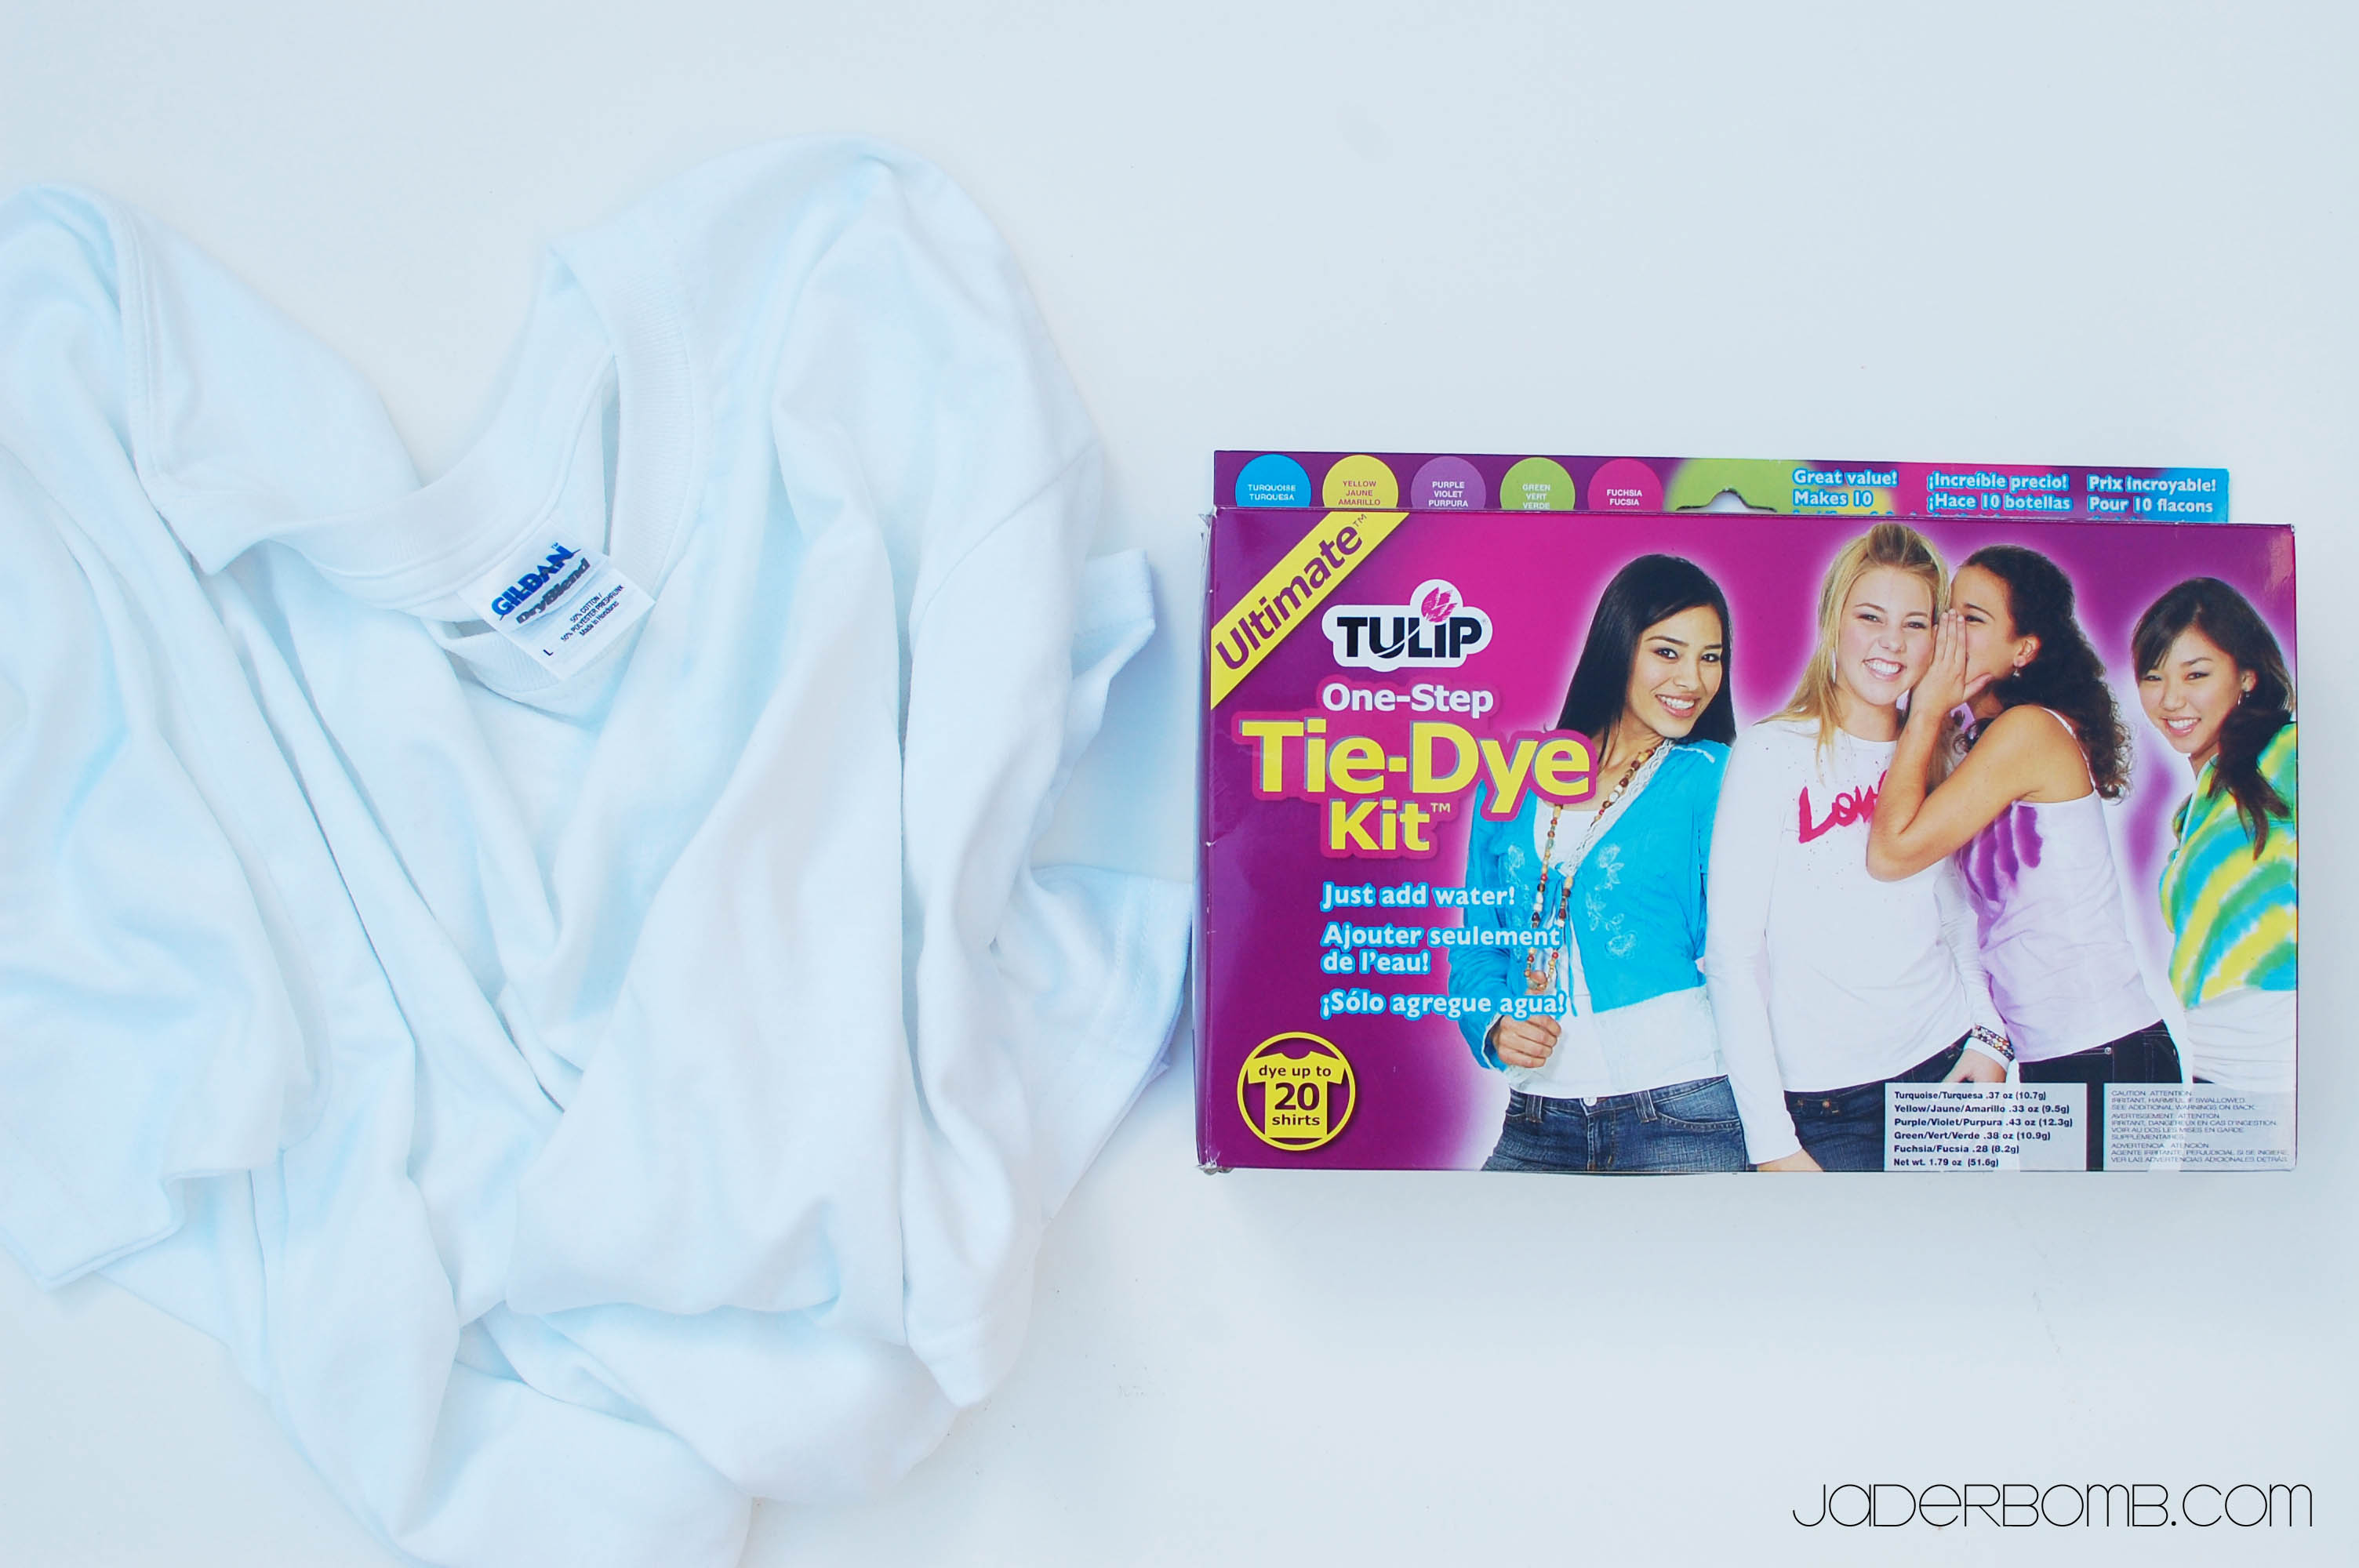
I used the Tulip one step Tie Dye Kit.

Tie-Dyed-Pillows-By-Jaderbomb.com

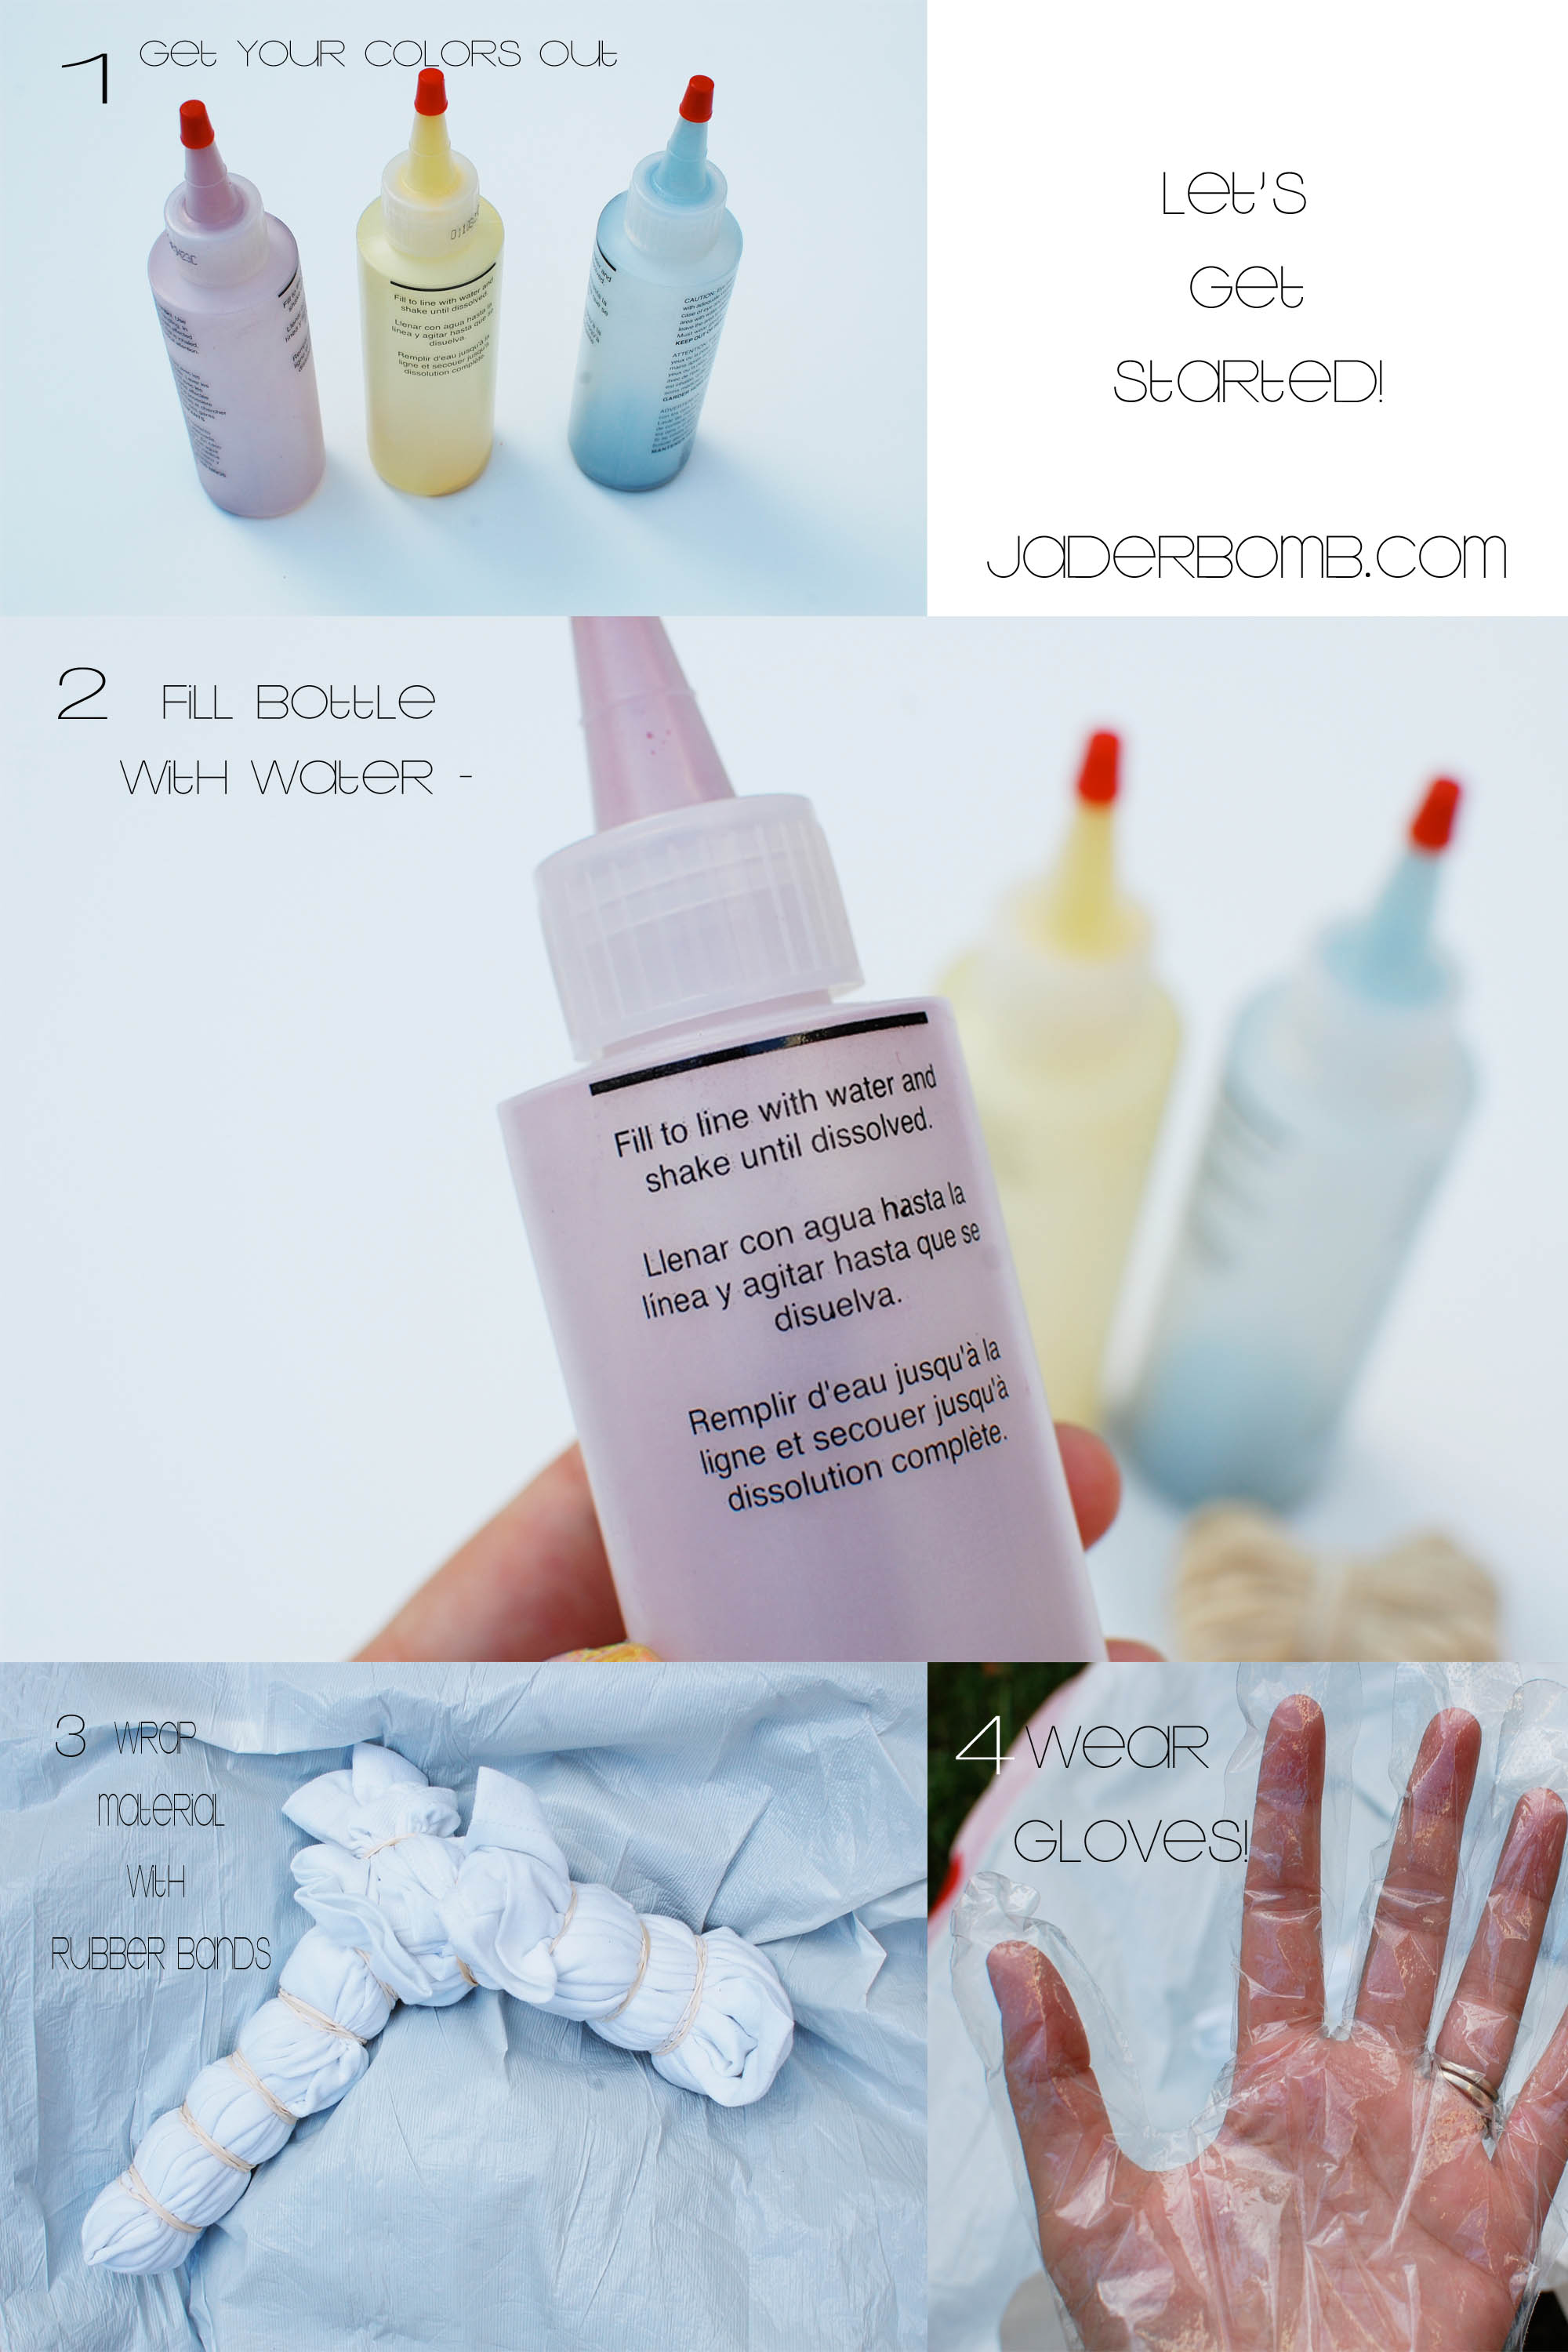
It’s super easy to do because the bottles already come with powder in them. All you have to do is fill them up with water. Make sure to stop at the line. You don’t have to wear gloves but your hands will be stained if you don’t. Be creative when you put your rubber bands. After all, the bands are the things that break up the color so make it fun!


Tie-Dyed-Pillows-By-Jaderbomb.com

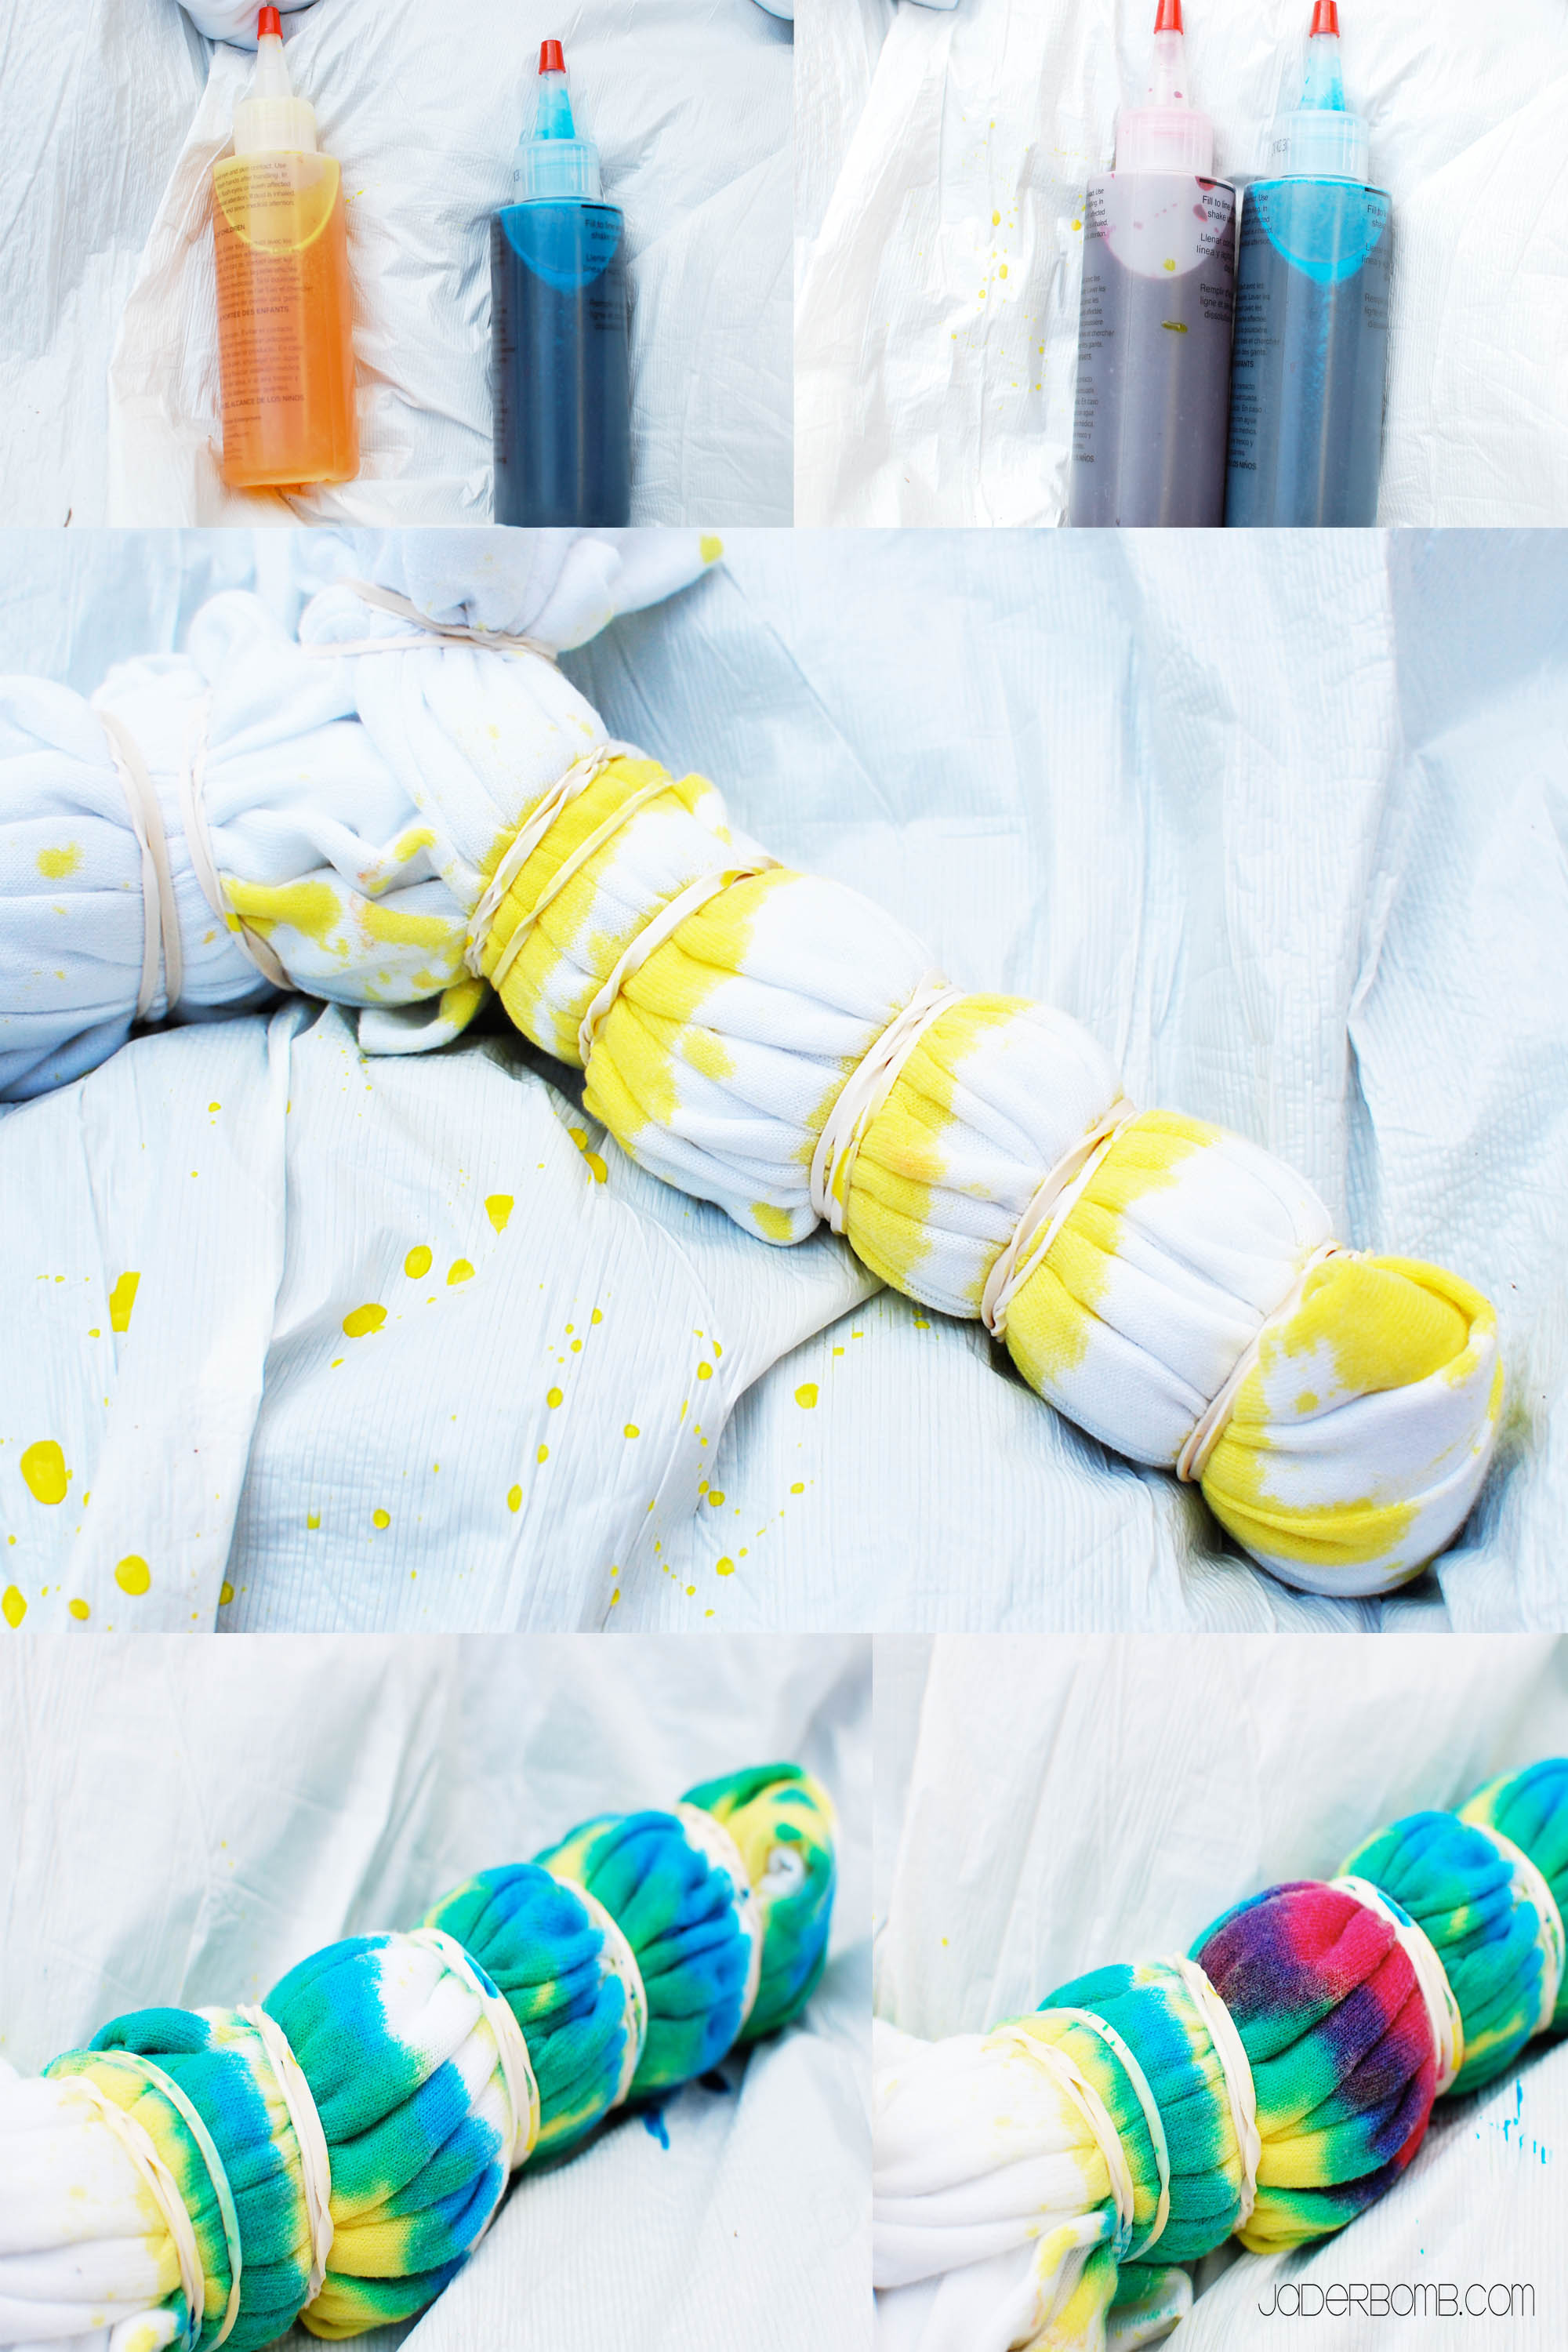
You can see I just started squeezing color onto my shirt in different spot. Remember that color chart from when you were a kid.
Red + Blue = Purple
Yellow + Blue = Green
Red + Yellow = Orange

The reason whey I want you to know this is because even if you only have a few colors you can make so many more by pairing them up with other colors. This is my favorite part.

Tie-Dyed-Pillows-By-Jaderbomb.com

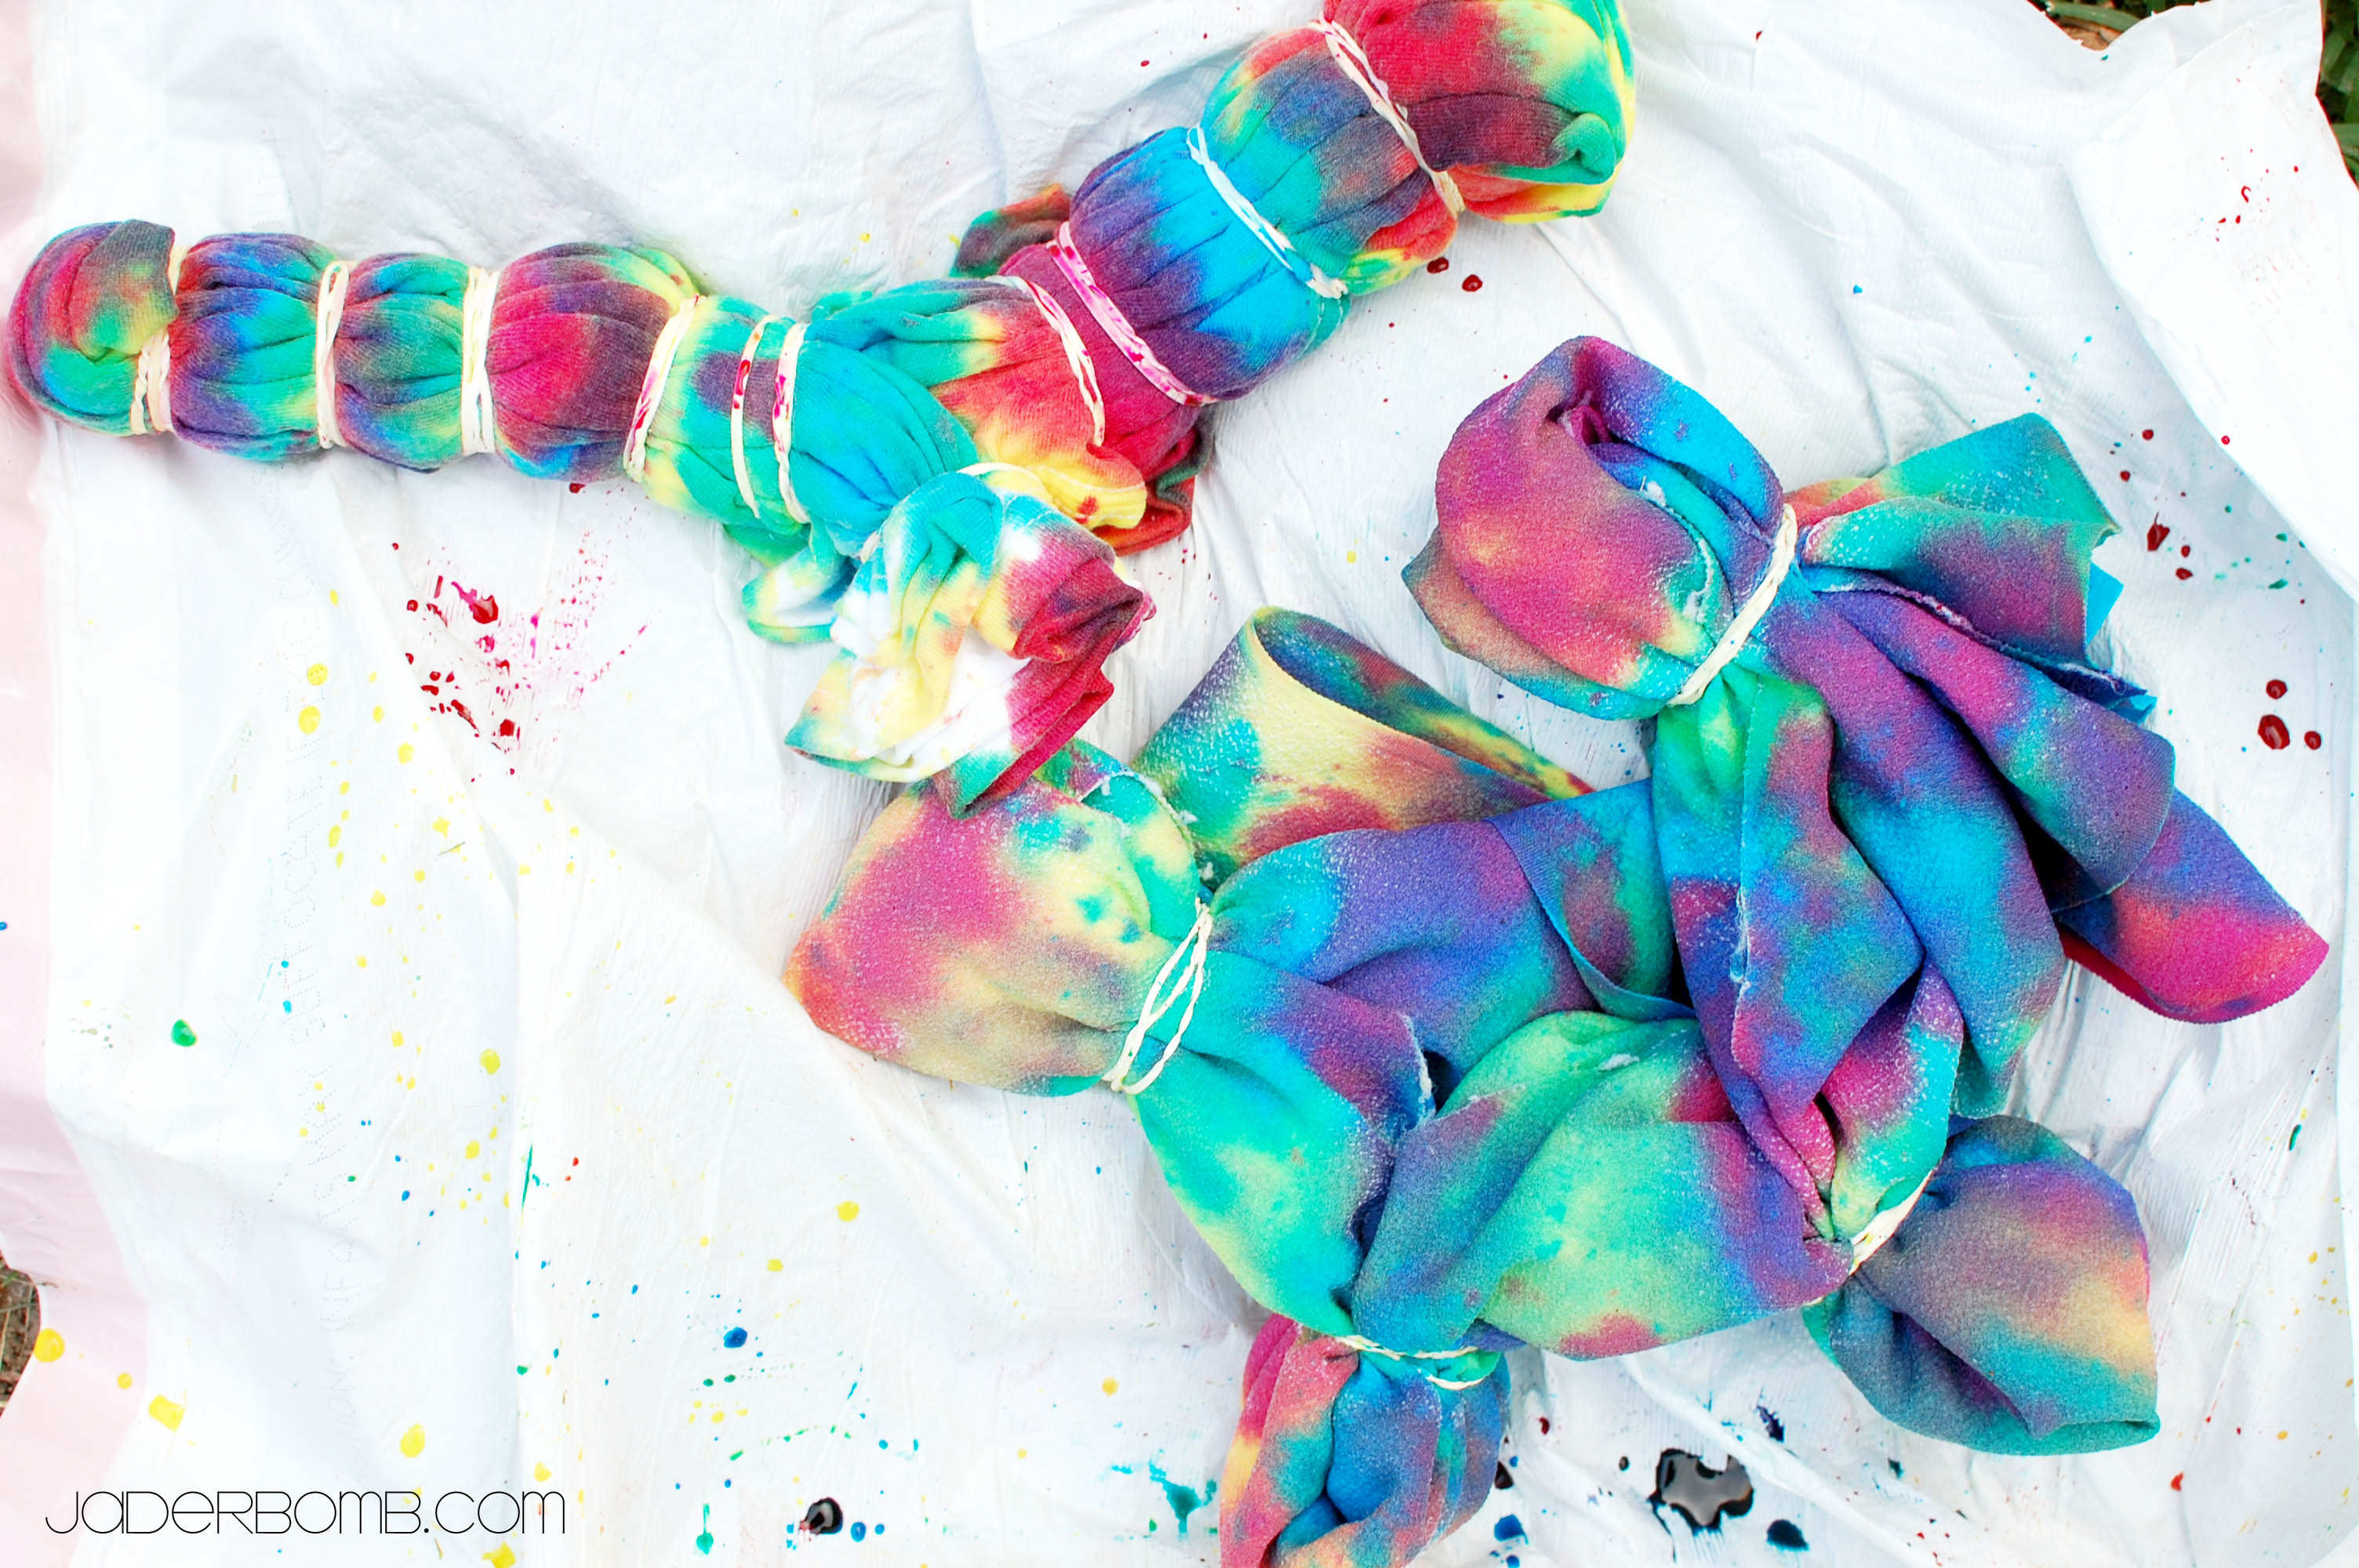
This is my mess when I was done. You want to let it dry outside over night or 7-8 hours. I did mine in the afternoon so checking on it in 7 hours would of meant me getting up in the middle of the night….
Well. I decided it wouldn’t hurt a few more hours, haha. When you let it dry rinse it out, then wash it. Don’t wash with other clothes.

Tie-Dyed-Pillows-By-Jaderbomb.com

When you are done washing and drying lay your shirt out on a flat surface. Make sure you turn the shirt inside out. Lay your pillow down on top of the shirt. Get a piece of chalk and outline the pillow. Sew all of the sides except one. Cut all of the edges then turn the shirt right side out.

Stuff your pillow inside and then hand sew the side that we didn’t sew.
That’s it Jaderbugs!

I wanted to include this fun print for you. I thought it was so cute and perfect for this time of year!

Sending you and yours and HUGE hug from my family to your’s….

jade-26

Good day my little jaderbugs~!!!!
It is Sunday and I am super duper excited!!! I have had a great week and I have alot of crafts coming up that you will LOVE LOVE LOVE!!!! Fa Reel!!!
Can you believe WOMAN’S DAY magazine LIKED this craft on Pinterest!!! Check it our here!
This craft is SUPER fun and SURE to catch anyone’s eye!
For the warp, cut 1-inch-wide loops from the bodies of one or two tees removing the hem and stopping at the sleeves.
You’ll need a total of 11 loops (to start off with). For the weft, cut at least 50 loops from the remaining shirts. Save the unused sleeves for the basket project.
-Stretch one warp loop over the hula hoop, as shown above in the second picture. Add and secure a second loop, perpendicular to the first (above, third picture).  Repeat, filling in the spaces, until all 11 loops are in place (above, fourth picture)
-Push together two warp loops at the top of the hula hoop. This creates an odd number (10) of warp spokes in your wheel, which allows the over-under pattern of the weft to alternate with each new row.
-Now that you have 10 loops grab an extra t-shirt loop wrap it around the double spoke and loop it back through itself. Begin weaving the t-shirt loop over and under the warp spokes, forming a tight spiral.
 Treat both parts of each warp spoke as a single unit, weaving over or under the two together. As you work, push the weft material (t-shirt) loop toward the center of the hoop and keep it just snug. If you pull the weft tight, the rug will develop lumps or bends. When you reach the end of the piece of weft, add a new loop by threading it through the end of the first and back through itself.
Keep repeating this process till you are happy with the size.
It might take a little practice until you get comfortable with it.
Remember, in order to get this “cone” shape you will need to make it tight. So when you are weaving over and under your original 10 loops make sure it’s snug as a bug.
It’s really more important that you make it snug when you first start till about halfway. When you are about halfway through it start making it looser and looser. This will form our SHAPE.
When you are done you will ut the warp spokes off the hoop one at a time and then tie them into a know. This will prevent out cover from unraveling. GOOD LUCK!!!

Wanna visit me? Come on!!!

ETSY,PINTEREST,FACBOOK,

GOOGLE+,TWEET ME