The Simple Secret to using Popsicle Sticks!
Today is the day that we all learn what to do with those left over popsicle sticks! Wait, does anyone even eat popsicles anymore? When I was little I would rush to get to the wooden taste of the stick! The craft stores fixed our problems by selling these sticks in packs I will tell ya! I am excited to team up with Kwik Stix for this project and show you how to brighten up your personal space with good ole popsicle sticks.
♥ This is a sponsored post. All ideas and beliefs are based completely off of my personal opinion and I only post products on my blog that I stand behind. 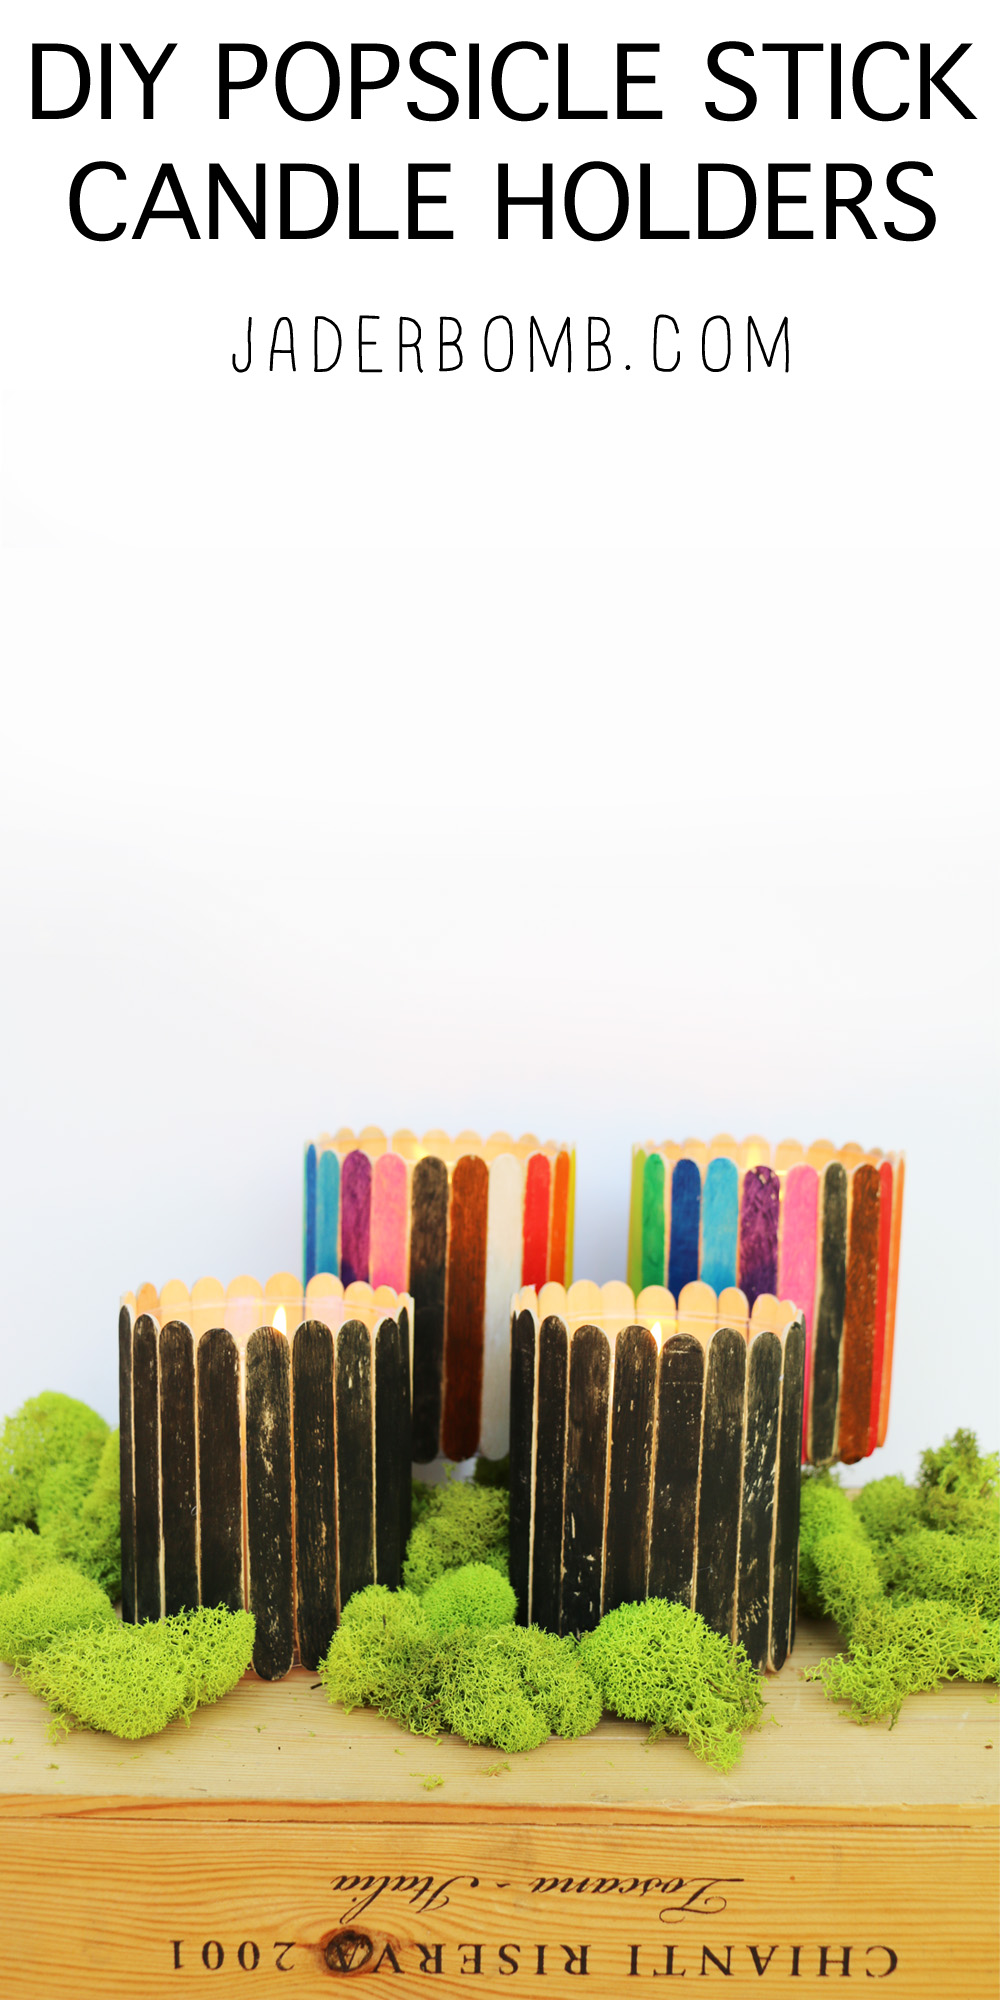
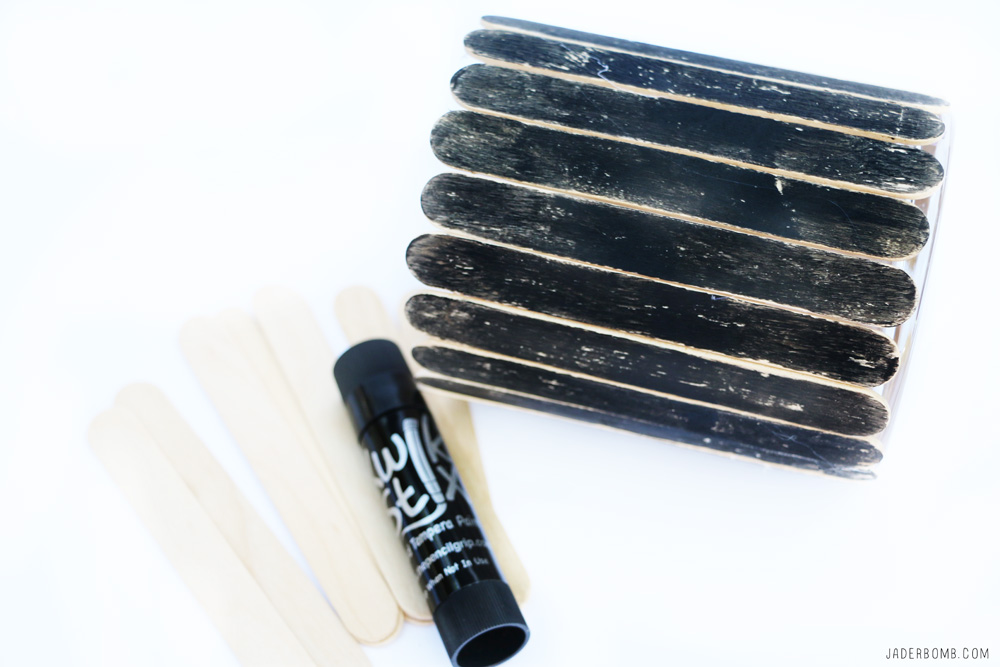
You will need: High Temperature Glue Gun * Glass Candle Holders * Candles * Craft Sticks * Kwik Stix from the Pencil Group 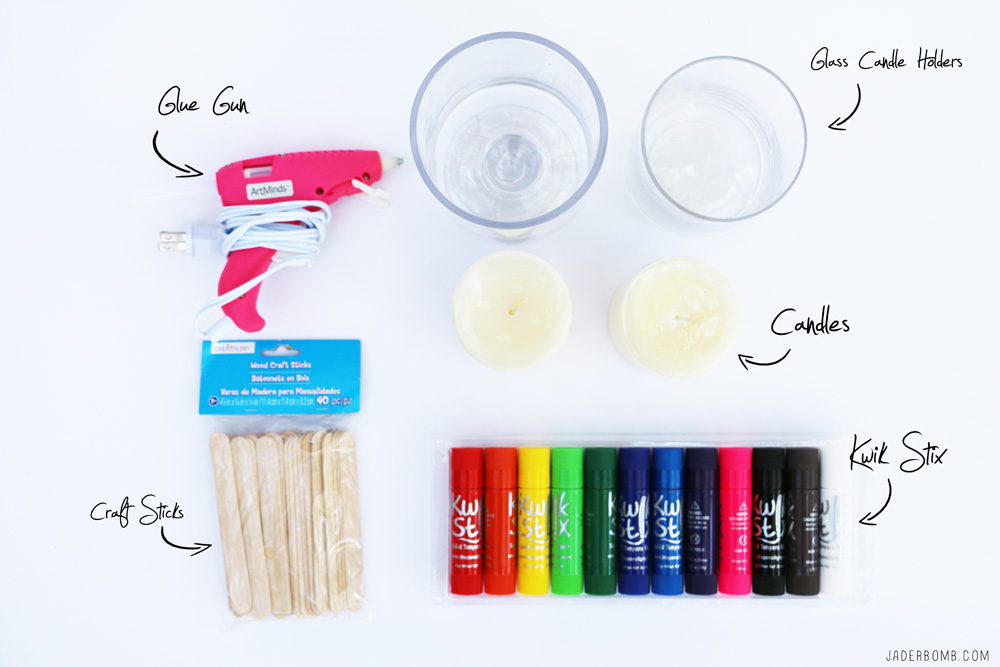
Tired of the endless mess of painting? Fear not! Kwik Stix Solid Tempera Paint sticks take the mess out of painting while keeping all the fun! Simply uncap, twist, and paint! Kwik Stix have a fast drying formula that allow them to dry in 90 seconds ( YES 90 SECONDS ) while still leaving a paint-like finish! You can also purchase these from your local Michaels stores or click here to purchase.
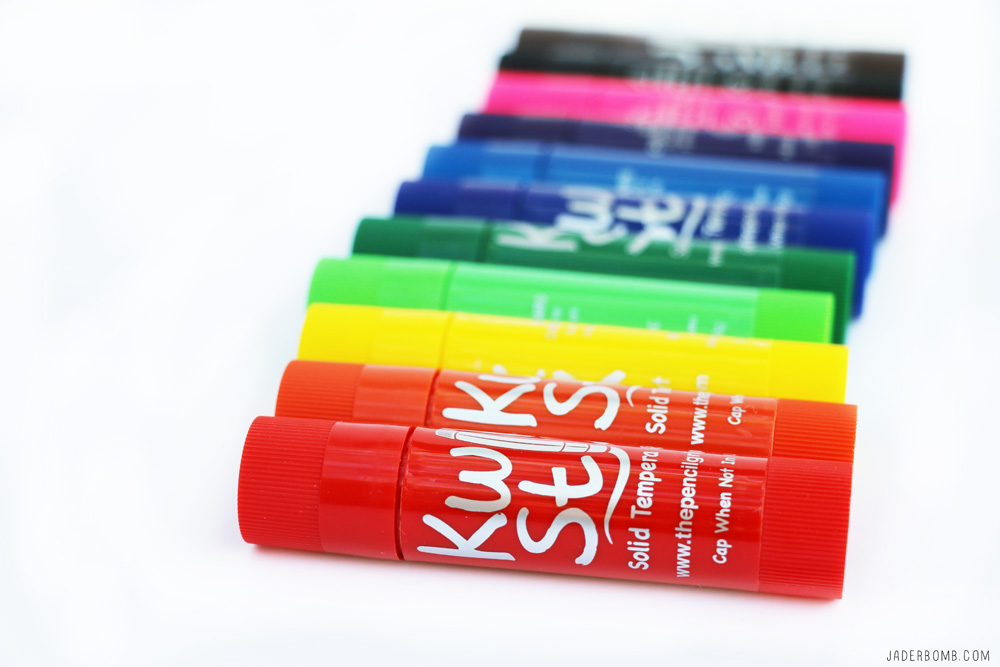
No cups, smocks, water or brushes required. Kwik Stix come in assorted vibrant colors with coverage that won’t crack. Great on poster paper, cardboard, wood and canvas and much more!
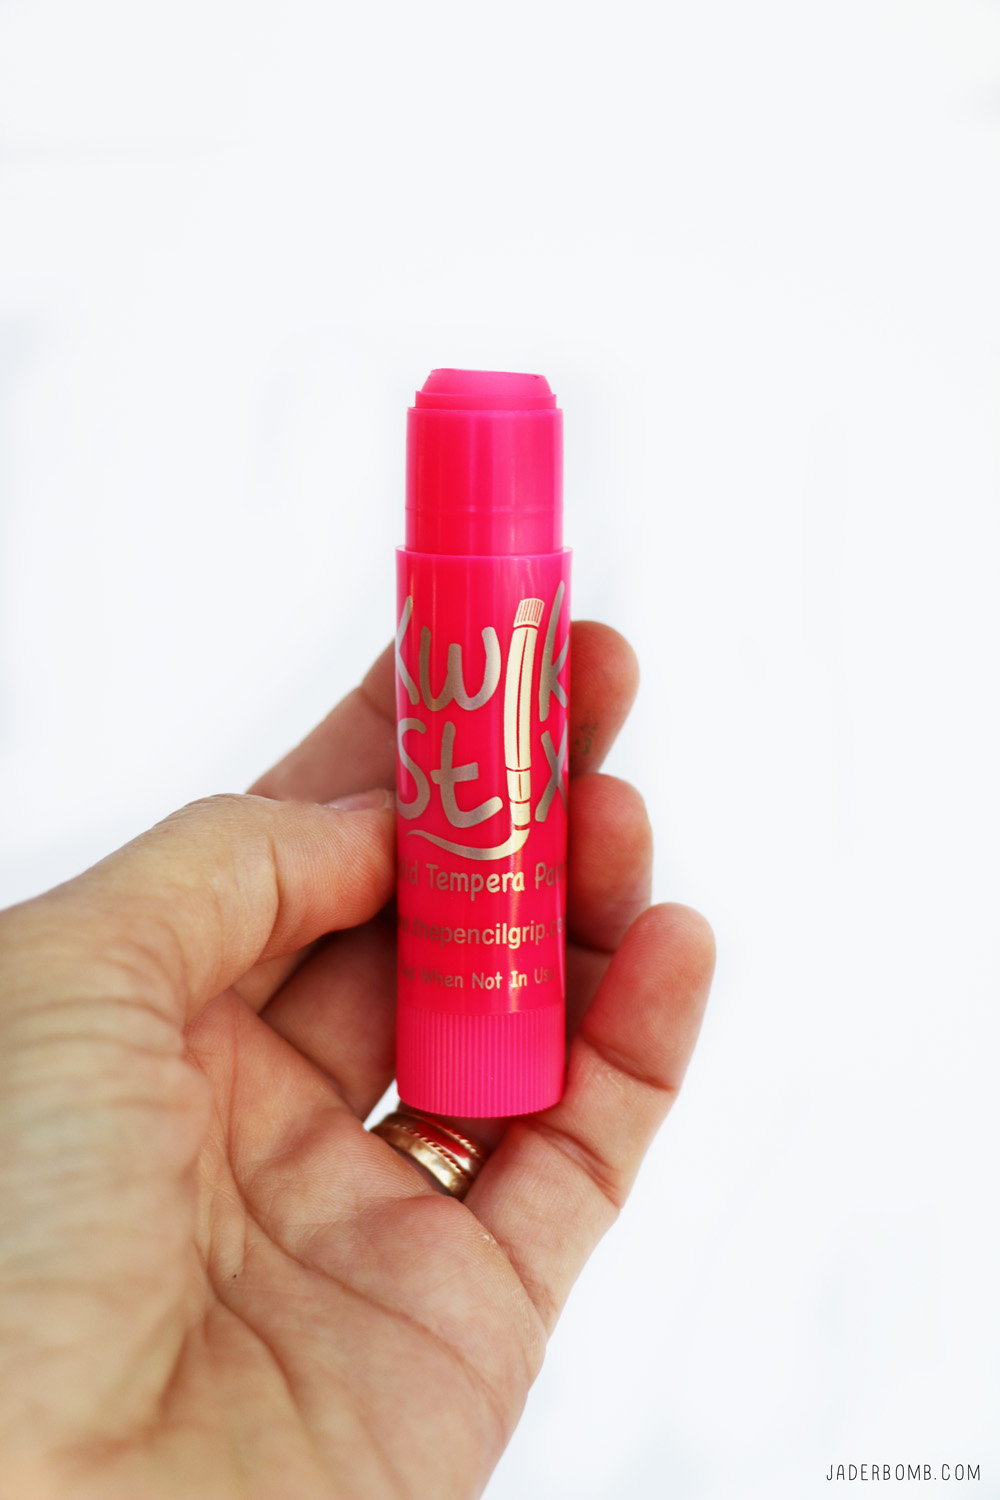
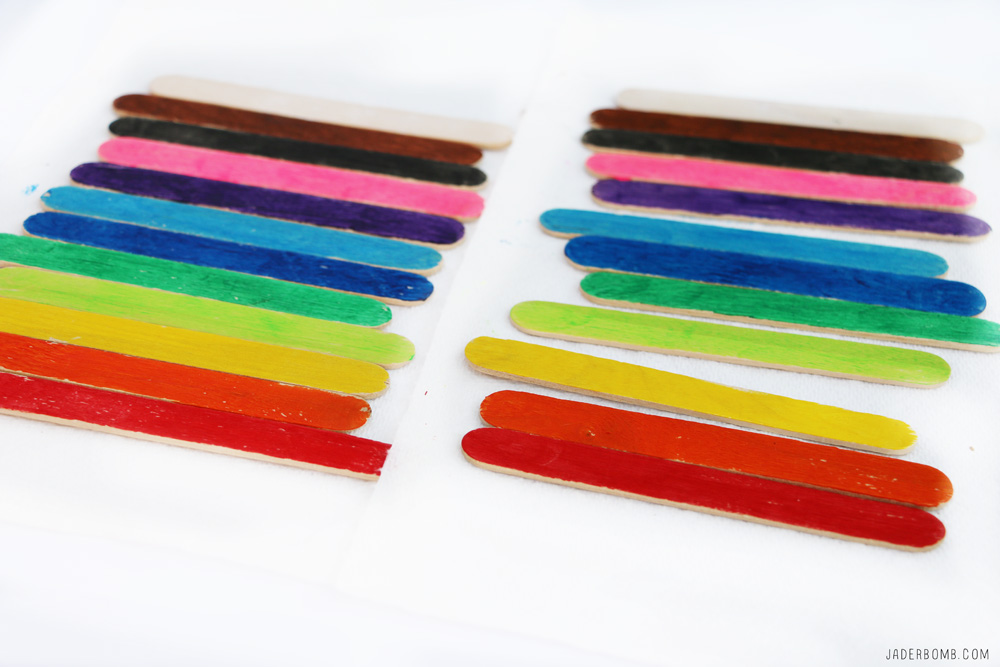
Let’s just all take a moment and stare at this beautiful hot pink paint stick! I literally opened it and thought about using it as lip stick! You can’t lie- you thought the same thing as me!
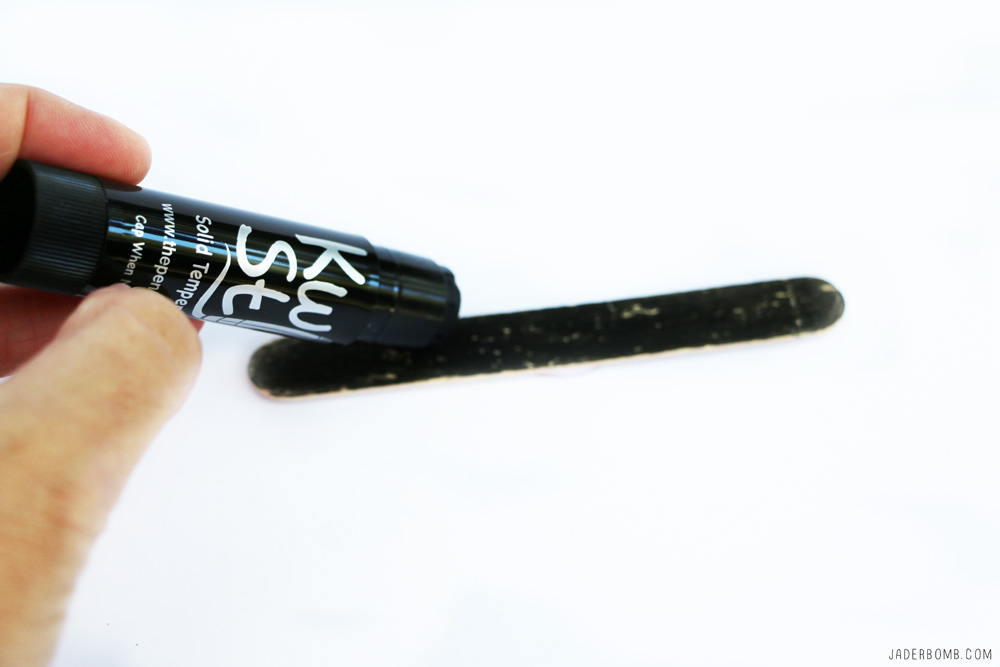
Step one: Paint one side of your popsicle stick with the color of your choice.
I wanted to have a fun theme and a more elegant theme so pull up your britches because it’s gonna be a fun ride with me today!
I was quite surprised to see this product in action and I literally mean this! At first the paint appears wet but then within seconds it starts to dry. It’s the most fascinating product that I have used in a while.
The colors literally come alive once you apply it, which had me thinking. Why didn’t anyone ever make colored popsicle sticks? Just a thought…
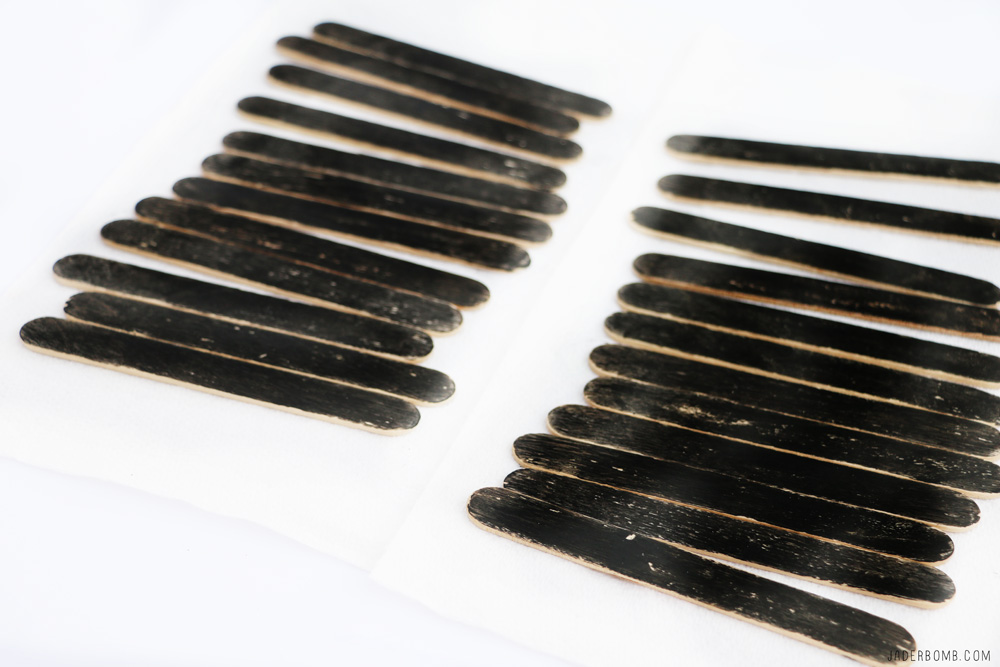
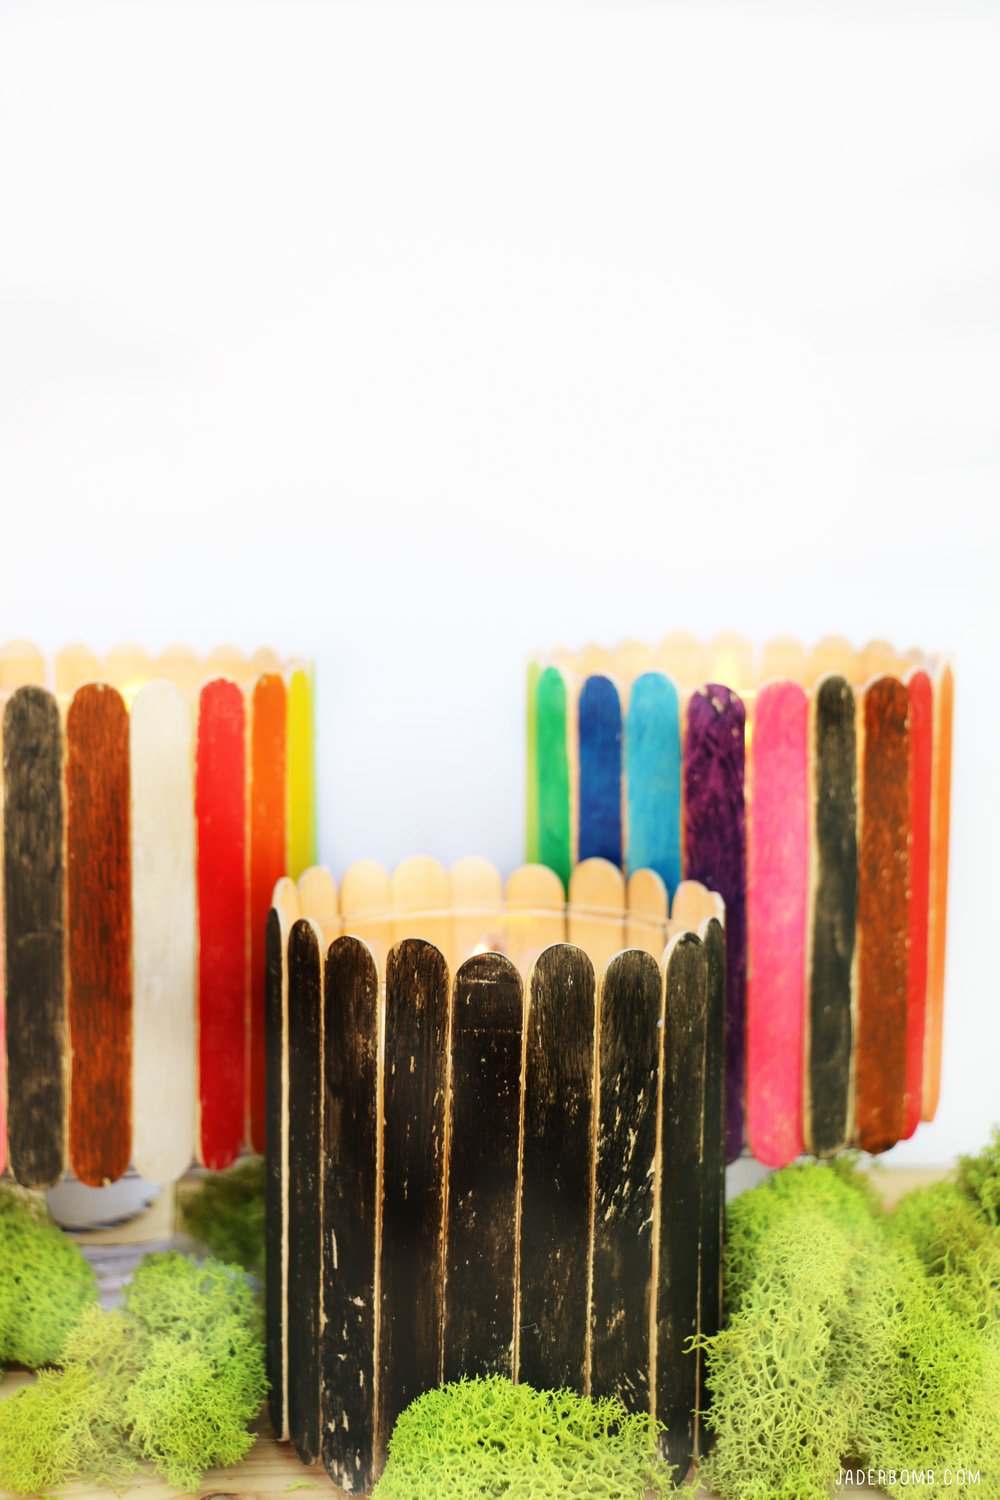
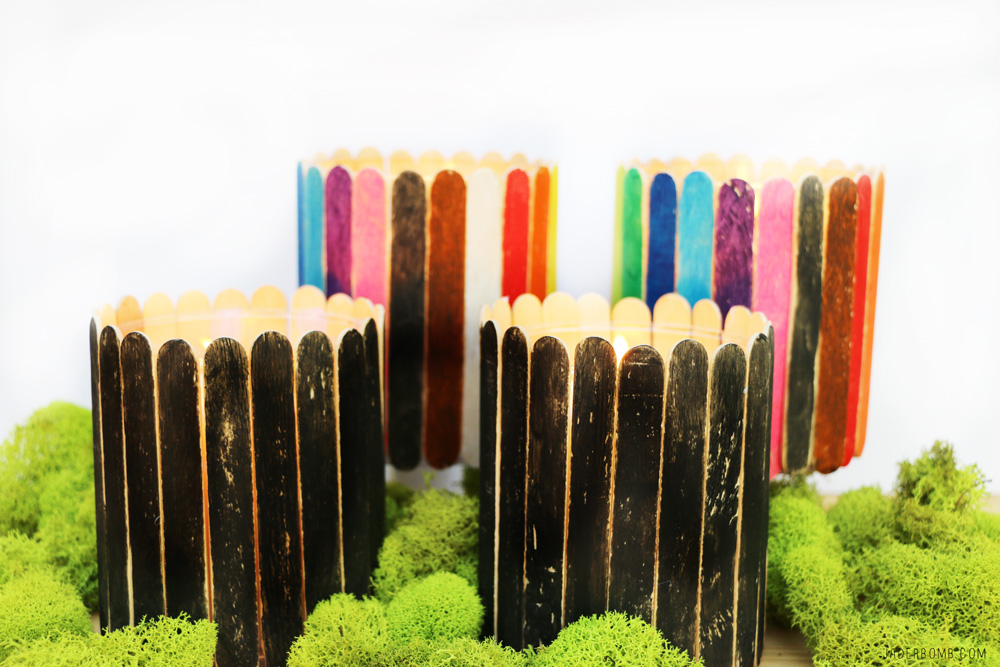
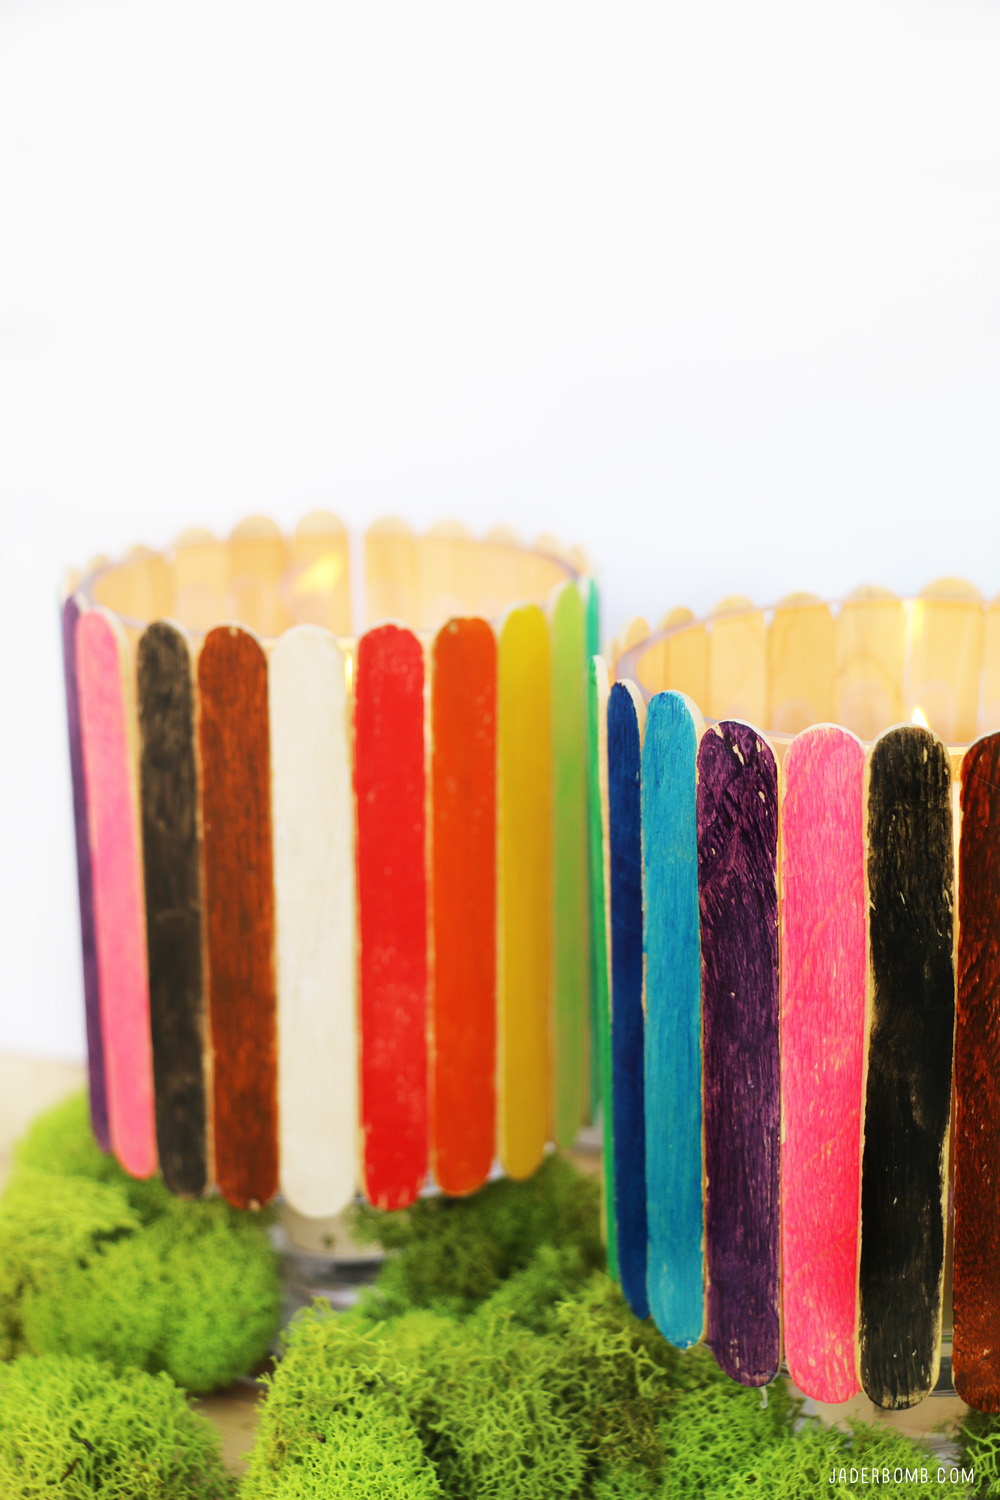
I asked myself what kind of picket fence would I would want around my house and if you know me then you know I would pull for ” Team Rainbow” but some days I wake up and feel like Cher and my inner sophisticated side comes out, which leaves us with a black picket fence.
 The black popsicle sticks kinda remind me of the Nightmare before Christmas. Personally I would keep these candle holders up all year long and decorate around them! Can I get an AMEN! My imagination is screaming like a kid on Christmas morning thinking about all the things I can create with these paint sticks.
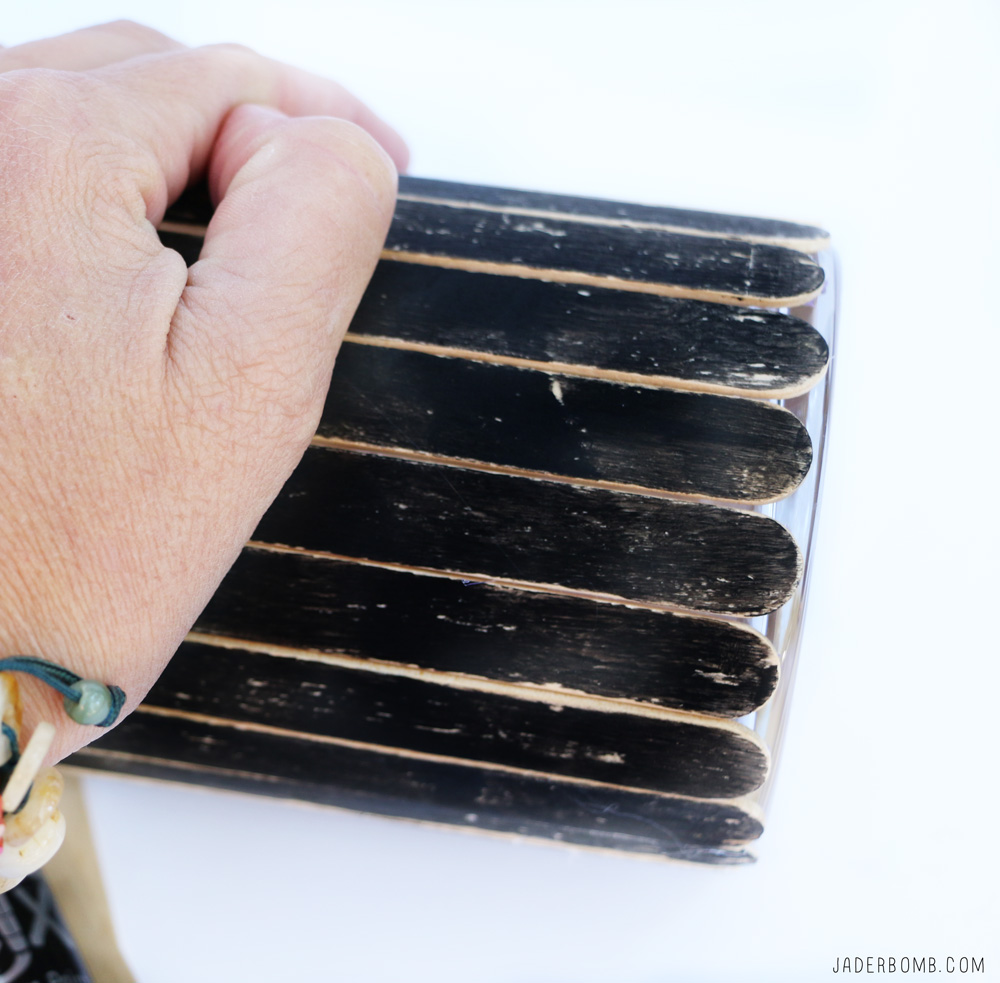
Clean your glass candle holders with cleaner before glueing the popsicles to them. The glass needs to be really clean otherwise the sticks won’t stick properly.
Once you are ready get your glue gun and start glueing them on one by one. If small kids are doing this project, now is the time I would suggest having an adult help out. We don’t want to burn those little fingers. Let your kids color the sticks- trust me they will love it!!!!
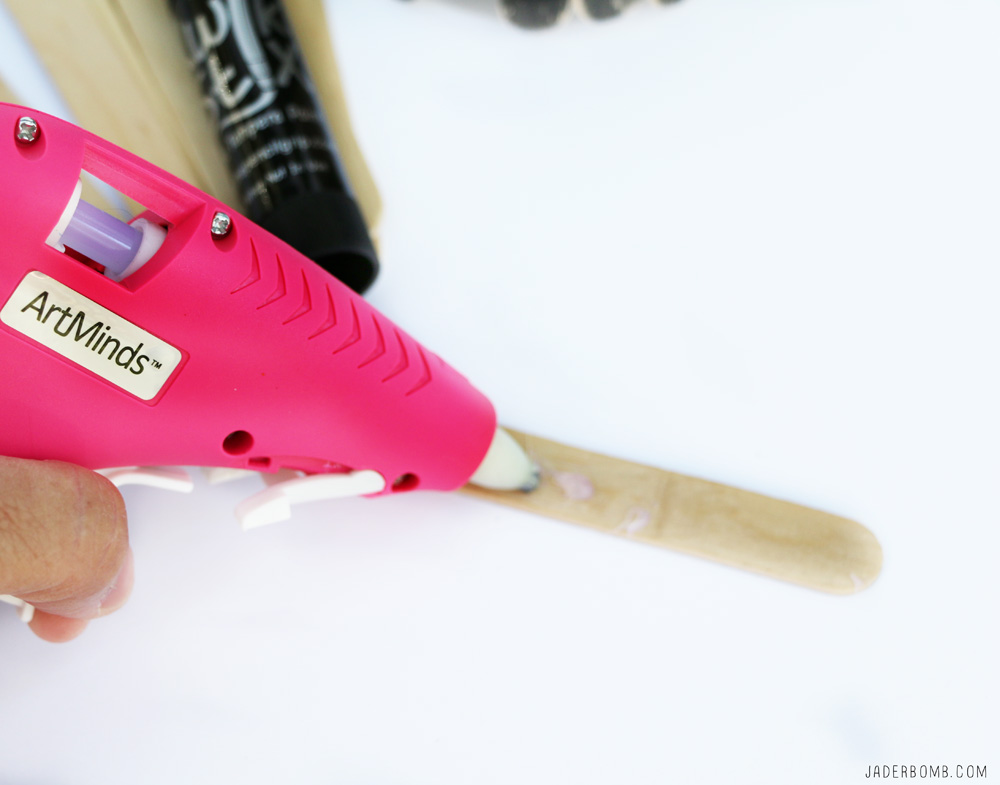
I made two passes with my glue gun to make sure there was enough glue on them.
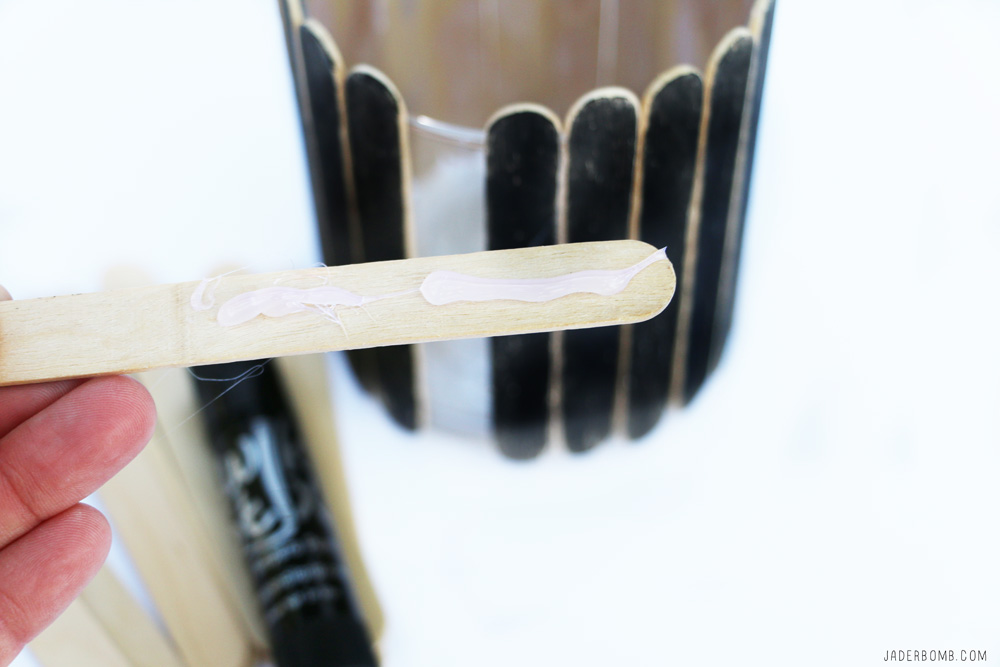
Make sure to press firmly on each stick right after you place it on the candle holder.
I am really in love with these Tempera Paint sticks. They are perfect for people on the go since they dry so quickly, this means no mess for the parents to clean up after!
Not sure what to do when you are busy cooking, cleaning and working? Throw some popsicle sticks on the table with these paint sticks and you won’t hear a word for hours. Seriously how do I know this? it happened to me, I found myself so zoned into painting them that I didn’t realize I painted much more than I actually needed!
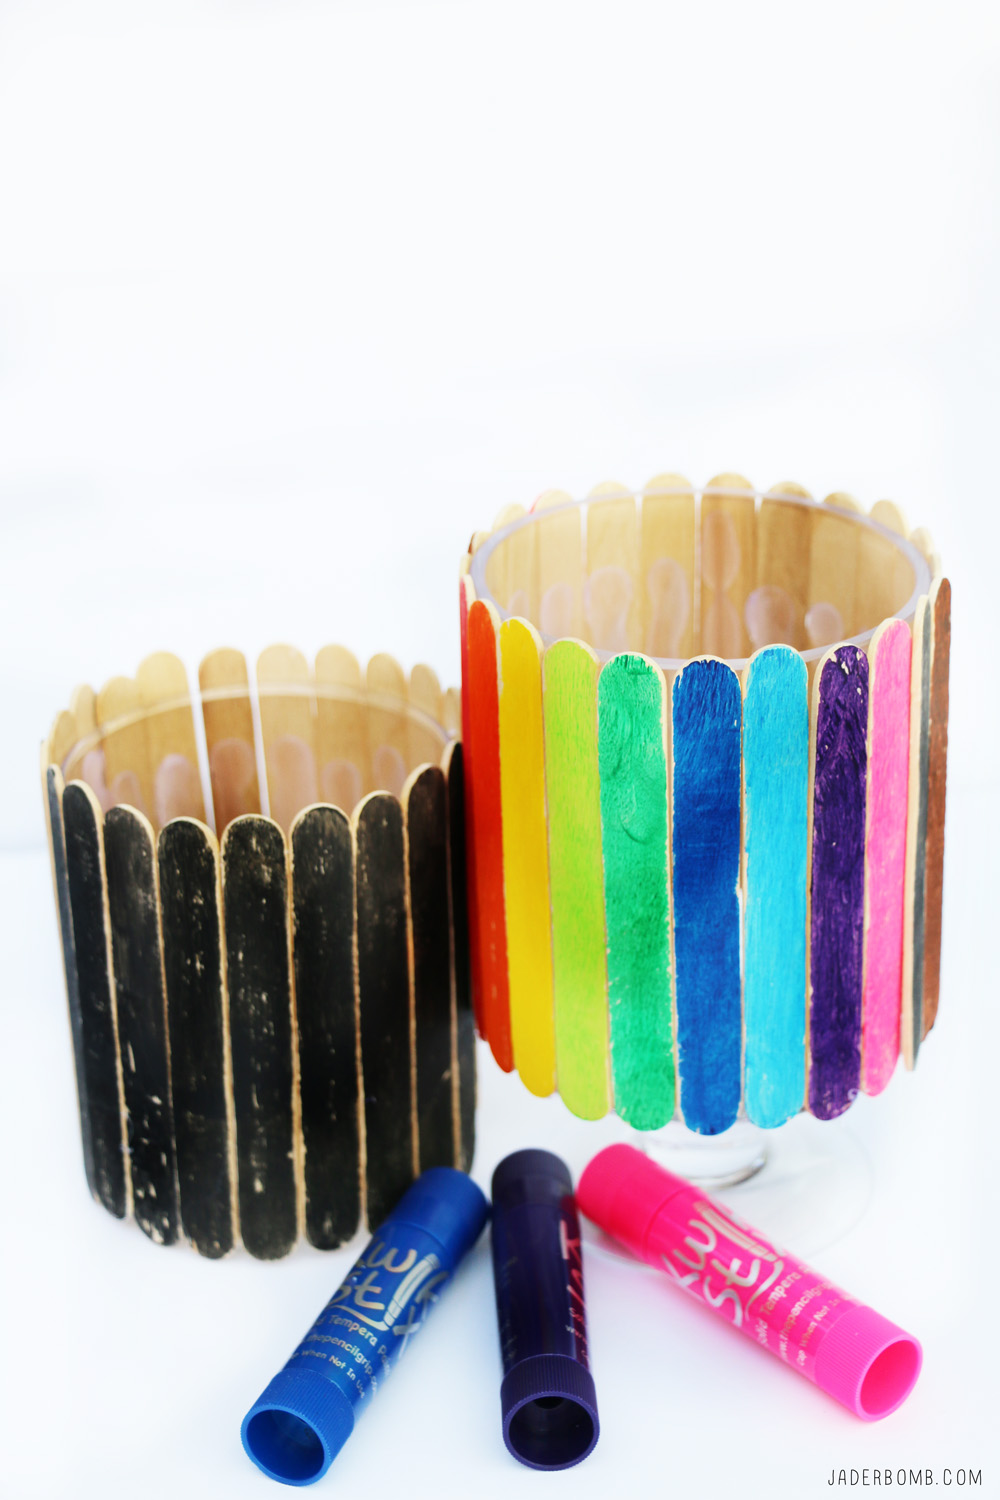
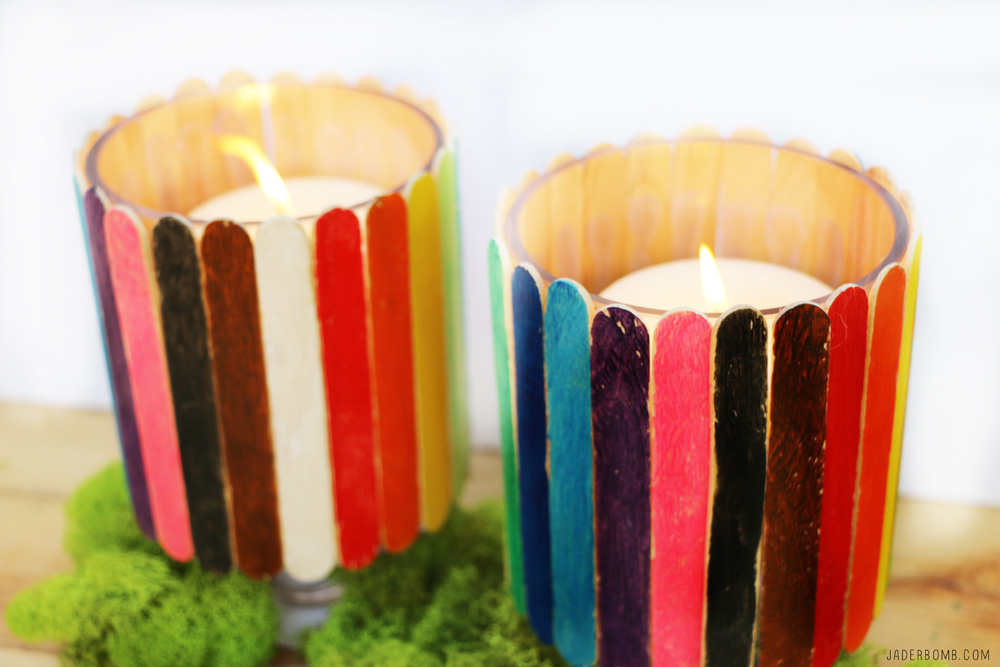
How beautiful are these picket fence candle holders!
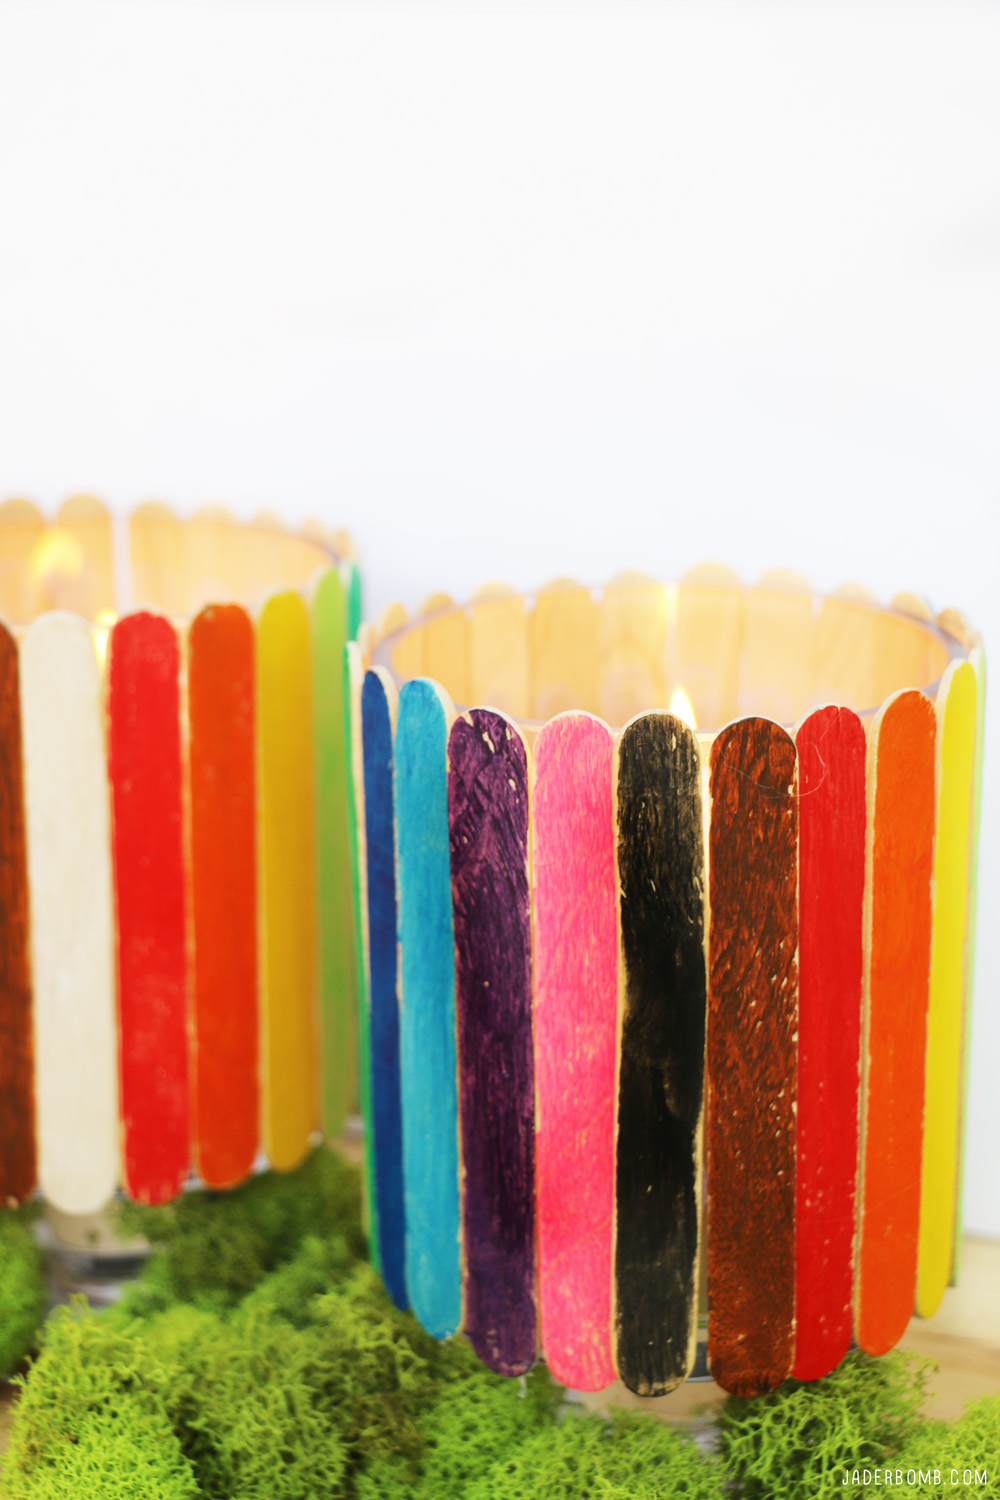
Just close your eyes and imagine yourself snuggled up on the couch watching your favorite movie with these just glowing away, pure happiness.
Fill these containers up with candy and treat your guests to a warm surprise.
You are welcome, I just made life amazing for you!
The ideas are endless with these tempera sticks! I can’t wait to try them on paper! 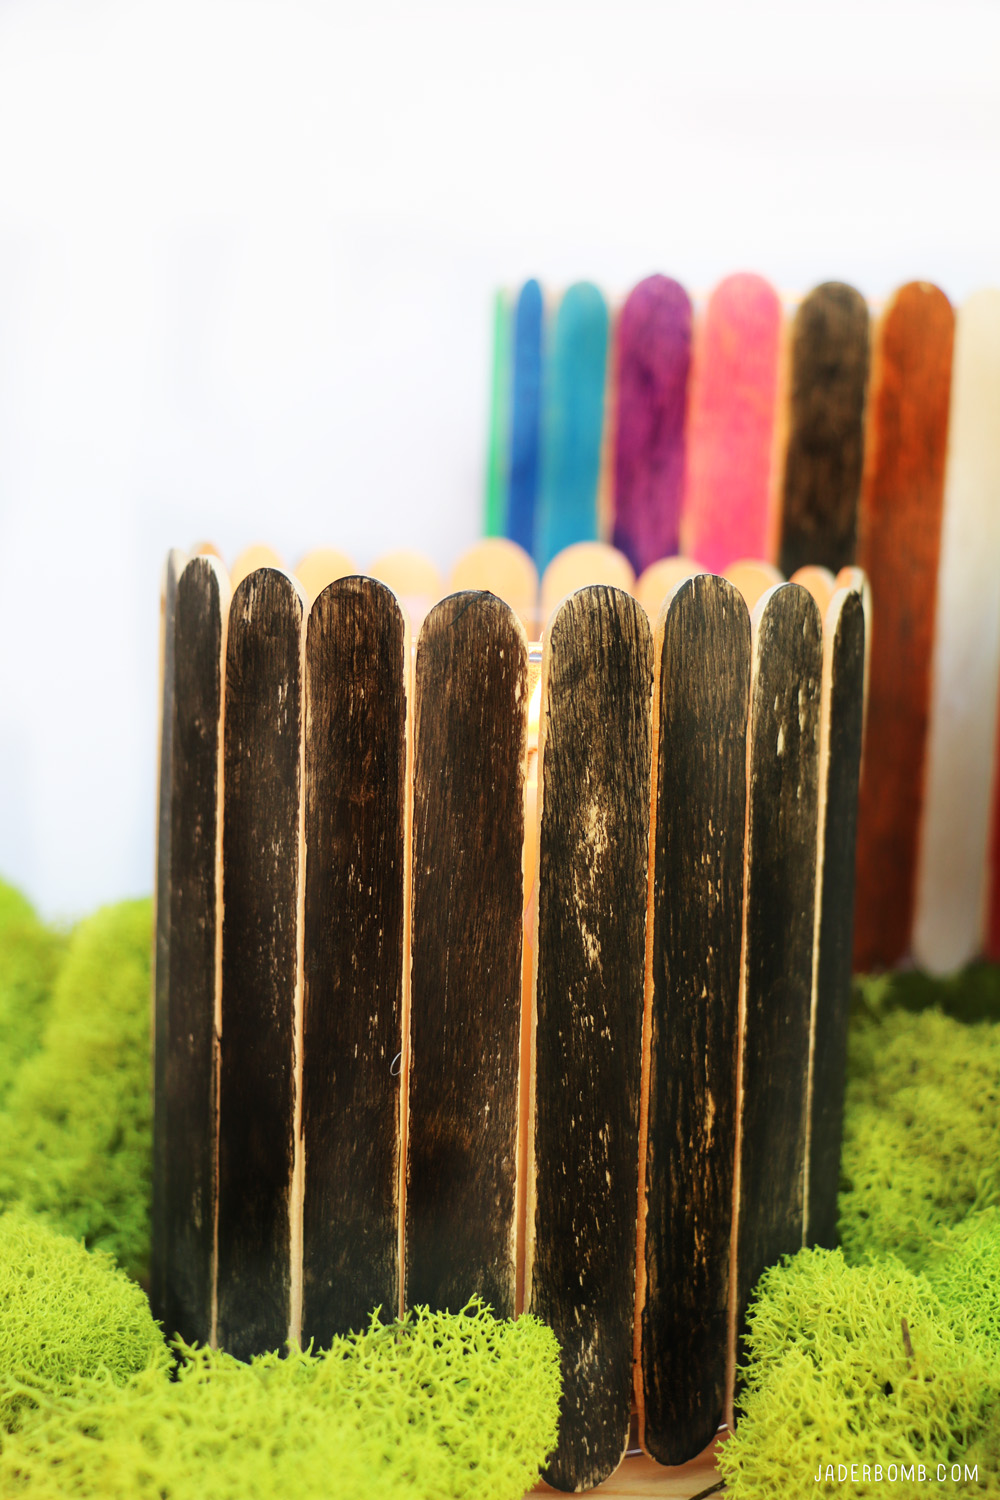
I feel like these belong on the set of a whimsical movie with lightning bugs flying around. Did I mention you could put these on your desk with pencils and pens in them. You can put so many different things in them just use your imagination. 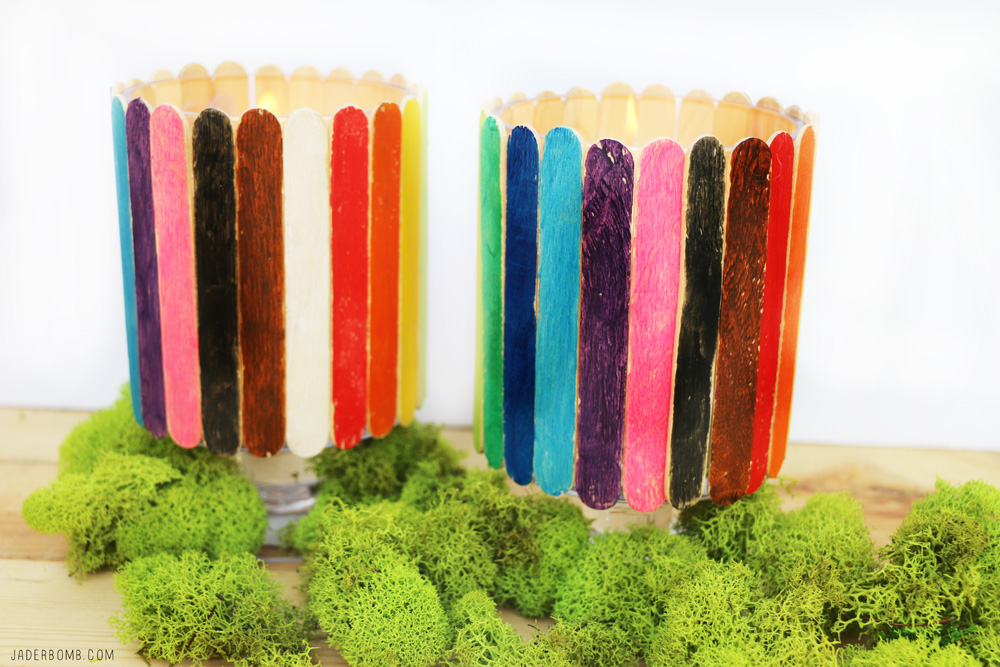
Check out all of the Kwik Stix colors. You can purchase from The Pencil Grip.
I hope you enjoyed this project as much as I did! See you in the next post, until then hugs from my computer to yours!
Don’t forget to follow me on all of my social media channels because I love all of you to pieces!!!!
FACEBOOK | INSTAGRAM | TWITTER | PINTEREST
a Rafflecopter giveaway

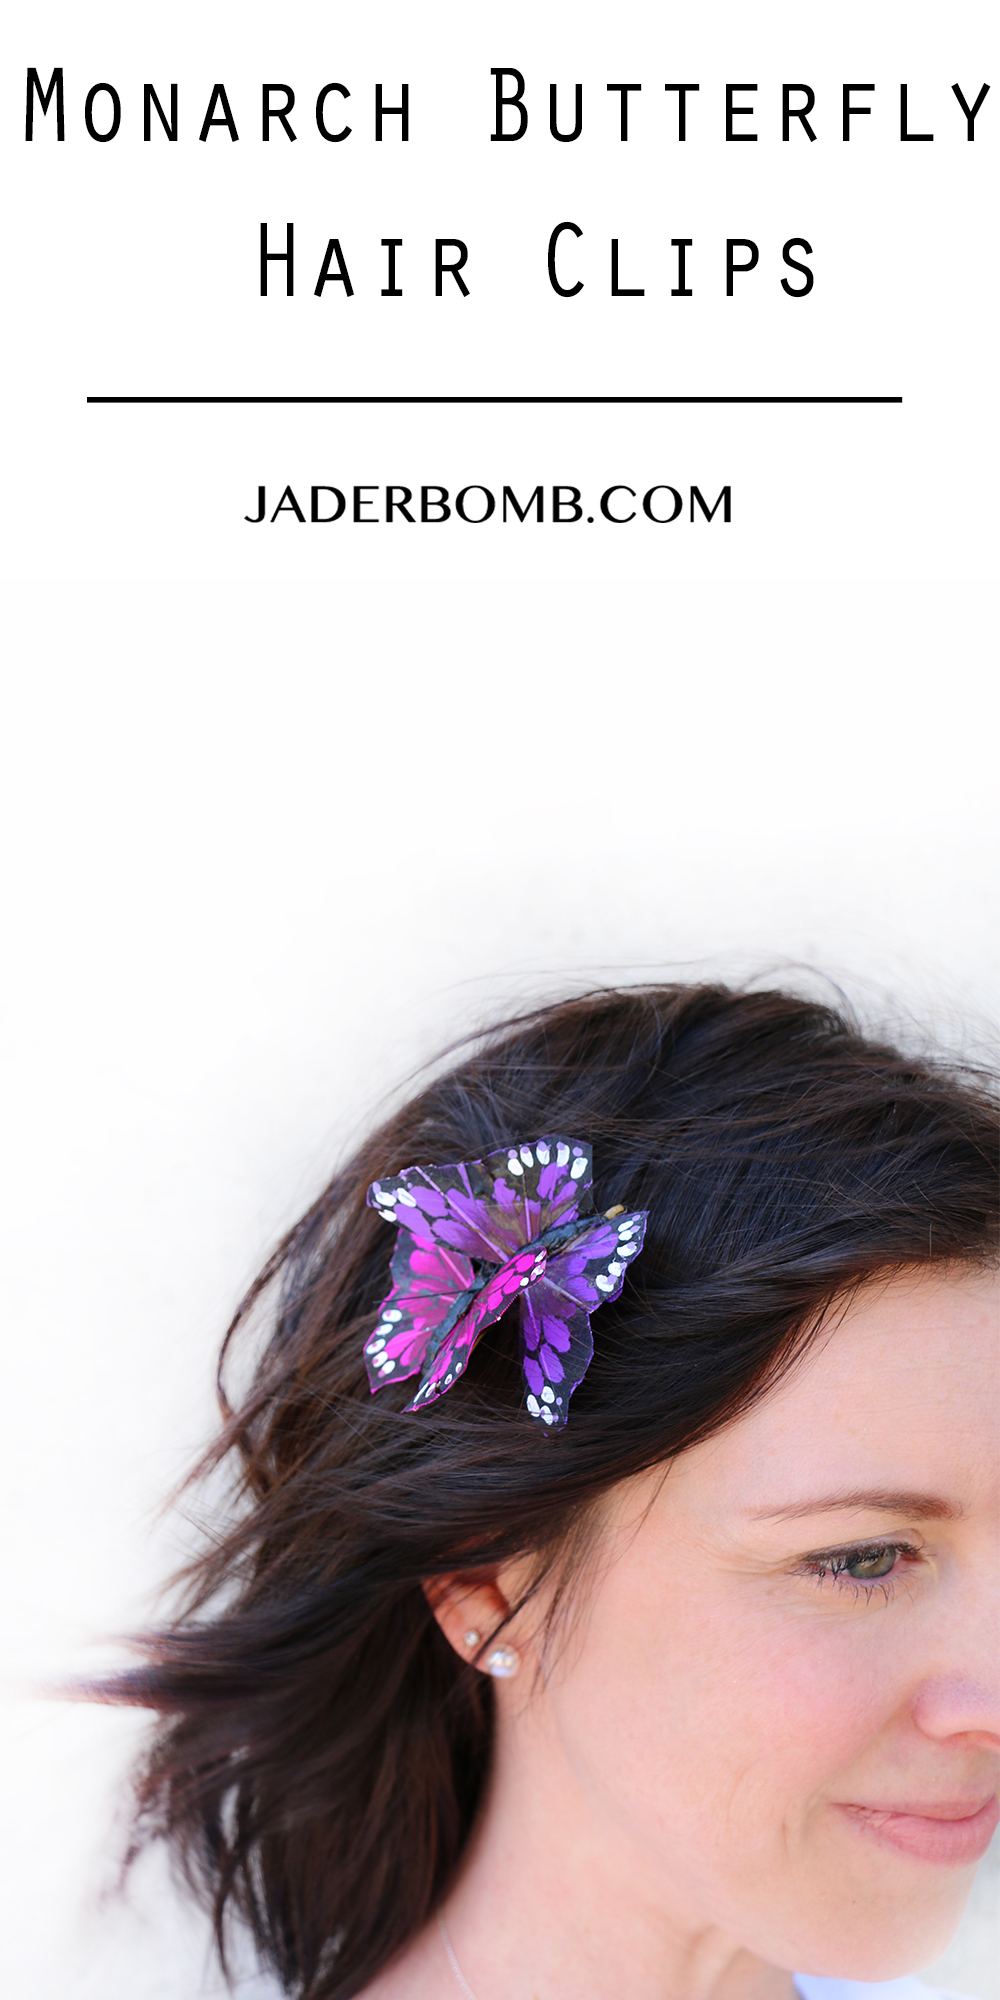
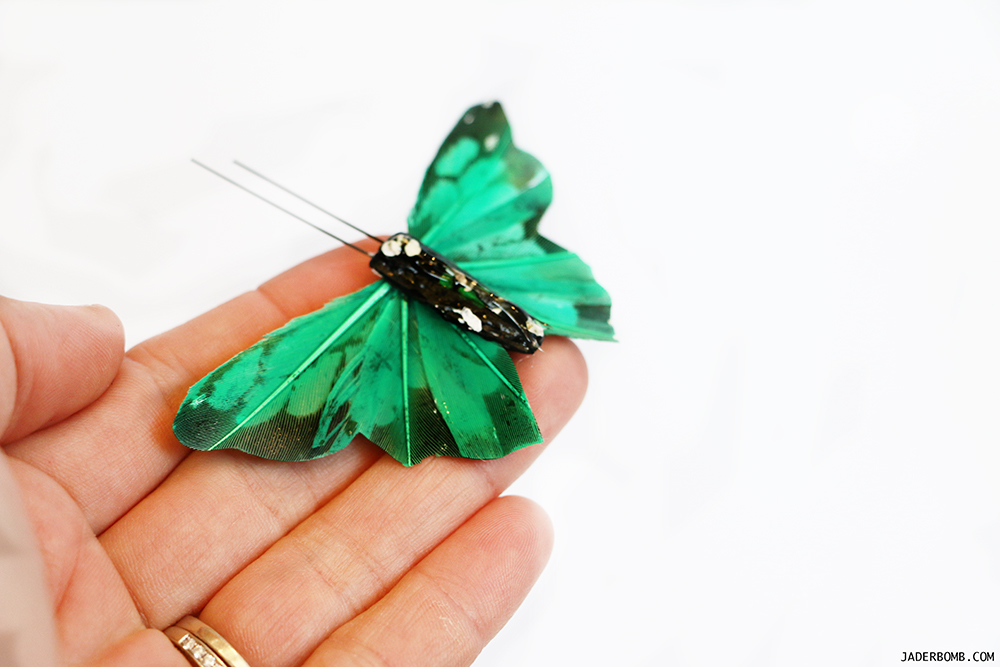
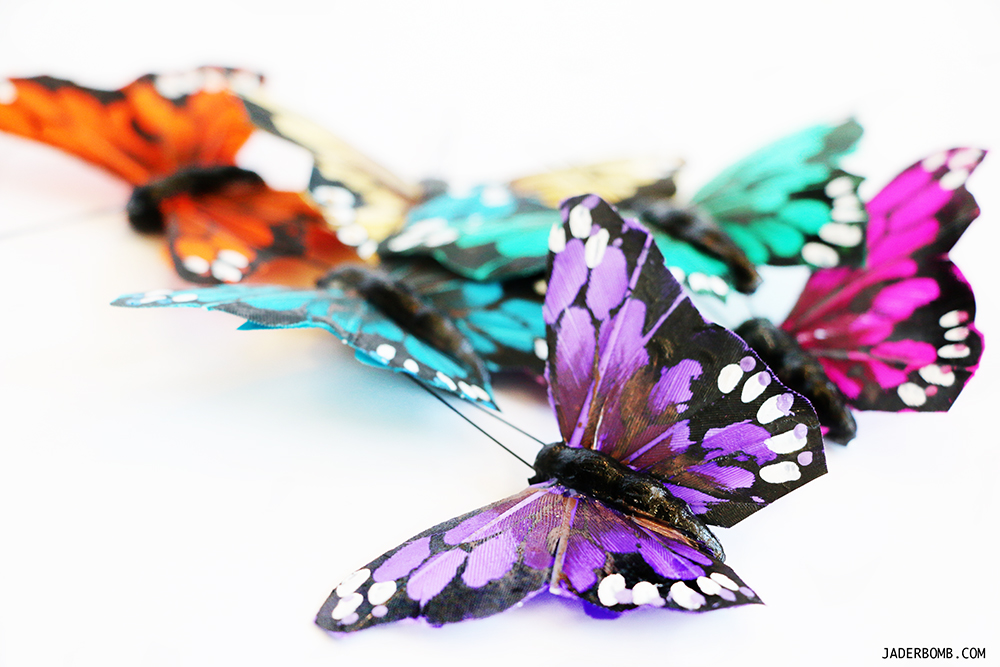
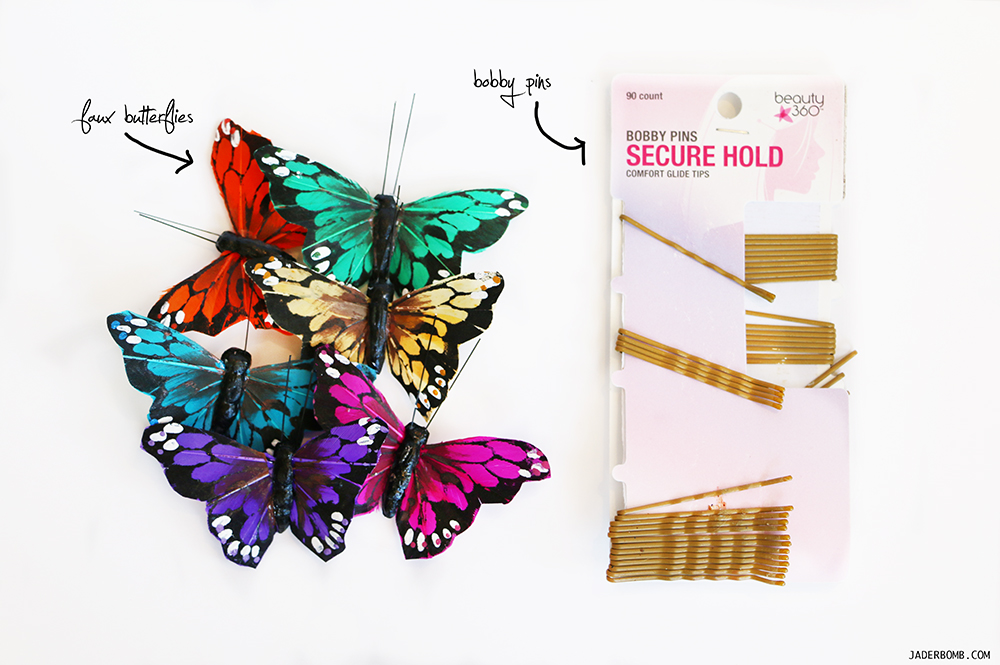 Anything that is bright and whimsical so when I ran across these butterflies at Michaels I fell in LOVE! You can mix and match these in your hair or simply wear one bold color to make a statement! This project literally cost $3 bucks to make, now that is a deal!!!

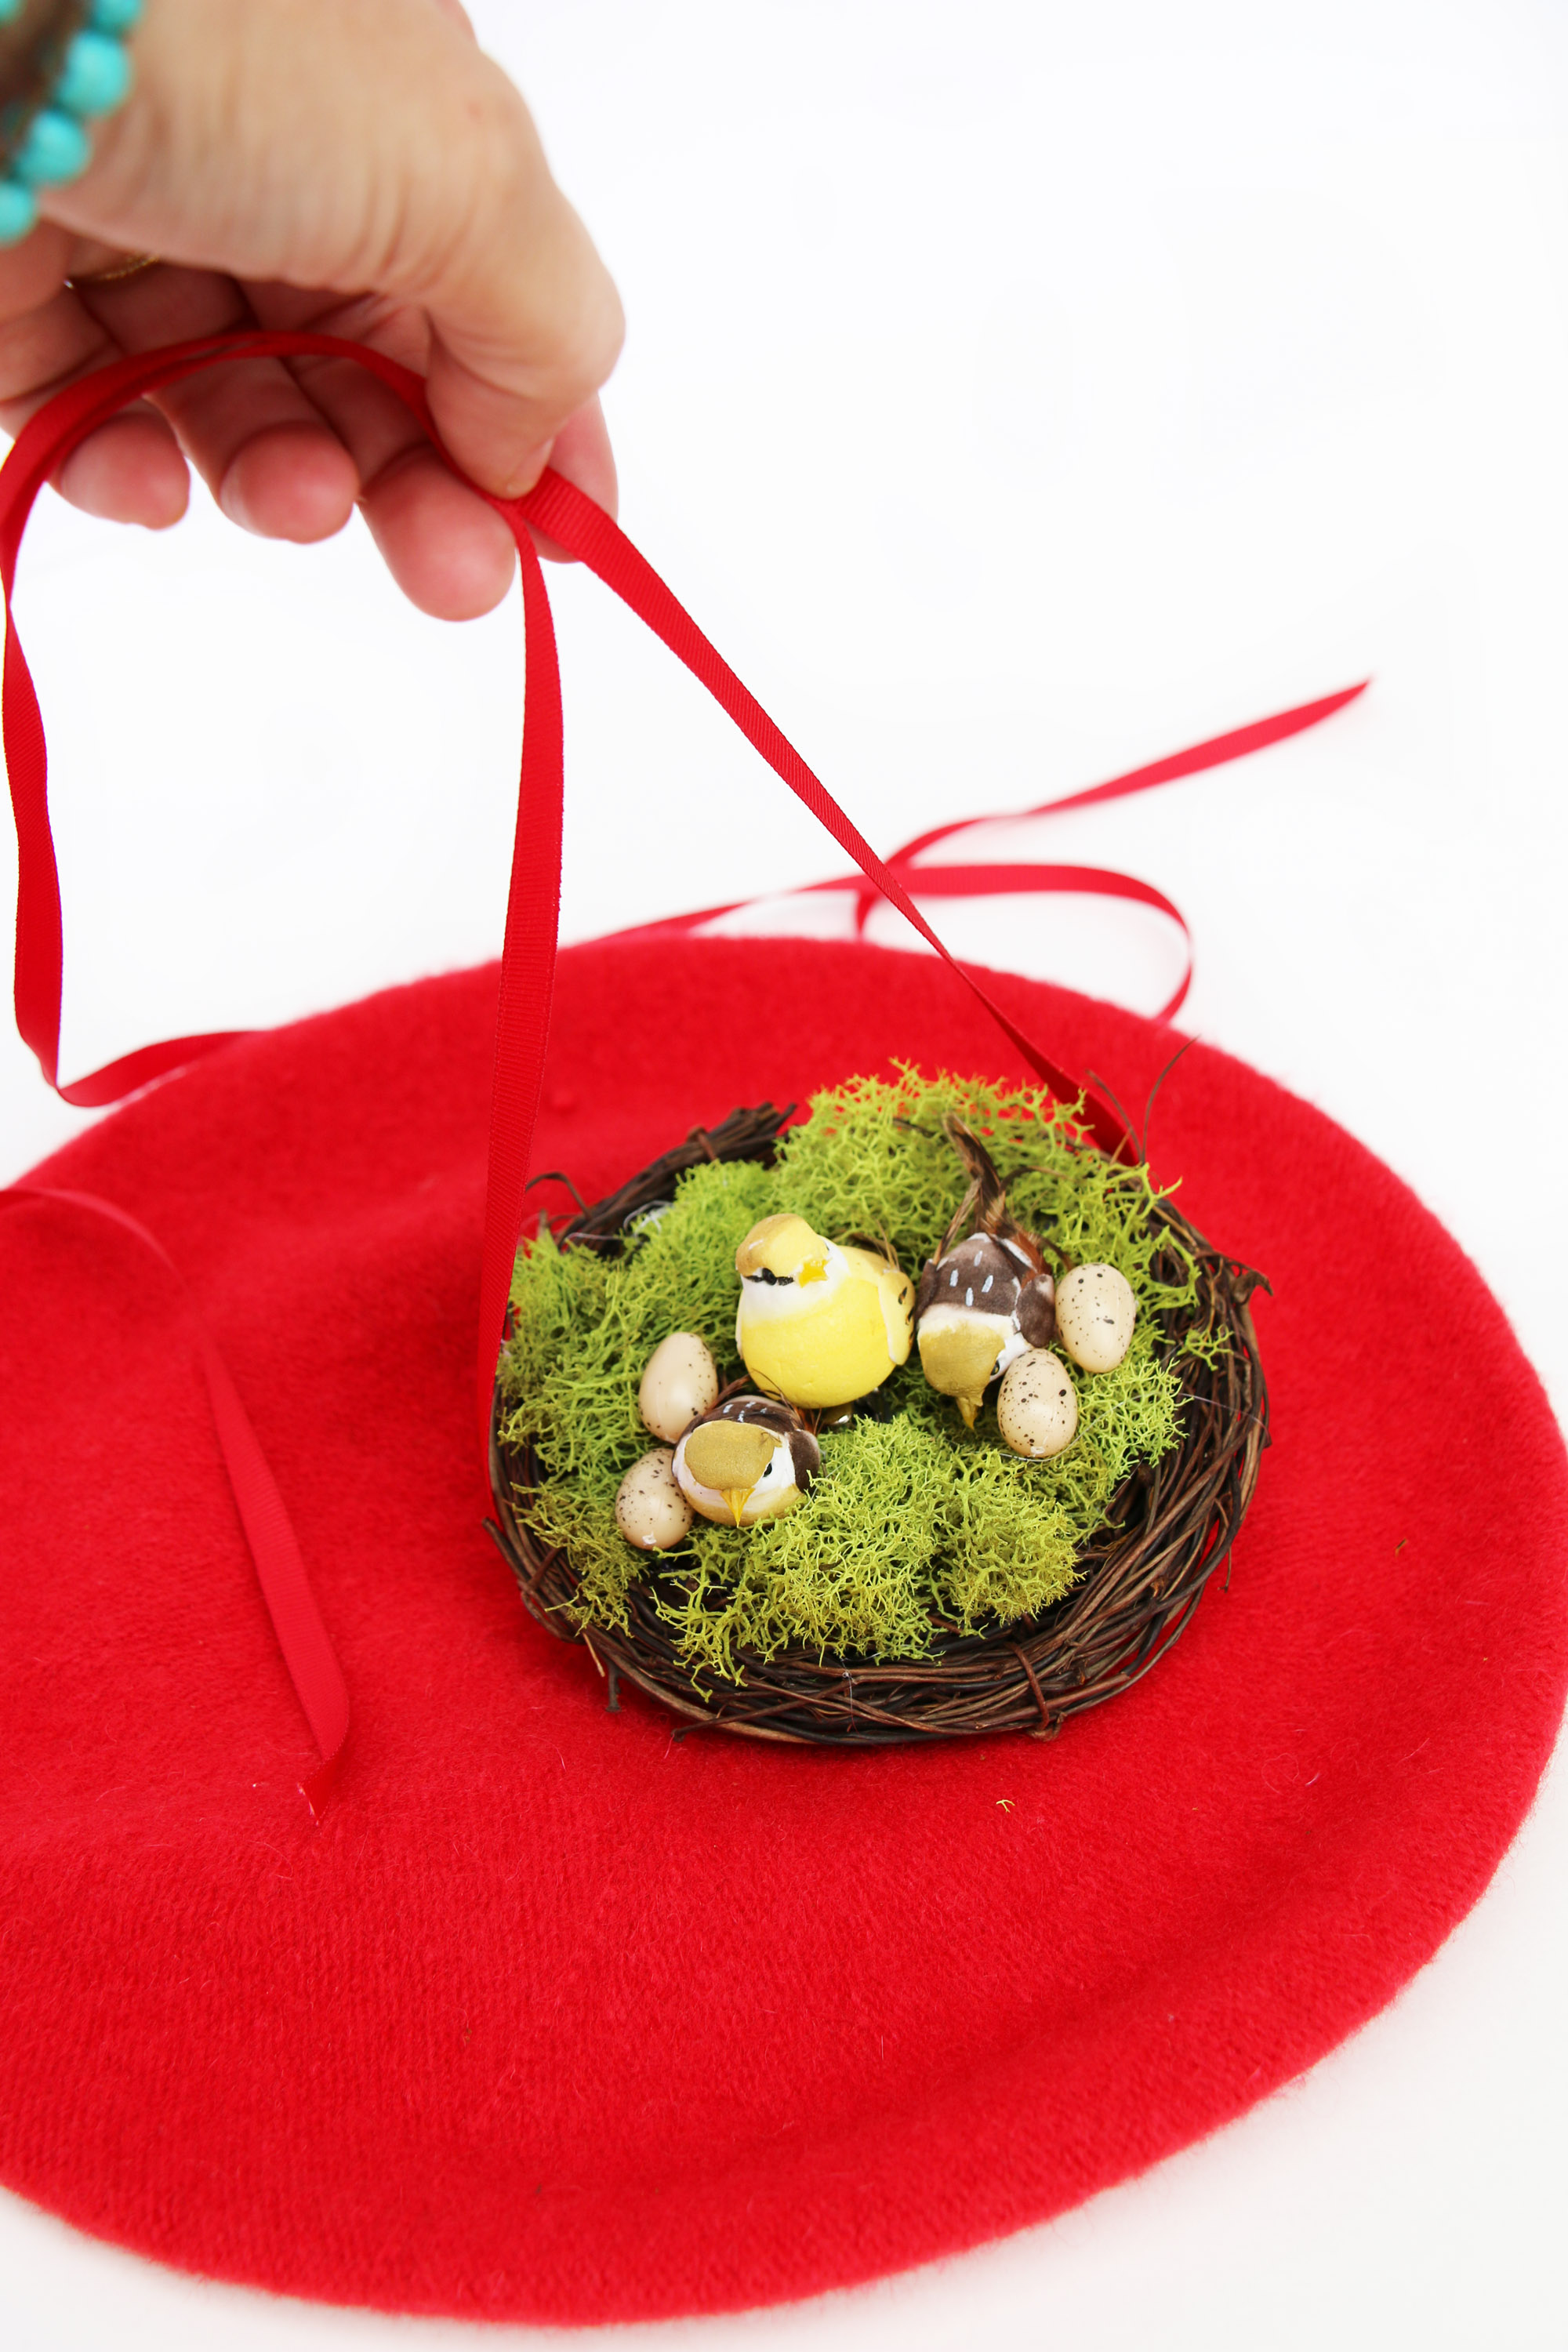
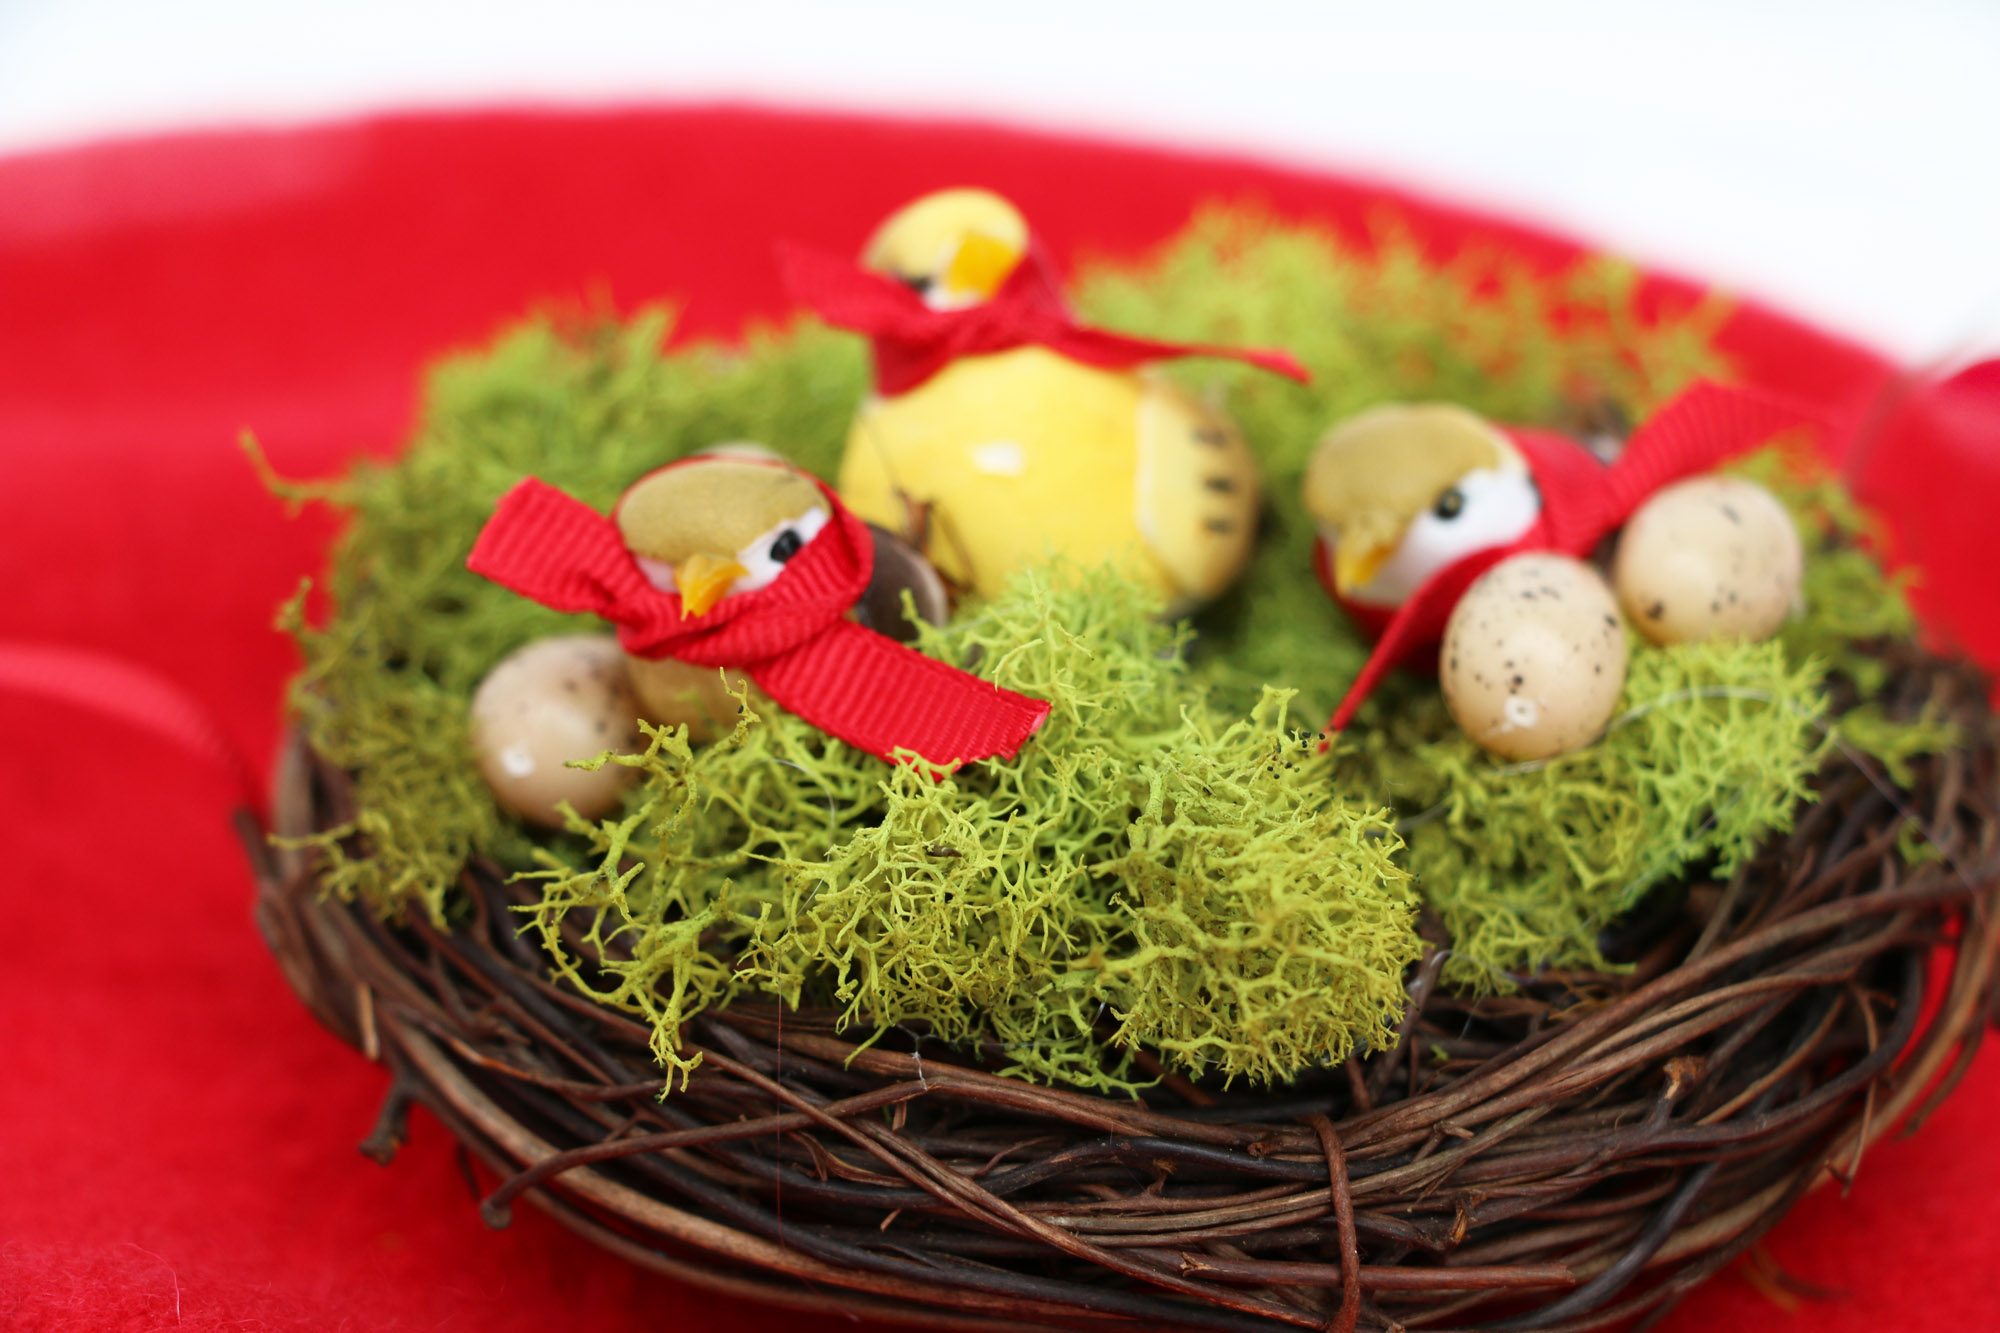
 Now is the time to adore them, literally! It’s fun to wear them in a cluster and somedays just one will do…


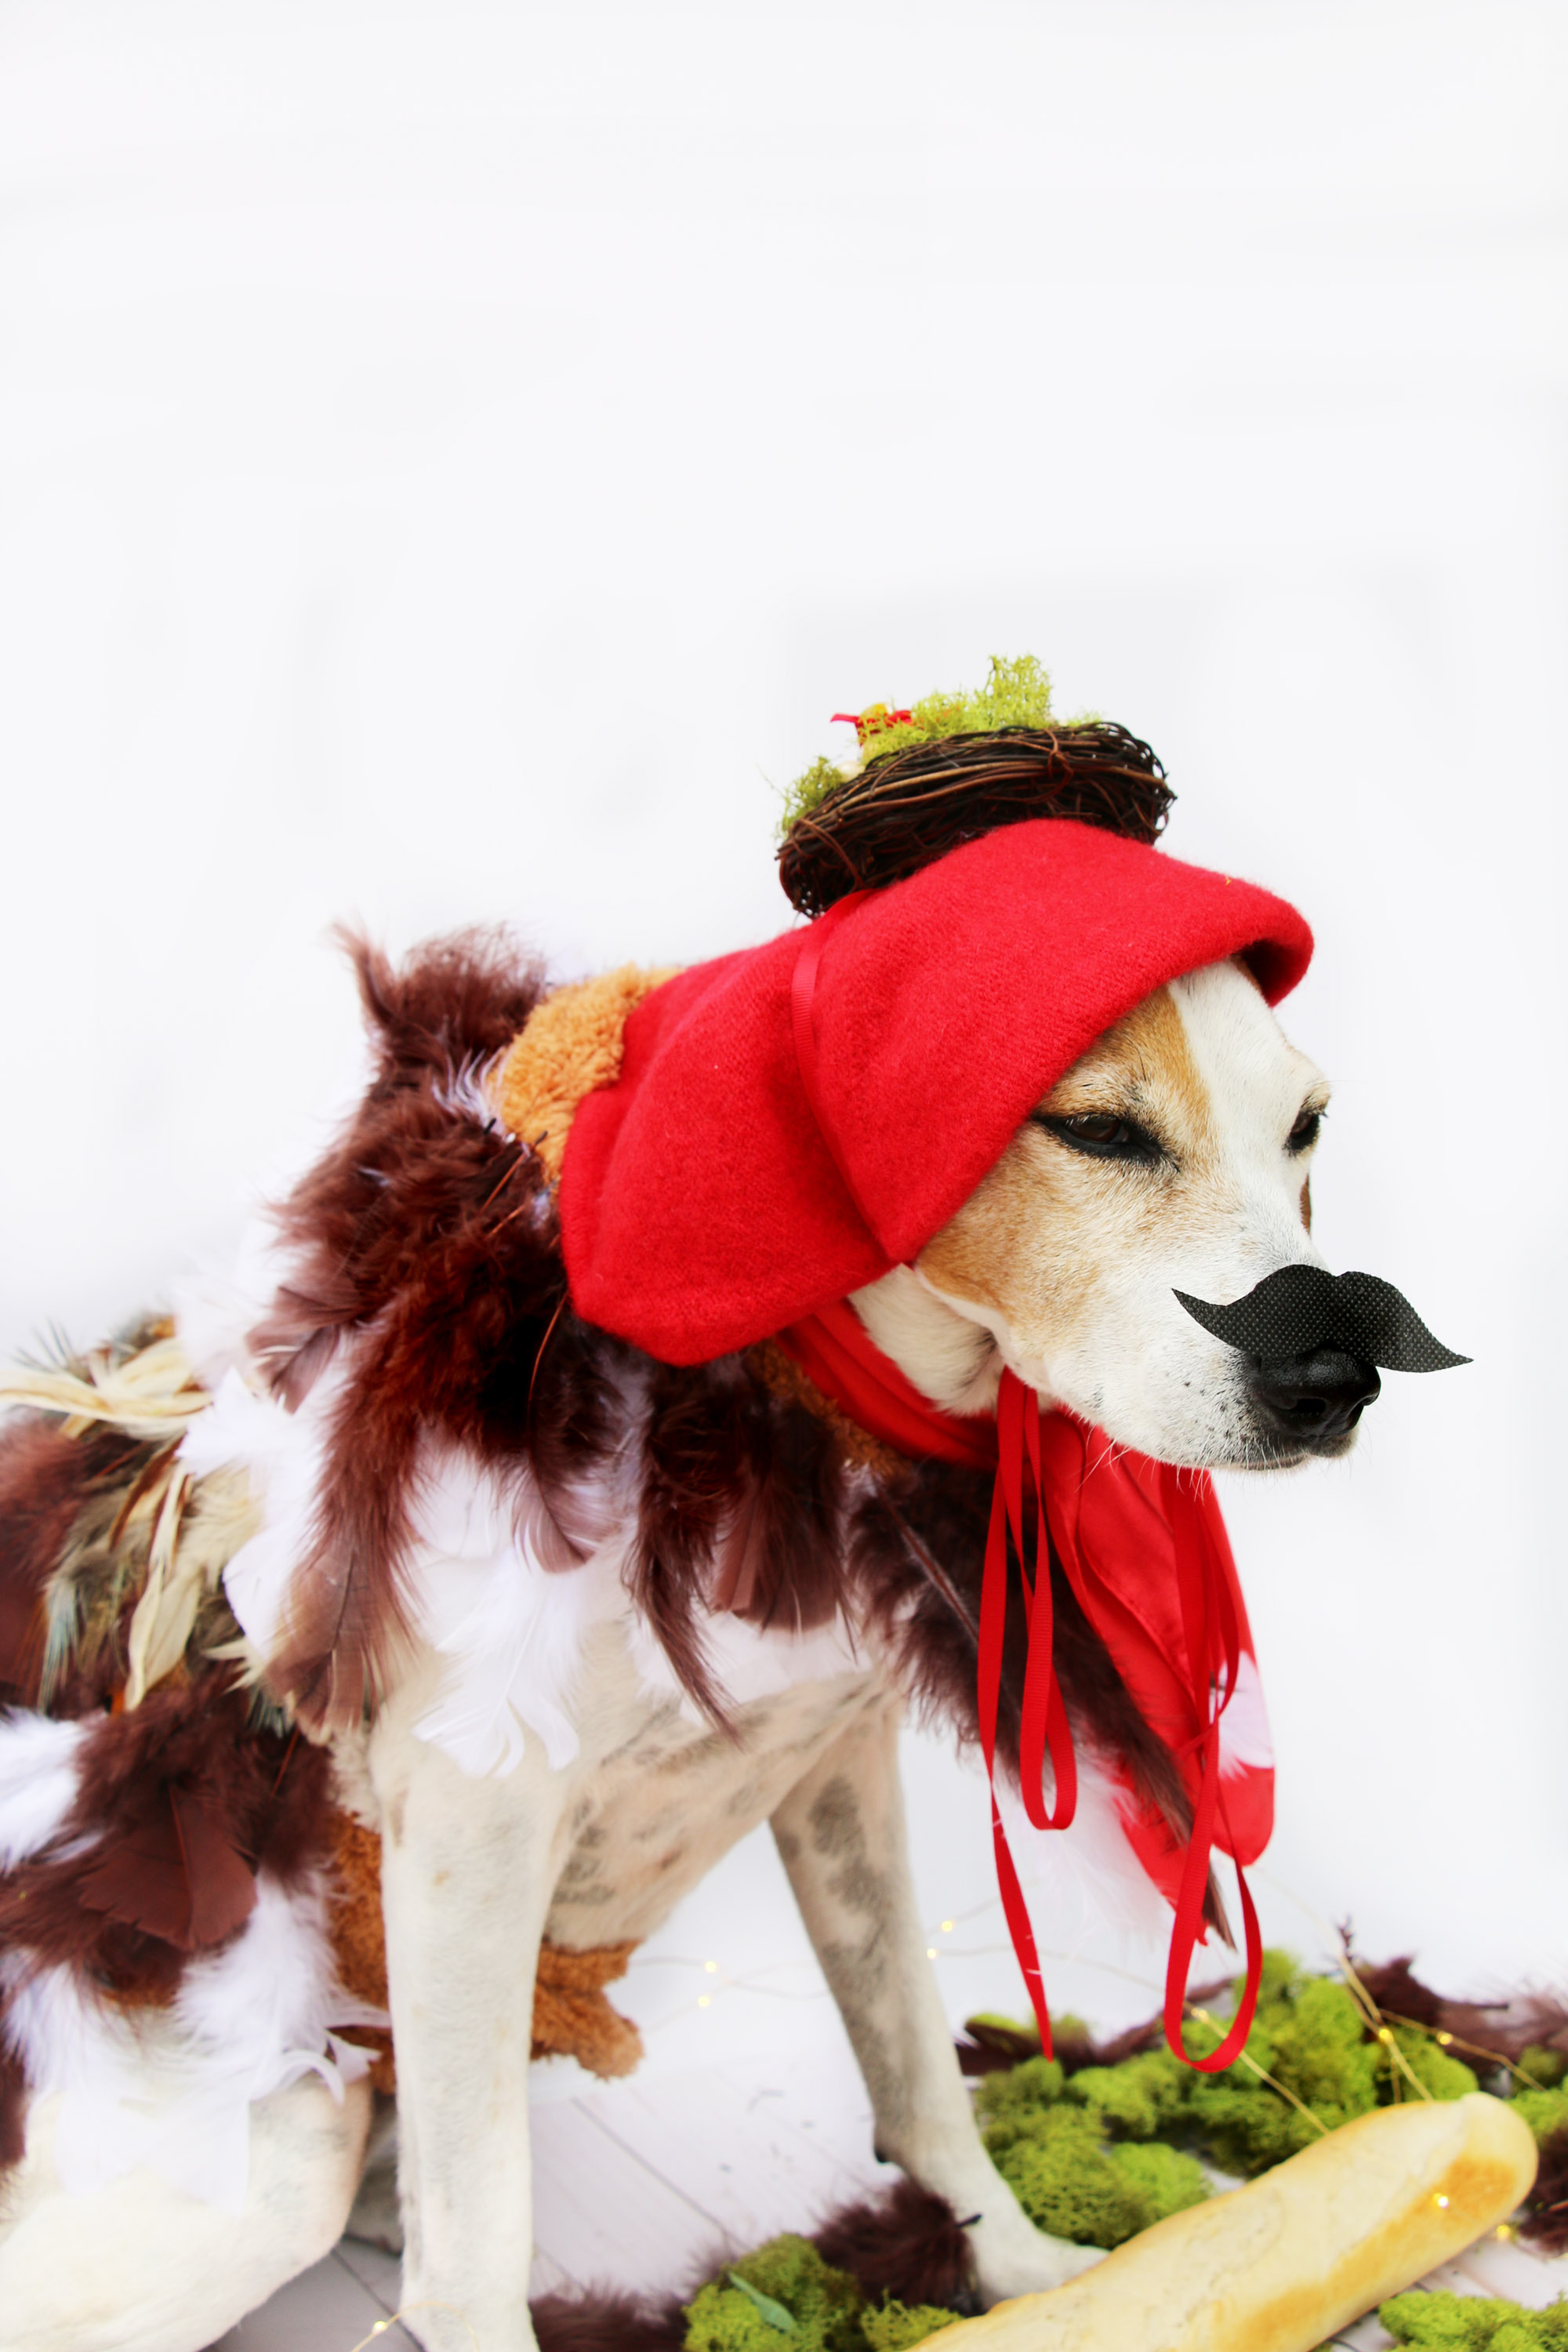
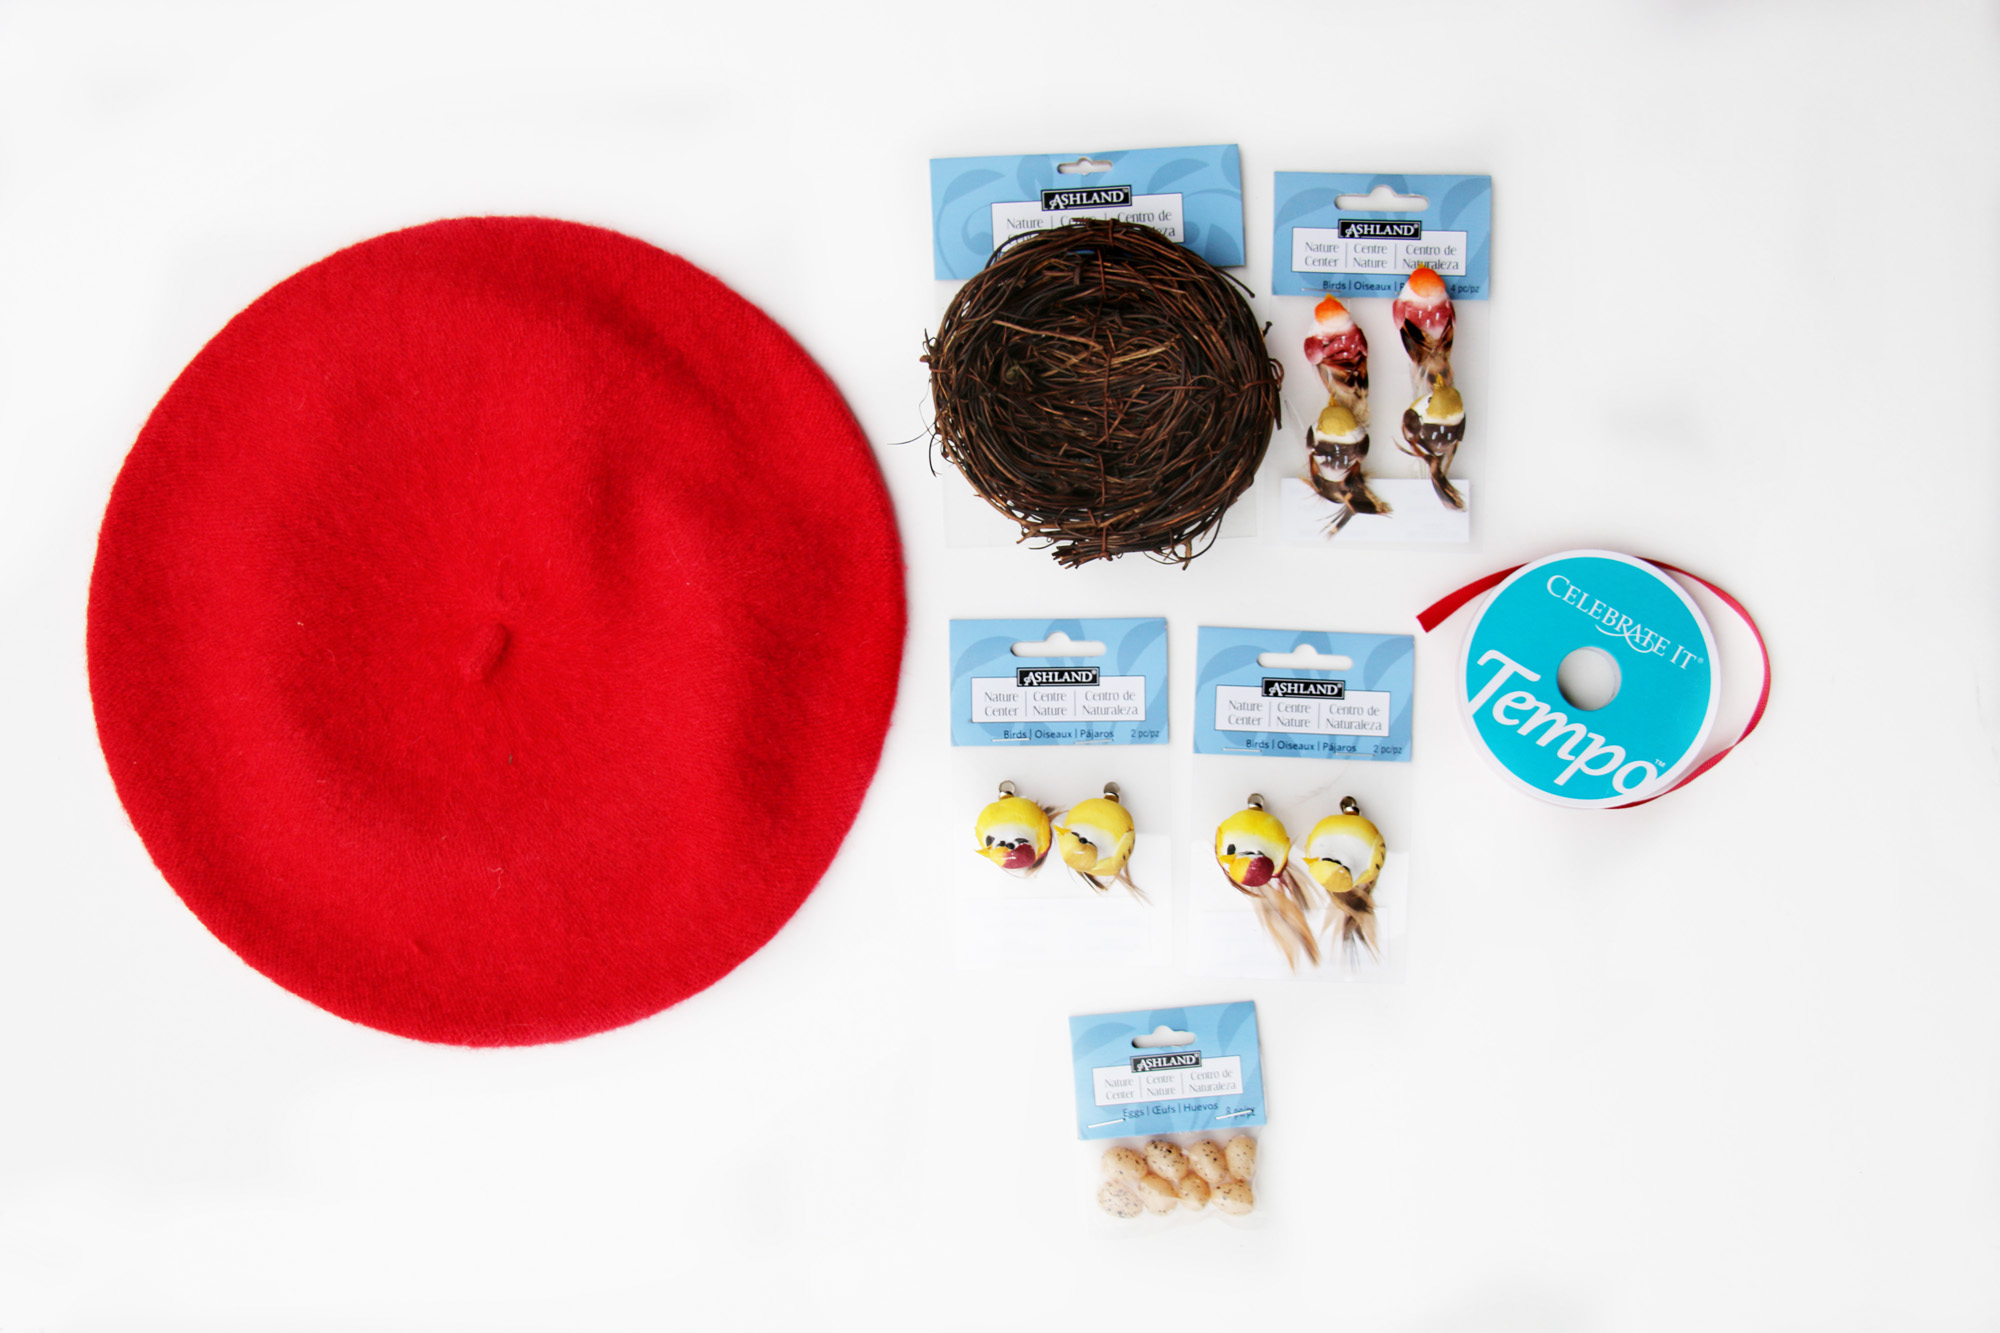
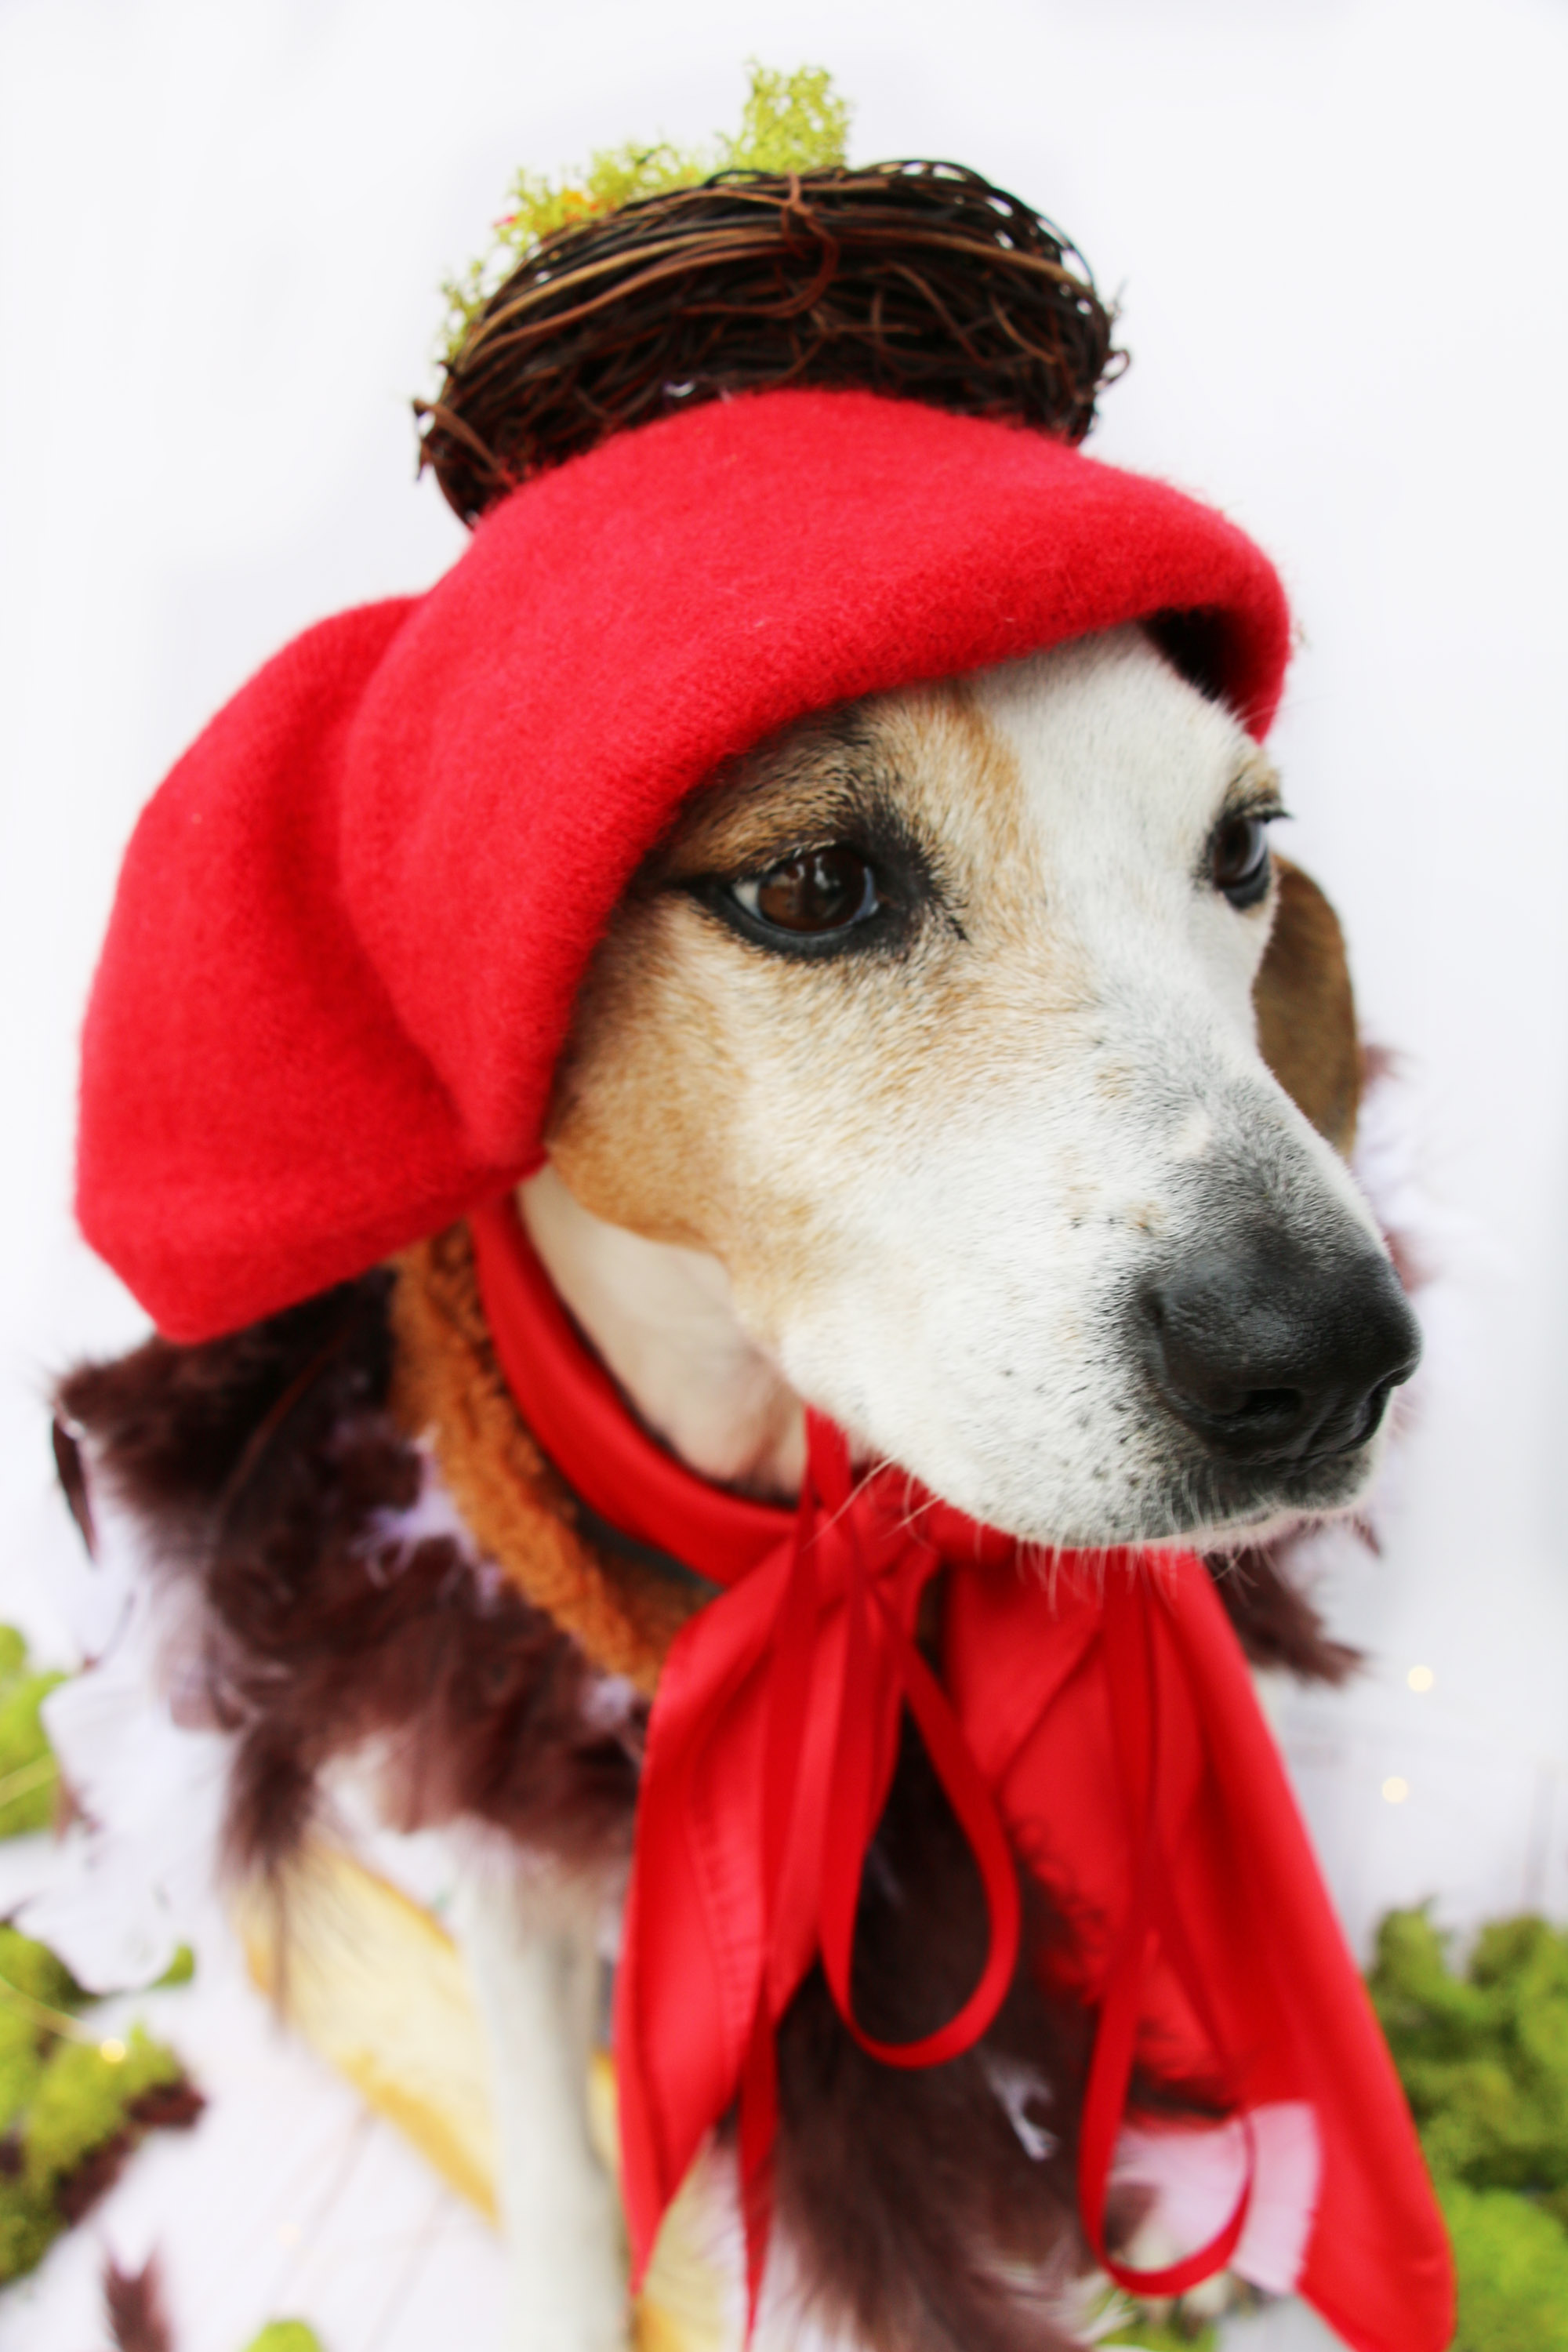
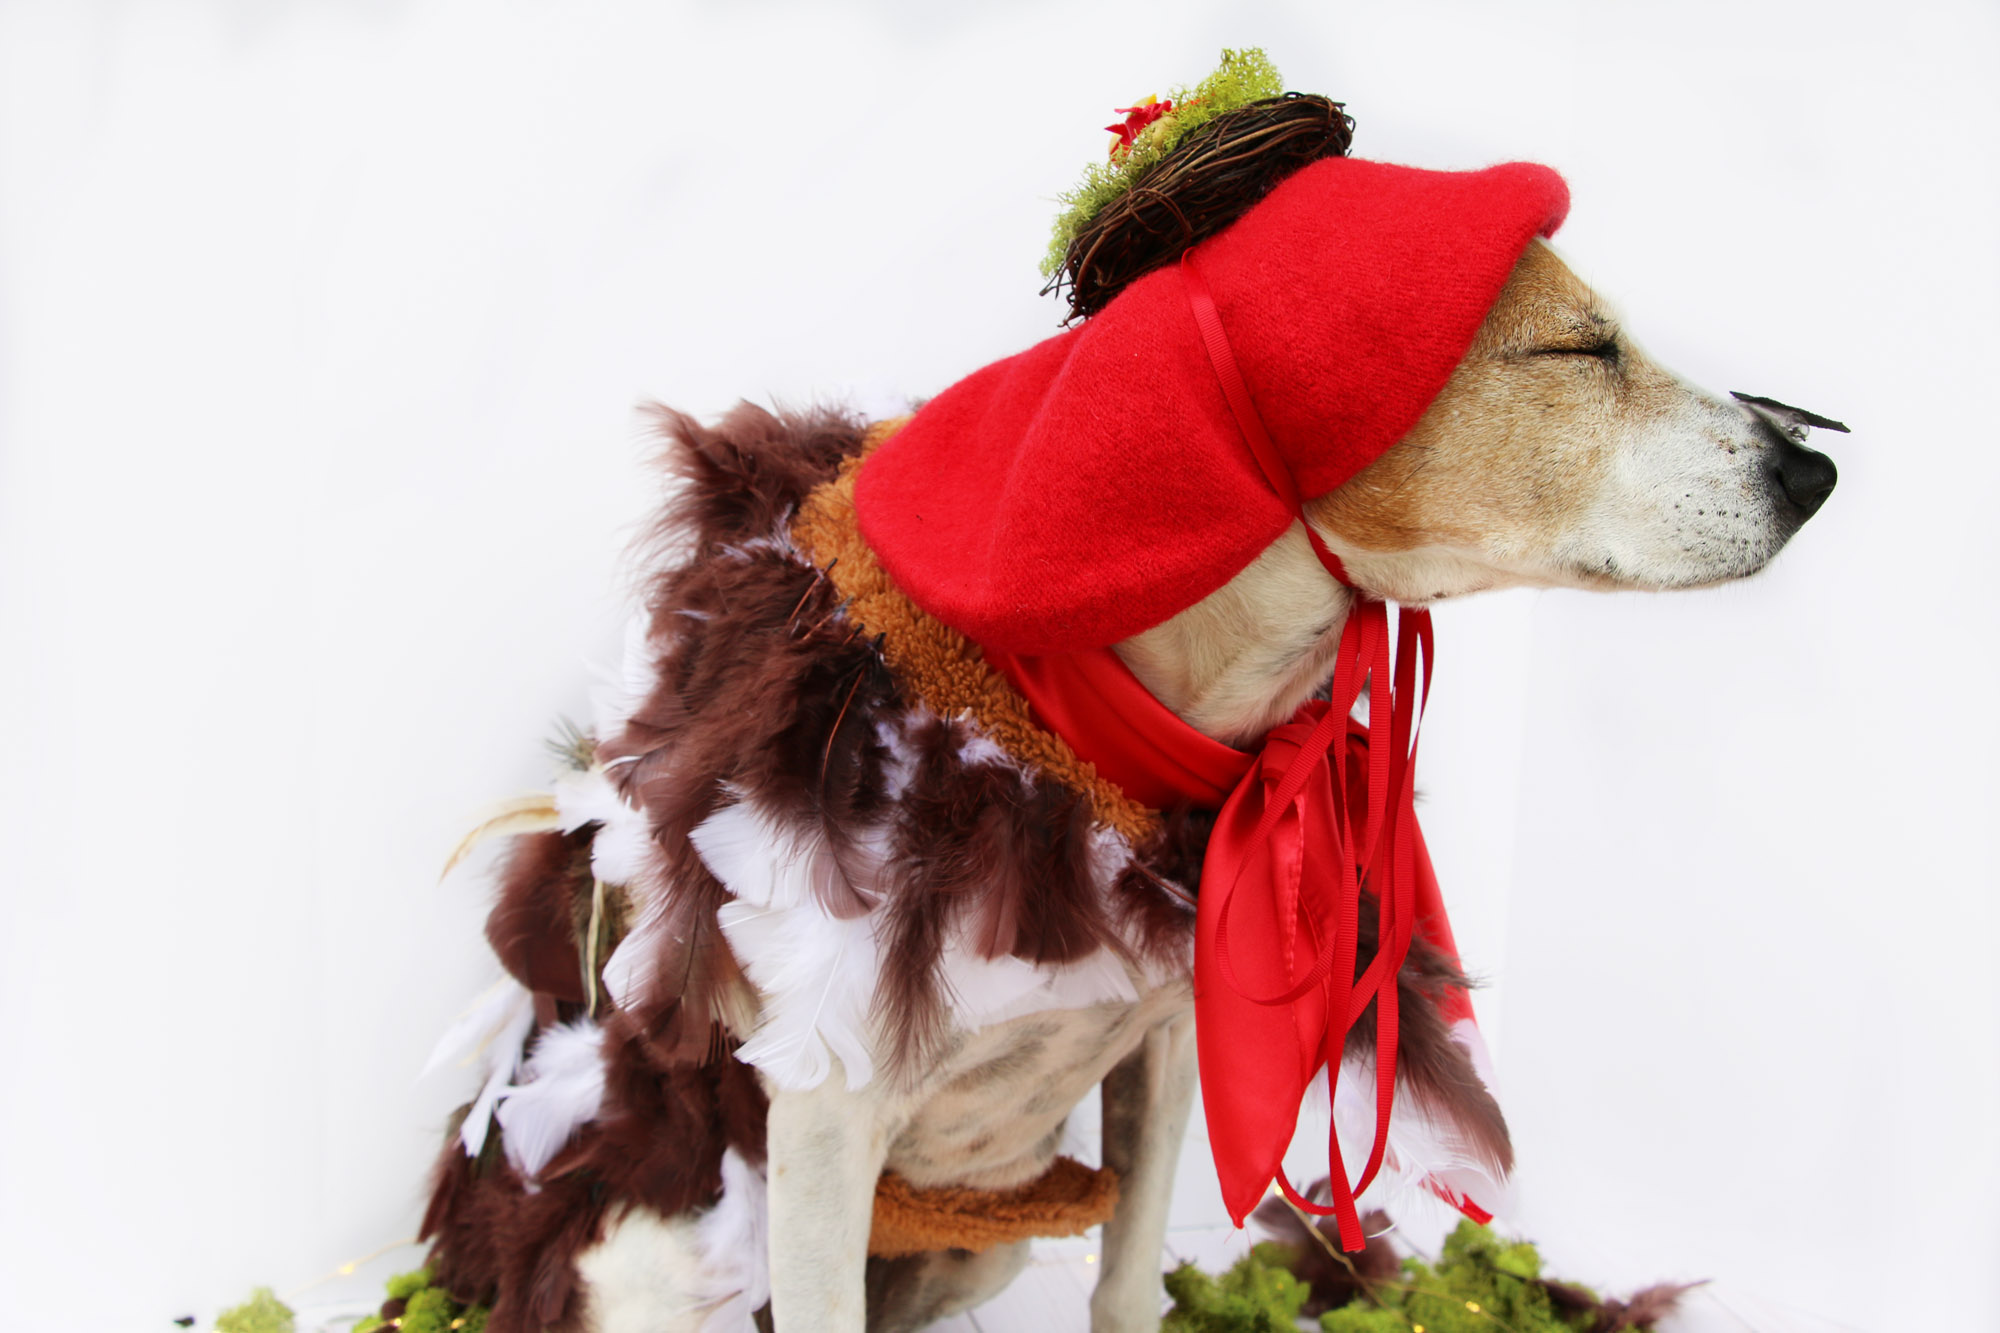
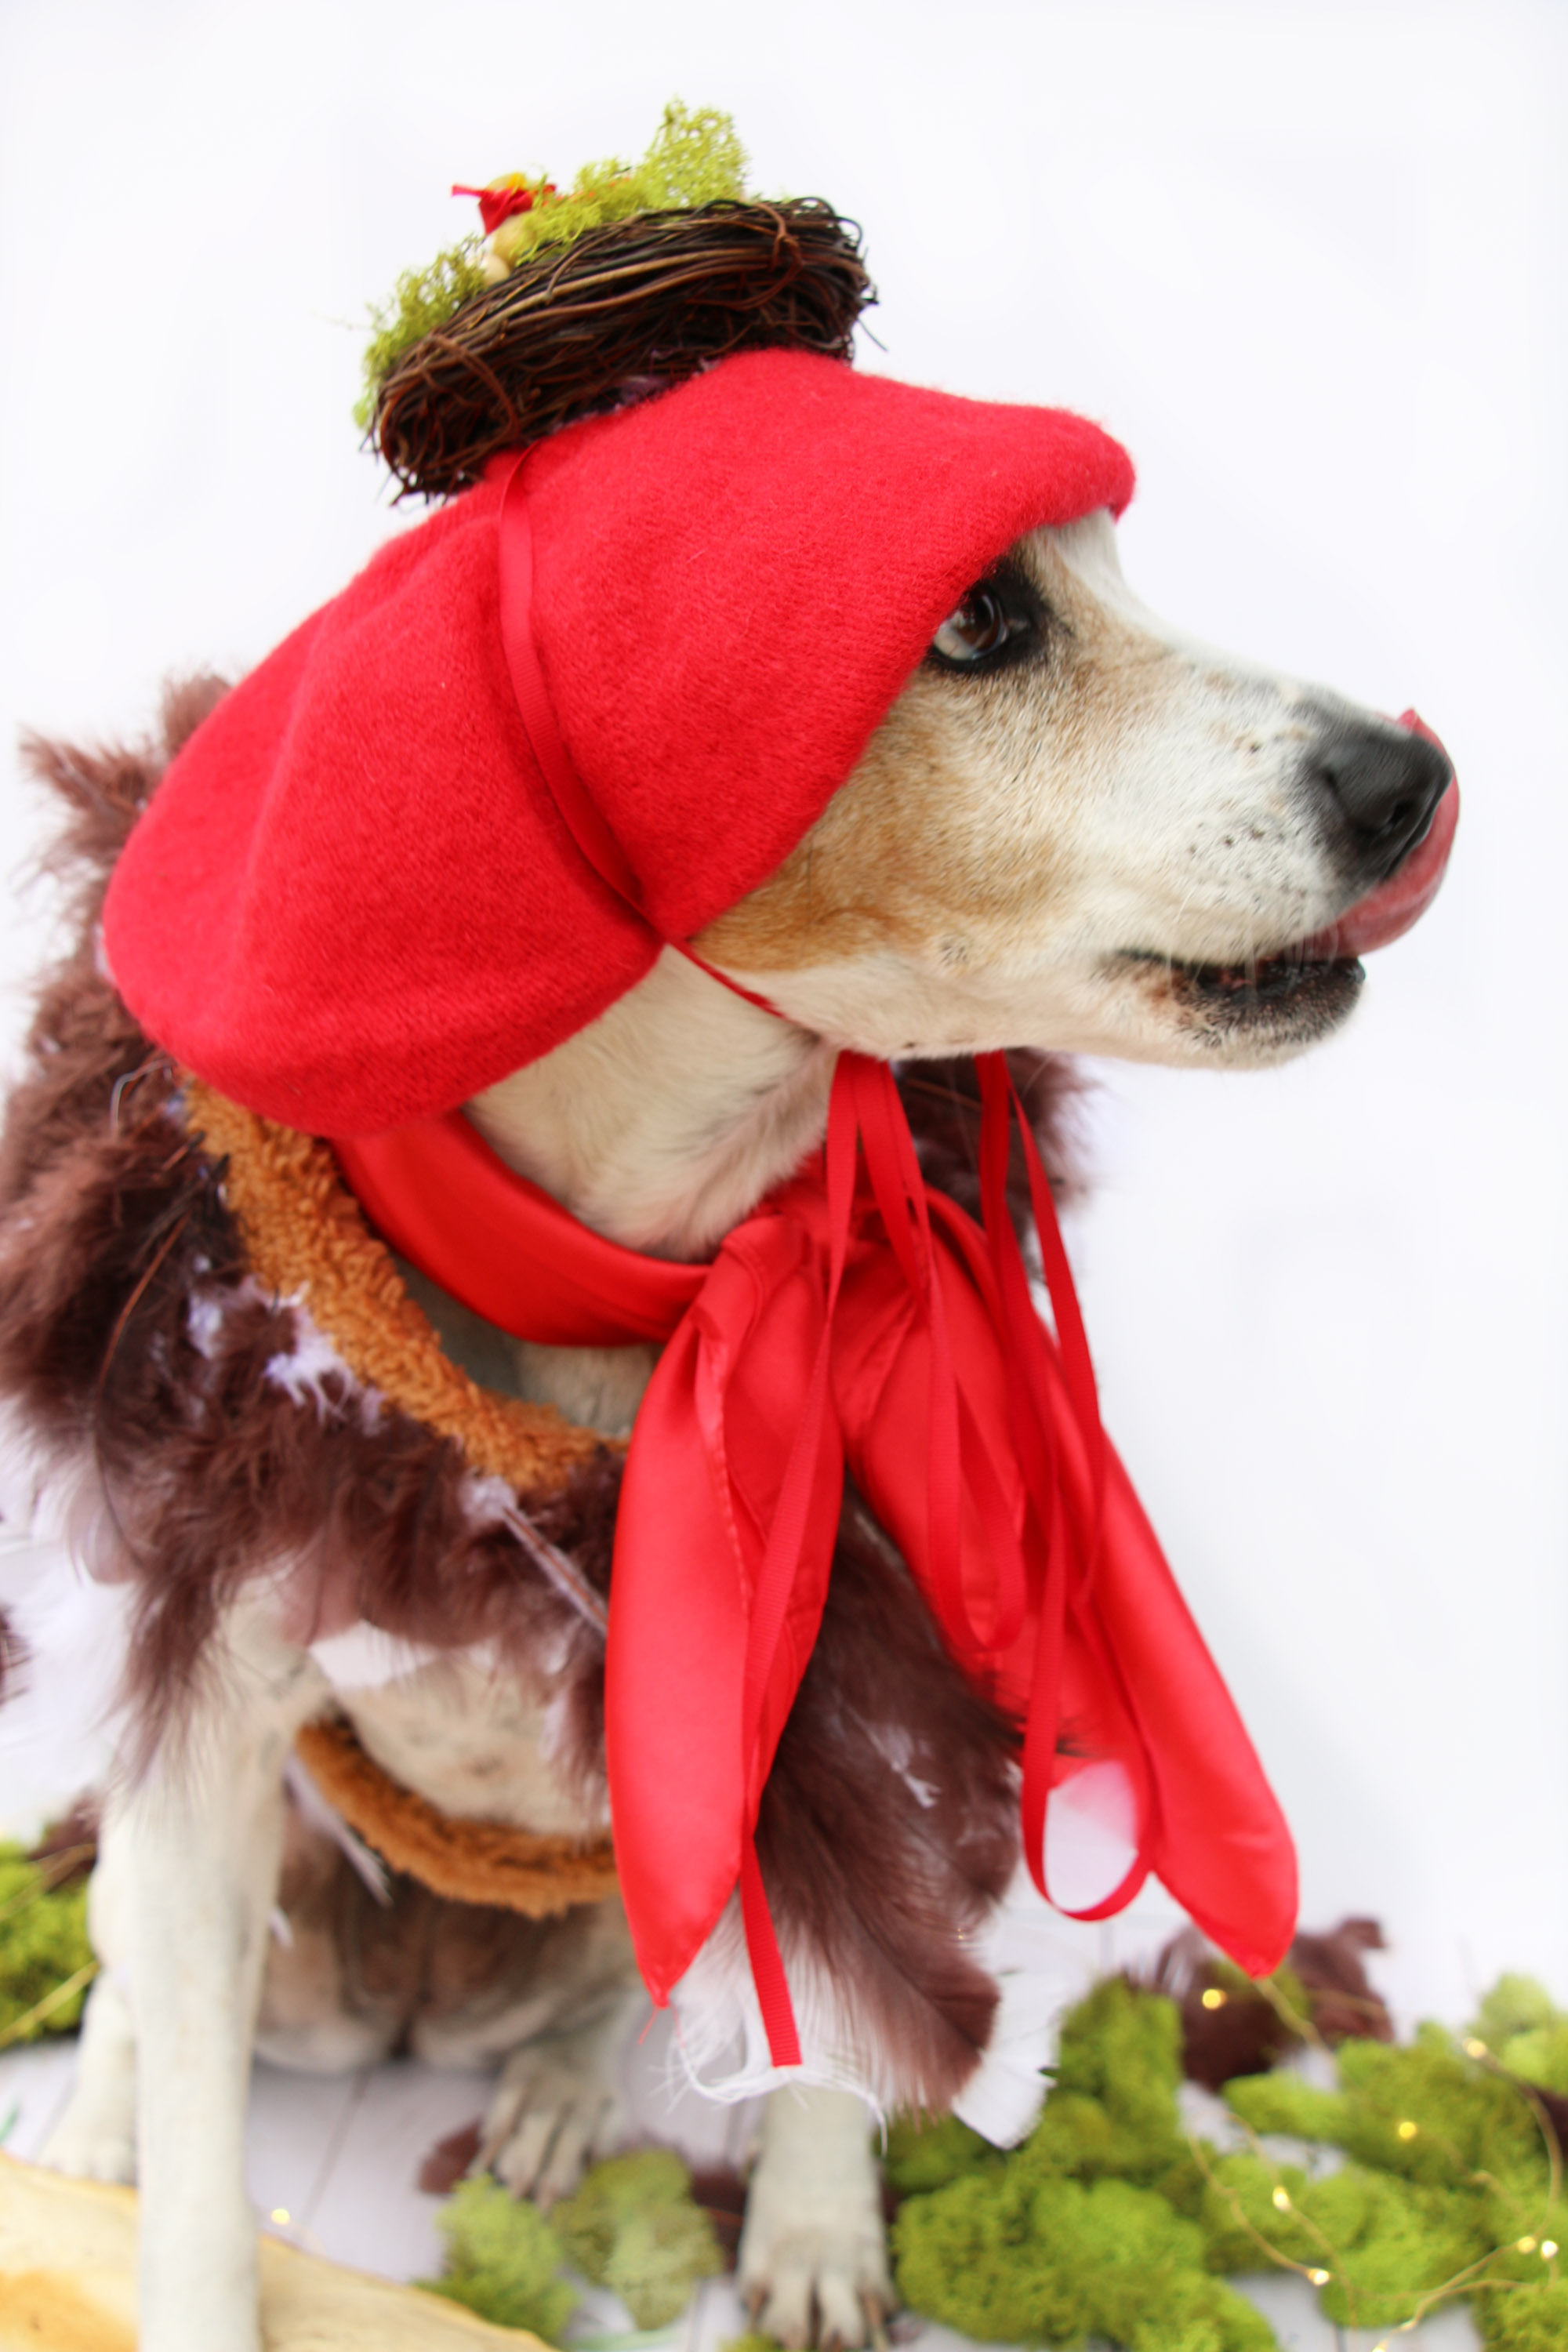
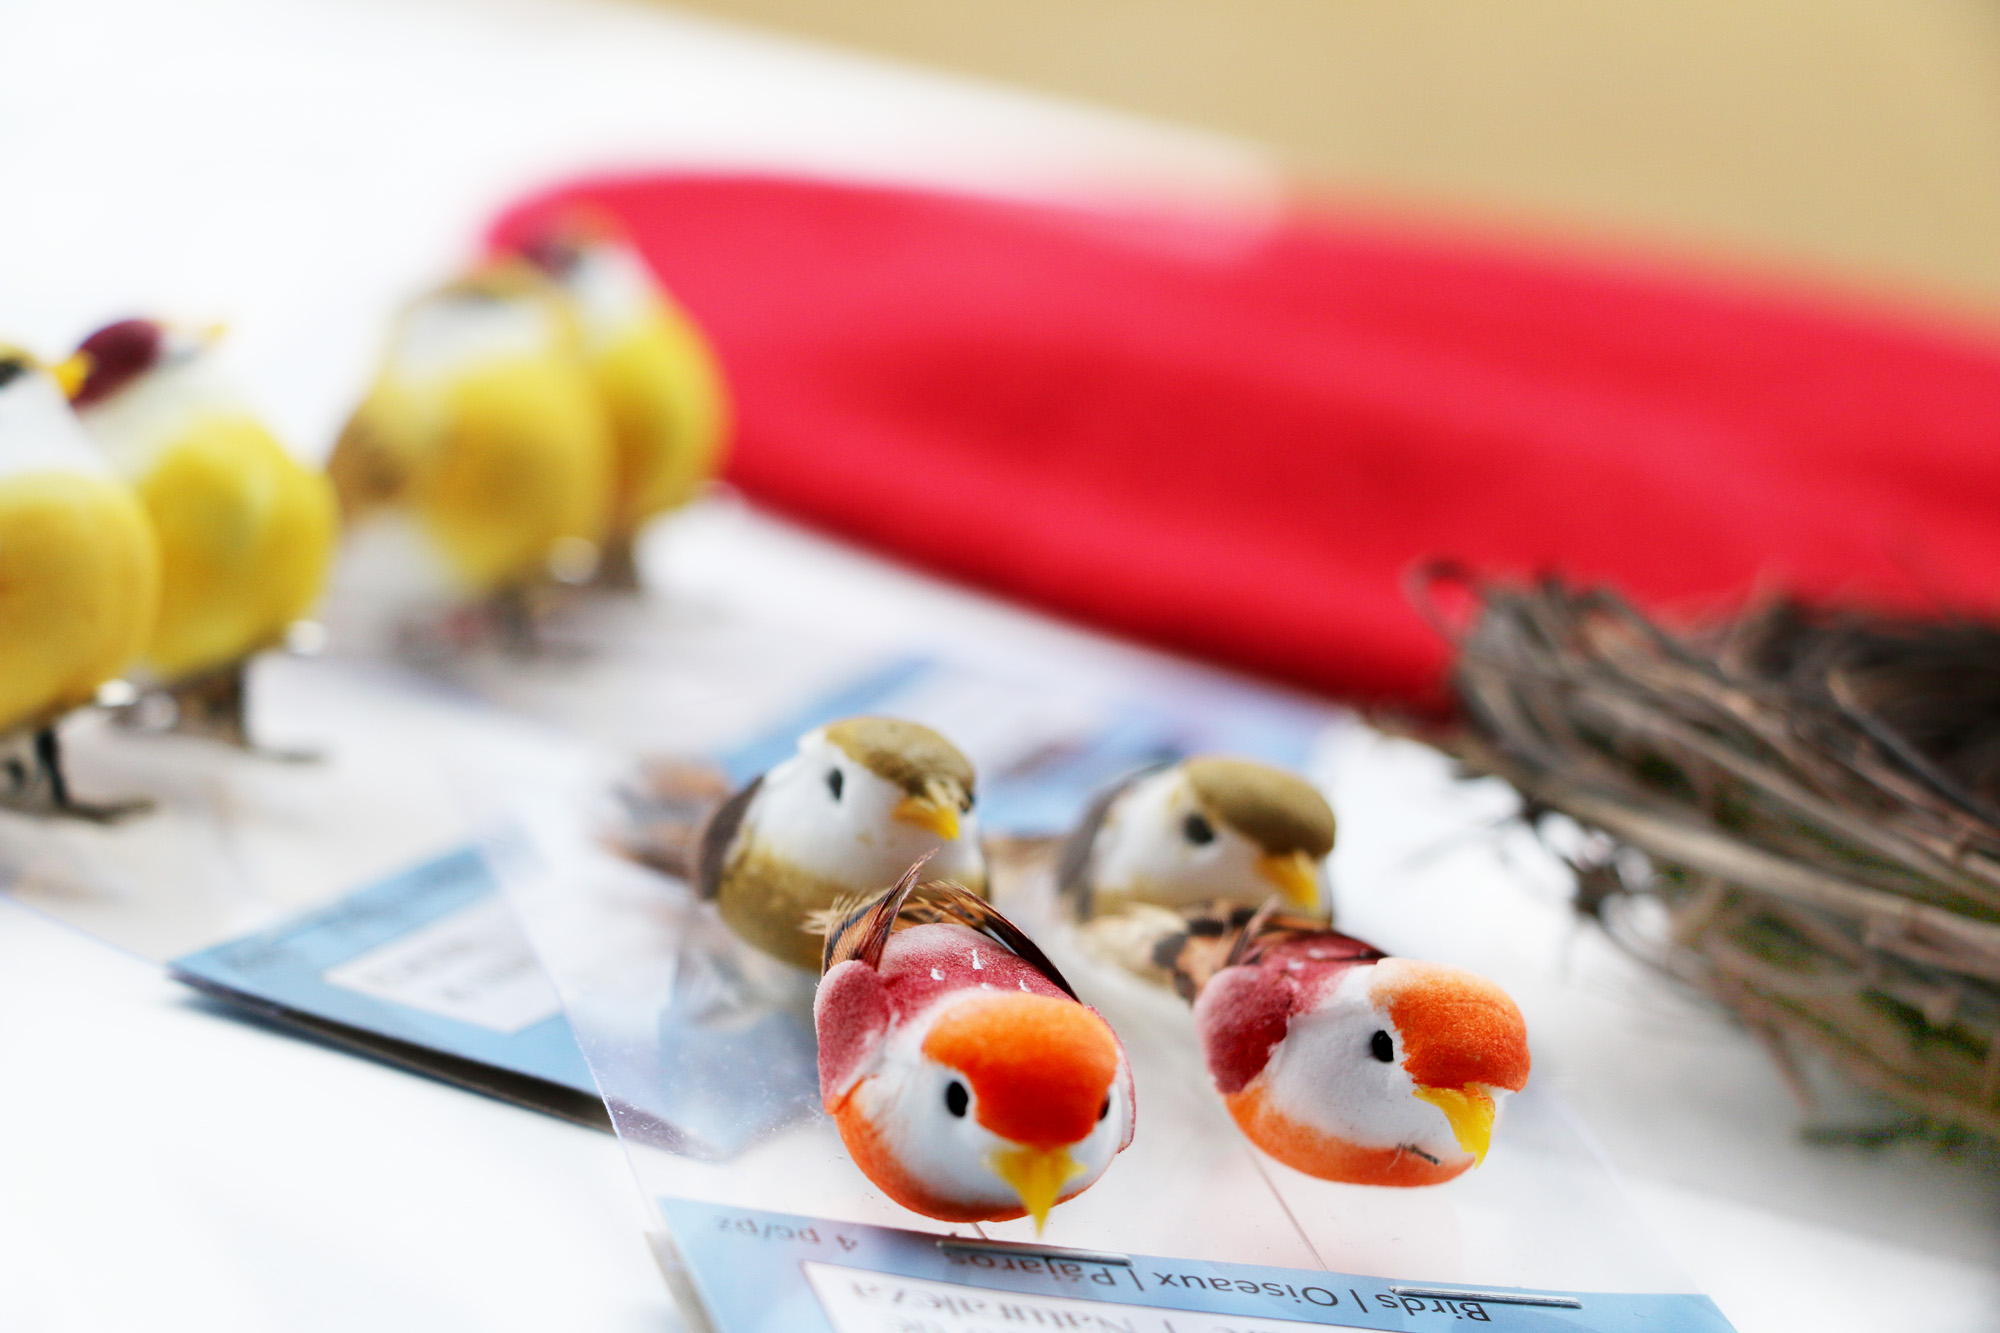 I made it a point to use the darker birds because they look a little more like a French Hen.
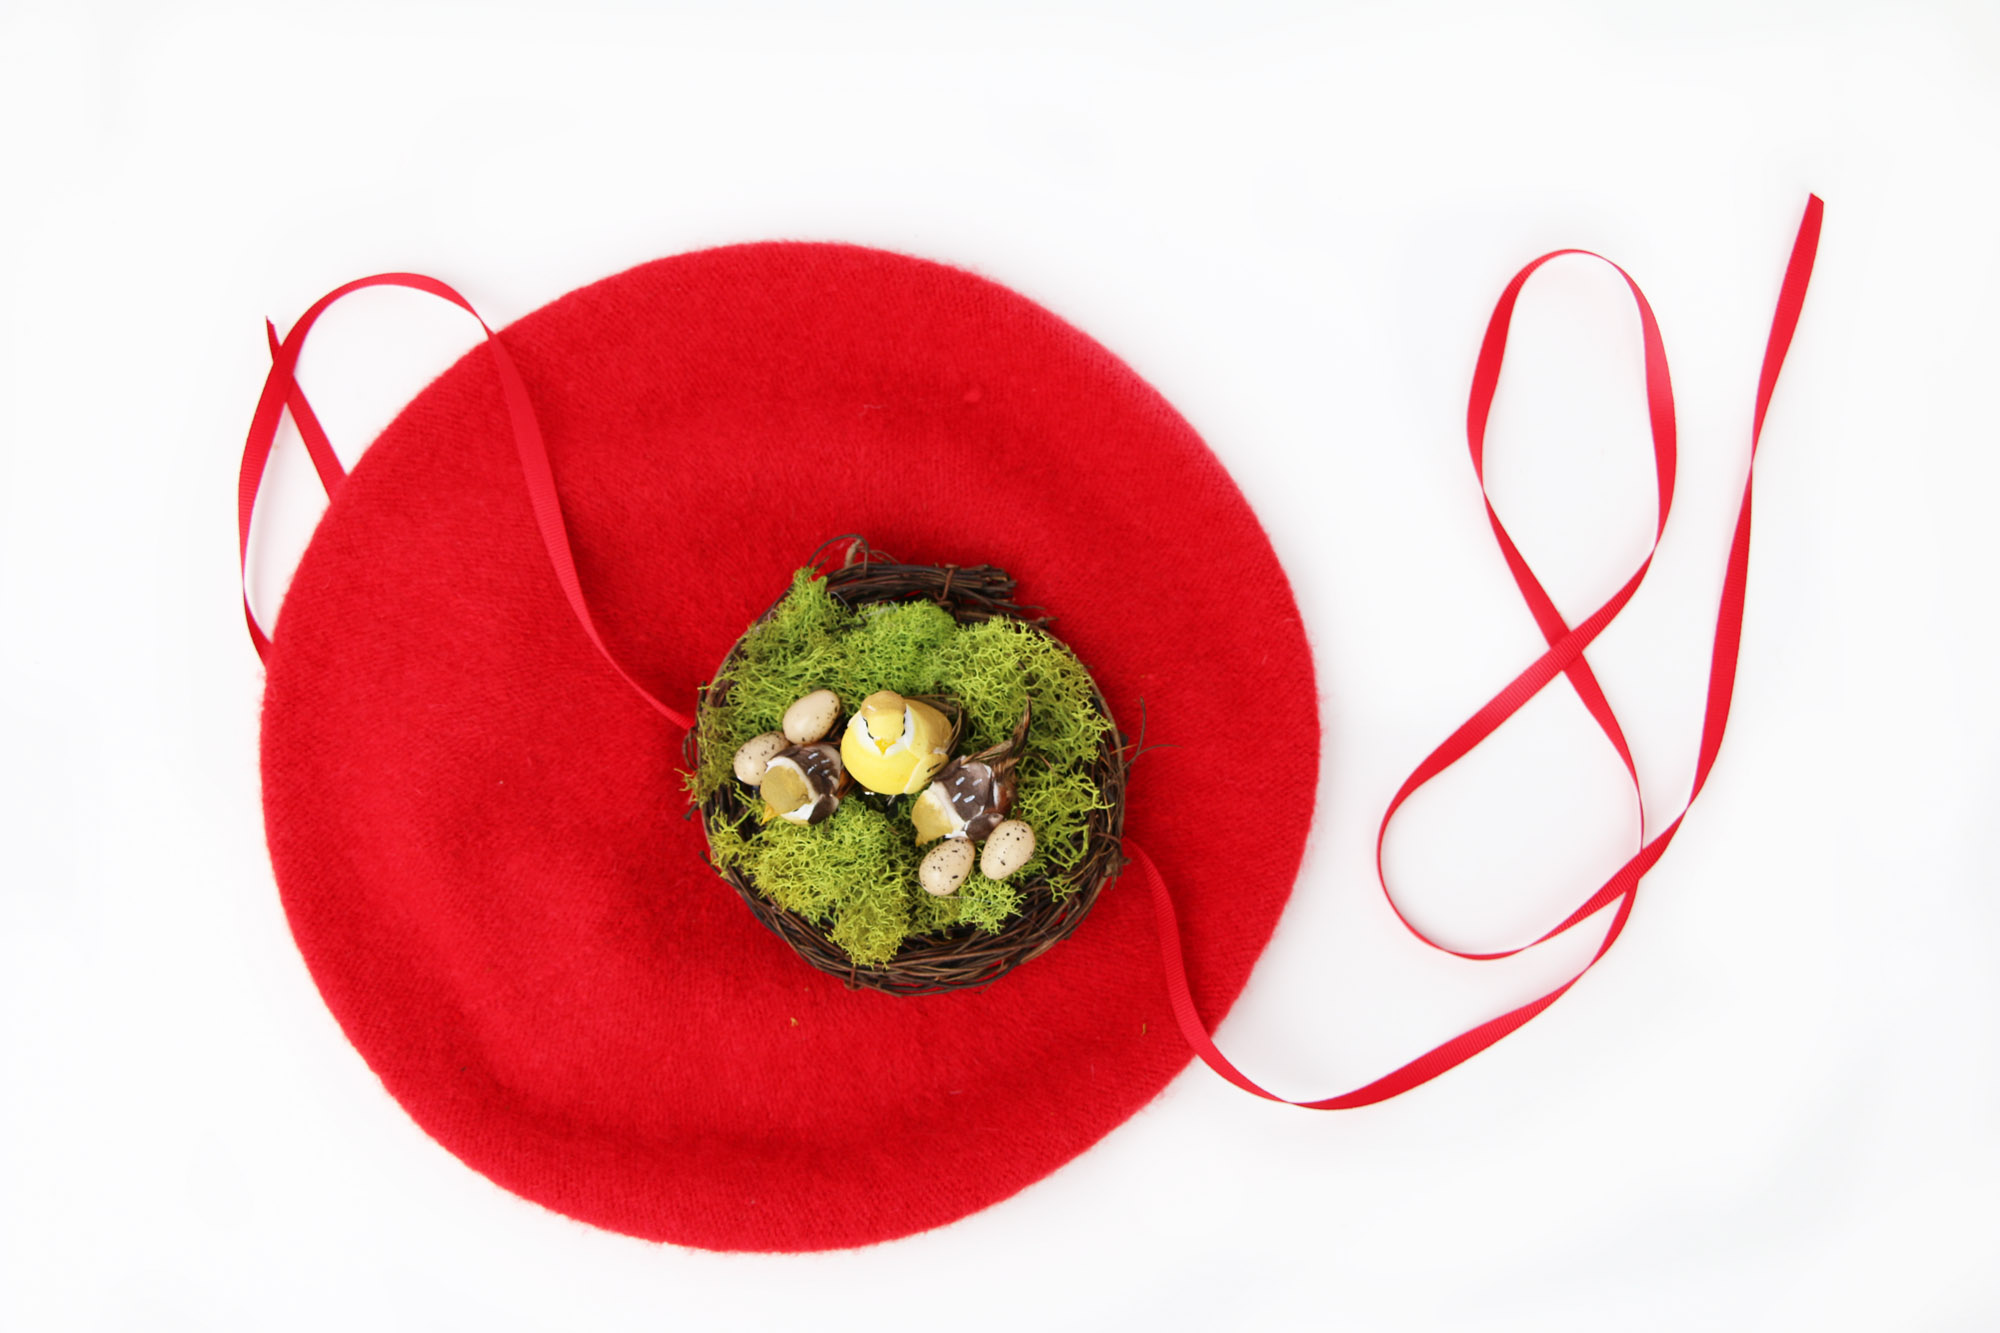
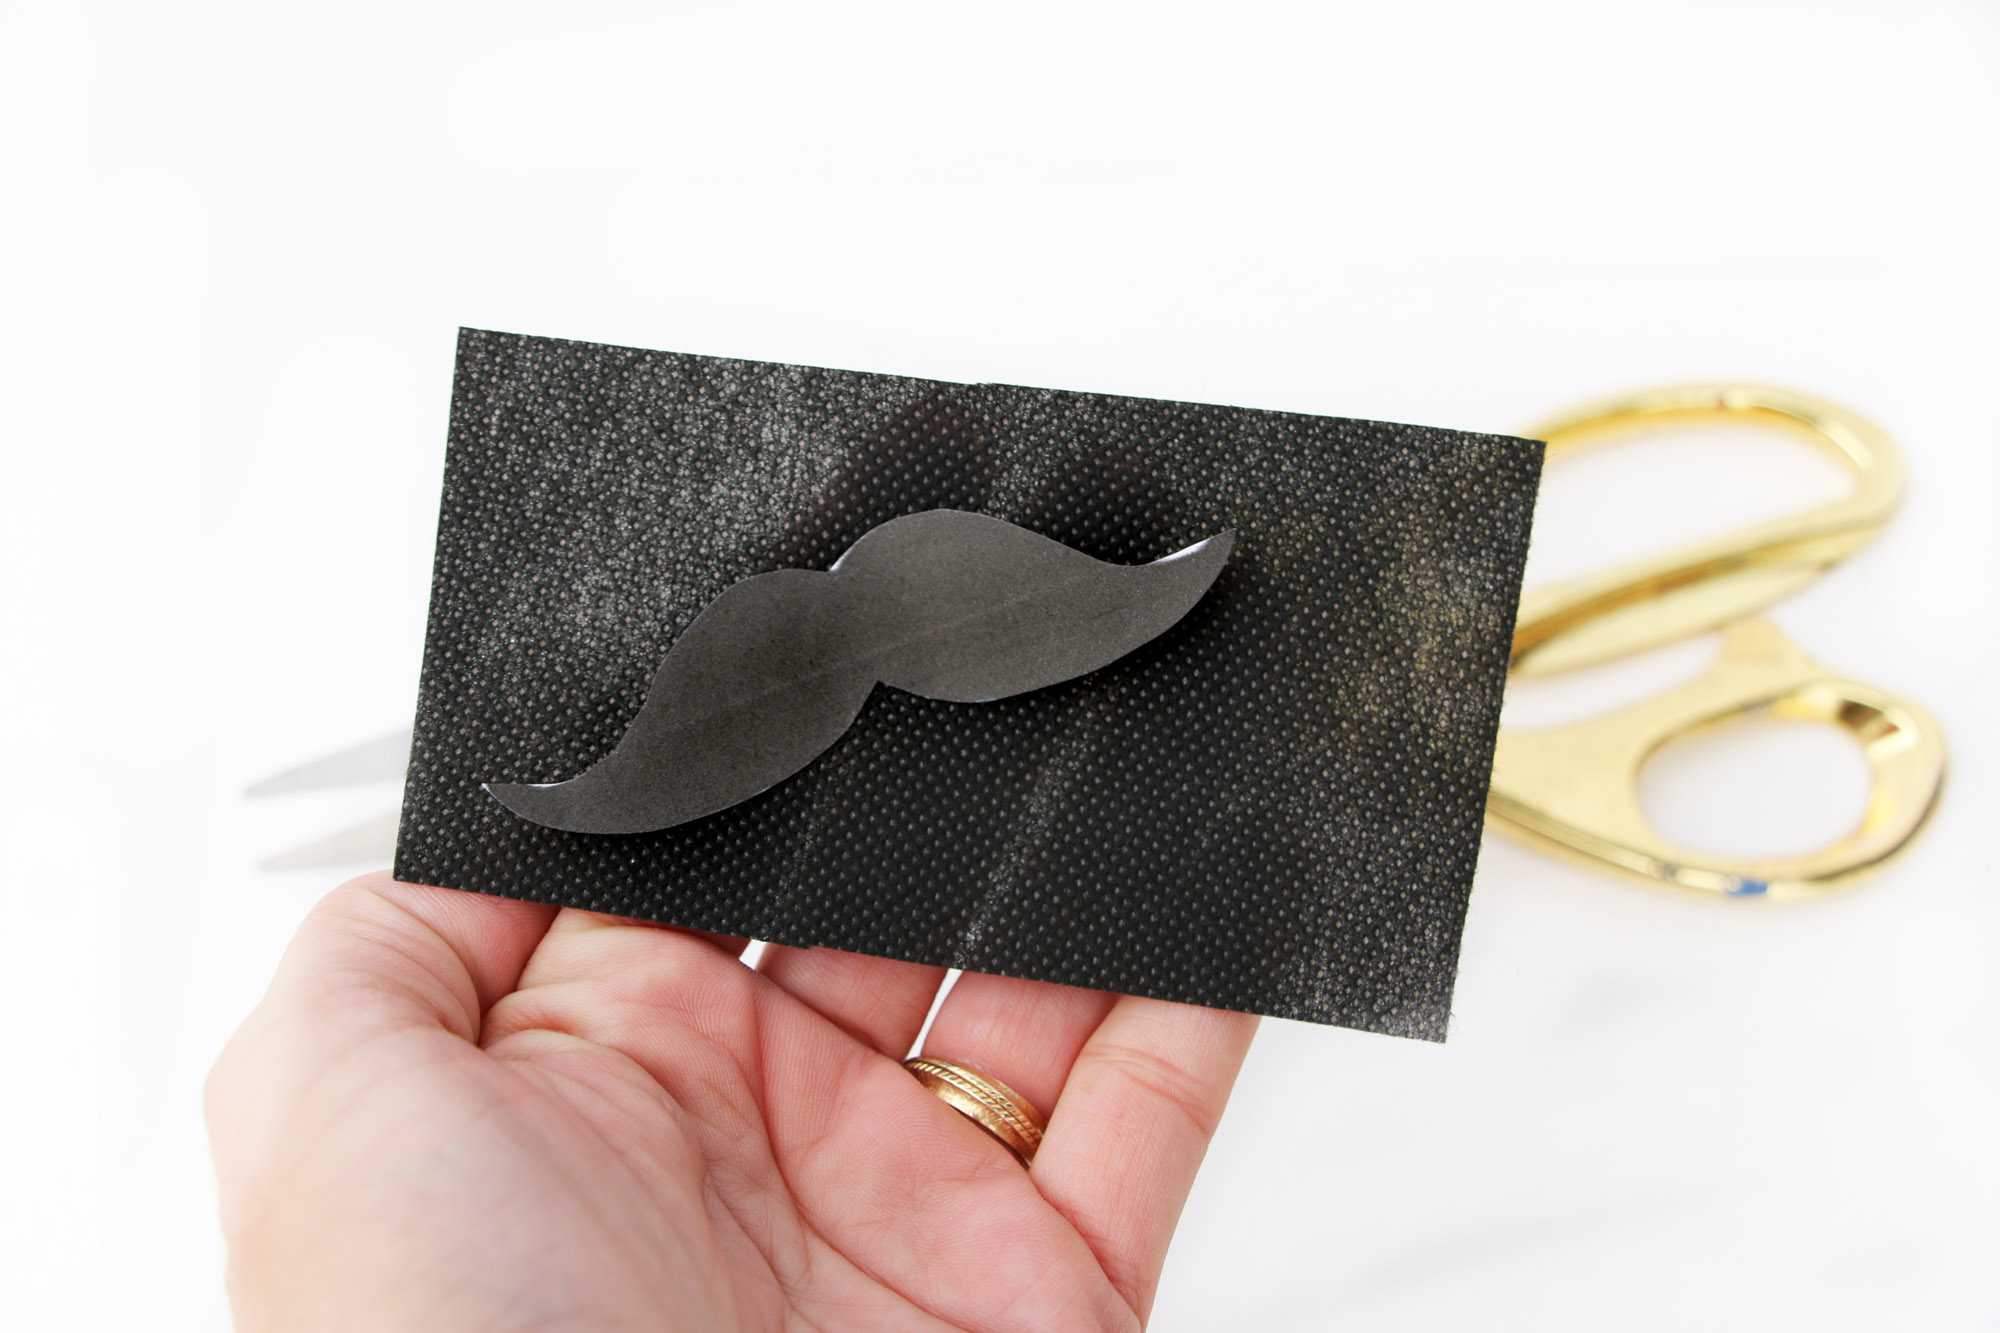 Step one: Cut out your paper mustache and then use it as a template for your black fabric. I had intentions of placing the mustache where is belongs on her face but there was NO way, she kept licking it off as I think most animals would. So just place it above her mouth. It’s still super cute! I used double stick tape for this step.
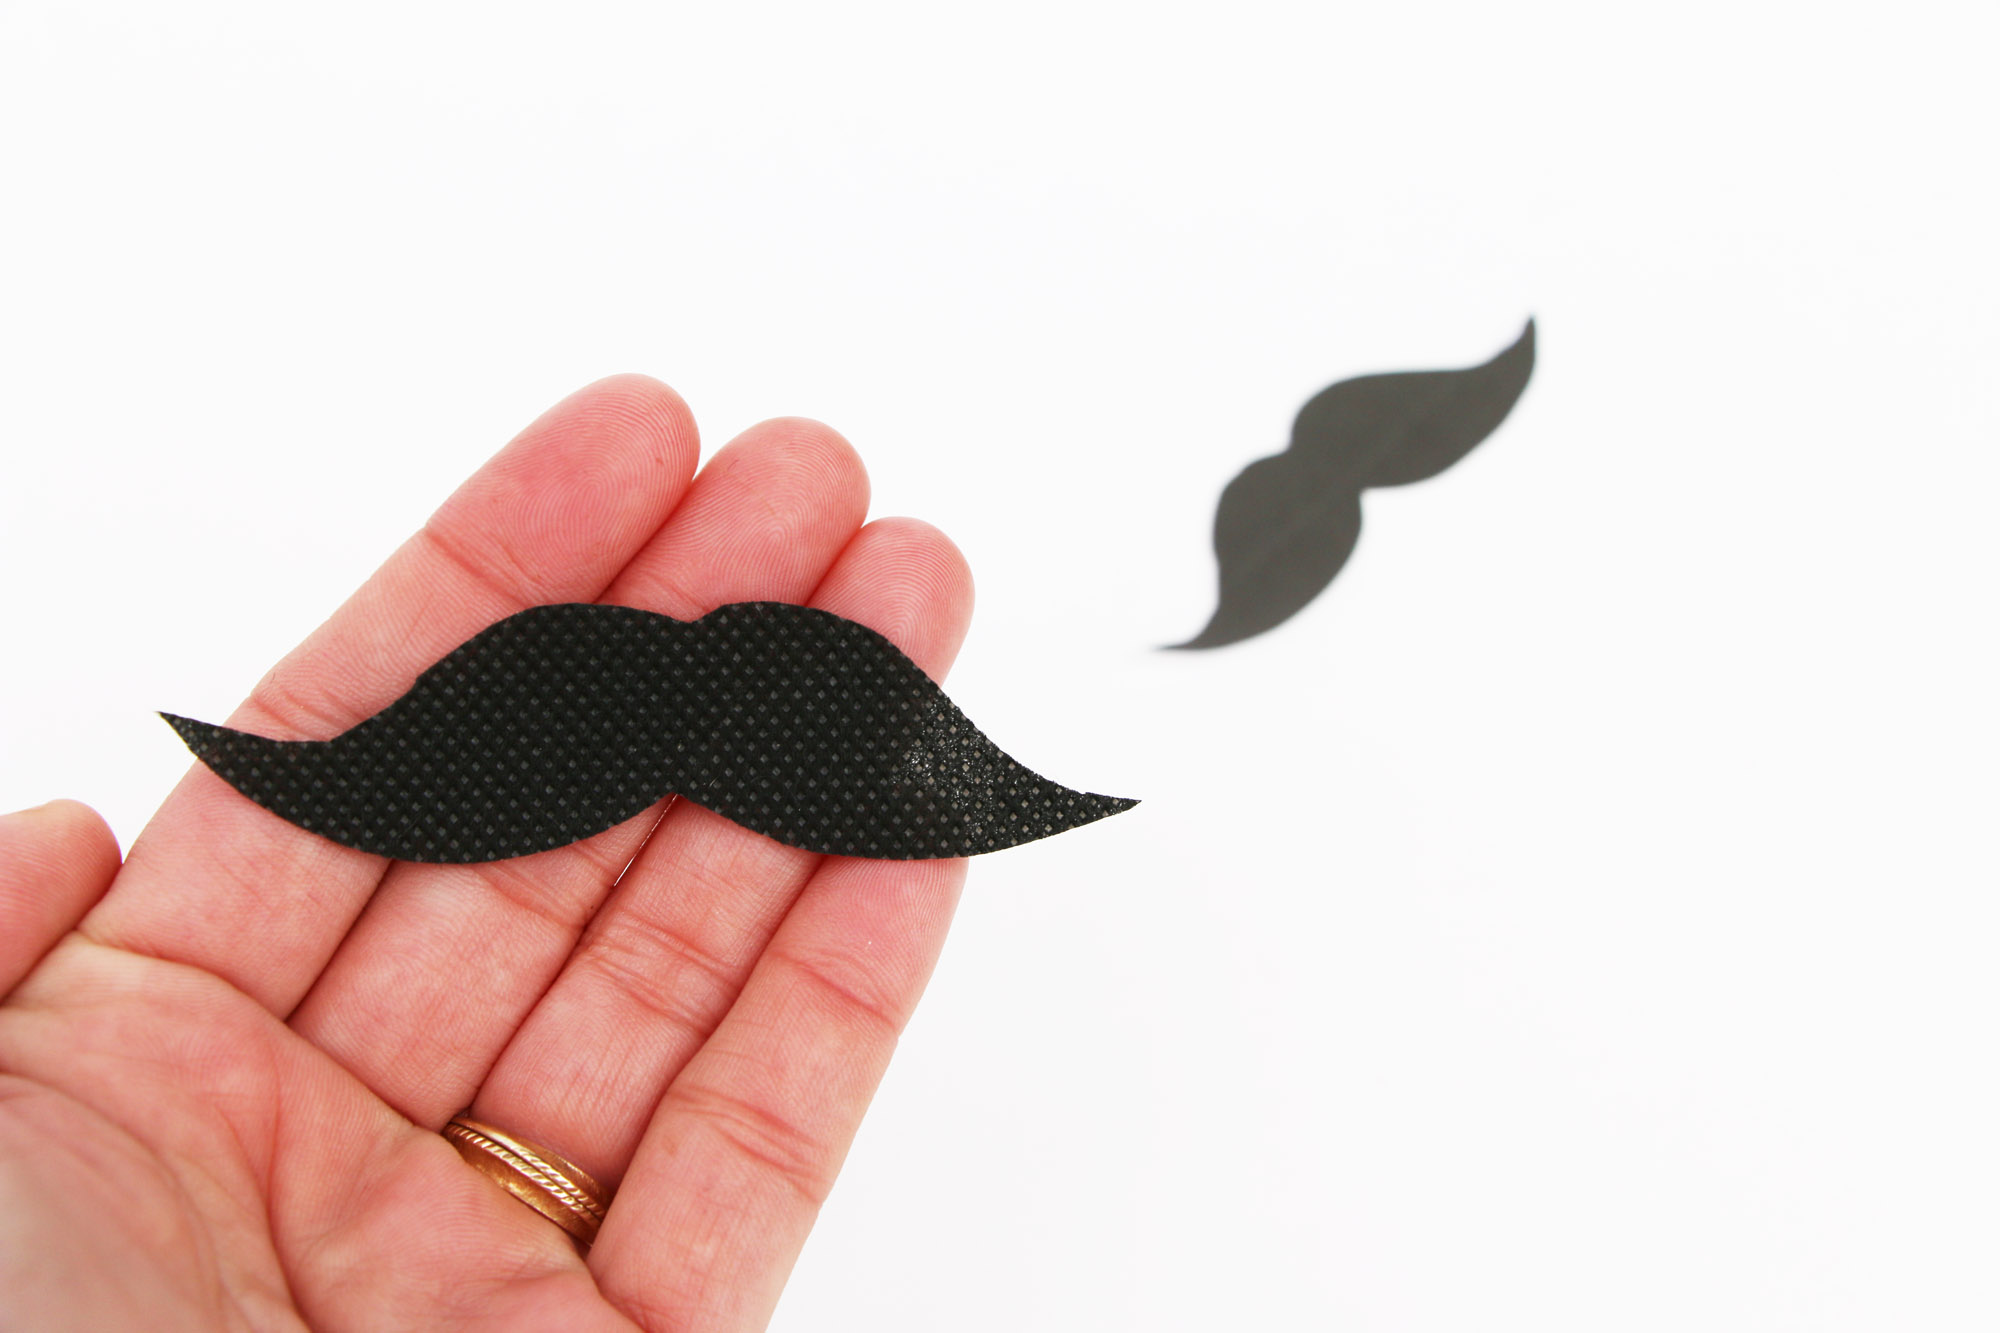
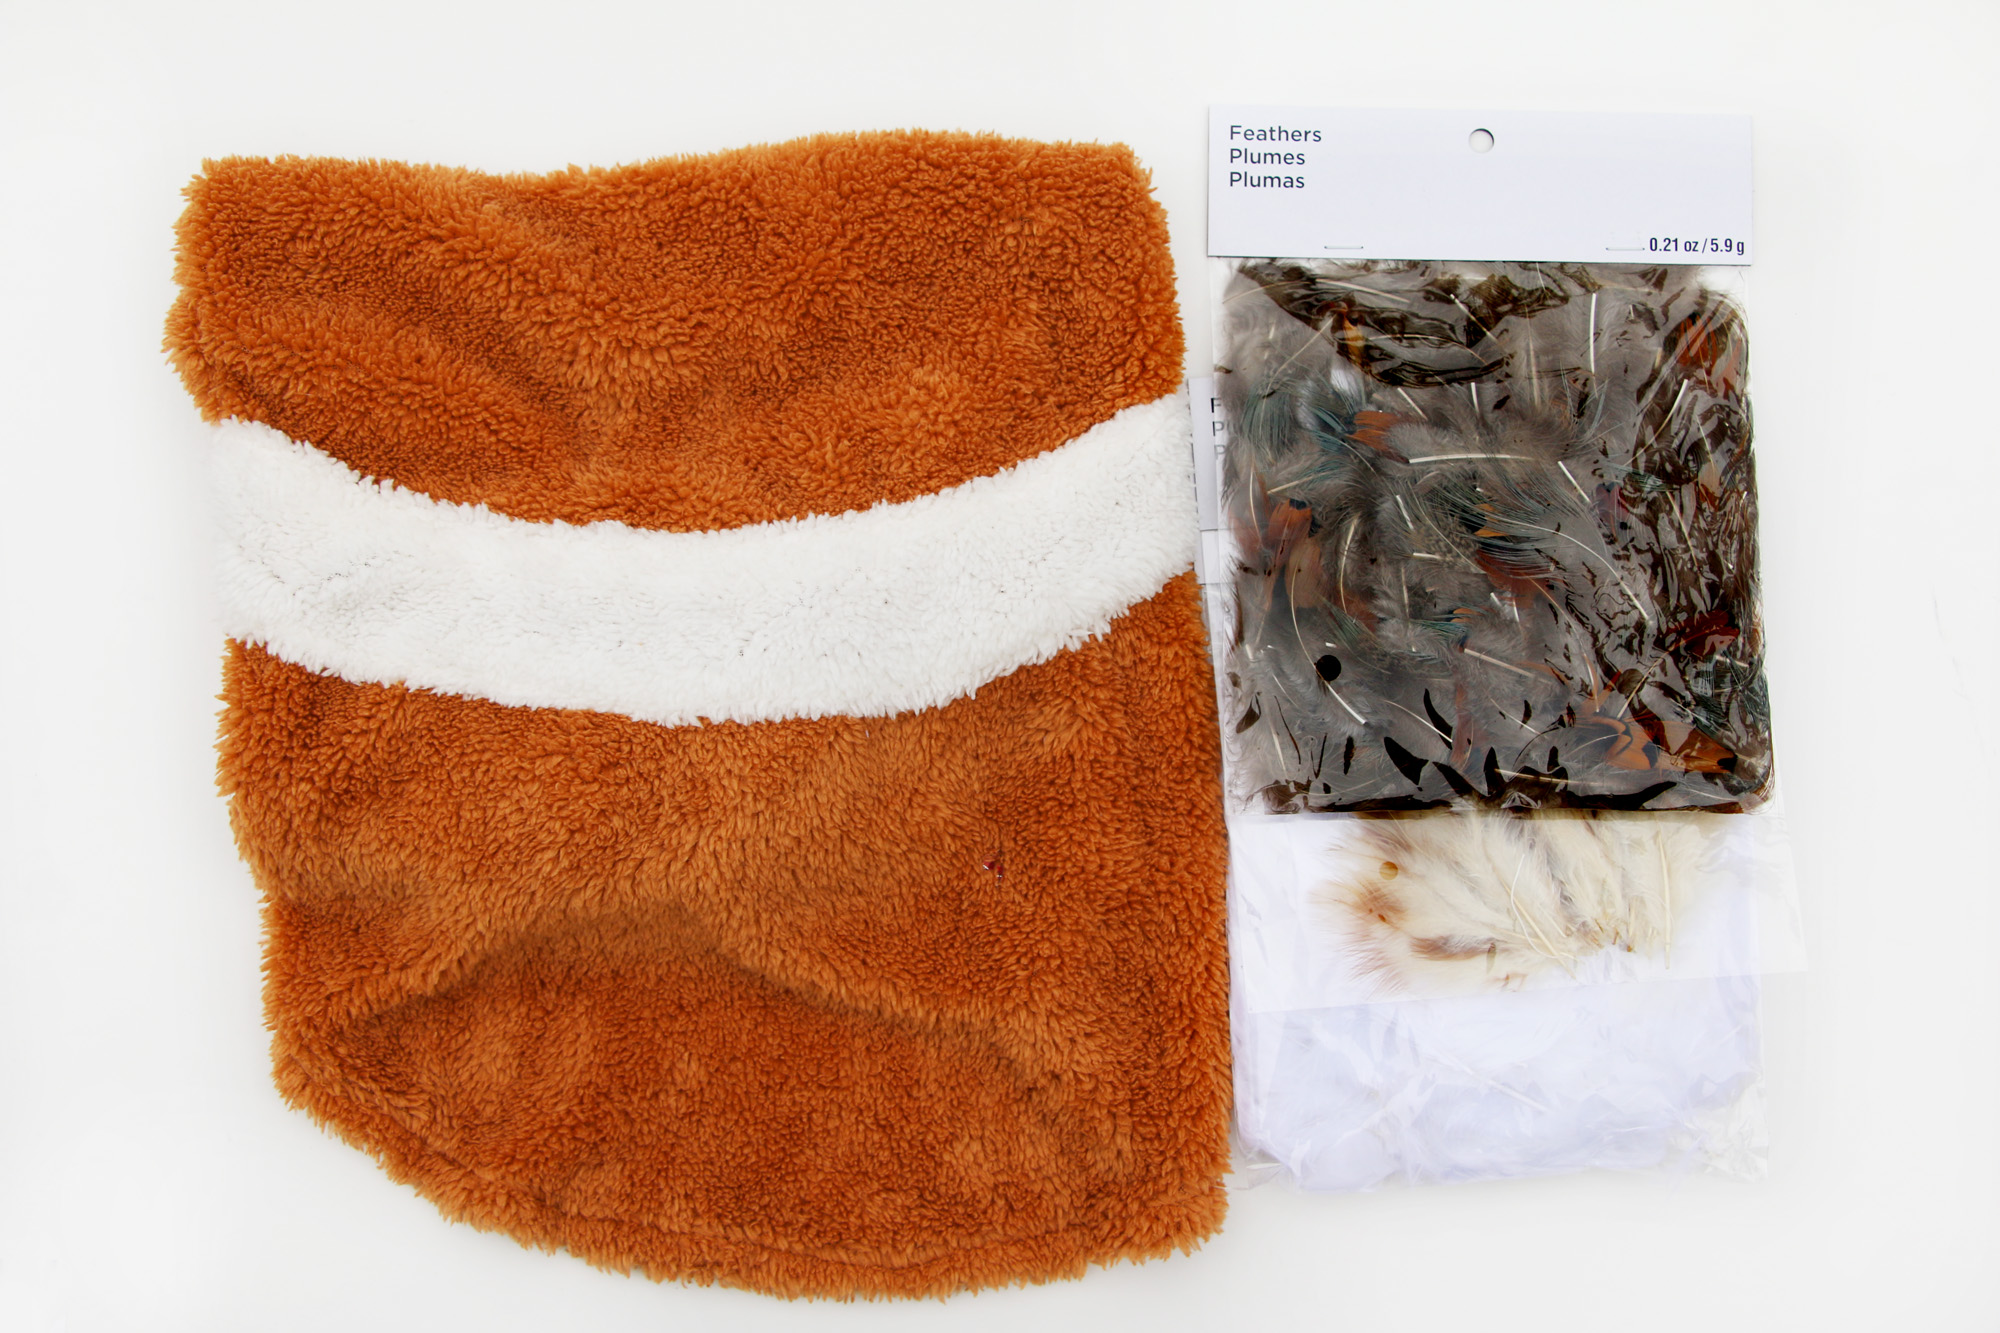 Step one: Start at the very top and add a little dot of hot glue to the tip of a feather then place on the shirt. Continue the whole top layer. When moving onto the next color just lift the first layer up and add second layer under first one.
  Repeat until the entire back of costume is filled with feathers. I did do research to find out the actual colors of most french hens and I think I pulled off the colors well! The feathers are so light that you can’t really tell a difference in weight when you are all done.
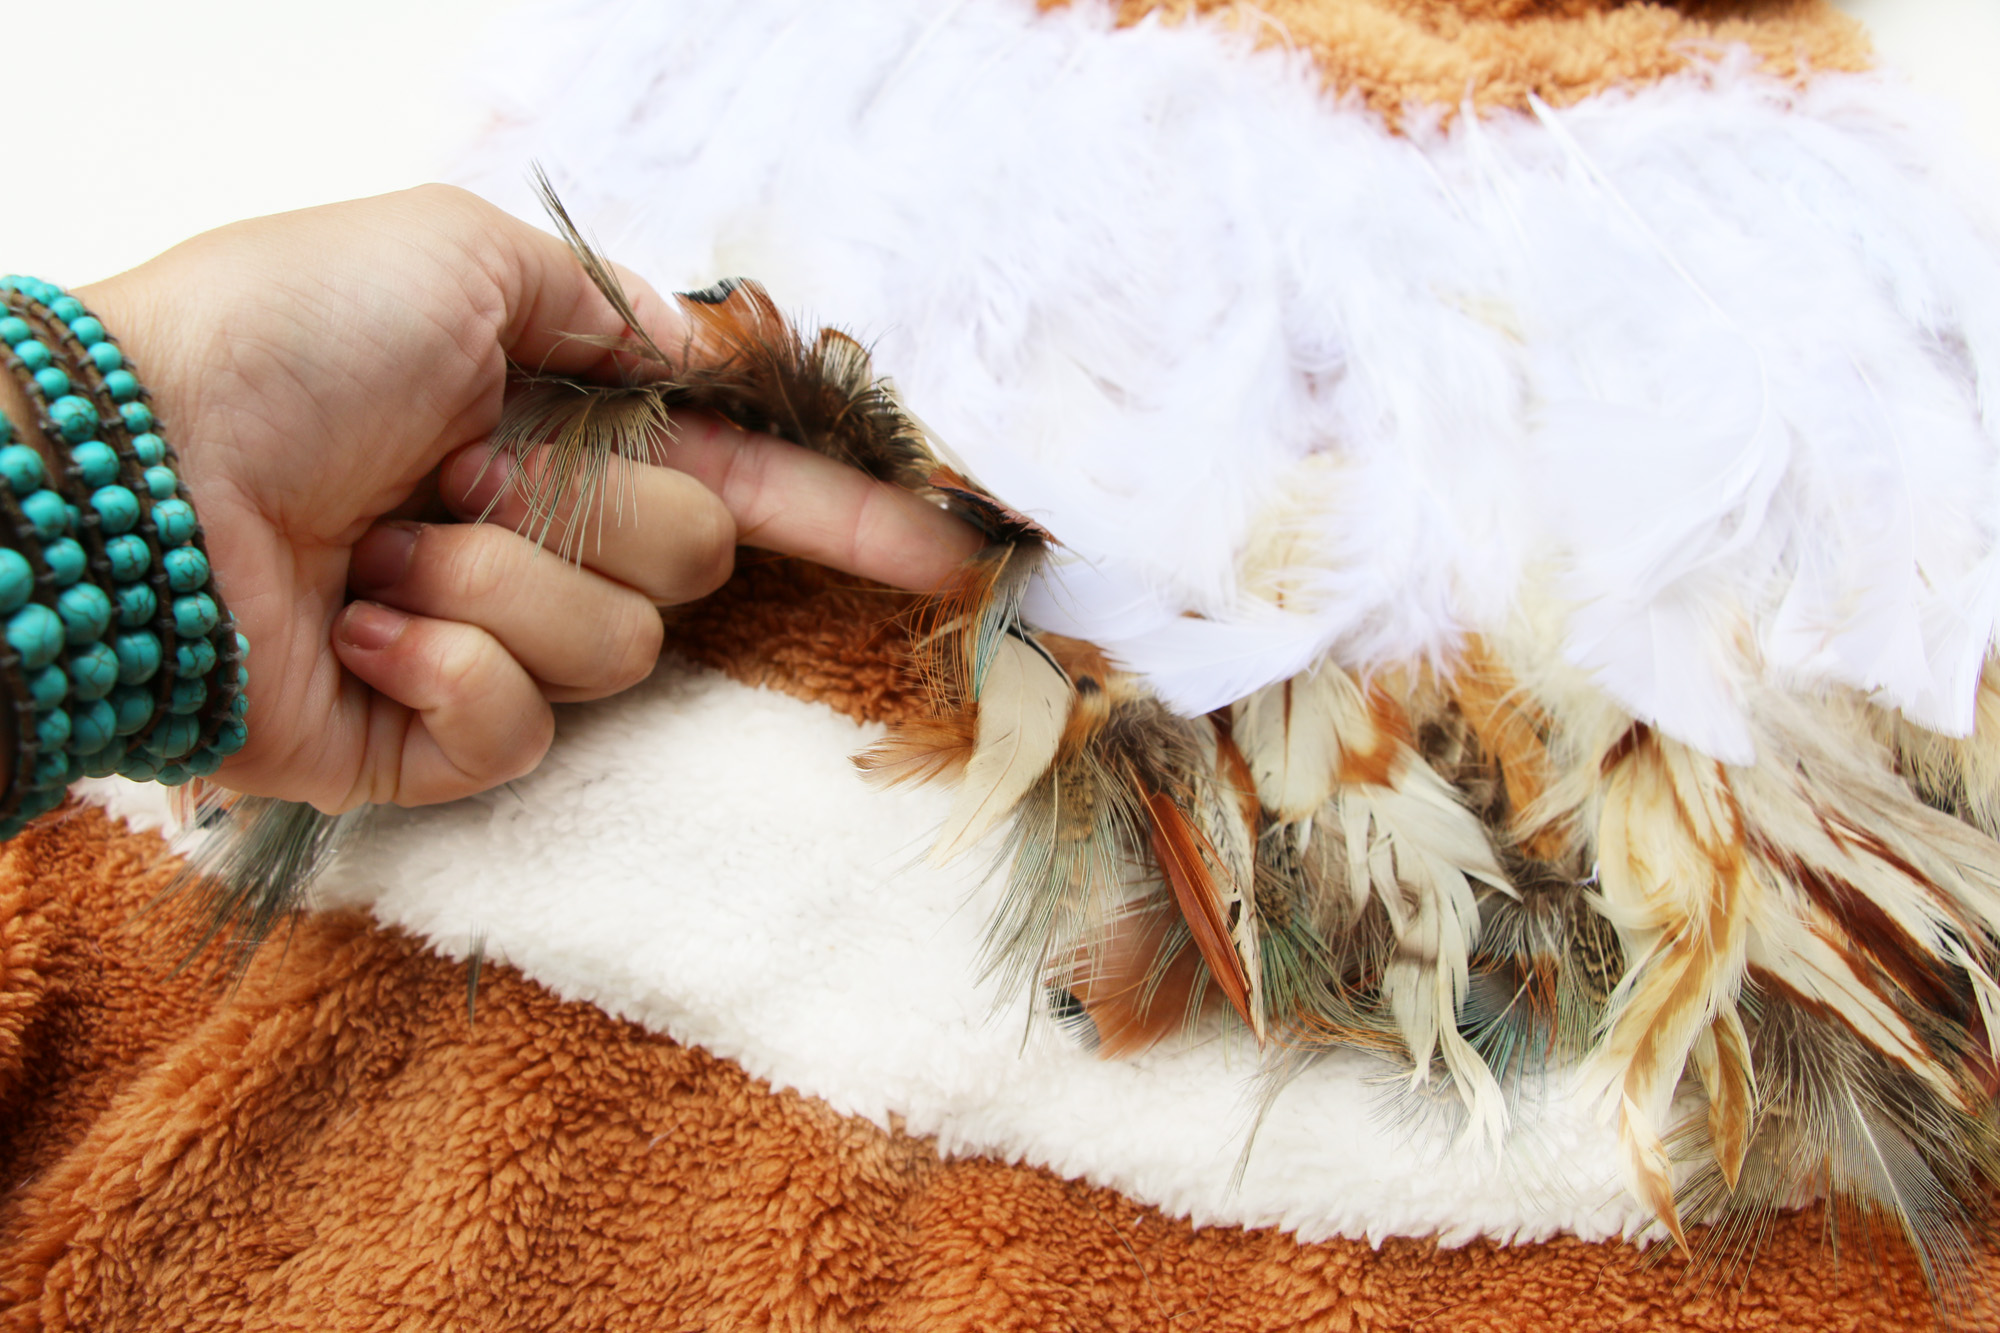


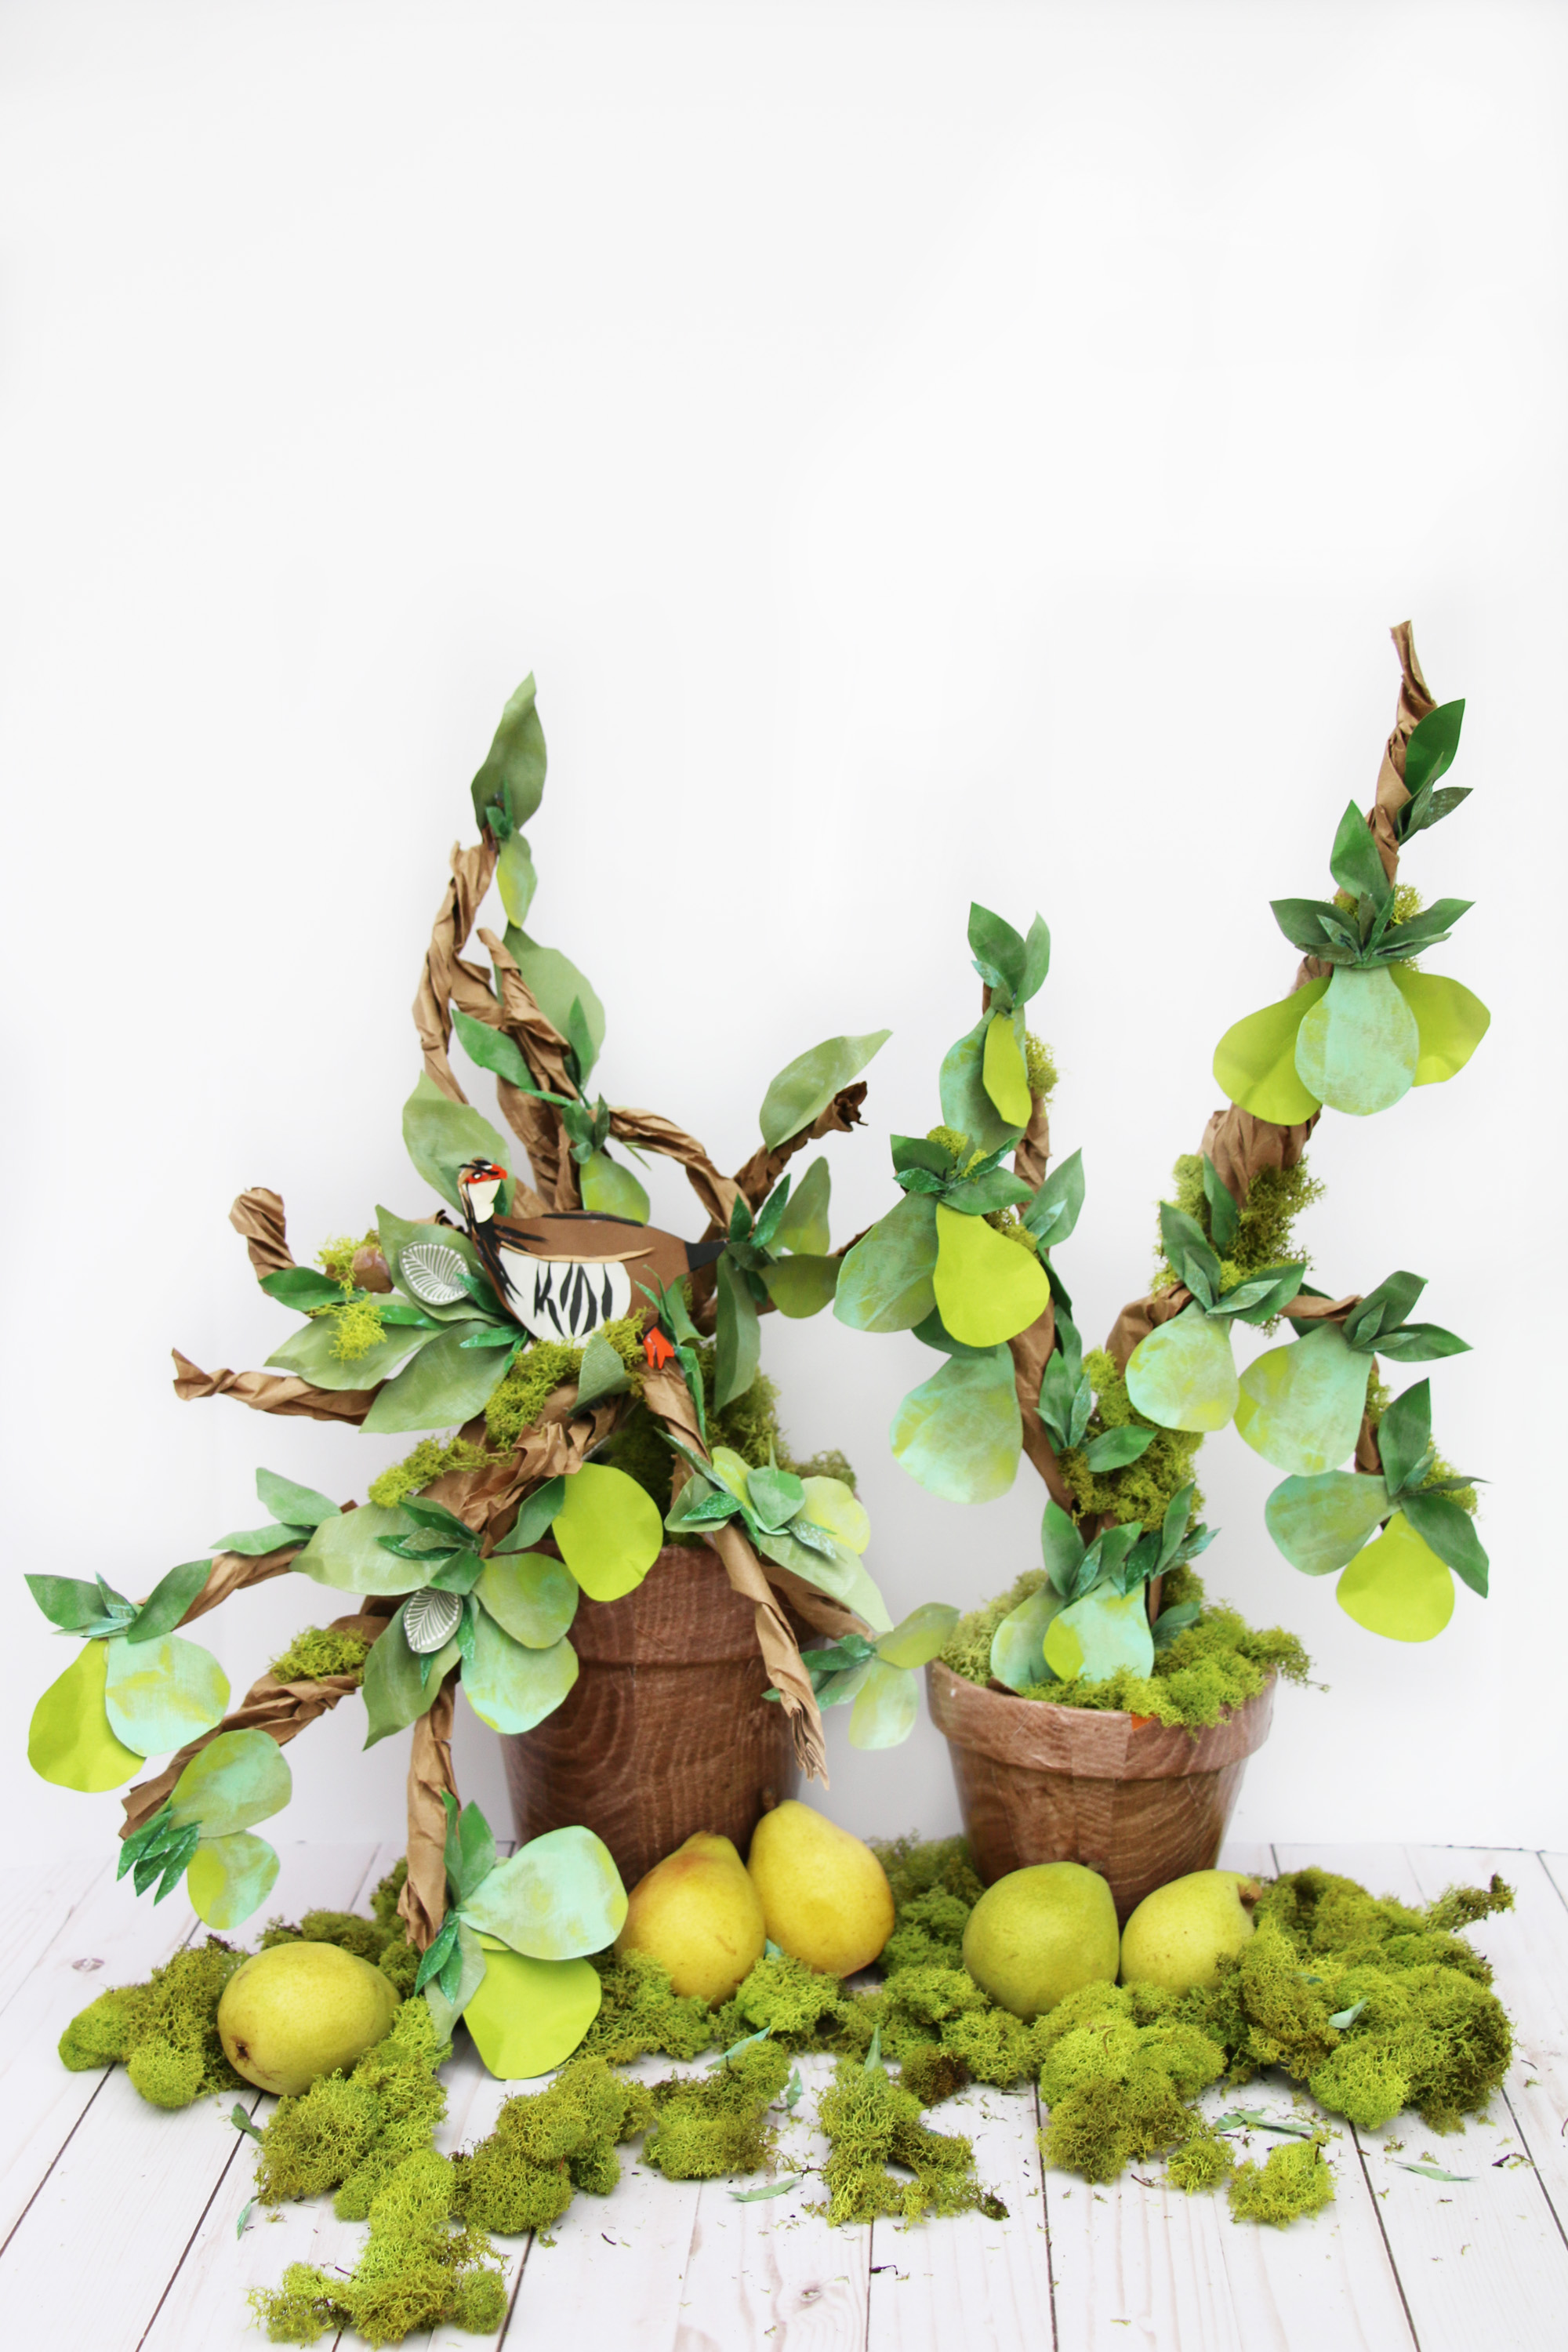
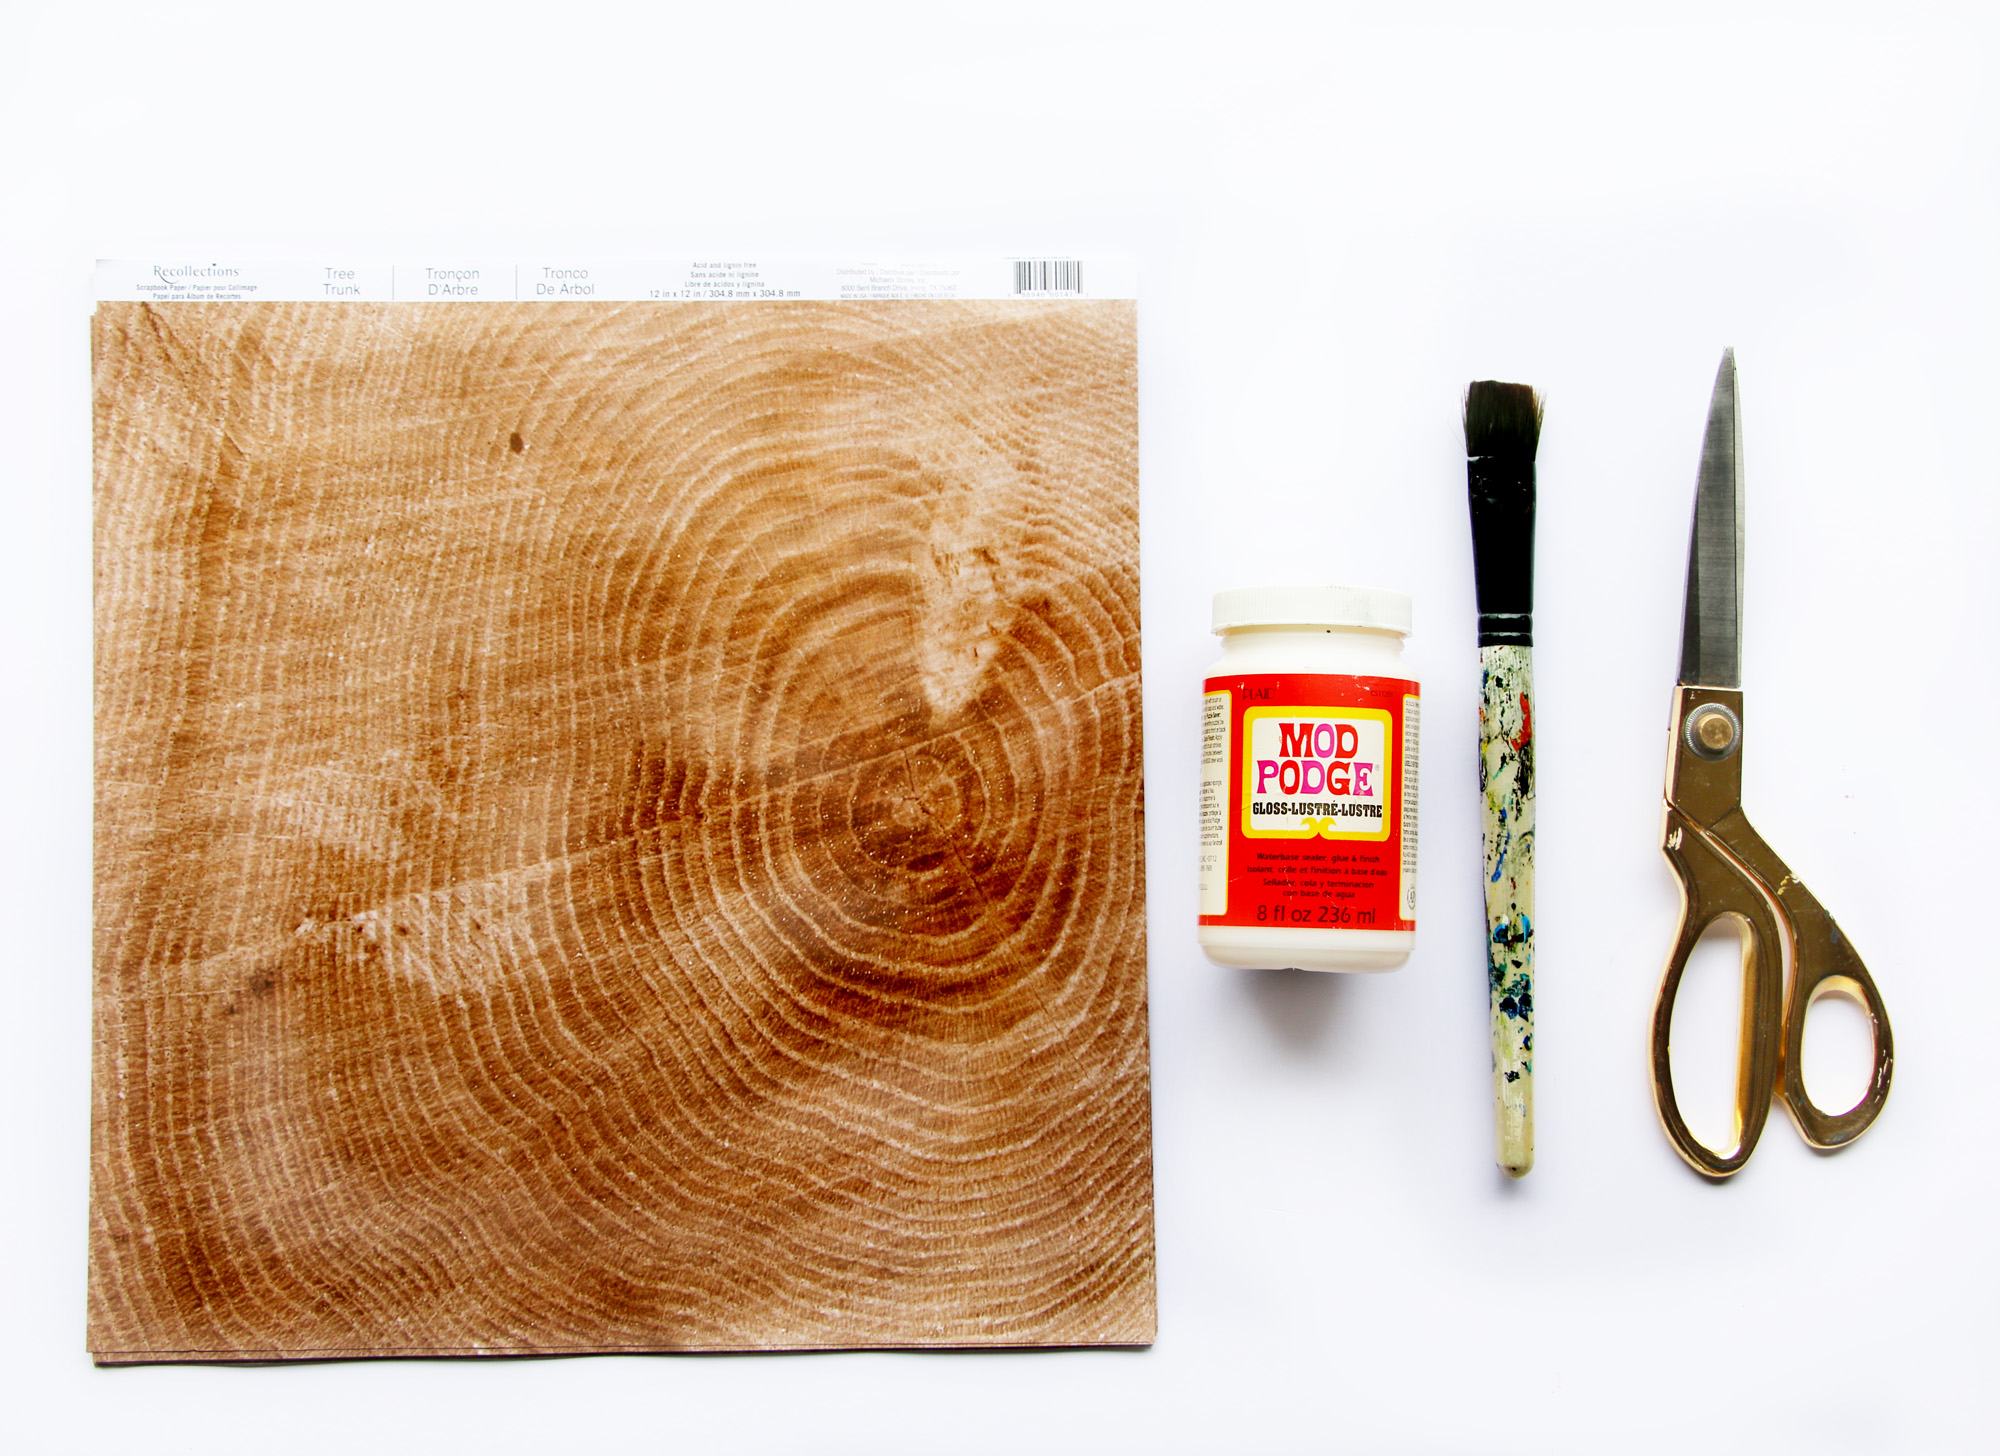
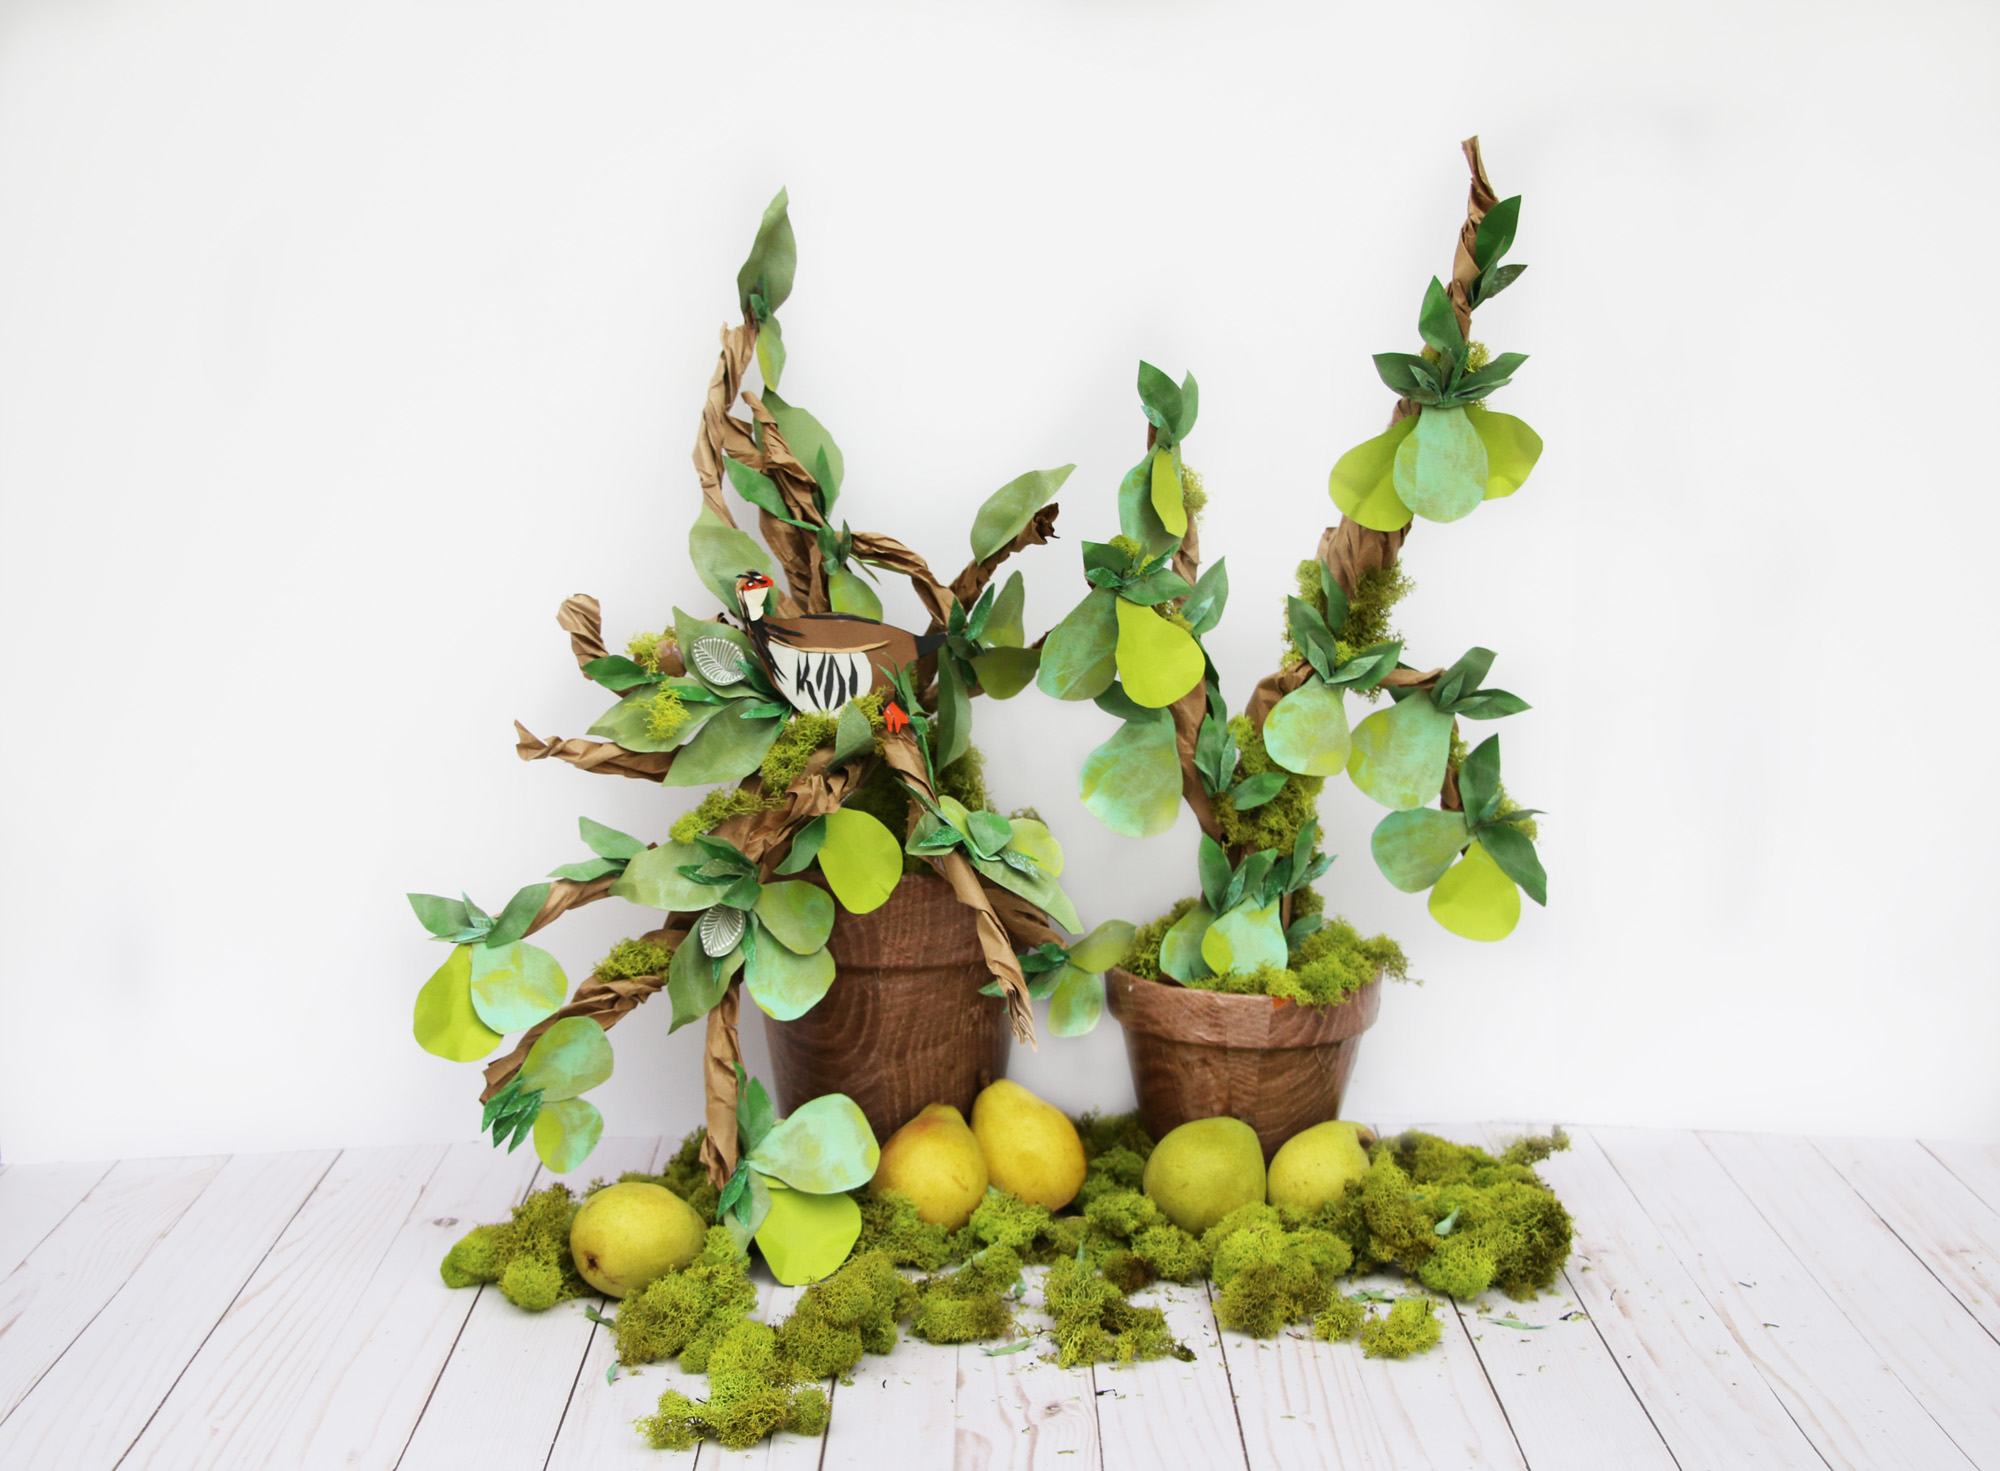
 Make sure you get enough sheets to cover all of your pots if you intend on doing more than one pot. I like to do more than one because it looks better in a group plus you never know when a friend will come over and you might want to send them home with “Partridge in a Pear Tree.”
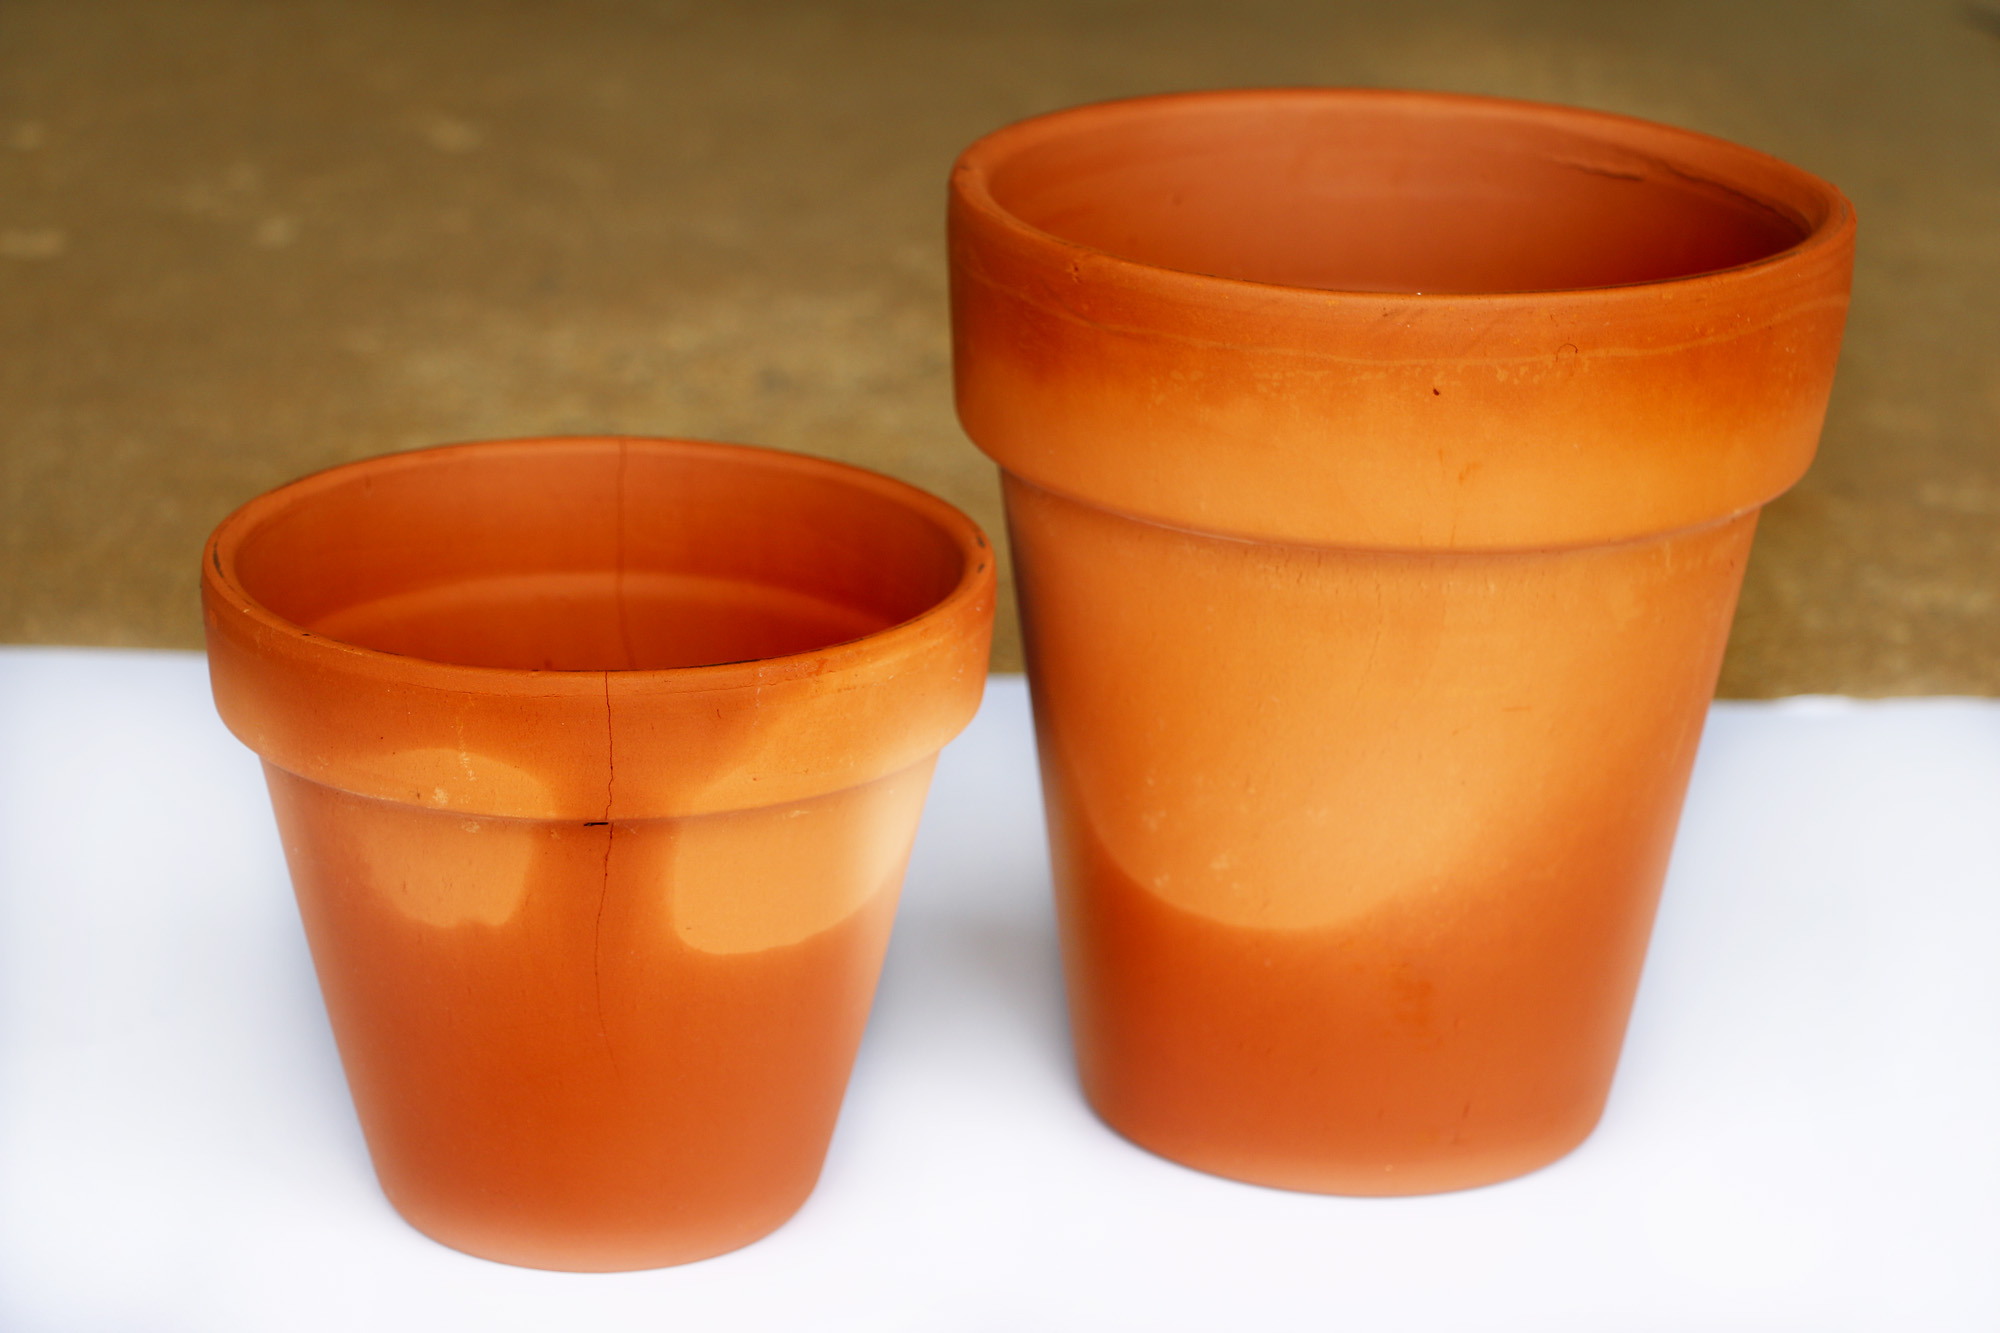 Step One: Get a damp cloth and wipe down the entire surface of your terra cotta pots. Did I mention how affordable these pots are? Terra Cotta pots are the best pots to craft with because of this!
 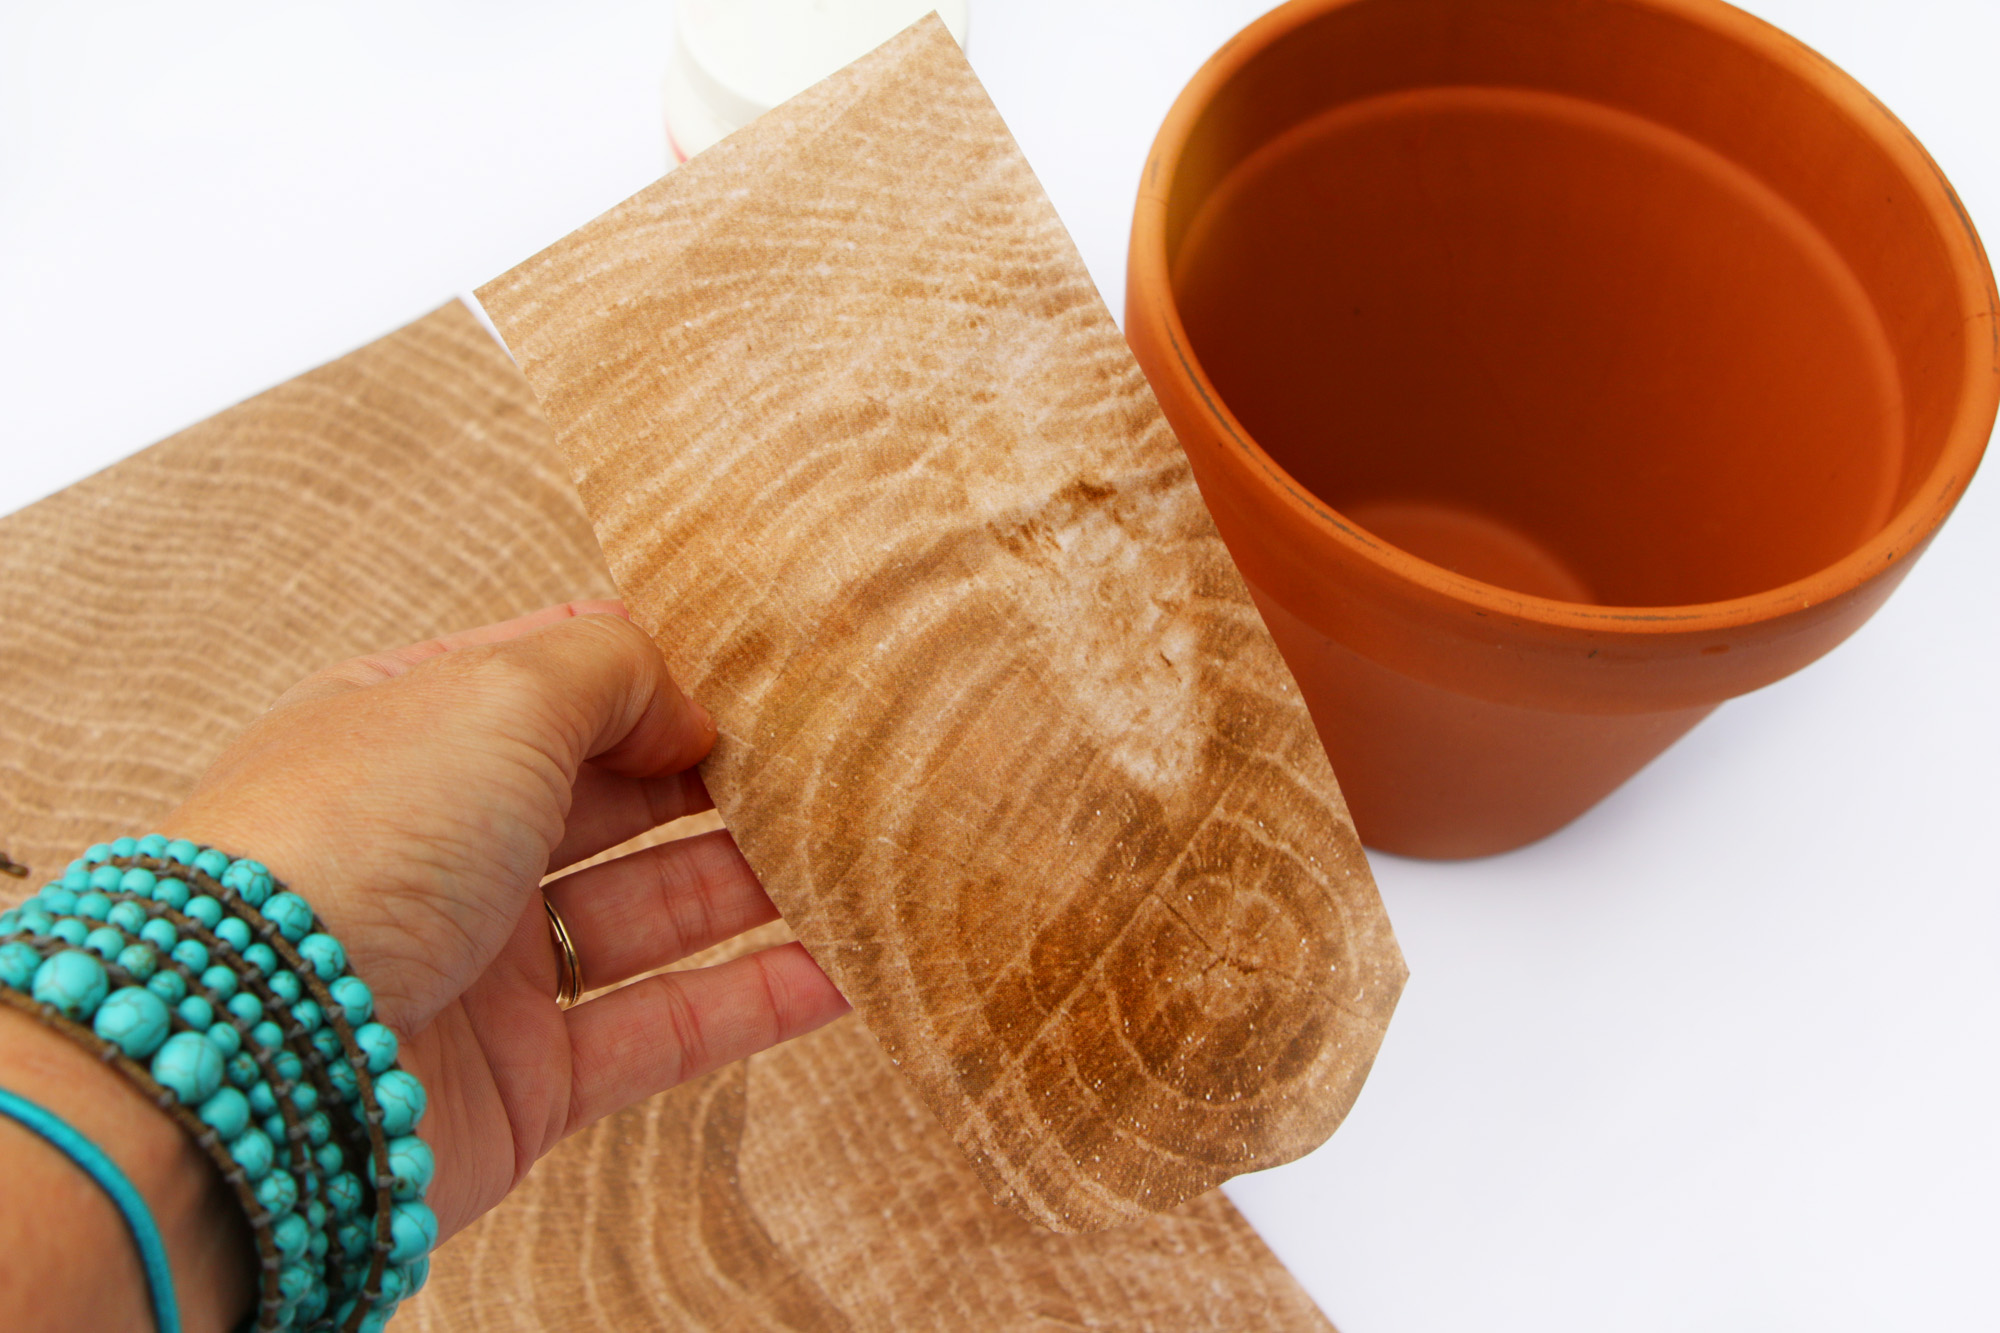 Step Two: Cut pieces of your woodgrain paper longways to ensure one strip fits completely vertically. We want this to look as real as possible in the end. Lay down a whole sheet and cut long strips while leaving them in the correct order. Apply them in the order you cut them so once they are all on, everything will line up properly!
 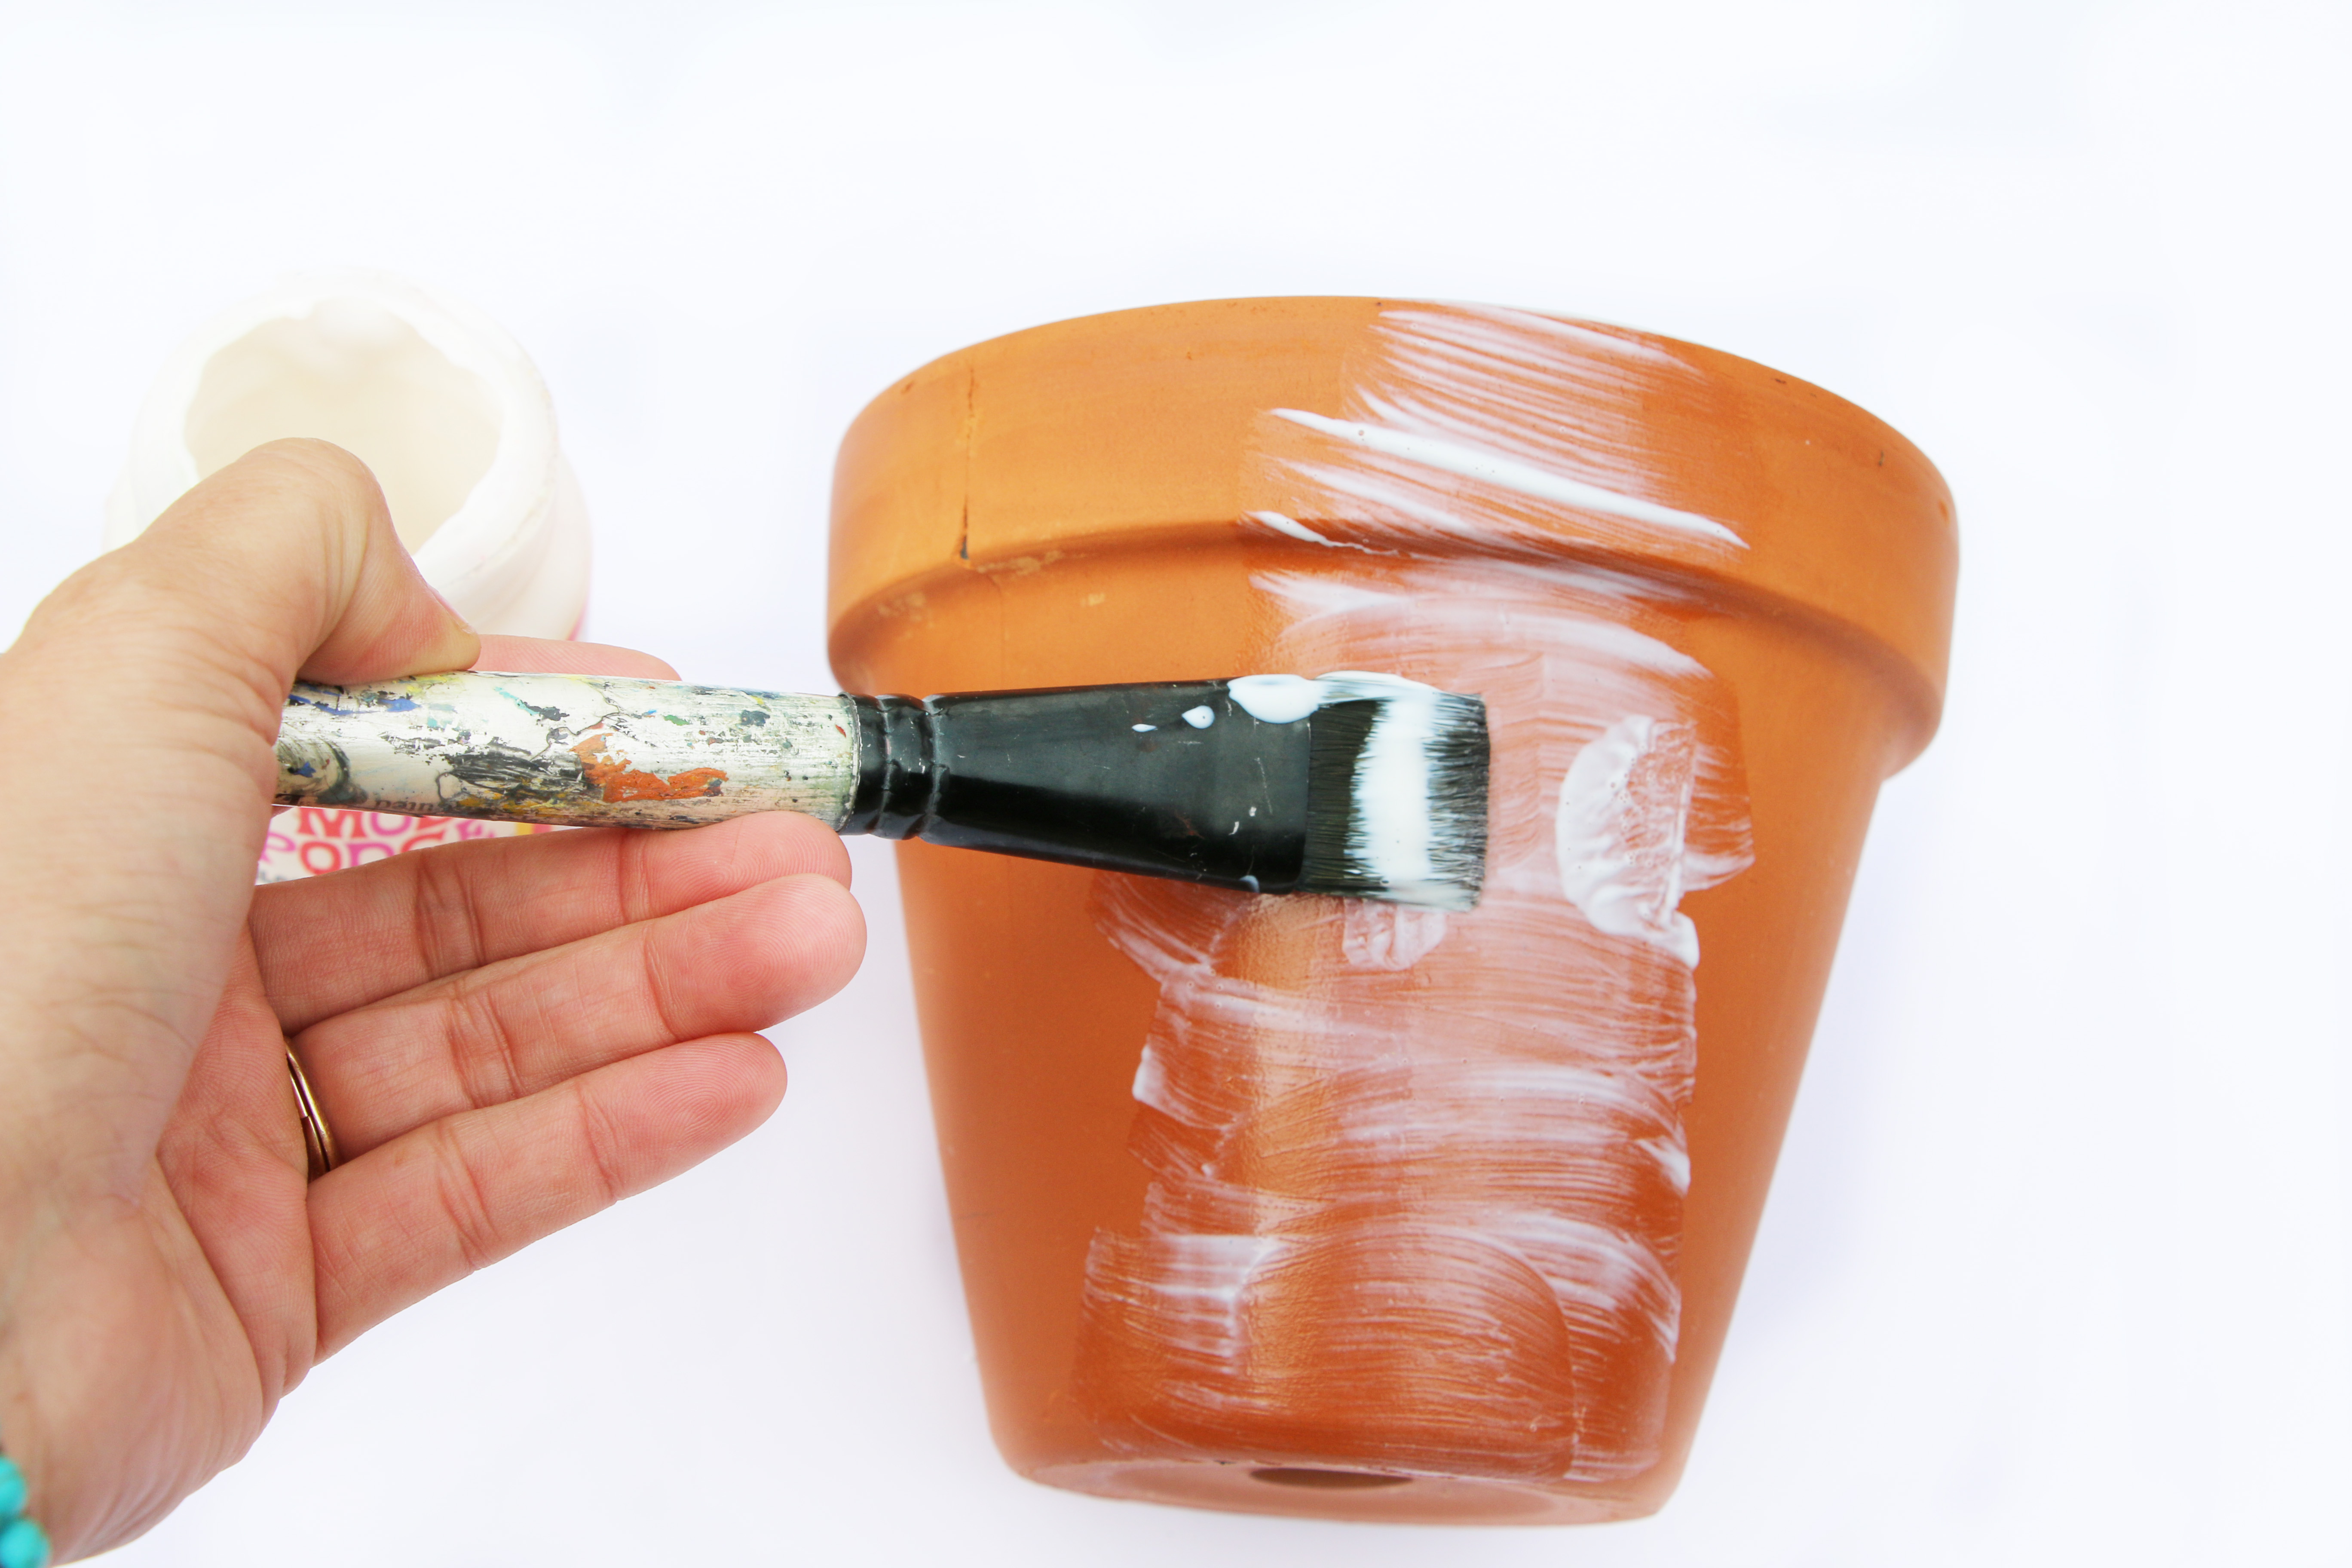 Step Three: Apply a coat of Mod Podge onto one strip of your terra cotta pot. Make sure your strip is ready to place on the pot because we don’t want this to dry.
 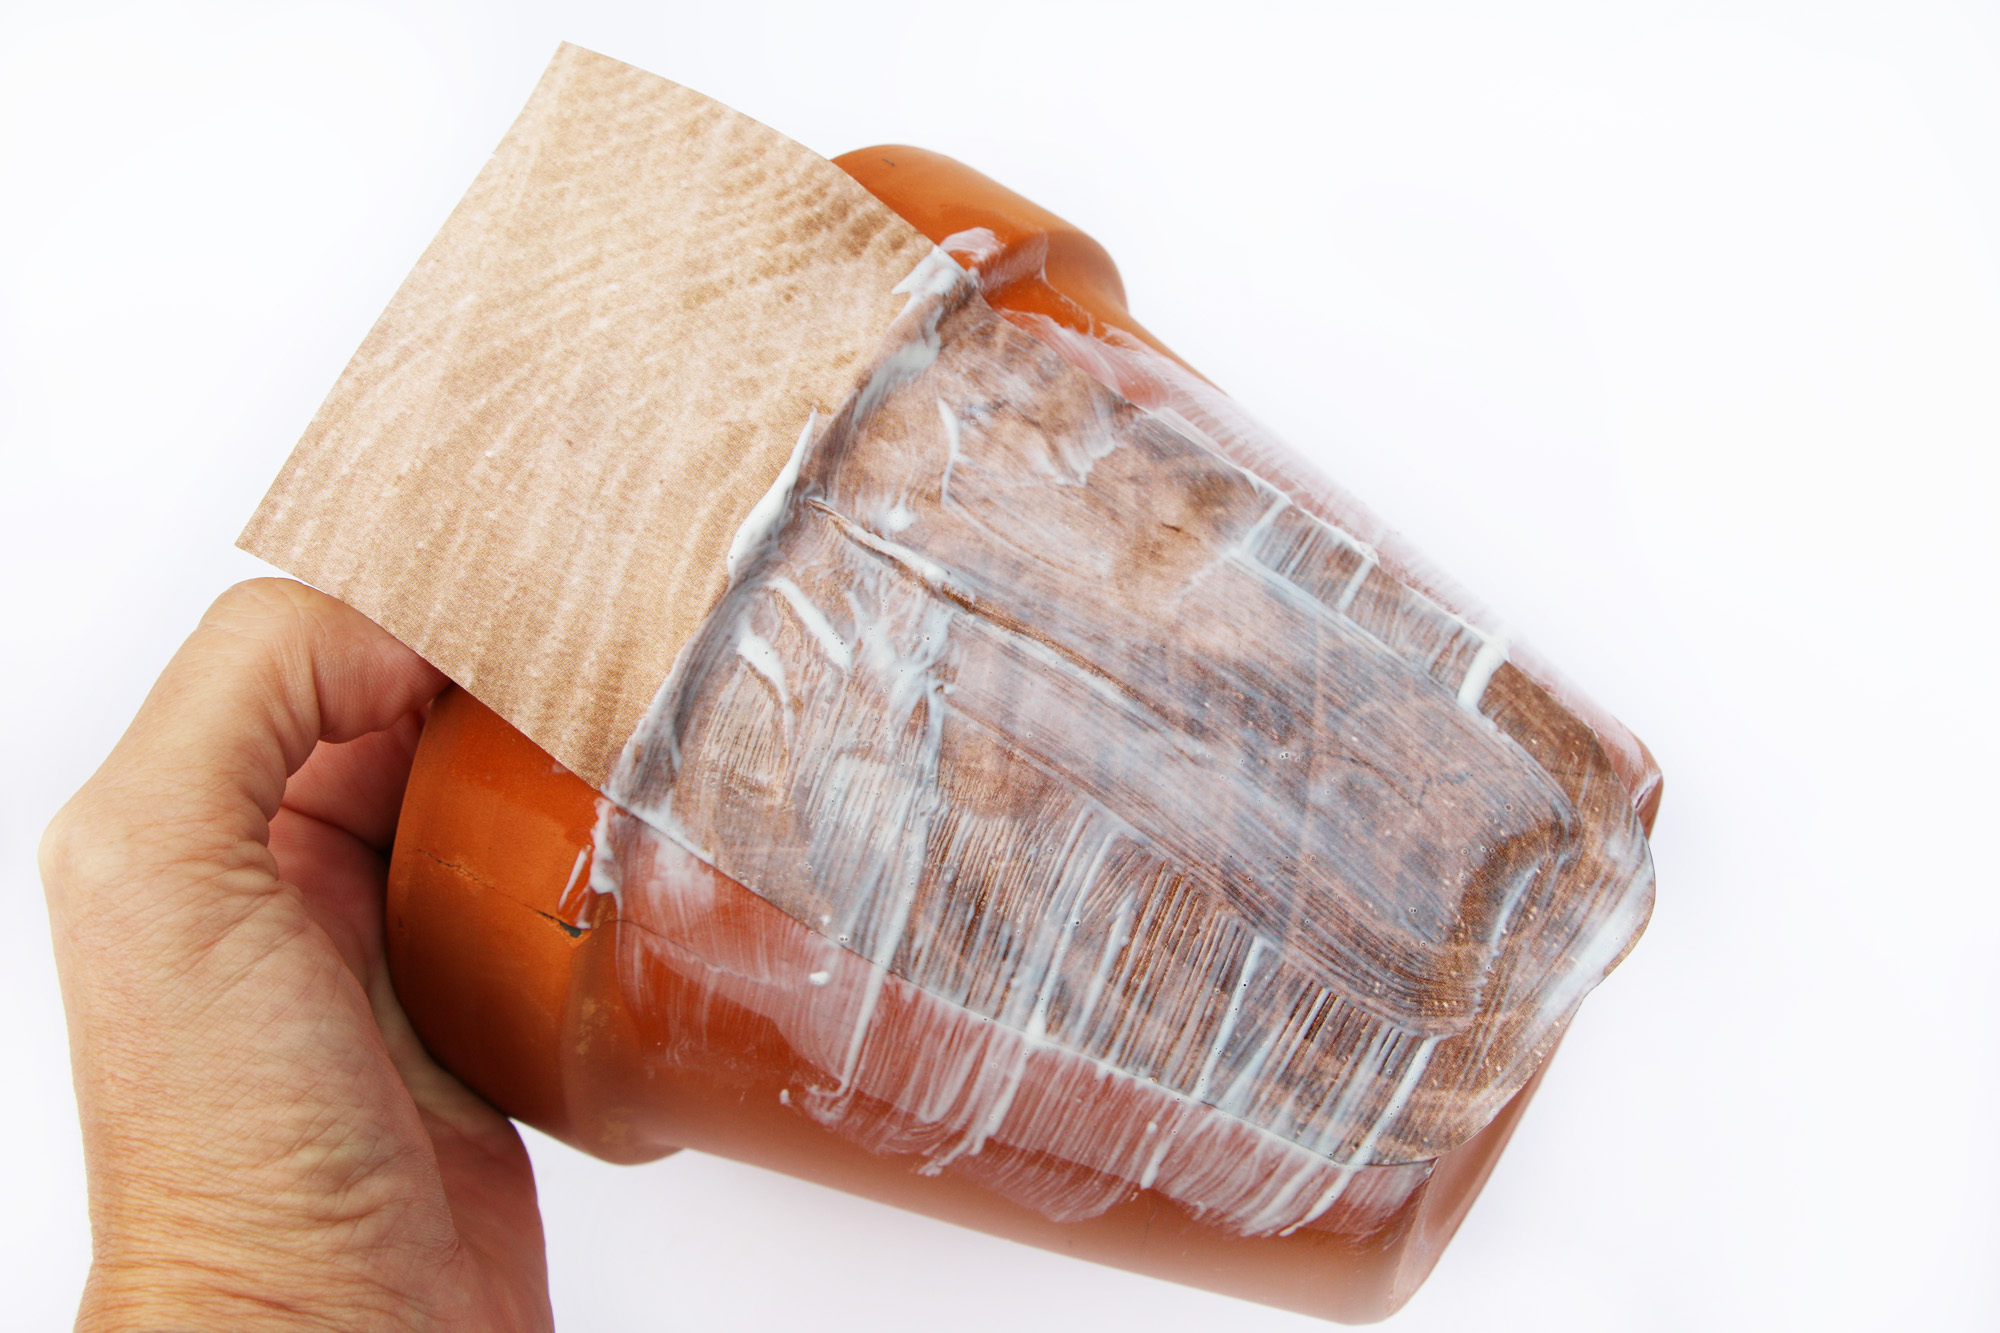 Step Four: Once you place your strip on the pot, apply more Mod Podge on top of the strip. Initially it looks white but once it dries it will be clear. Use your finger to rub in the Mod Podge and push down any cracks or pieces of paper that’s not flat.
 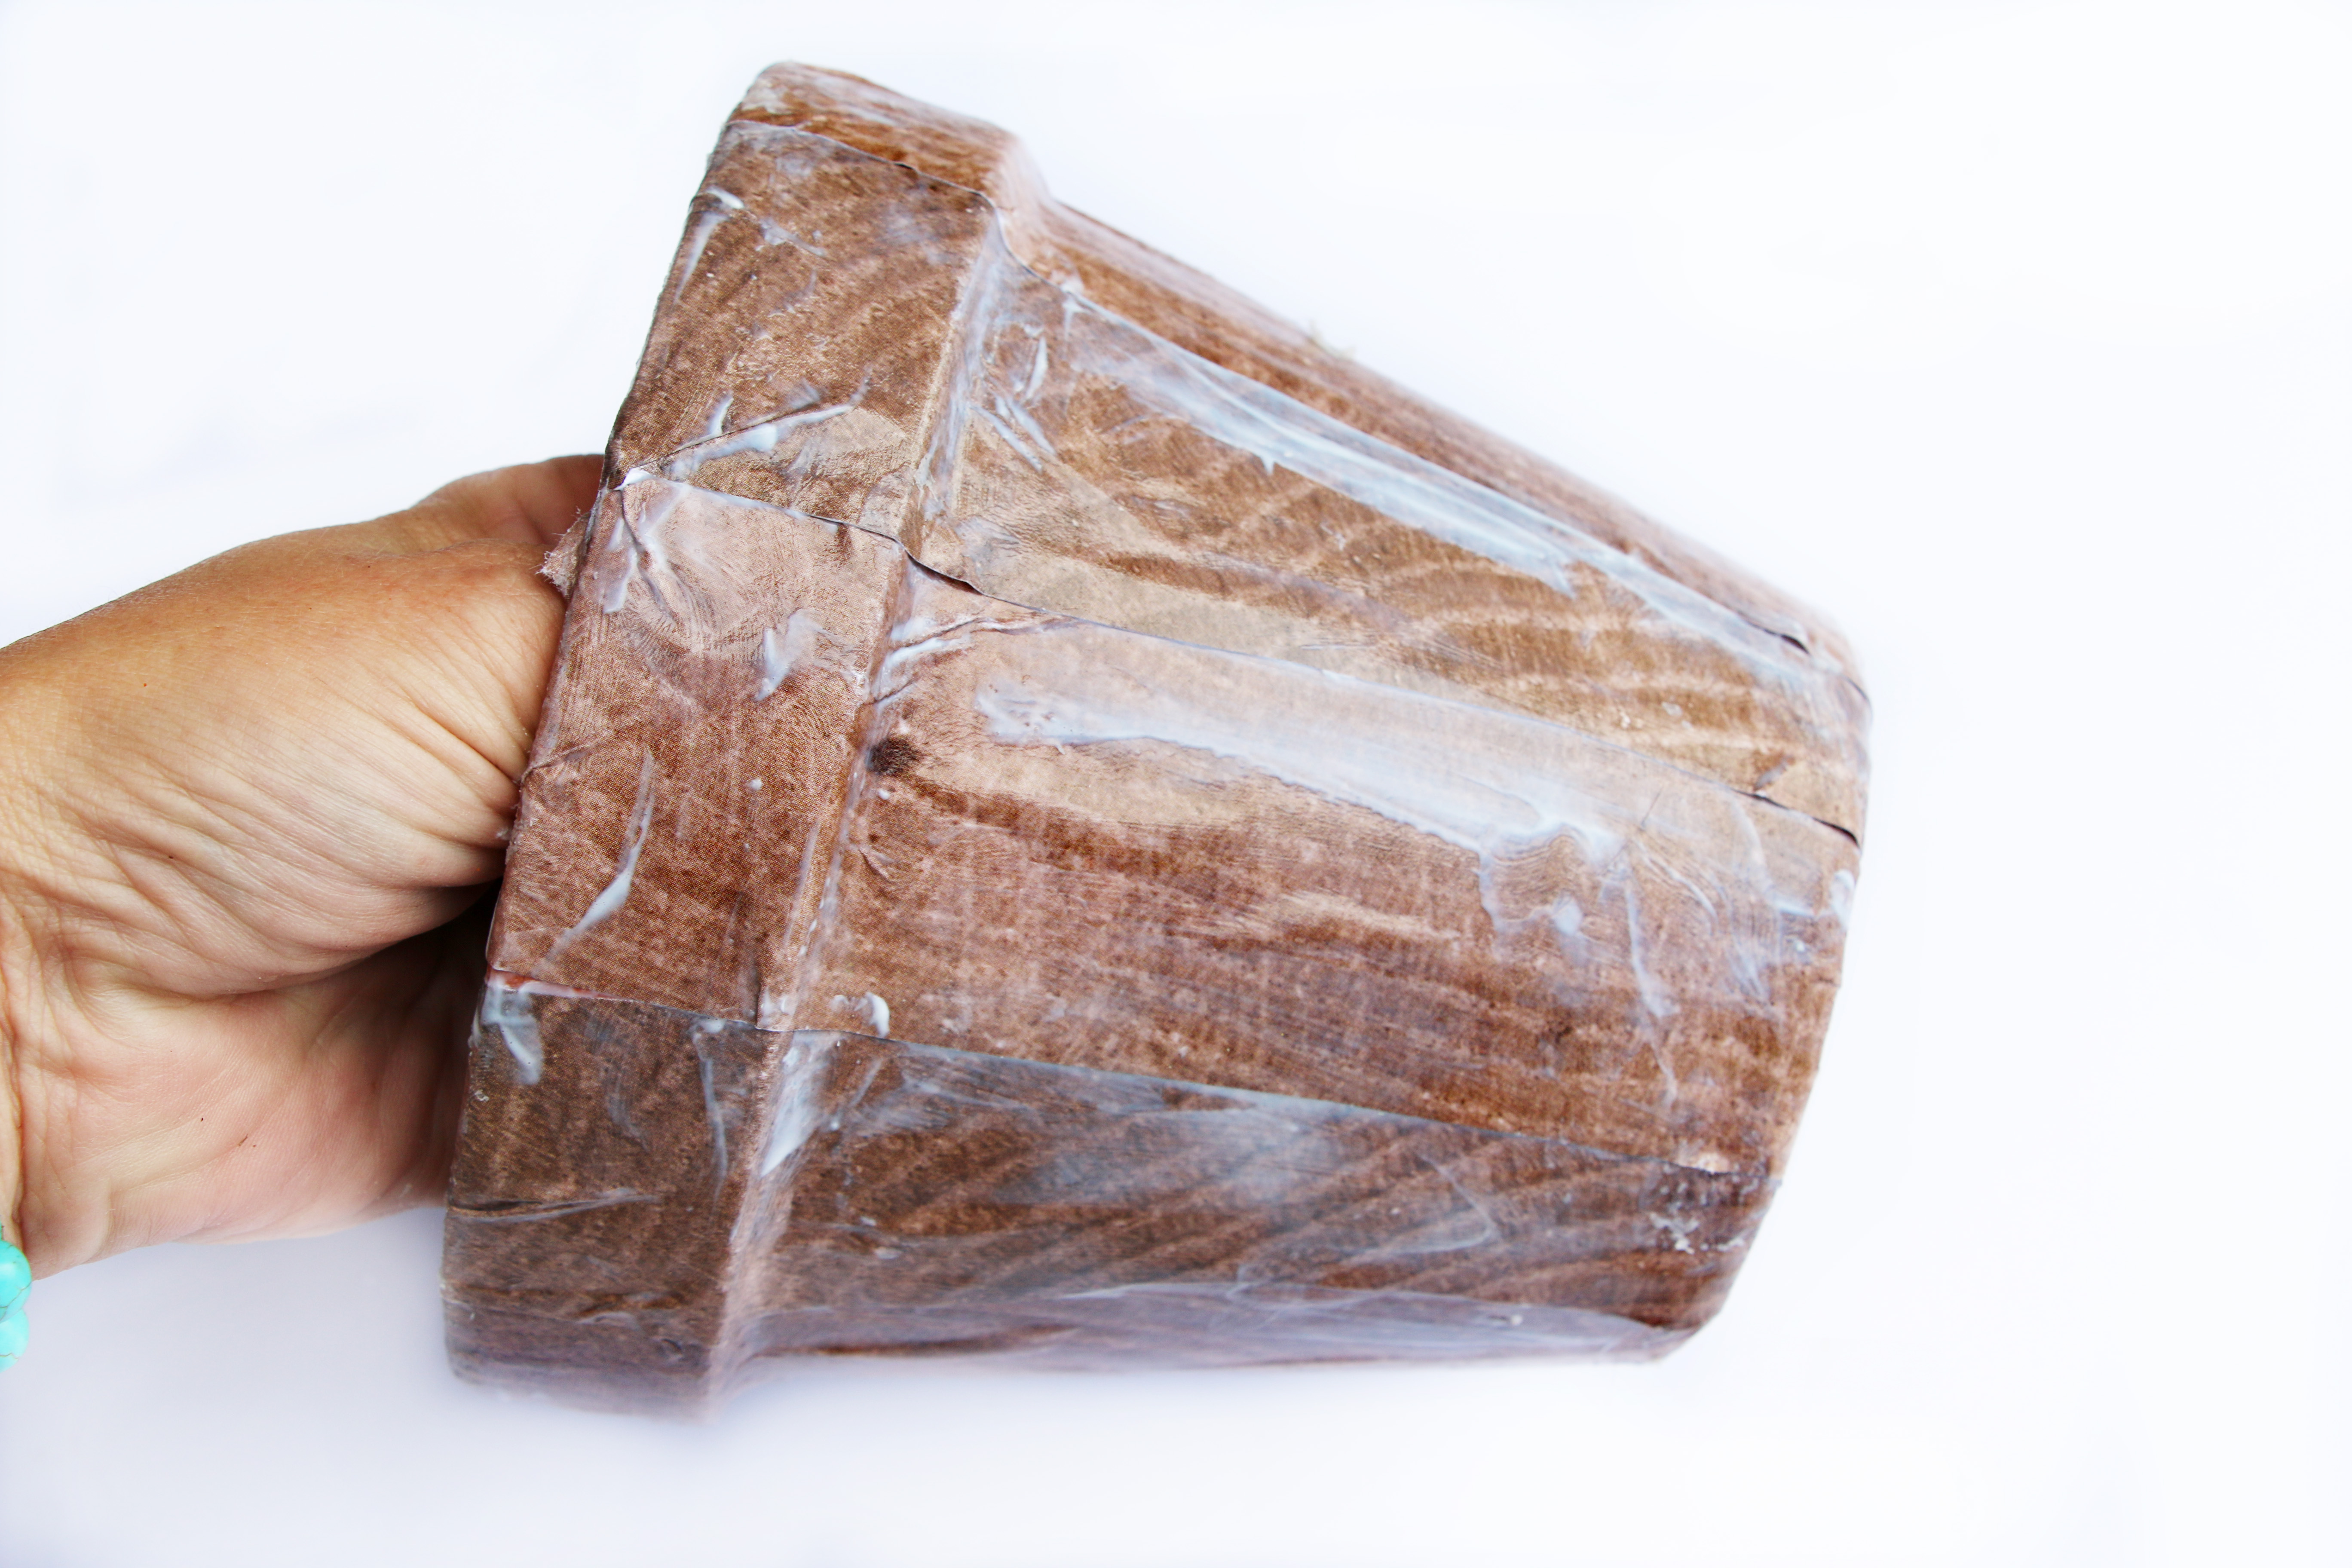 Step Five: Continue until your entire pot is covered. Just a quick tip, if your strips of paper aren’t lining up 100% perfectly don’t stress about this ok…I promise it will look fabulous once it’s completely dry!
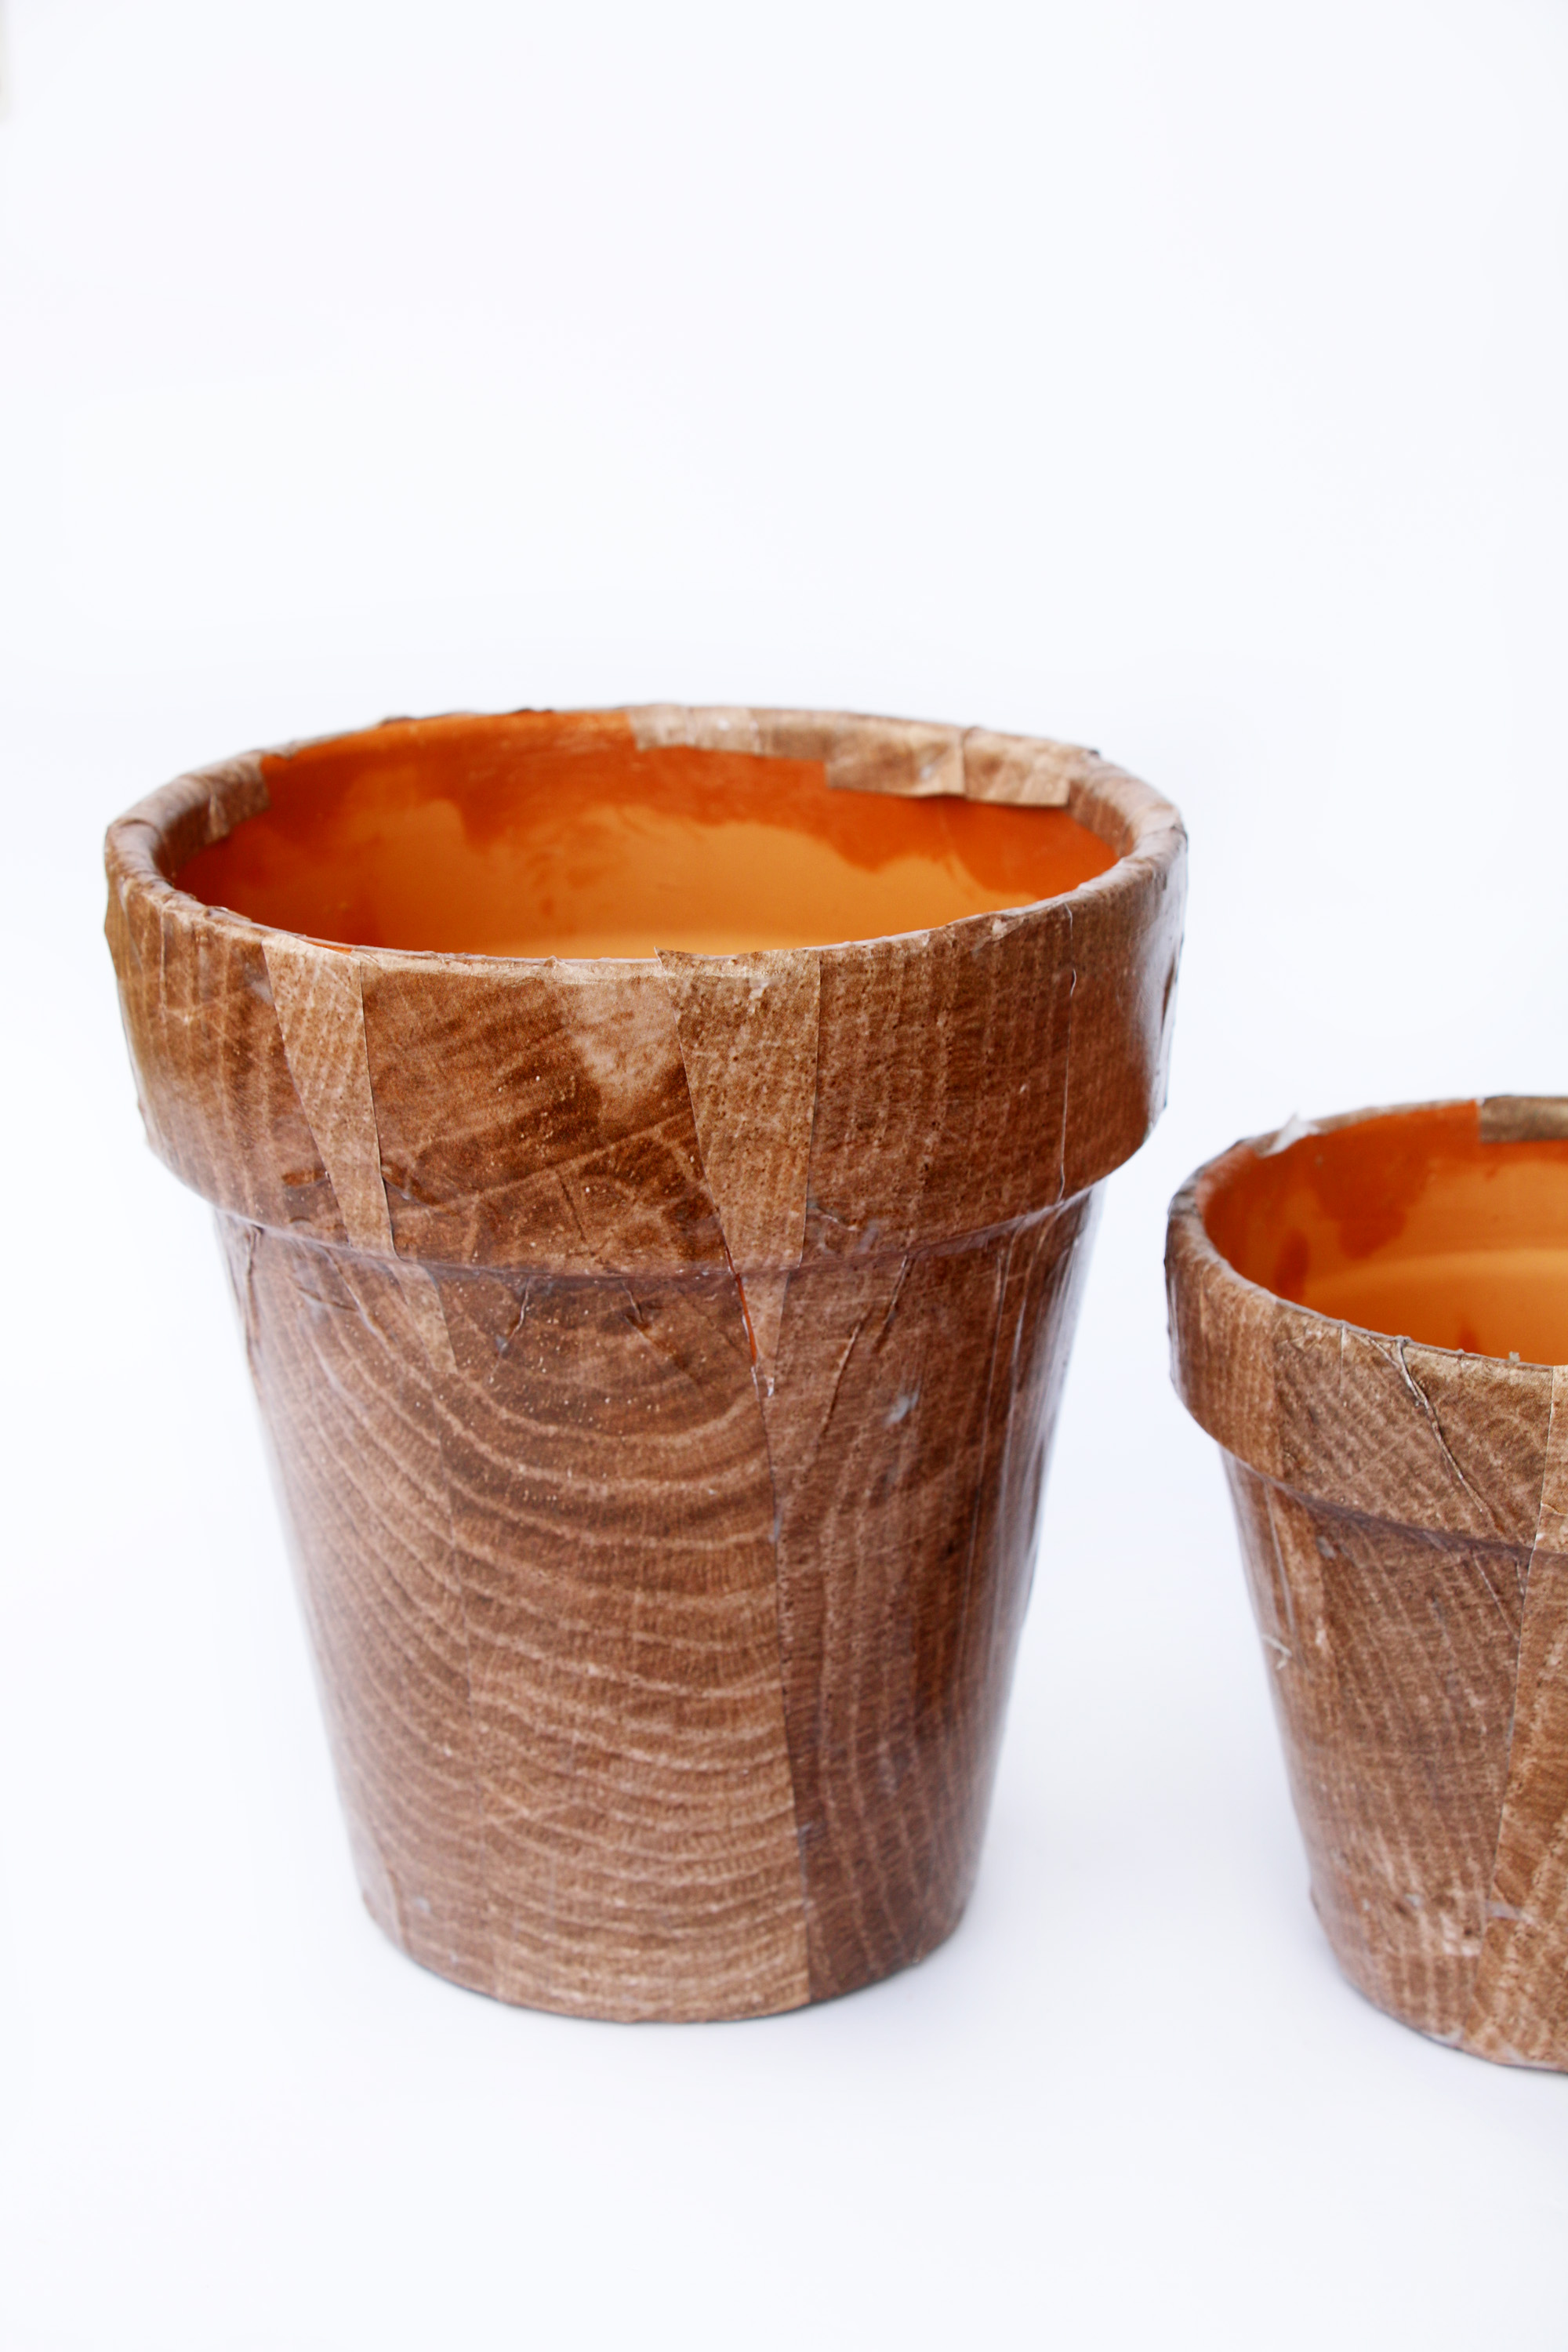
 Supplies for second step:
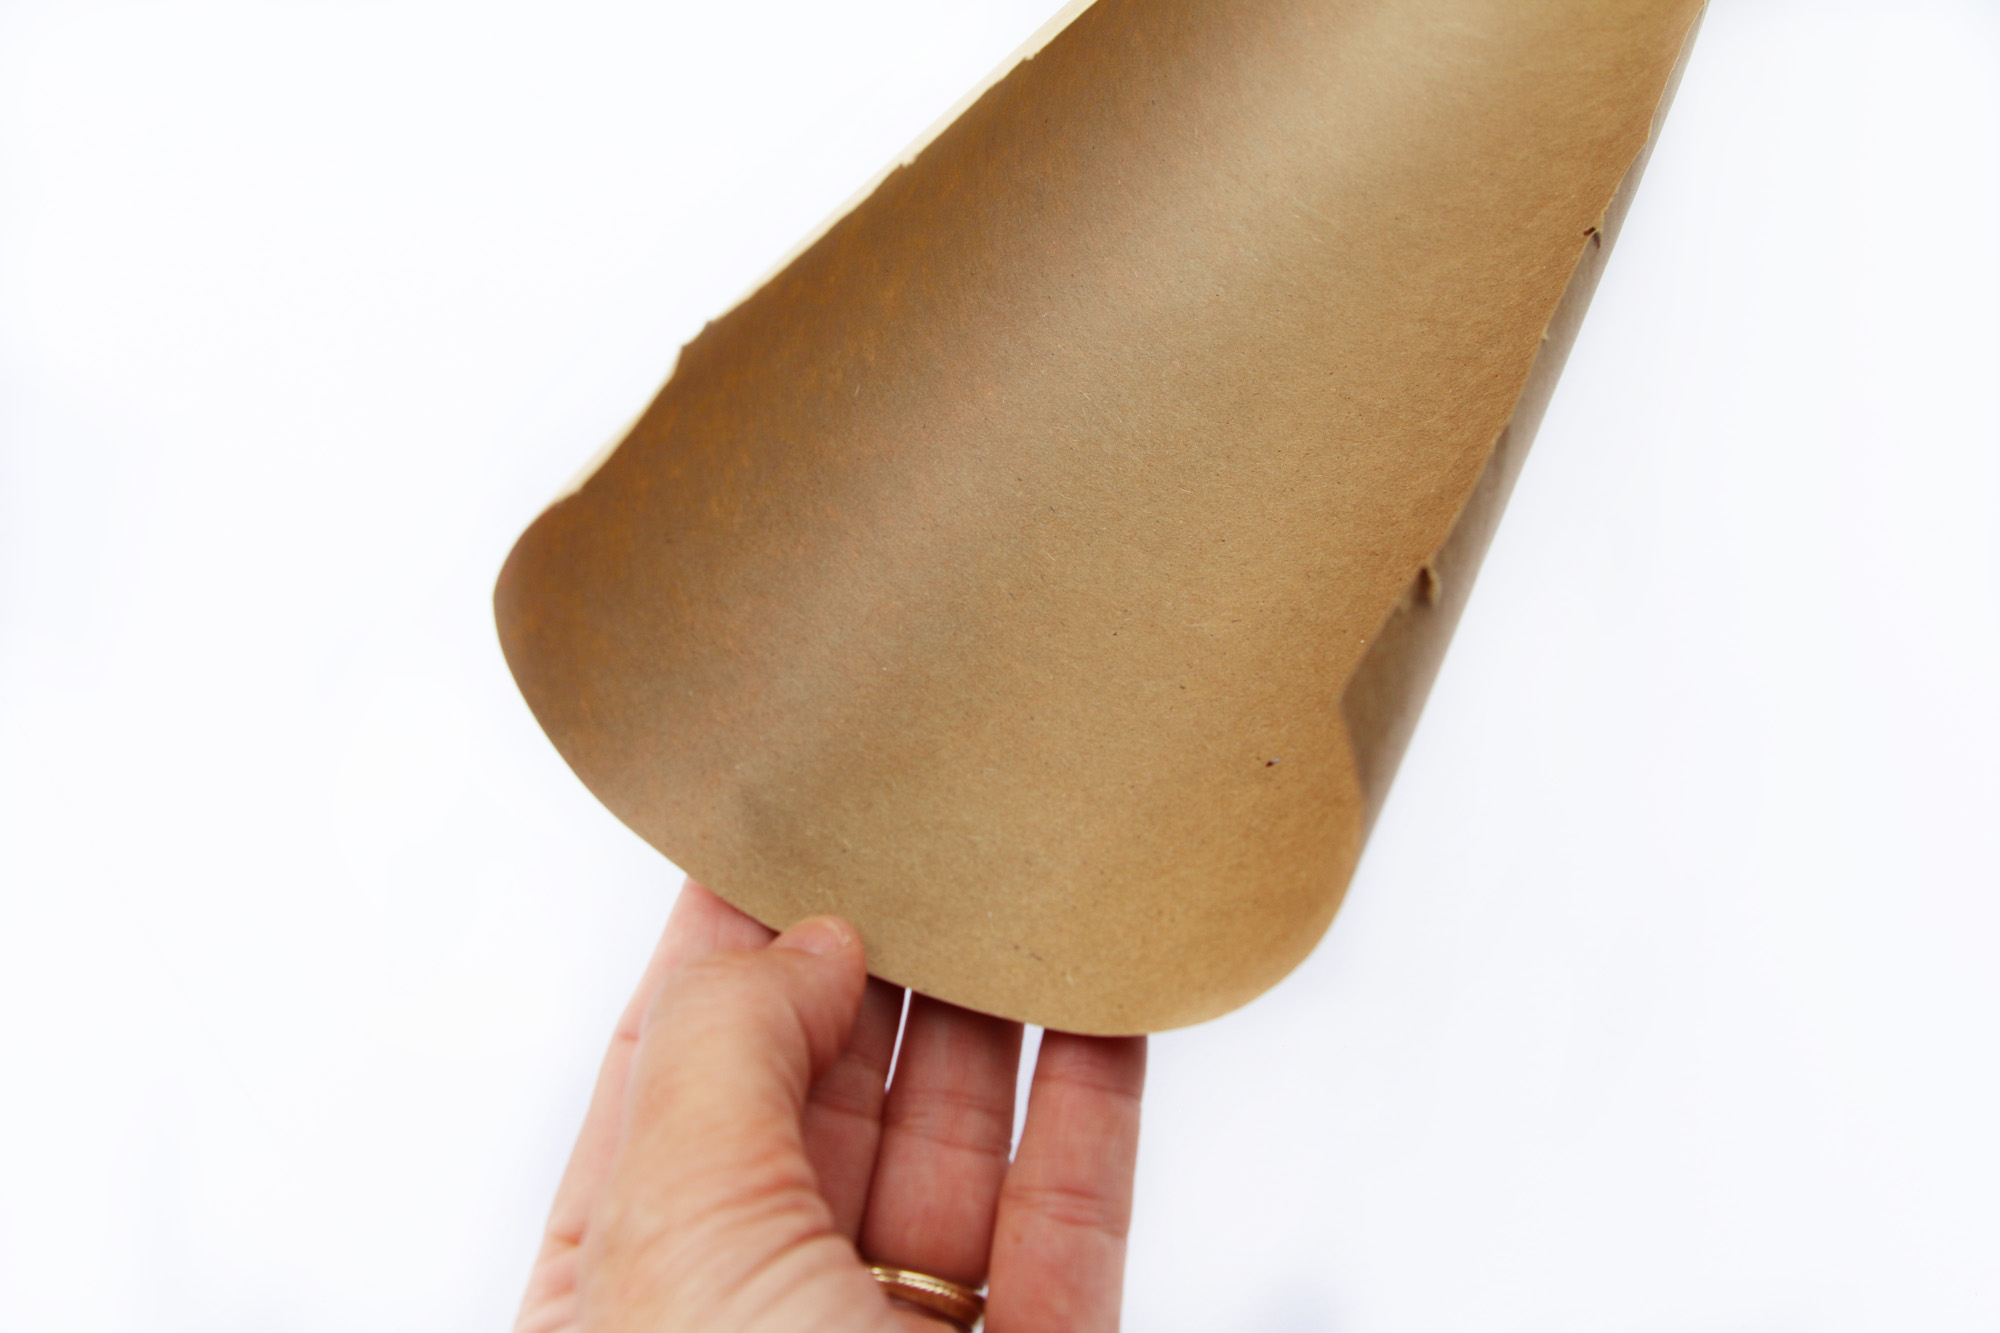 Step One: Cut long pieces of the brown craft paper so we can have a stack ready to roll. Don’t worry if the strips are too long we can always cut them when we are done.
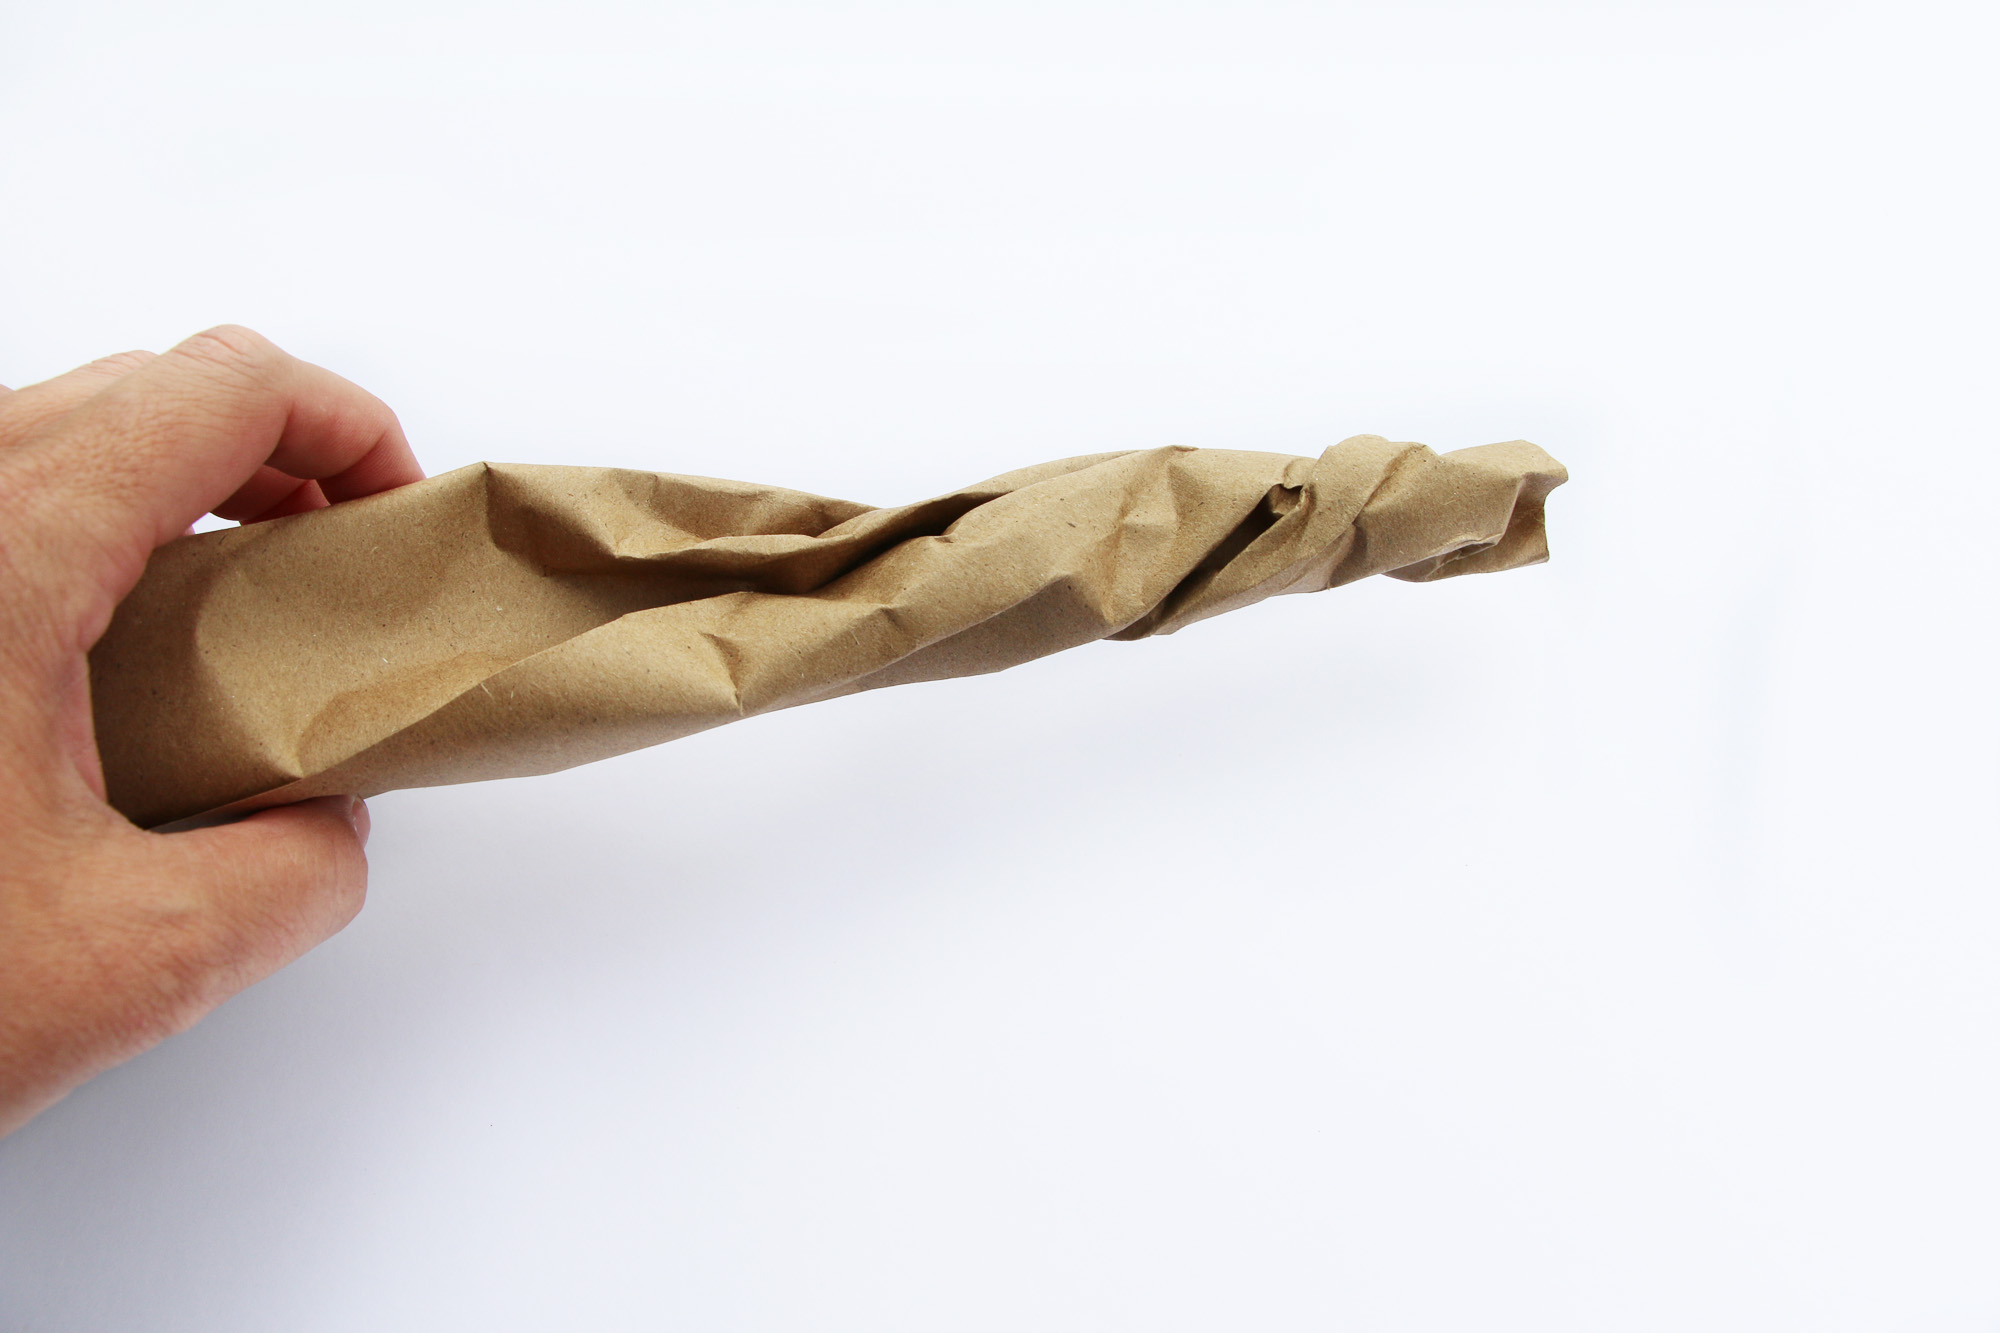 Step Two: Carefully twist the paper using both hands. Don’t be too rough during this step because you will tear the paper. For the main branch (that goes in the middle) I twisted one piece and continued adding more strips around it till the width and thickness was where I wanted it.
 Step Four: Grab your big branch and tape it down to the inside of the pot. I added a few pieces of tape to just make sure it was really secure. Continue doing this with as many branches as you want.
  This is what it will look like when you tape them down inside the pot. Keep in mind we will be filling the negative (empty) space with crunched up craft paper so that will also keep your branches secure. You can also use a stapler or clear tape to add branches onto other branches. It will all be covered in the end!
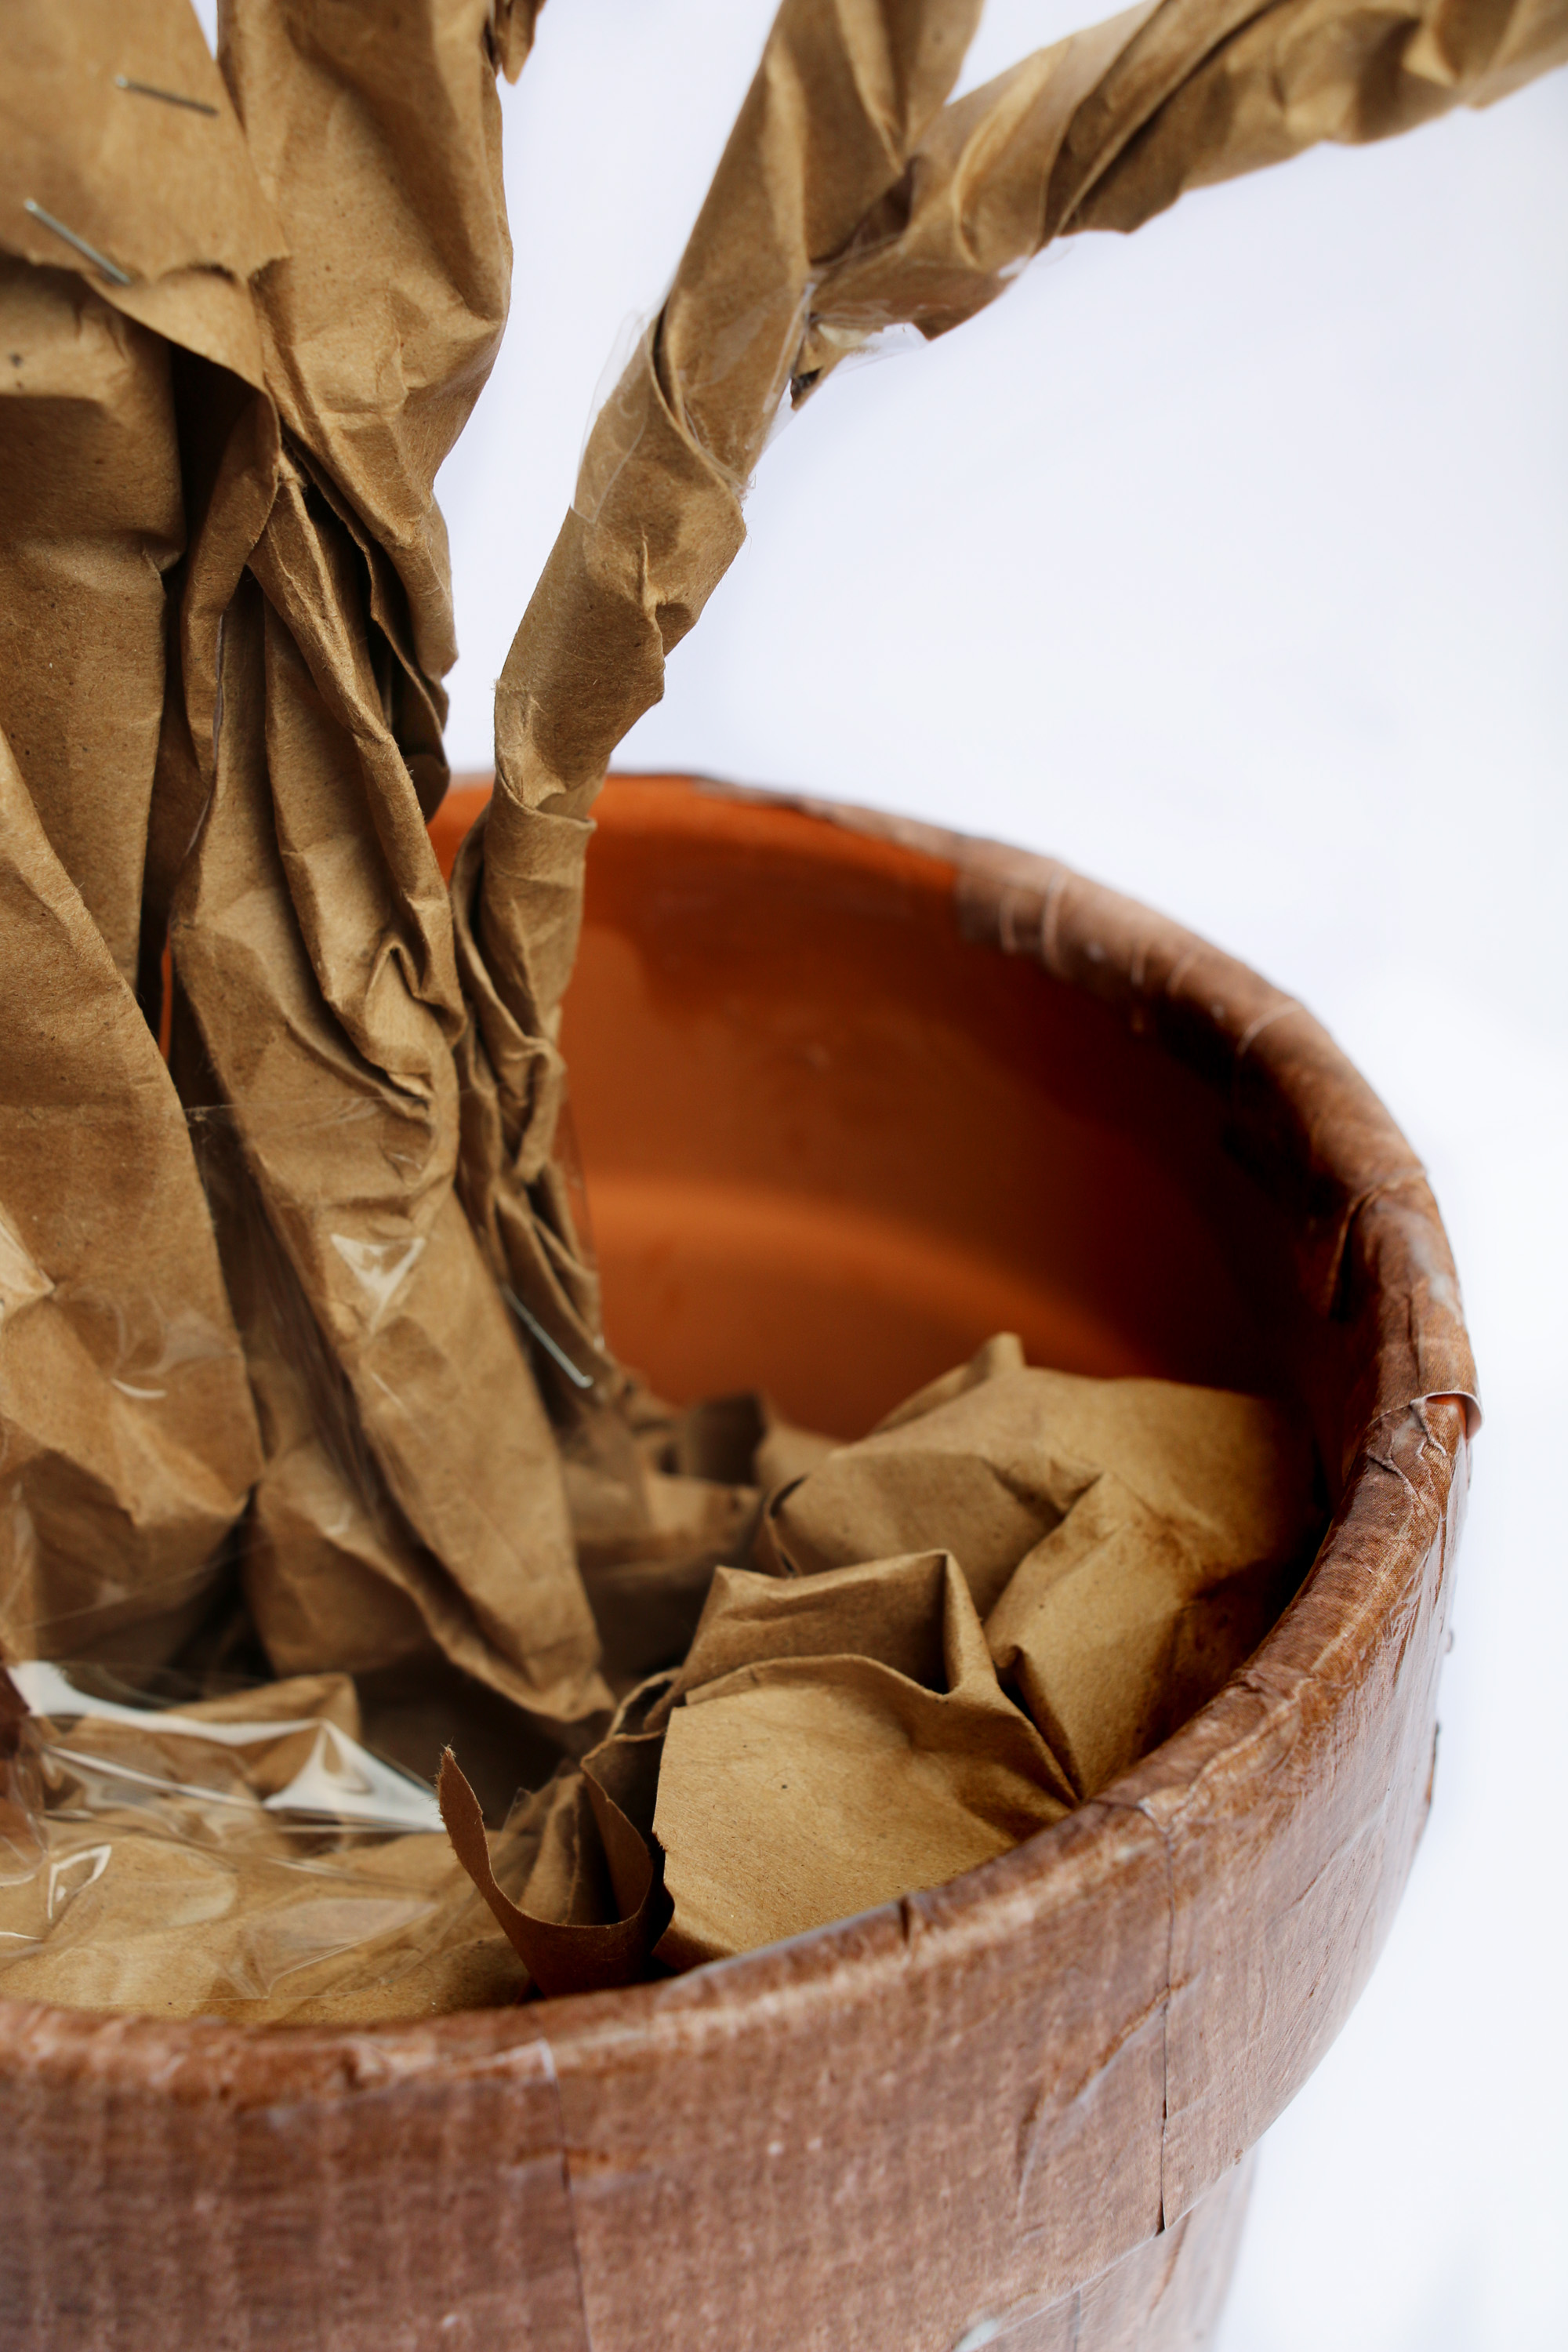 Step Five: Start crumbling paper and filling it inside the pot. Also, notice that I used some clear tape to bunch up the base of all my branches so it looks like one massive tree on the bottom.
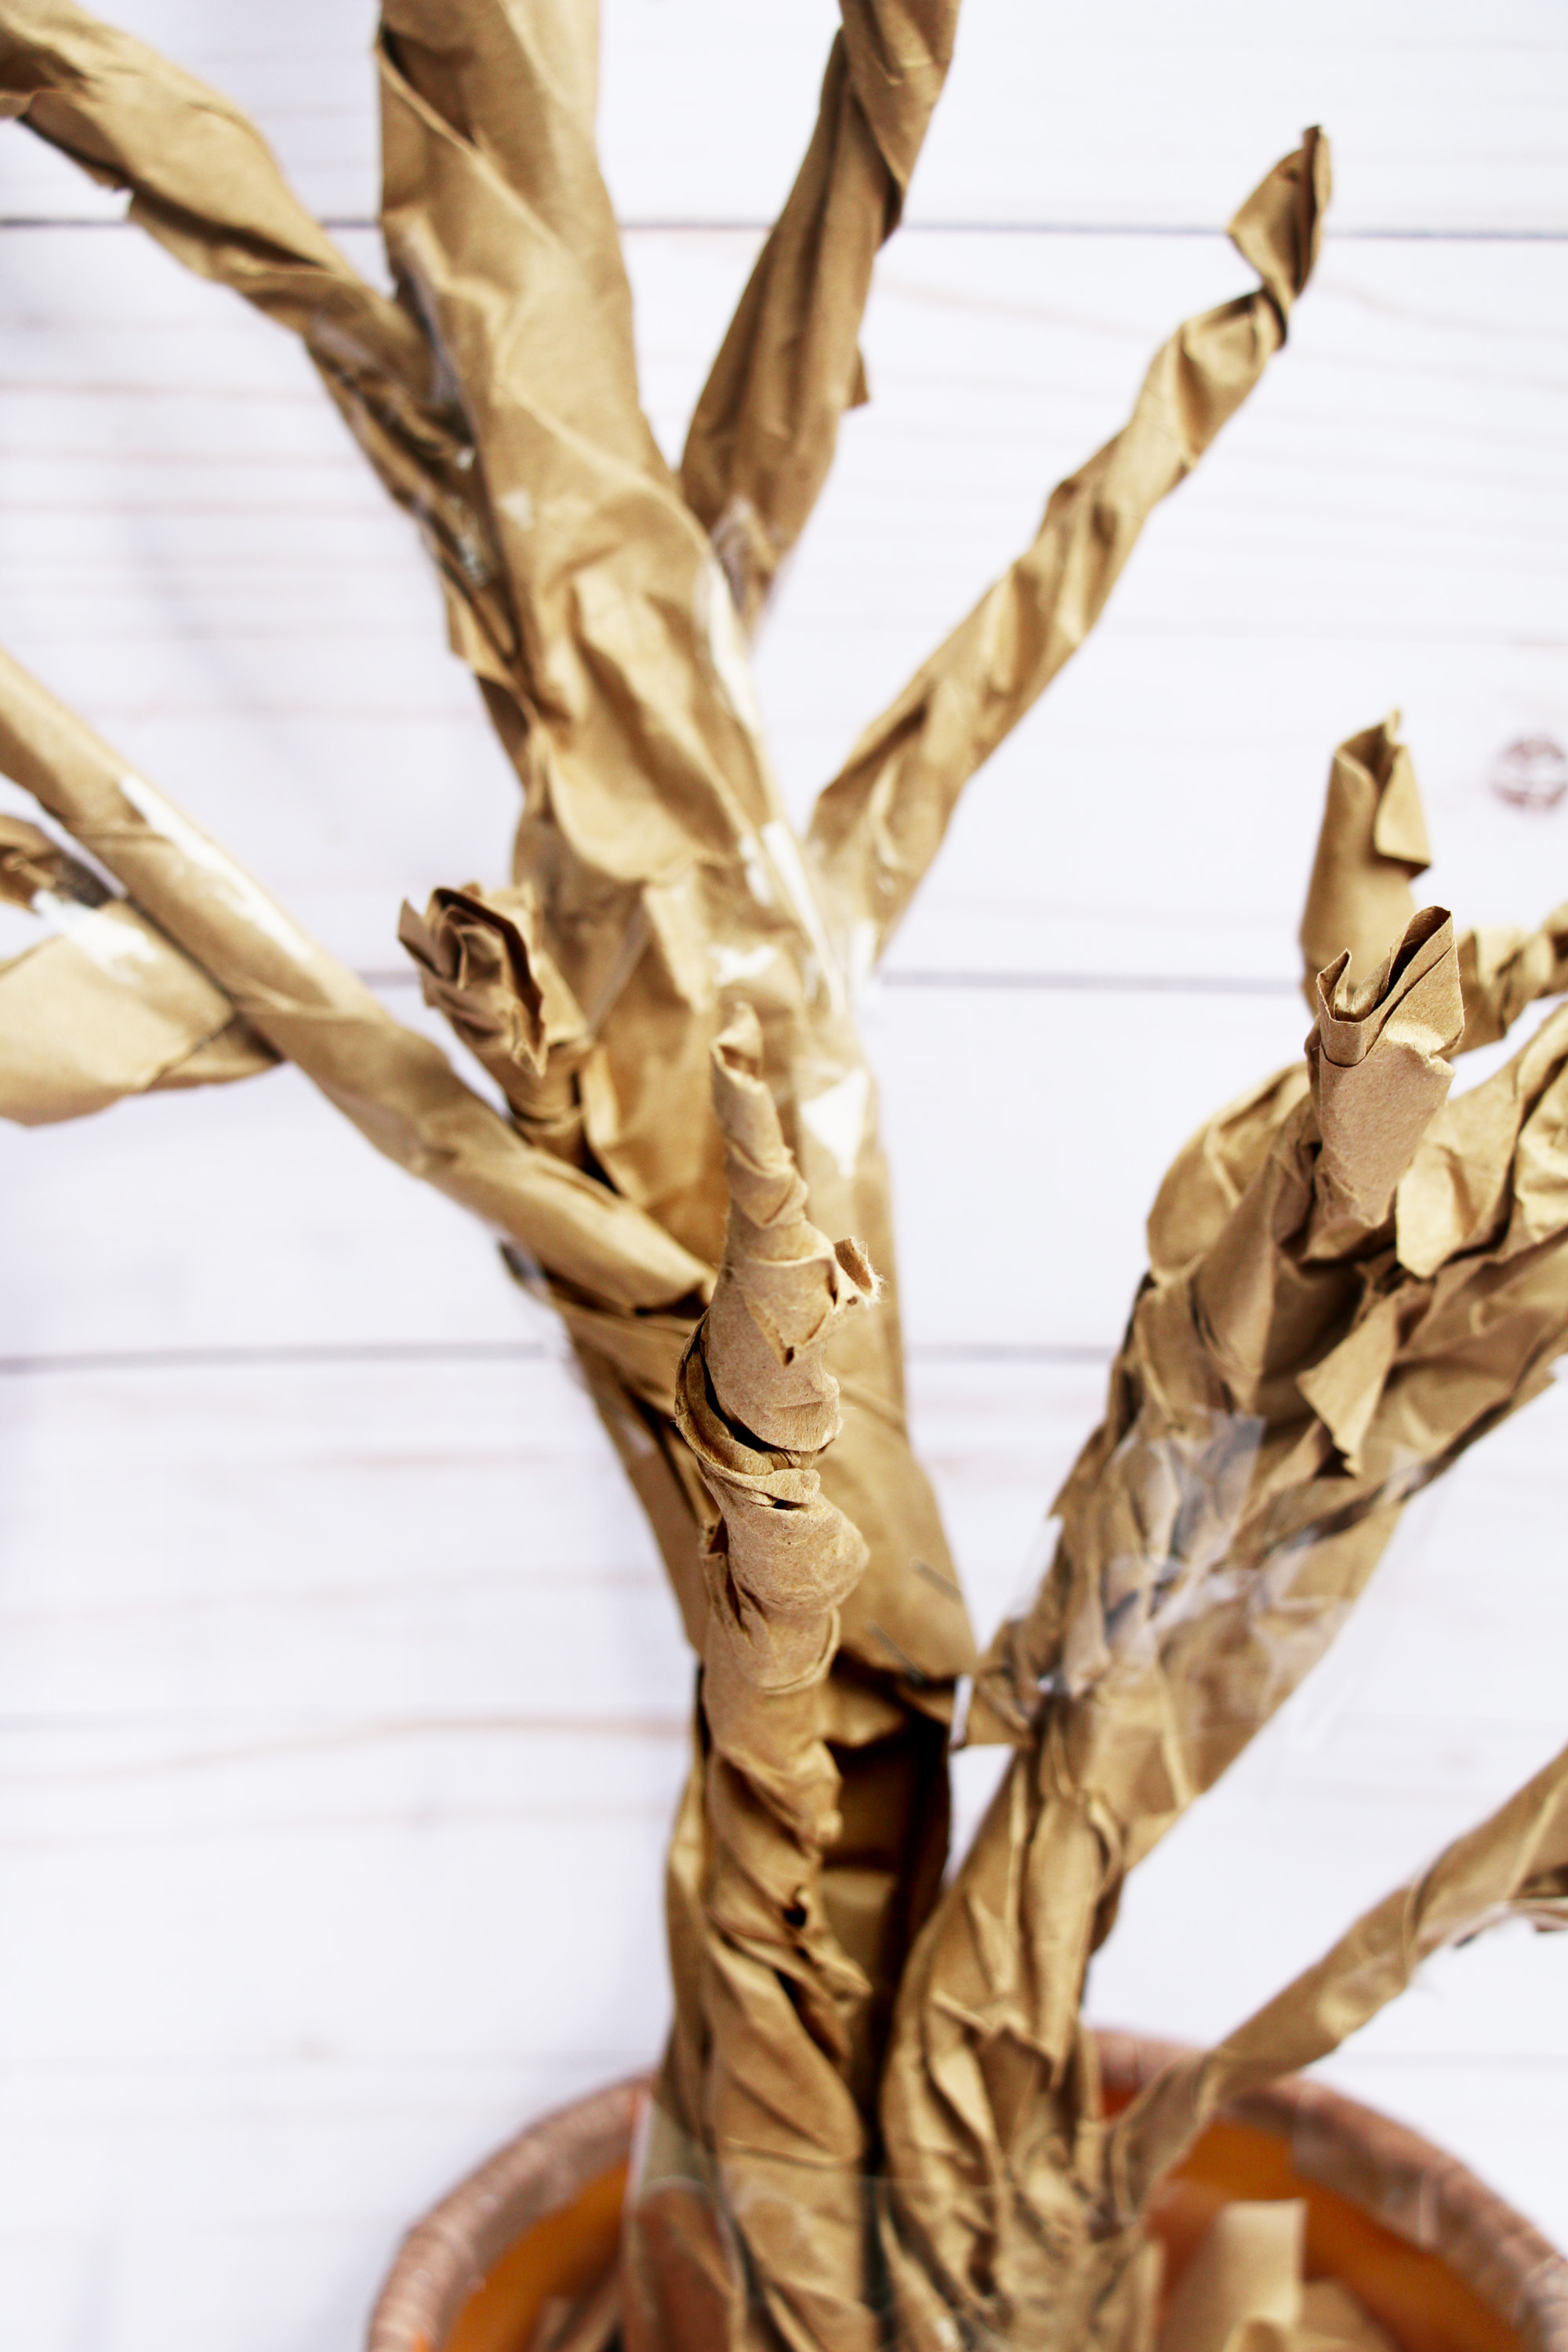
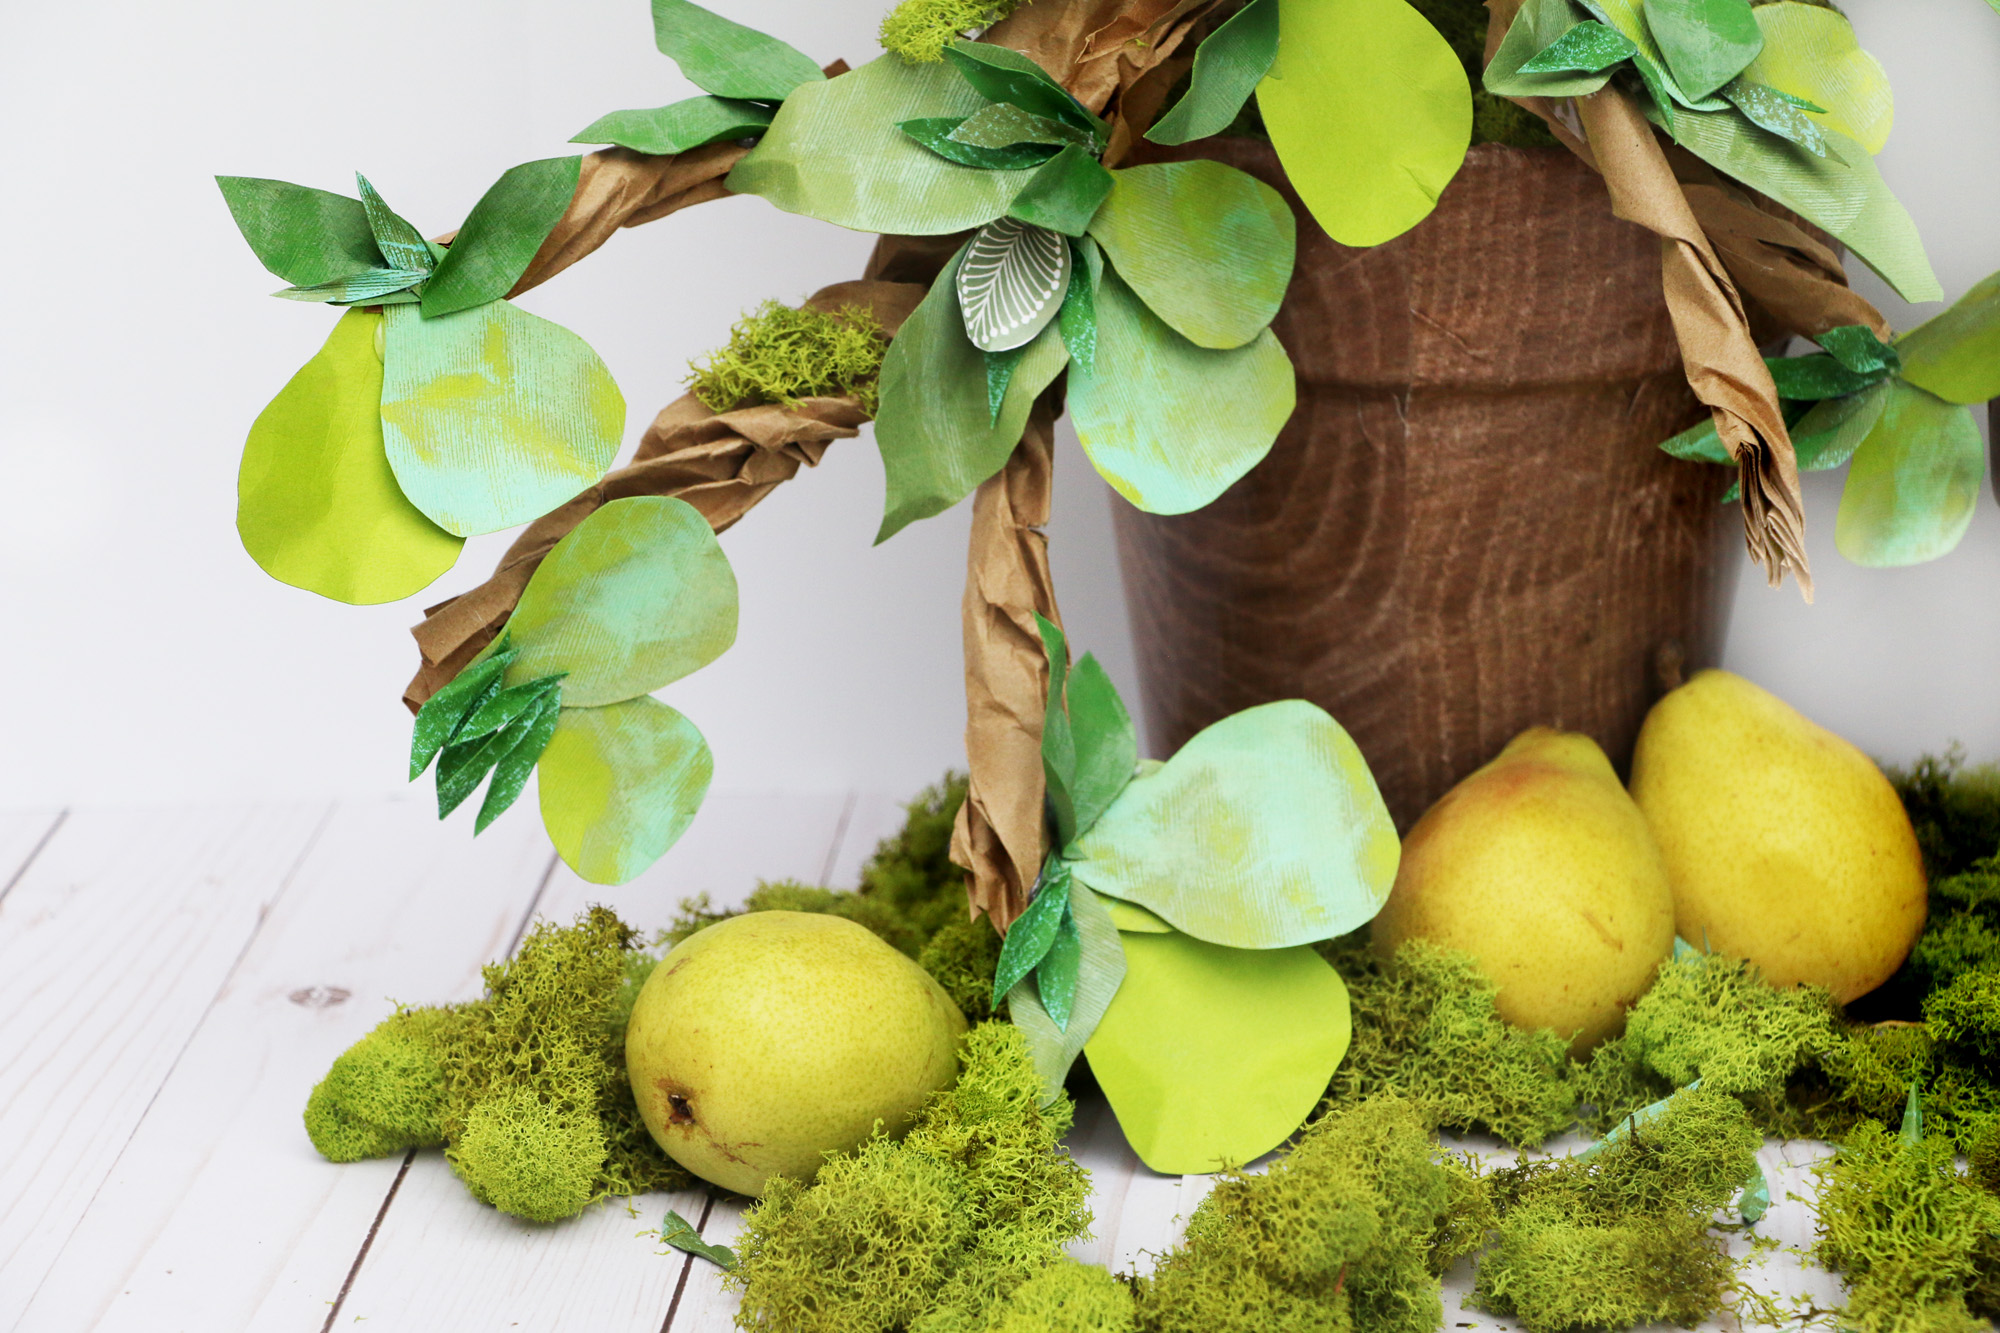
 Step One: I actually eyeballed cutting out my leaves because I knew in the end once I bent them up with my hands they would look like different shapes.
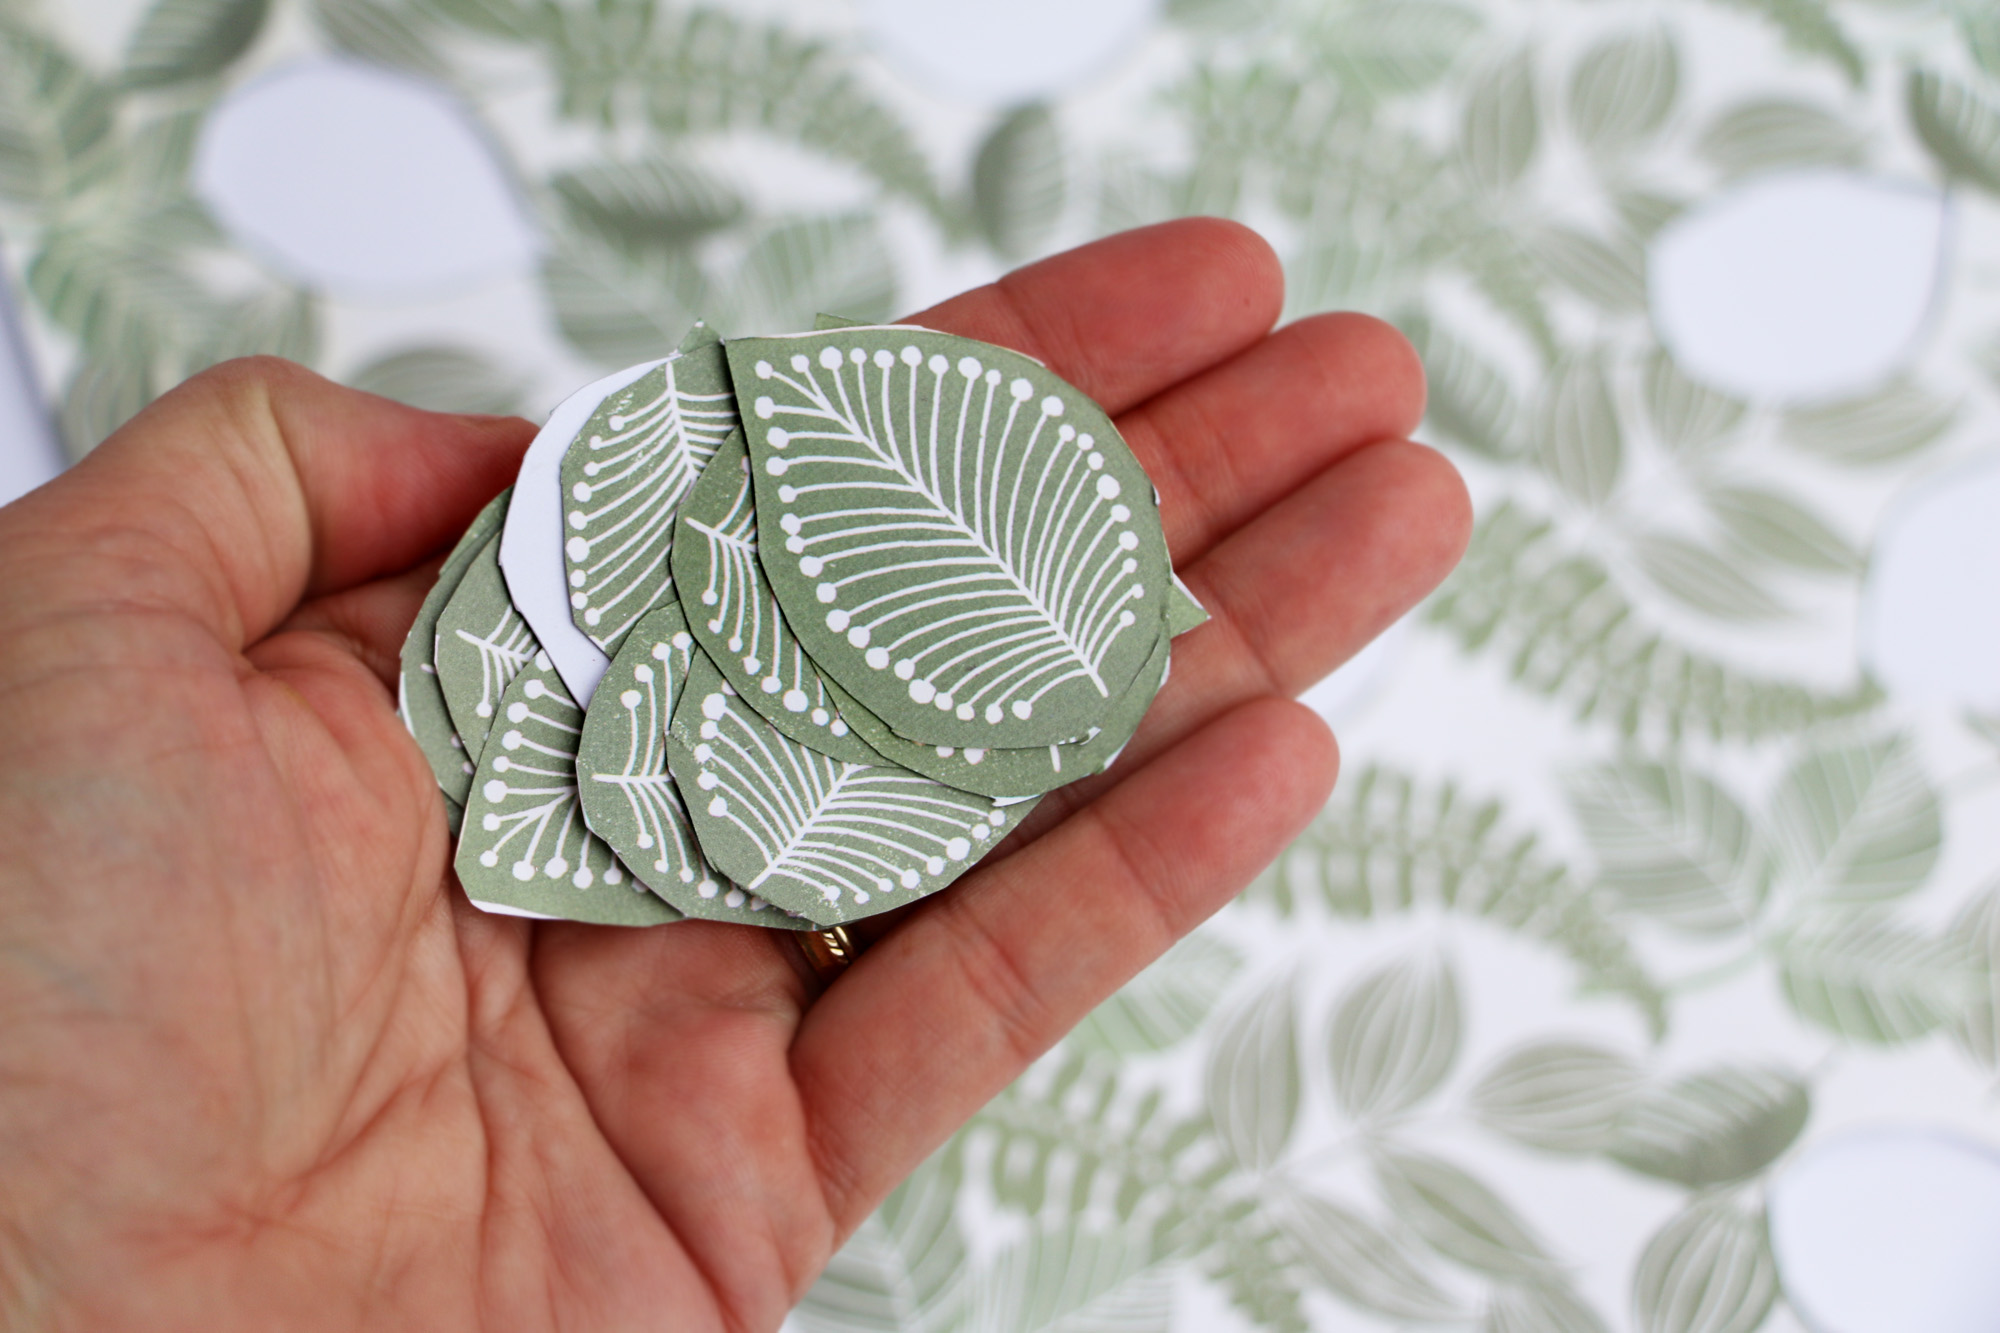 Step Two: Make sure to grab some craft paper that is pre-printed with leaves like this because they will be nice to add in random spots to add some texture!
 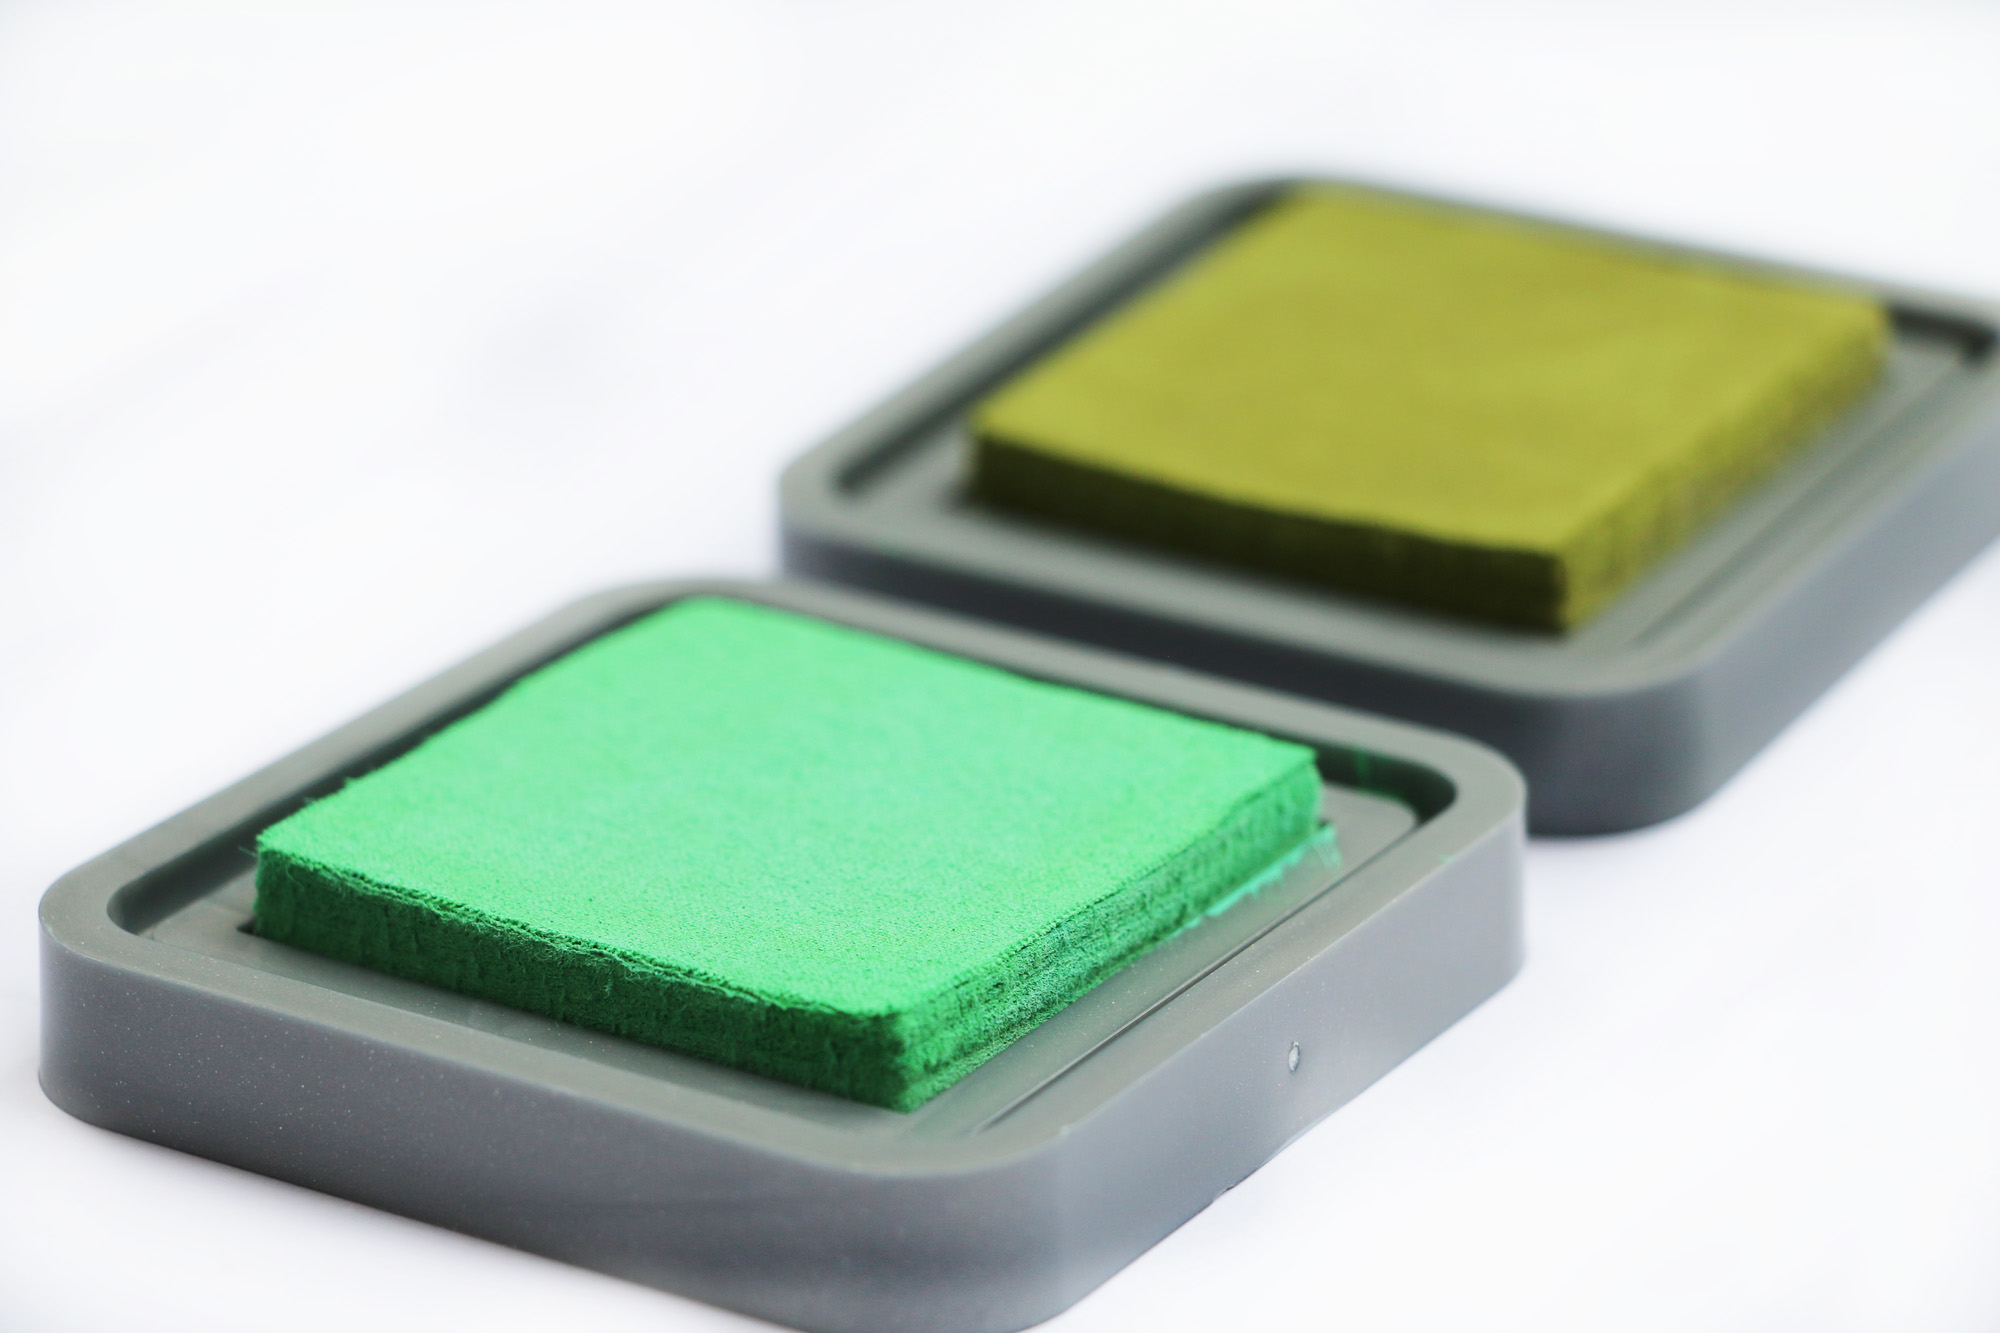 Let’s just take a second to look at how beautiful these ink pads are.
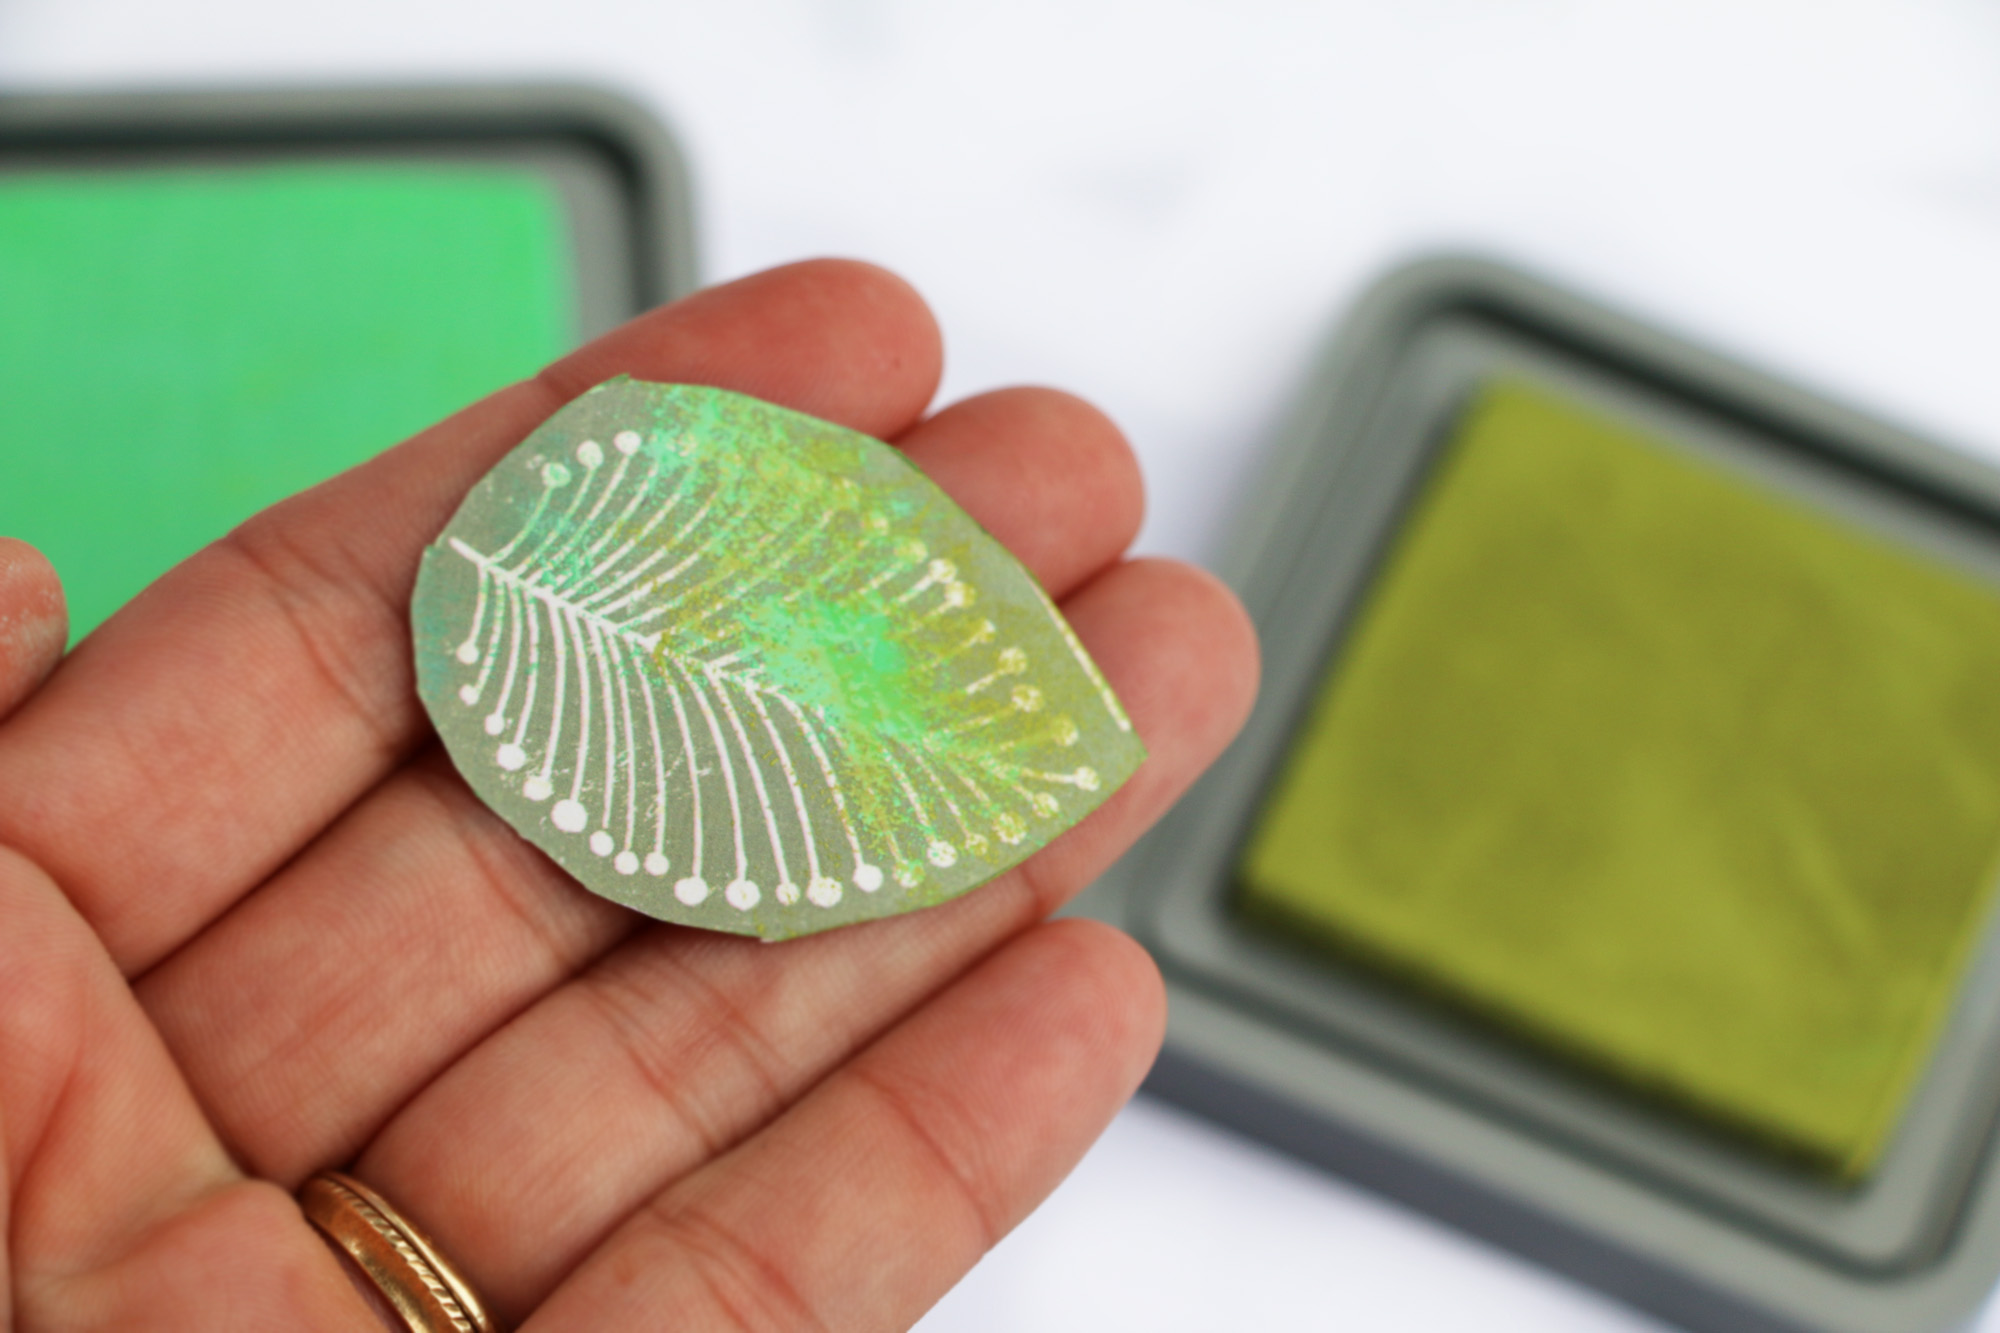 Step Three: Add multiple shades of ink onto your leaves to make them look realistic. P.S. Make sure you cut all different sizes in different shades of colors.
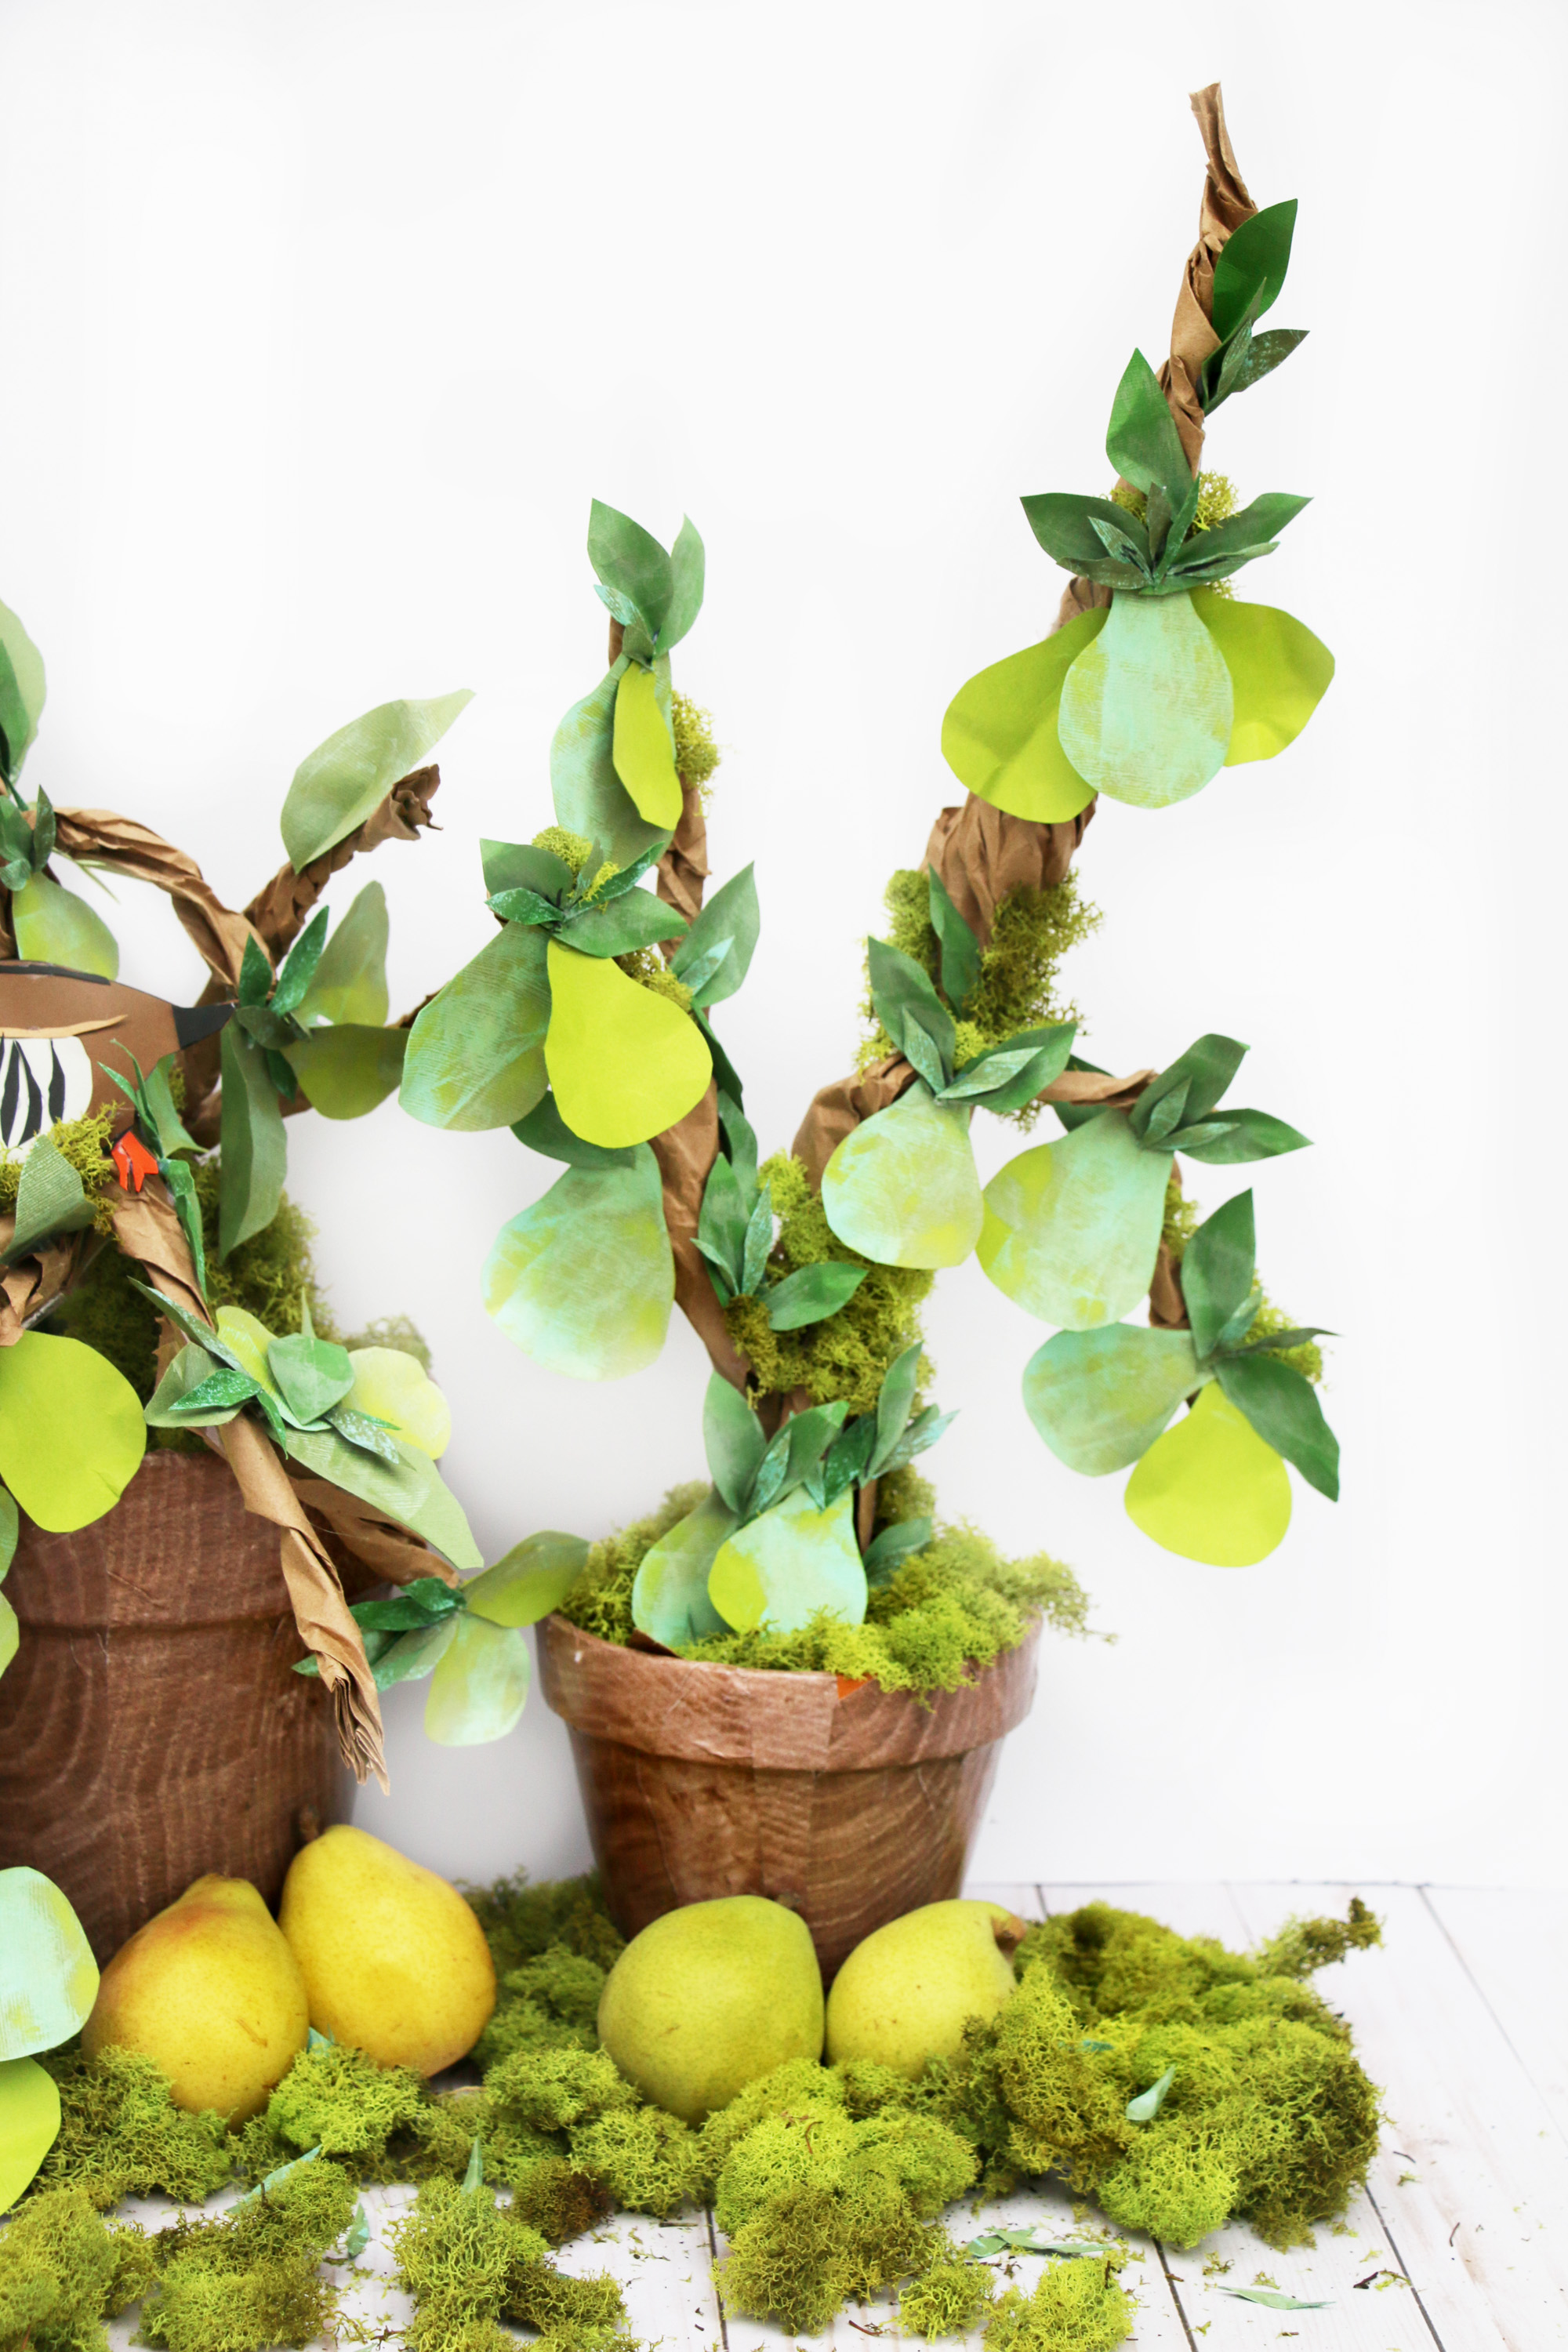
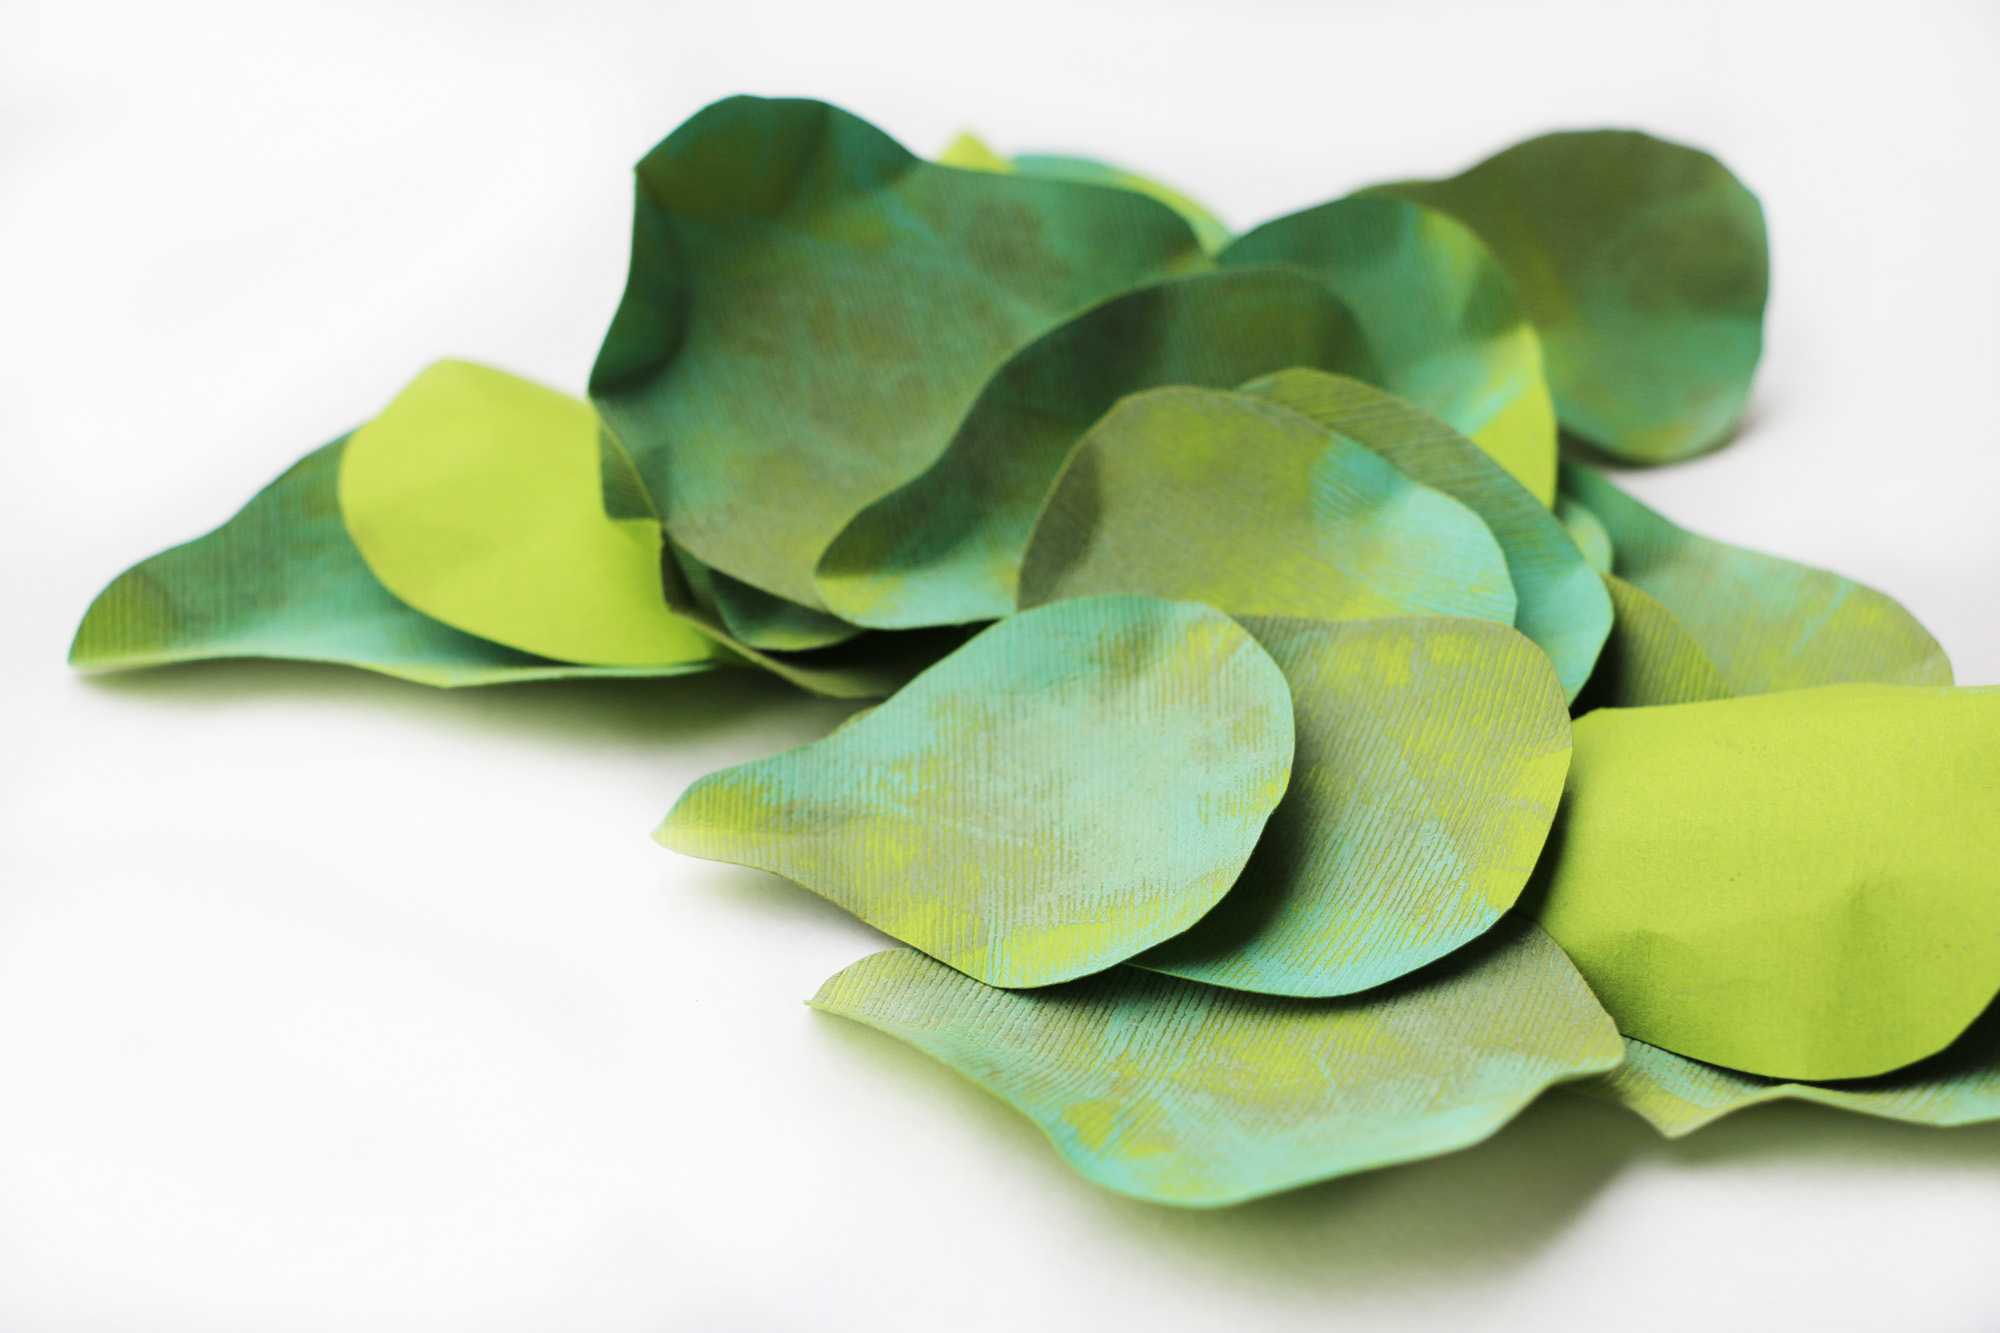 Make sure you use a bright green paper for the pears, we want to make sure they stand out against the other green shades. I love how they look a little real, at least from one angle!
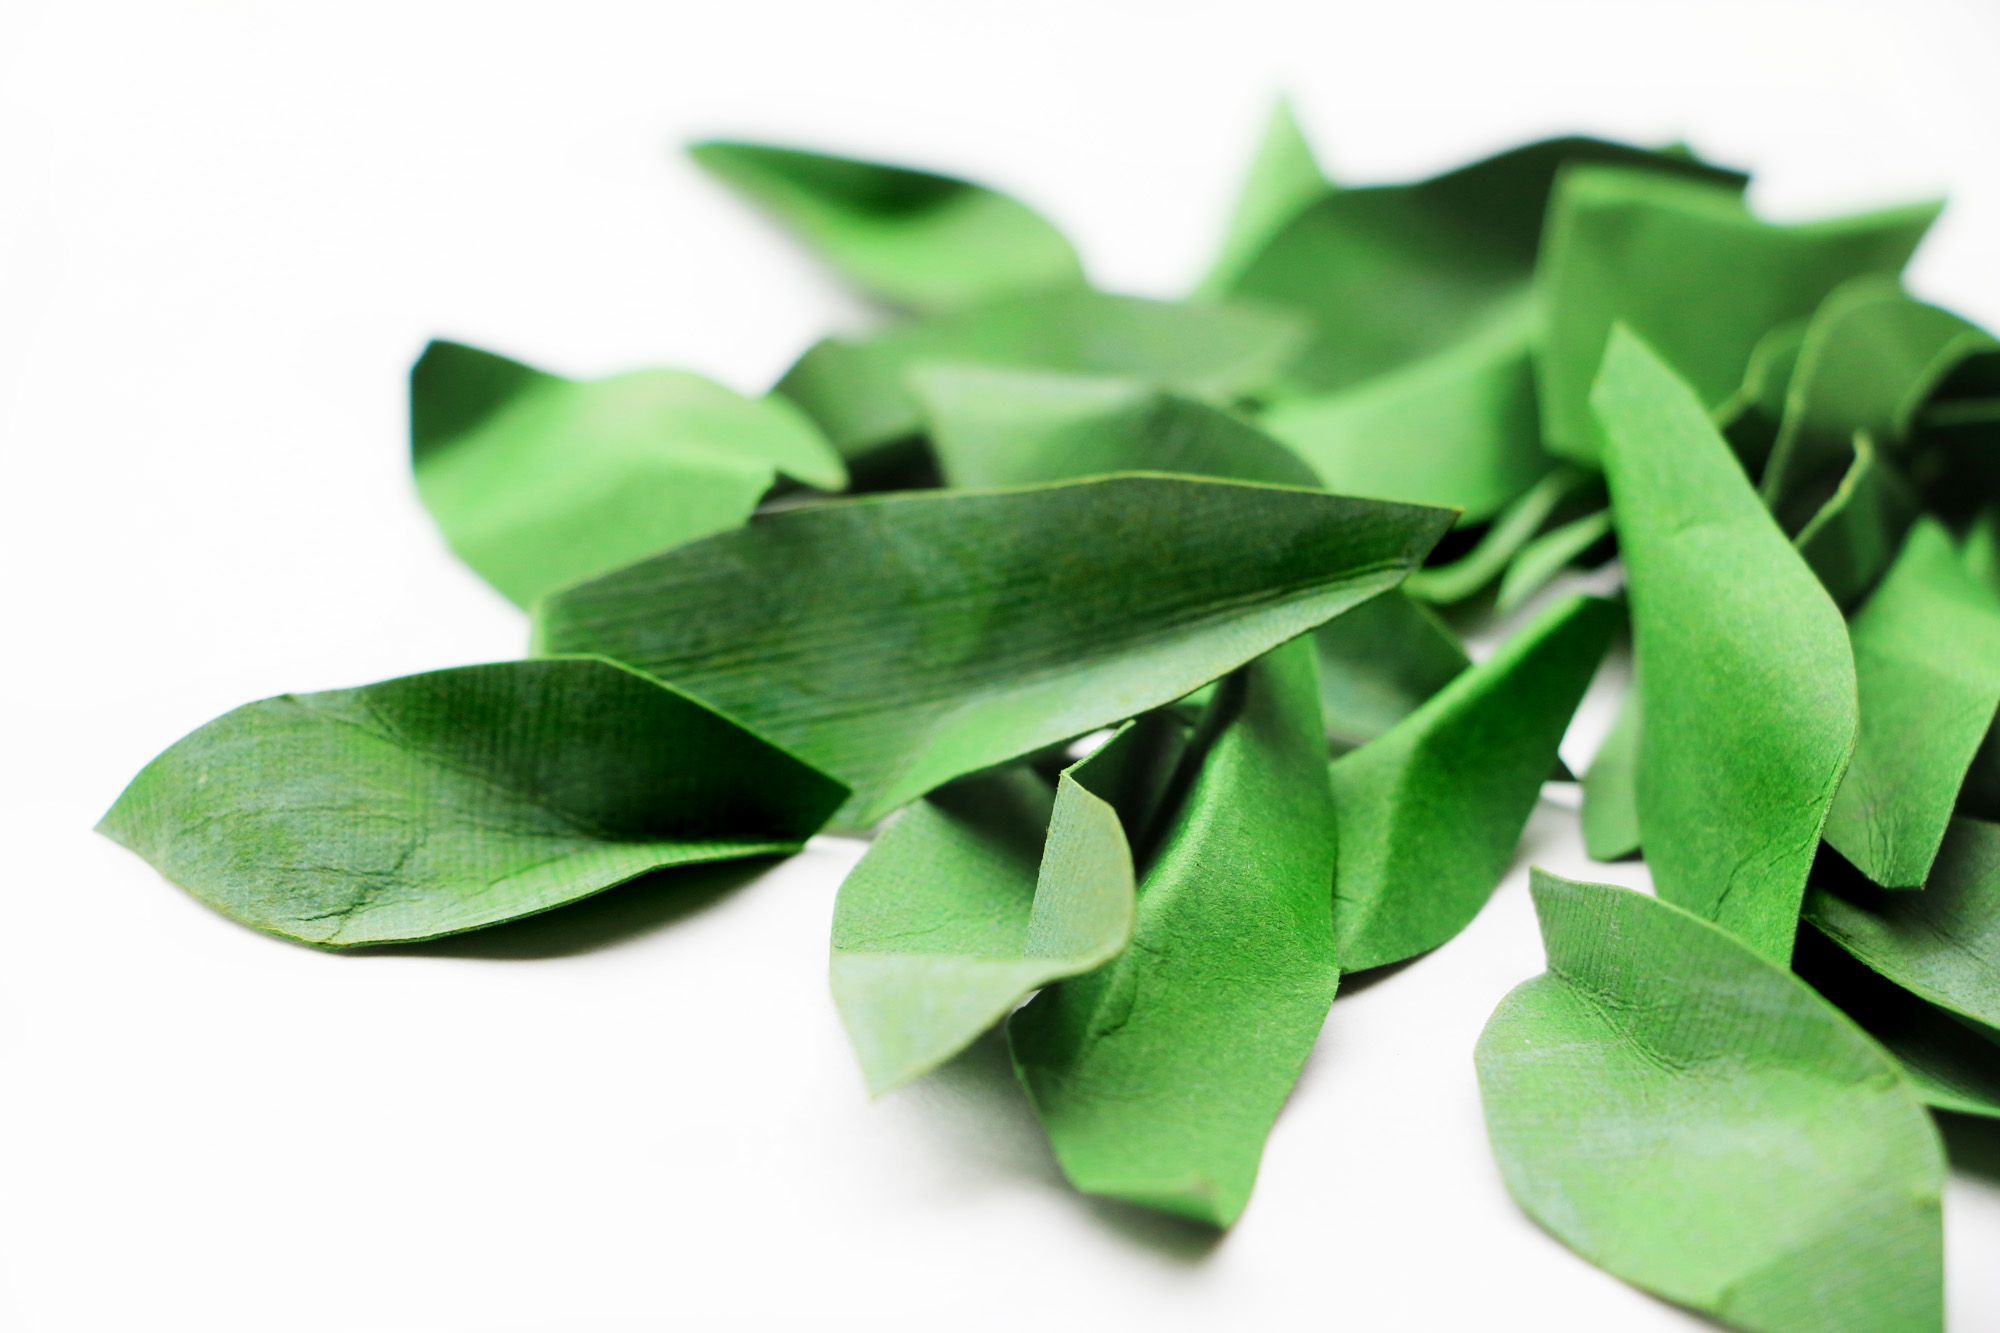 You will do the same thing for the leaves. I found pinching one end of the leaves inward then folding the other end backwards, made them look extremely real.
 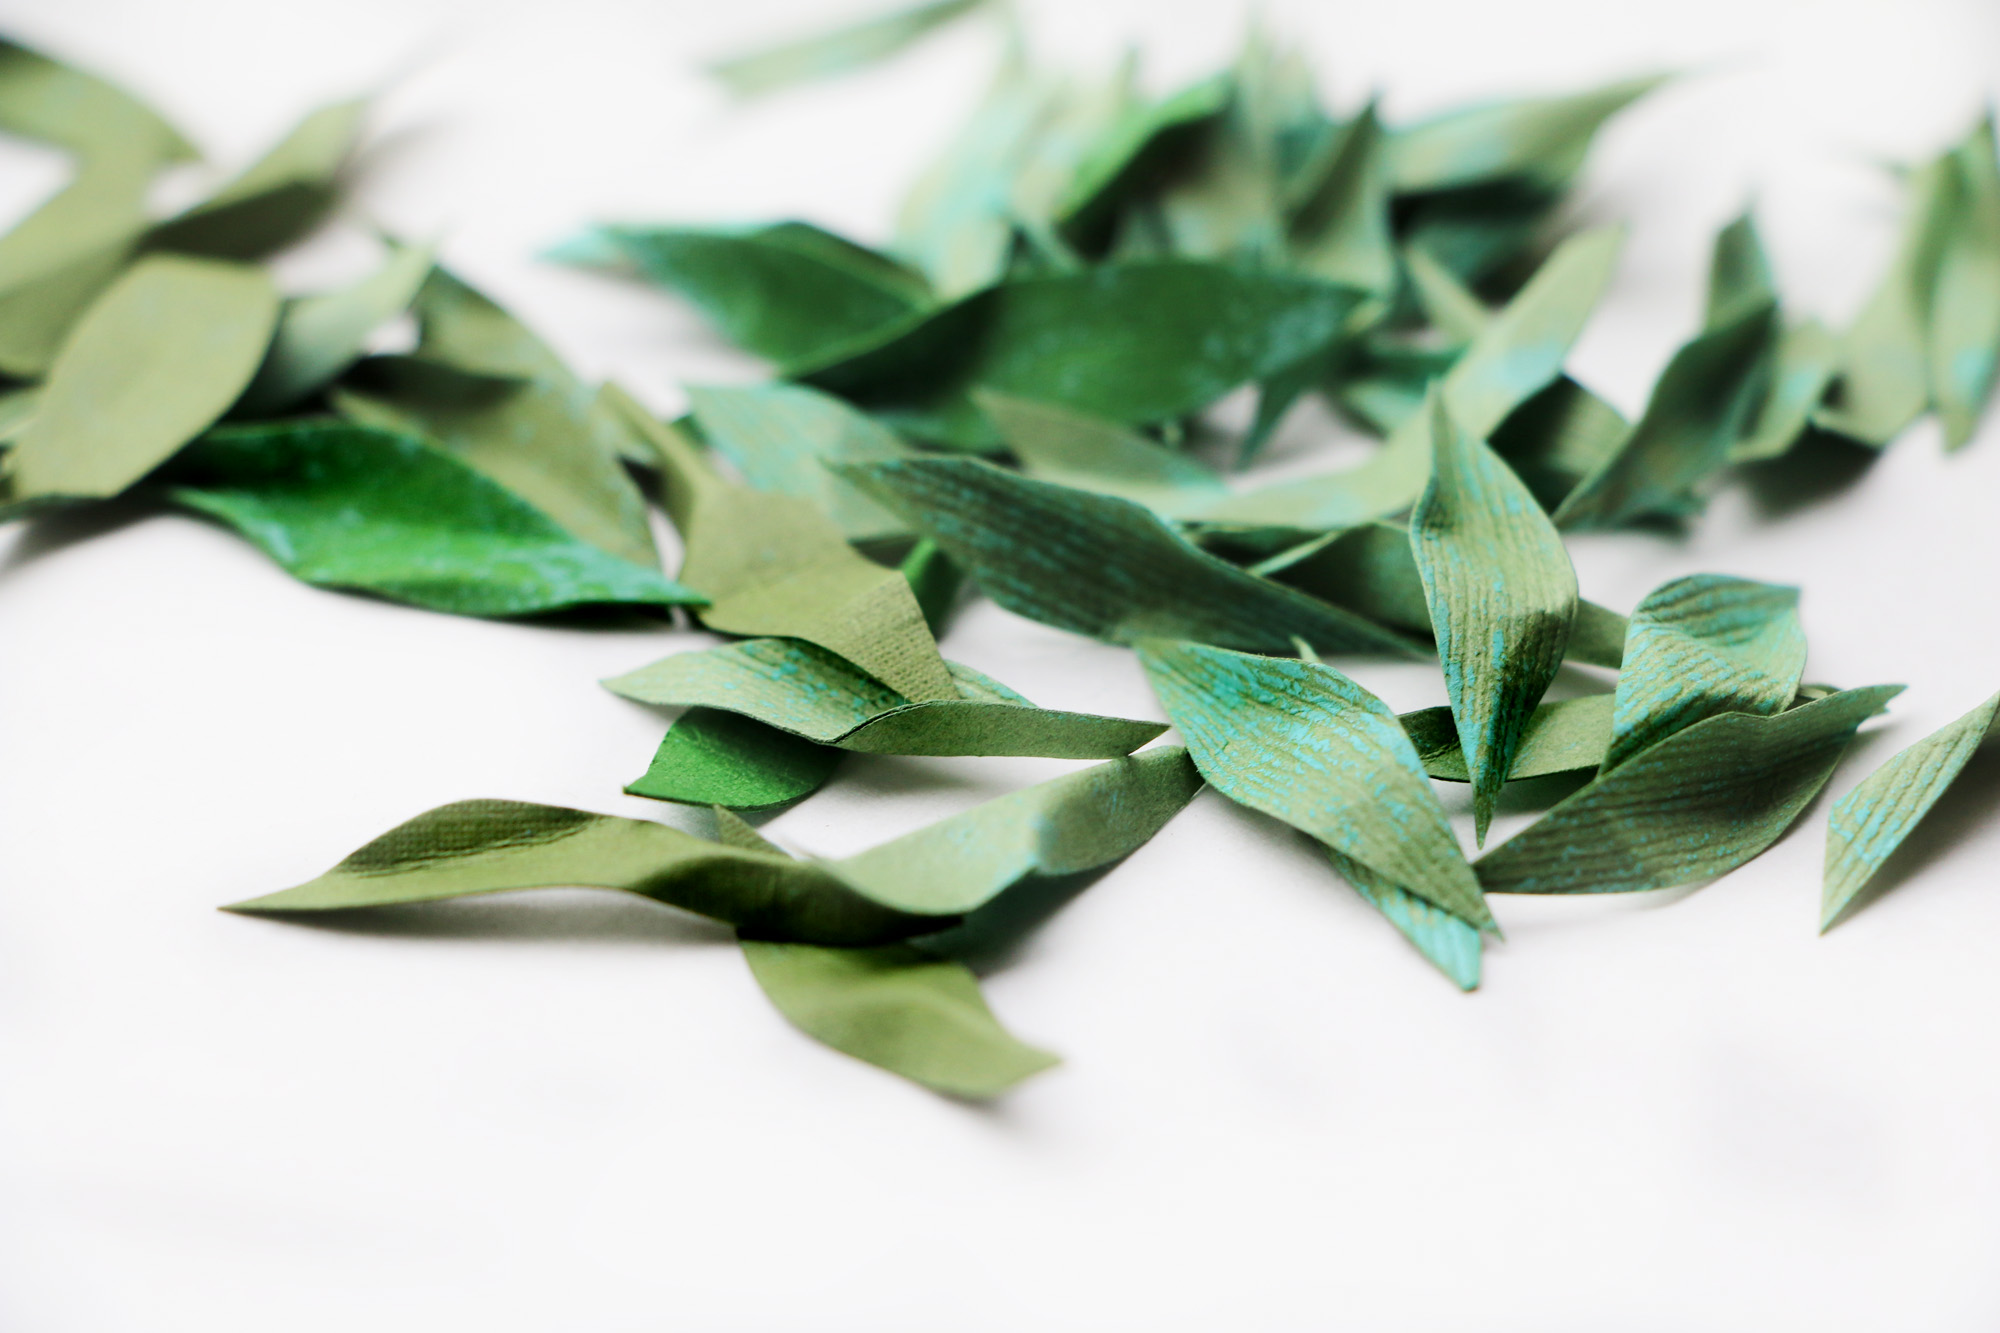 I am super happy with the way the different leaves and pears came out! Make sure you cut MORE leaves than you think you will need because you will need a lot! It’s always better to have more than less, plus a real pear tree has lot’s of leaves!
 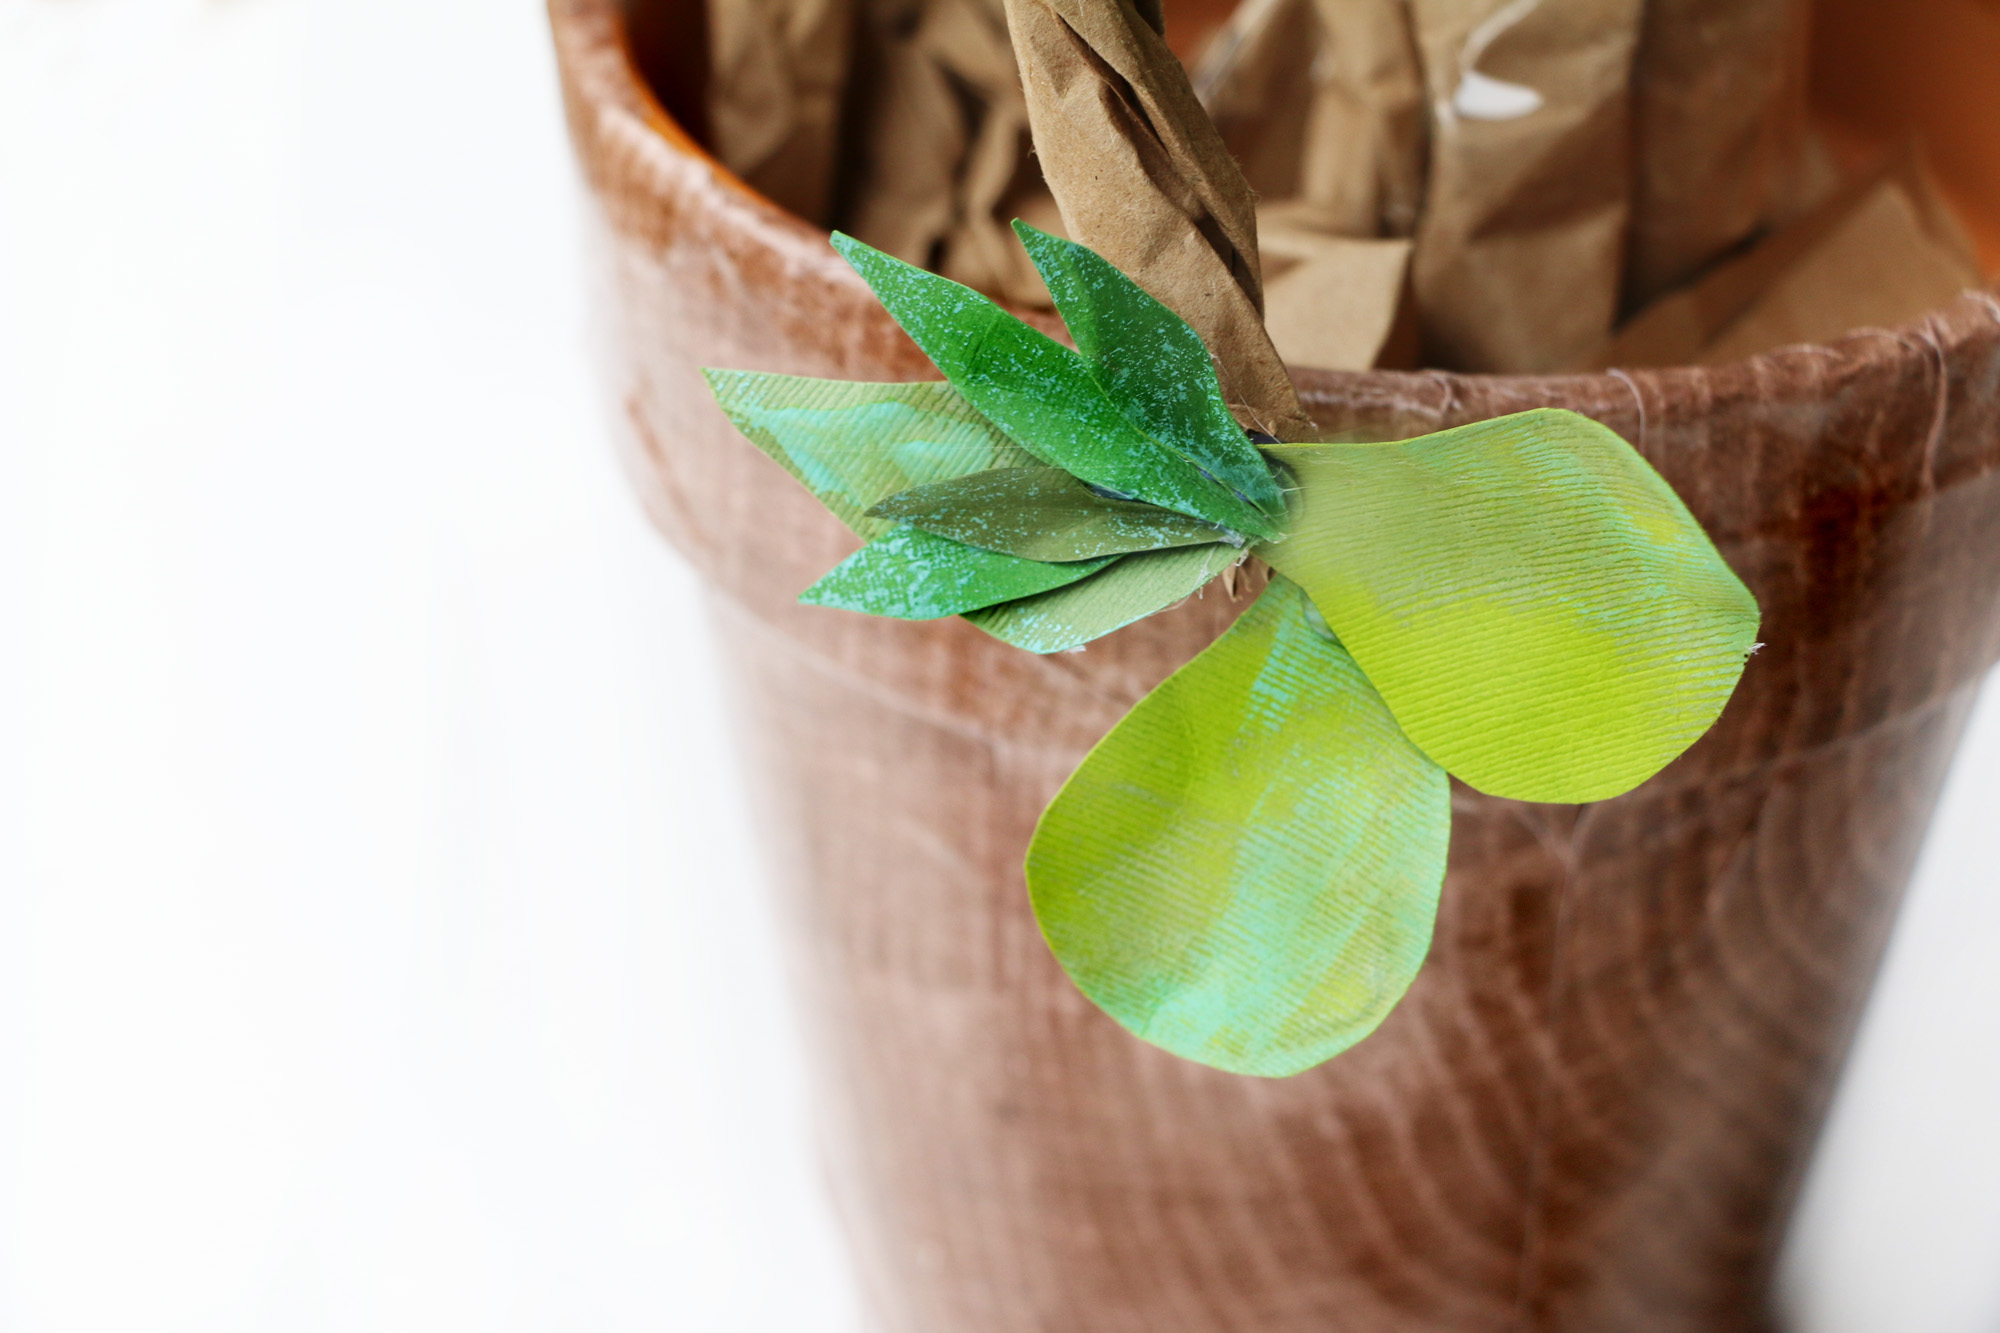 Step Four: Grab your glue gun and start gluing a pear on one of the branches then adding leaves around the tops of them. If your kids are helping, make sure to monitor this step. Kids can use glue for this step.
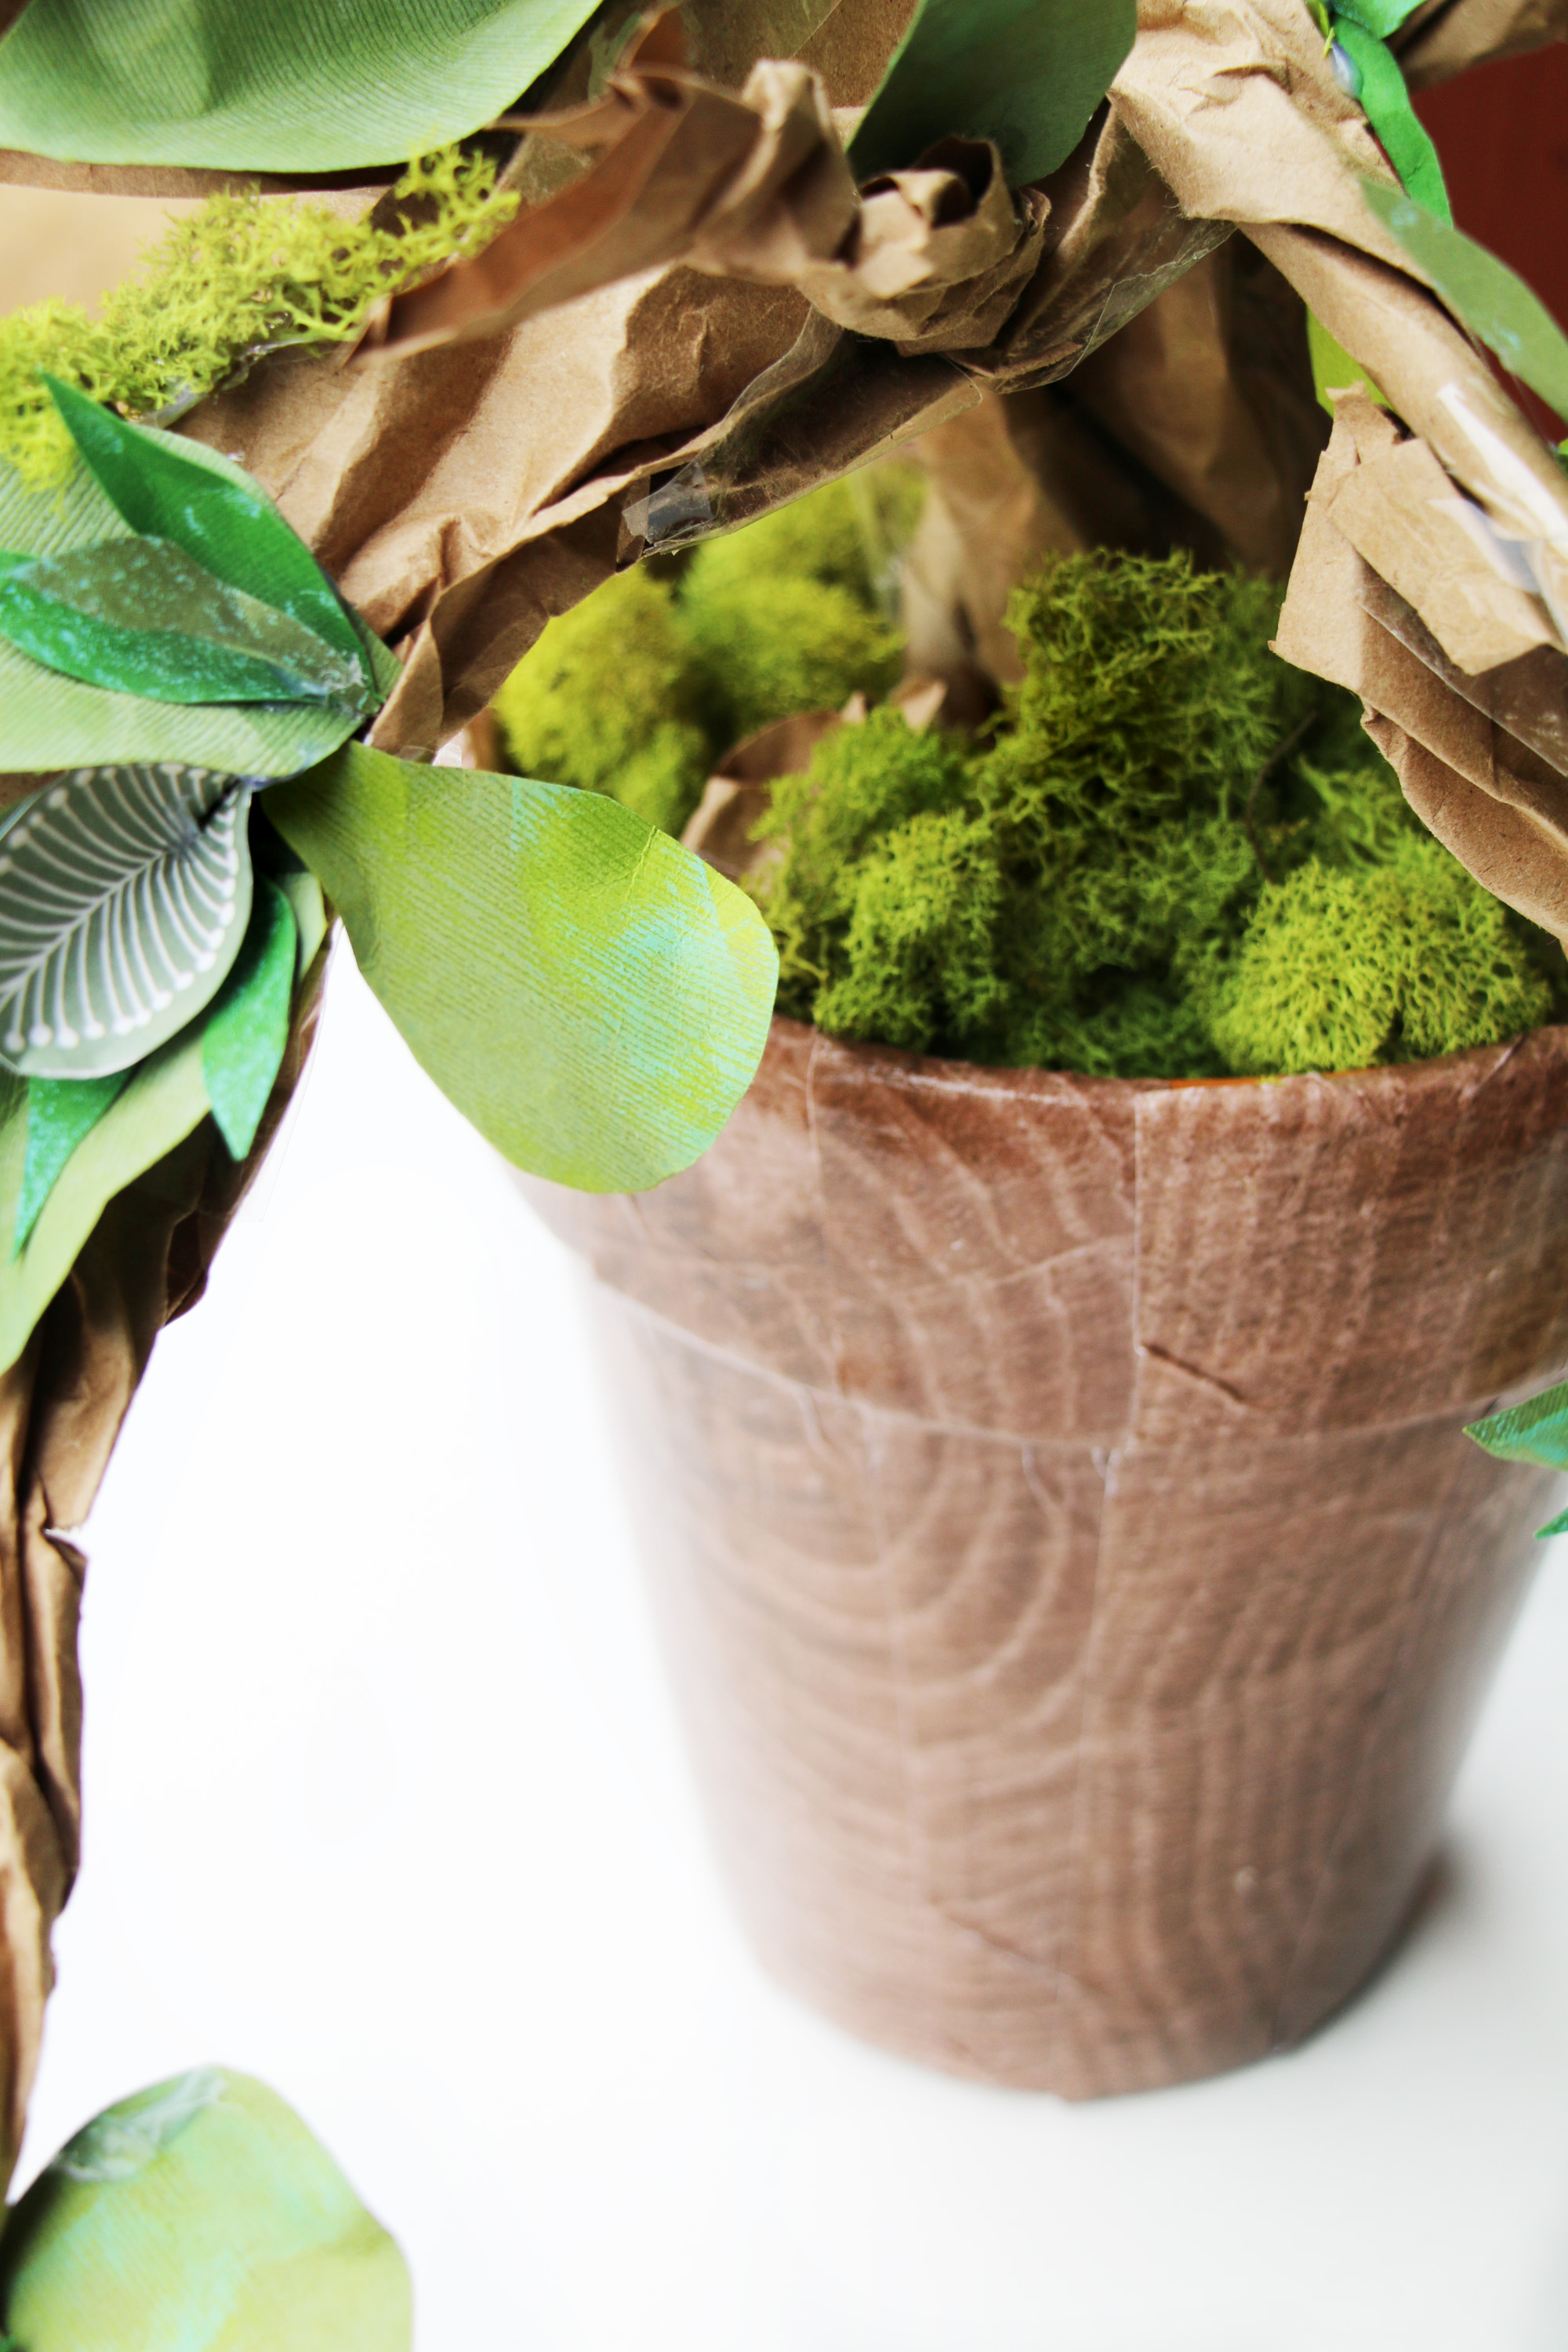
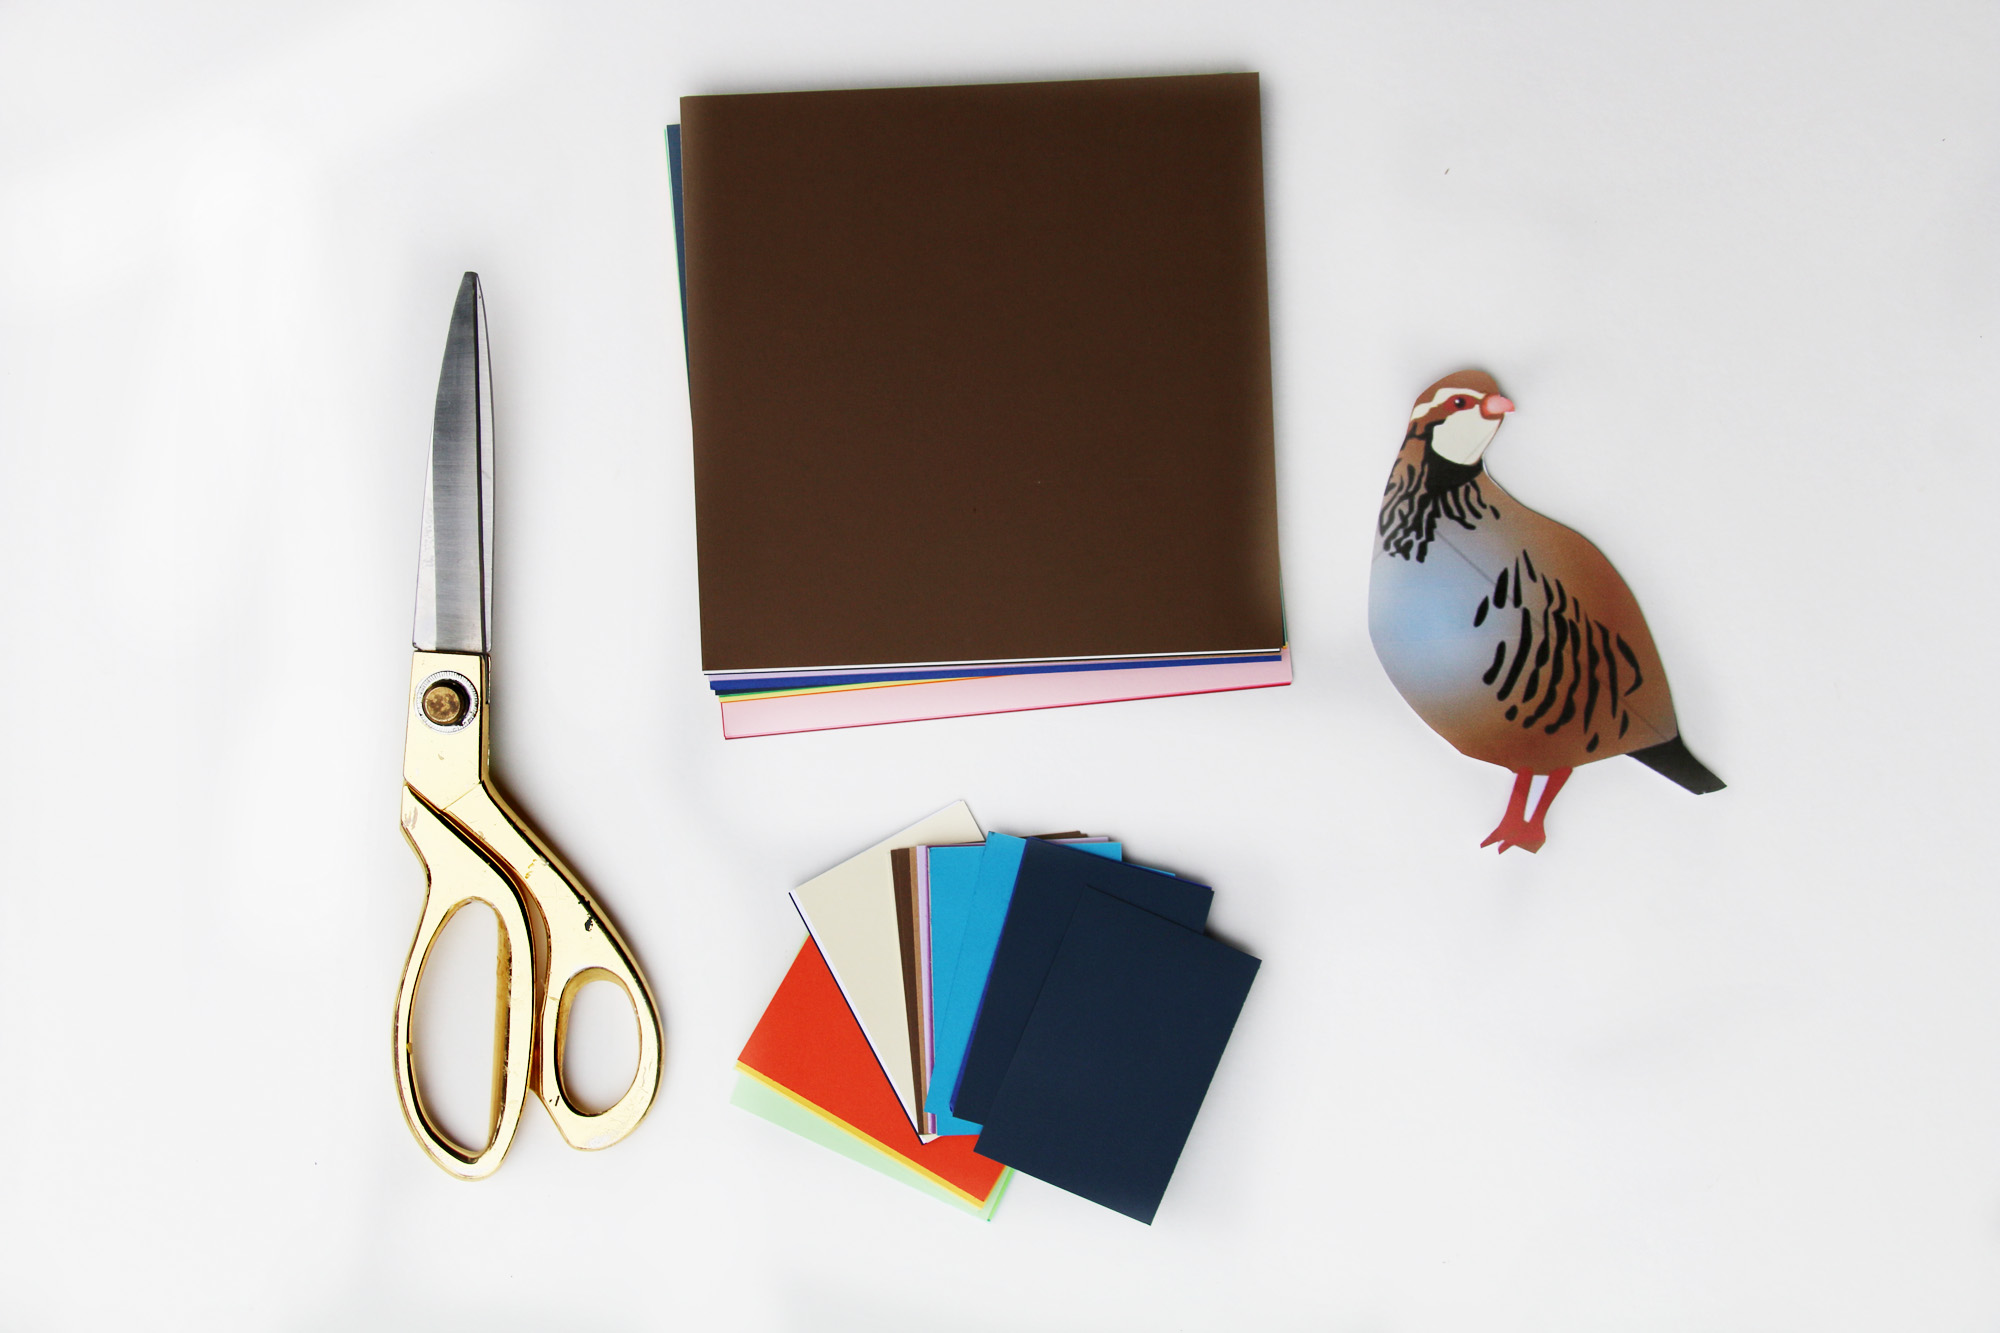 Step one: Print out a picture from the internet of a Partridge just to use as reference.
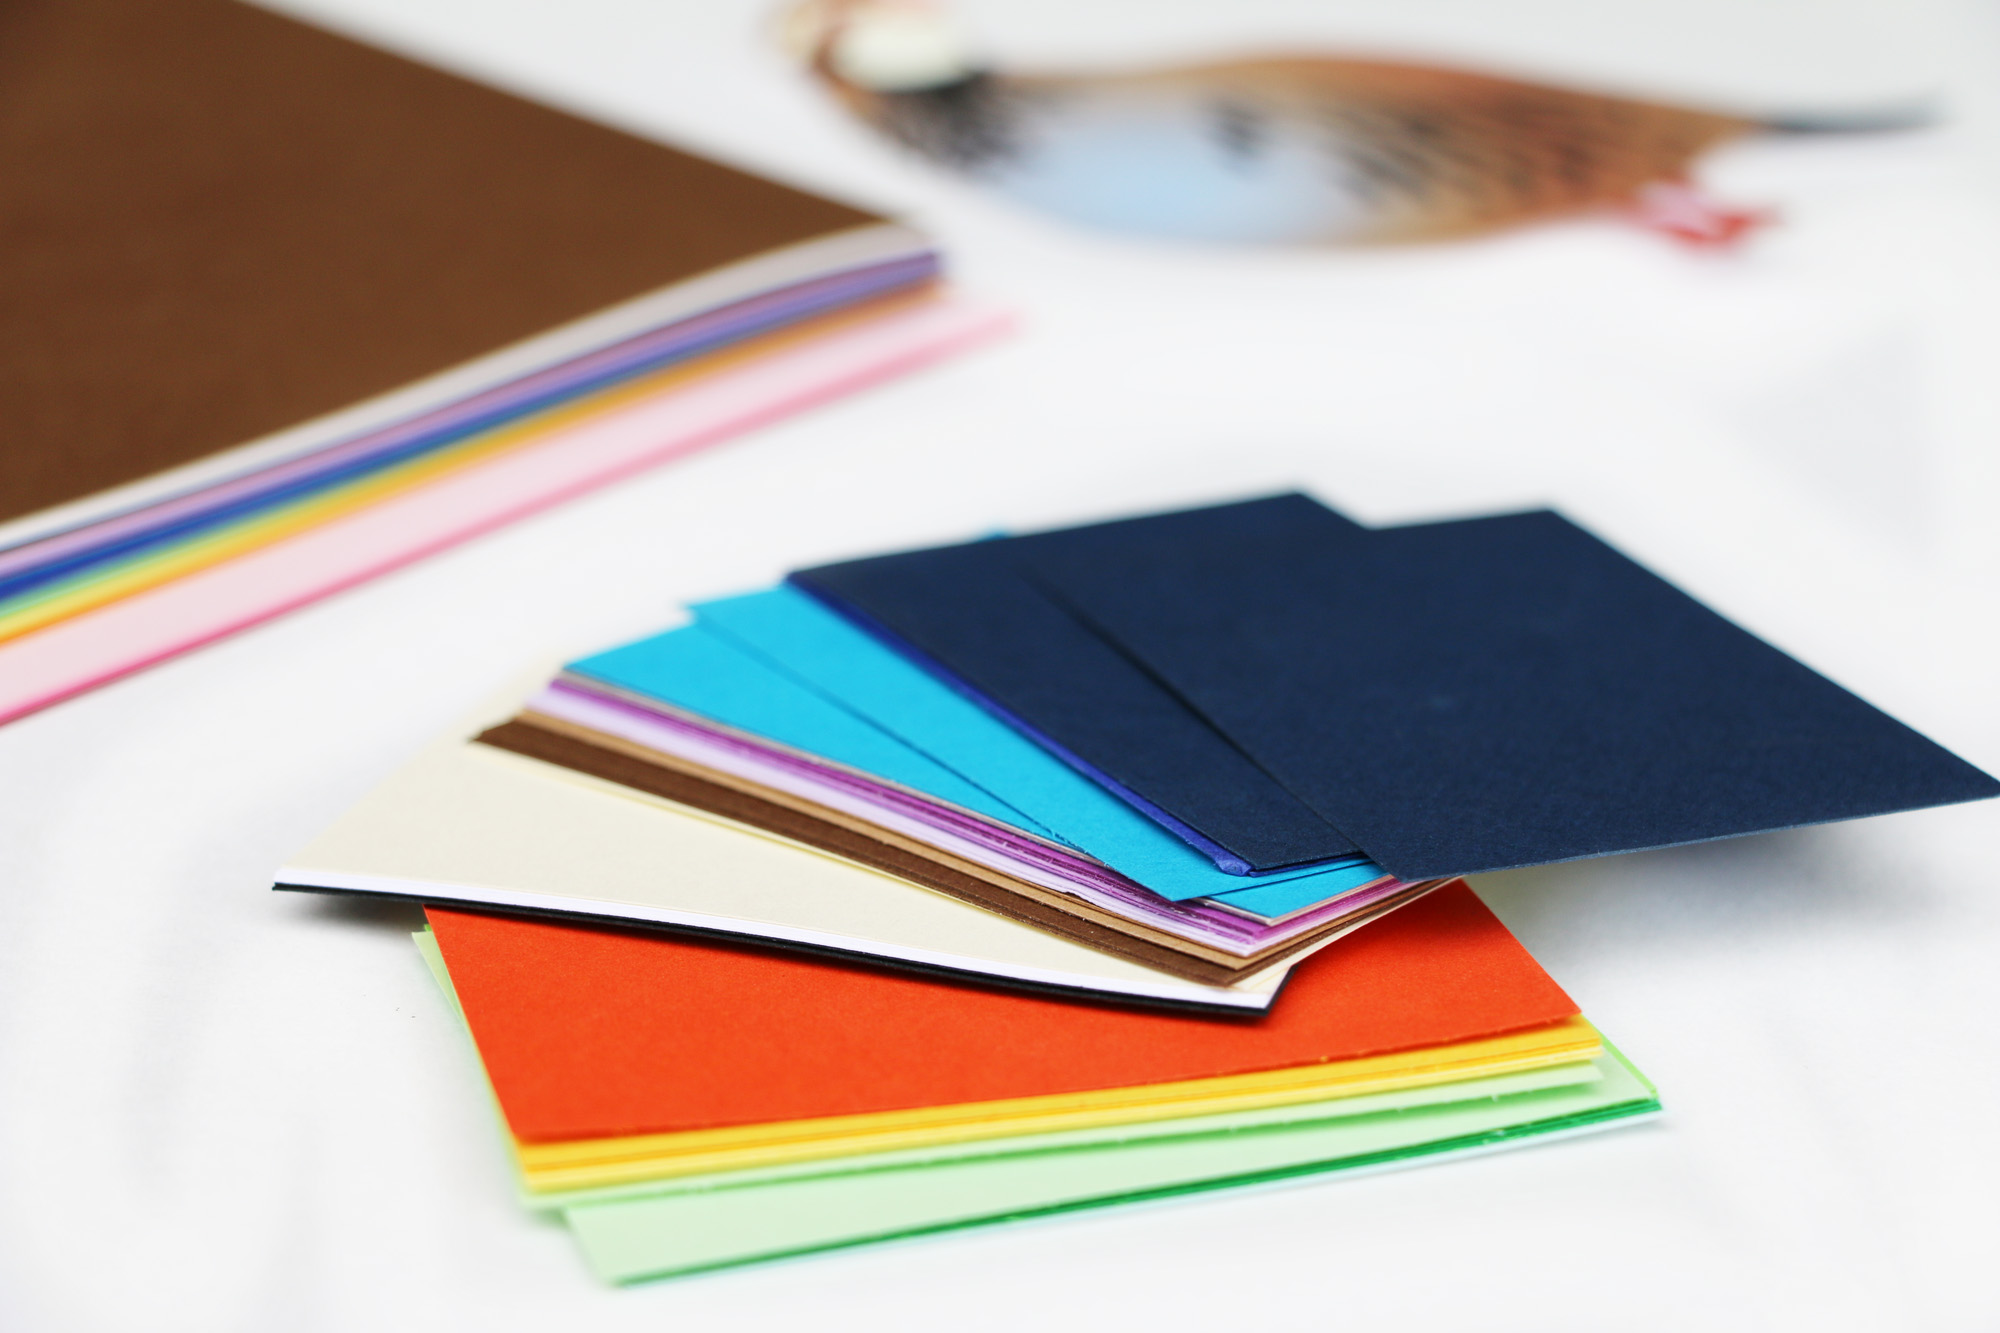
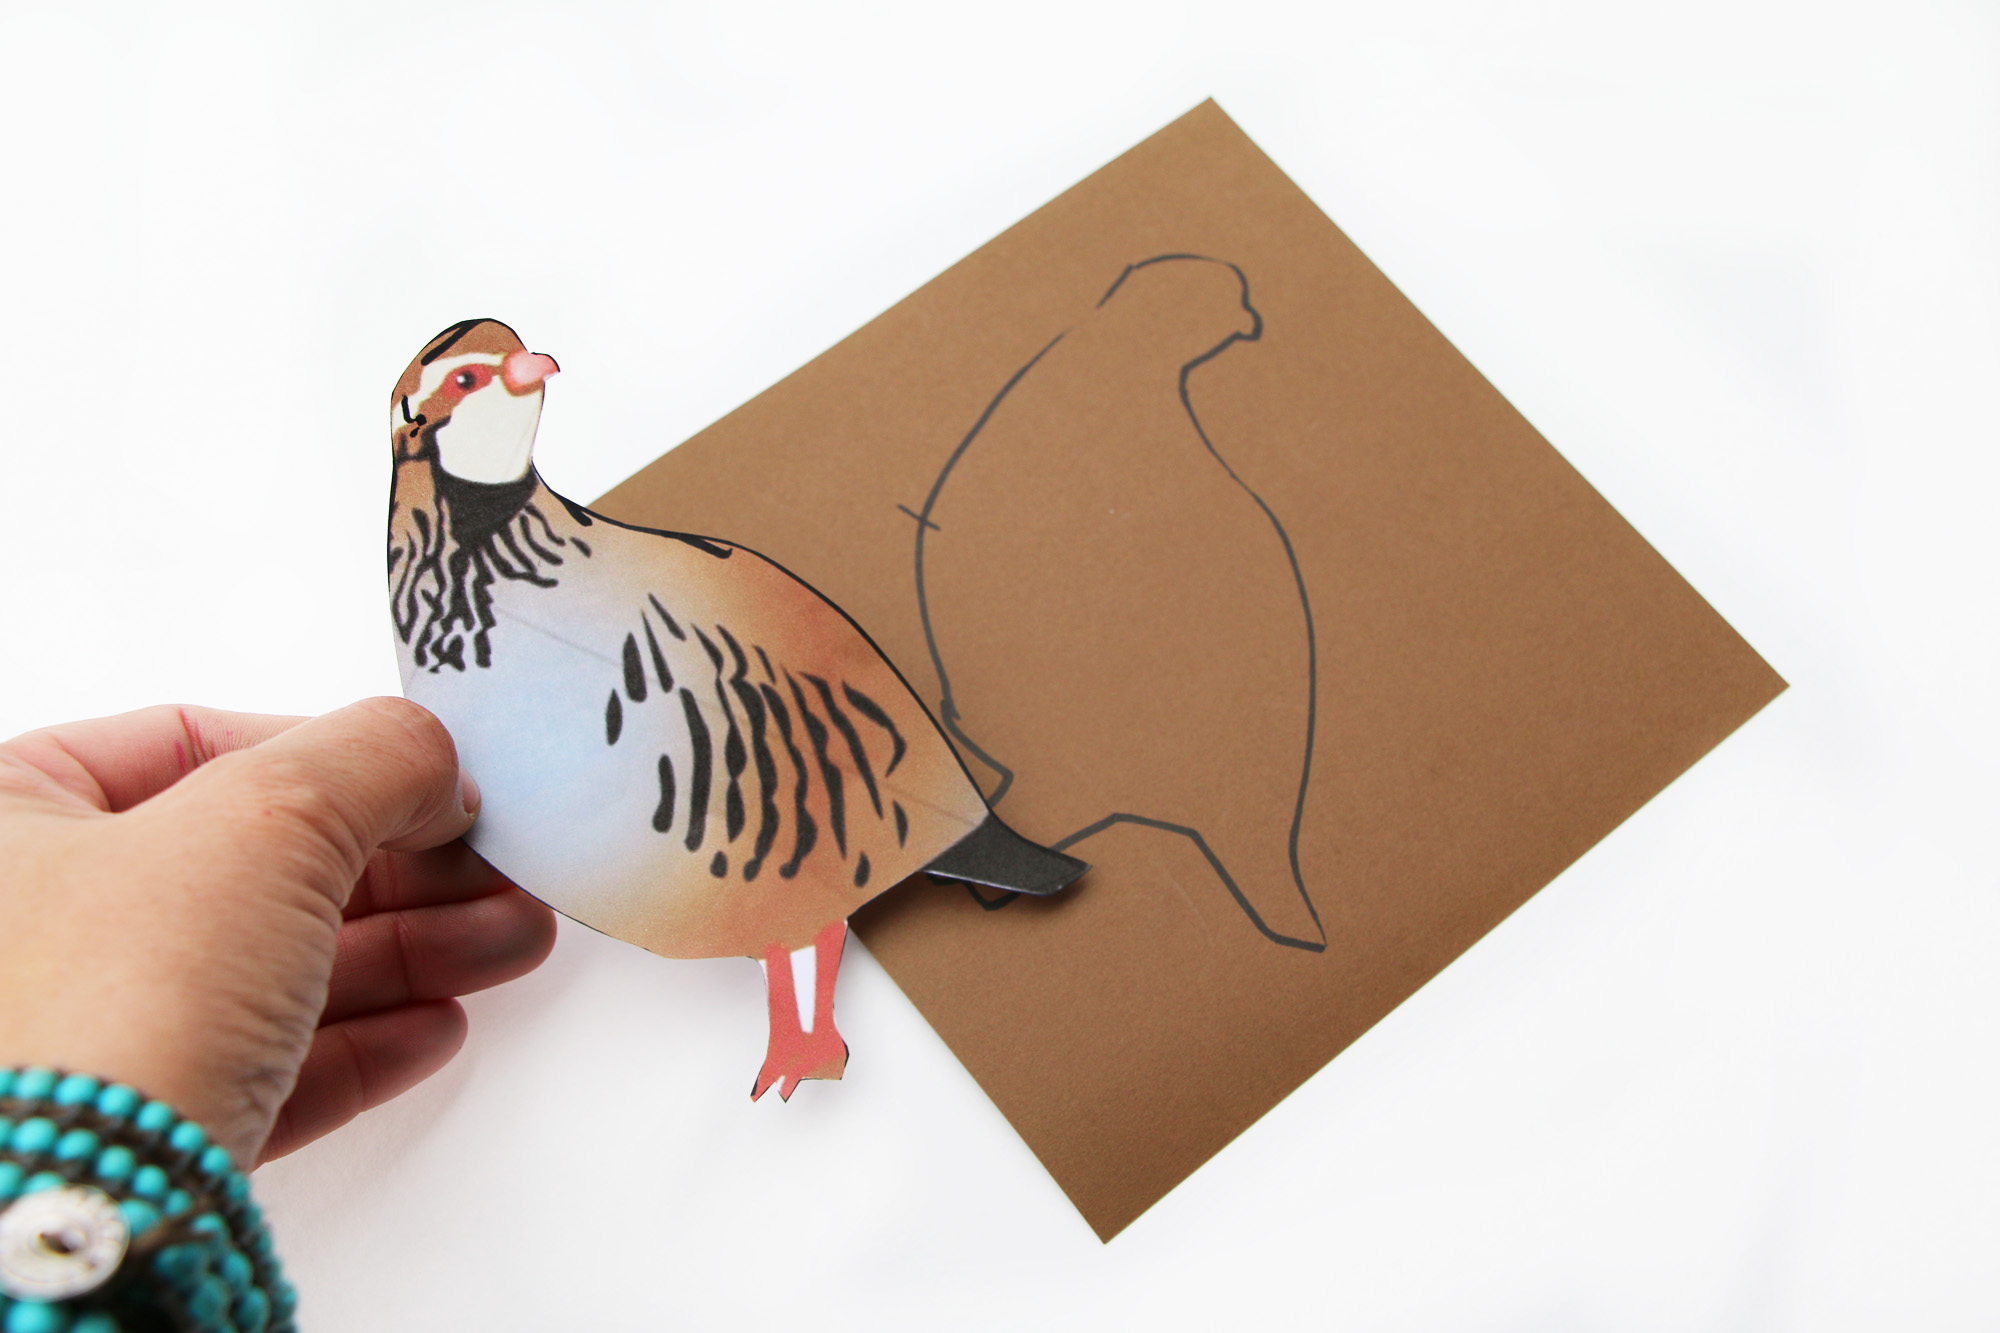 Step two: Take your print out and trace it onto a dark brown piece of craft paper.
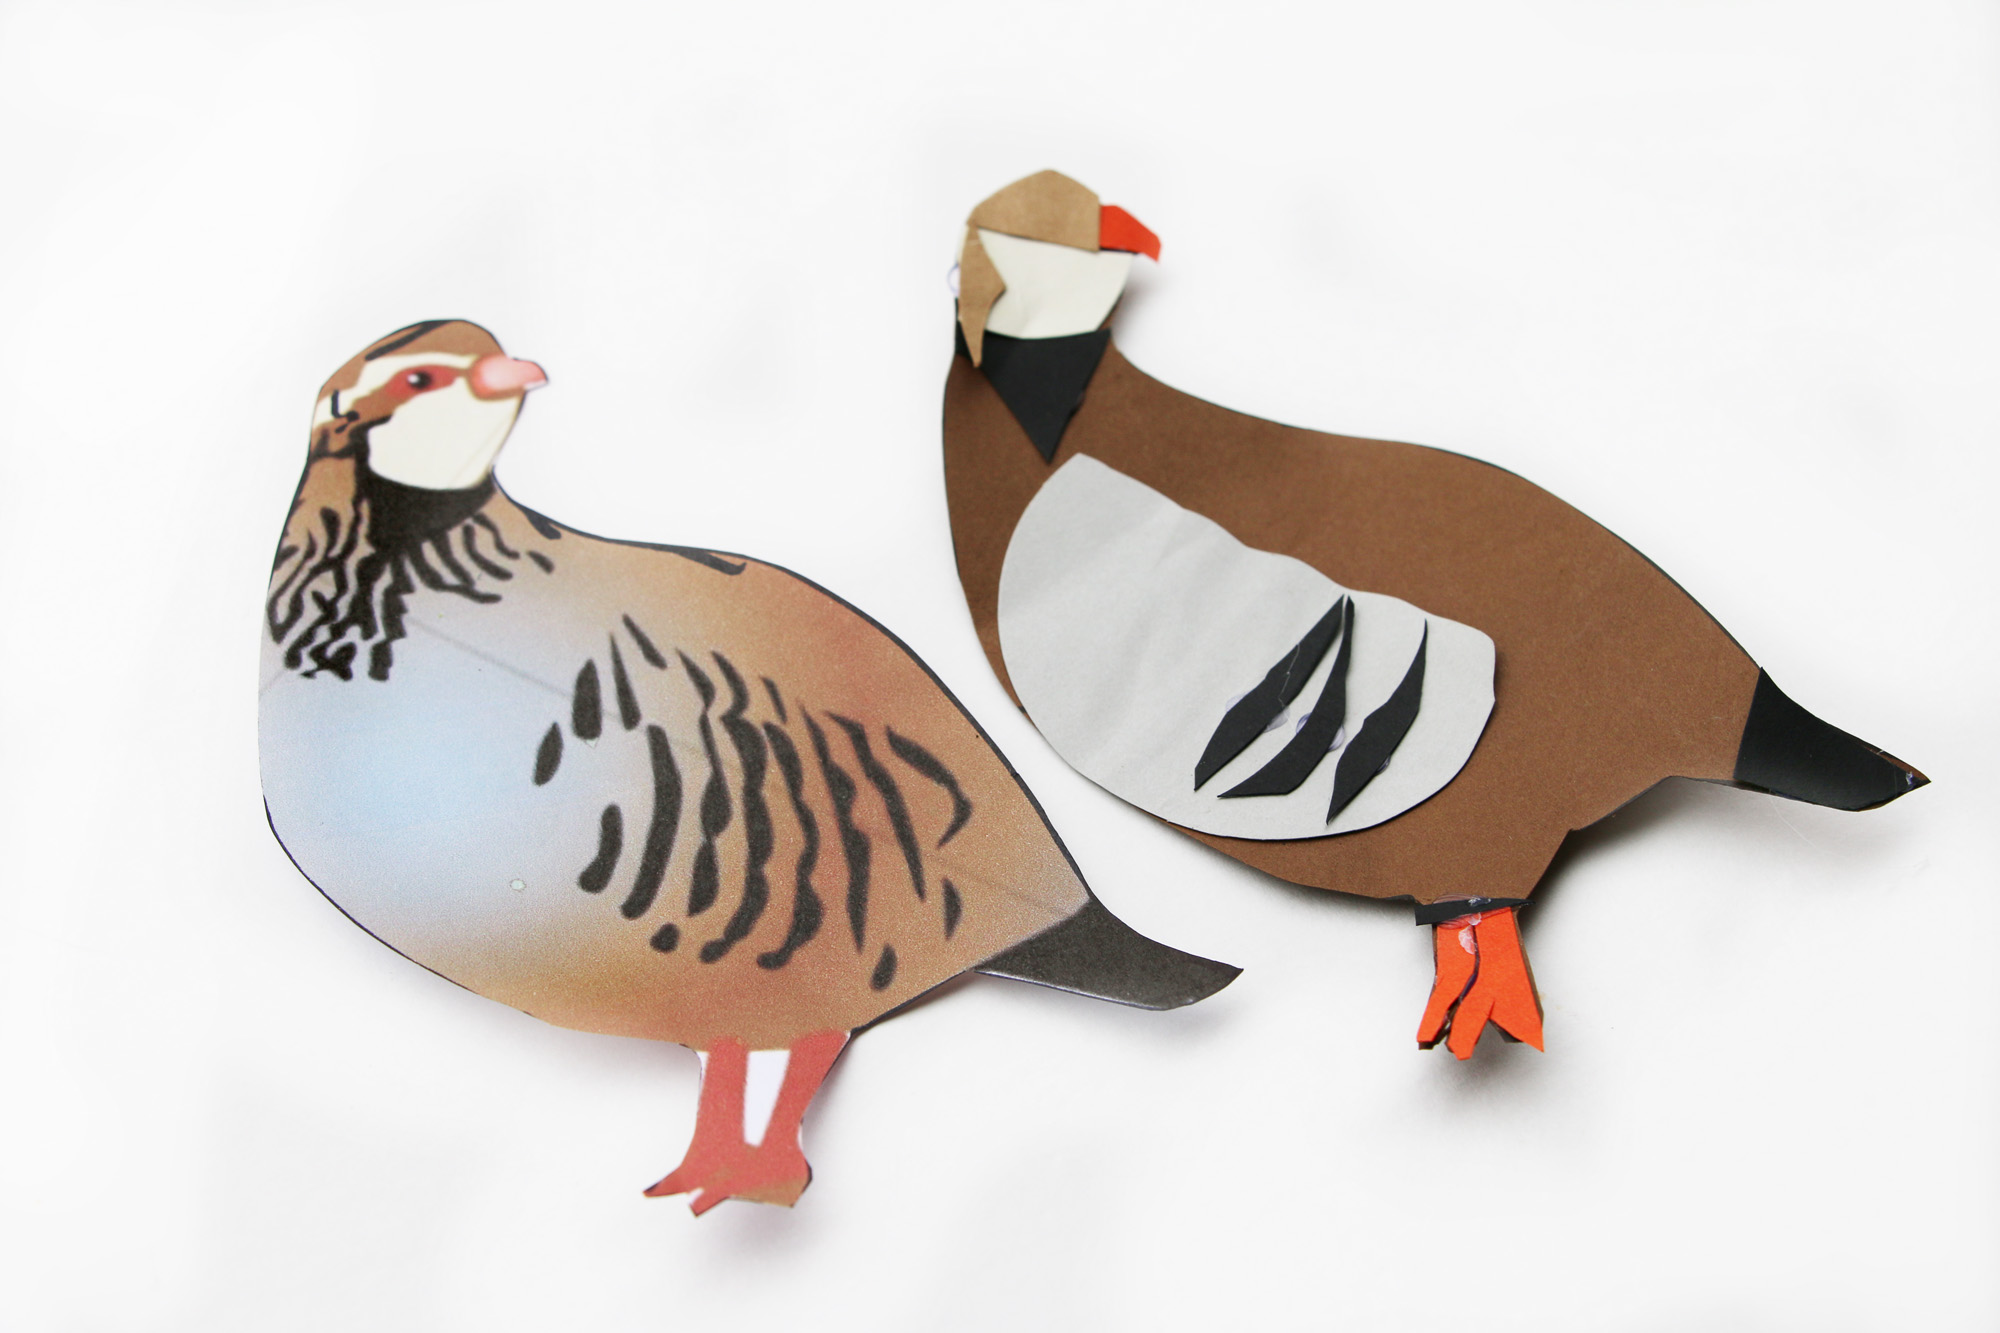 Step three: Using the print out as reference, start cutting all the shades you see out of your stack of craft paper and hot glue them down onto your brown cutout.
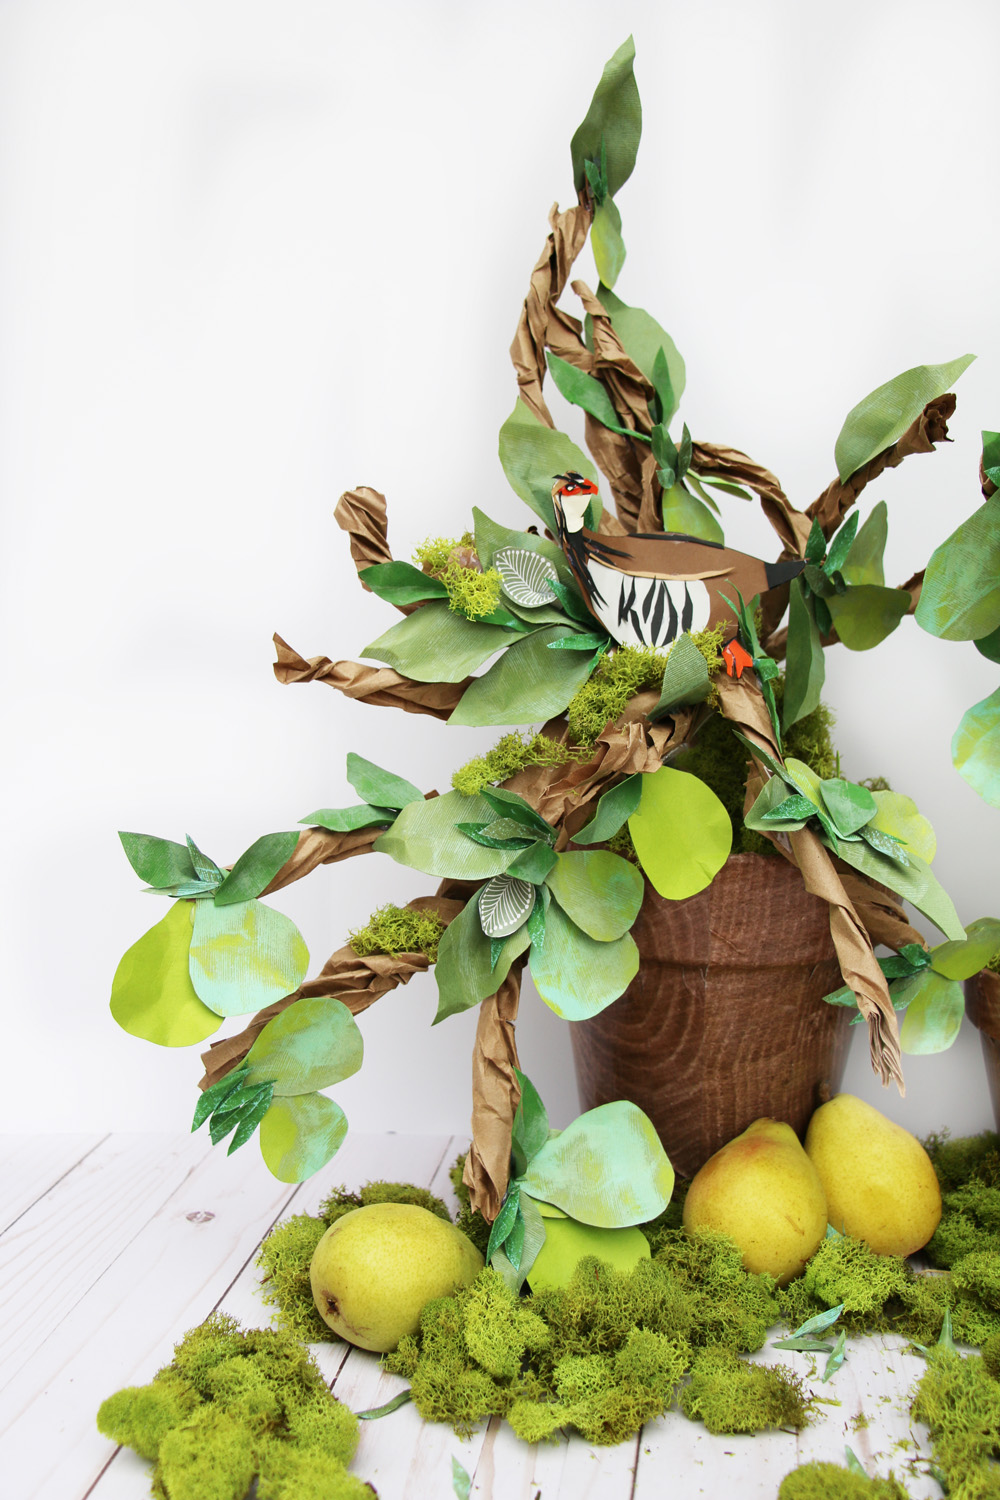
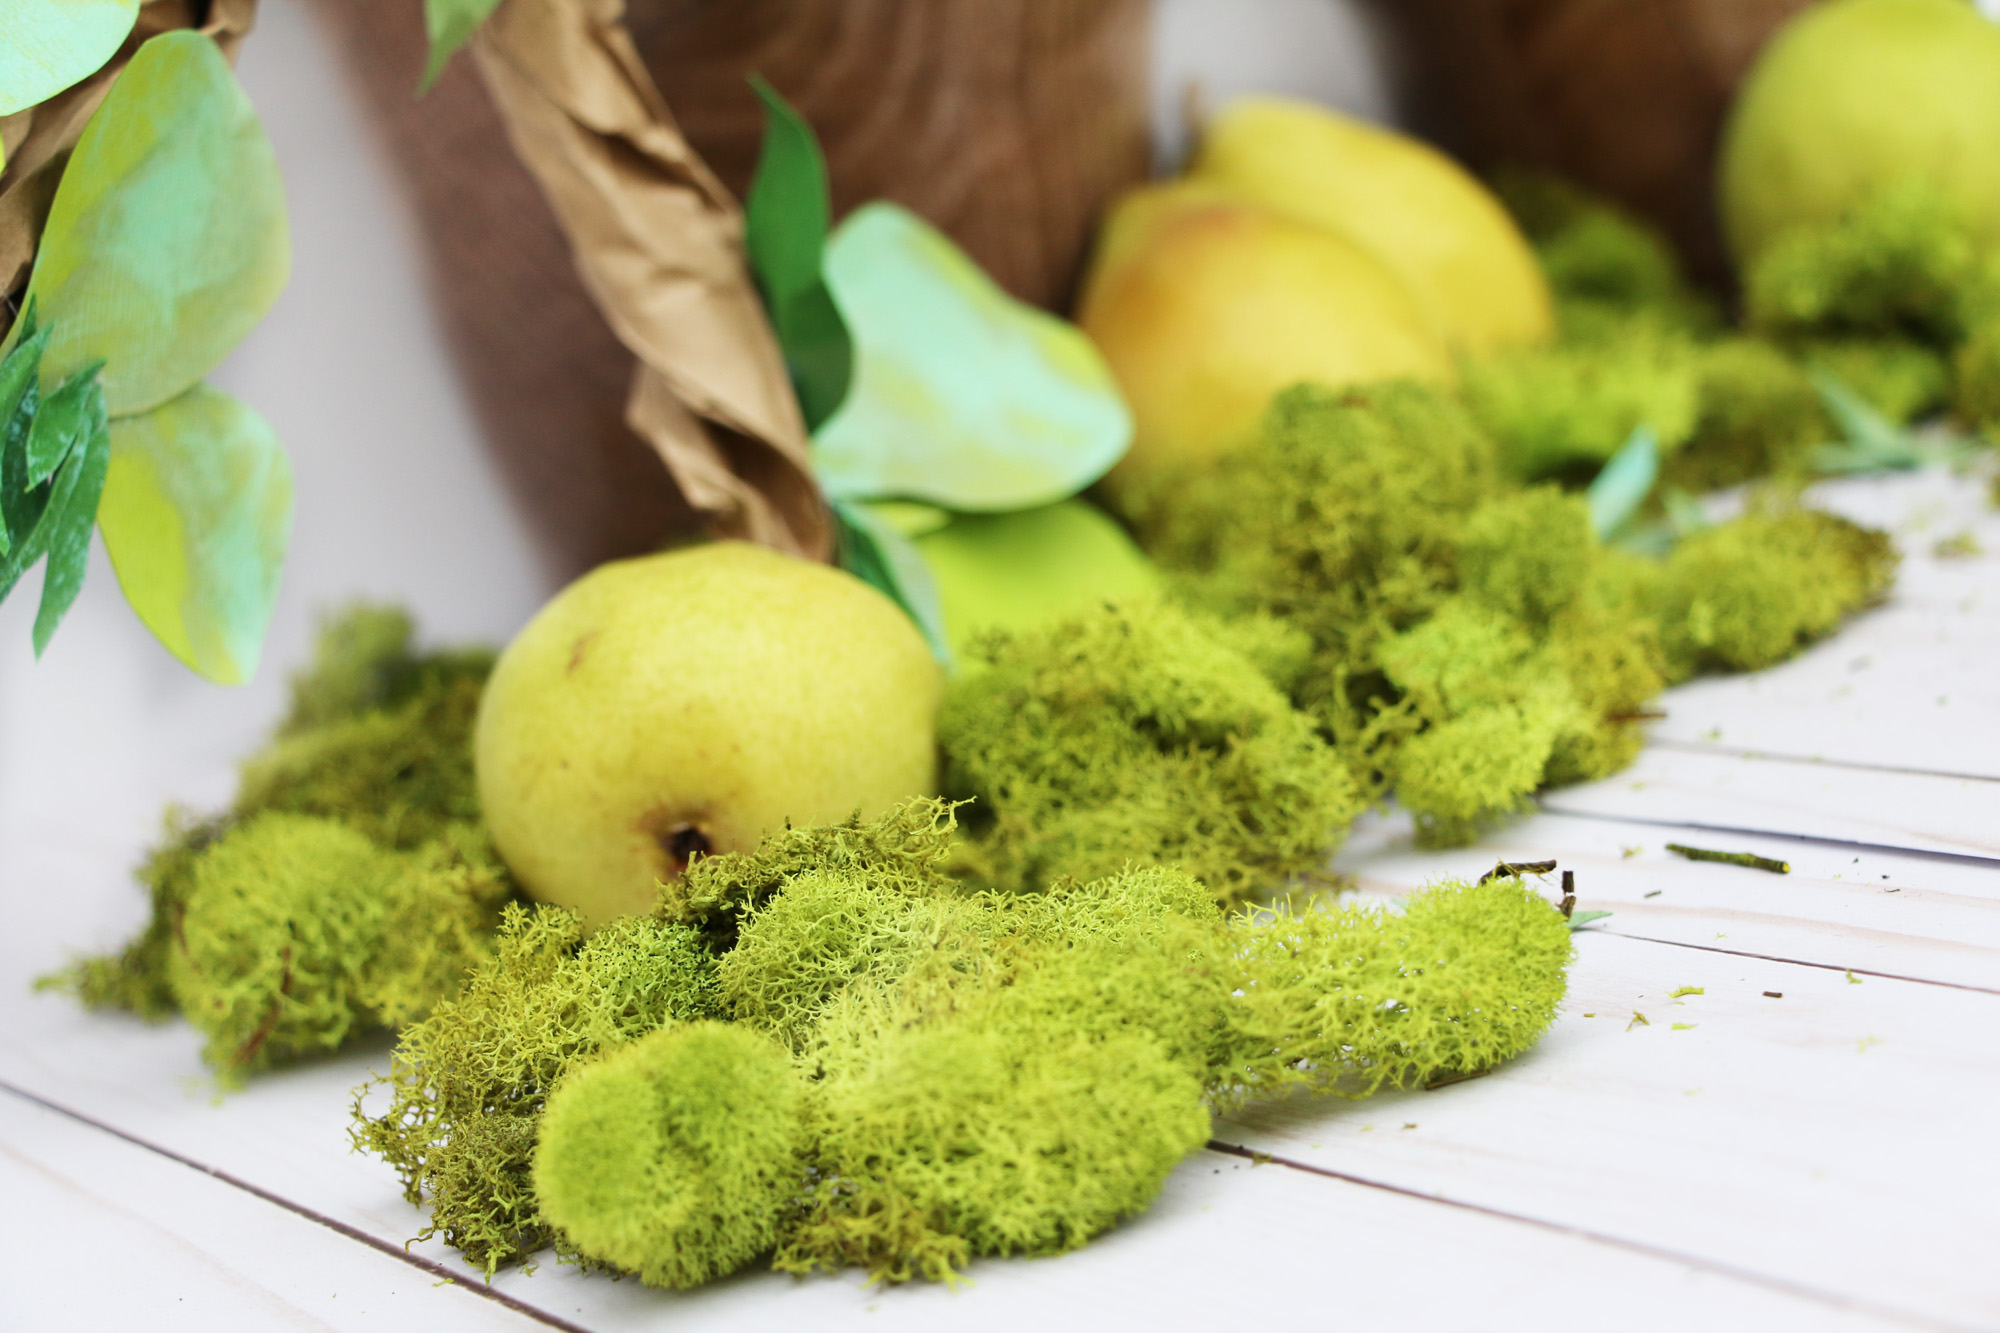 I had to add a few real pears to bring to life the “Pear Tree.” Plus you will have a snack to eat after you are finished with these trees.
 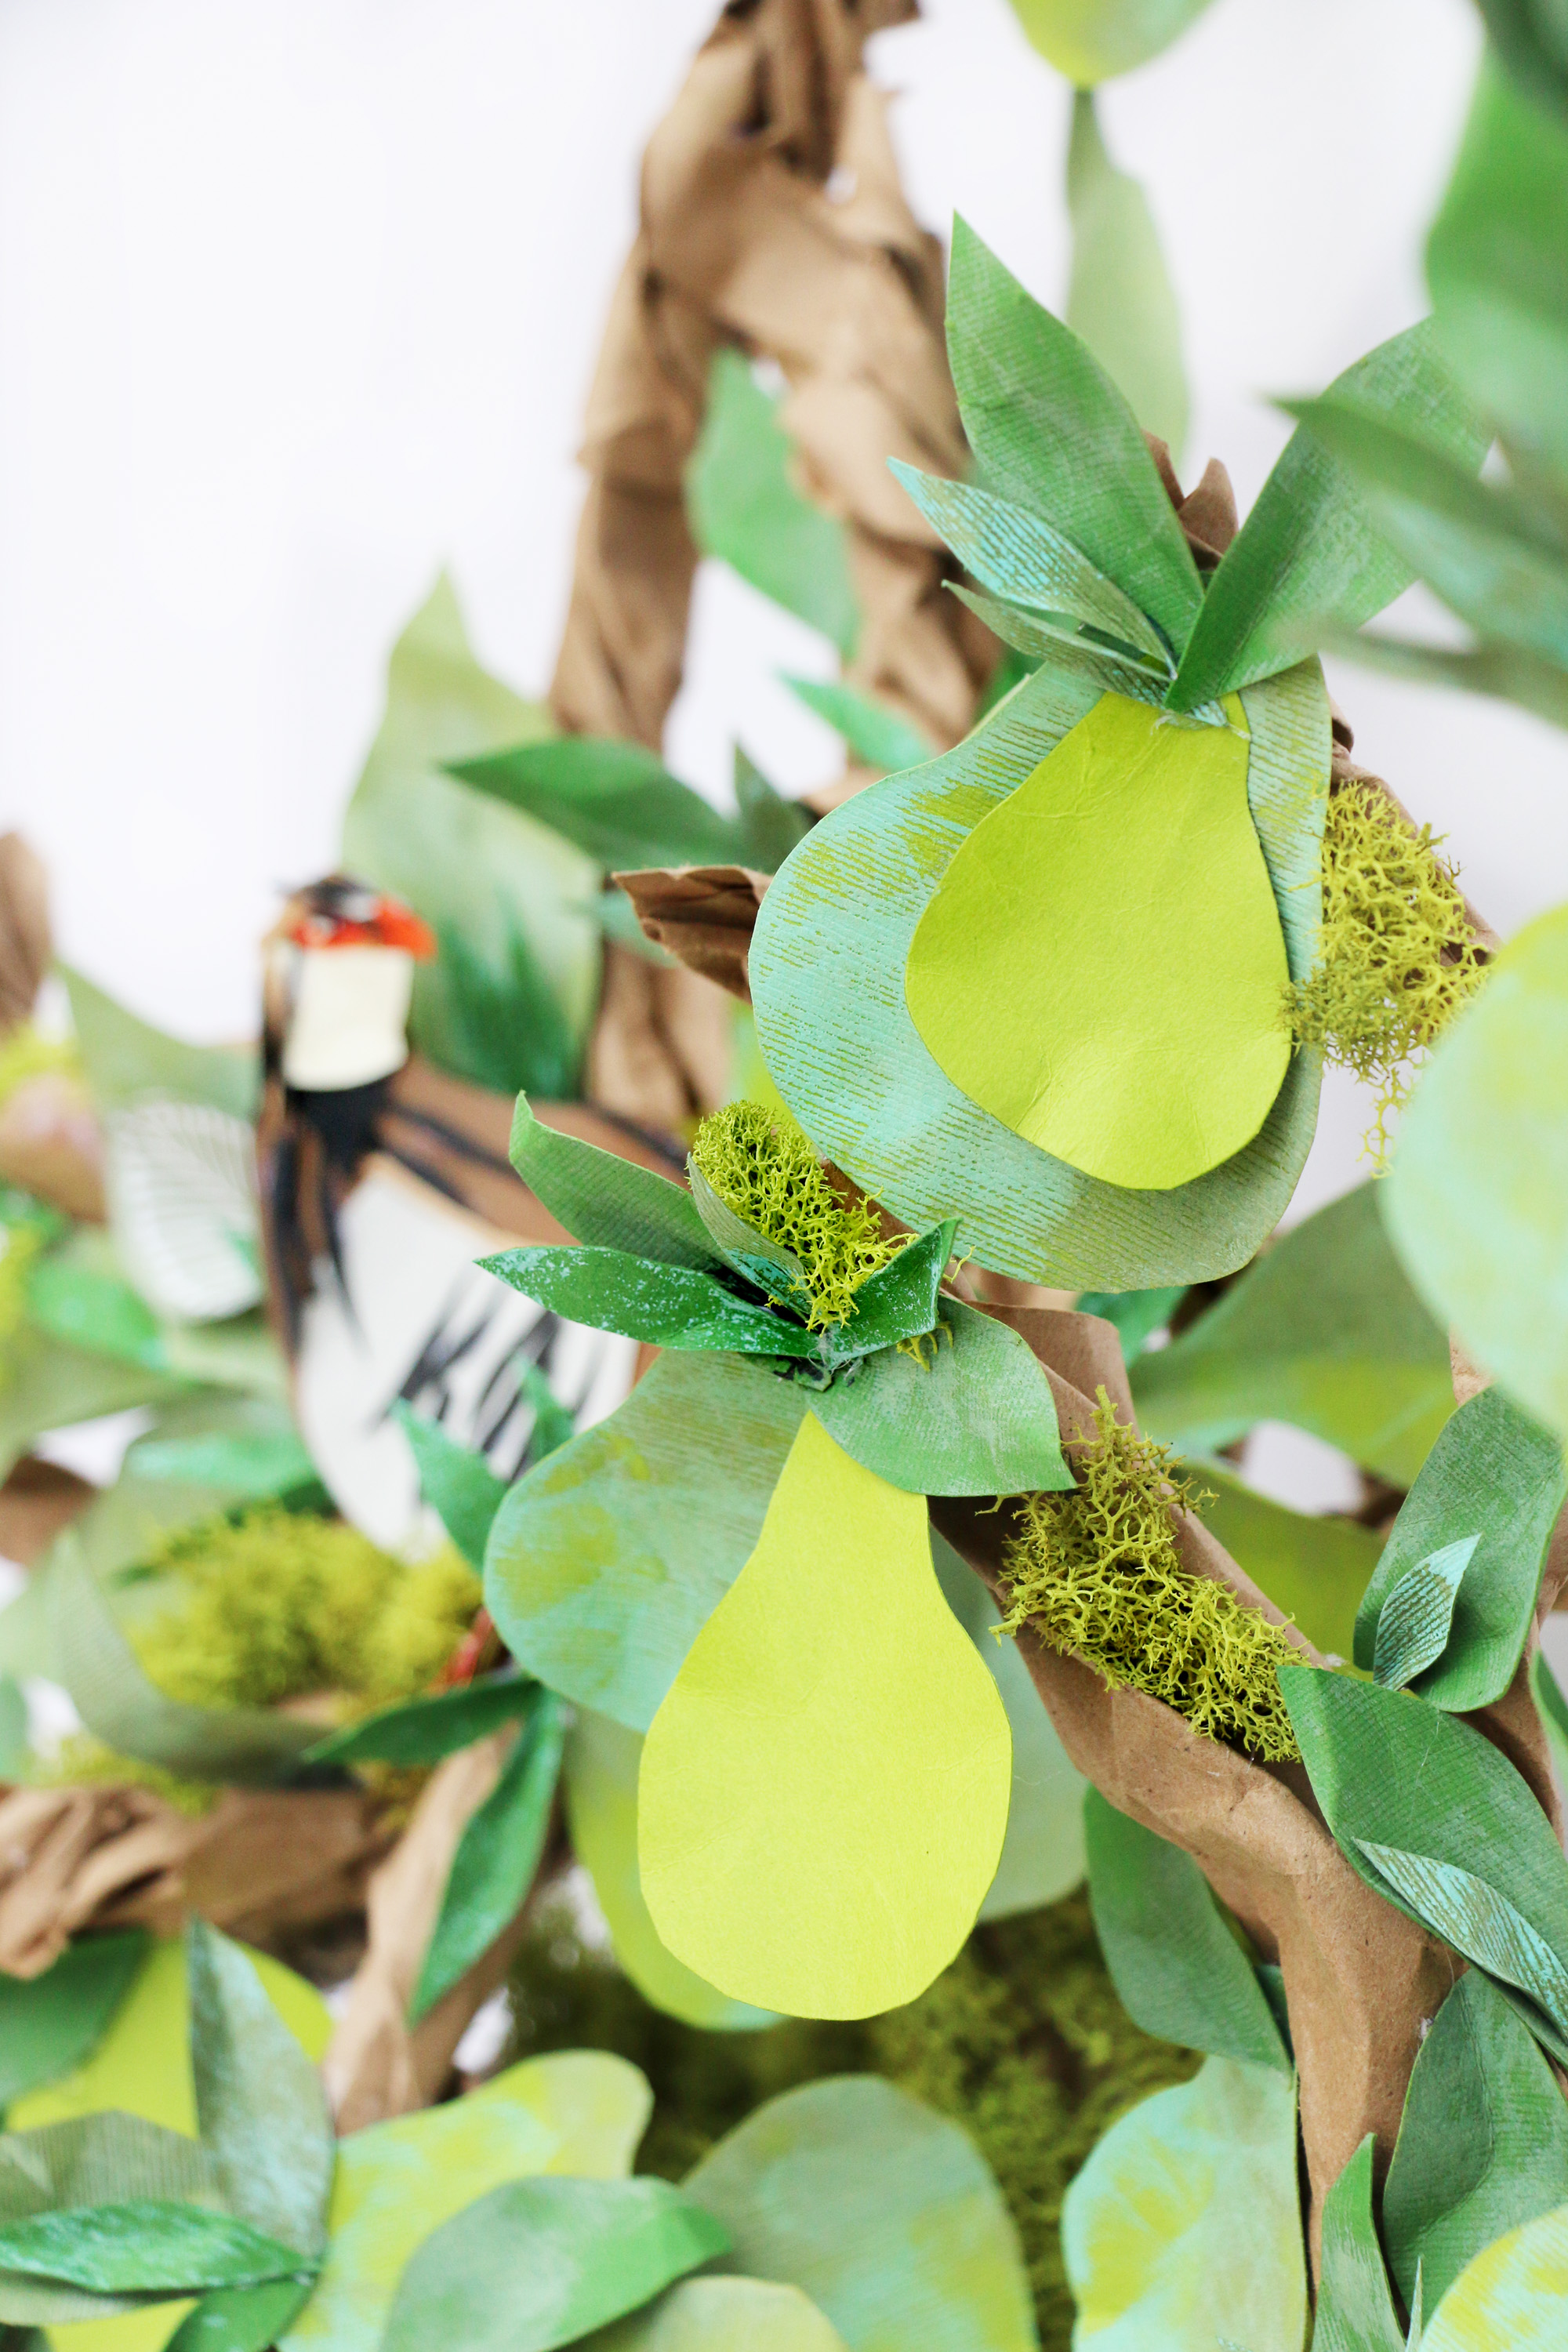 Notice how I added the stamped pears along with plain ones next to each other to accentuate the different shades that pears actually go through while blooming.
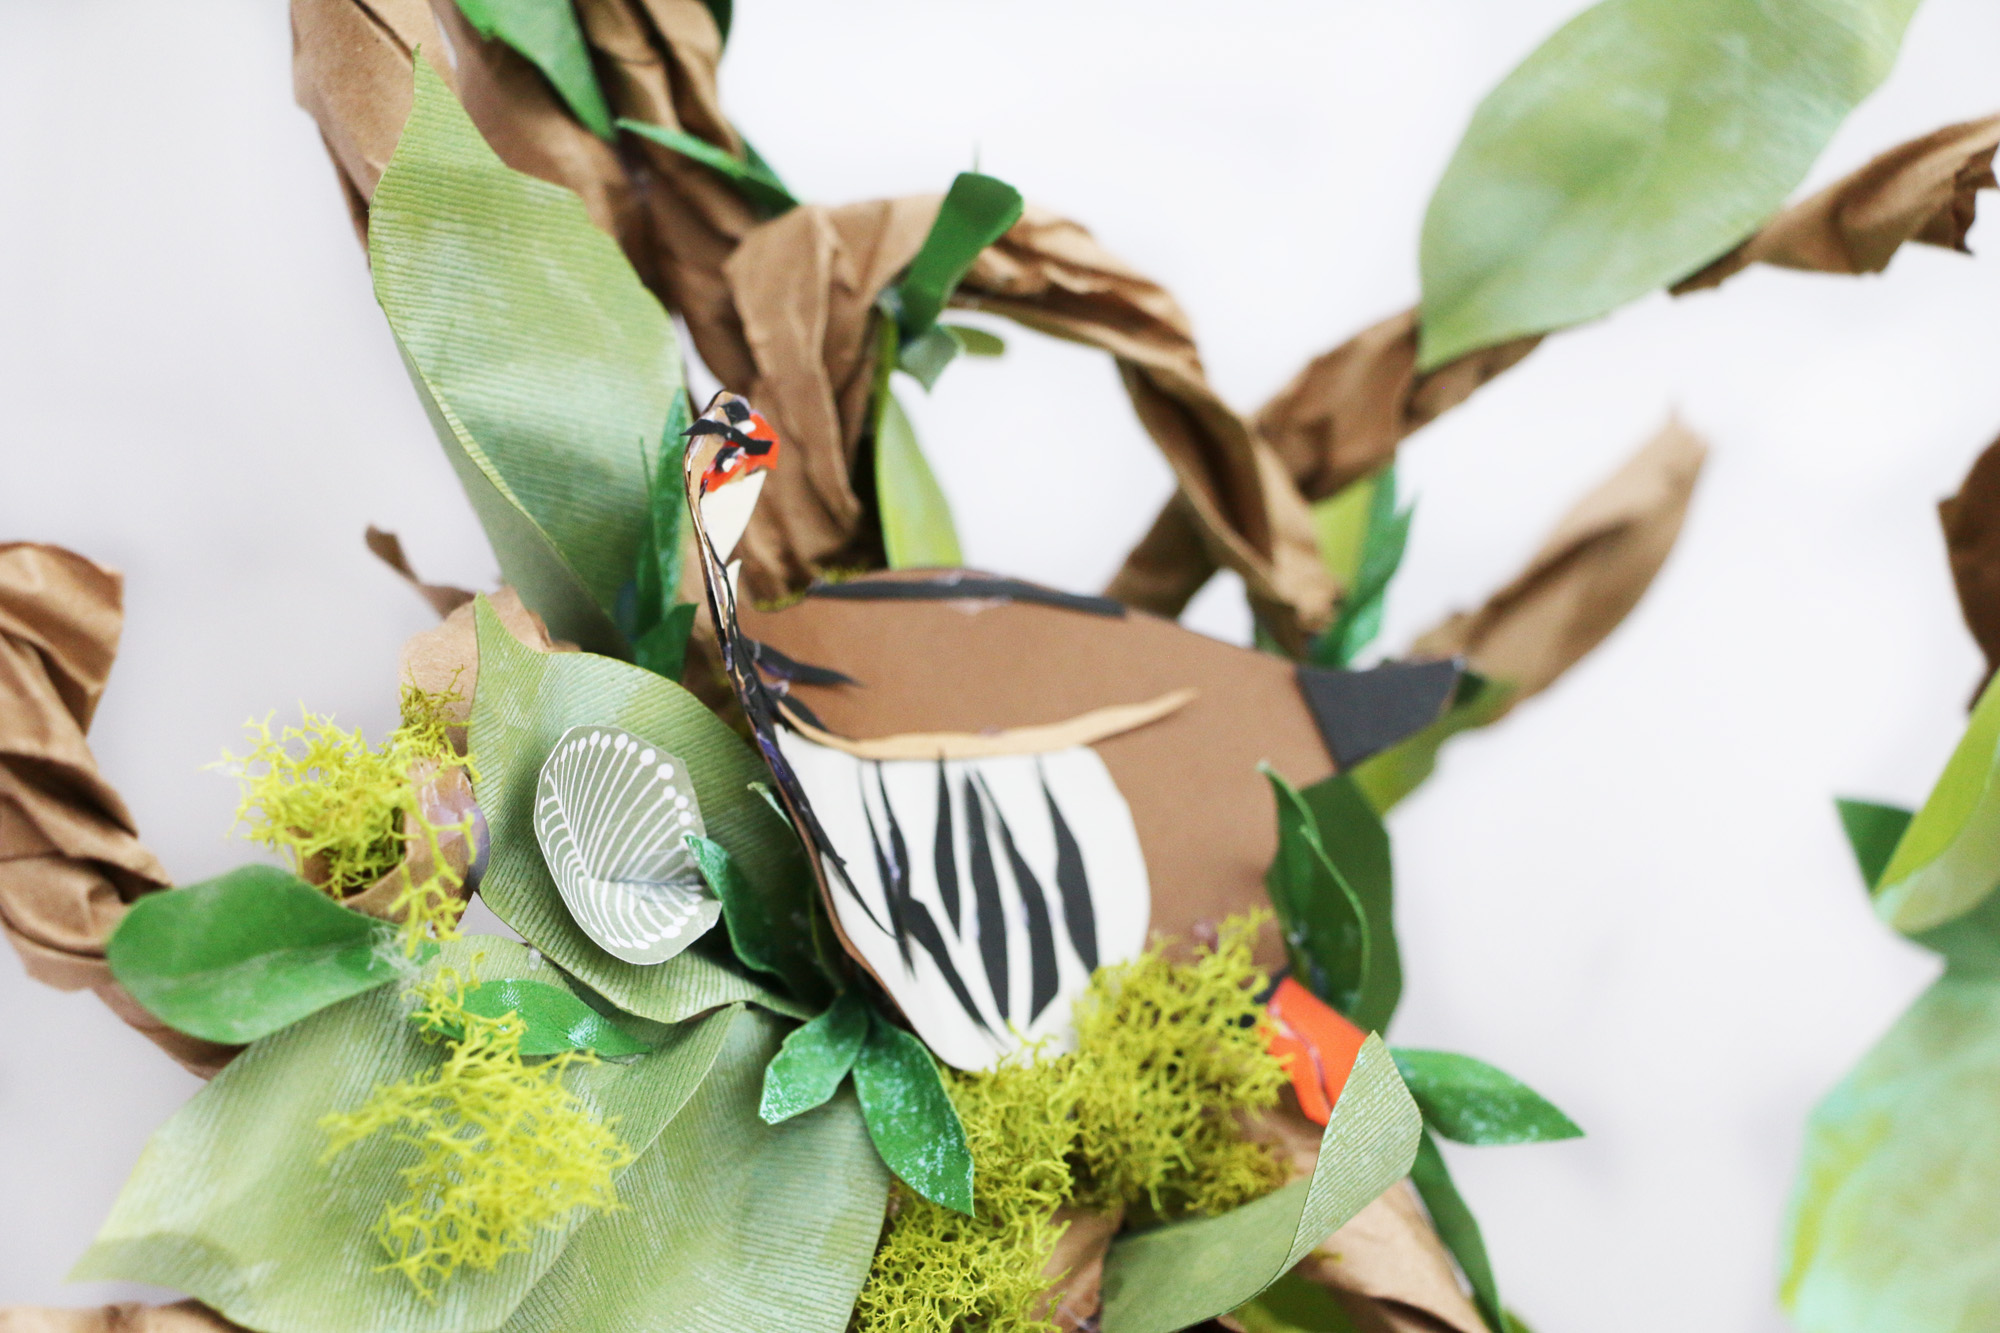 I think my favorite thing about this project is that adults can have fun doing this as well as kids. It’s the perfect “family” project that you can put out on display throughout the holiday season.