Monthly Archives: October 2012

Quote of the day:
“A good scare is worth more than good advice.” -Edgar Watson Howe

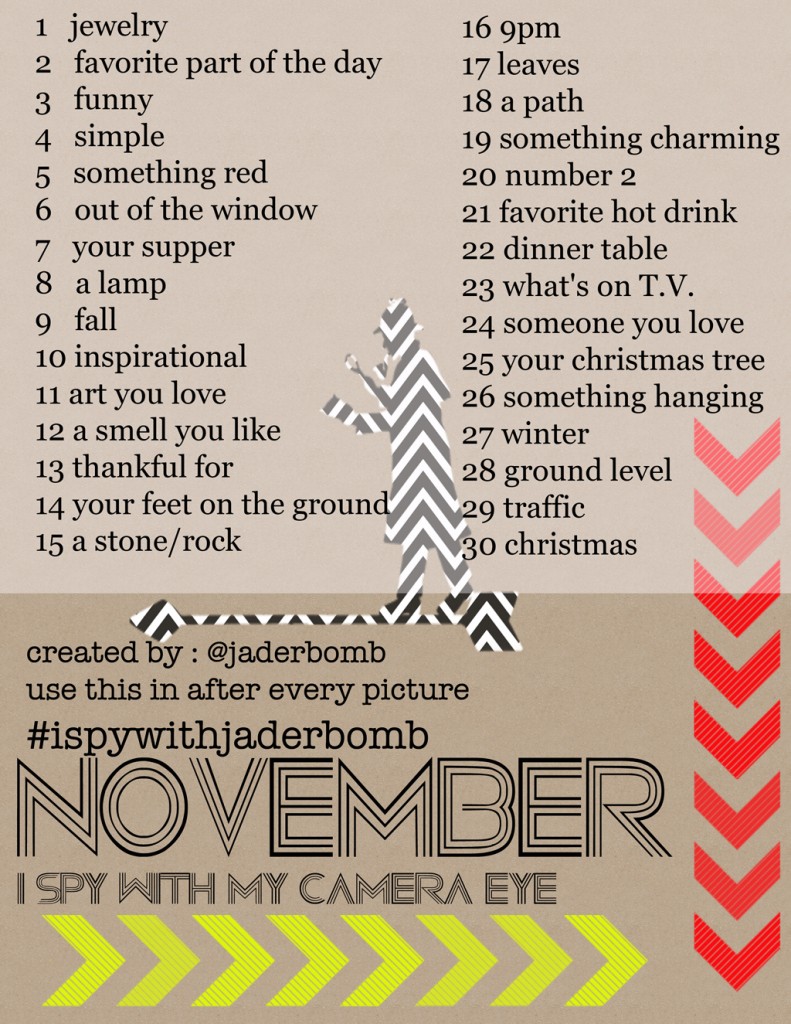
Happy Monday! I am so excited to reveal the new list for October.

{a good thing to do is make this picture your screen saver so you will NOT forget to play the game}
You can print it out, put it on your fridge, at your desk or just keep it in your pictures album on your phone. It’s also good to set a daily reminder on your phone.

The HASH tag for every picture you post will be

#ispywithjaderbomb

(it’s very important that you put this in the comment section for each picture)

So…If you are new to this game I host every month let me tell you a little about it. It’s a fun game that anyone can play. It’s a simple way to stop and smell the roses. I know, that sounded so cliche but you understand. We all live busy lives and sometimes we miss little things that are really HUGE important things. It’s not hard to mess up because each day represents that day in the month. Don’t worry if you skip a day, we still want you to pick right back up and start taking pictures!

Share your pictures on your INSTAGRAM, TWITTER,FACEBOOK or wherever! I am in love with instagram.  I love that I can post a picture to facebook or twitter right from it. 3 in 1. These are little things that make me happy.

Follow me on INSTAGRAM. My handle is

@jaderbomb

Some fun apps that I am ALWAYS using to add flare to my pictures are:

Camera+
(this app has a ton of filters to make your pics amazing)
LensLight
(I love this app because you can add sparkle and shine to your pictures)
Collage Day
(FREE, this is the one stop shop to add washi tape or whatever to your pics)
PicFrame
(use this to put more than one picture in one frame and you can write on your pics here)
 BubbleFrame
(this app allows you to put your pics in BUBBLE’S and cute bubbles at that)

P.S. If you want to add the button for this months list to your website or blog just grab the button on my sidebar (on website homepage) and voila.
You will  “add a Gadget” then “add html box”

You can also right click and save it to your desk top. If you have trouble send me a message!


I hope you enjoyed this tutorial, see ya in the next post! Make sure you come visit me in these places too! (look below this line, hehe)

Facebook Twitter Gplus Pinterest YouTube E-mail RSS

Get your DAILY dose of DIY delivered in your inbox! Just put your email address below!

Enter your email address:

Delivered by FeedBurner


Quote of the day:
Dear George: Remember no man is a failure who has friends.
Thanks for the wings!
-Letter to George Bailey from Clarence the angel, in It’s a Wonderful Life.

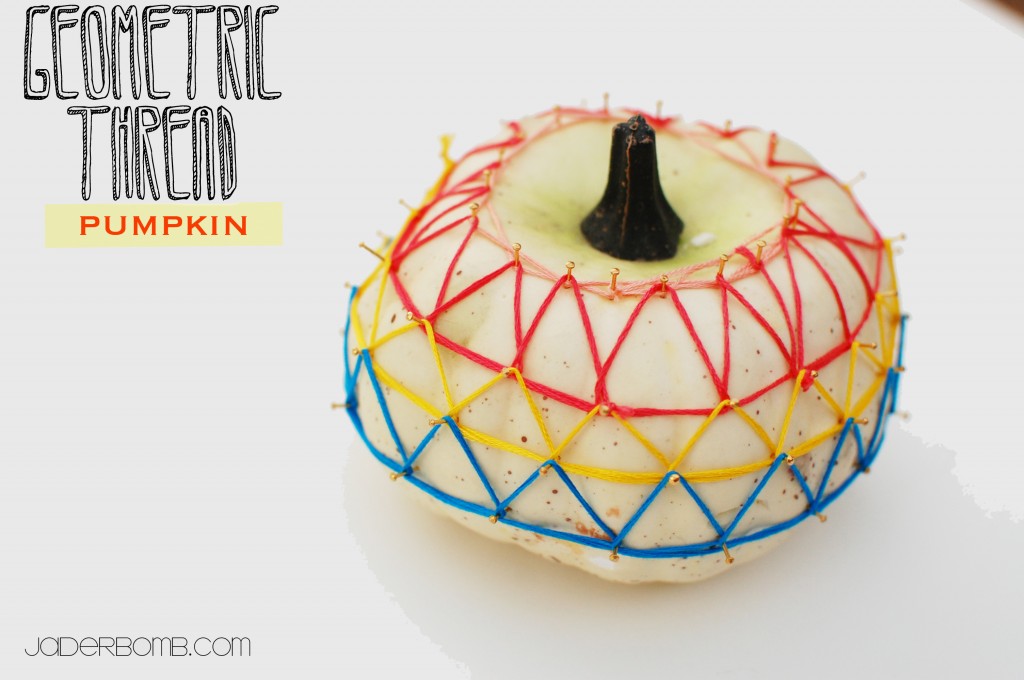
\I hope everyone had a great weekend! They have a huge “FRANKENSTORM” brewing on the East coast so all of my peeps there please be safe. I was really excited the other day when I thought about doing this tutorial. I have seen a lot of pumpkins decorated with yarn but I have not found any with a distinct design on them like this Thread Pumpkin

I mean doesn’t everyone need a thread pumpkin decorated with thread? It’s a must have, fa real.P.S. the good thing about this craft is you can decorate with ANY color thread and it will look good ALL YEAR LONG. Use Fall colors for your table decor, pure happiness there I tell ya!

Let’s get started!

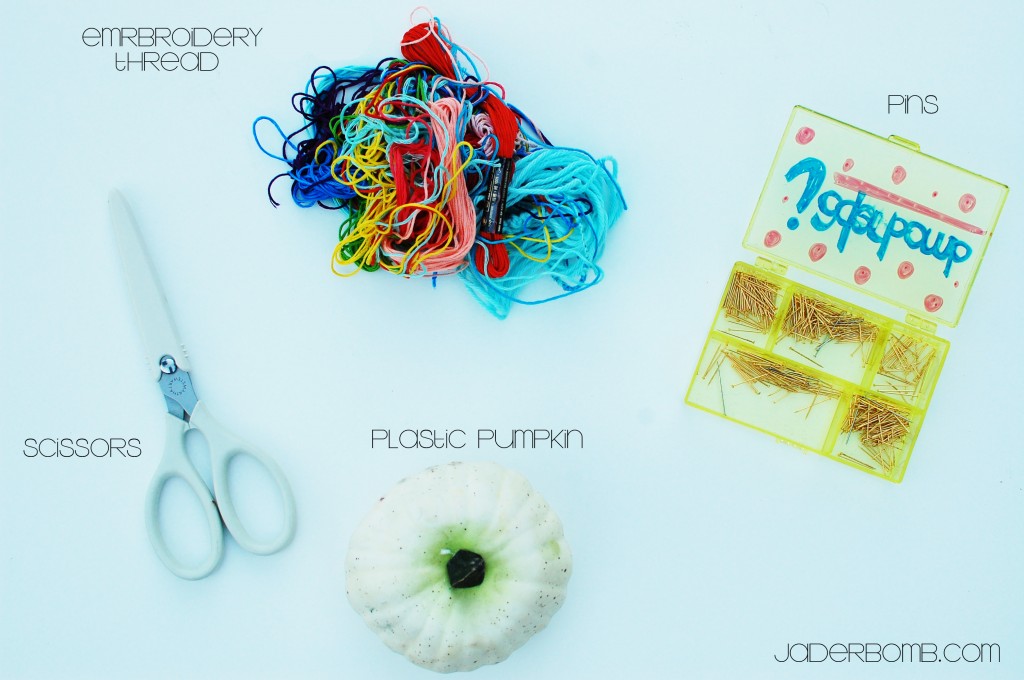
INGREDIENTS:

Thread Pumpkin

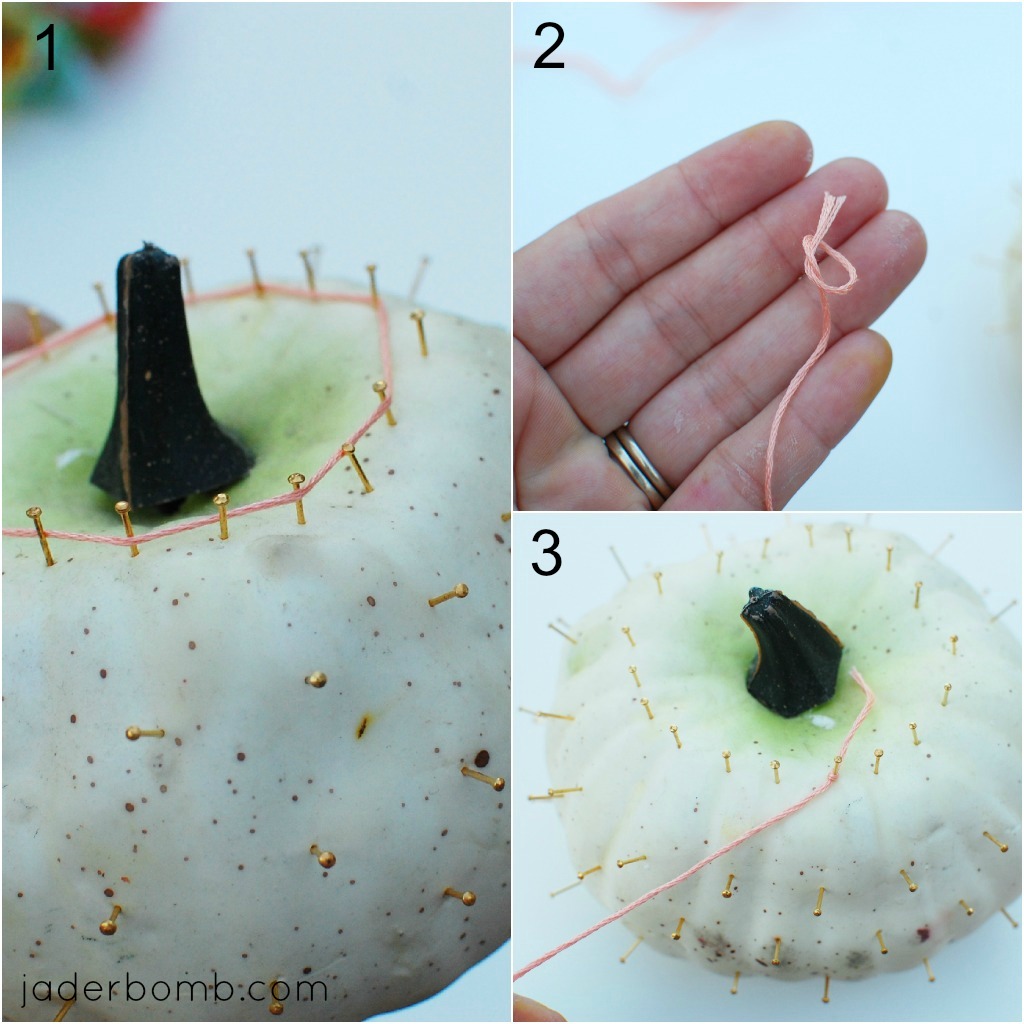
Here is the first thing you will do. Notice the order of numbers, this part is very important. You want to start by making a ring around the top with the  pins. Then go down some and put another ring of push pins. However you will put the pins in the center of the ones above it. You want to start seeing a triangle from layer to layer.

When you are done with the pins, tie a little knot around the top of thread and put on a pin.

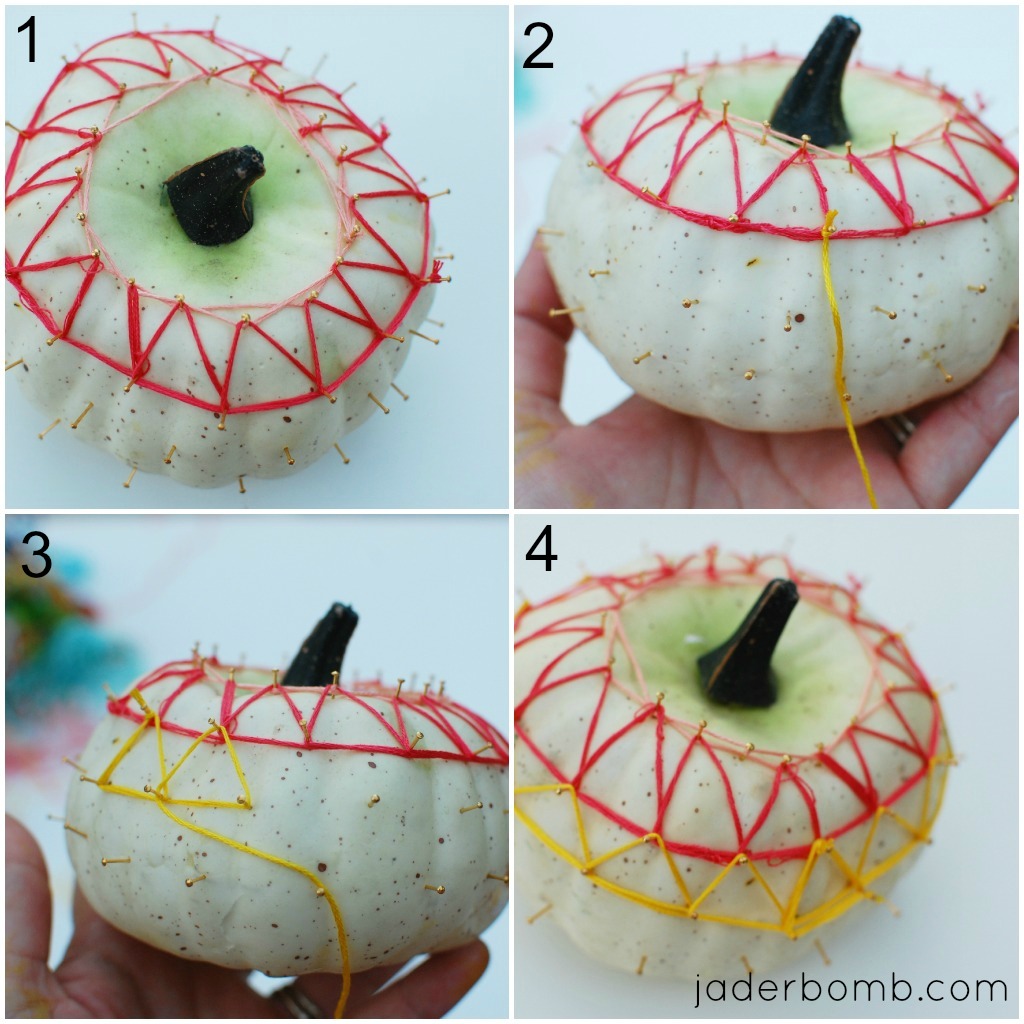
Start wrapping your thread around the pins! Once you get started you will figure our your pattern. You can go over the triangle a few times to make it look layered!

I hope everyone had a good weekend! Oh and btw: this yarn pumpkin is good for ANY time of the year.

I hope you enjoyed this tutorial, see ya in the next post! Make sure you come visit me in these places too! (look below this line, hehe)

Facebook Twitter Gplus Pinterest YouTube E-mail RSS

Get your DAILY dose of DIY delivered in your inbox! Just put your email address below!
Enter your email address:

Delivered by FeedBurner

Jaderbomb!

Who’s ready to attend the best ONLINE party in the entire world! Well WELCOME because you are in the right spot!
I am so excited to be a part of this fun linky party.

Wanna know why?
Well for once we will not be linking up our creations but we will link up our social media outlets.

Why is this good?
Because it’s a great way to let others know who you are , plus YOU get to meet a ton of new people.

Let me tell you a little more about Social Saturday.

The LAST Saturday of EVERY month we will each host a different Social party.

The hostesses of this party will rotate social sites each month so that means you will get to meat TONS and TONS of great, amazing, creative, nice, unique and NEW people. Are you getting all of this, because it’s gonna be TONS of fun.

The parties will start at 8am EST and close at 11:59 PST

Don’t forget to link up at the bottom of this post! After all it’s the most important thing to do today.

Wanna meet the team that put’s everything together?

I have the honor of working with a great group of ladies on the Saturday Social party.

The 4 hostesses will be:

Domestically Speaking
(Hosting Google+)

Jader Bomb
(Hosting the Pinterest Party)

Setting For Four
(Hosting Facebook Party)

Its So Very Cheri
(Hosting Twitter Party)

Once you have entered my party, head over to the other parties and get SOCIAL.

This month I will be hosting the PINTEREST party!

Pinterest has become a real big household name. Everyone loves Pinterest because it’s an easy way to keep track of the things we like, want to do, dream of and everything else.

The one thing I love about Pinterest is how fast things spread on it. One good picture can get around really quick in the Pinterest world.

I am always pinning things so check out my Pinterest page!


I hope you enjoyed this tutorial, see ya in the next post! Make sure you come visit me in these places too! (look below this line, hehe)

Facebook Twitter Gplus Pinterest YouTube E-mail RSS

Get your DAILY dose of DIY delivered in your inbox! Just put your email address below!

Enter your email address:

Delivered by FeedBurner


Quote of the day:
“It is the first duty of the citizen to be calm.

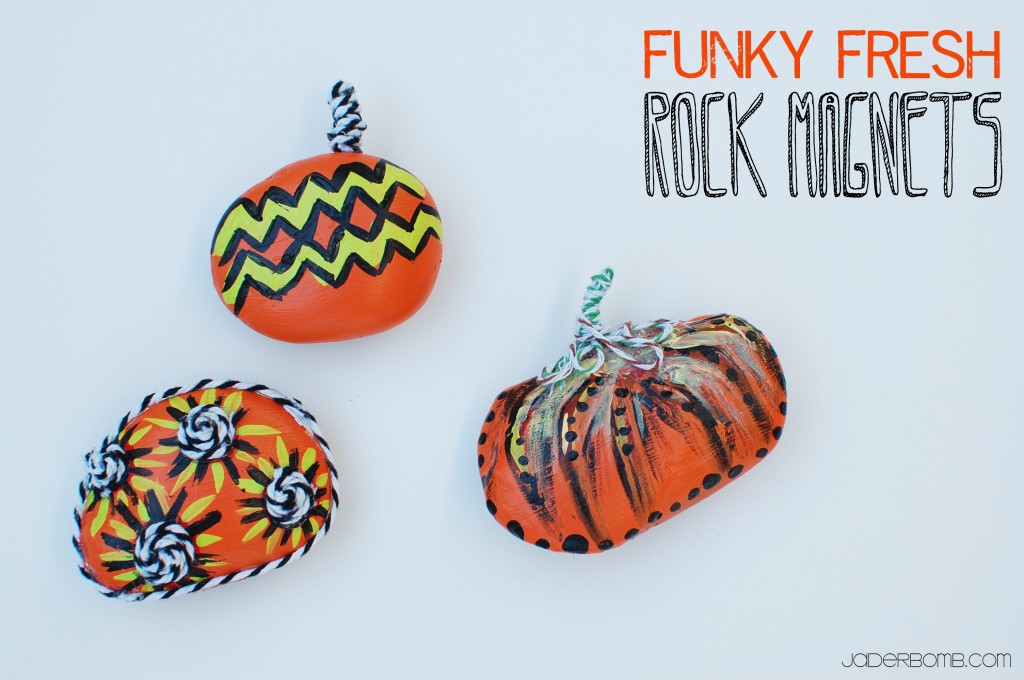
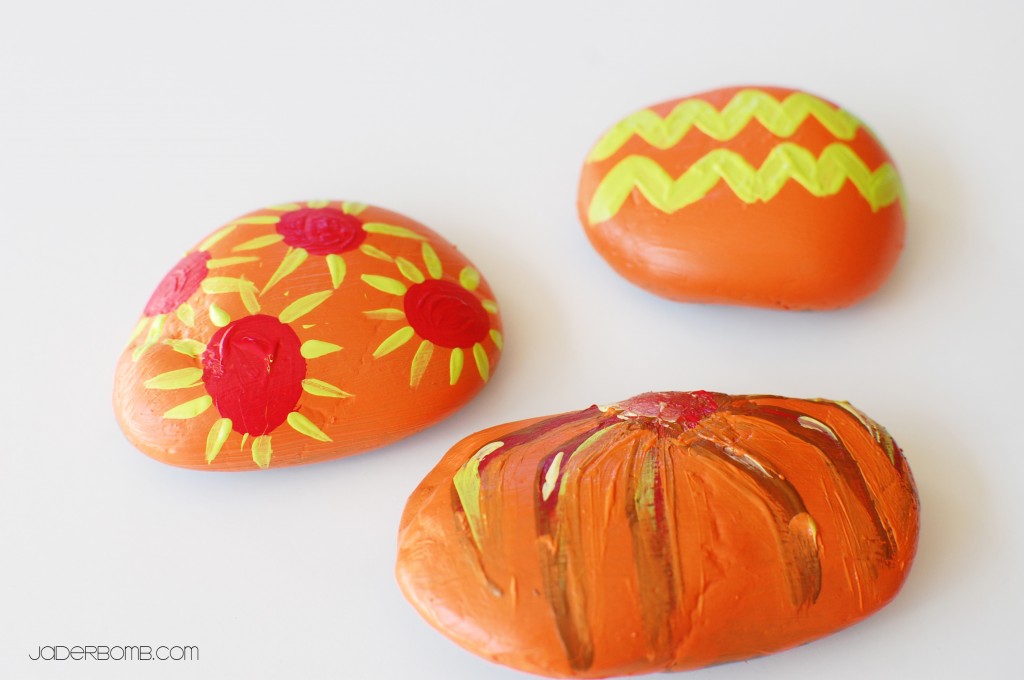
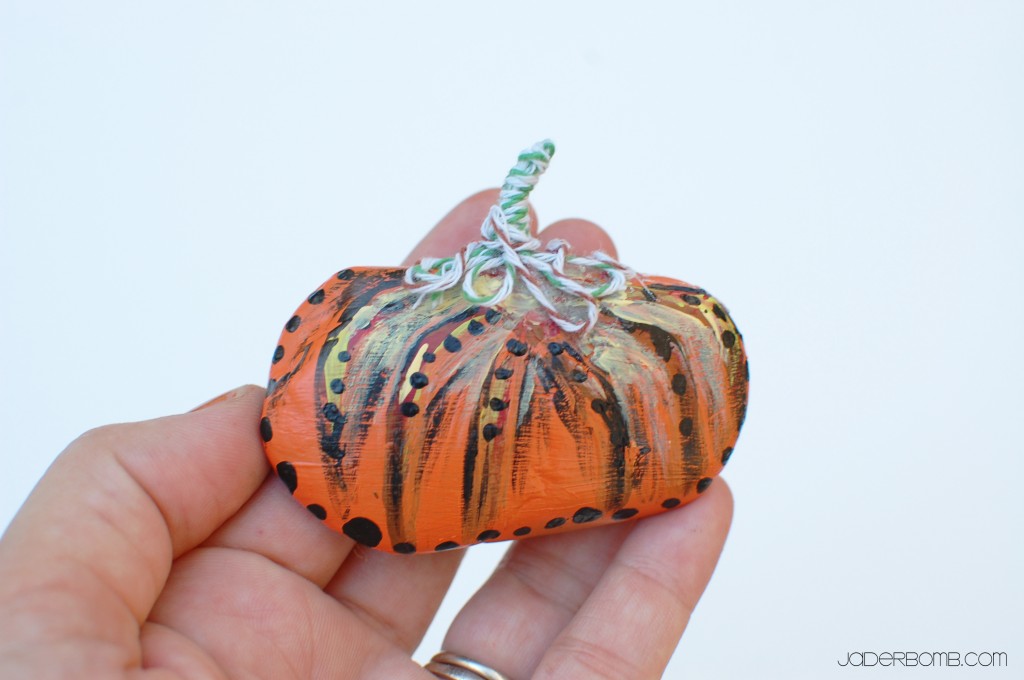
Won’t you take me to… FUNKY TOWN with FUNKY ROCKS… with FUNKY MAGNETS…

You get it, I am pretty excited about these babies. However I never even got to put them up because dad took them to Hawaii and already gave them away! He said all of his friends there would love them. I was hoping he would of “forgot” to give them away. Eh. He didn’t.

Good thing is it’s only rocks! I can make TON’S more Jaderbugs! Let’s get started on our halloween rock magnets

Halloween Rock Magnets

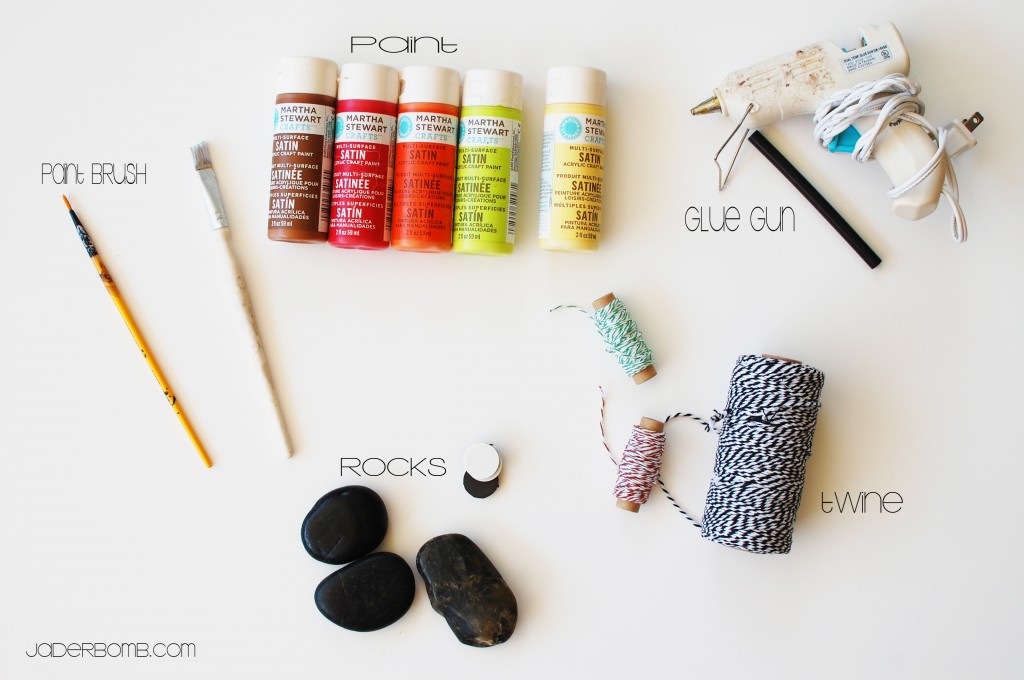
 INGREDIENTS: 

*Paint
*Glue Gun
*Craft Brush
*Baker’s Twine
*Rocks
*Magnets

Make sure you click on the links of ingredients to order these items!

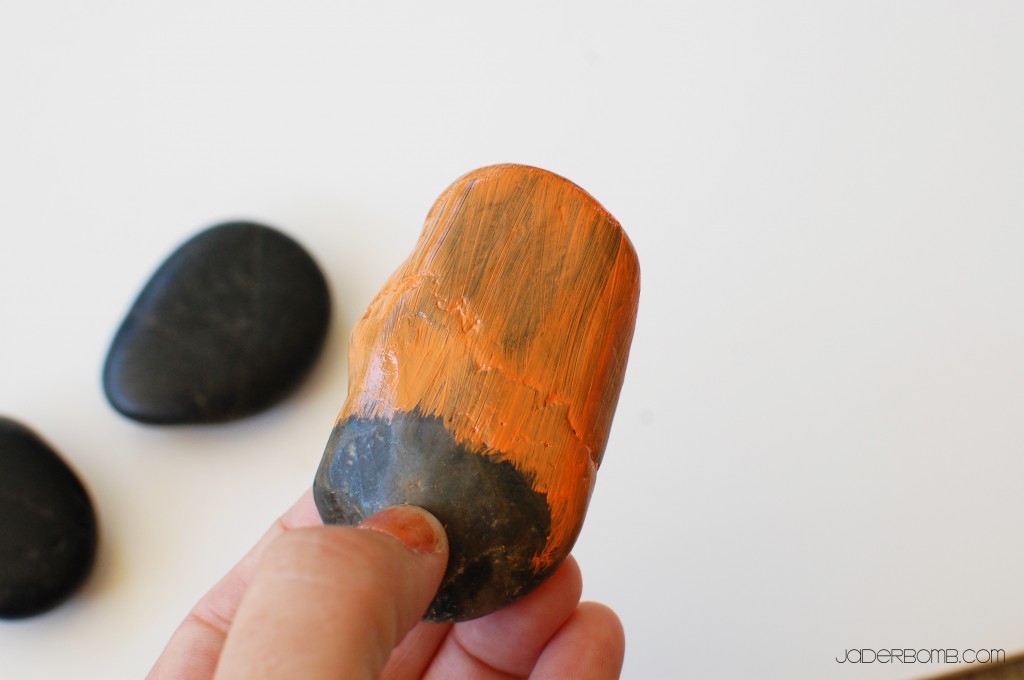
The first thing you will do is paint your first coat of paint onto the rock. I like to do one half, let it dry then do the other half. Remember your first coat will be translucent to a certain degree.

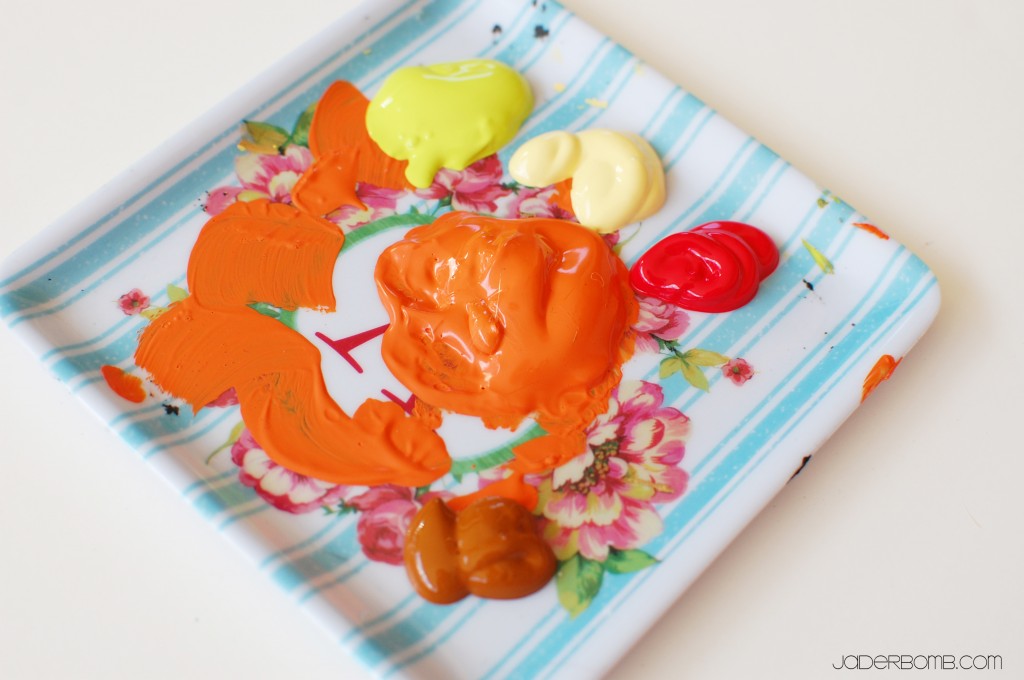
I love taking pictures of my paint. It looks so pretty! NO. I don’t want to eat it, today.

Once your rocks are fully coated you can start painting your design on them. I really enjoy whimsical, organic designs.  Remember if you are putting different designs on your rocks to let each color dry thoroughly. I won’t show you the rocks that threw in a pile because I thought I had magical brushes that would not mix the paint together.

HAHA

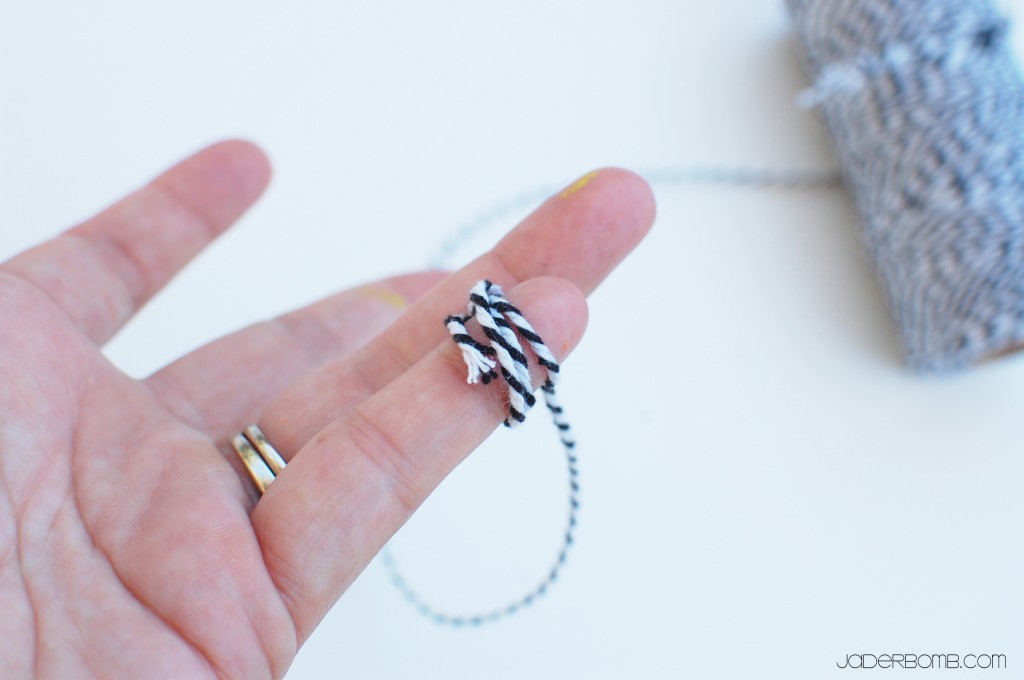
To make the little designs with your baker’s twine I like to start by wrapping them around my finger like this. If you find an easier way please do that!

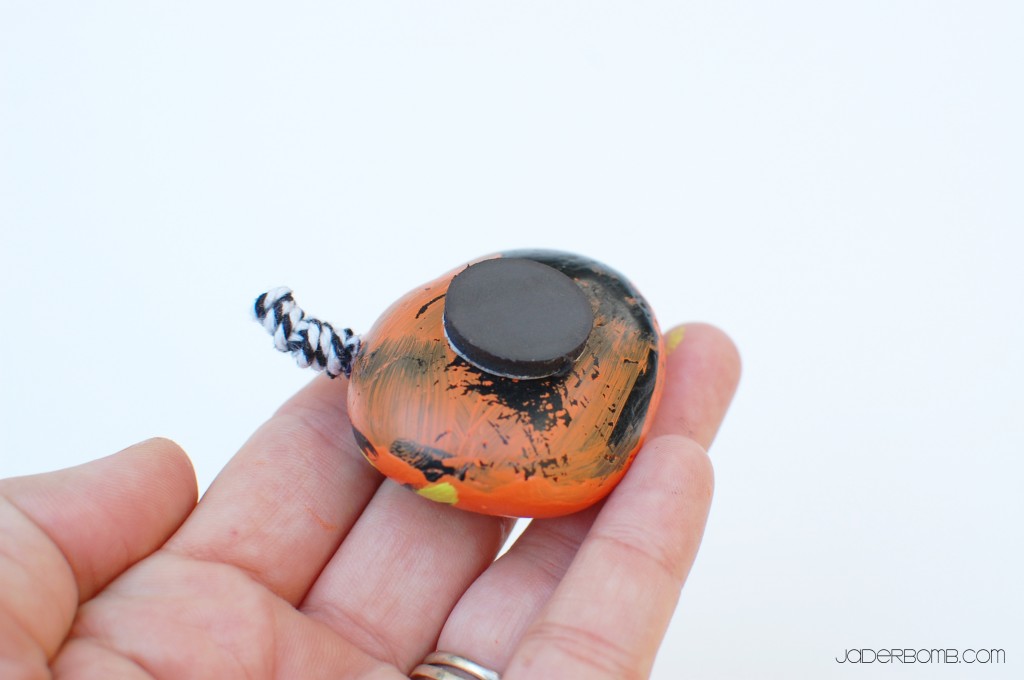
I know. I was lazy. I did NOT paint the  backs of my rocks. I mean, had I known they were taking a trip to Hawaii I would of.  But, once you are done painting and gluing you can place your magnet with an adhesive backing to the back of the rock. Where ever you choose to put your baker’s twine just hot glue it down.

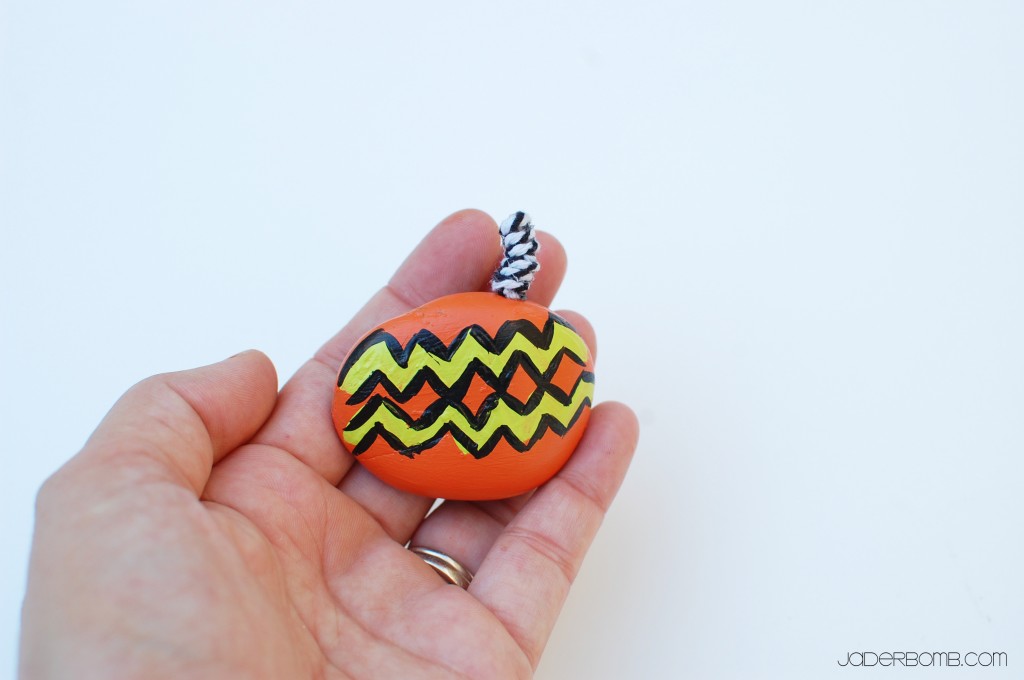
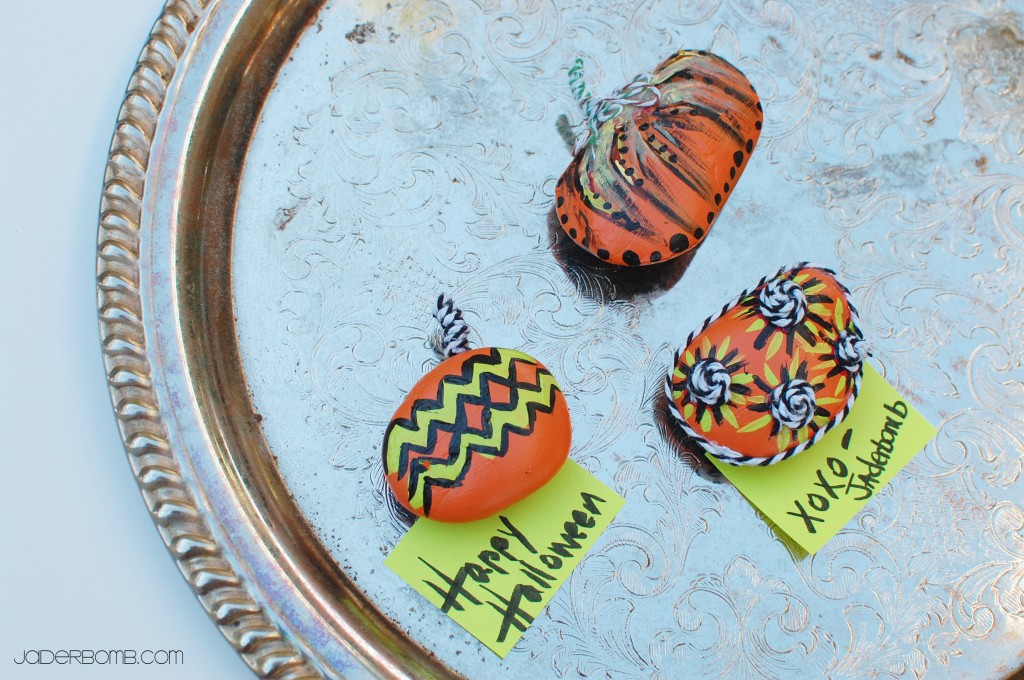
This one kinda reminds me of Charlie Brown’s shirt. I love the way the black and white baker’s twine makes everything pop!

I am totally in LOVE with my little pumpkin. Guess I will make a new one!
(Insert shaking head here, haha)

I have this vintage serving plate in our kitchen and I use it to post important notes. These little magnet’s were cute on it.

I hope you enjoyed this tutorial, see ya in the next post! Make sure you come visit me in these places too! (look below this line, hehe)

Check what else I did  these Halloween earrings that look like these magnets here.

Quote of the day:
“When rungs were missing, I learned to jump.” -William Warfield

Today I found myself stuck in YouTube. Looking at some of my old Halloween favorites. It’s kinda crazy to think a movie can take you back in time. I remember watching Practical Magic, circa 1998 over and over. Hocus Pocus is an all time favorite. I am especially happy right now with ABC Family playing the 13 nights of Halloween. We cook egg sandwiches at night and all watch tv in the kitchen. Kinda like a country cozy moment. It’s sometimes odd to think that I watch the same shows with my own family now. Lil one loves when we all watch movies together!

So earlier today when I STARTED this post I put in Julie and Julia. Almost two hours later I realized I didn’t type anything but I sure finished that dang movie! I remember when Martha Stewart’s The Family Room wrote a post about me.  They compared my “Martha Countdown” to Julie and Julia but with glitter and a glue gun. . Maybe that is why I feel so happy when I watch that movie.

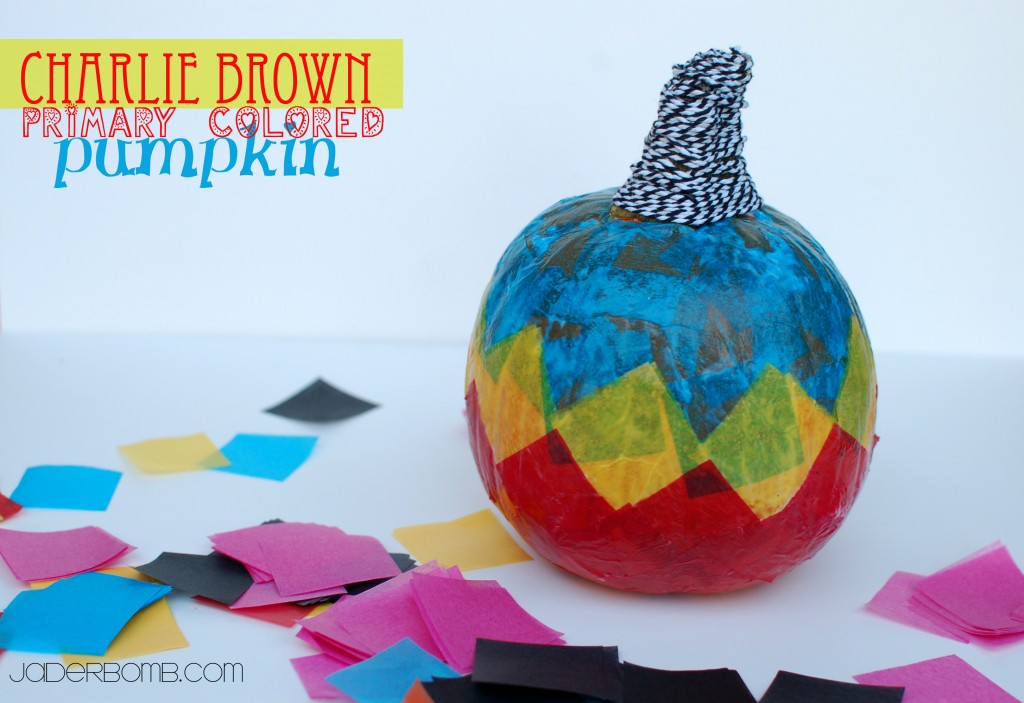
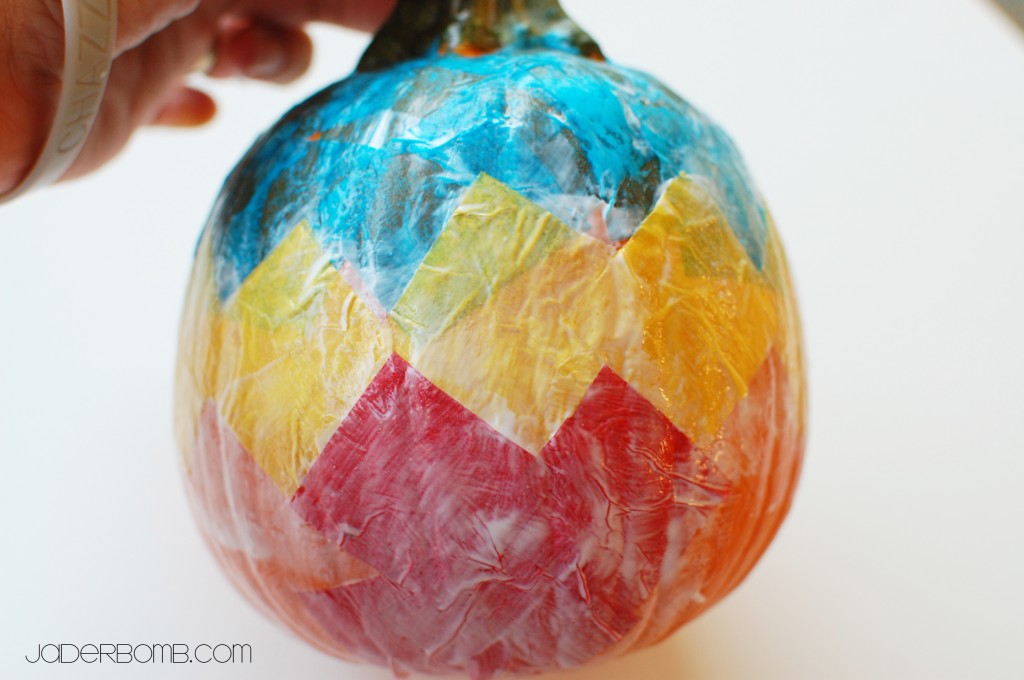
This here is my vision of what a “Charlie Brown” chevron pumpkin would look like. See, when I think of Charlie Brown not only do I think of a chevron pumpkin but I also think of PRIMARY colors. There ya have it Jaderbugs!

My video inspiration comes from this AMAZING video that Sesame Street made. It says it all plus it has a good beat! Enjoy
{{tipyrooo: play the video while sifting through the post, it’s sure to make you tap your foot}}

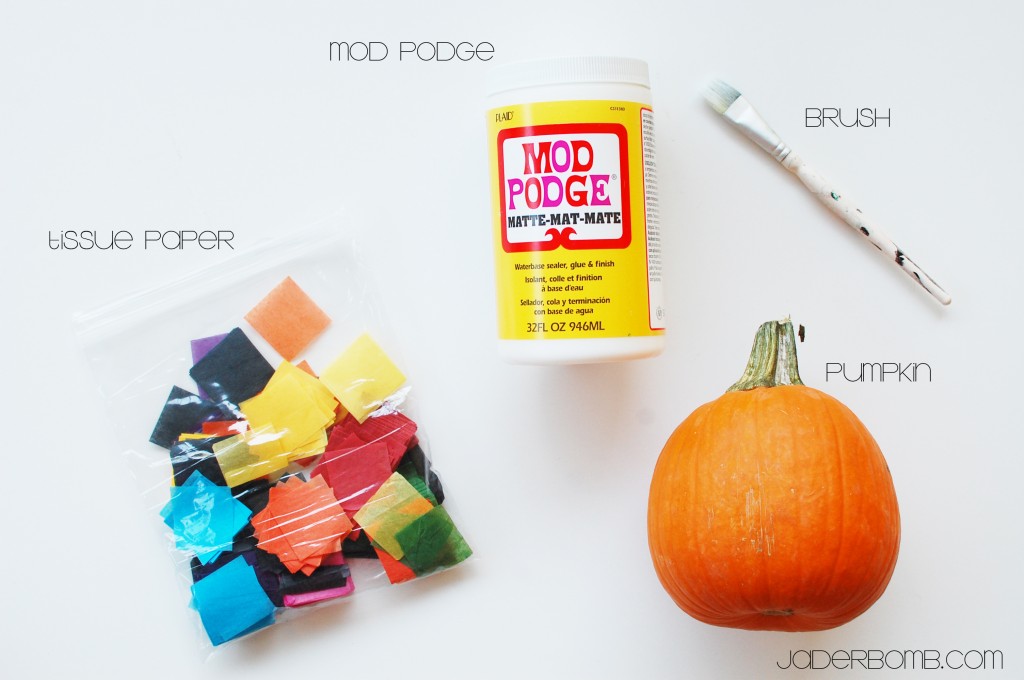
INGREDIENTS:

*Mod Podge
*Craft Brush
*Tissue Paper
*Pumpkin

P.S. You can click on any of the links (up above) to order these ingredients.

Let’s get started making our chevron pumpkin!

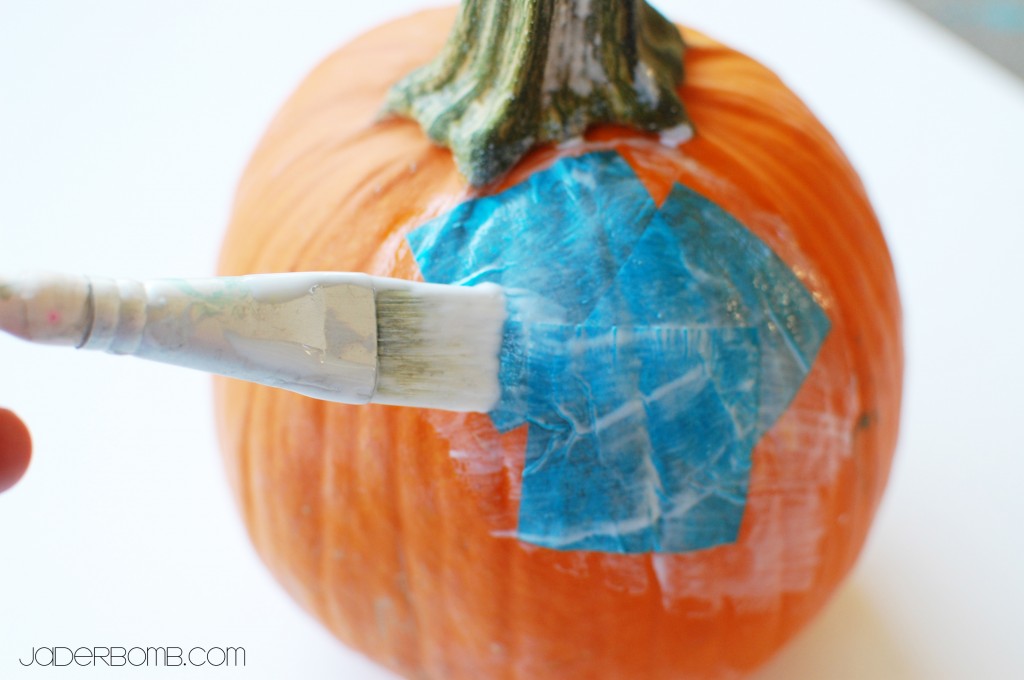
The first thing I do is brush on a little Mod Podge then start placing my tissue squares on top of it. After the tissue is applied I pass my brush over it again, with a little Mod Podge. Remember, if you don’t have the pre cut squares you can use ANY tissue paper you have. I just keep these babies stocked in my studio because they really come in handy. You can get them from Michael’s or any craft store.

Keep in mind that video I posted. When you place the blue tissue over the yellow you will get shades of green. Red and Yellow will give you orange. You could keep going with the colors and get some really beautiful shades like I did HERE.

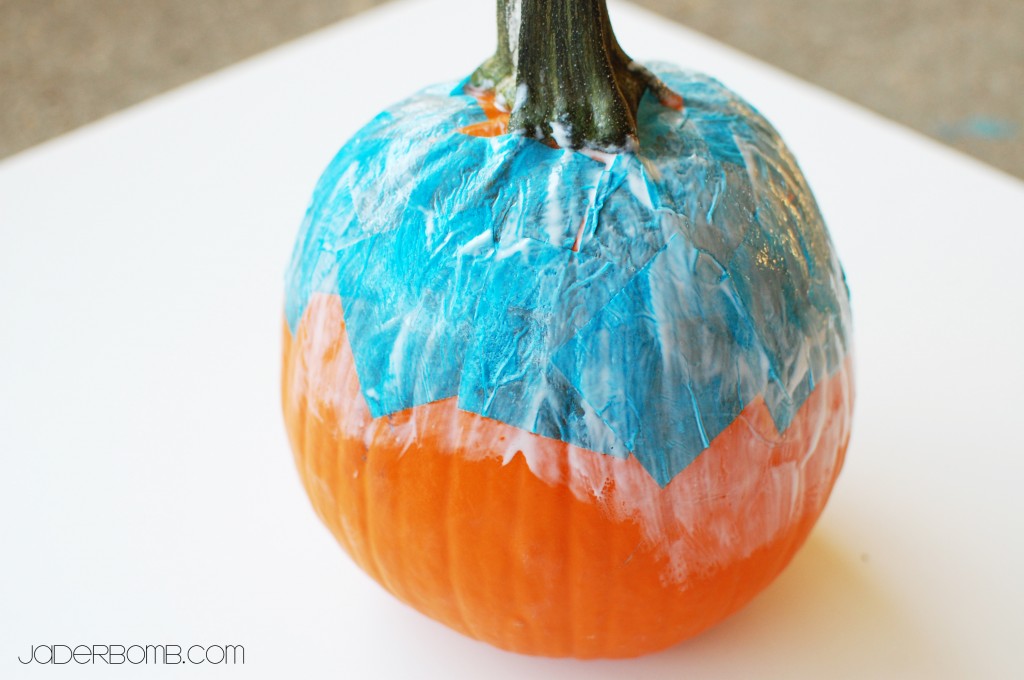
I went all the way around the top of the pumpkin first with the blue. I continued down with the yellow then red. Notice how I placed the yellow pieces of tissue paper. It’s important you get an organic chevron shape. Be creative too! If you don’t want to do the design have fun with it and make it your own. You will be surprised when you see all of the amazing colors the tissue make once you start layering them.

Gotta run, see ya in the next post!

{p.s.  stay tuned for my string pumpkin and homemade washi tape this week}


Hey Jaderbugs! Today’s post is a fun one! Do you remember in the beginning of October when I told you about the Fall Pinterest Scavenger Hunt I was a part of?  I know, you are prolly thinking scavenger hunt… I wanna do that. Let’s do it.

The Fall Pinterest Scavenger Hunt and Giveaway hosted by ArahBellas, All Done Monkey, and Just a Little Creativit

Thanks ya’ll

So today is MY TURN. That means that you will have to sift through my blog using my “clue” and find the post it goes to. Wanna learn more about the prizes? Come on, everyone loves prizes. Did I mention we are forcing you to go on “PINTEREST” in order to participate? That might be hard for some of yall, hehe.

Here’s how to Play-

*Create a new Pinterest board specifically for this Scavenger Hunt
*Each day, a new clue will be revealed on the Host blogs as well as the Rafflecopter entry form. With the clue, a link will be provided to the blog with the photo to be pinned.
*To be eligible to win, you must pin a photo from each clue provided
*There are also many additional ways to earn extra entries, so be sure to give them a try!

Here is some information about Our Grand Prize and about Our Week 4 Sponsors:

———————————————————–

Sponsor One

Suzy’s Sitcom Store

Suzy's Partridge and Pear Pattern

Great patterns, Ukrainian eggs, gifts, and much more!

Prize:  Patridge and Pear Faux Stained Glass Kit (value $20)

(Pretty cool, ey)

Sponsor Two

DIYFluffies

DIY Cotton Whale Sewing KitWhale Pattern 1

Mariska Vos-Bolman is a dutch soft toy designer, and a graduate from the Utrecht school of Arts. In her Etsy shop, DIY Fluffies, customers can purchase ready made Fluffies, complete sewing kits for soft toys, rag dolls, softies, and stuffed animals, as well as downloadable PDF patterns patterns!   All e-patterns are available in English and Dutch, some in German or Spanish.  Her creations are inspired by her sons, as well as her many years of work history in the video game industry.

Prize: DIYFluffies Cotton Whale Toy Sewing Kit (value $24)

————————————————————————————————–

Ready to see my HINT?

Ok. Here is it…

YOU ROCK!

With this all said it’s time for you to start pinning to win

Don’t forget to participate in the RAFFLECOPTER below. These are all EXTRA ways for you to WIN.


a Rafflecopter giveaway

See ya in the next post


This blog is not responsible for prize redemption, and was not compensated for participating in this sweepstakes.