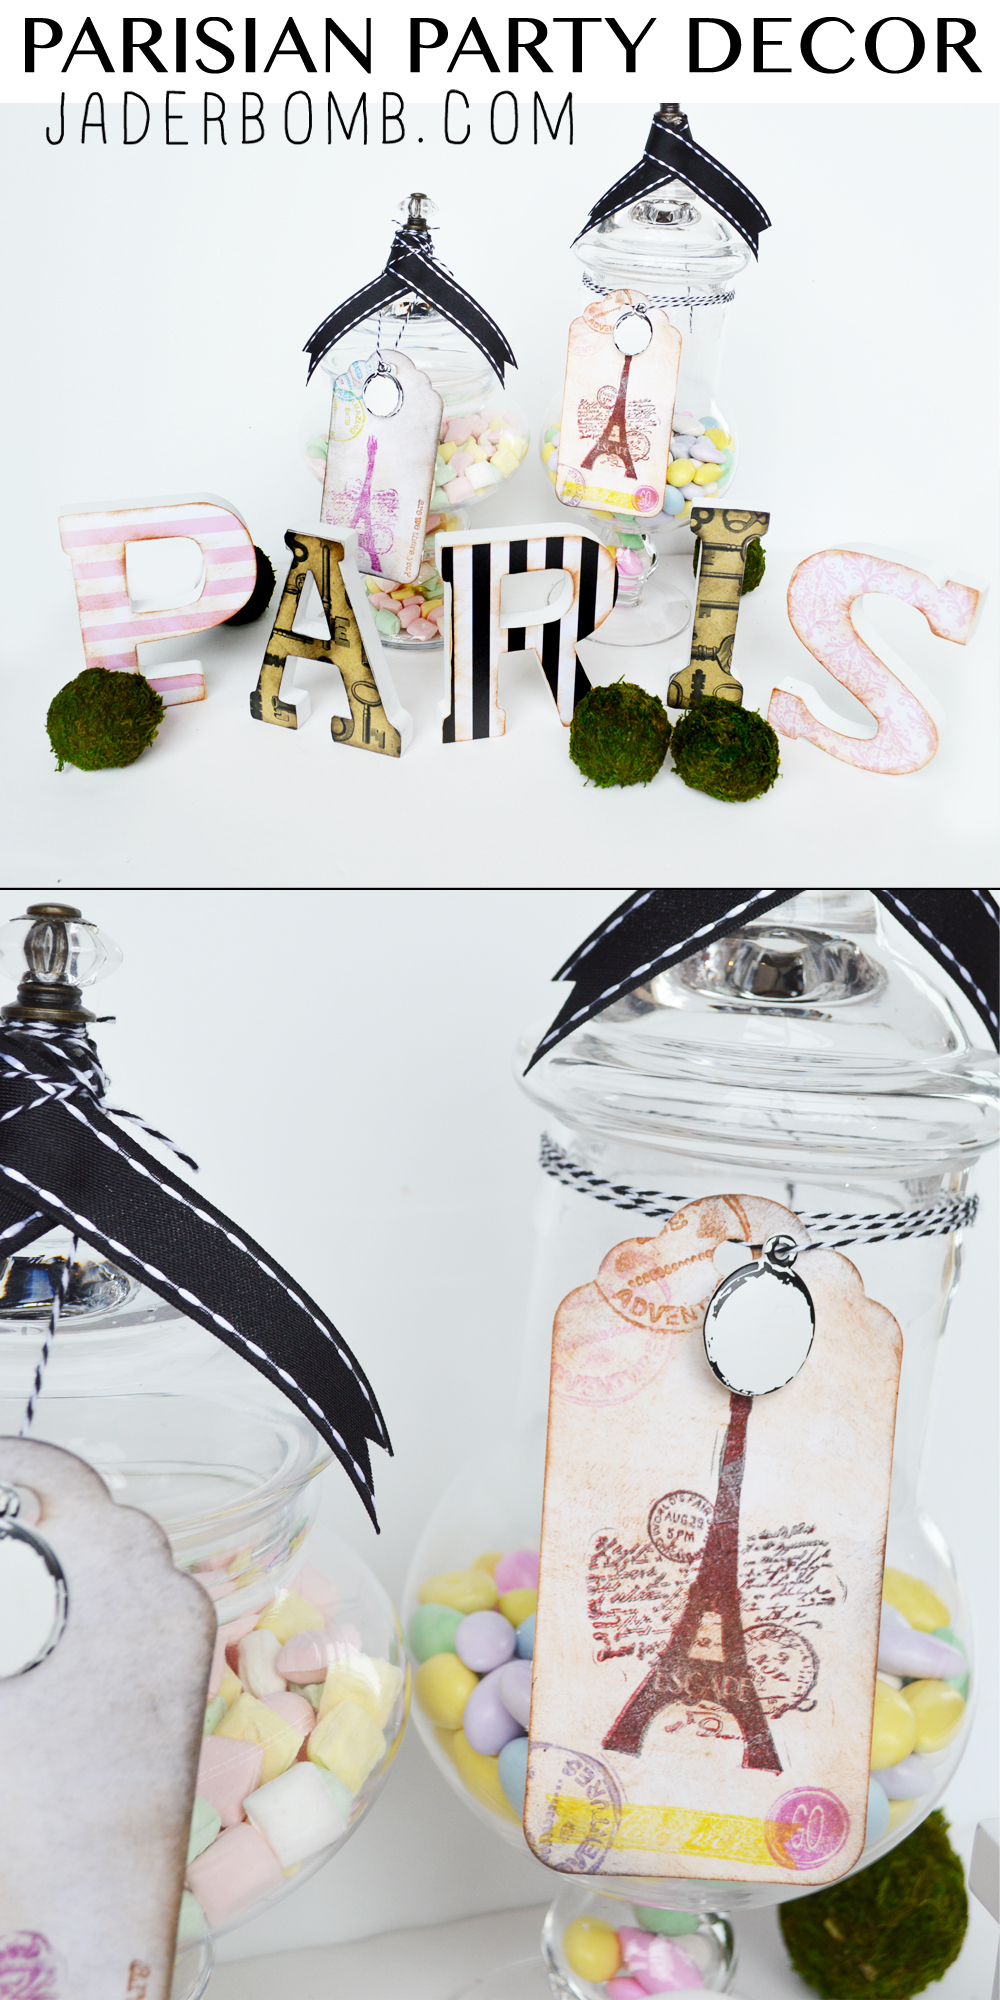
Today I am super excited to show you my Parisian Party Decor!!! This was a fun post because I used my favorite colors pink and black/white stripes. If you know me then you know this is right up my alley. As a Michaels Maker, Michaels challenged me to create something “Paris” based and the fabulous news is you can ALSO win a TRIP TO PARIS!!!!
YOU HEARD THAT RIGHT! A TRIP TO PARIS!!!!
Don’t forget to enter the contest too – you can upload to the Paris site HERE or share on Instagram using #SpringtimeinParis #Contest beginning on 3/1.
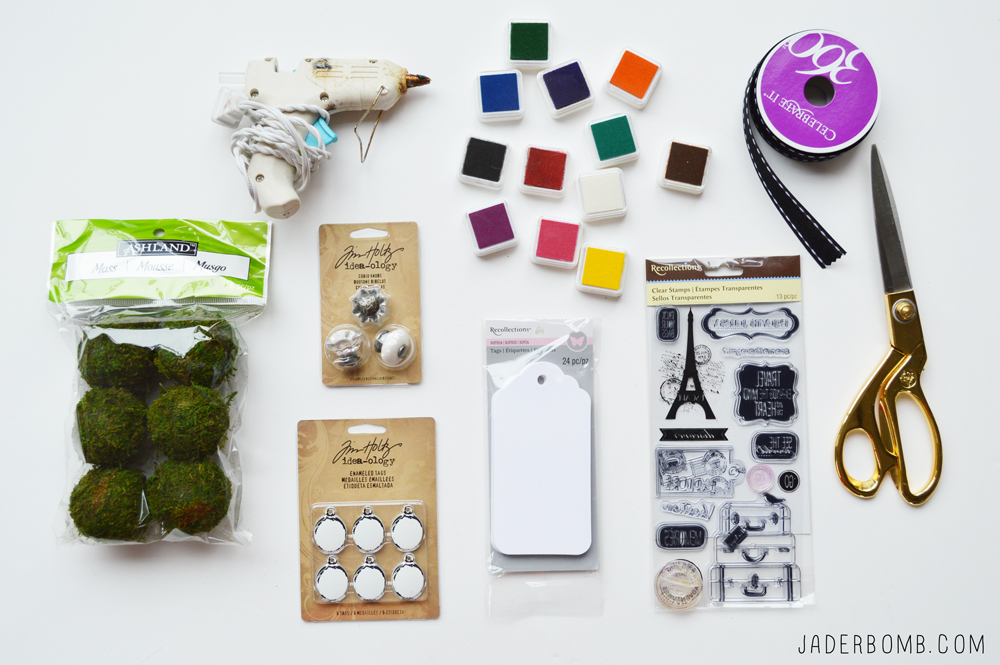
You will need:
*Apothecary Jars
*Glue Gun
*Rubber Stamps (paris themed)
*Ribbon
*Scissors
*Ink Pads
*Plain Labels
*Candy
*Scrapbook Paper
*Wooden Letters
*Adhesive Spray
*Trinkets to put on Jars
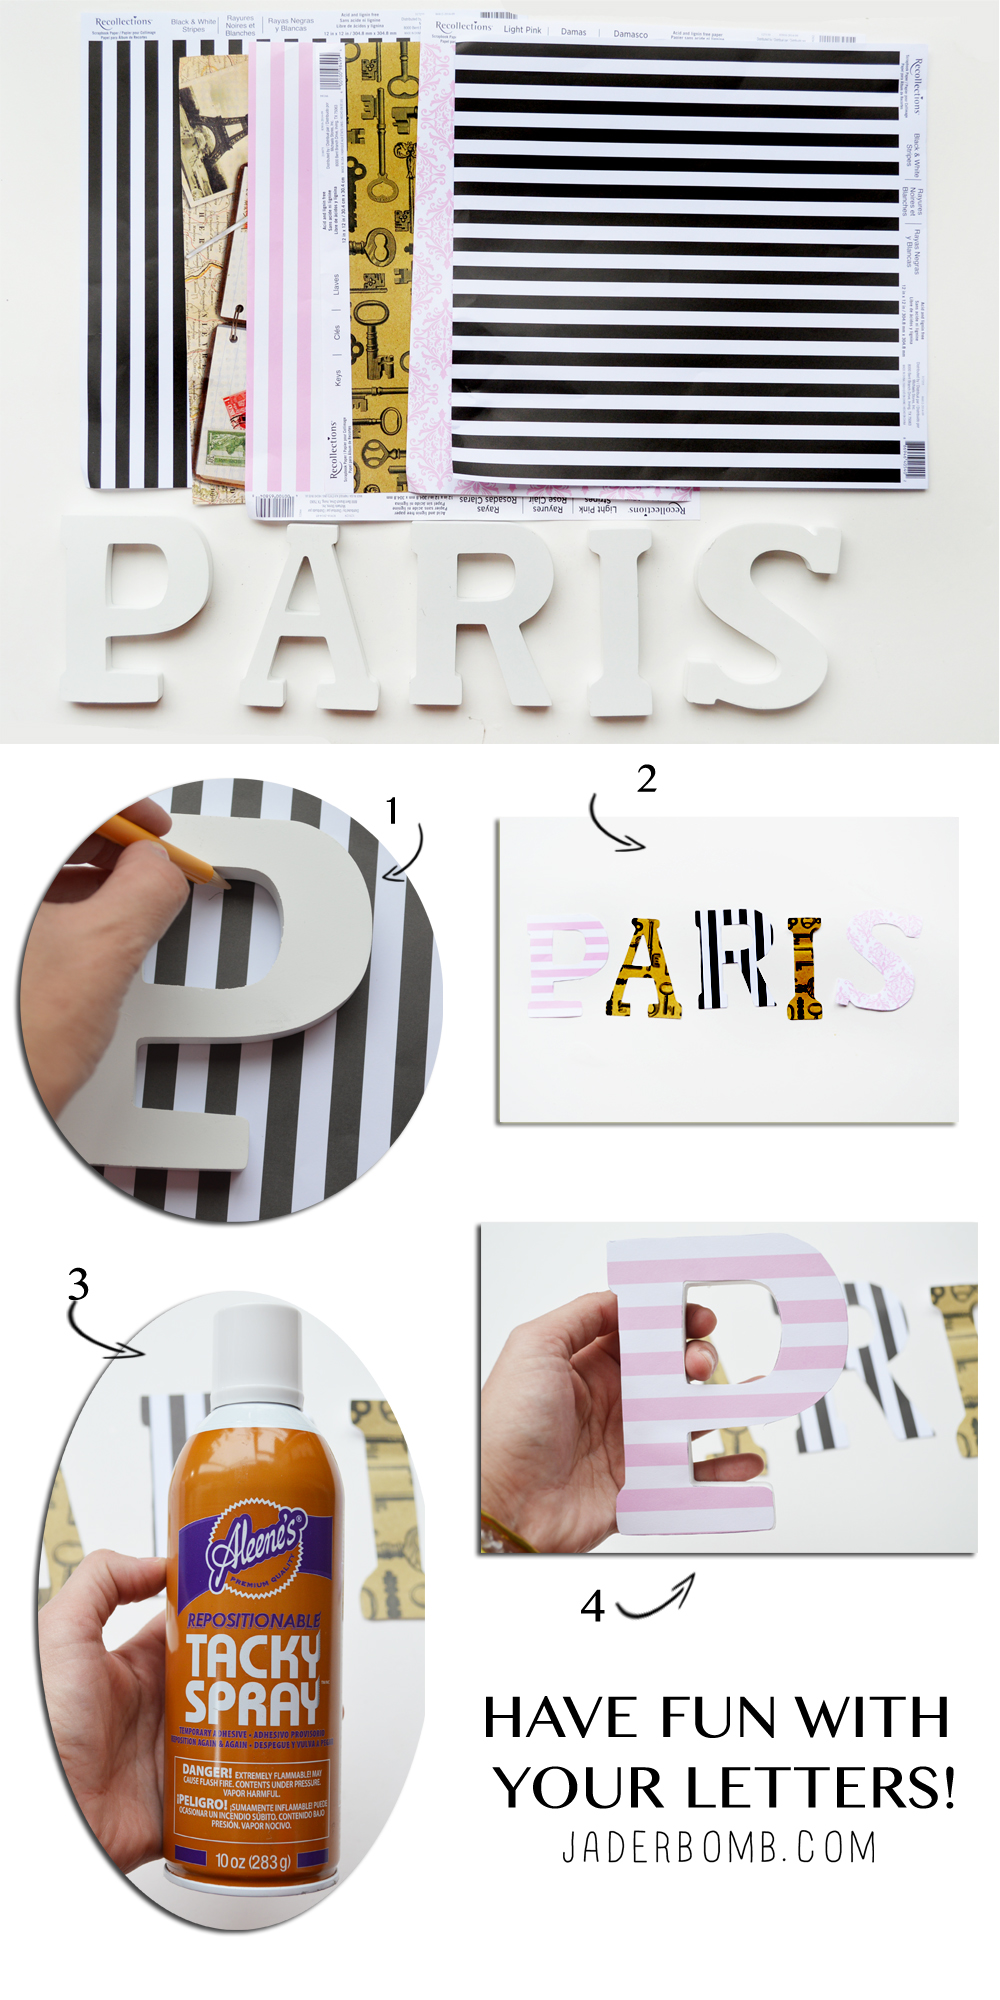
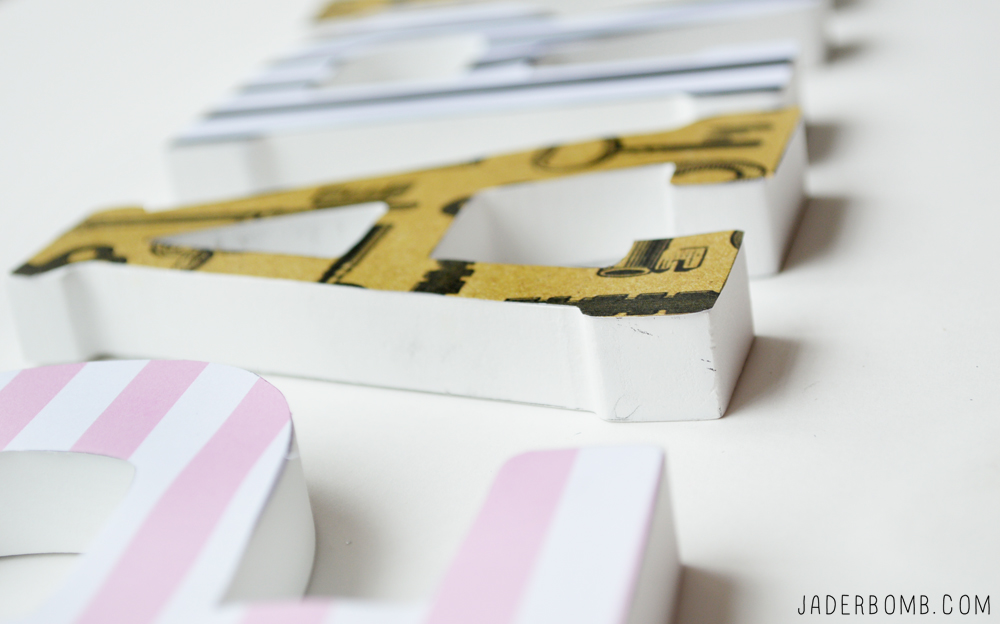
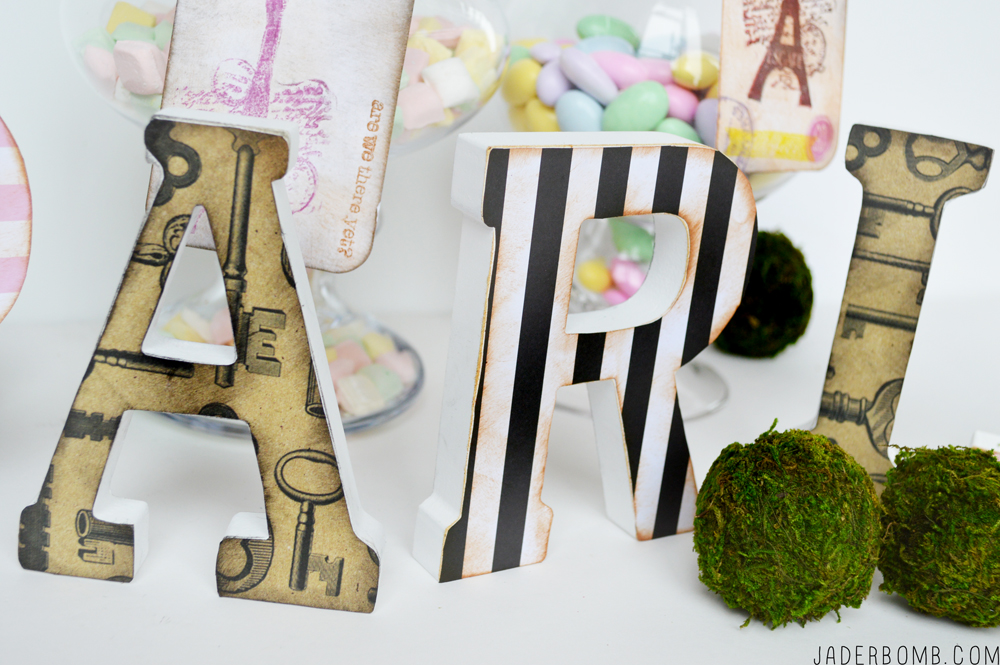
The first thing we will tackle is the letters. I love this craft because you can spell out ANYTHING and dress up ANY space! Grab your scrapbook paper and letters!
1. Place your letter on your paper and trace it out.
2. Carefully cut out your letters
3. Grab your adhesive spray
4. Spray your letters then carefully place paper cut out on top
Next will be the antique stage of the letters. Now they look snazzy just the way they are but I wanted them to look a little worn!
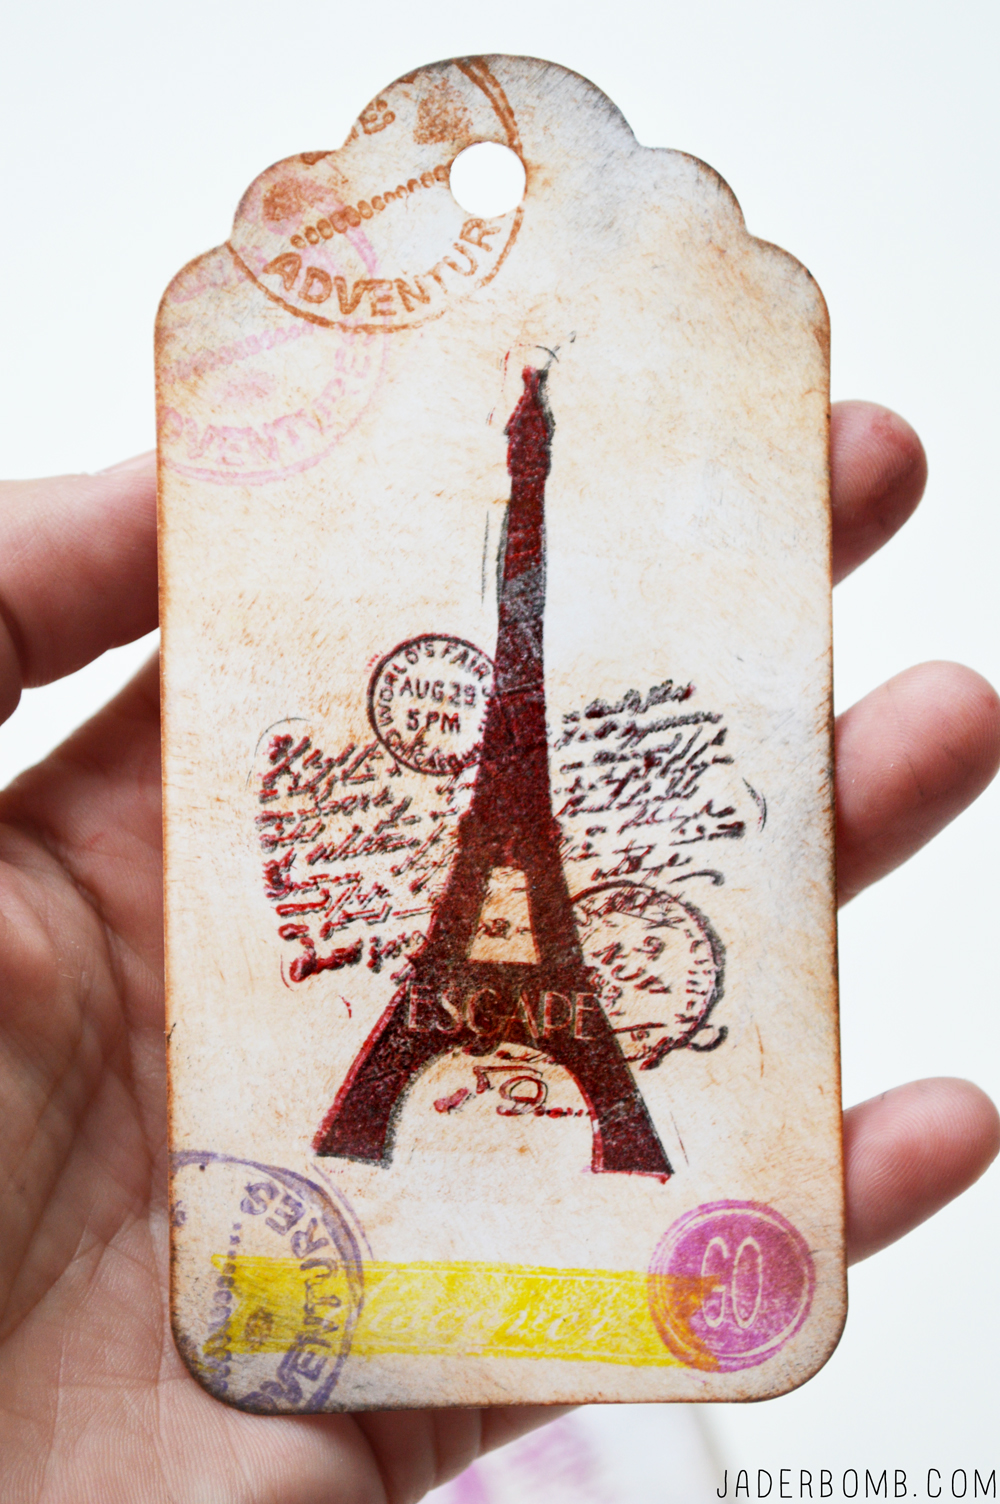
You will grab your ink pad (your choice of color), I use the sepia because it looks naturally old. Rub the edges of the letters and a little bit inside the letters.
You will do the same thing for the labels. Once you are done with your labels you can start to add whatever rubber stamps on them as you like. 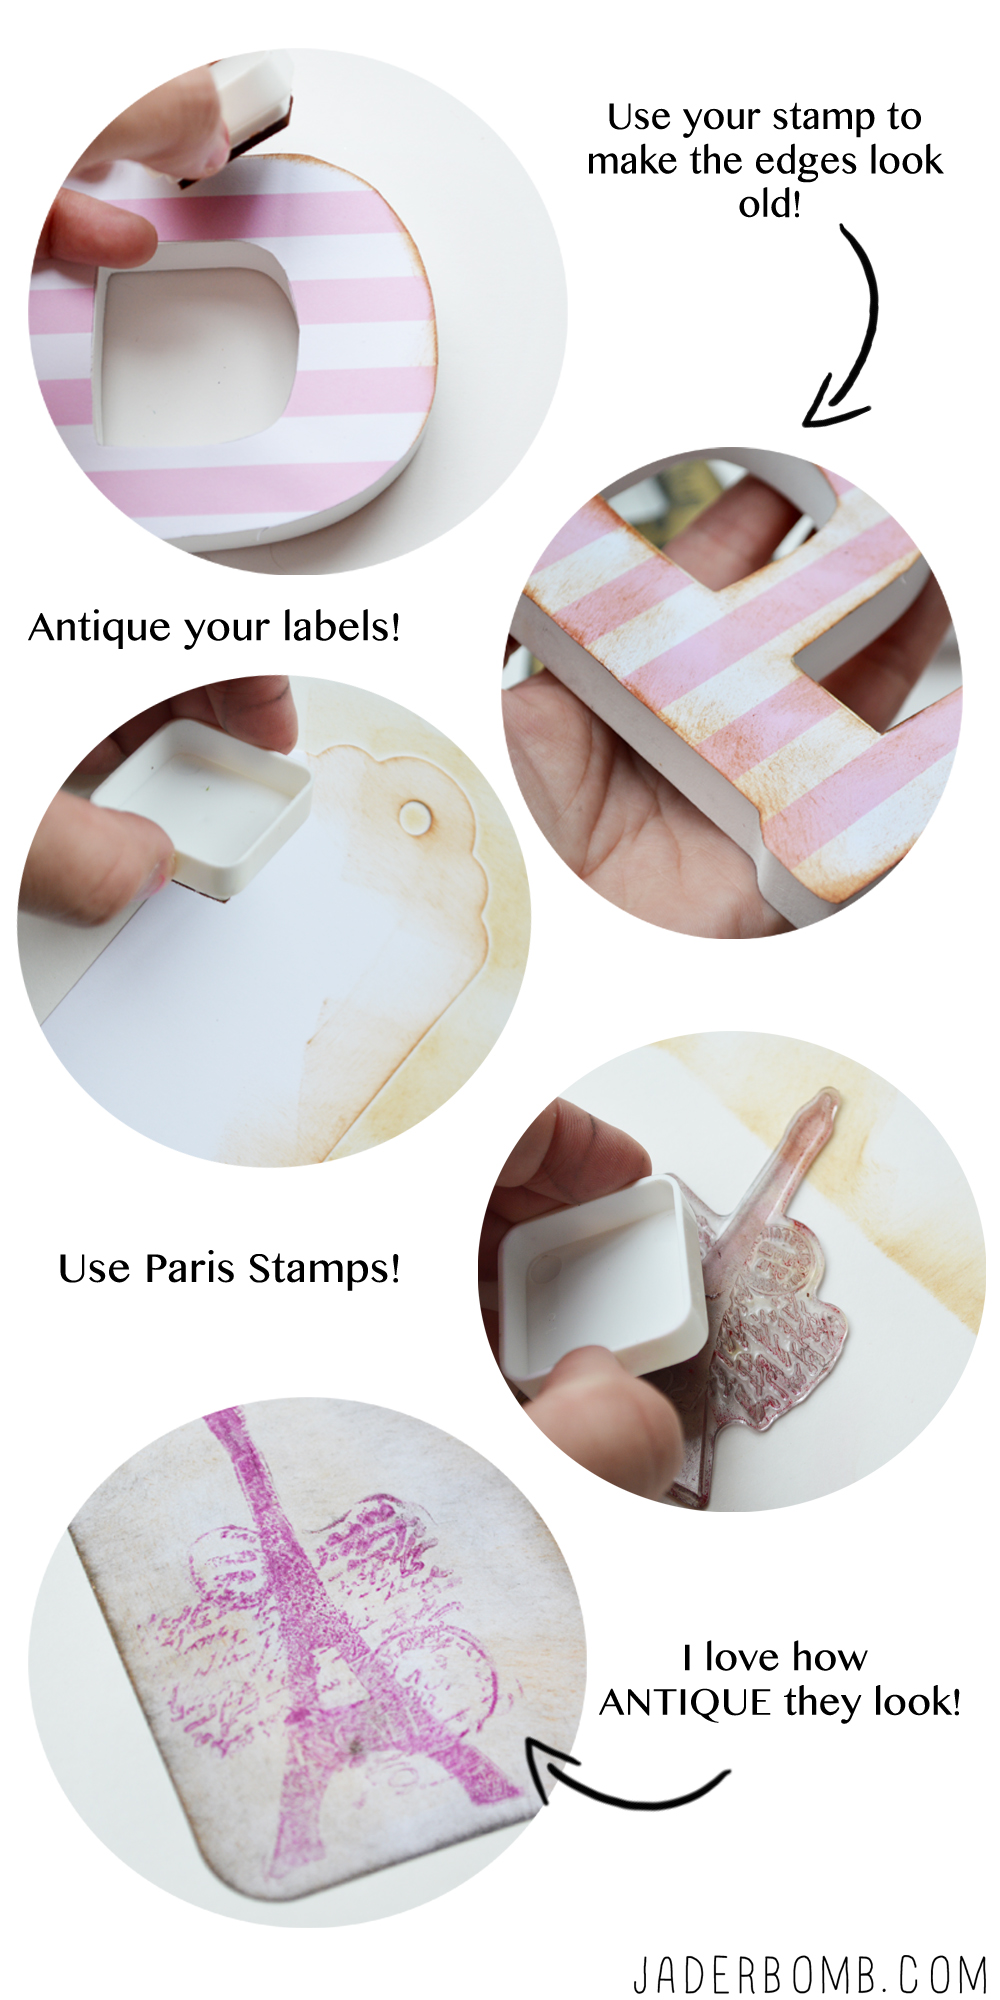
To dress up my jars I added these decorative knobs. To apply add a little dot of hot glue then smack that baby down!
Cut a piece of ribbon and wrap it around the neck of the jar. Adhere with a drop of hot glue. 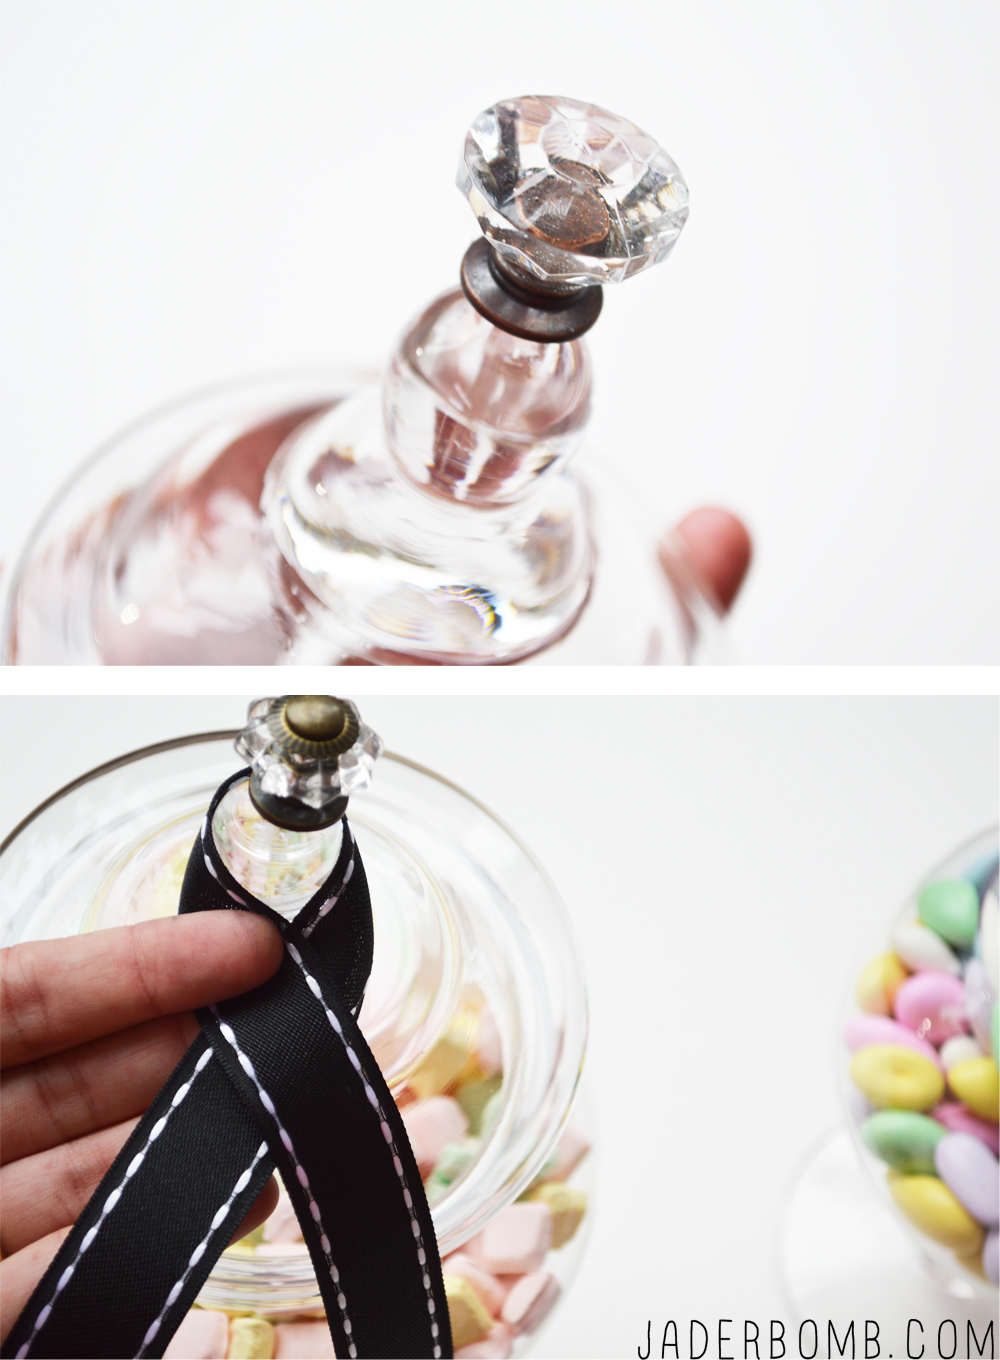
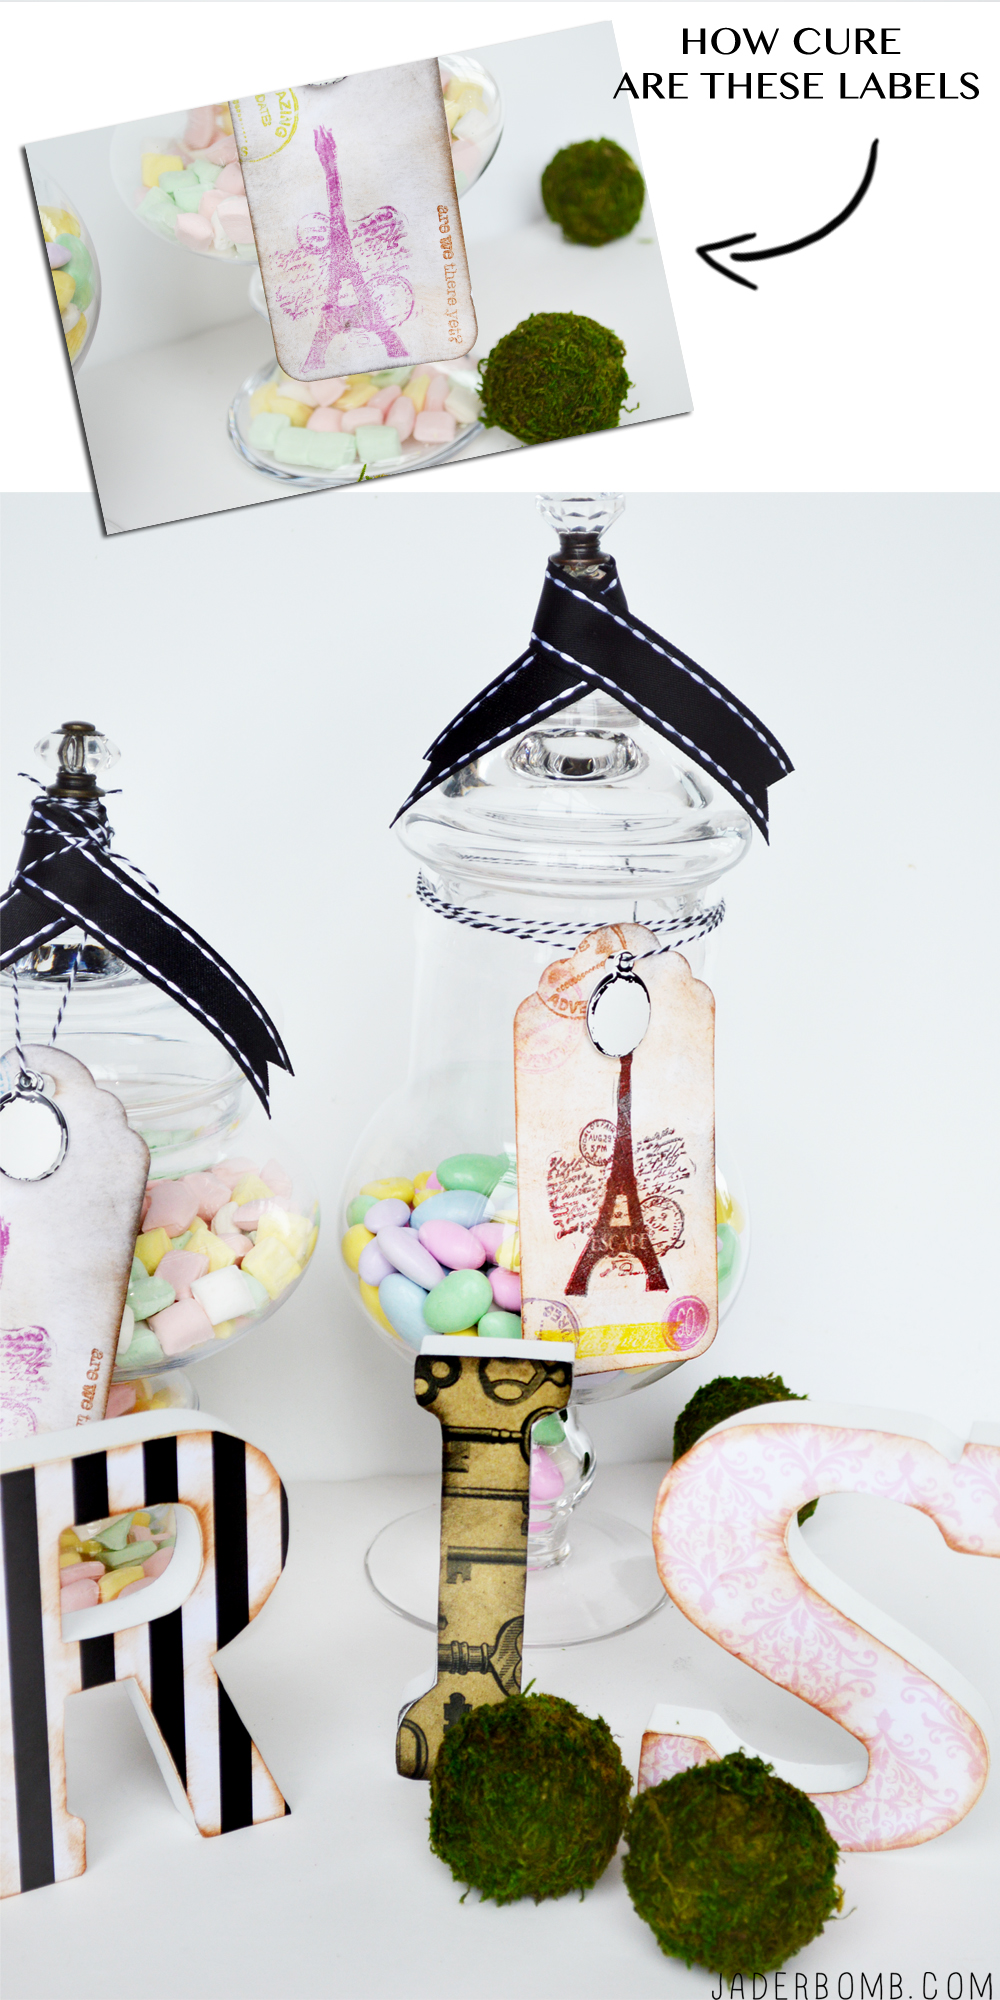
I am truly happy with this project! The ideas are endless. You could spell out TONS of things and have TONS of jars filled with lovely candy and adorable handmade labels. I purchases all of my materials from Michaels and I know you will have a blast doing them!
- Now it’s your turn! That’s right, you can enter to win the trip of a lifetime to Paris too. How? By creating your own Parisian-inspired art, floral, baking or paper crafting project and uploading a photo HERE through March 31. You can also share your project on social using #SpringtimeInParis #Contest
- What do you win? A four-night trip for two to Paris, 1,000 euros, a VIP tour of the Louvre, private classes including sketching, floral arranging, baking and more!
- If you need a little Paris inspiration to get you started, take a look at some of the Springtime in Paris projects on Michaels.com.· Now it’s your turn! That’s right, you can enter to win the trip of a lifetime to Paris too. How? By creating your own Parisian-inspired art, floral, baking or paper crafting project and uploading a photo to https://paris.michaels.com/ through March 31. You can also share your project on social using #SpringtimeInParis #Contest.
HUGE LOVE FROM MY COMPUTER TO YOURS!!!
XOXO, Jaderbomb
Don’t forget to enter the contest too – you can upload to www.paris.michaels.com or share on Instagram using #SpringtimeinParis #Contest beginning on 3/1.
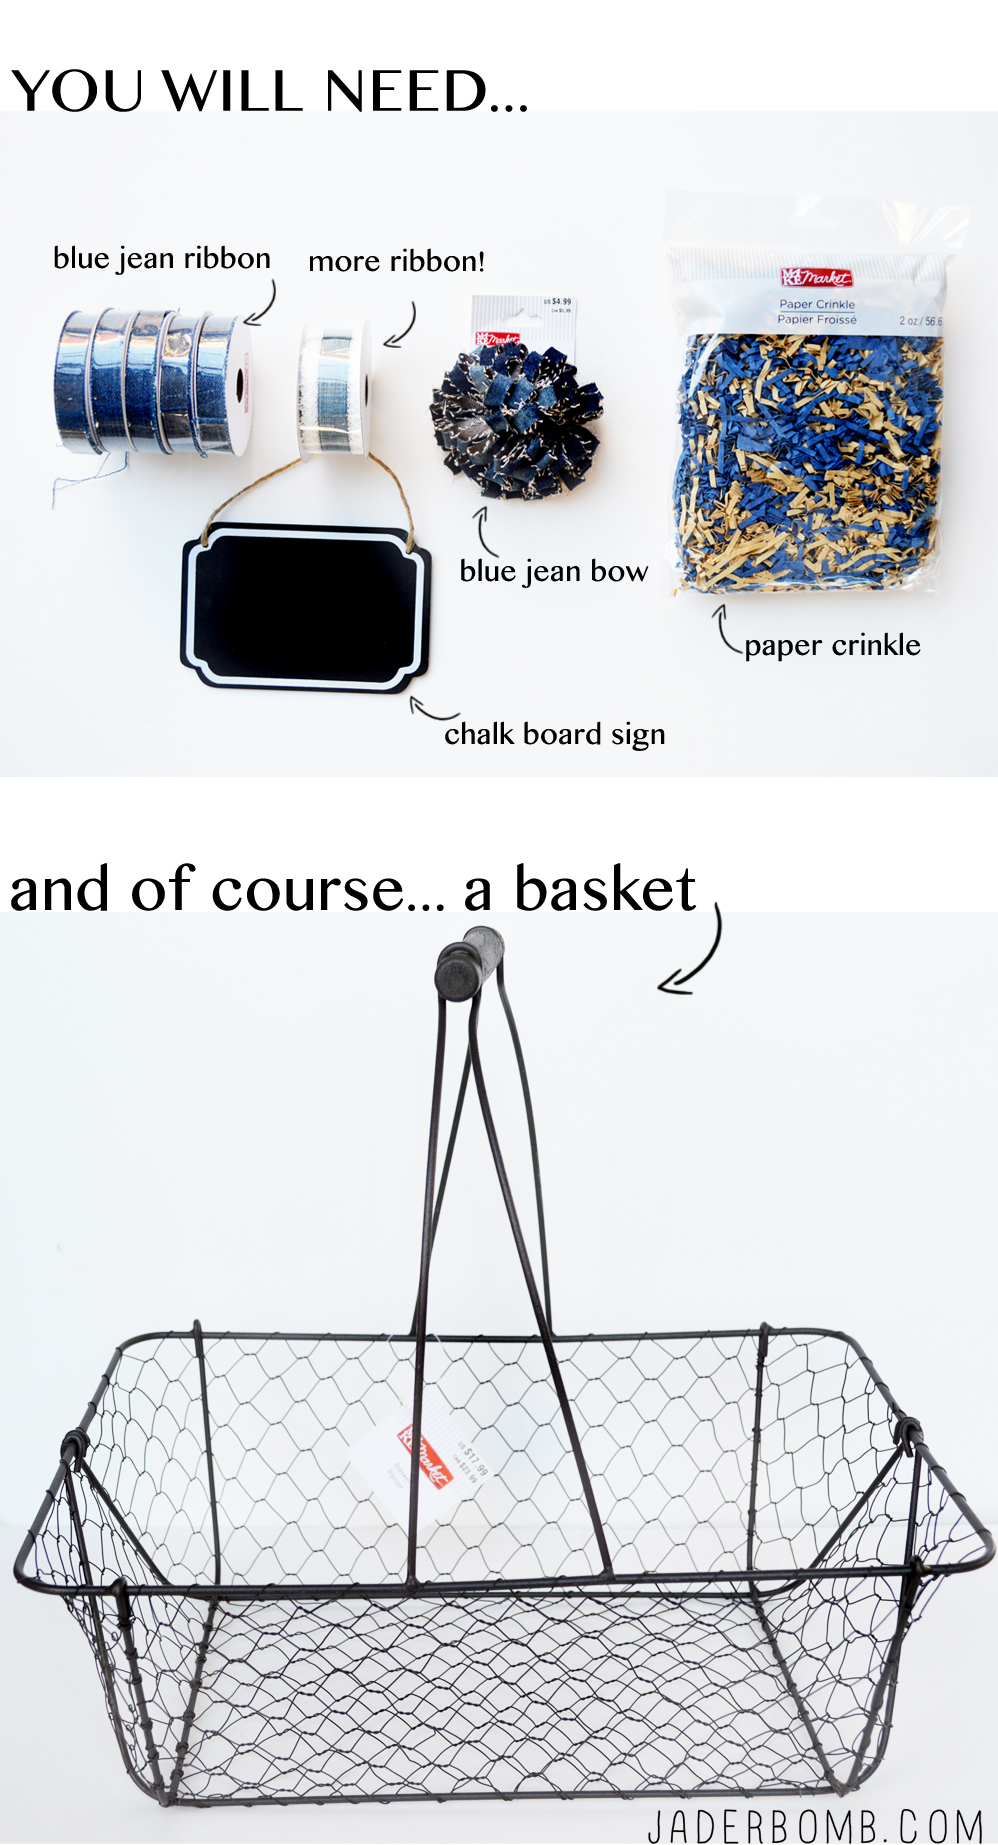
 Happy Monday! I am so excited to share some denim crafts with you today! As a Michael’s Maker I was challenged by my friends at Michael’s to do something magical with their new line of denim products – Make Market. If you have not seen this line yet, now is the time! I can remember the day’s I would beg my friends for their old jeans so I could rip and tear them up. I used to always use denim and let me tell you this makes things NICE!
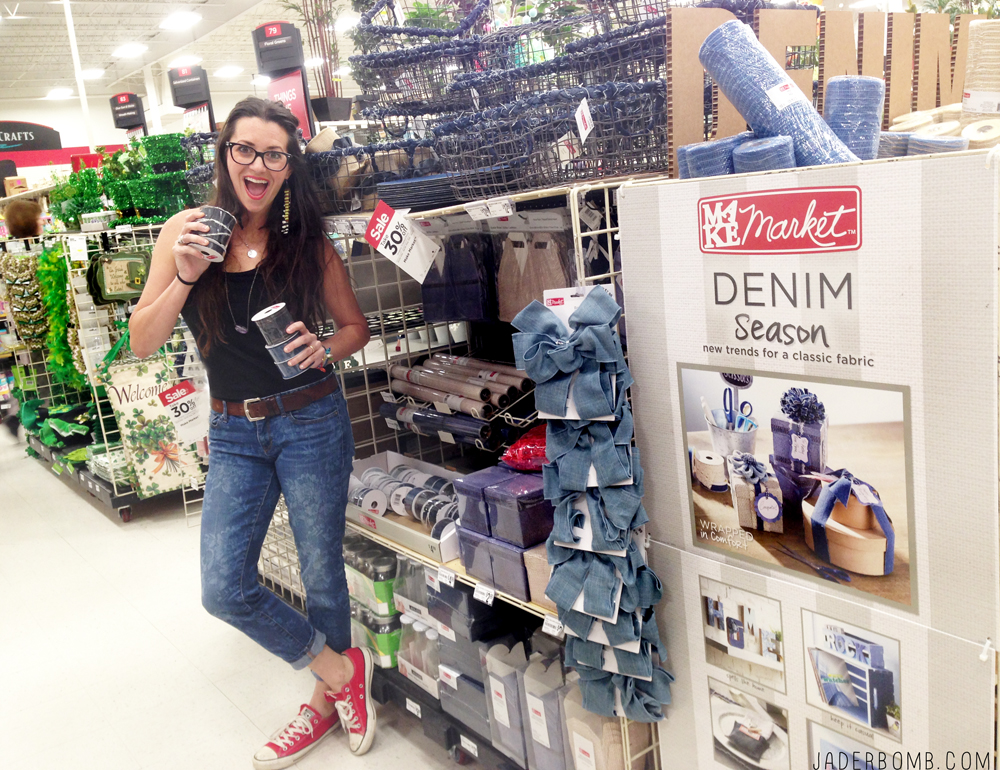
 & and chicken. If you don’t have a chicken or fresh eggs you can still make this basket and use it for decoration or fill it with goodies and give to someone as a gift.
 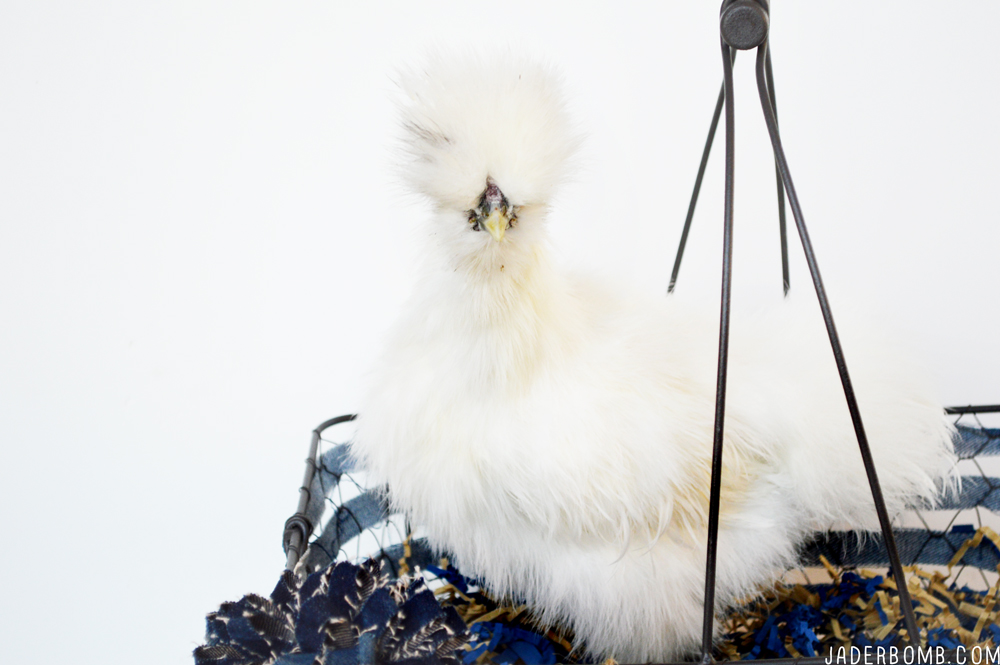 I simply love this ribbon. I would be a little happier if they made some with adhesive backing! I mean then I could stick them on practically everything!
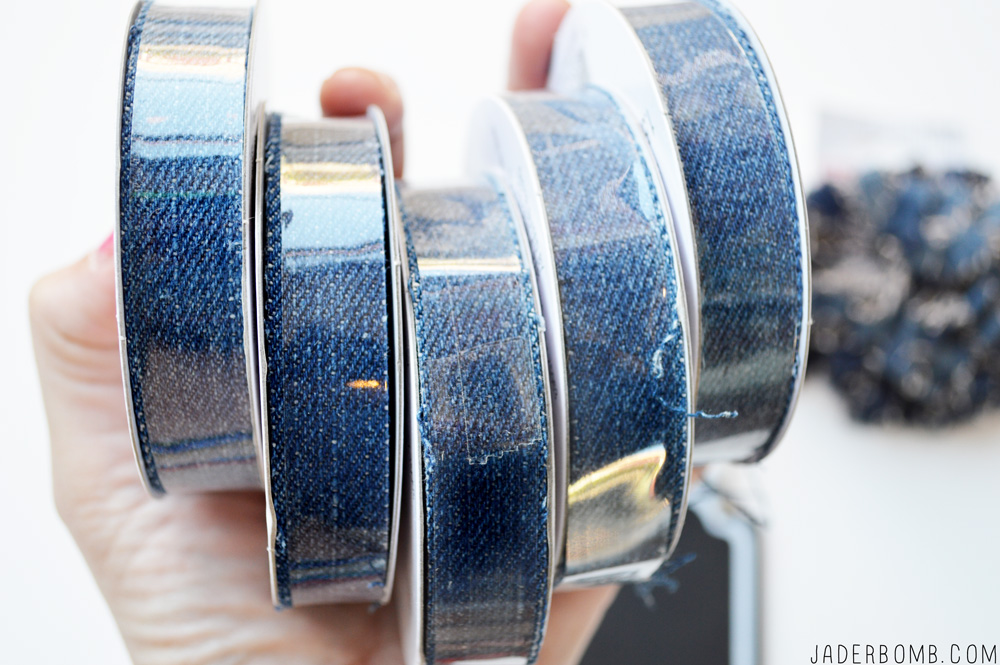 Step 1: Open a pack of ribbon and start on a corner, weaving the ribbon over and under the openings. It’s truly simple but time consuming.
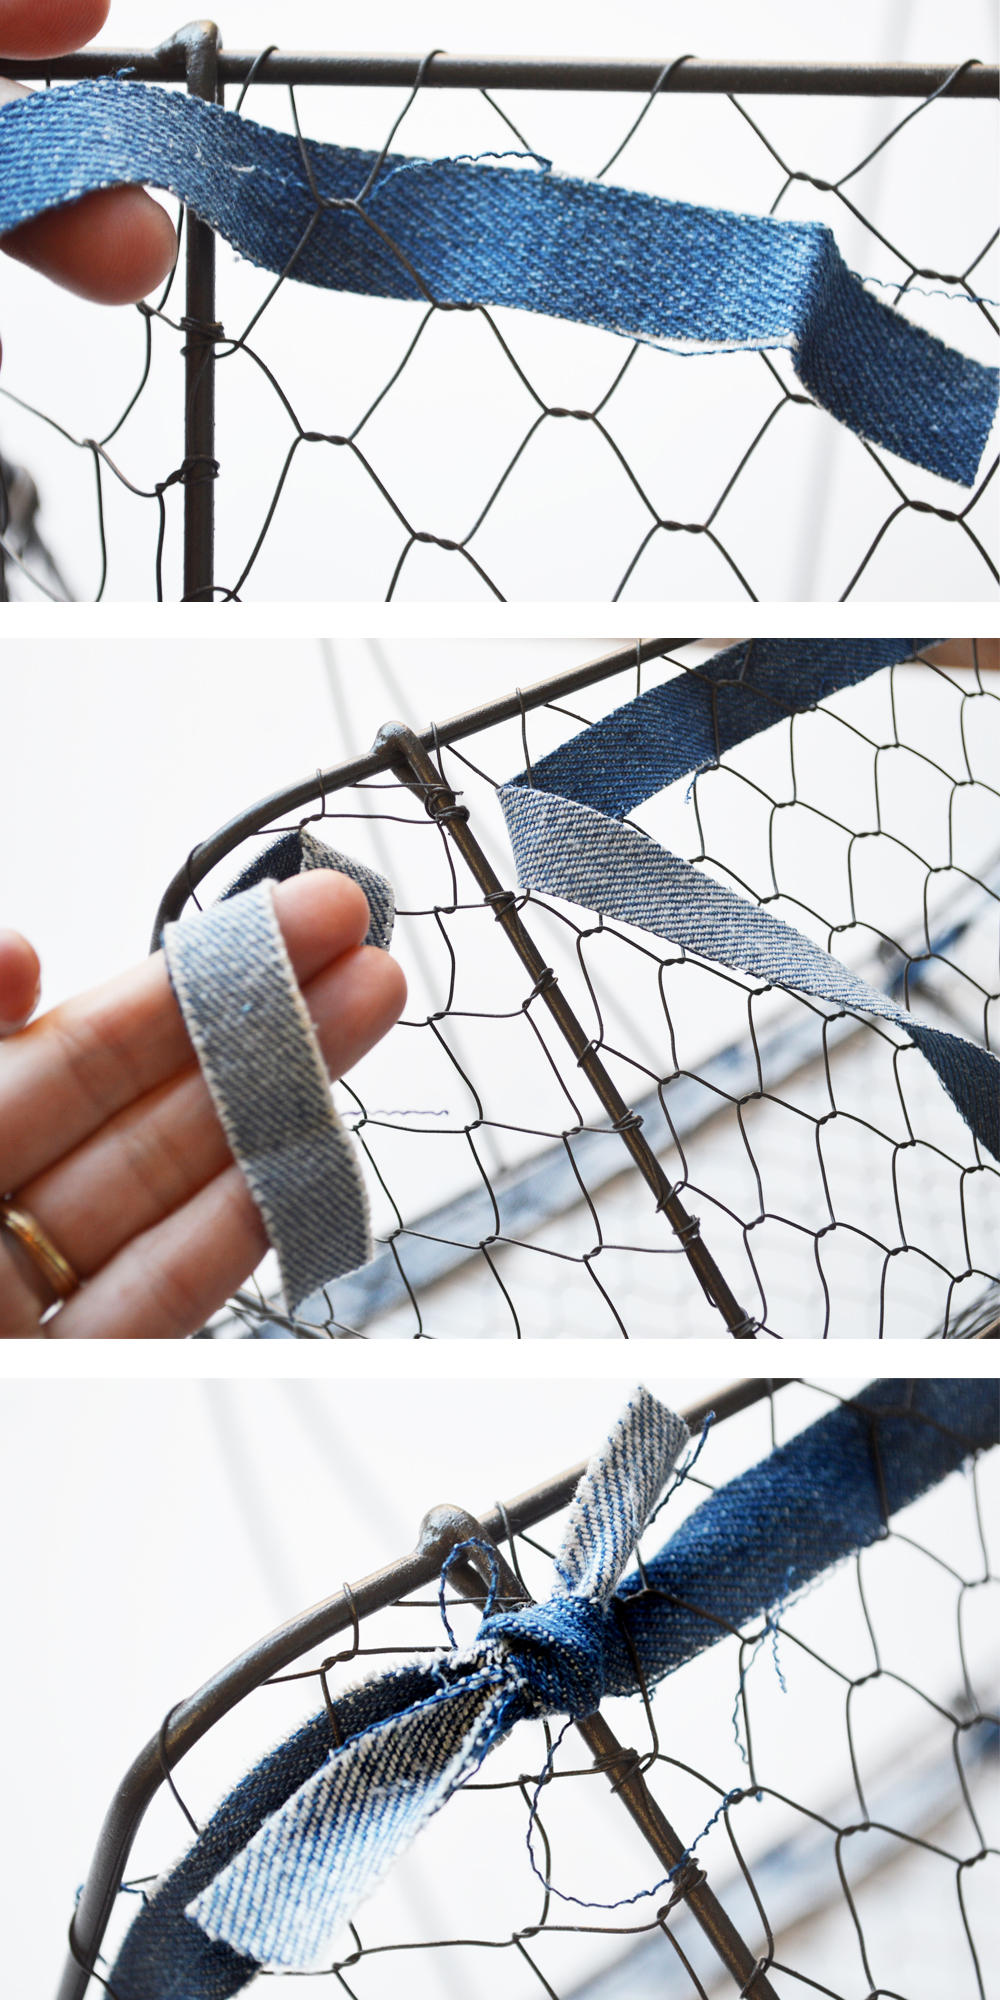 Once you get your first stripe start with your next one. You will start seeing the stripes appear and then…you will start to fall in love!
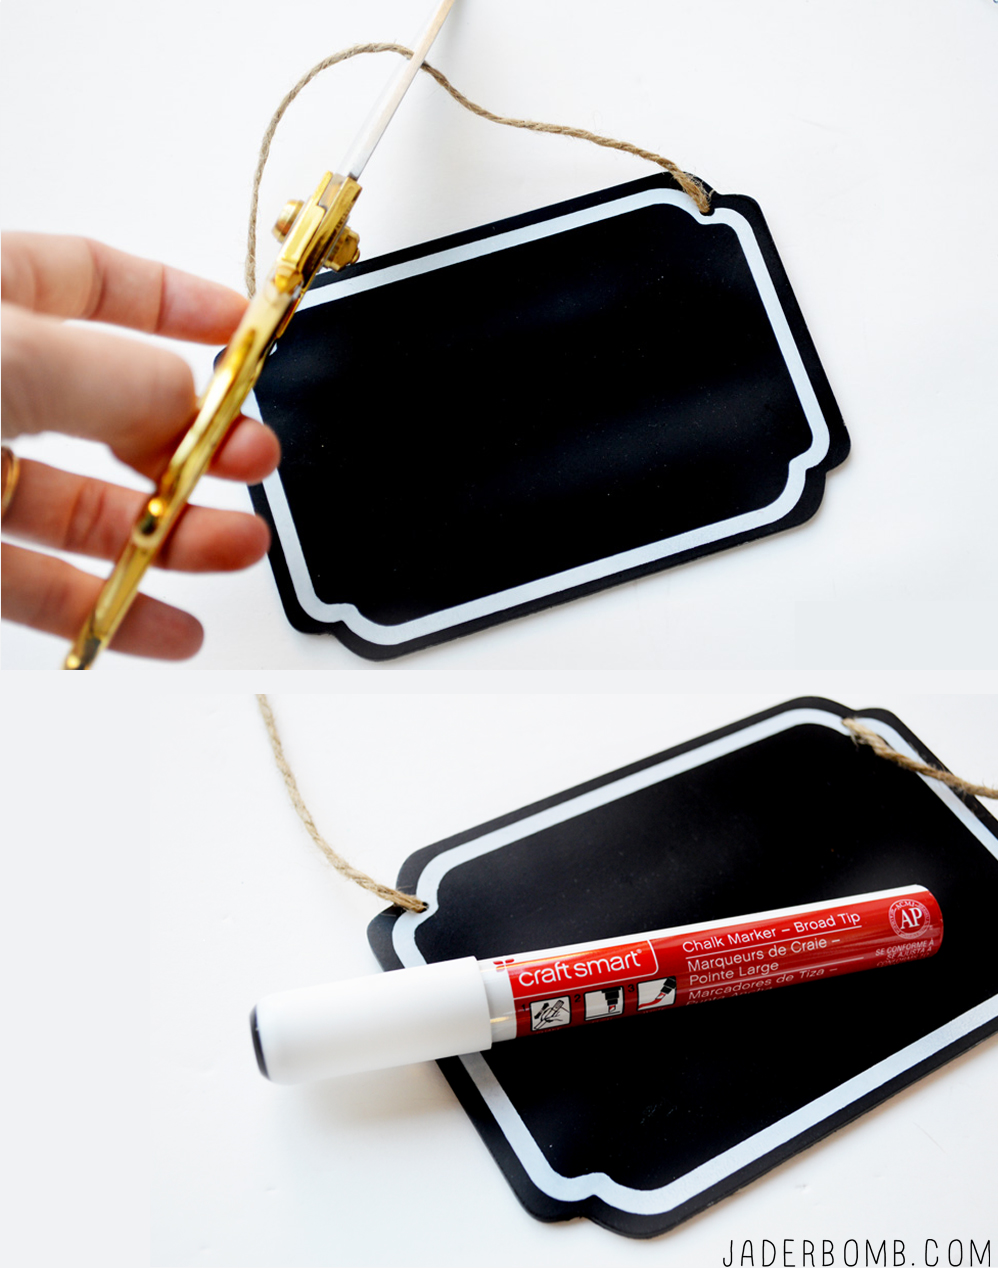 I bought this fluffy blue jean ribbon to add to the front of the basket. I love that it’s a clip. I can take it on and off and use it for other projects!
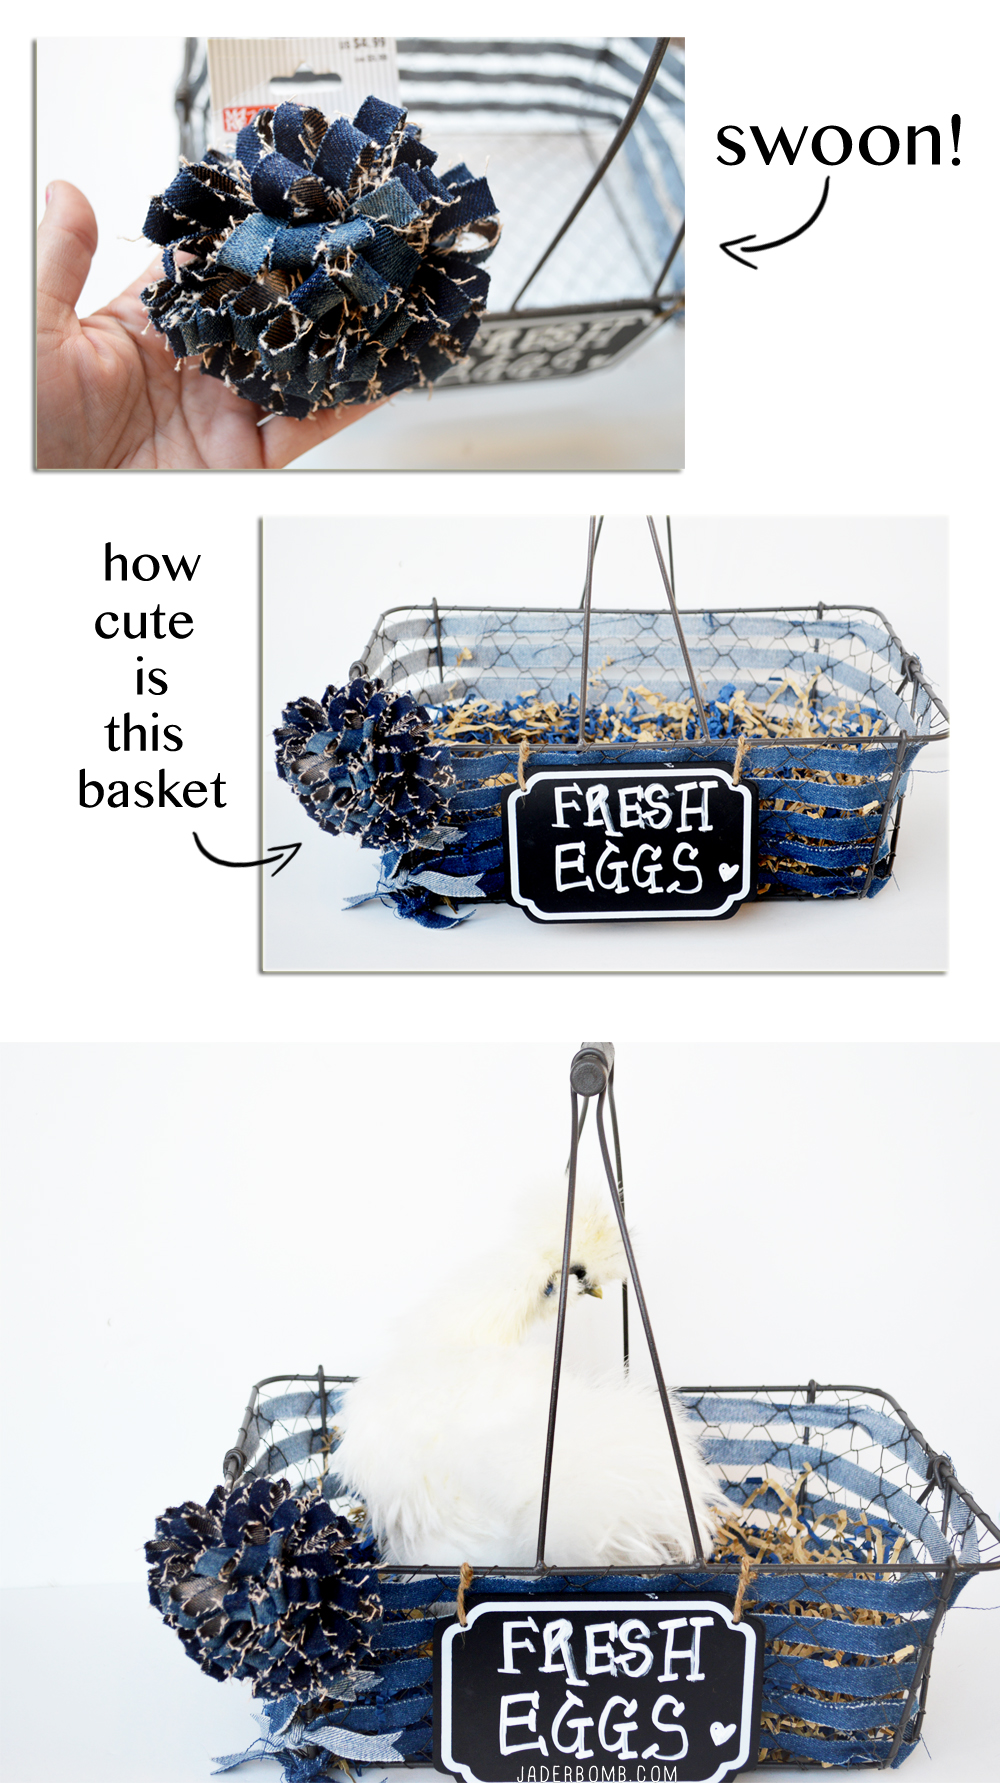 To make the chalkboard -n- denim planter: purchase a chalkboard pot or paint one and grab some denim -n- lace ribbon. Cut a piece and tie around the top of pot! Grab your chalk marker and write your message on the pot!
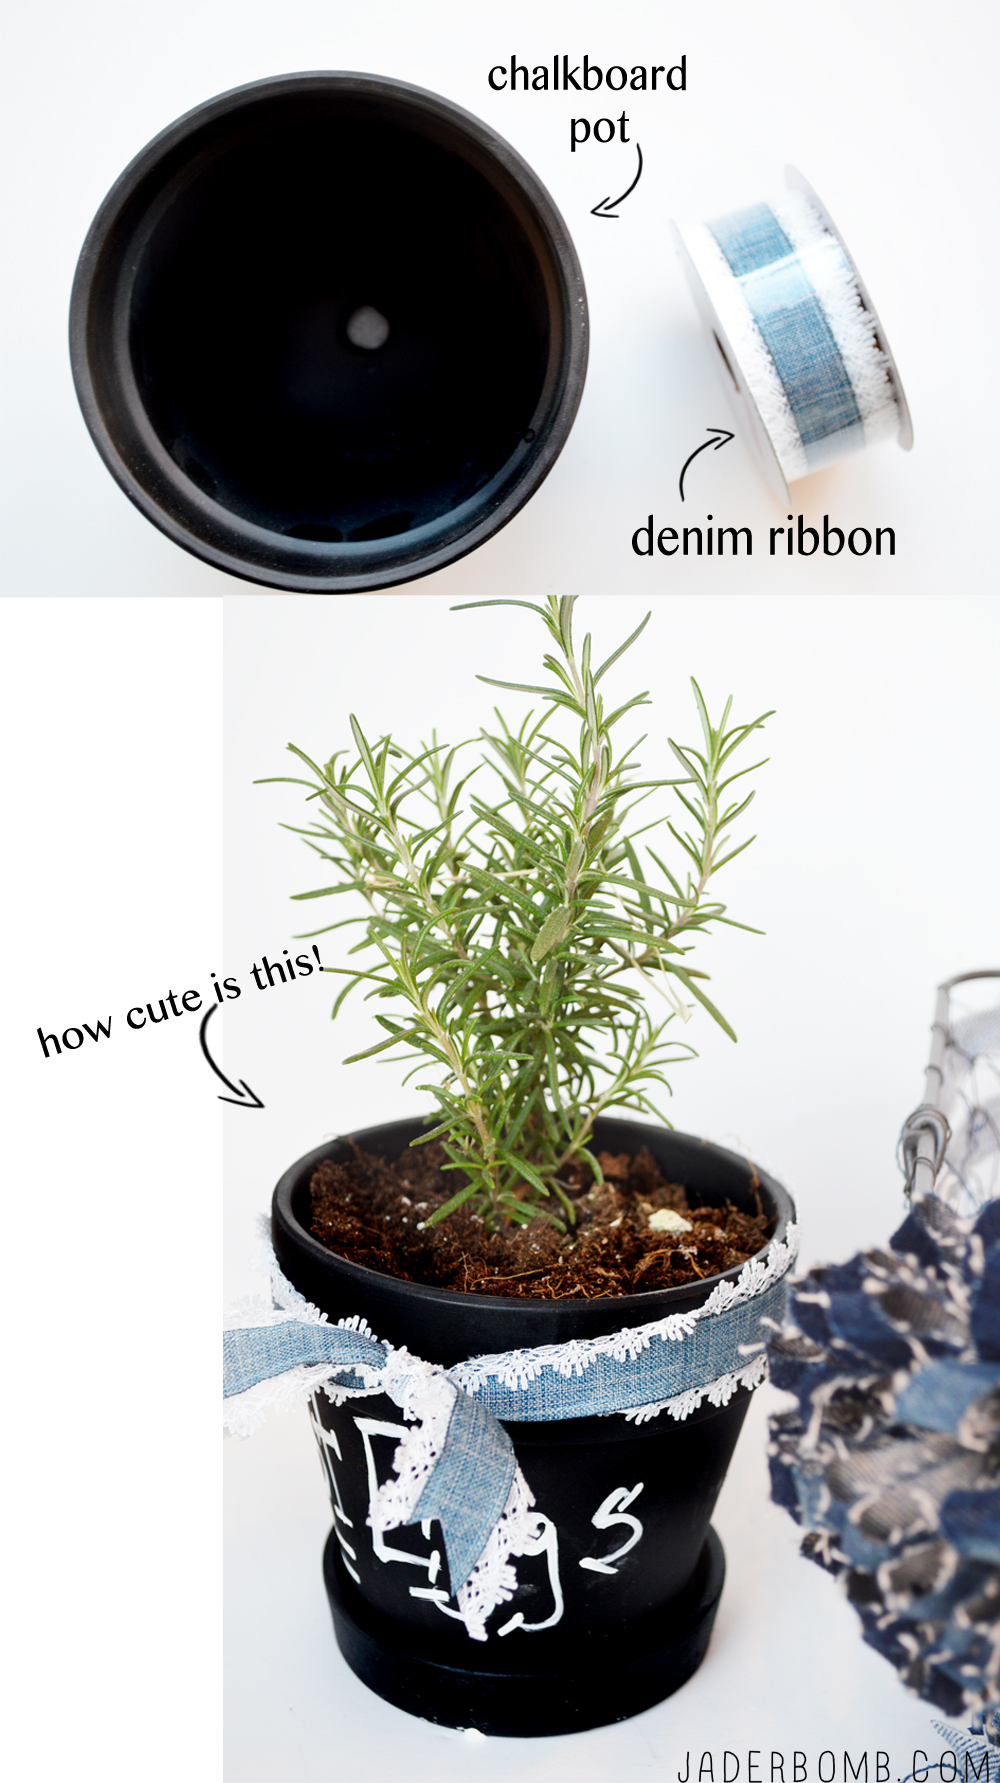
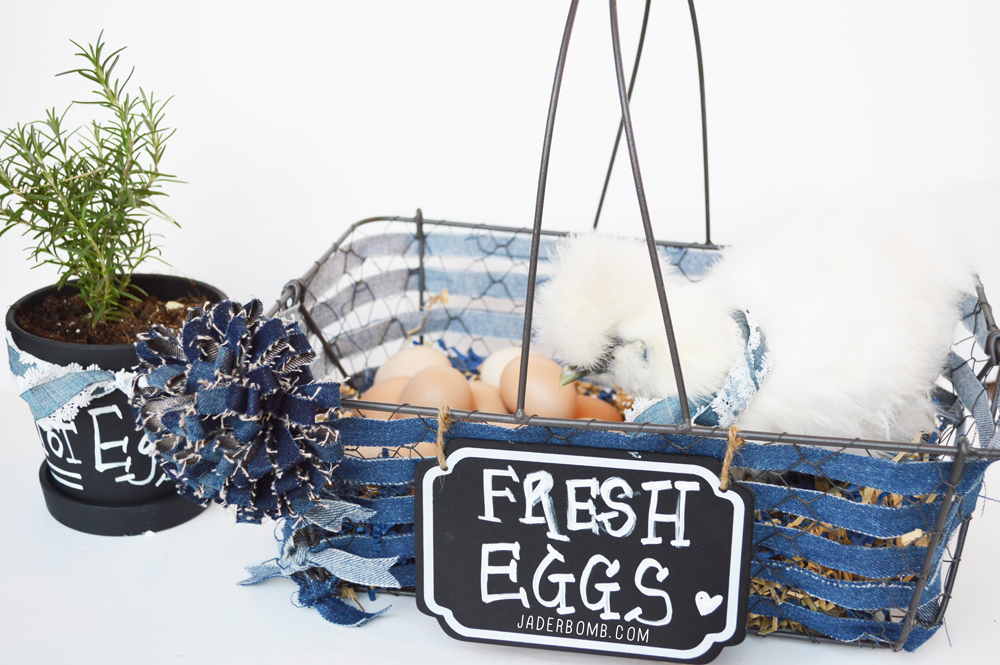 Voila! It’s all done. You now have your magical denim basket to gather your eggs or goodies in. You know… This would make a GREAT EASTER BASKET.
 ♥Make sure to check out these