Author Archives: jaderbombllc

About jaderbombllc

I am a Southern DIY blogger and Designer known for fearlessly conquering anything and everything do-it-yourself. I aim to create unique designs by working through my thoughts, dreams, emotions, and tons of glitter! I believe in doing things that make my heart flutter and smile, and I live by my motto, “Life is simple and so should your style.” To learn more about me, visit jaderbomb.com or email me at [email protected]. You can also visit my Etsy shop at jaderbomb.etsy.com. Make sure to check out my FREE PRINTABLES site www.freeprettyprintables.com My biggest accomplishment thus far is being a guest on the Martha Stewart show, yes she smells good. I love my dog Ceaux Ceaux, pens,the smell of Christmas, GOLD, Dr. Pepper and blogging. BTW: I bleed glitter, all shades.

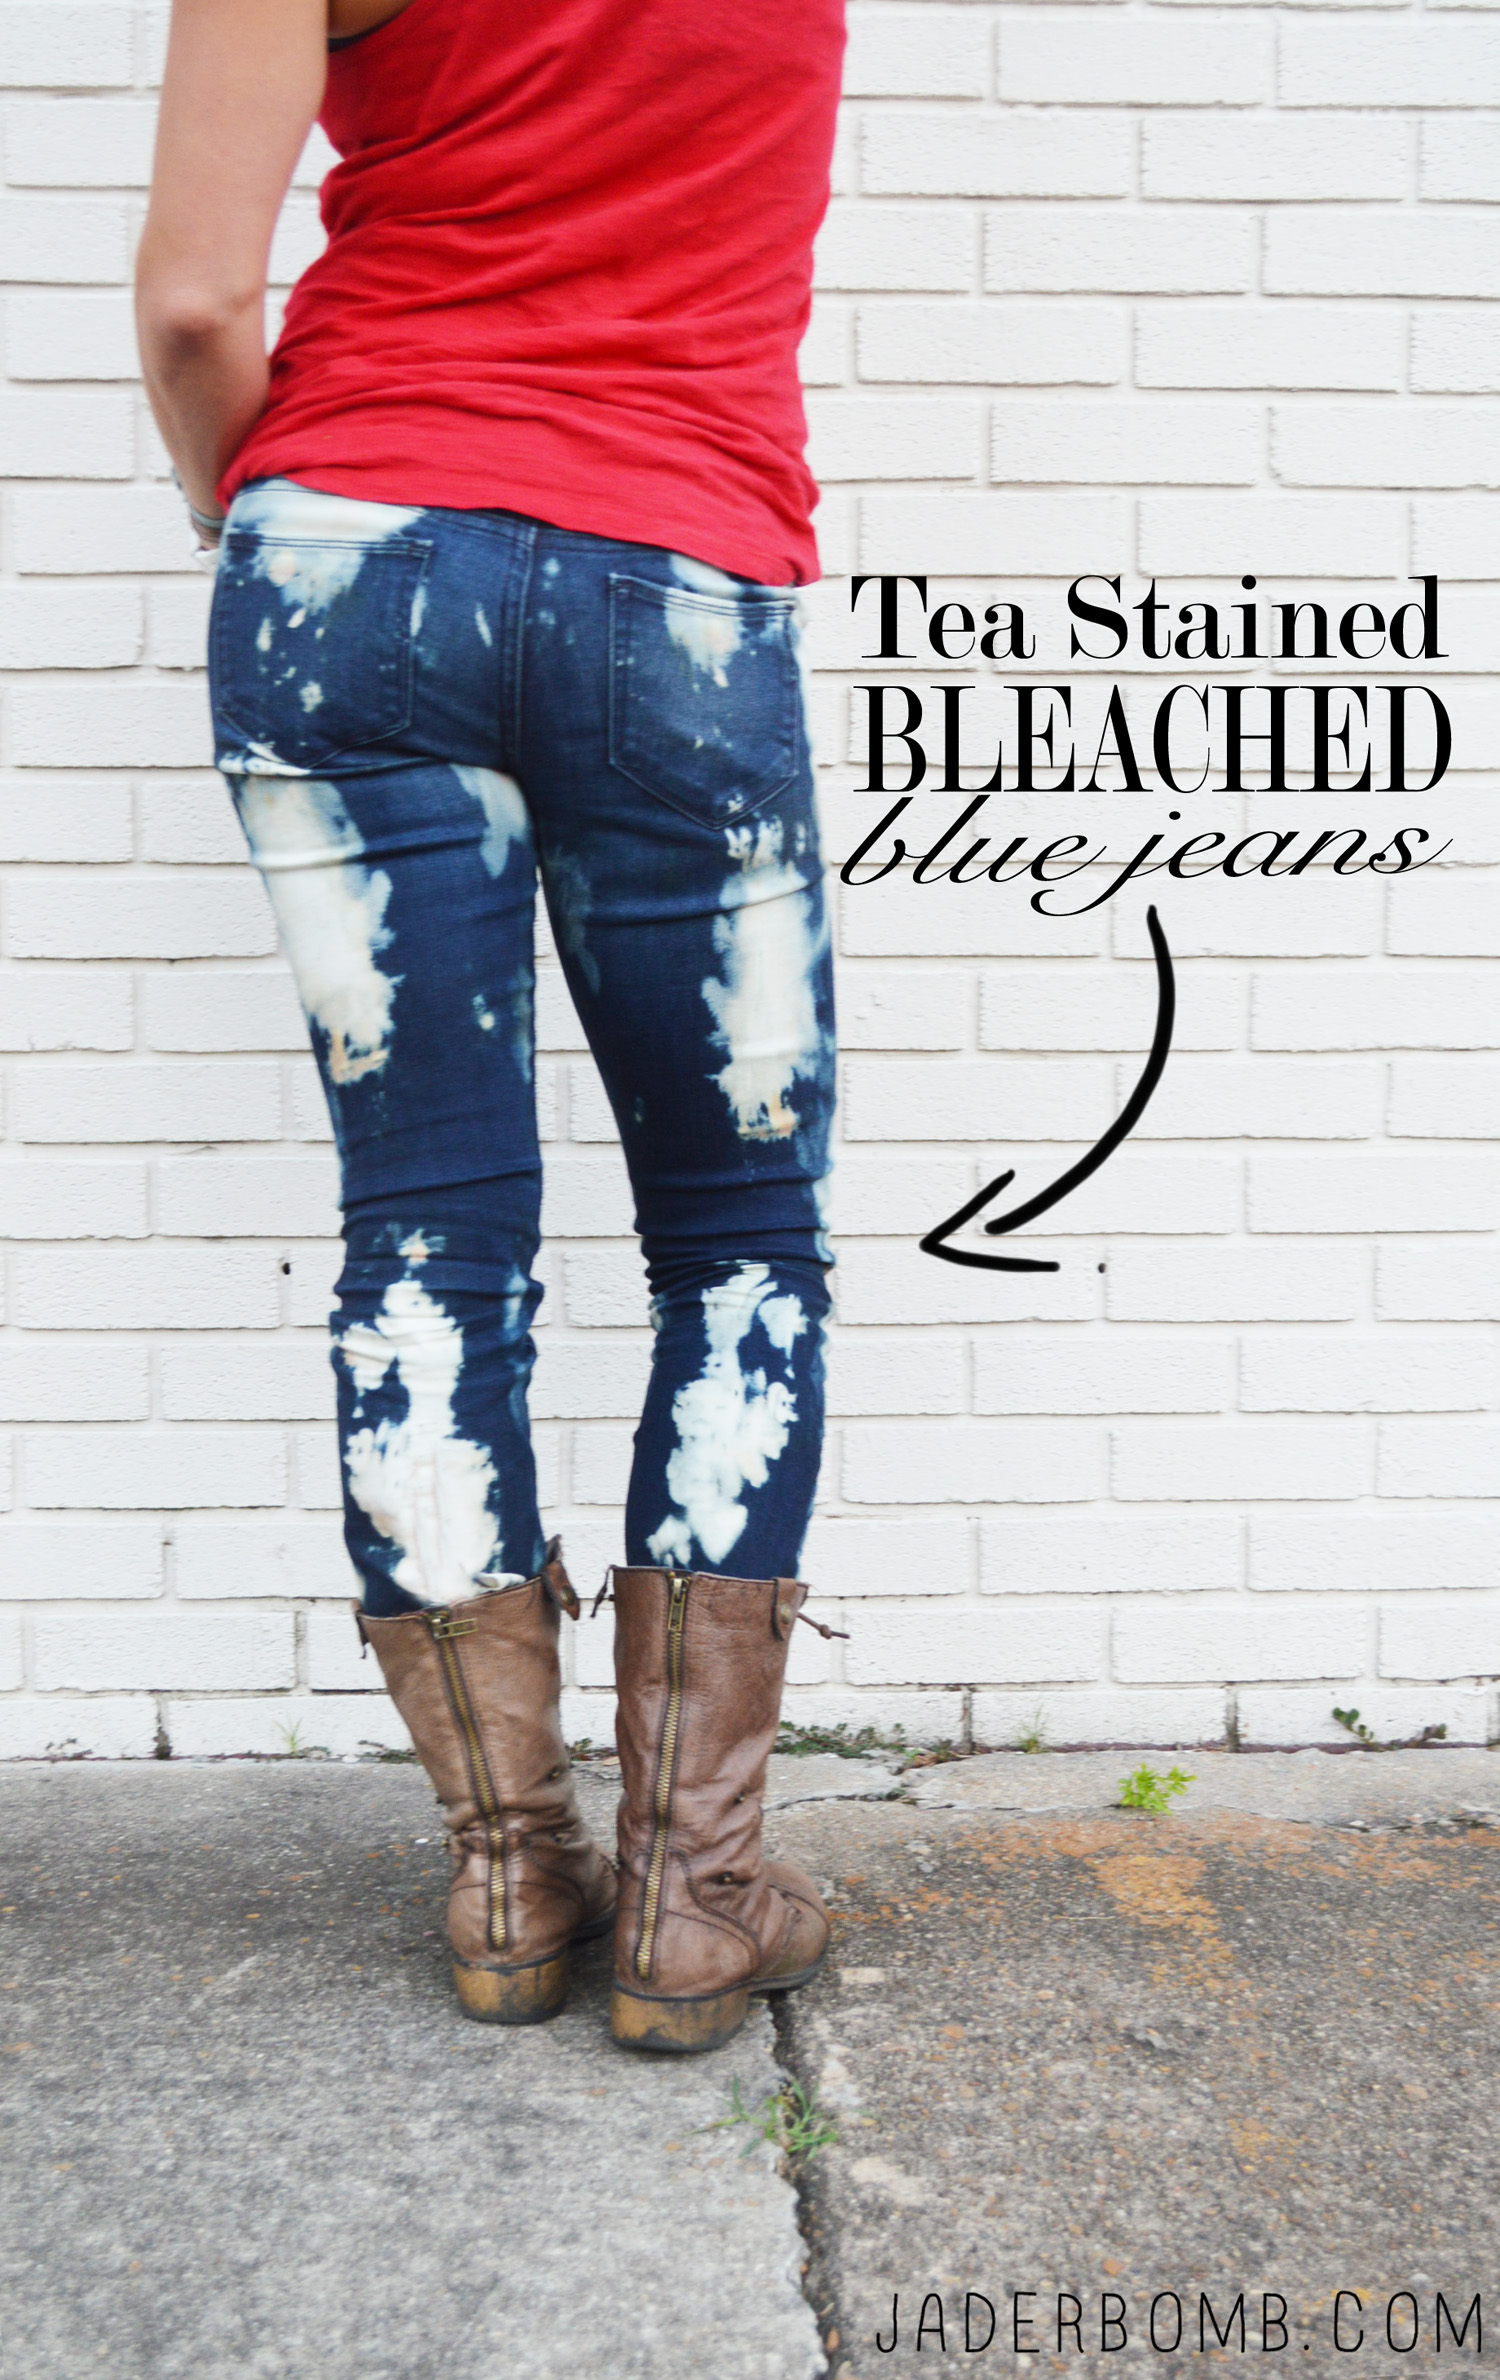
What the BLEACH? Today I we are making “Tea Stained Bleached Blue Jeans”!!!  I know these days all of the cool kids are wearing bleached jeans and shirts so I figured I would add my own little touch to some! You all know one of my favorite brands I work with is I Love to Create and they have this amazing new tie dye color called “Tea Stain”…. I know! Check how Martha Stewarts visit to Louisiana! ALSO! You can still enter the Michael’s sweepstakes to win MOOLAH!

Now we don’t have to use up all of our tea bags to stain anything. I wonder if there is a ketchup dye because I seem to always drop that dagumm stuff on my clothes.
Tea Stained Bleached Blue JeansYOUWILLNEED
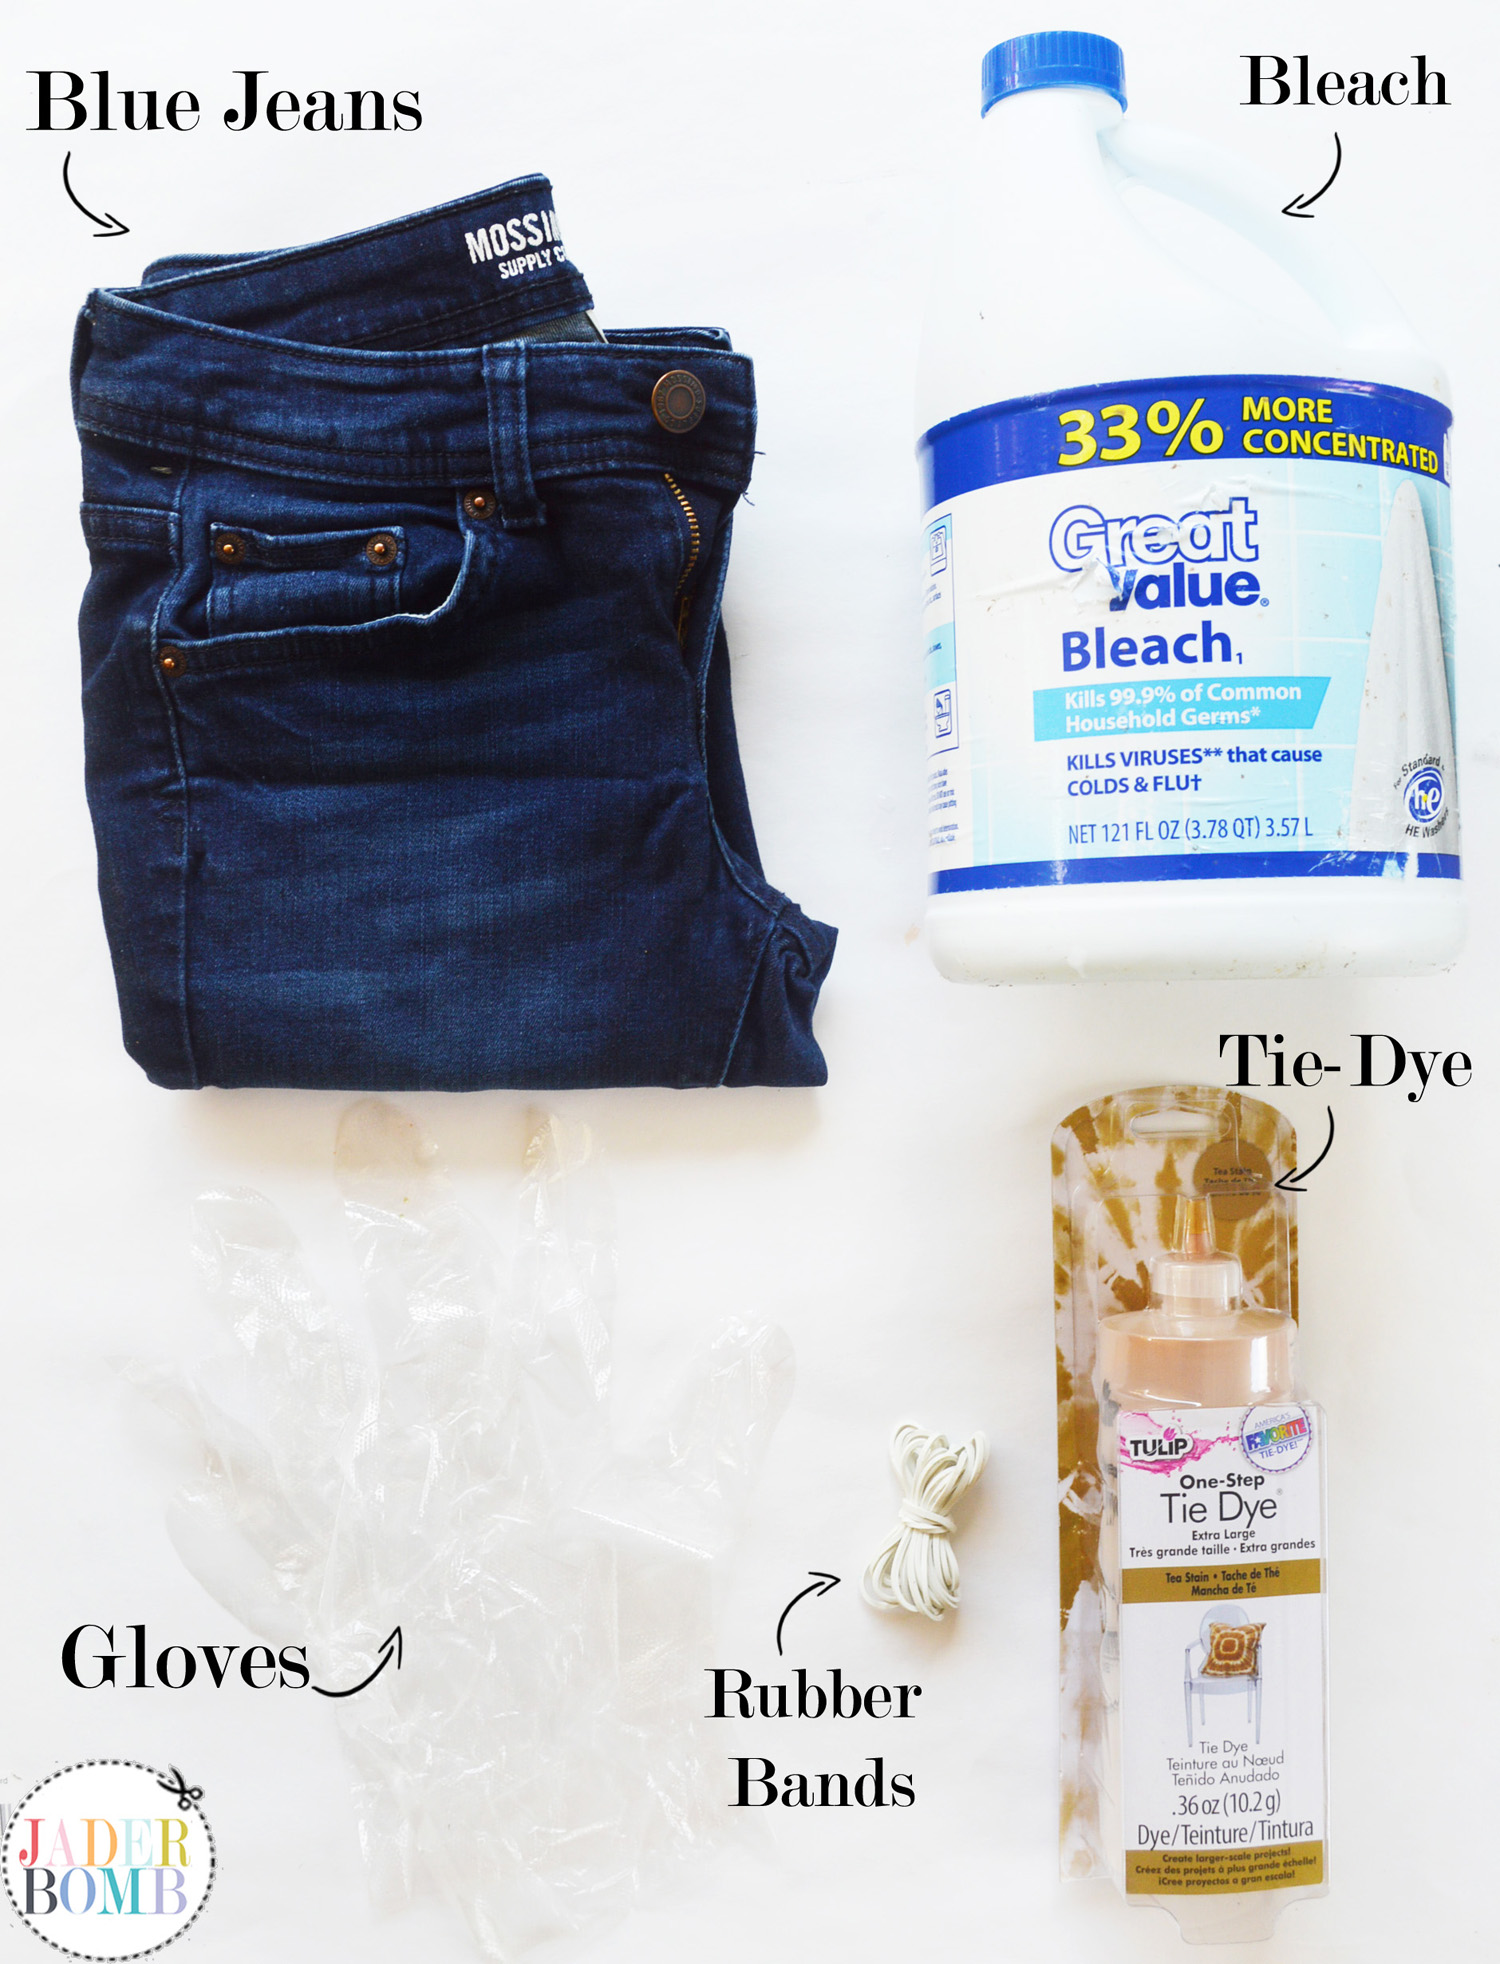
Blue Jeans | Bleach | Gloves | Rubber Bands | Tie Dye 

If you don’t have any of the products I used in this project you can click on the links above and order them all from one spot! Yes, they are affiliate links so thank for helping me buy tons and tons of glitter to put more smiles on your face!
bleachedjeansupplies
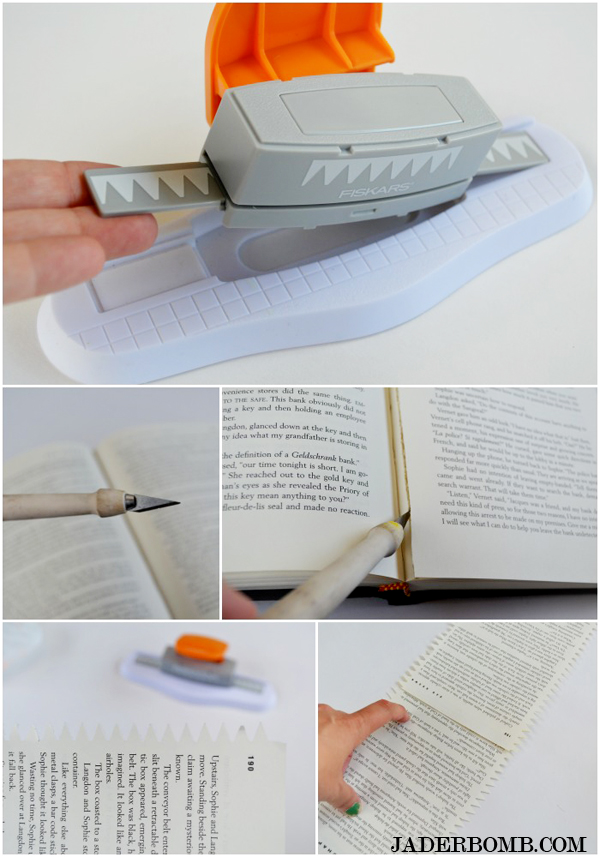
1. Wrap your jeans in rubber bands from top to bottom then pour strait bleach directly on top of the rubber bands. bleached clothes diy2. Let them sit for a few hours in the sun. They will start to get orange then white. It all depends on the color of your actual jeans. white blue jeans diy
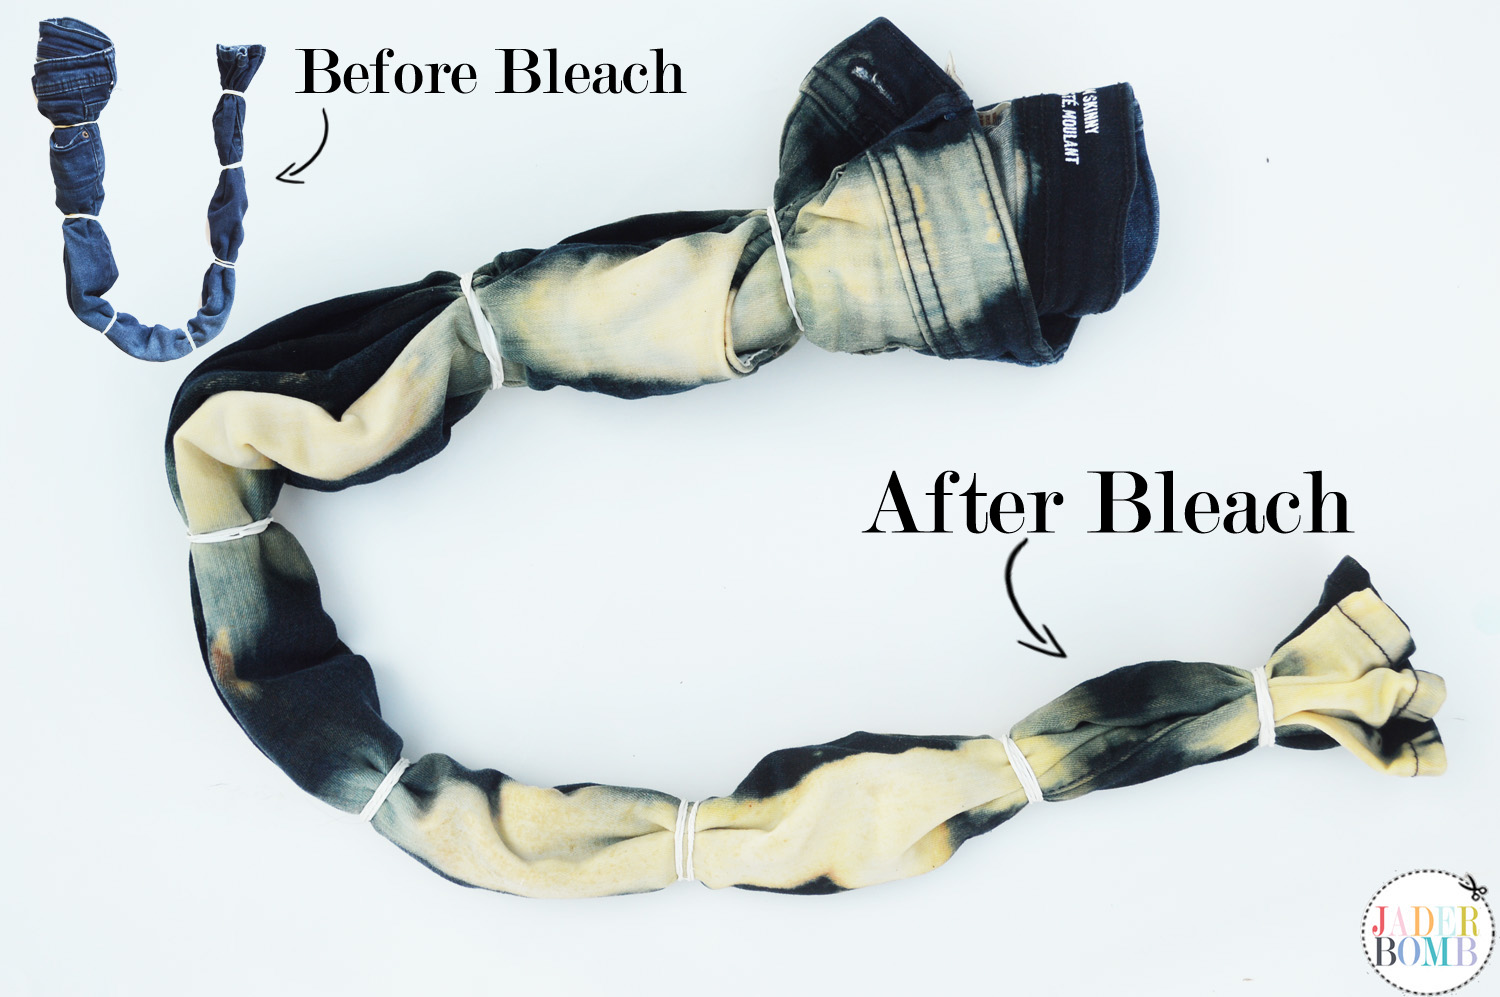
3. Fill your bottle of tie dye with water, to the line. Pretty simple!how to use tie dye

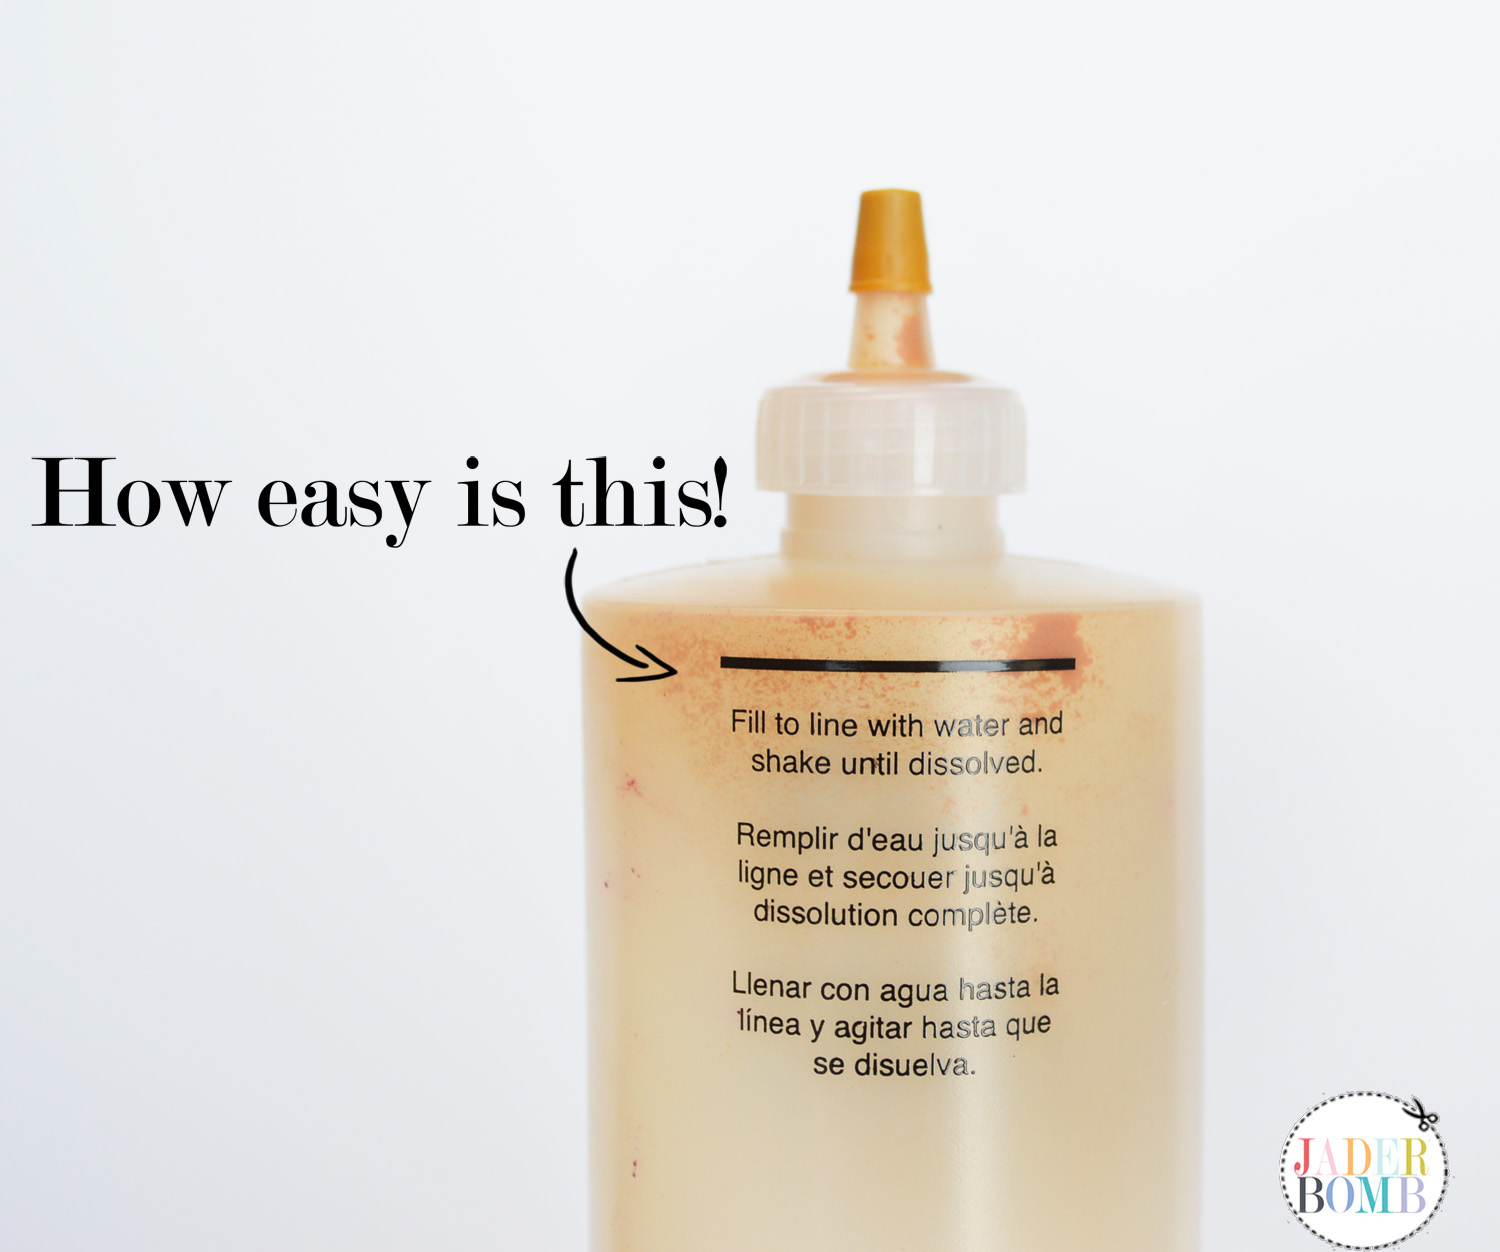
4. You have to mix really good because the powder settles on the bottom and it needs to be completely dissolved. one step tie dye diy

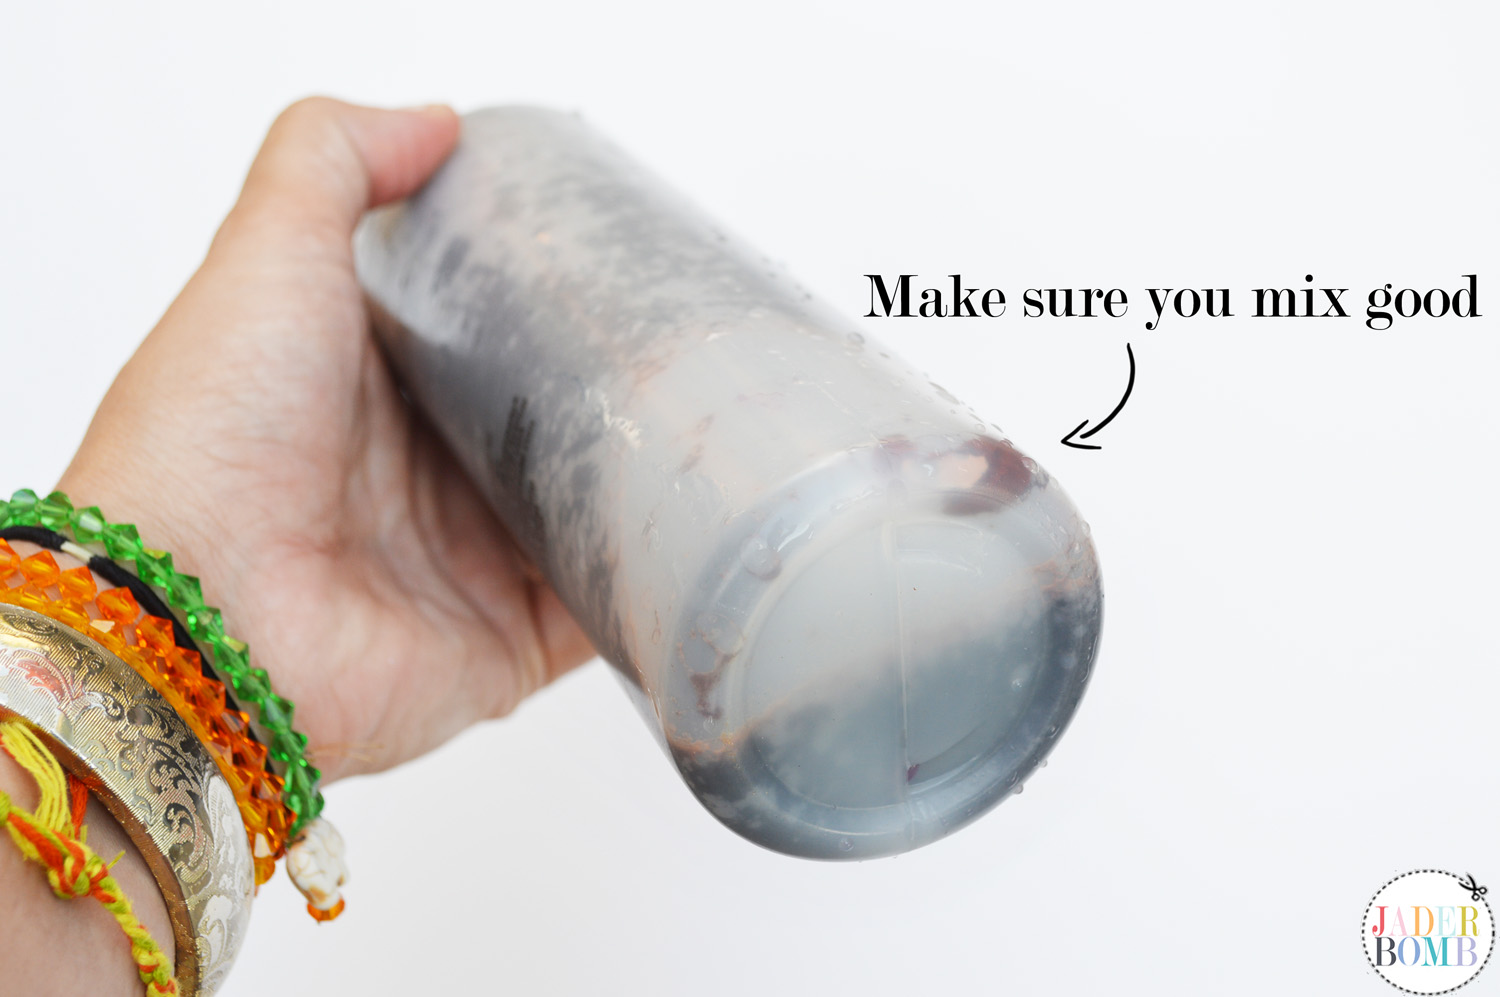
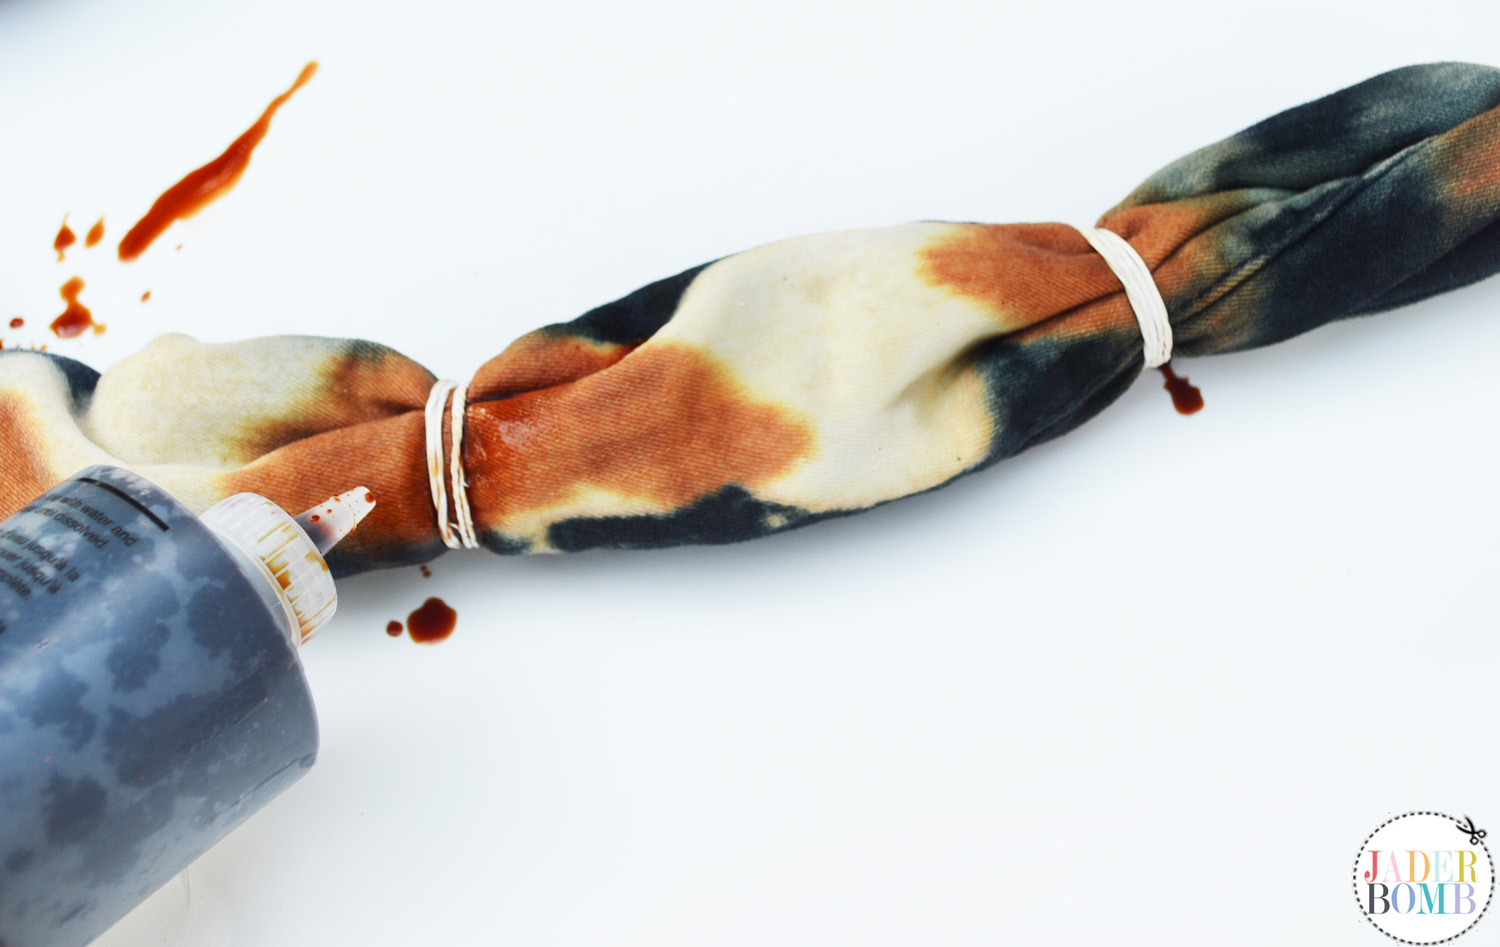
5. While your jeans are still wet with bleach start applying the tie dye liquid directly on top of bleached areas. If you put too much then pour a little bleach on top of dye. how to dye jeans diy

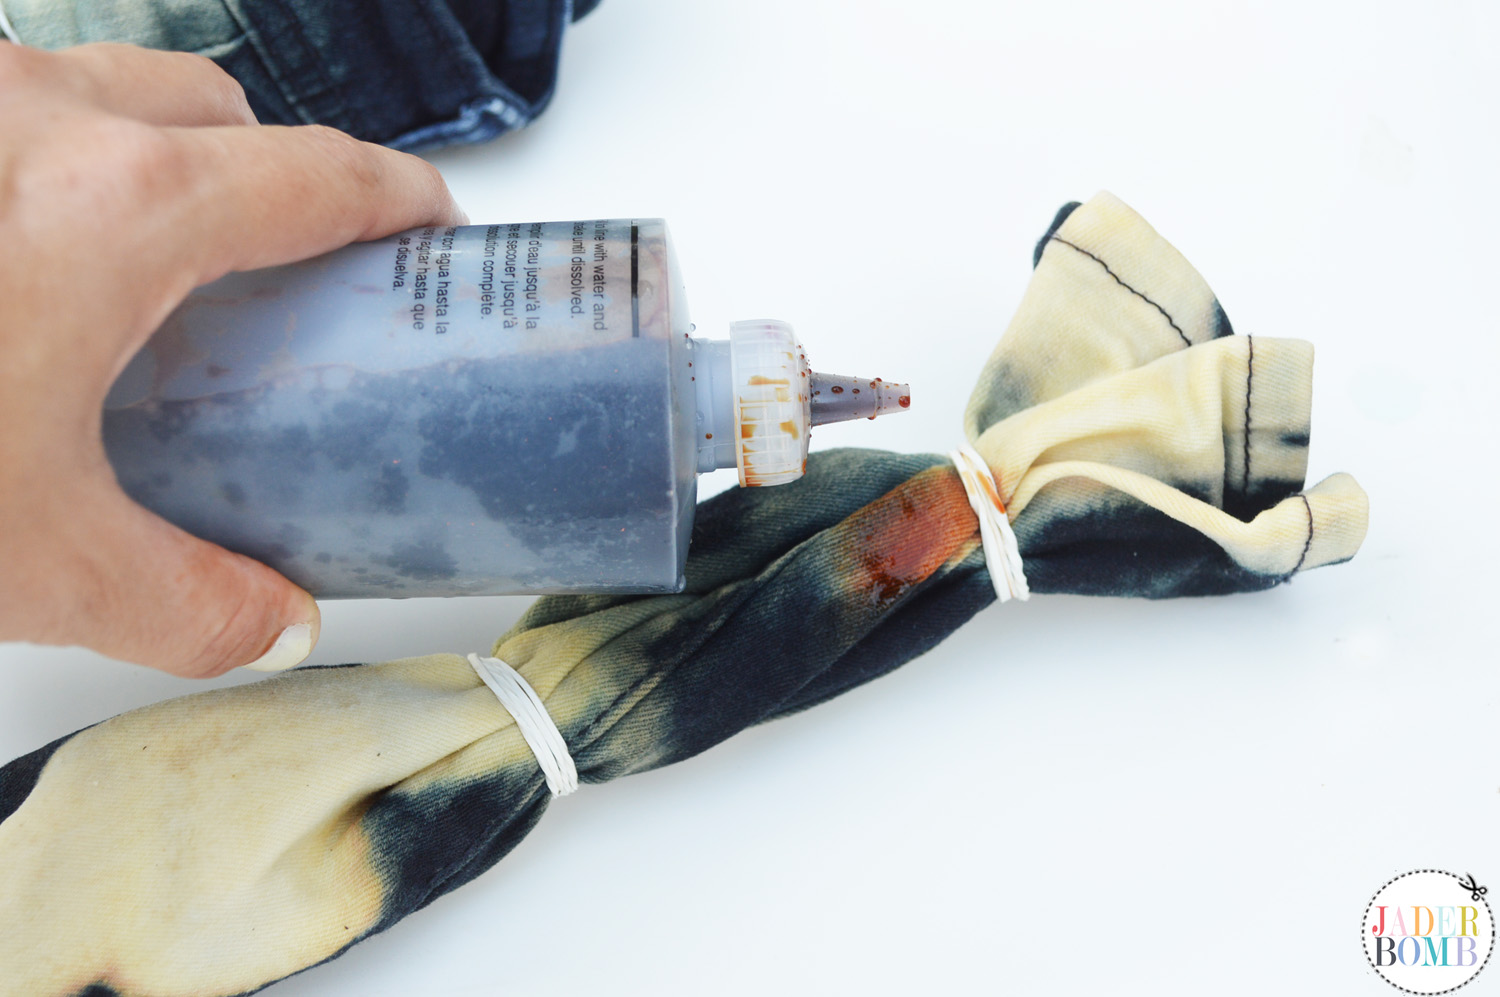
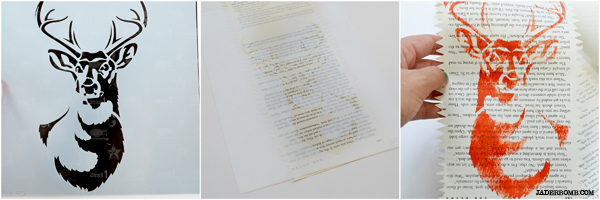
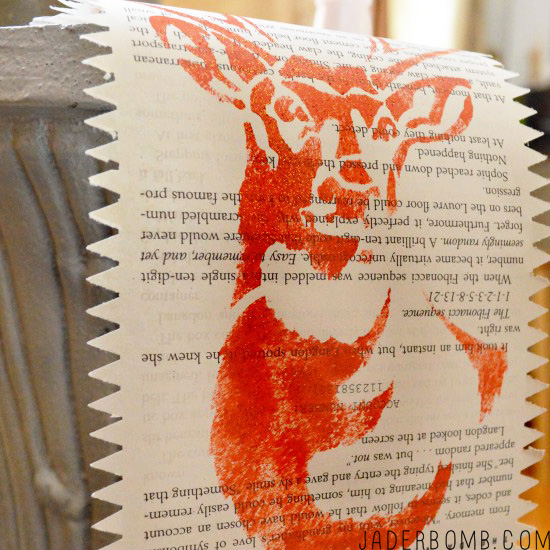
This is what it will start to look like. I am loving this vintage look already!
easy tutorial on bleaching jeans

6. When you are happy with your jeans put them in a plastic bag for a few hours or overnight. bleached jeans
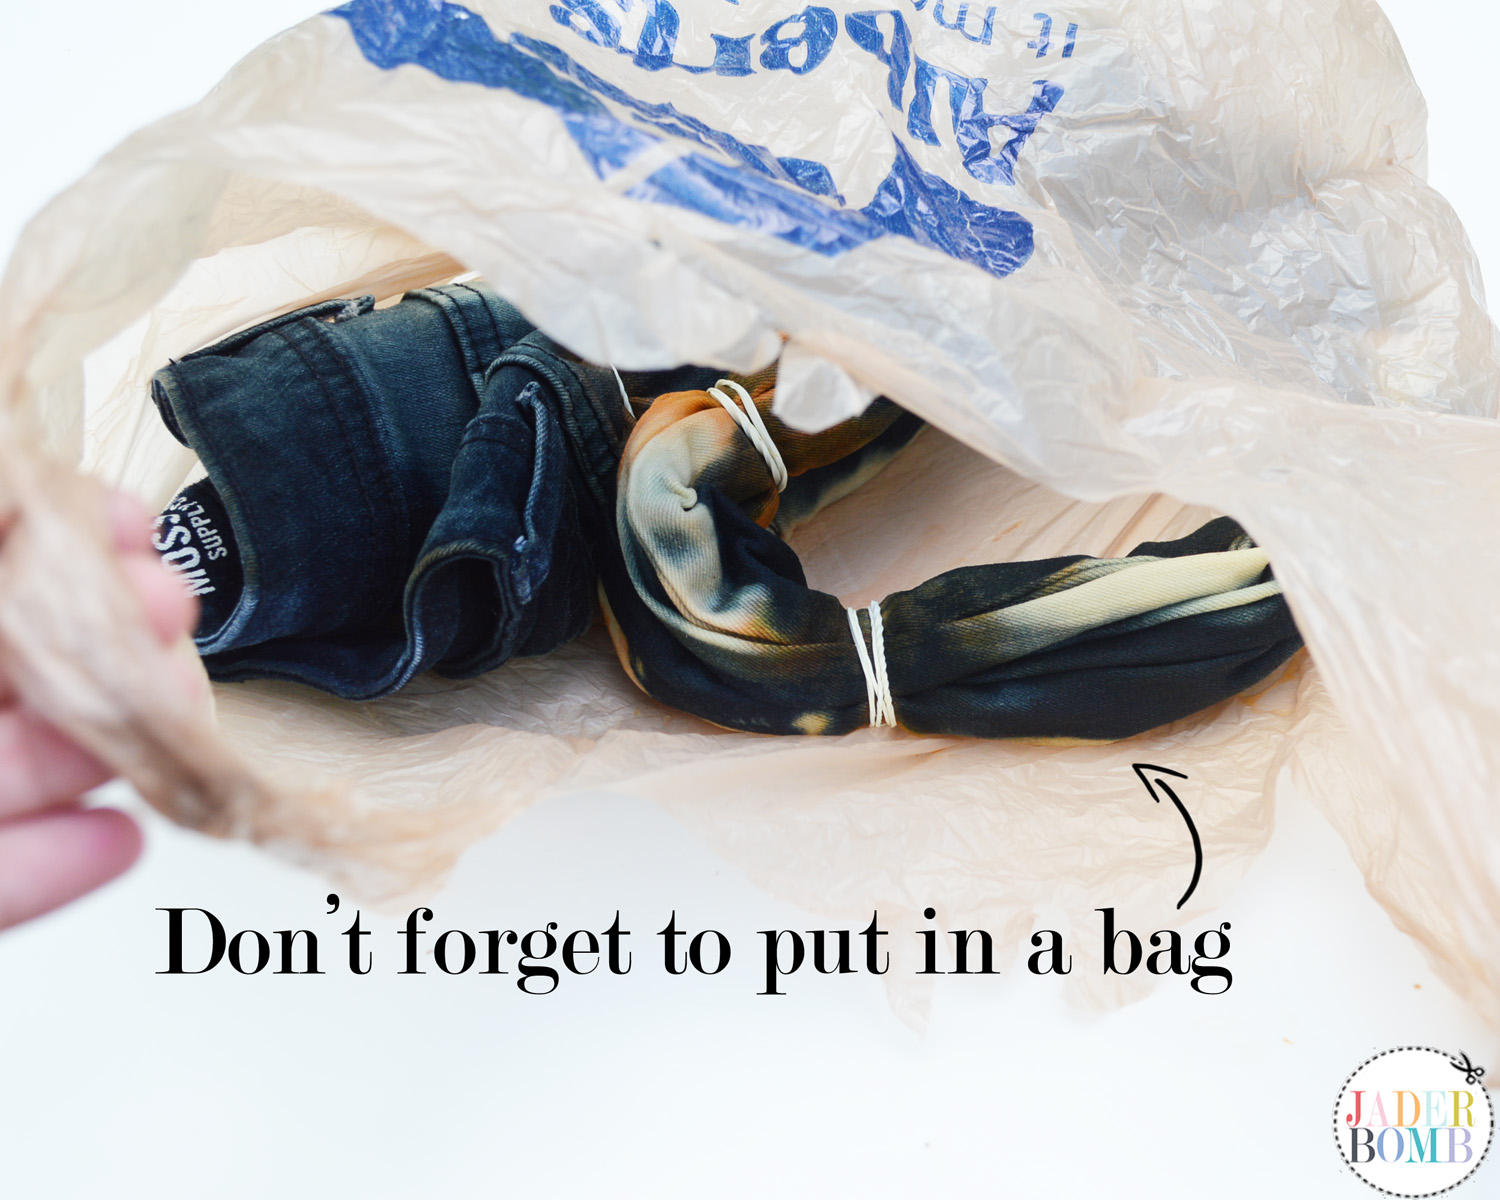
This is what they will look like when you take them out of the bag. I am in LOVE!tea stained jeans diy

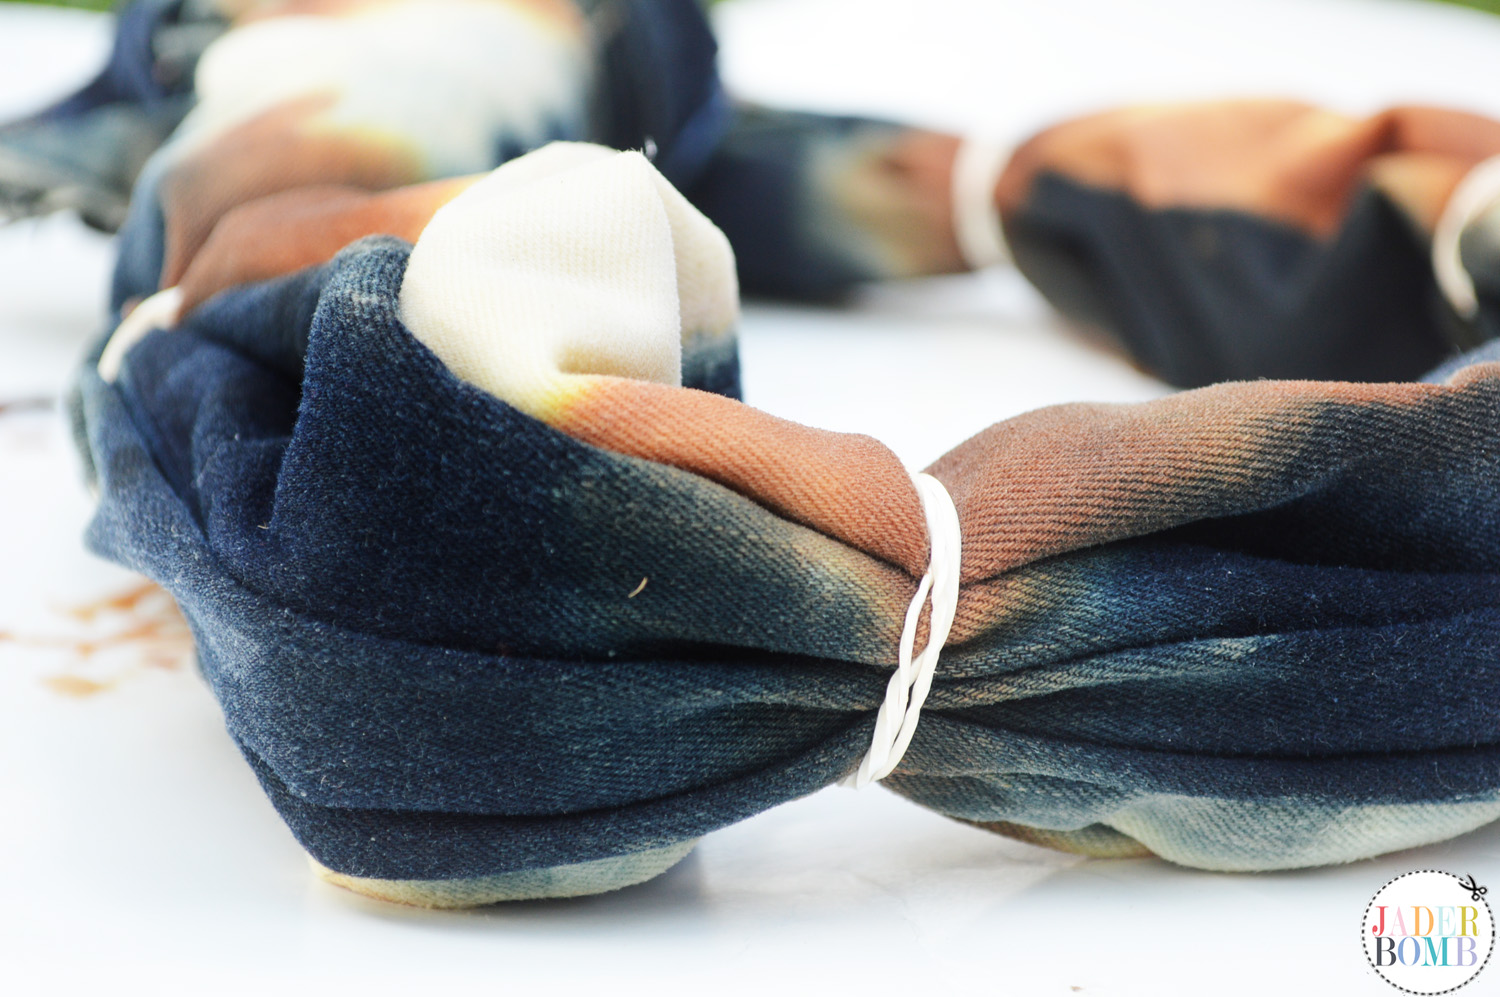
Cut off the rubber bands and VOILA! Magic! I like to wash them by themselves so nothing else gets damaged or stained.

tiedyedbleachedjeans

I am so excited with the way they turned out. FYI: When I washed them the tea stain washed out a little but I am still pleased with the light wash it left behind. tea stained blue jeans diy how to make bleached jeans

Don’t forget to connect on social media! Make sure to use use the hashtag #JADERBOMB on Instagram or Twitter or Facebook so I can keep track of all your awesome creations! HAVE A GLITTERY DAY! ♥, Jade

P.S. If you LOVE printables then check out my site where you can download hundreds of FREE printables!

DIY-PHOTO-CREDIT-Photography: Jaderbomb // DIY tutorial by: Jaderbomb // Tie-Dye : Michael’s // Affiliate Links: Amazon
HASHTAG LOGO


Happy Birthday Martha Stewart! Today’s post is dedicated to my best friend, Martha! I know what you are thinking. Jade, does she know she is your best friend and my answer is yes. When I texted her this morning she was so excited to hear from me. She asked me to send her some crawfish and a zydeco cd.

OK. FINE. She doesn’t know we are “best friends” but if we were I would treat her to the best birthday ever, the CAJUN way. I altered the photo below so she could visualize her birthday with me, however the portrait of her and I is legit. If you want to read my story of the first time I met her and watch my episode from the show click here! ENJOY!


Martha’s Cajun Birthday

martha stewart birthday

♥ I would surprise her with eggs for breakfast. I don’t do poached, sorry Martha. I would put a crap load of bacon grease in a magnalite pot and when it starts to boil I would throw her egg in it. This is known as heart attack eggs here. Let me also say these eggs will be from Wal-Mart not my back yard. I guess I would get “organic” for her. I would serve it with a bowl of hot cajun grits. I swear this delightful dish takes bacon, egg and grits to a whole new level. Calories. None. 

♥After breakfast I would tell her to put some boots, not Hunter. I prefer white boots known here as Cajun Reebok’s. I would take her to watch the sun rise on a 4-wheeler alongside a mosquito infested swamp. What can I say, we have the prettiest sunrises in Louisiana but it comes at a good cost.

♥ After the sunrise tour I would take her to a mud pit and we would wrestle like pigs. Isn’t mud good for the skin? She would know this.

♥ It’s almost noon at this point so I would take her to a random house of her choice and knock on the door. Yes, the saying is true everyone in Louisiana welcomes you with open arms, unless they don’t have any then they would probably wrap their legs around you. Wondering why we are at a random person’s house? DUH, for lunch! Everyone has rice and gravy cooking on a Sunday. I can’t promise her what kind of meat will be in that gravy but hey, Martha is fond of “delicate” meat so she will be good. Worse case scenario, I will tell her it’s chicken.

♥ After lunch she might be sick. Why? Well because once you eat our rice and gravy you will know what I mean. (wink wink)

♥ When she feels better (after a nap on the random person’s sofa) I will call my long time friend Kristy from Swamp People. Yes, they film it right here in Louisiana. She will take us on a luxurious horse back ride to get to a dock. We would then get in a random boat and go find a gator. Remember everything belongs to everyone here, including the boats. At this point in the day Martha will be sweating profusely because it’s HOT here. The heat “might” make her feel ill since she practically ate greasy eggs for breakfast and random meat for lunch.

♥ At the end of the day I would take her to a random house here, preferably one with a swing in the back yard. You know what kind of swing I am talking about, one like this. I would tell her to plop herself in it and I would push her while watching the sunset. Again, she would be eaten alive by mosquitos but it will be totally worth it. Good news is I am immune to them. She would then BEG me not to leave and adopt me.

I have a feeling when she reads this she will have her assistant book her flight asap. I know this birthday sounds GREAT but this is a 17 star trip so no, I can’t treat everyone to this kind of day. I think we can all agree Martha deserves it! Martha if you are reading this and you need to spruce up your french, check out my cajun dictionary here. Check out this fun video where Martha makes an appearance.

Oh Martha, incase you didn’t know I am one of your 12 Months of Martha bloggers! Come check out all of my crafts here.

Don’t forget to connect on social media! Make sure to use use the hashtag #JADERBOMB on Instagram or Twitter or Facebook so I can keep track of all your awesome creations! HAVE A GLITTERY DAY! ♥, Jade

P.S. If you LOVE printables then check out my site where you can download hundreds of FREE printables!

HASHTAG LOGO

Today I will be sharing how to create a DIY Painted Polka Dot Bag for the Michaels Create2Educate Sweepstakes. I always have so much fun creating back to school goodies! Go craft crazy on your classroom with the Create2Educate #sweepstakes! Post your classroom creations or DIY creations on Instagram with #Create2Educate and #Sweepstakes to enter OR enter HERE now! You have until August 15 the for a chance to win a $50 Michaels gift card and the great news is they will choose one winner each day until the 15th! Wahoo!!!!12495_10152598188149165_1175403598004922578_n

If you don’t have an Instagram you can submit your photo HERE. If you are on Instagram make sure to follow MEEEE and MICHAELS!

Let’s get started! Time to get crafty and create your very own back to school bag!

Michaels Create2Educate Sweepstakes

you will needTulip Fabric Paint | Imagins Backpack or Drawstring Bag (got these from Michaels) | Gold Iron-ON Studs | Foam Pouncers | Heat Gun 

If you don’t have any of the products I used in this project you can click on the links above and order them all from one spot! Yes, they are affiliate links so thank for helping me buy tons and tons of glitter to put more smiles on your face!
painted bag supplies
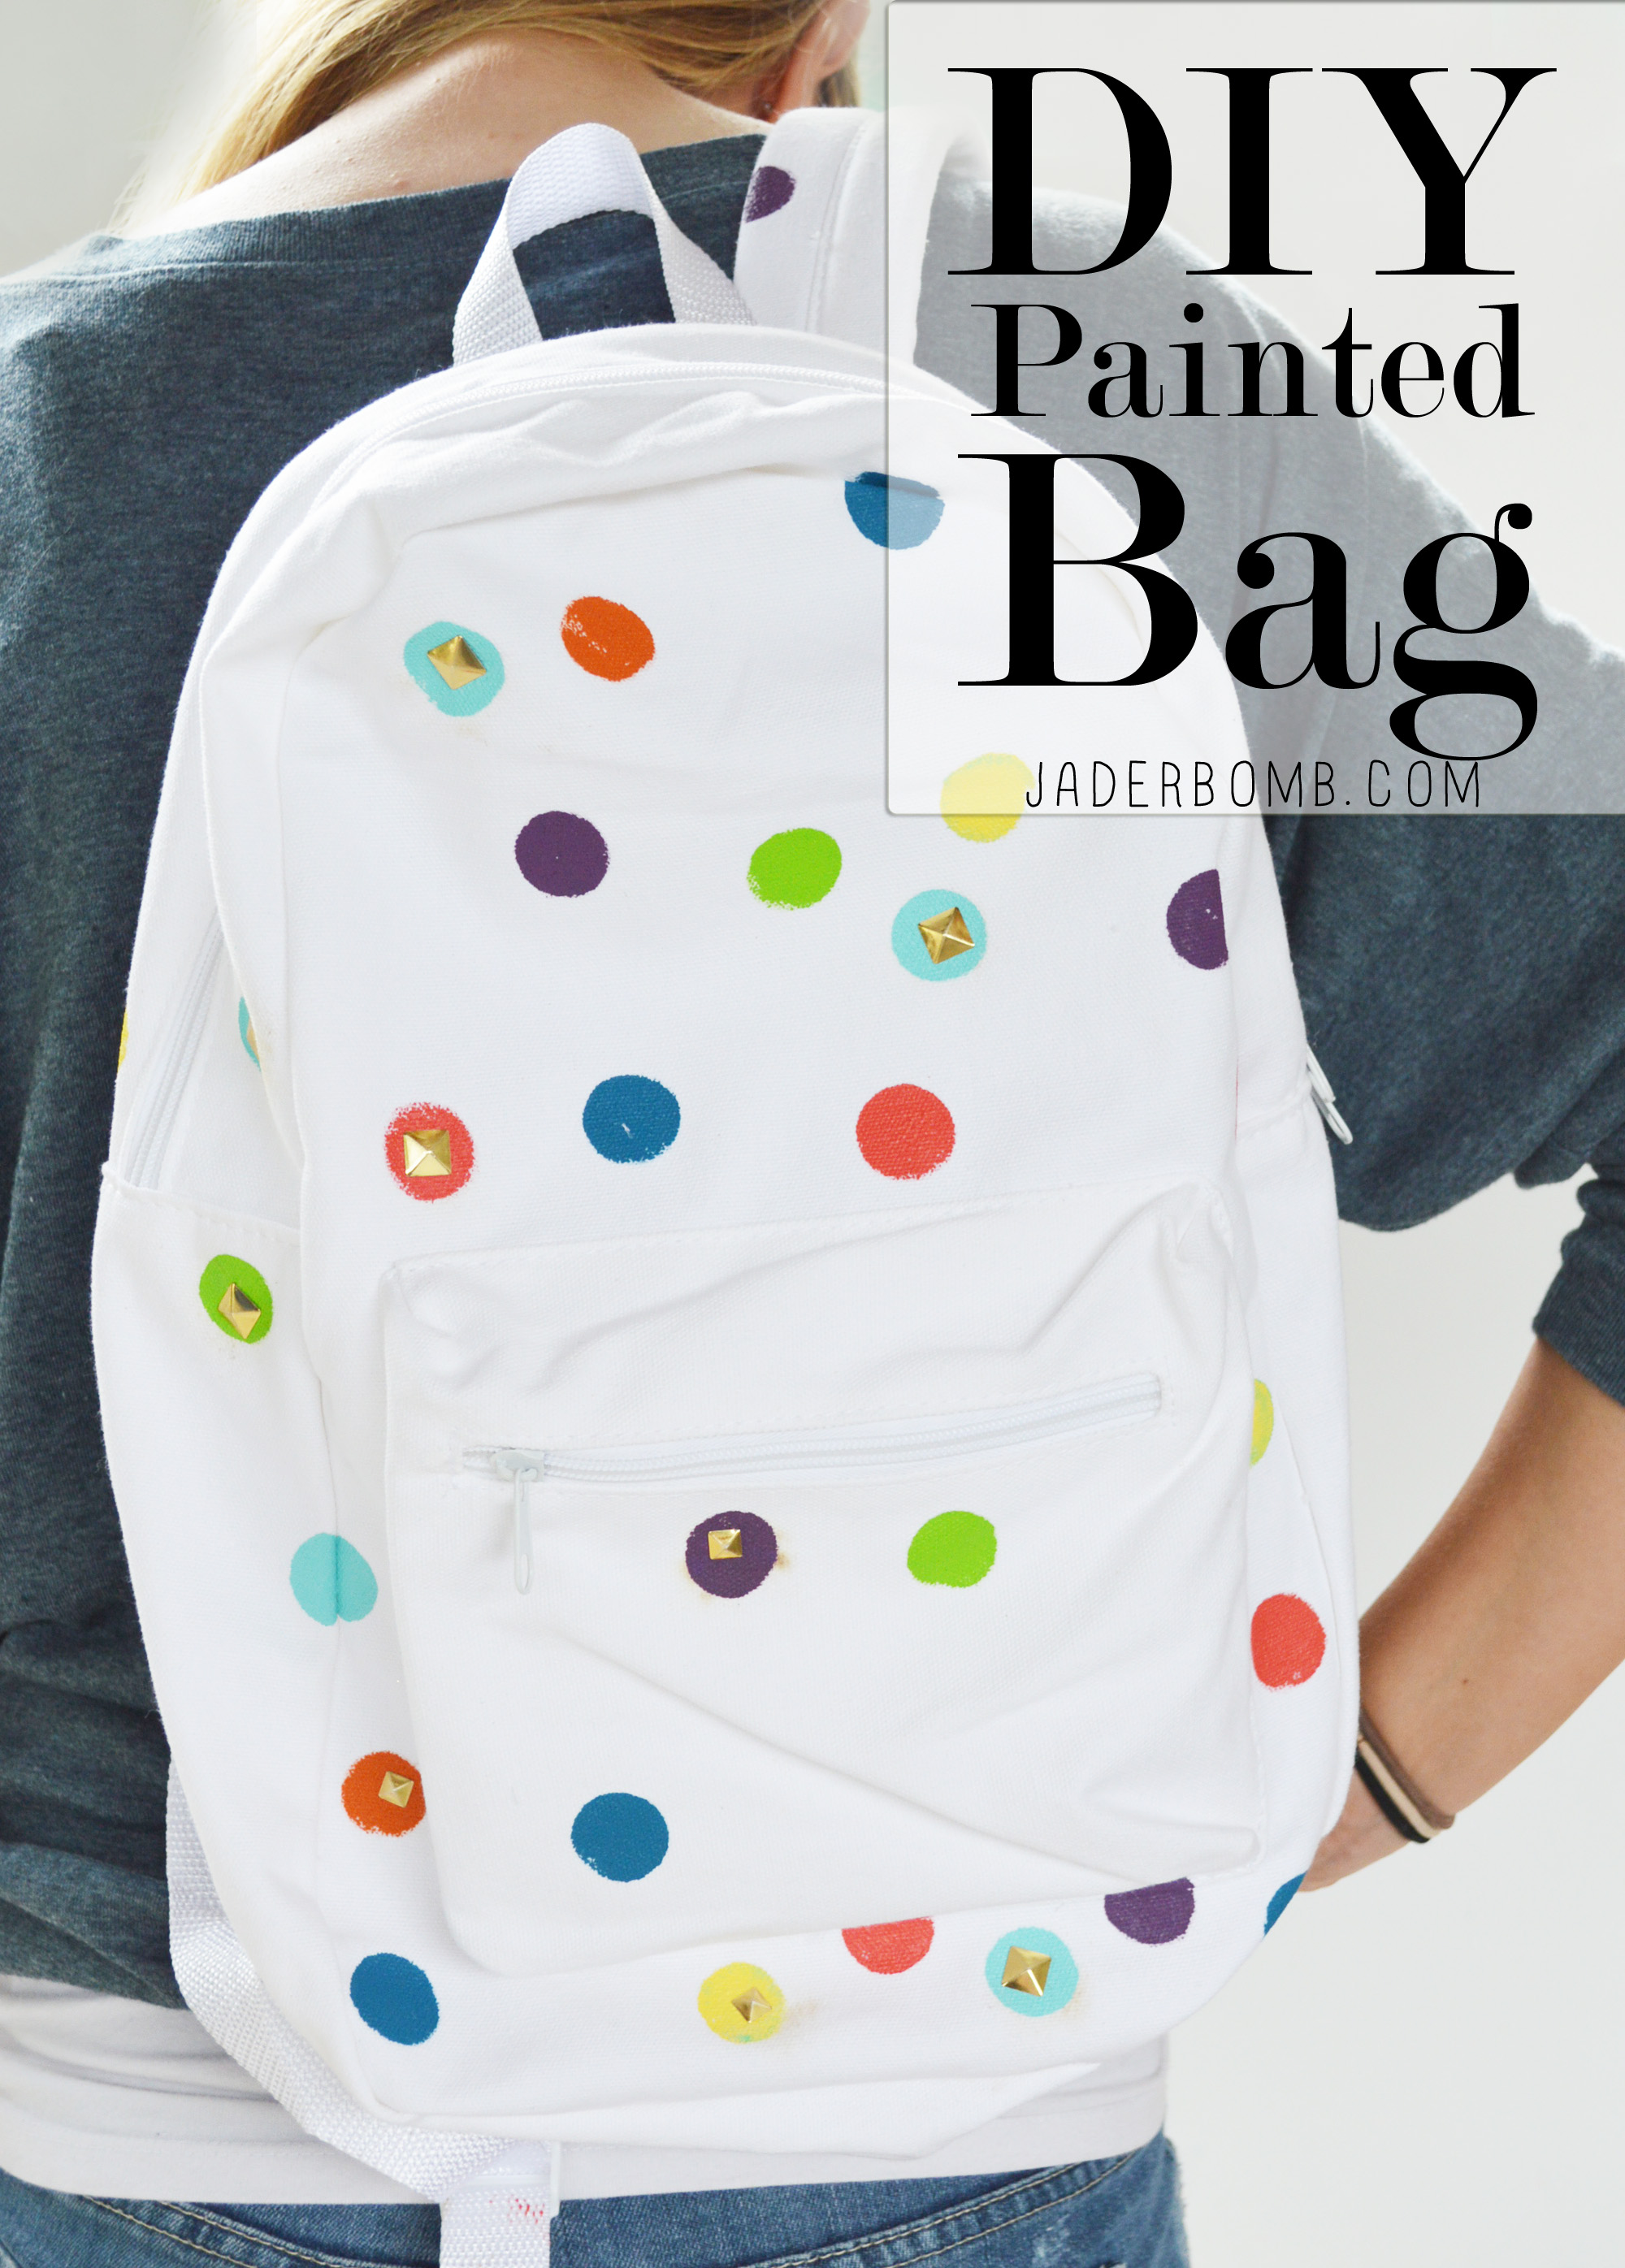
I got these two white canvas bags from Michaels and I truly love them! I love that you can personalize them to match your own personality! white canvas bagWhat product goes the best with fabric? Tulip Fabric Paint. This product owns my entire crafting heart. I use it on so much and it’s the most durable product I have come across for painting on fabric.
black puff paint

rainbow fabric paint michaelsThe first thing I like to do is insert a piece of card stock or water color paper in the inside of the bag. This stops the paint from bleeding through the bag to the back side. how to paint a bag

I prefer to have every color available on one big sheet before I start the project. Grab your foam pouncer and add enough paint to cover the bottom of the pouncer. If you have a big glob on it dab it on the side to get the excess off.
washi tape
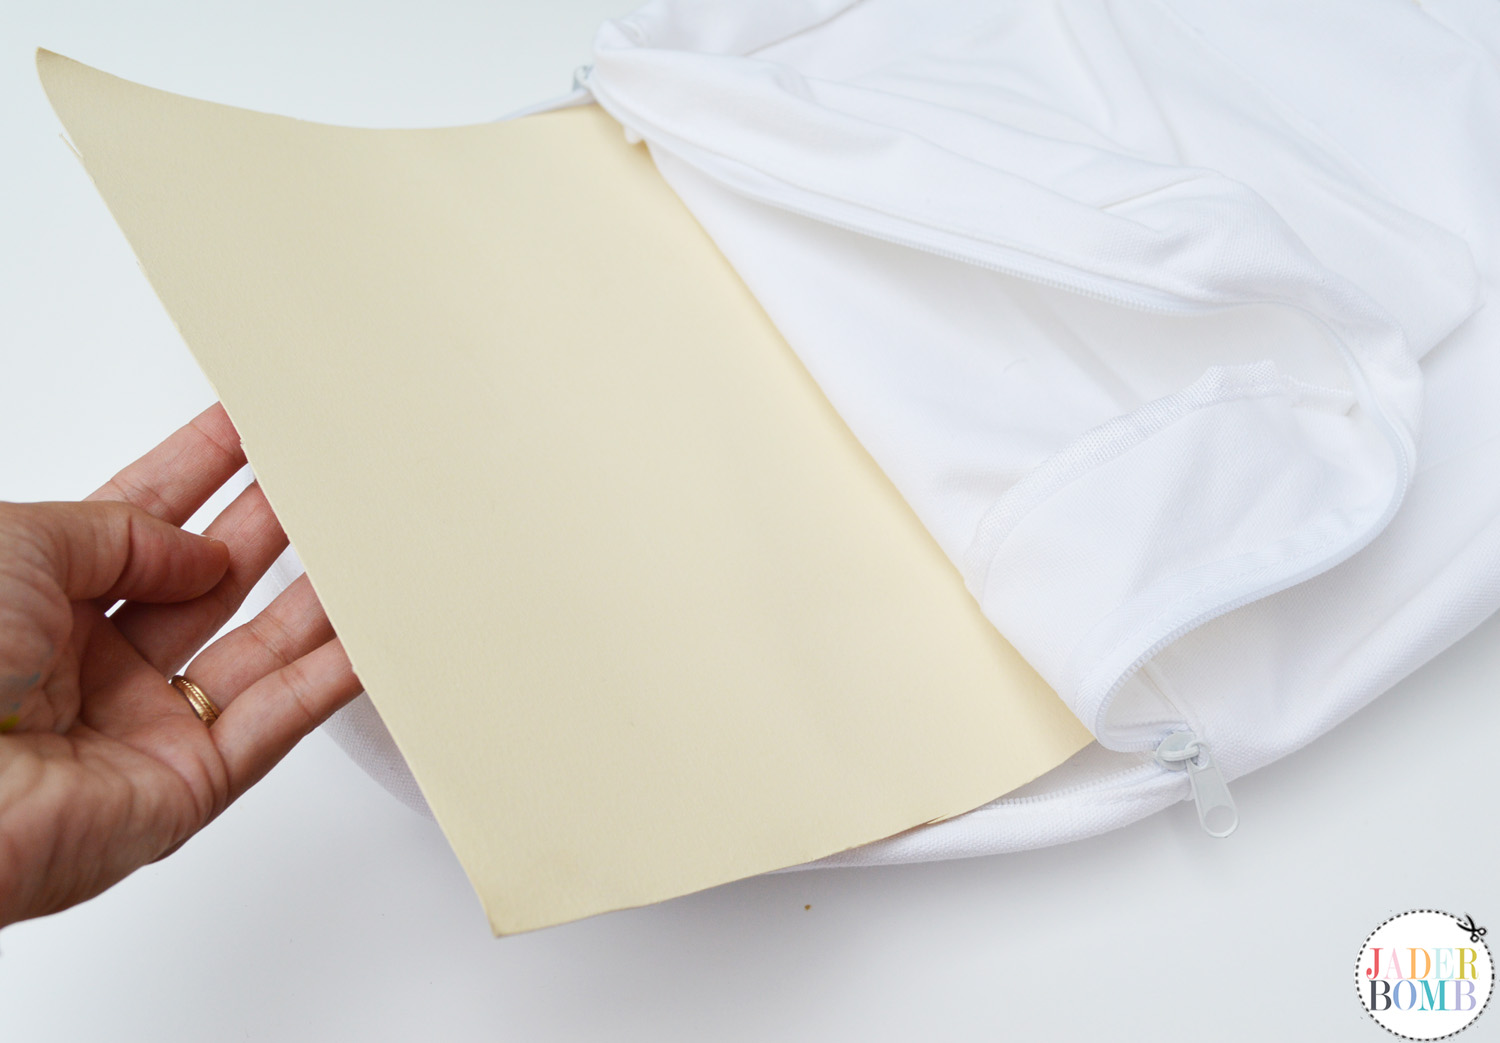
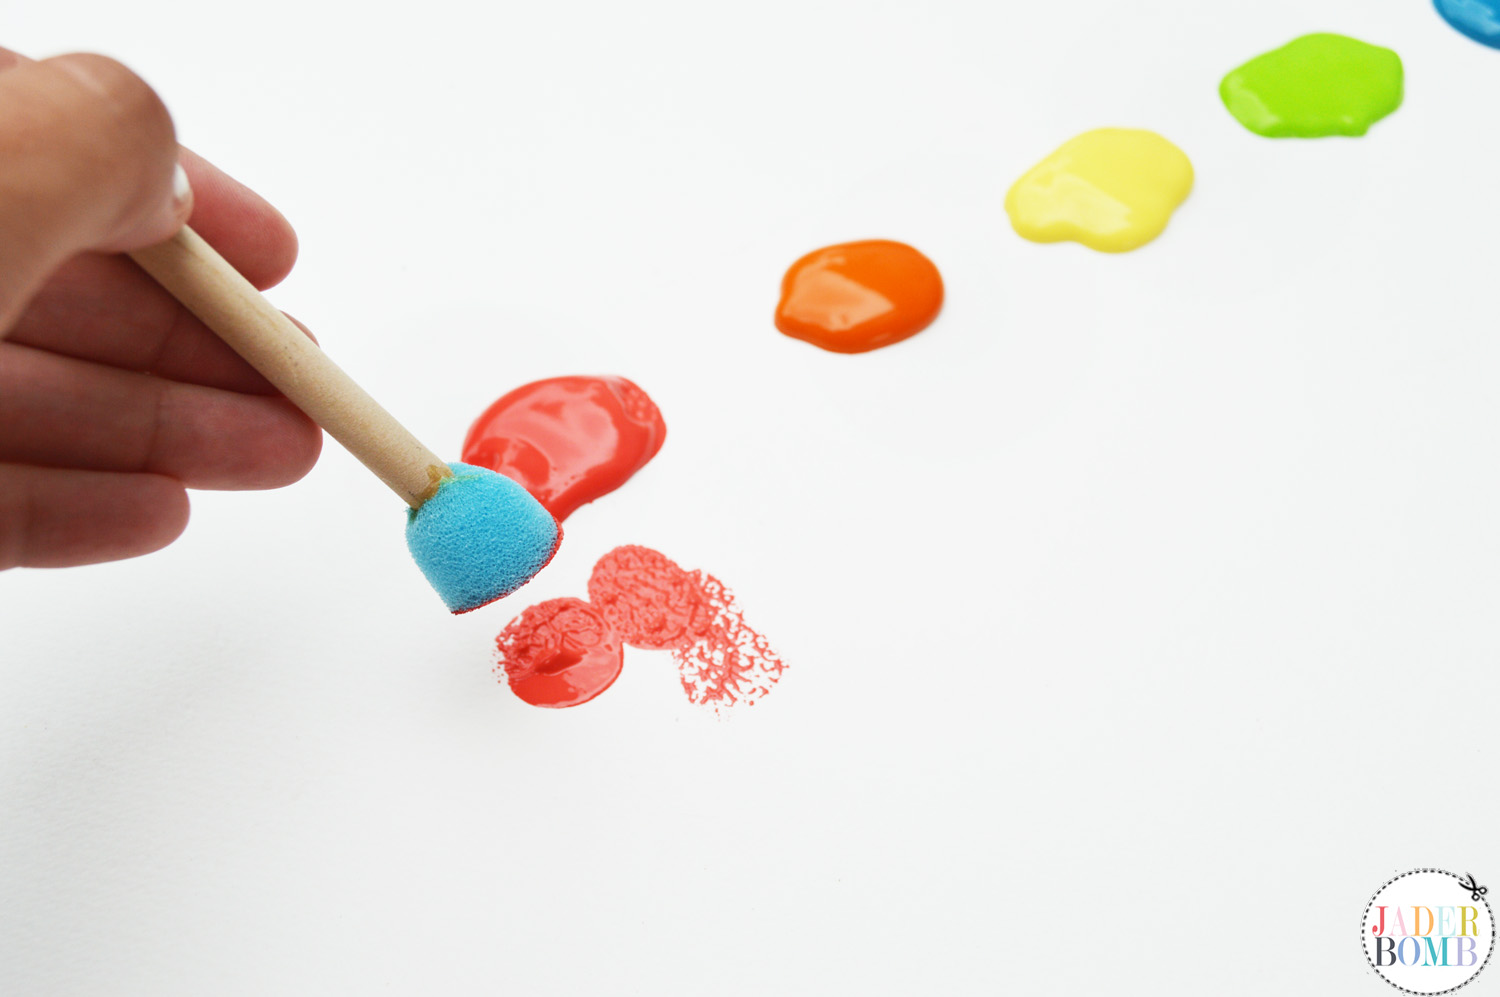
Start adding the dots onto the bag in random places. I had to add a few dabs to get a perfect circle. What helped me is once my pouncer touched the bag I sorta applied a little pressure to the pouncer and this helped push the paint out of it.
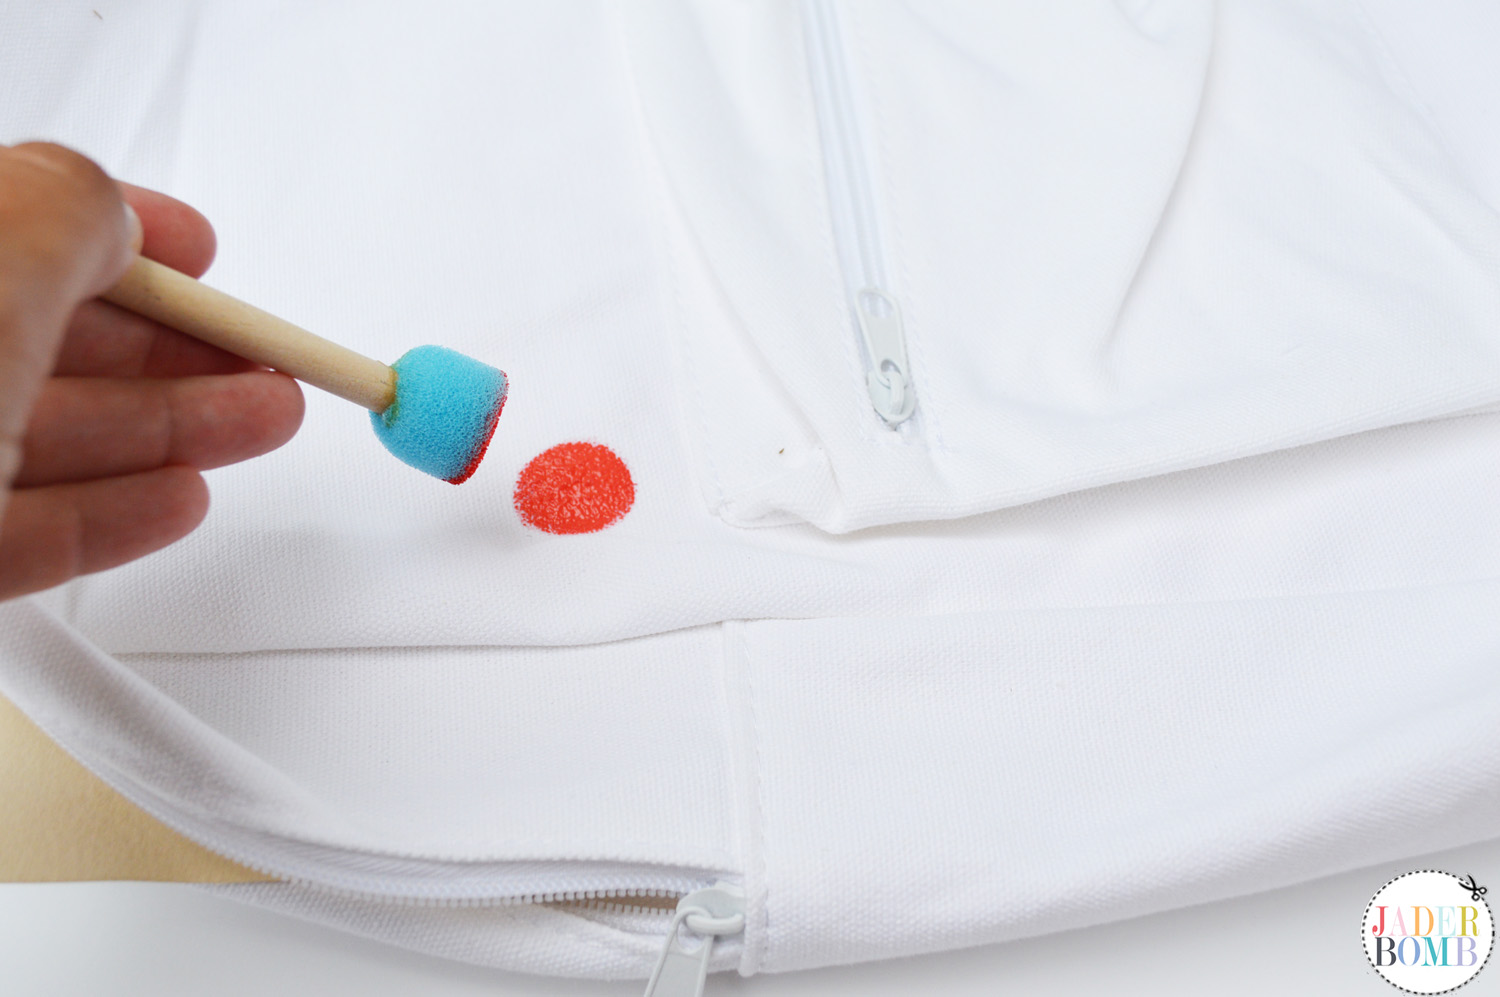
 tulip fabric paint projectsHow pretty!how to paint polka dots
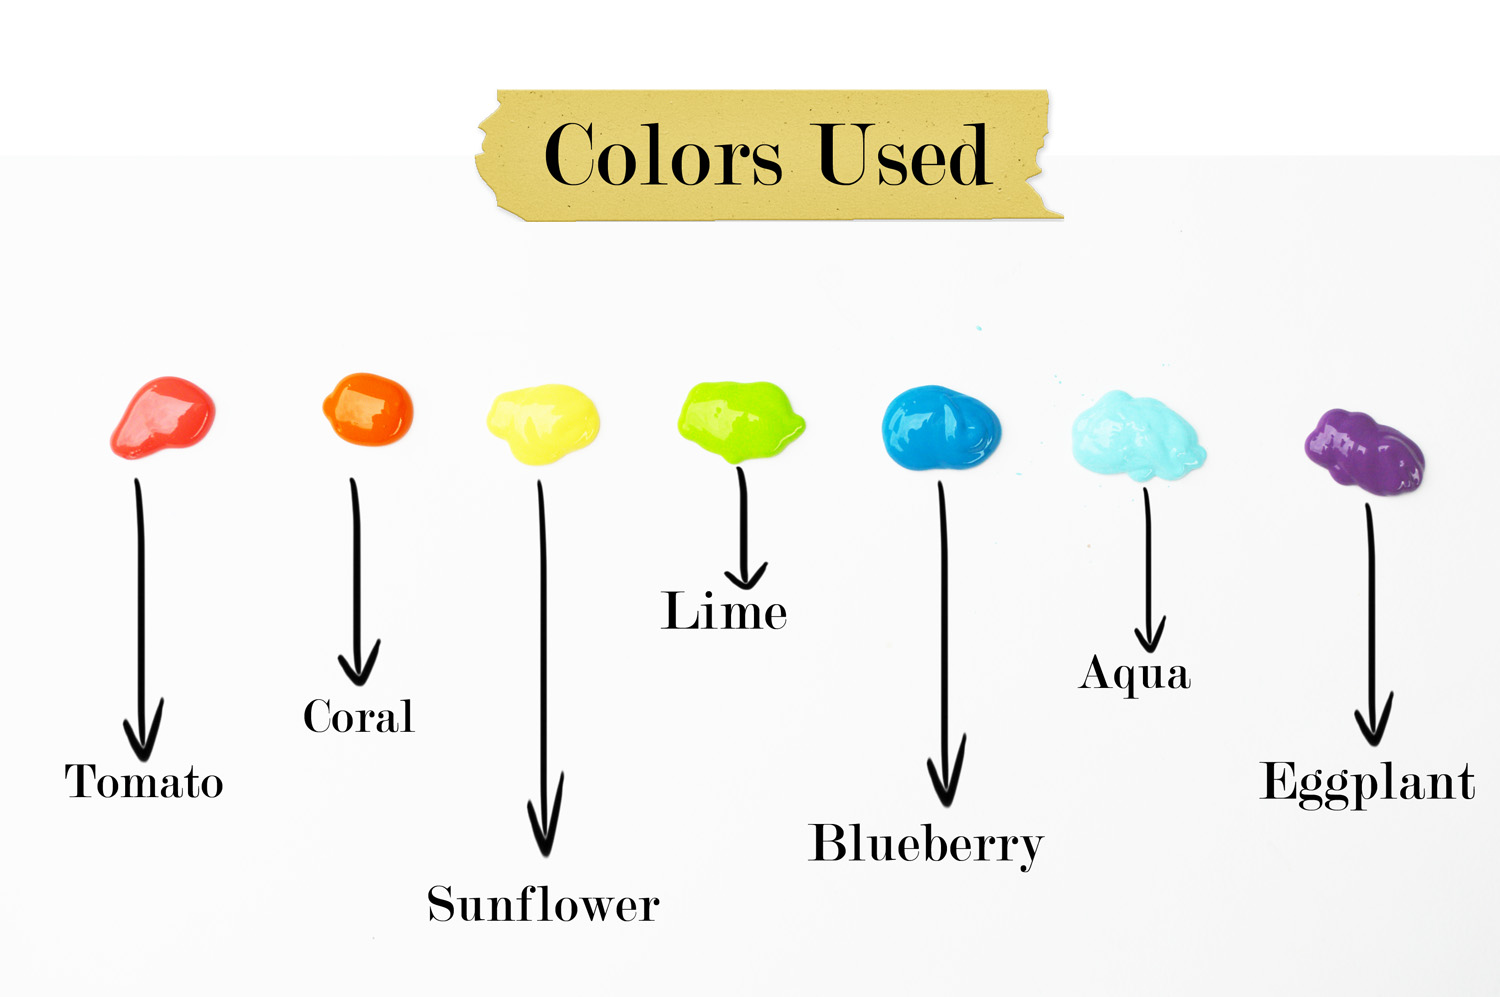
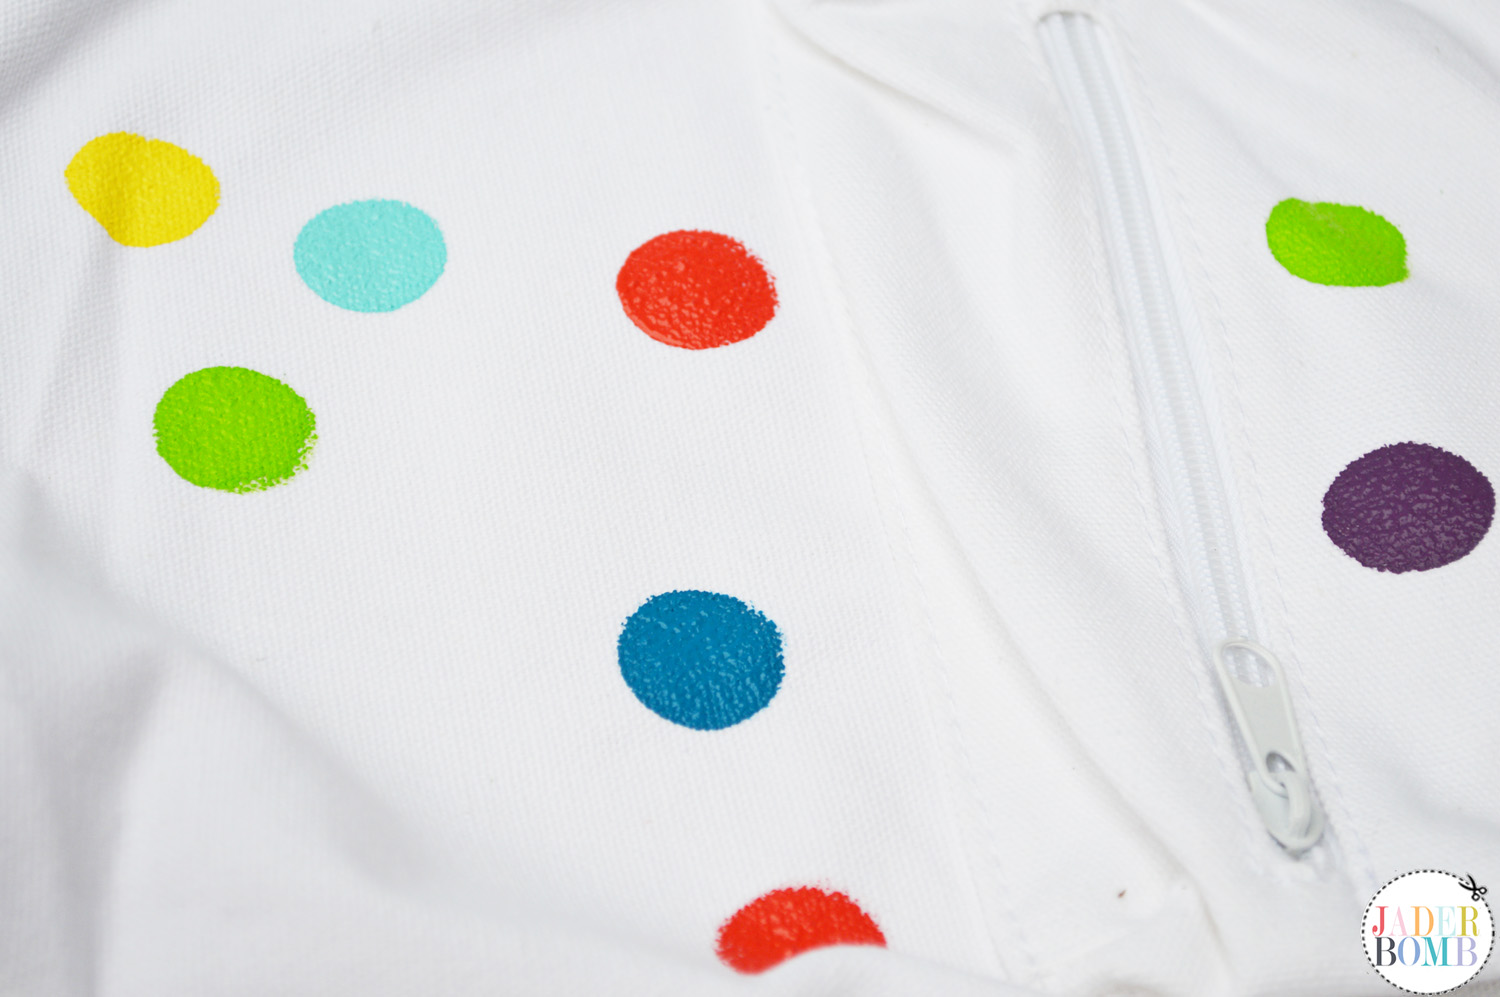
On the drawstring bag I wanted to use one color and how could I not use this Aqua color! It’s to die for. To add a little spice to the bag I added black whimsical circles around the dots. Don’t worry about these being perfect because they are supposed to be fun!

polka dot bag diy

Heated Studs

how to use a heat gun
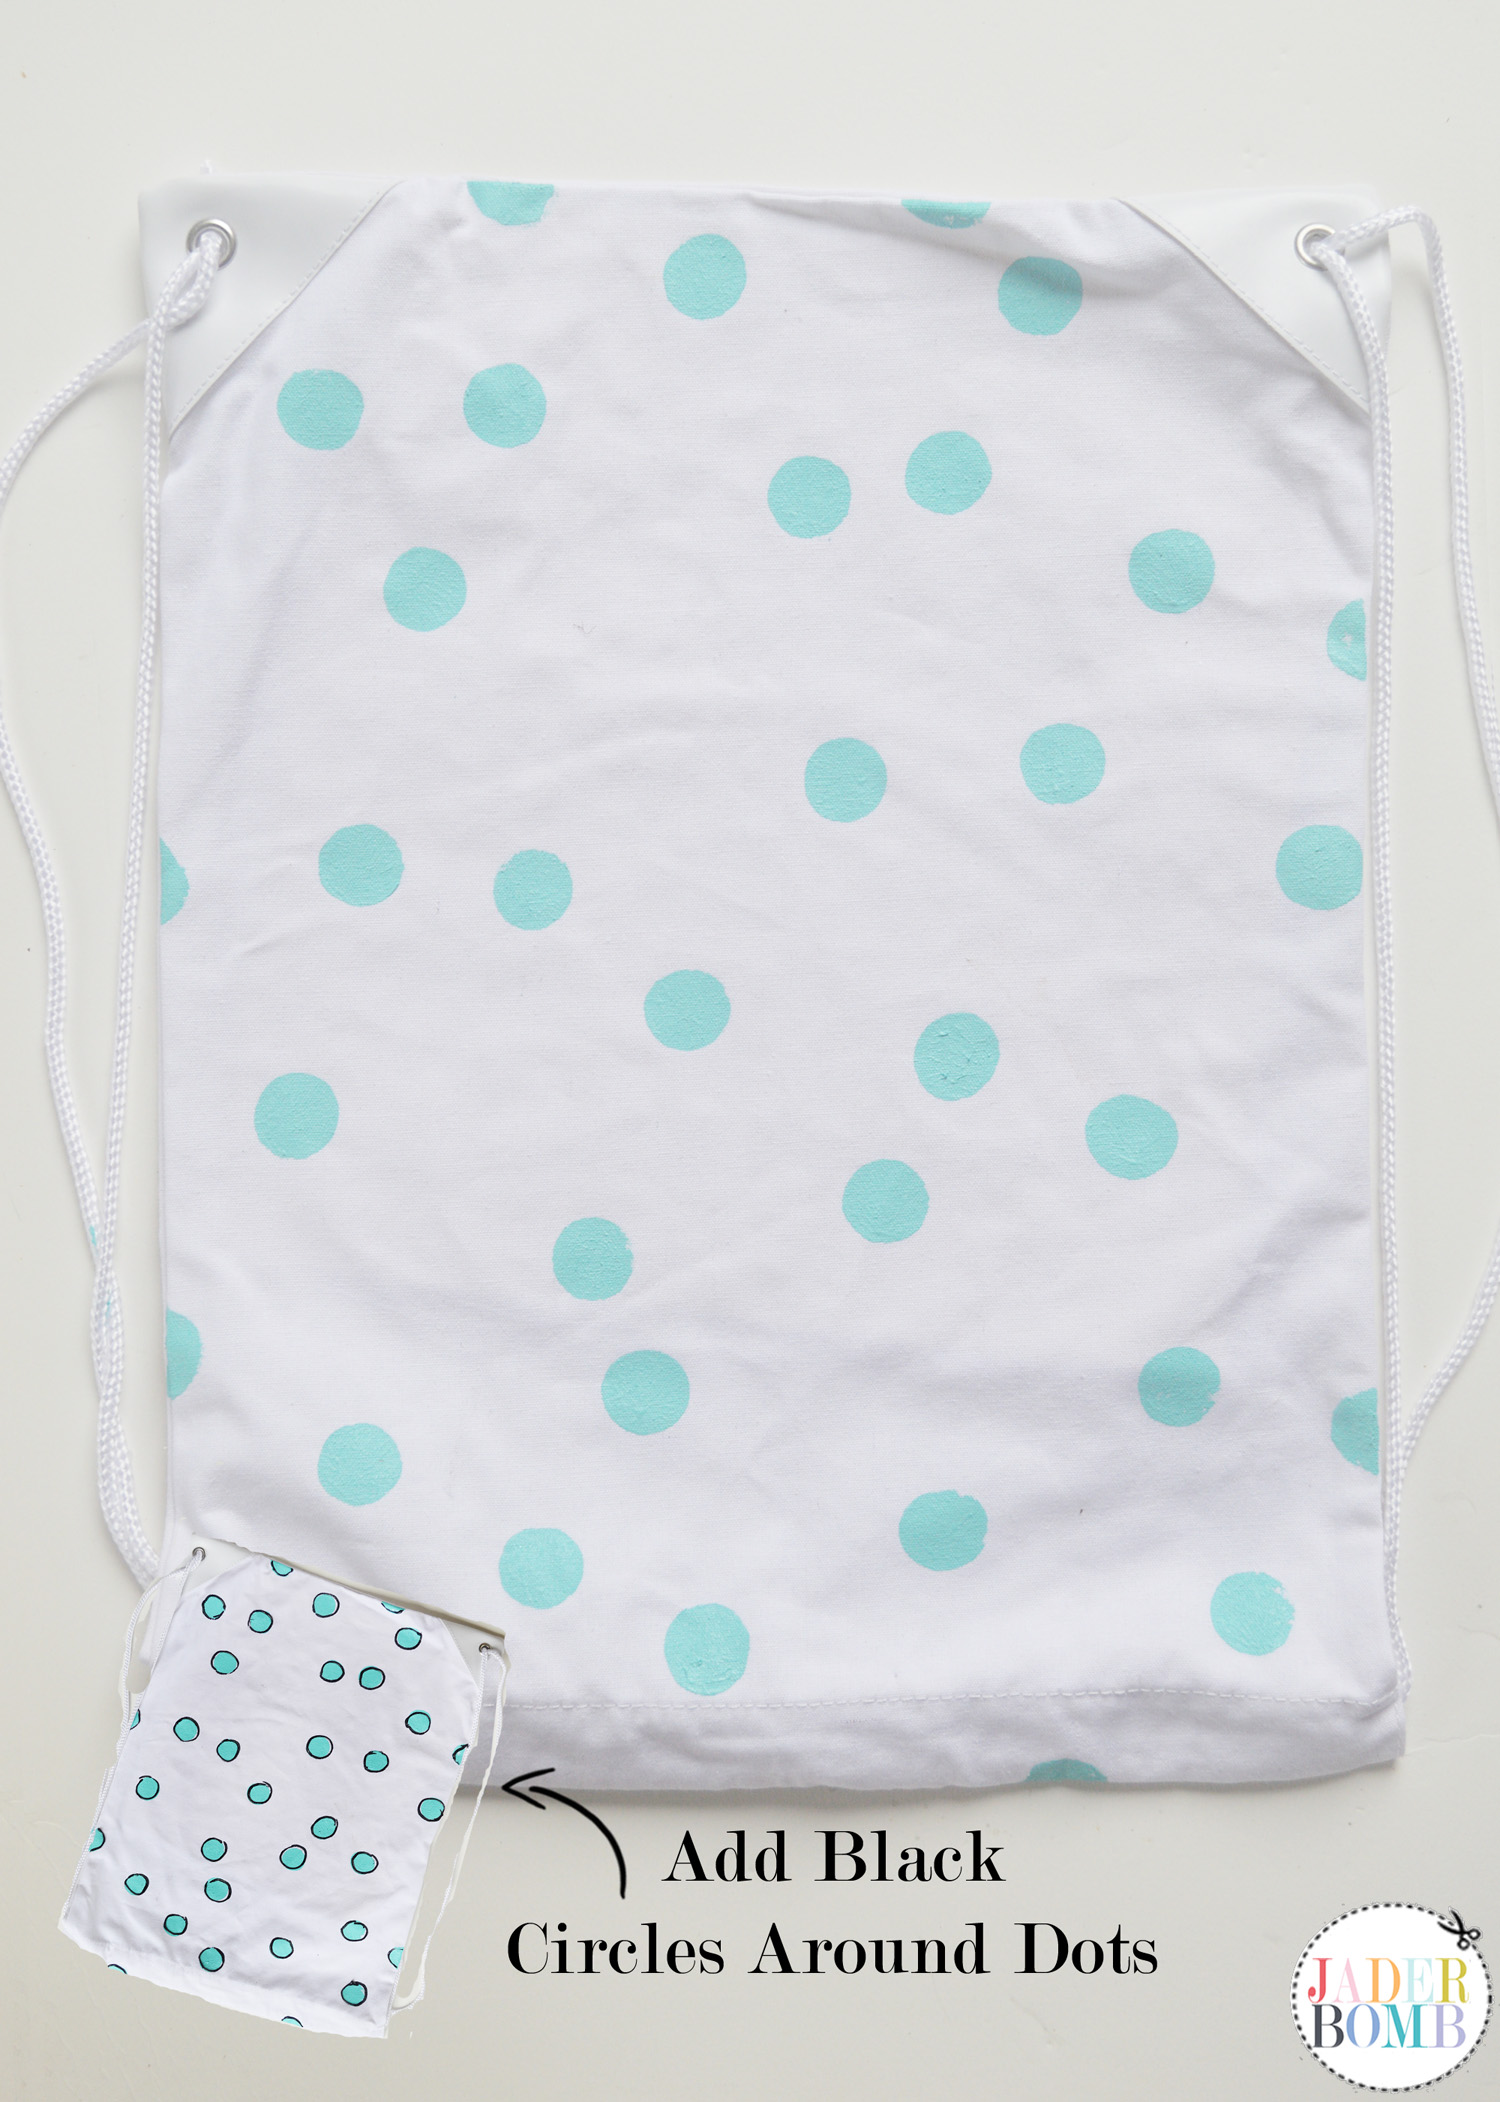
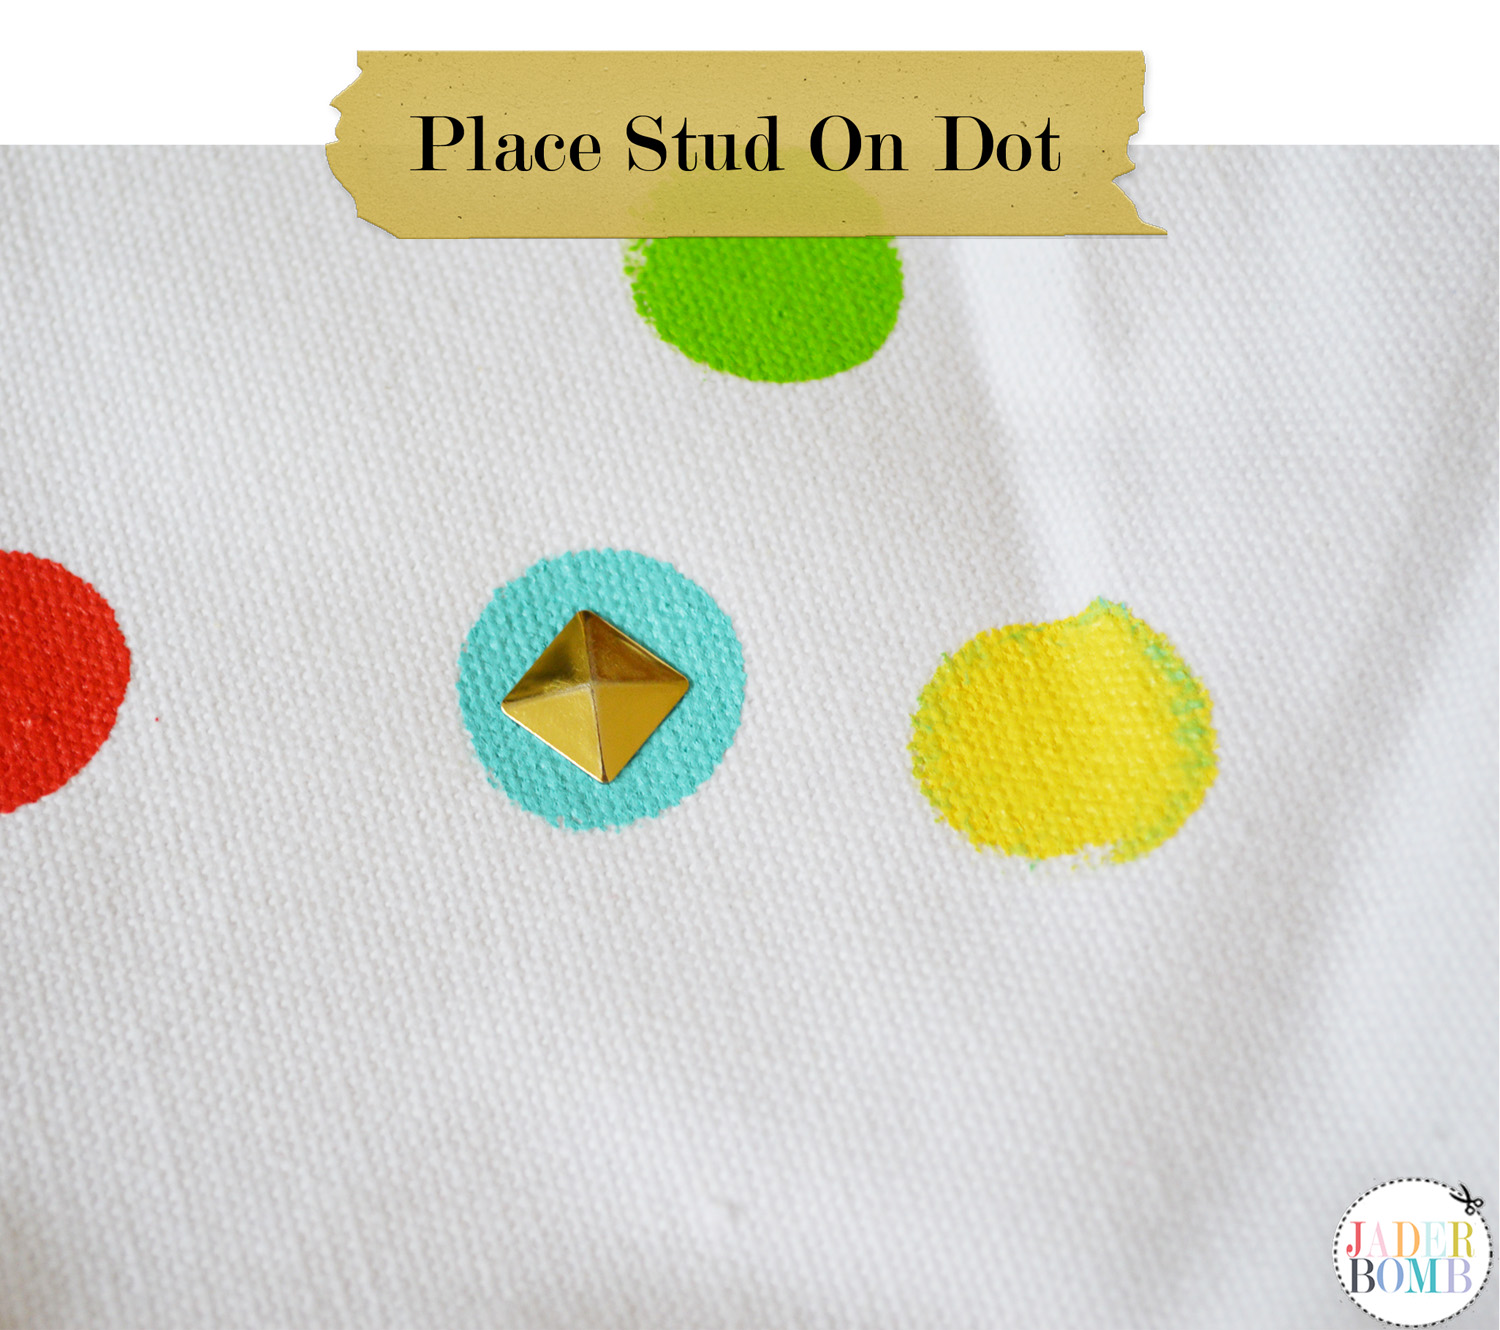
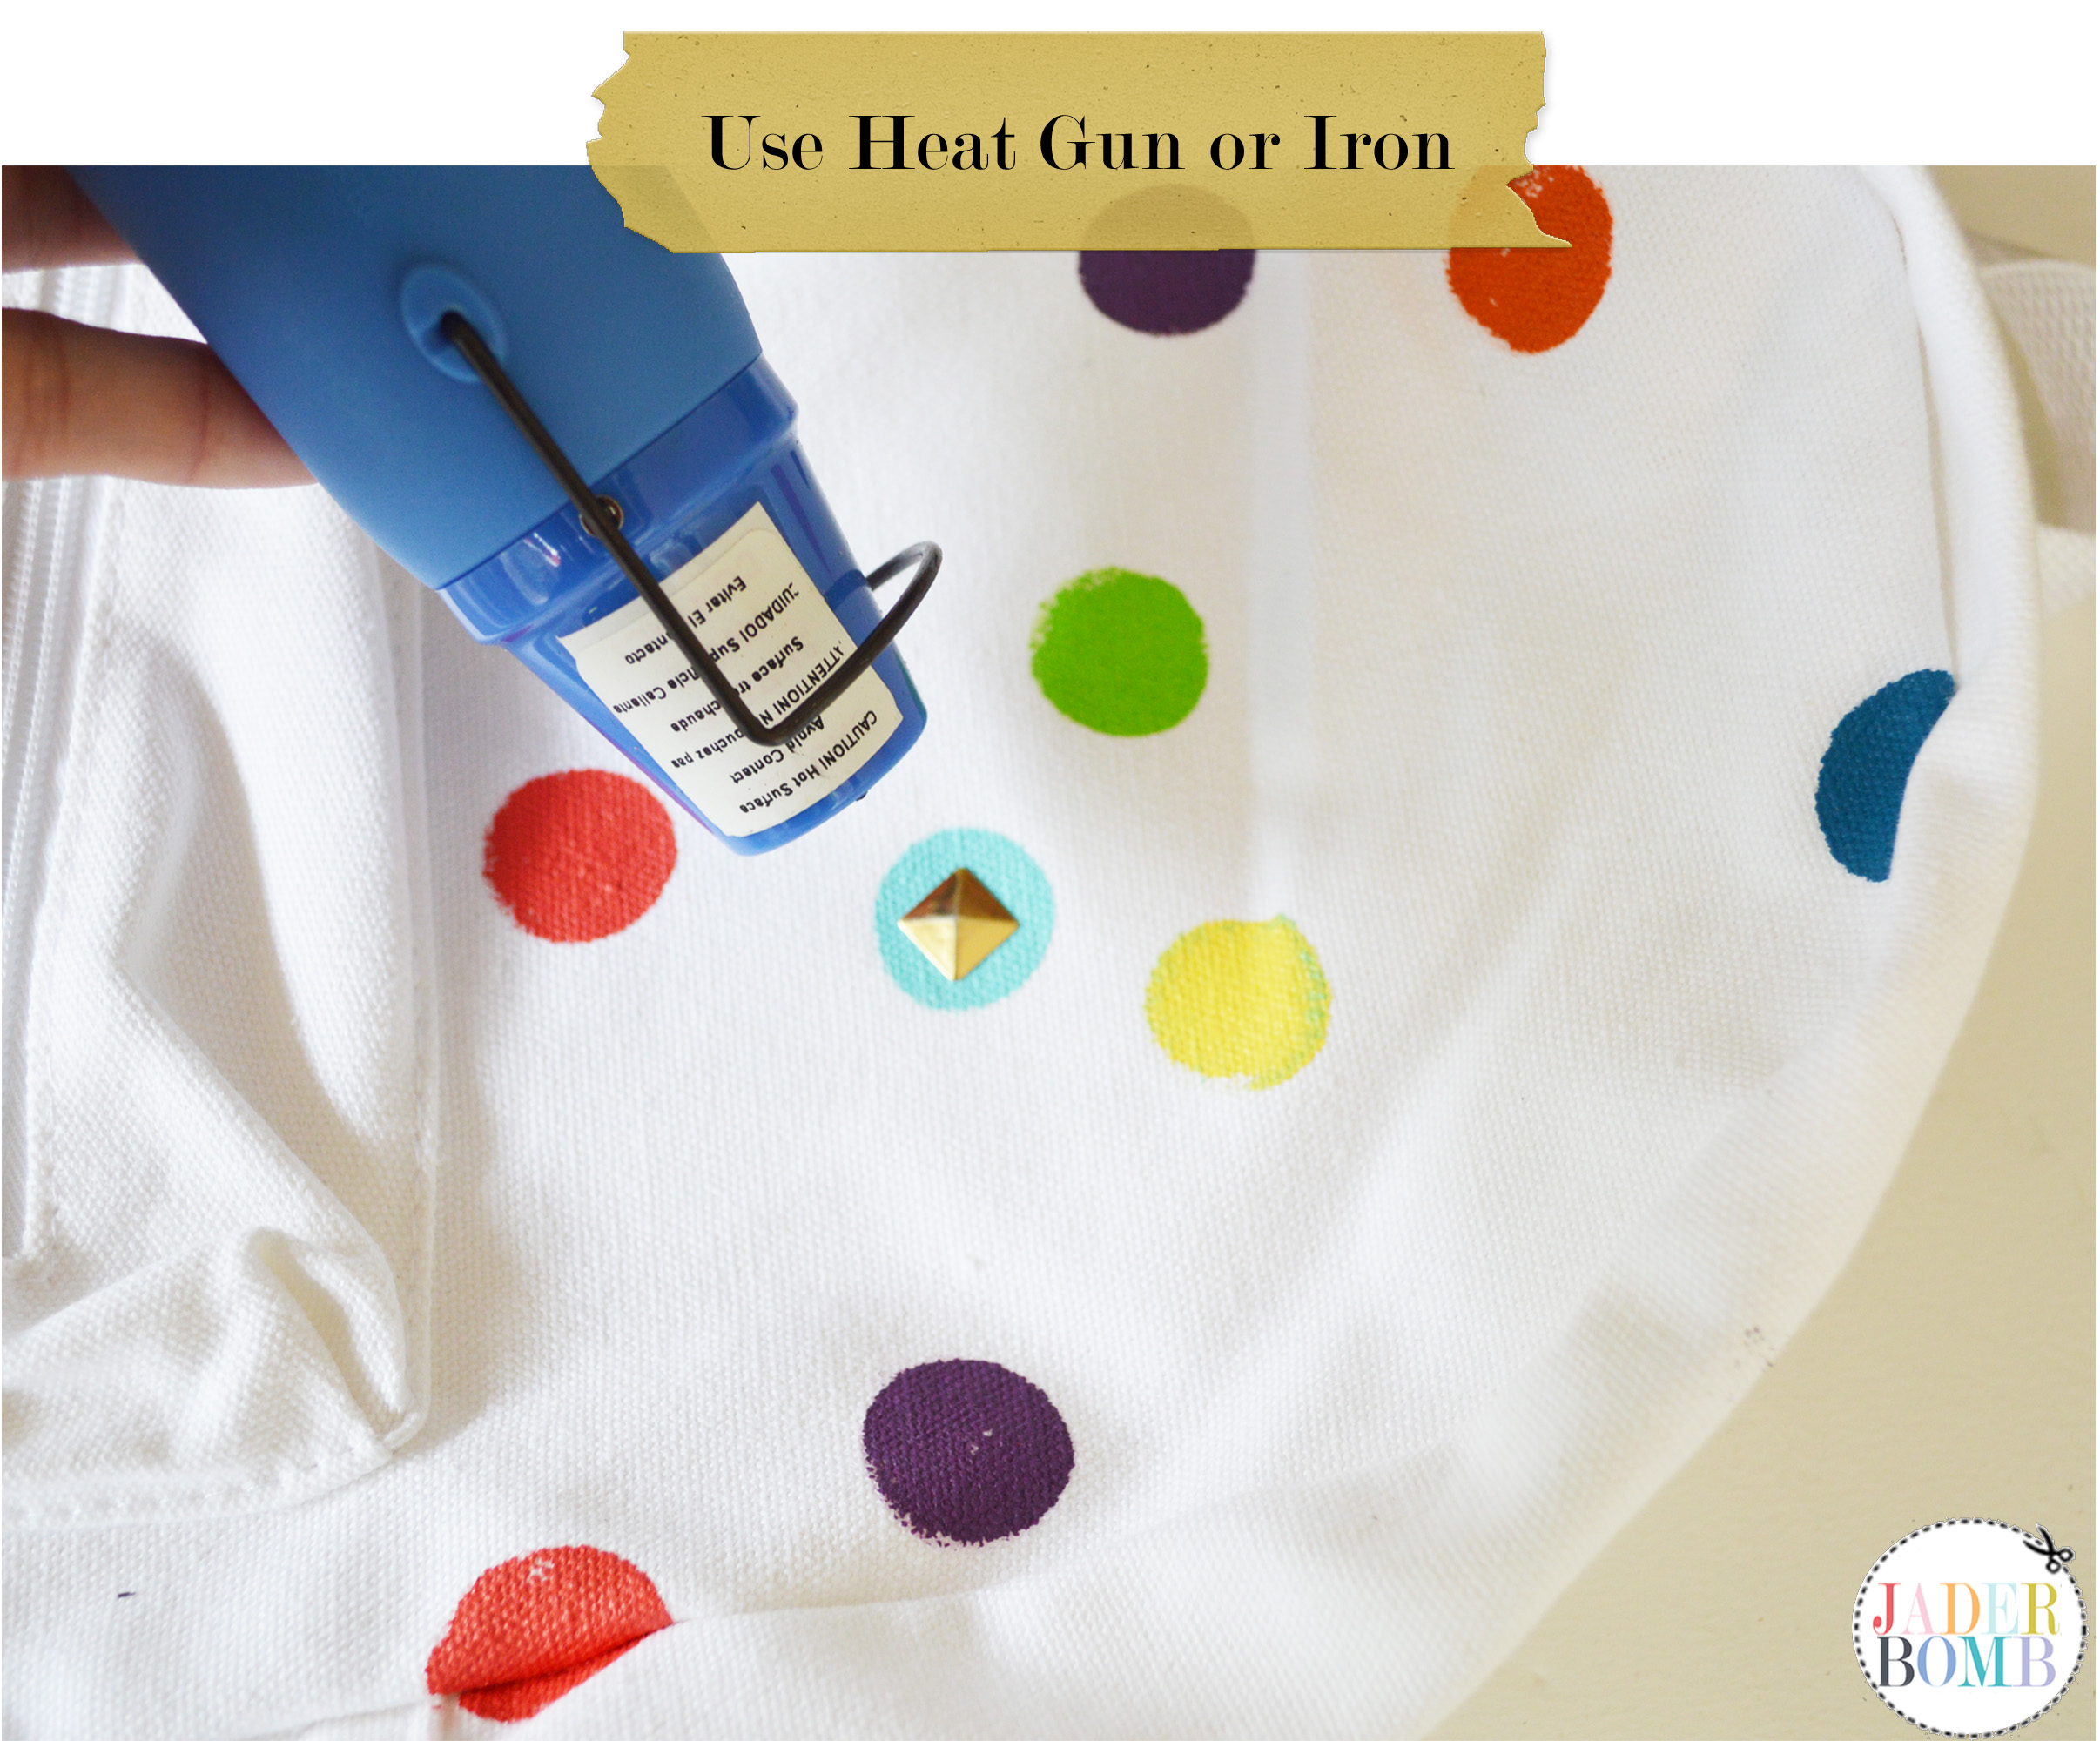
The instructions for the iron-on studs said to use an iron but I used my heat gun which I also purchased from Michaels. Place the gun a few inches away from the stud and while heating the stud I used a screw driver to hold it down to make sure the adhesive backing attached to the bag. I then opened the bag and applied heat to the stud from the back end. This is my favorite tool ever! Please do NOT touch the stud after you applied heat to it because it will indeed burn you. I have proof if you really want to see!

turquoise polka dot bag

I am so pleased with the way both of the bags turned out! I hope you have fun creating your very own DIY back to school bag! Don’t forget to enter the sweepstakes! diy painted bag michaels back to school

Don’t forget to connect on social media! Make sure to use use the hashtag #JADERBOMB on Instagram or Twitter or Facebook so I can keep track of all your awesome creations! HAVE A GLITTERY DAY! ♥, Jade

P.S. If you LOVE printables then check out my site where you can download hundreds of FREE printables!

DIY-PHOTO-CREDIT-Photography: Jaderbomb // DIY tutorial by: Jaderbomb // White Canvas Bag : Michael’s //  Fabric Paint: Michael’s // Iron-On Studs: Michael’s // Foam Pouncers: Michael’s // Affiliate Links: Amazon
HASHTAG LOGO

ST_12_months_of_Martha_Logo-1Hand Painted Cork Board
Today’s 12 months of Martha posts is super easy and I know anyone can do it with a little bit of love, joy and patience. I always find joy taking something and adding my own personal touch to it. Whether it’s a design I like or my favorite colors. Yes, it might take a little more effort but in the end it’s worth it. You will be surprised how good you will feel to make your own Hand Painted Cork Board!

Holy cow! It’s almost time for all the lil ones and big ones to go back to school. Are you as excited as me? Insert a crooked smile here.

I think I am excited to get a routine back because let’s face it the summer knocks everything out of whack and things tend to get a little nuts. I went school shopping with my lil one (14, don’t tell him I said lil one) and I realized at the register that most of the “supplies” in the basket were for me. I think I get more excited about “back to school” supplies than him!

Supplies:
*Ruler
*Craft Paint
*Craft Brush
*Cork BoardsDSC_0287

It’s time to kick off going back to school and what better way to do that than with some awesome home / office decor. I know what you are thinking, ” I can totally go buy some from the store, yo”… but why go buy something when you can DIY!

I am in love with the colors I am using in today’s project! They are soft pastel colors that will create a nice feeling in any room.

PicMonkey Collage.jpg

The colors I used: Poodle Skirt | Camellia Pink | Party Streamer | Wild Salmon | Yellow Jacket. DSC_0282
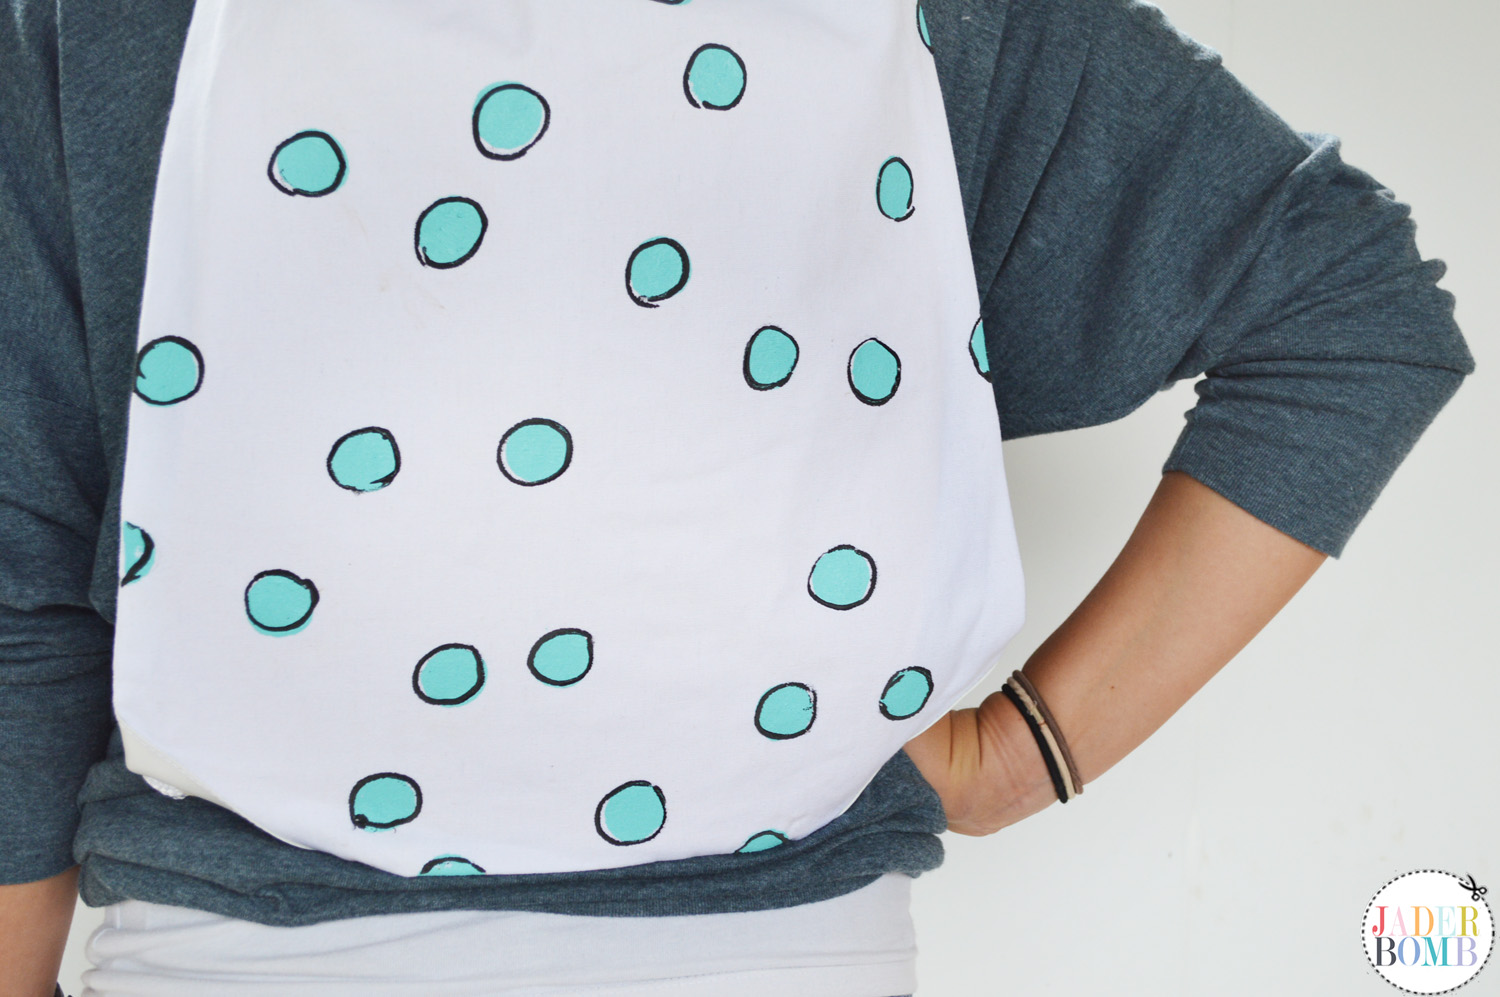
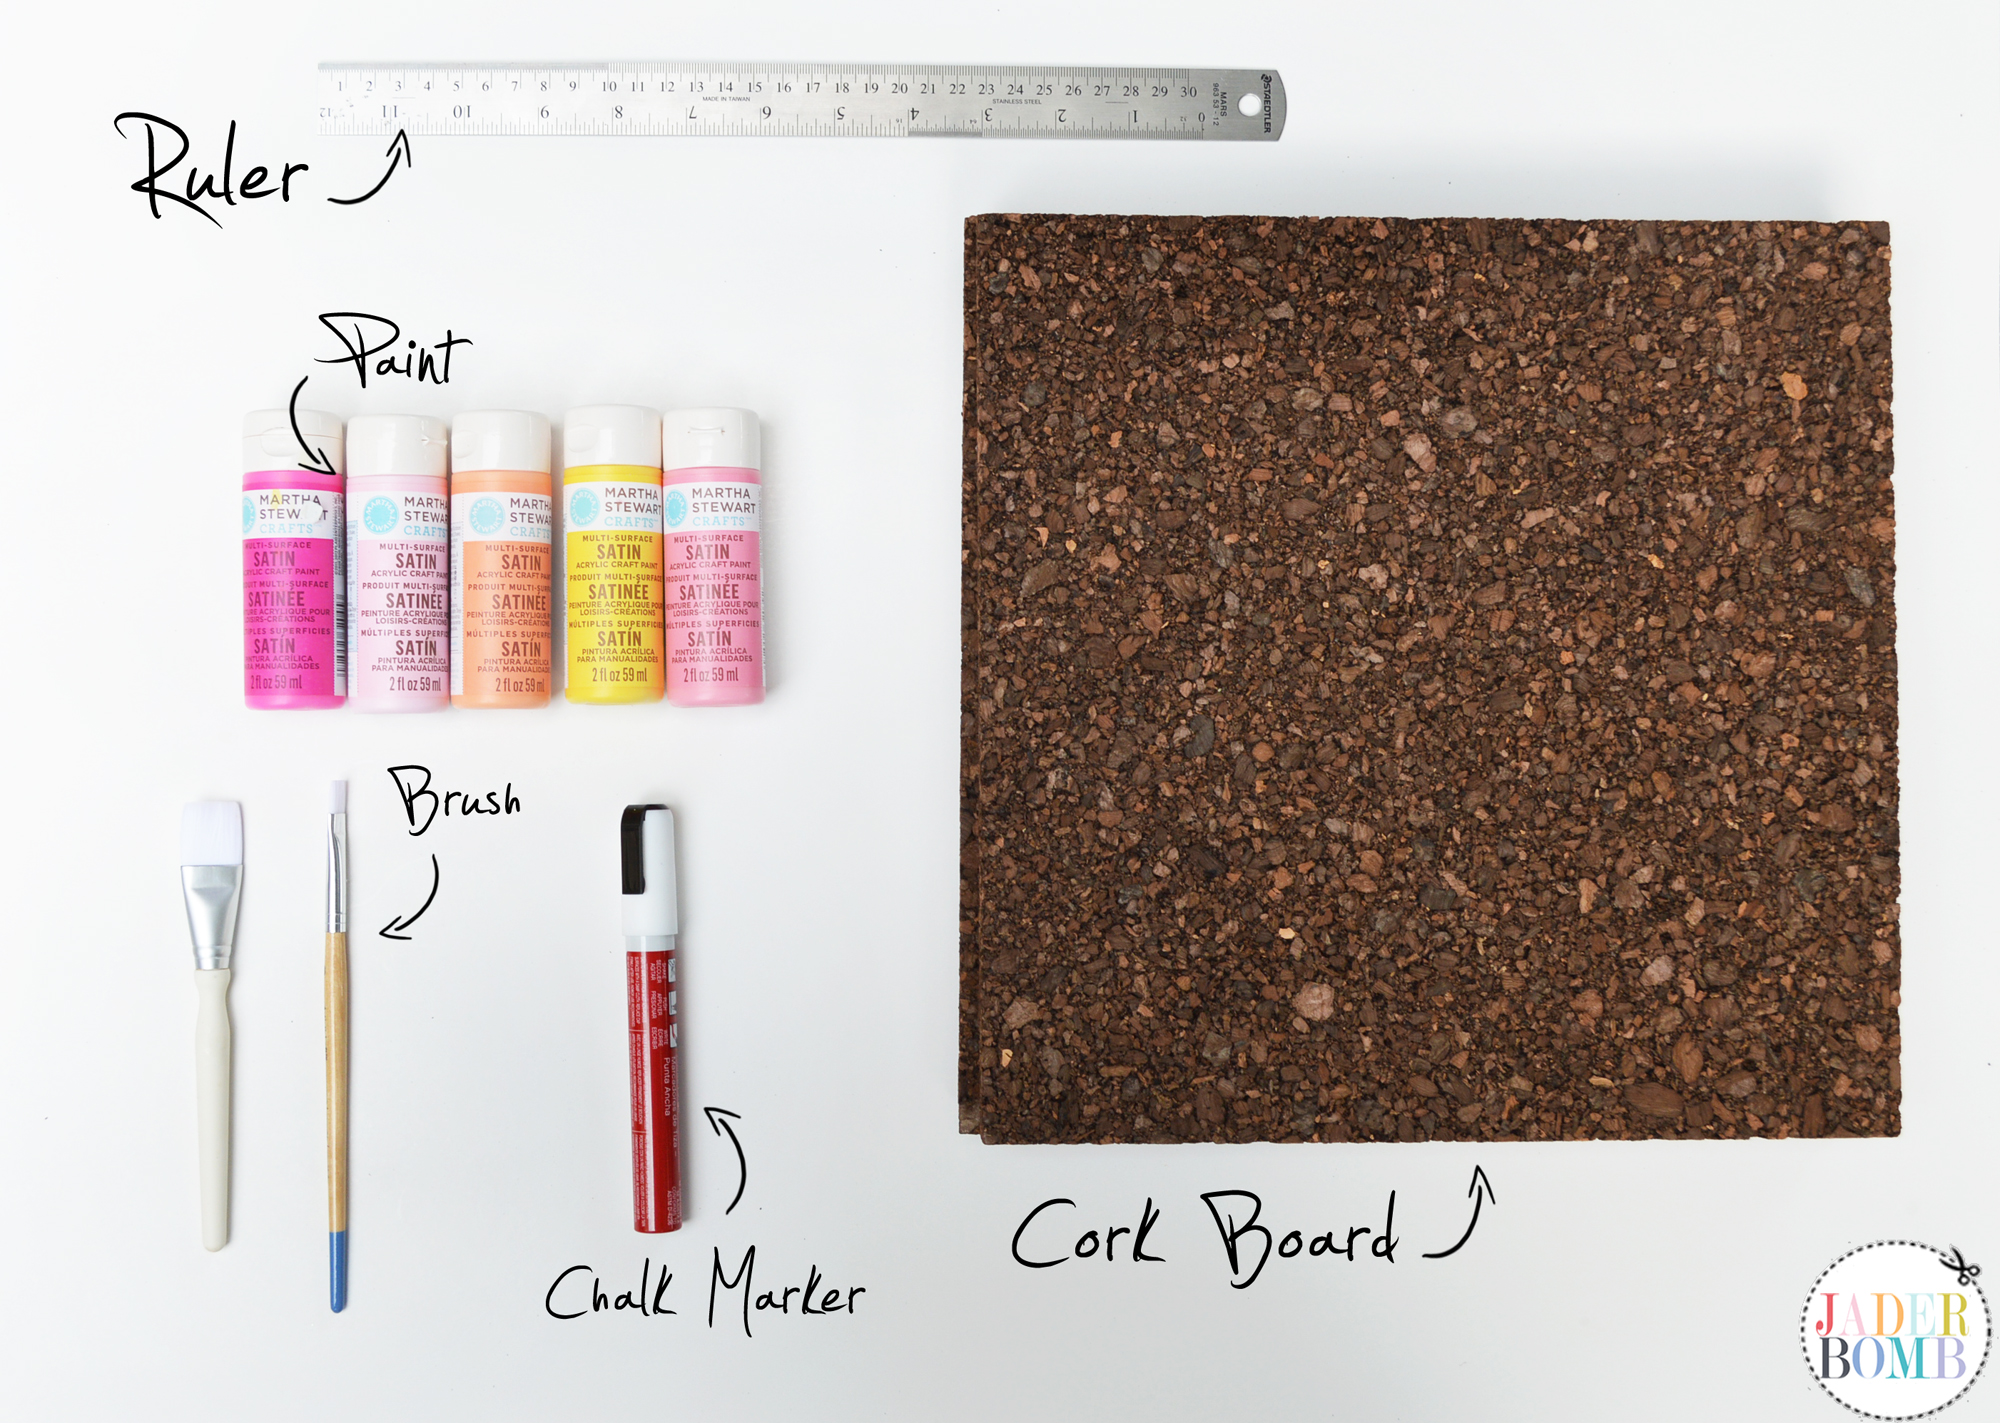
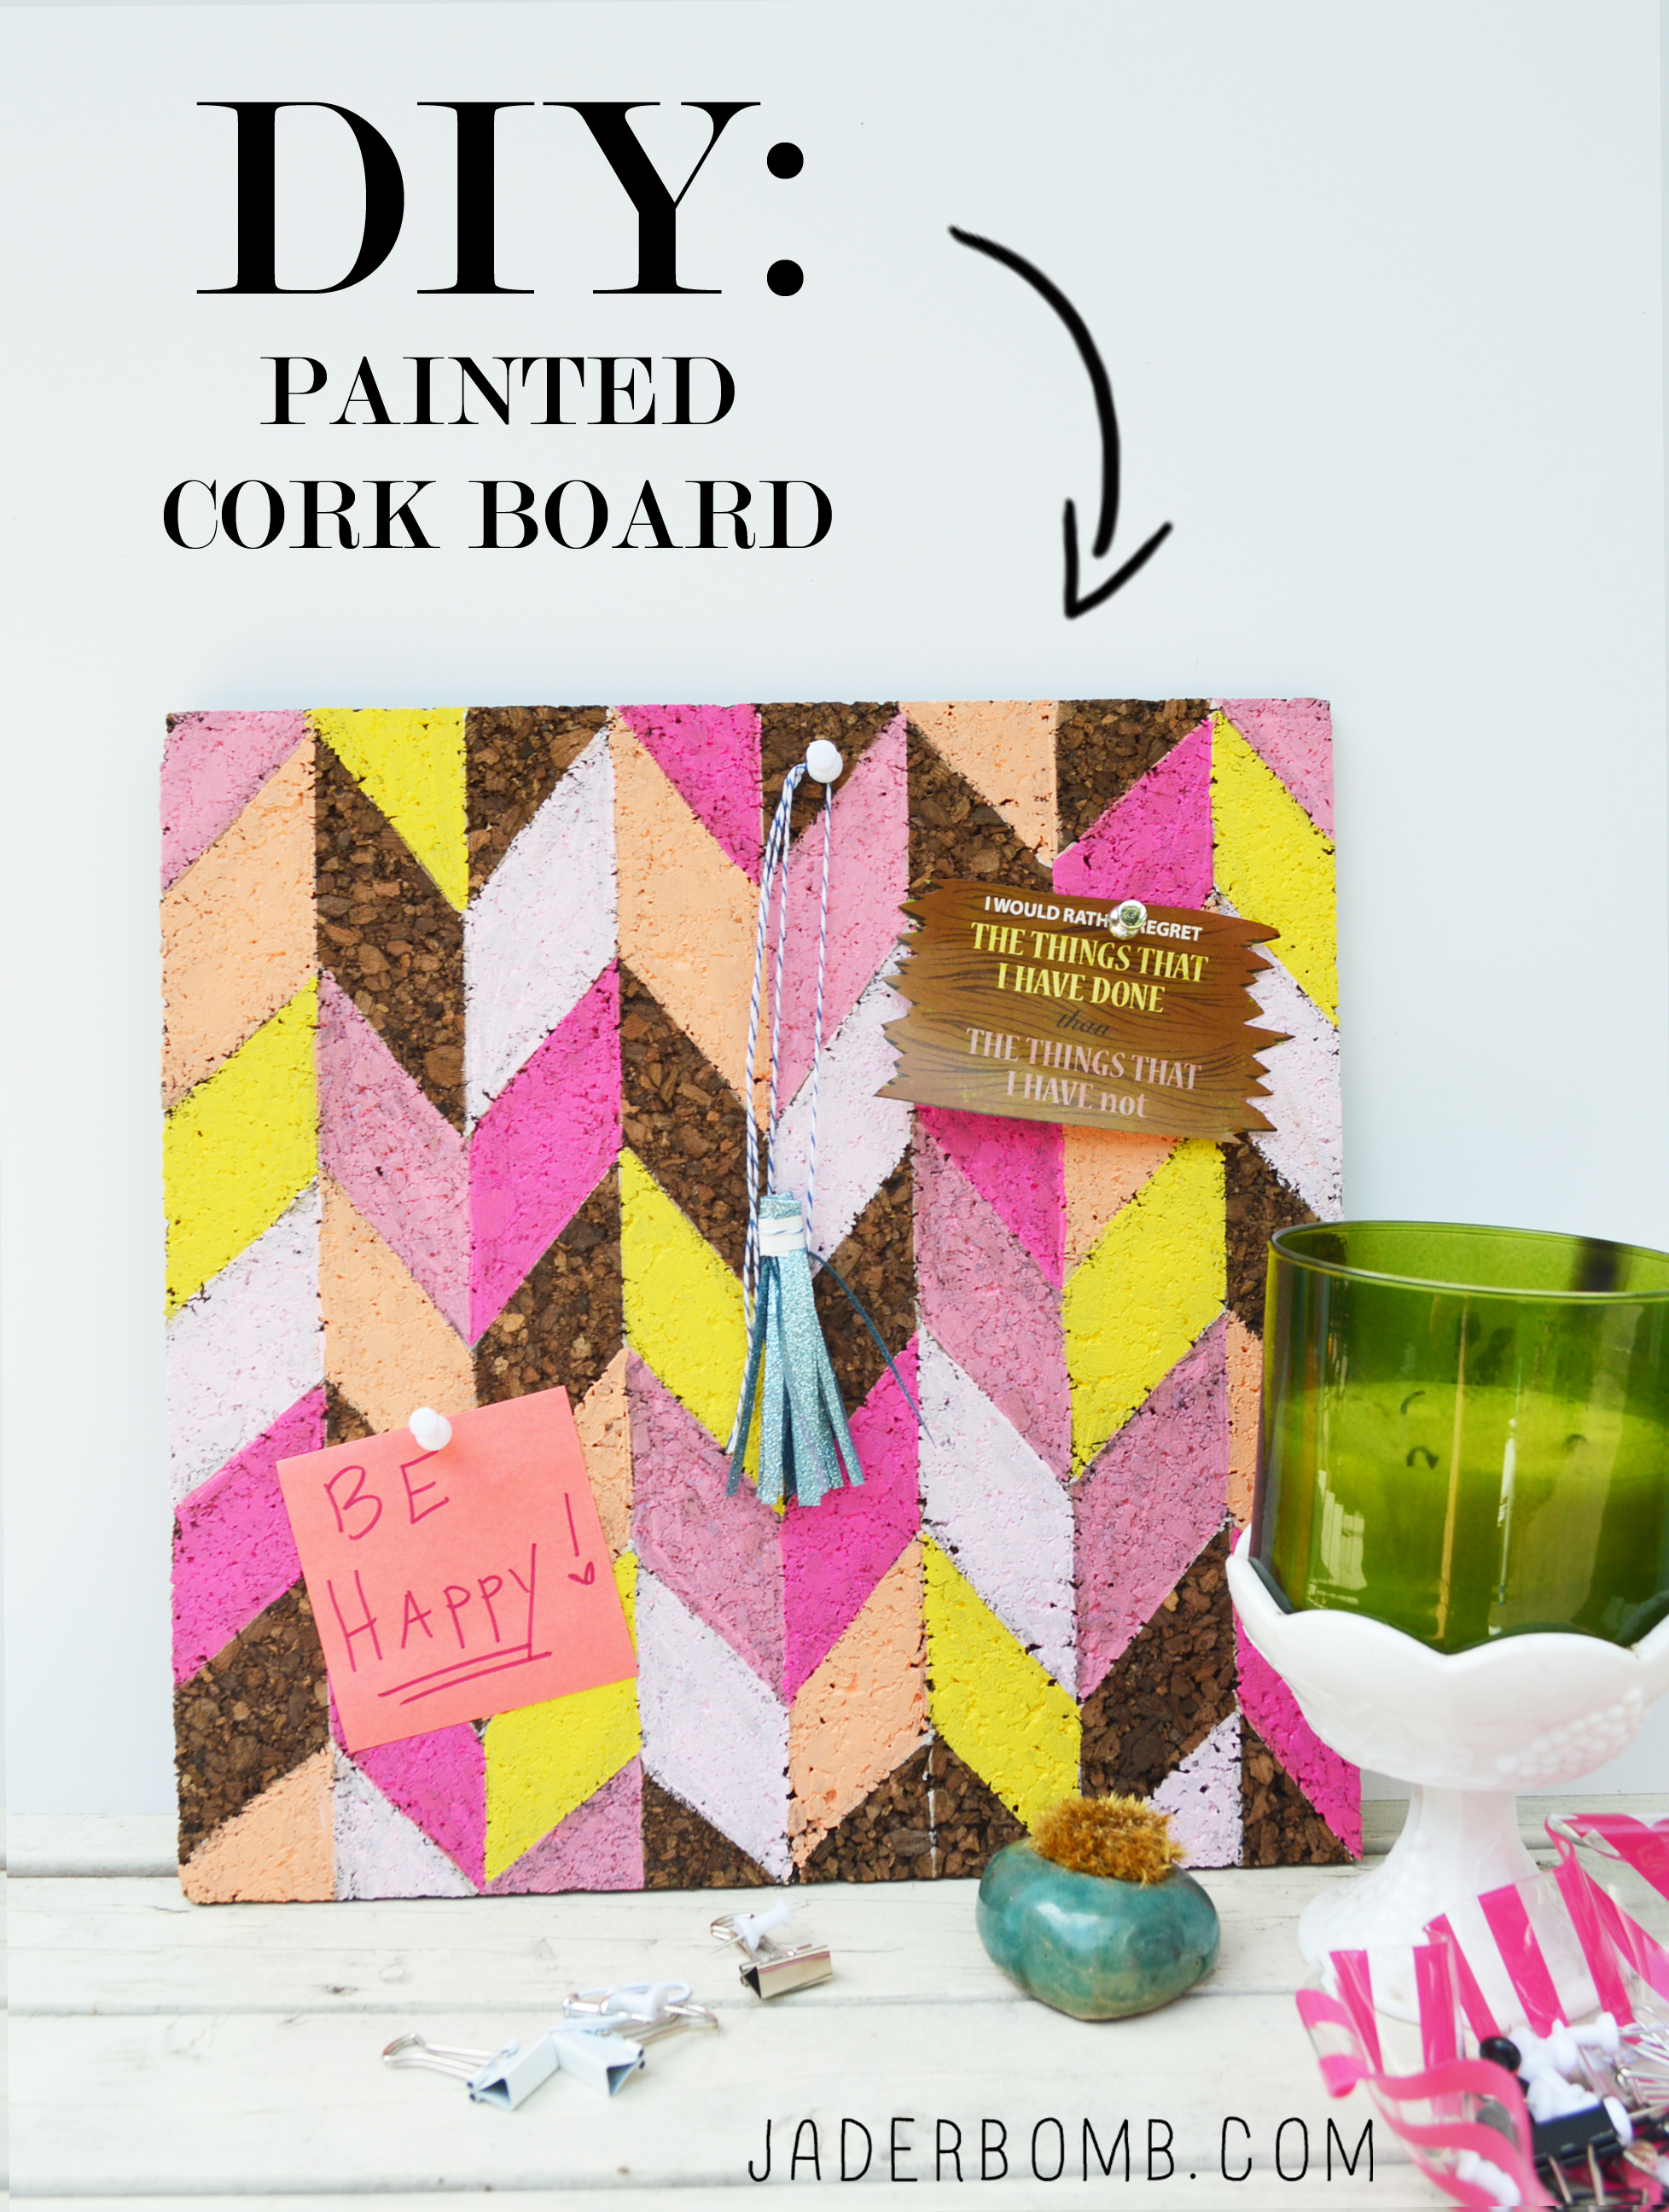
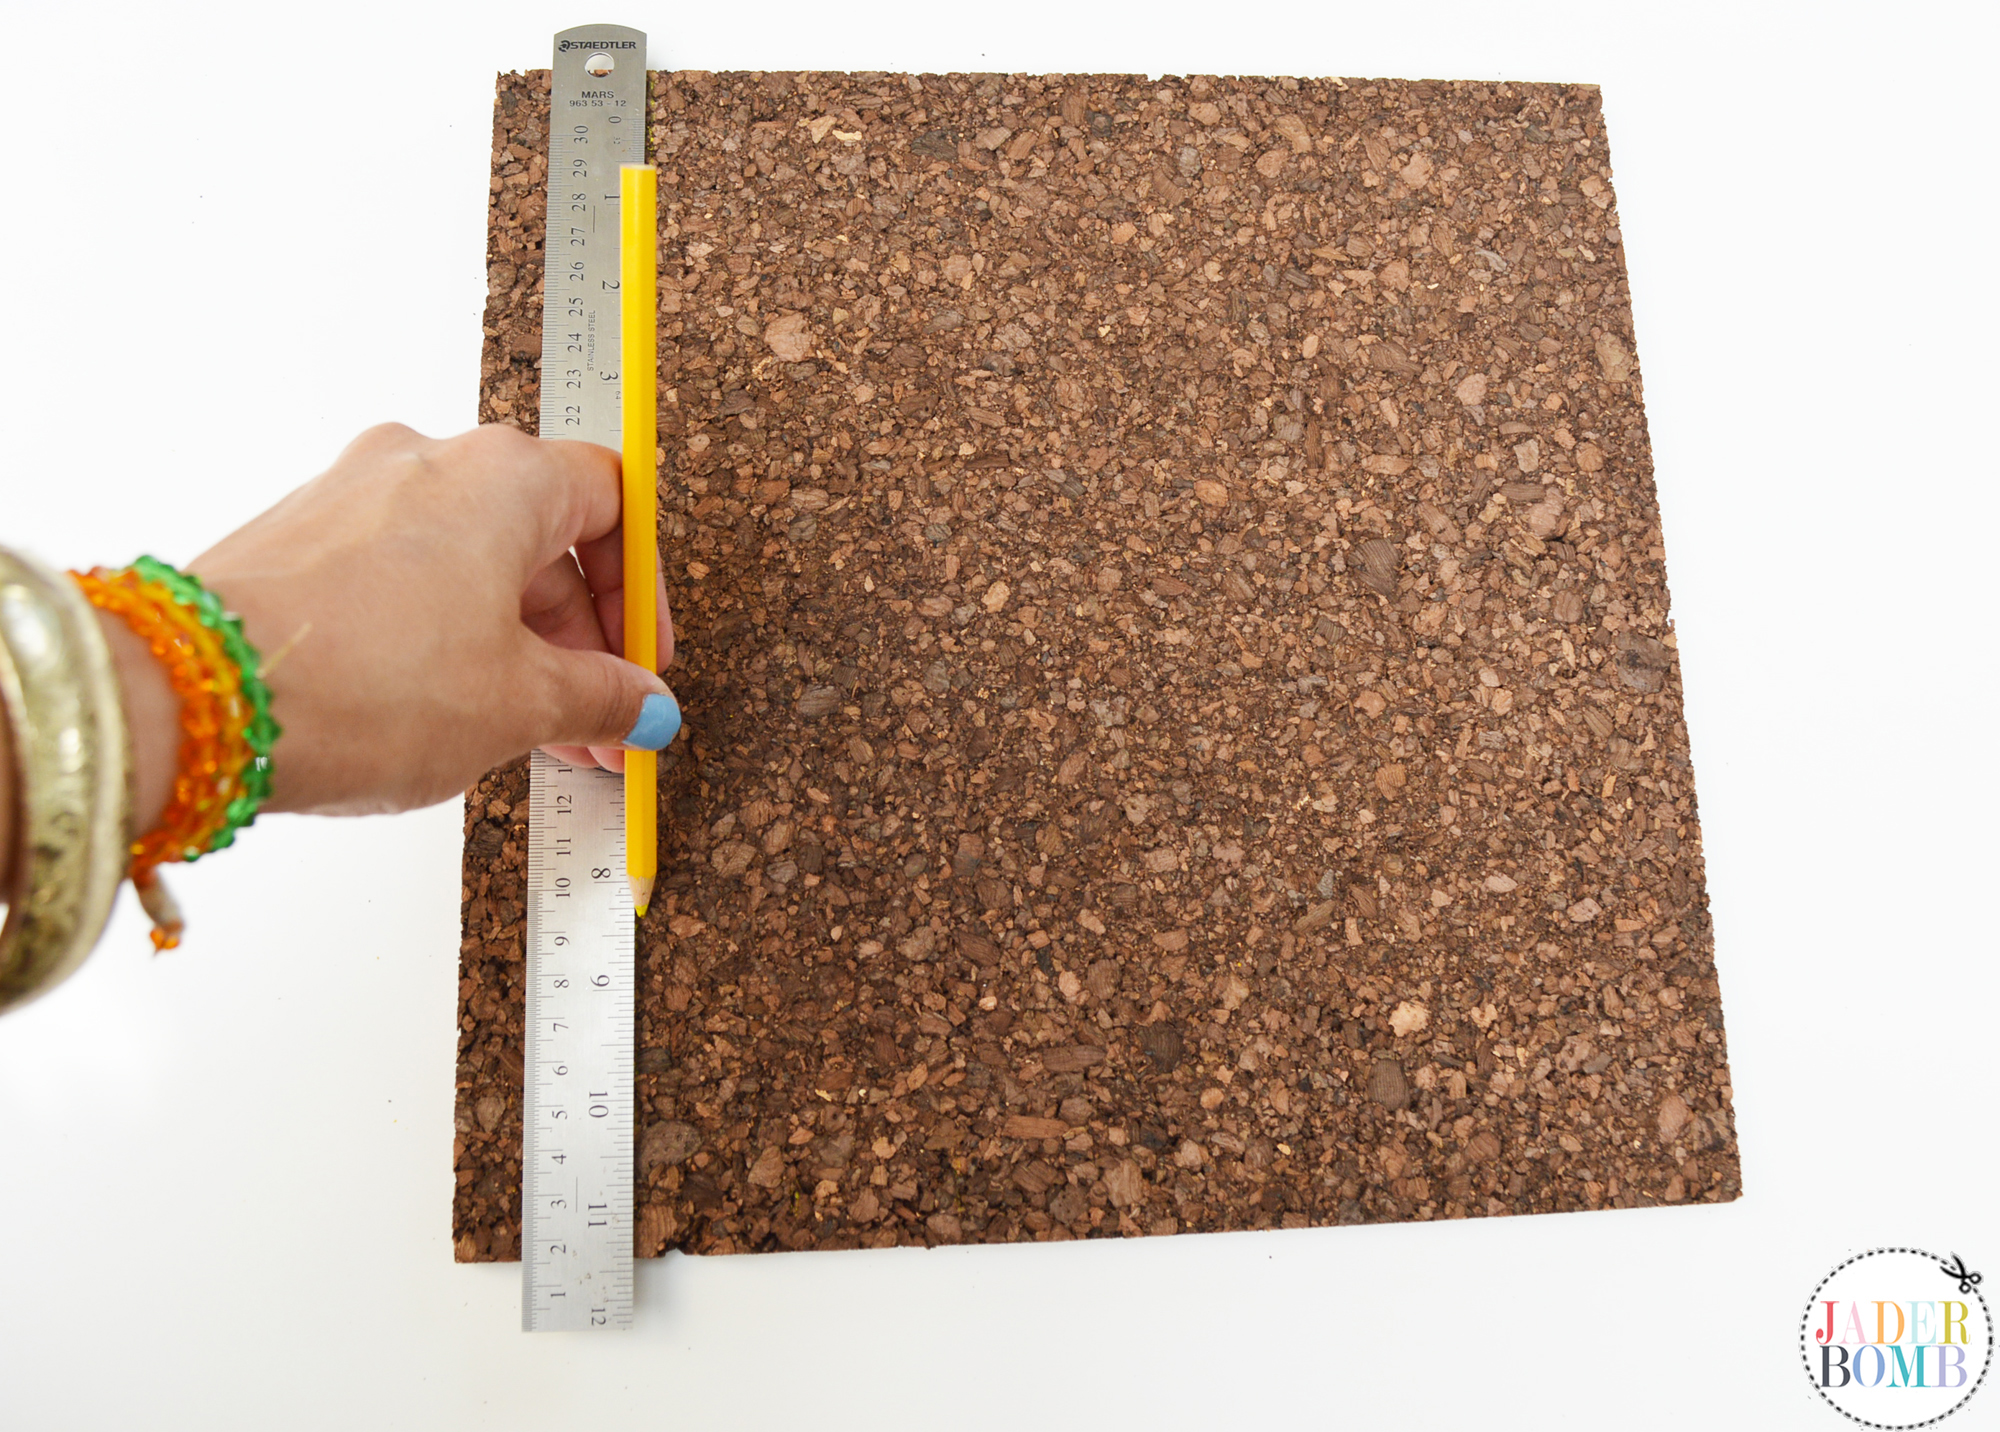
Step ONE: Get out your cork board and lay it on a flat surface.
DSC_0297

Step TWO: Get your ruler and mark 1.5″ dot’s with your chalk board marker or a light colored pencil. Do this all the way across the bottom of your cork board, on both sides. DSC_0285

Step THREE: When you are done with your dots connect them from one end to the other. You are creating lines on your cork board.

DSC_0286
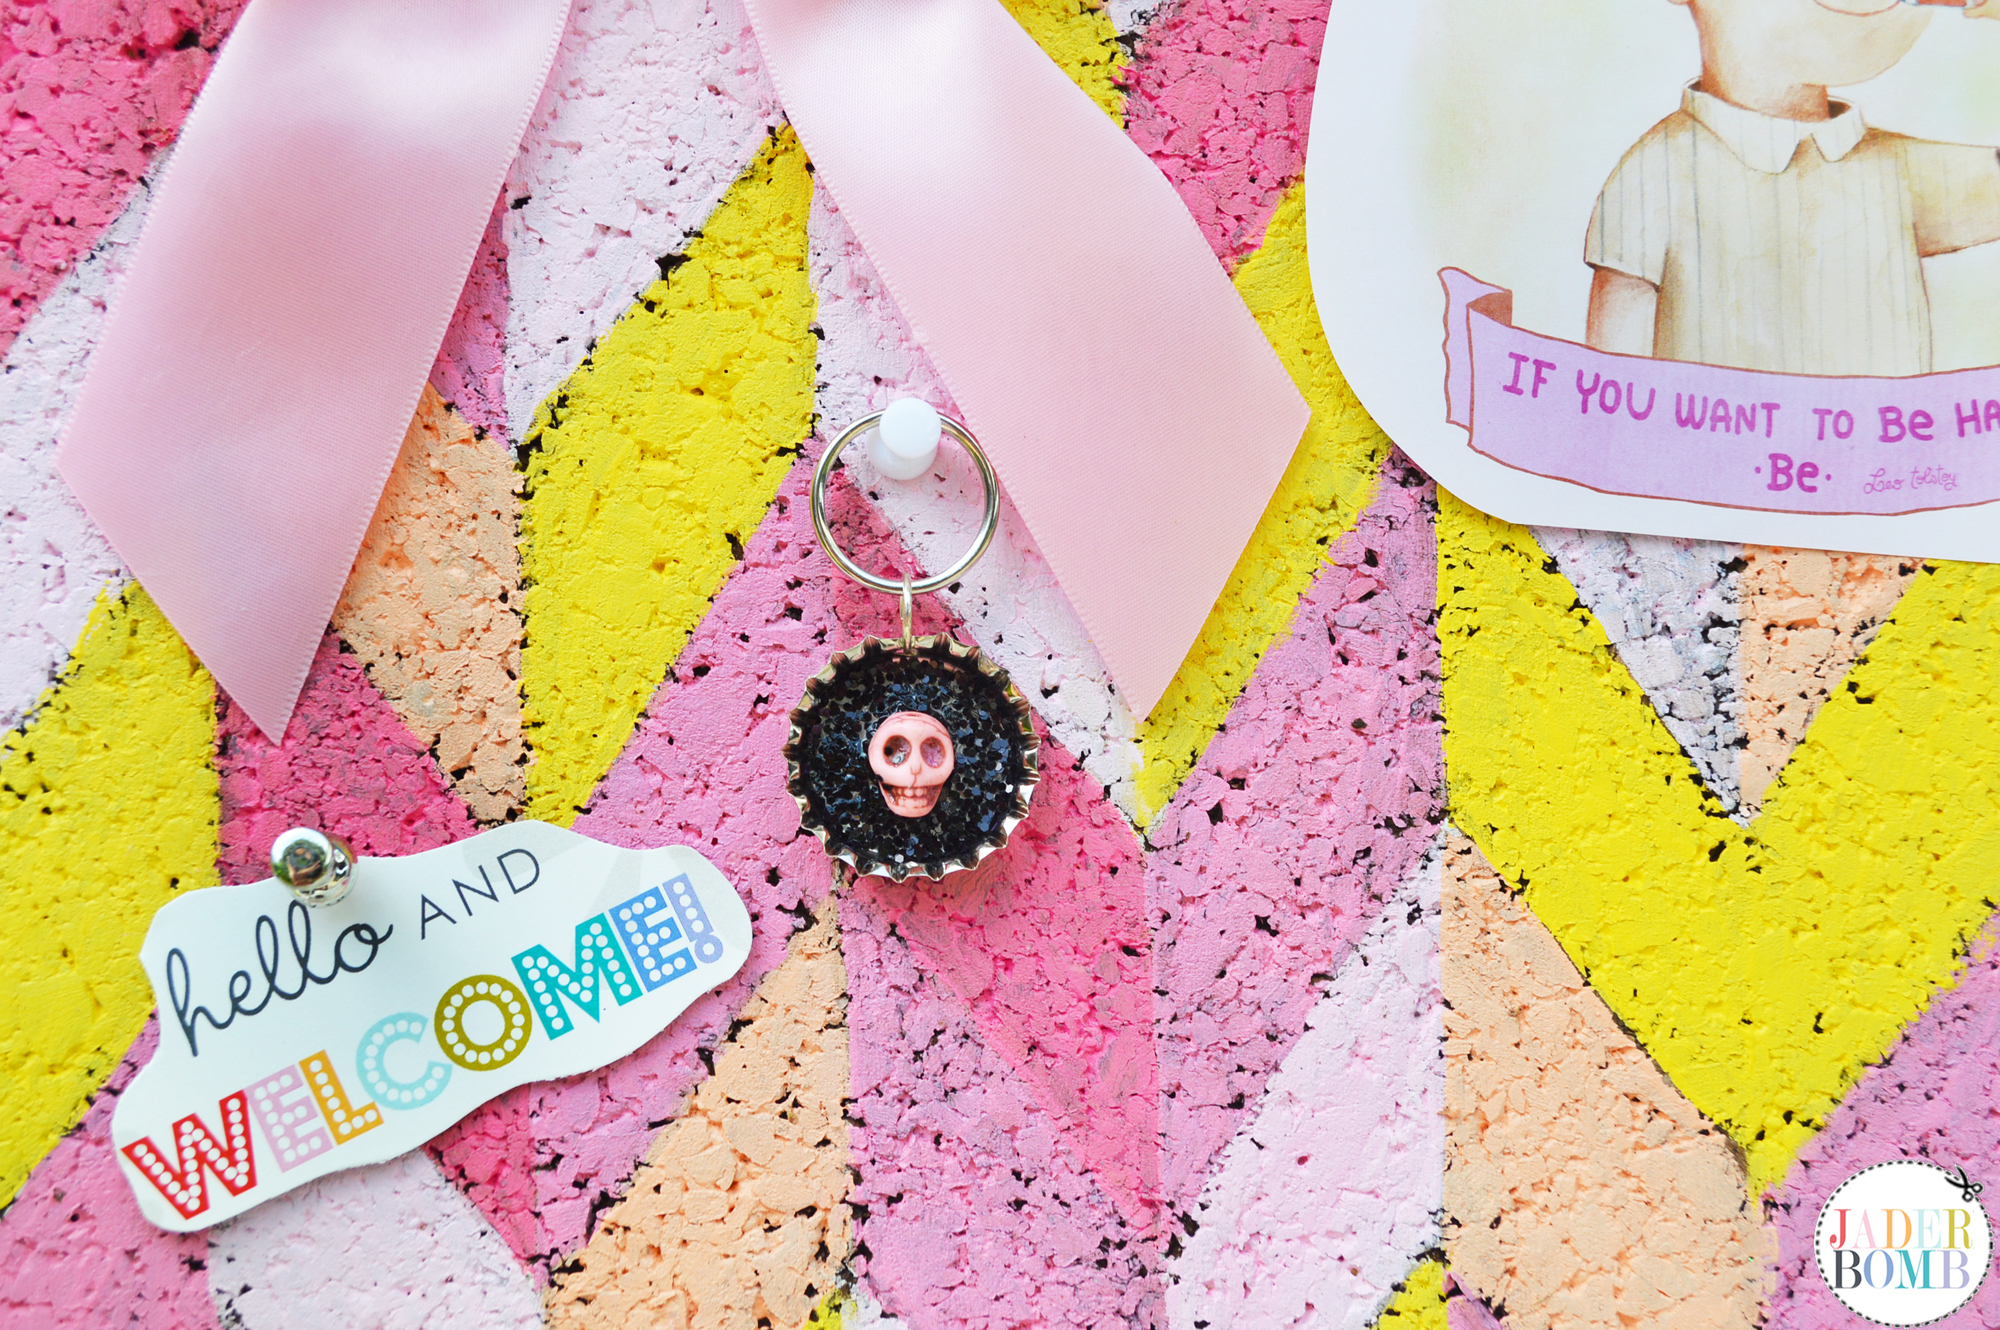
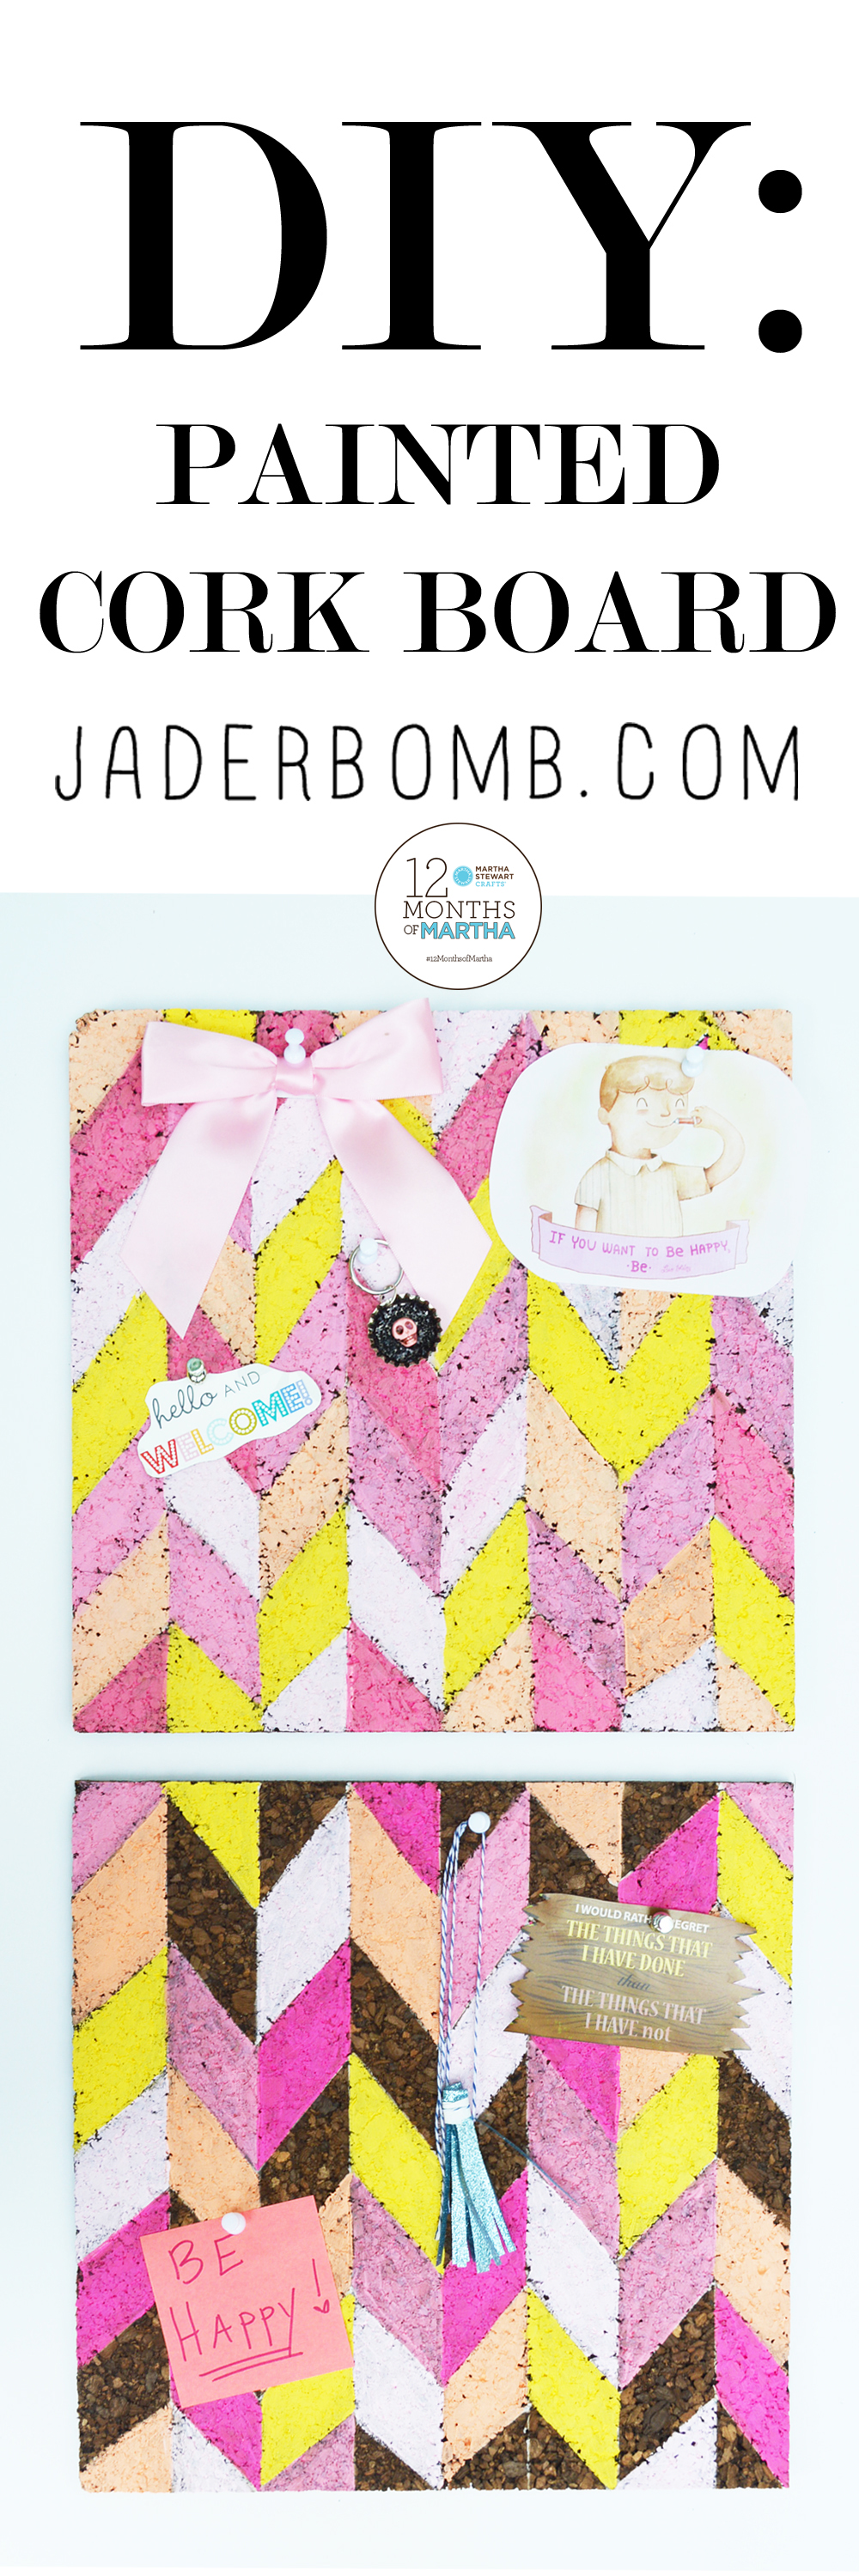
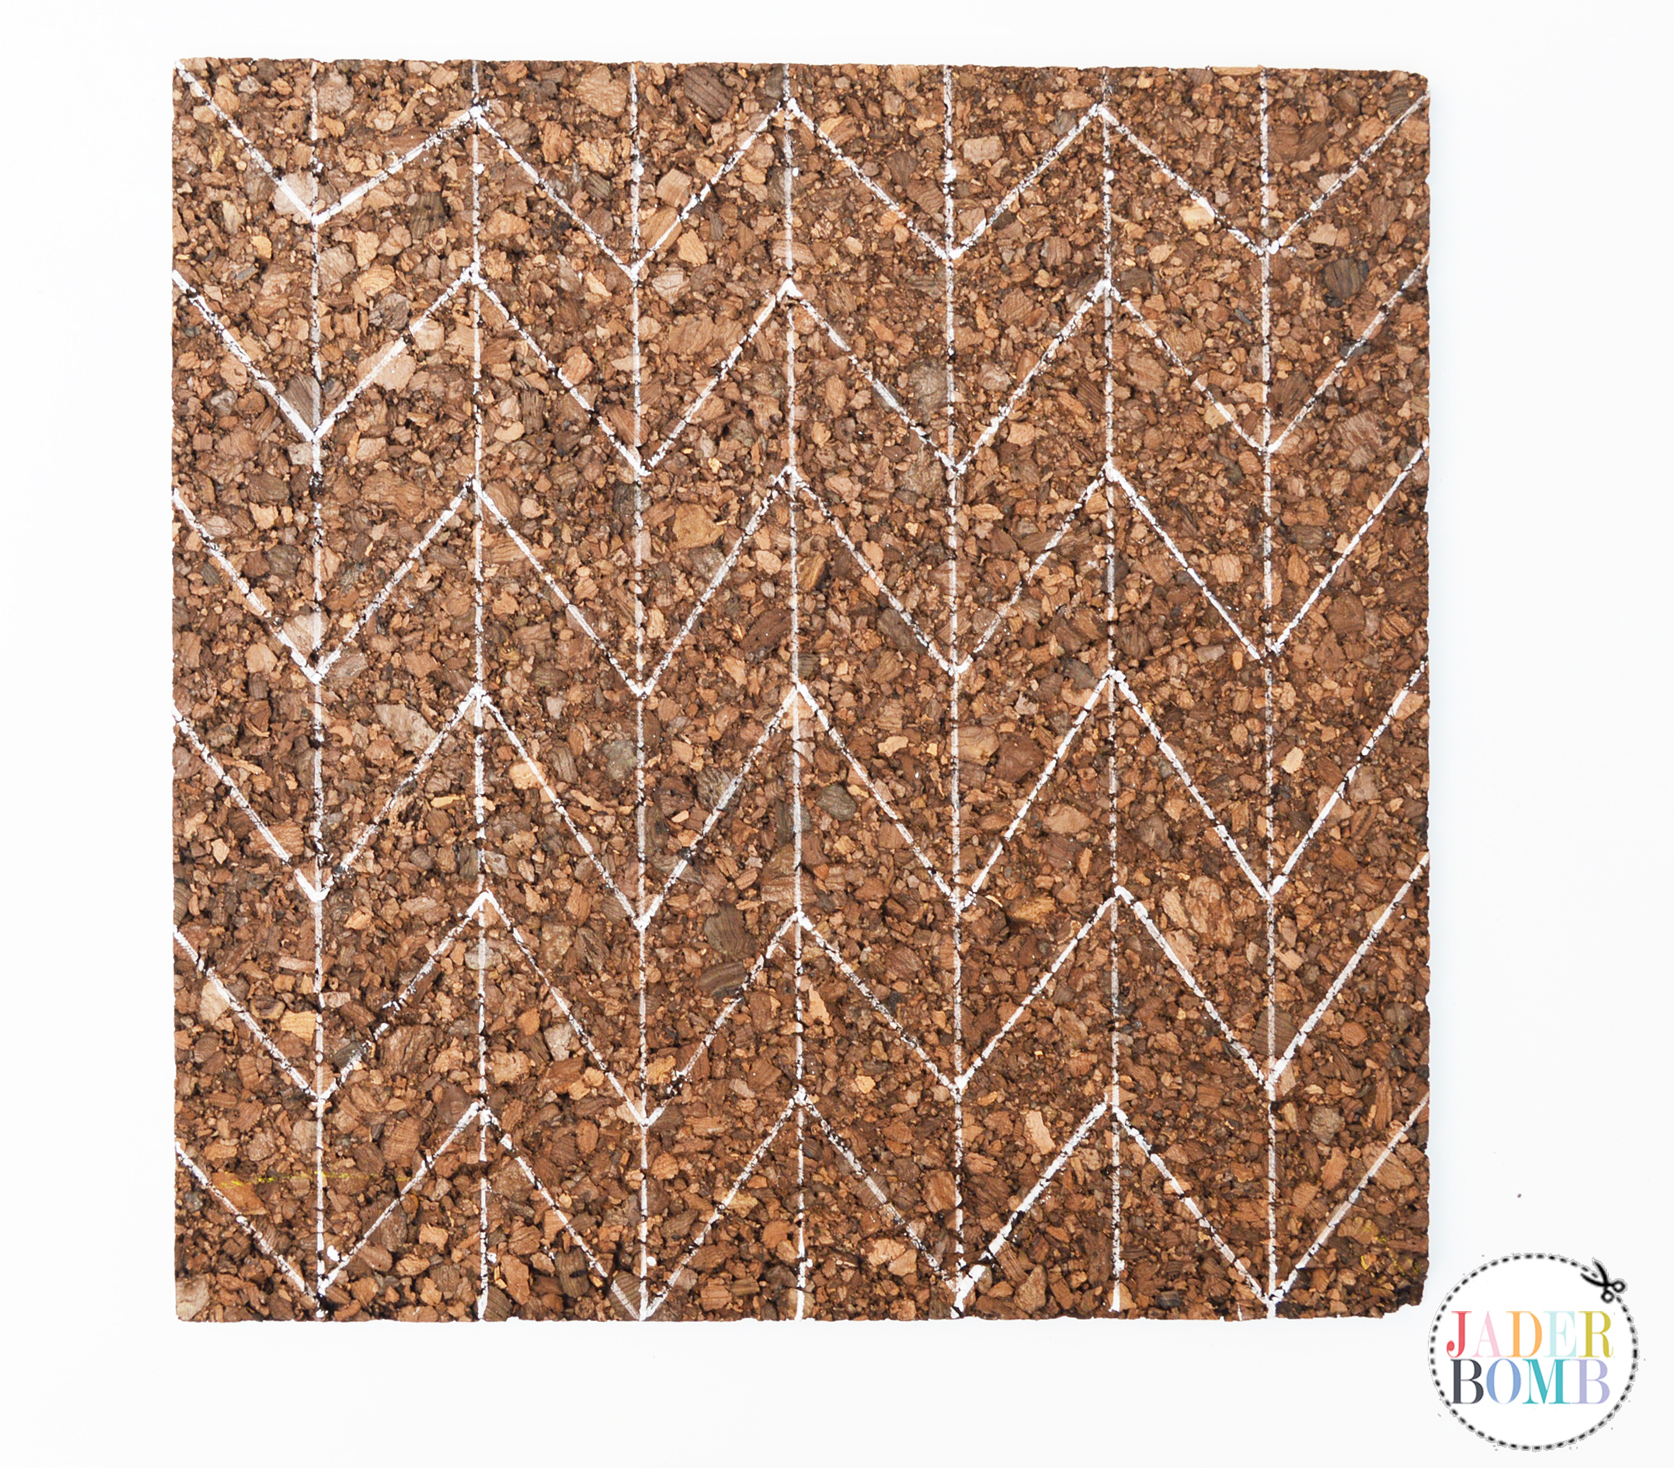
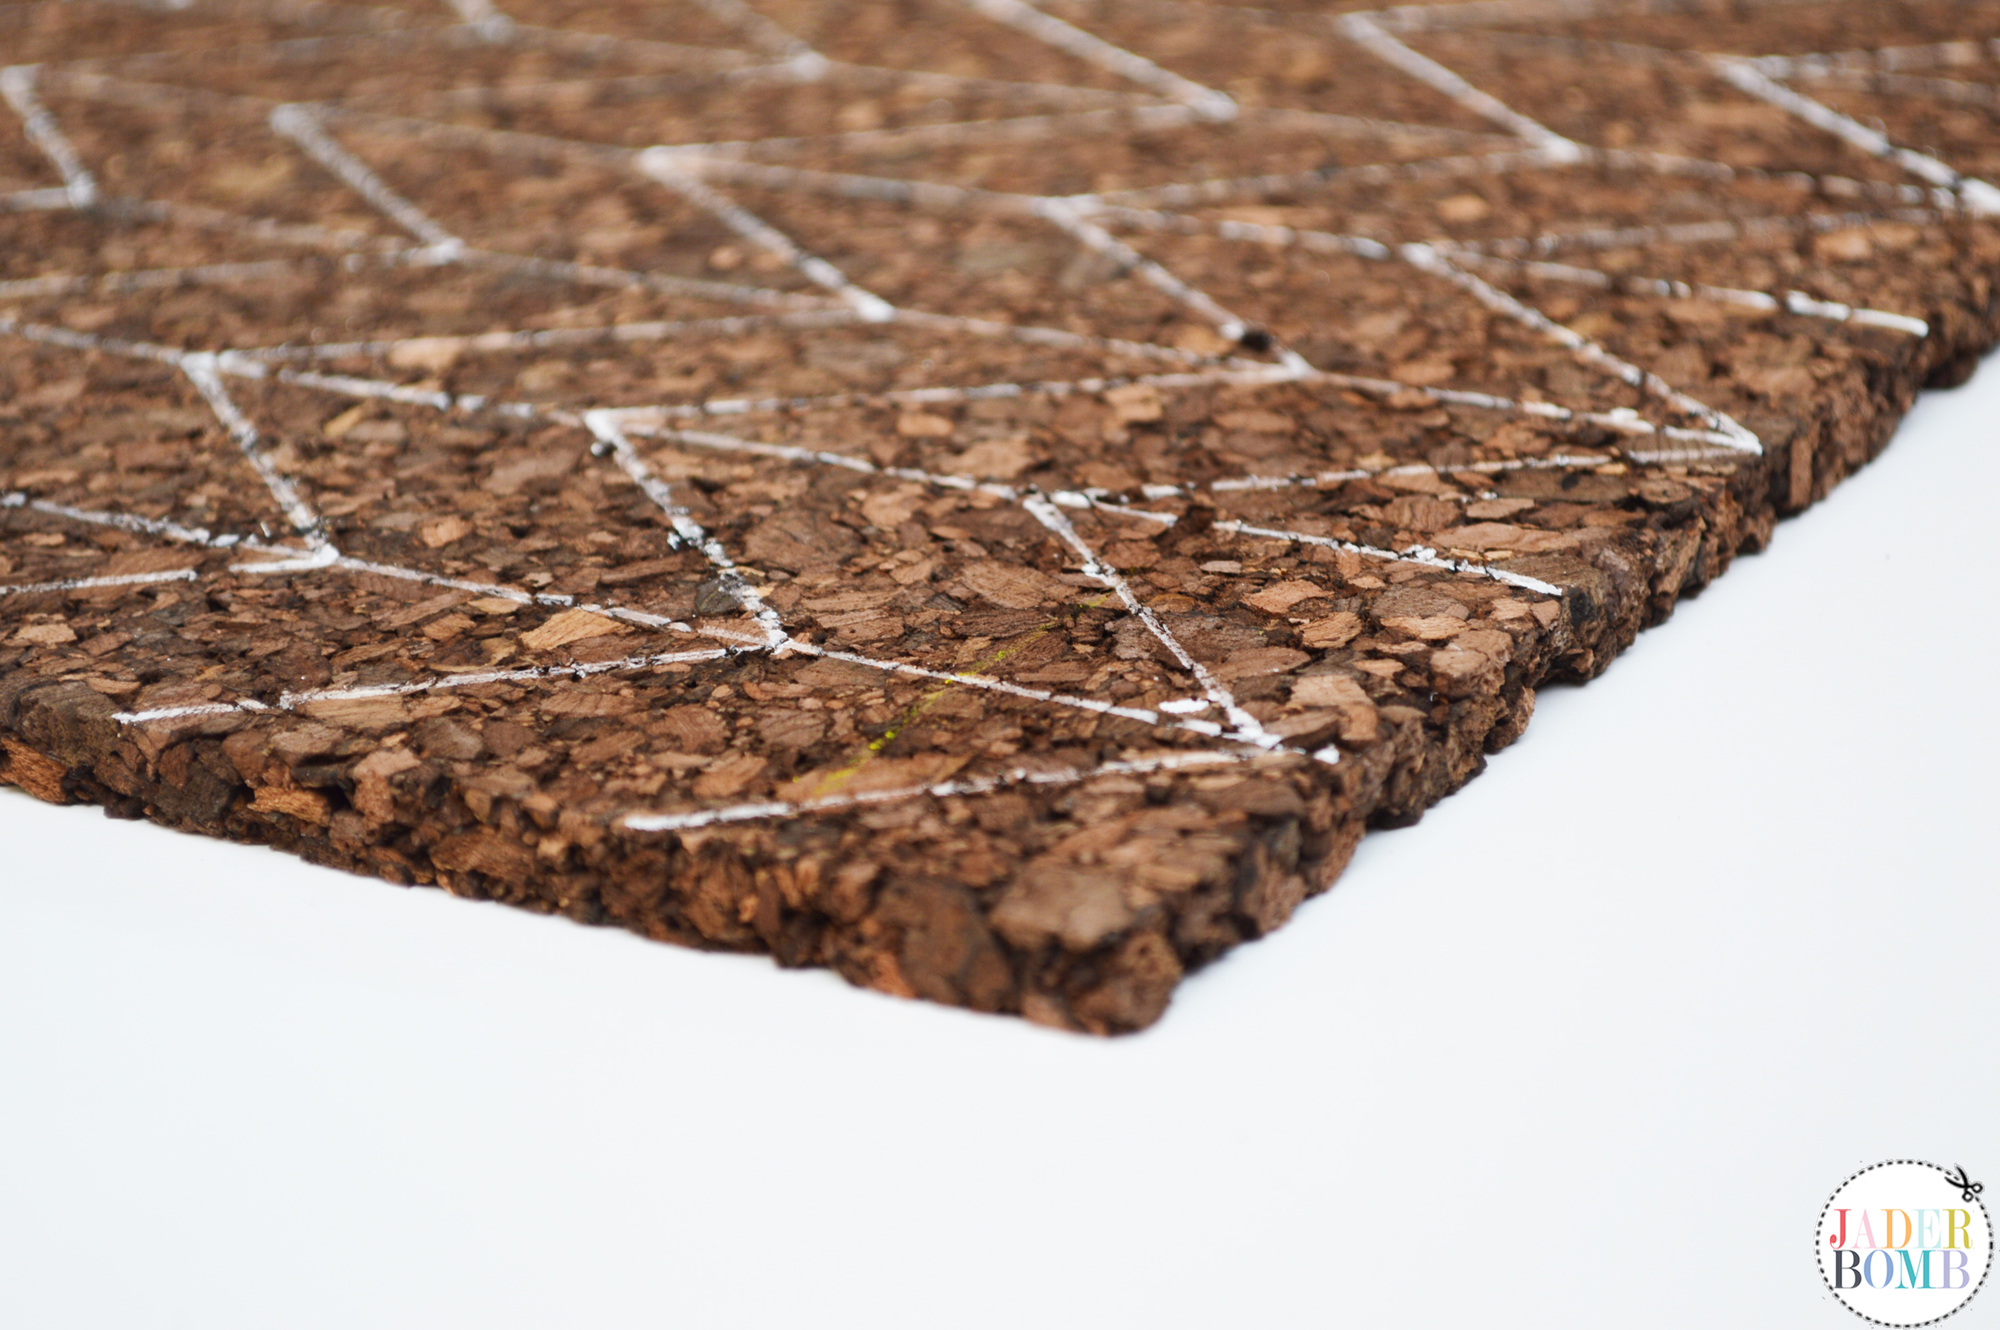
Step FOUR: This is what it should look like when you are done.
DSC_0298
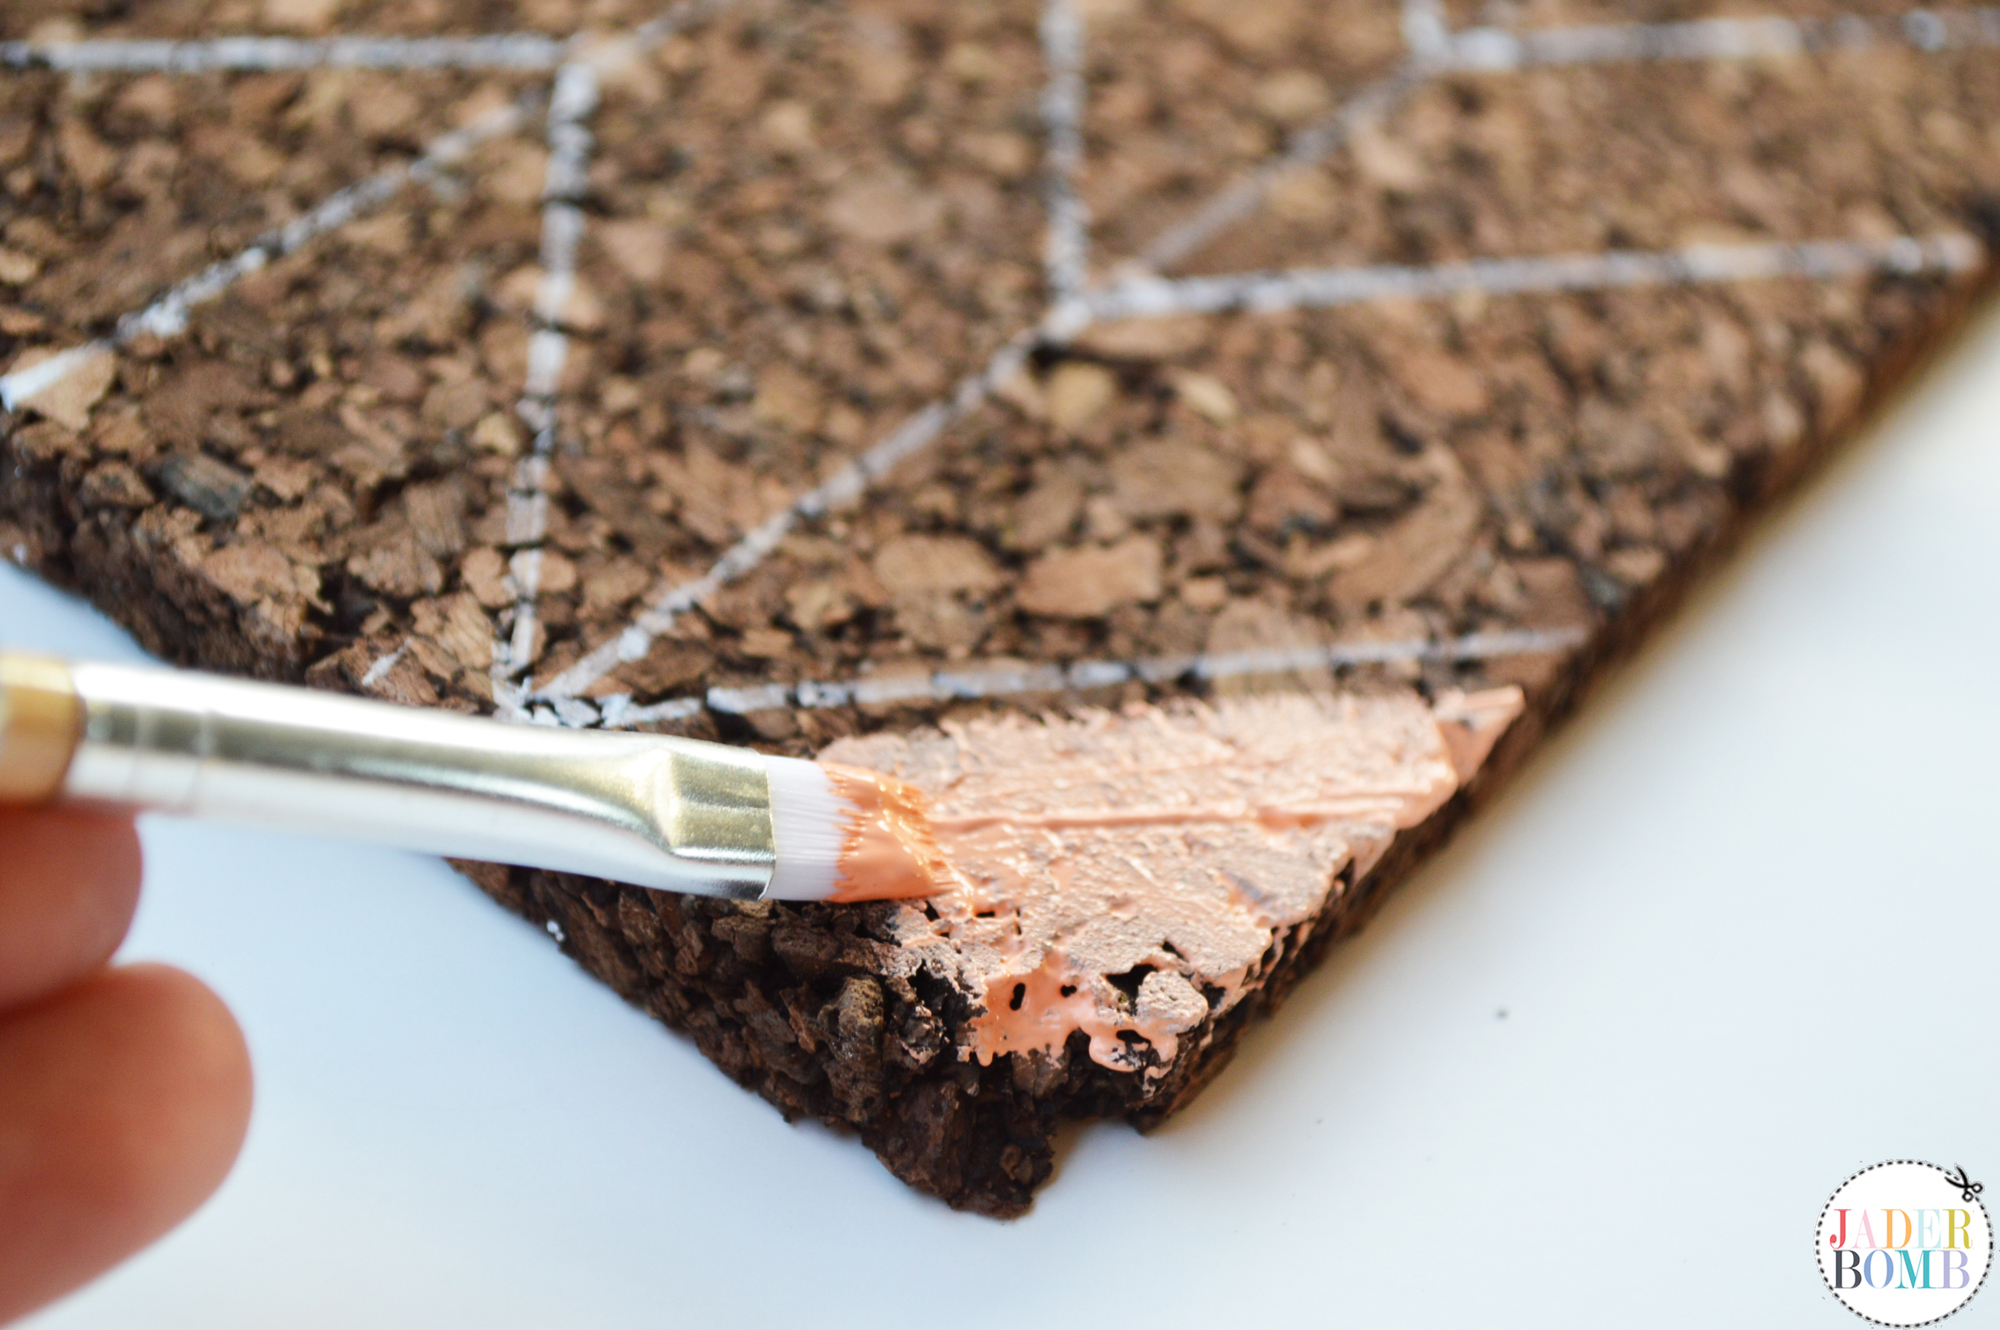
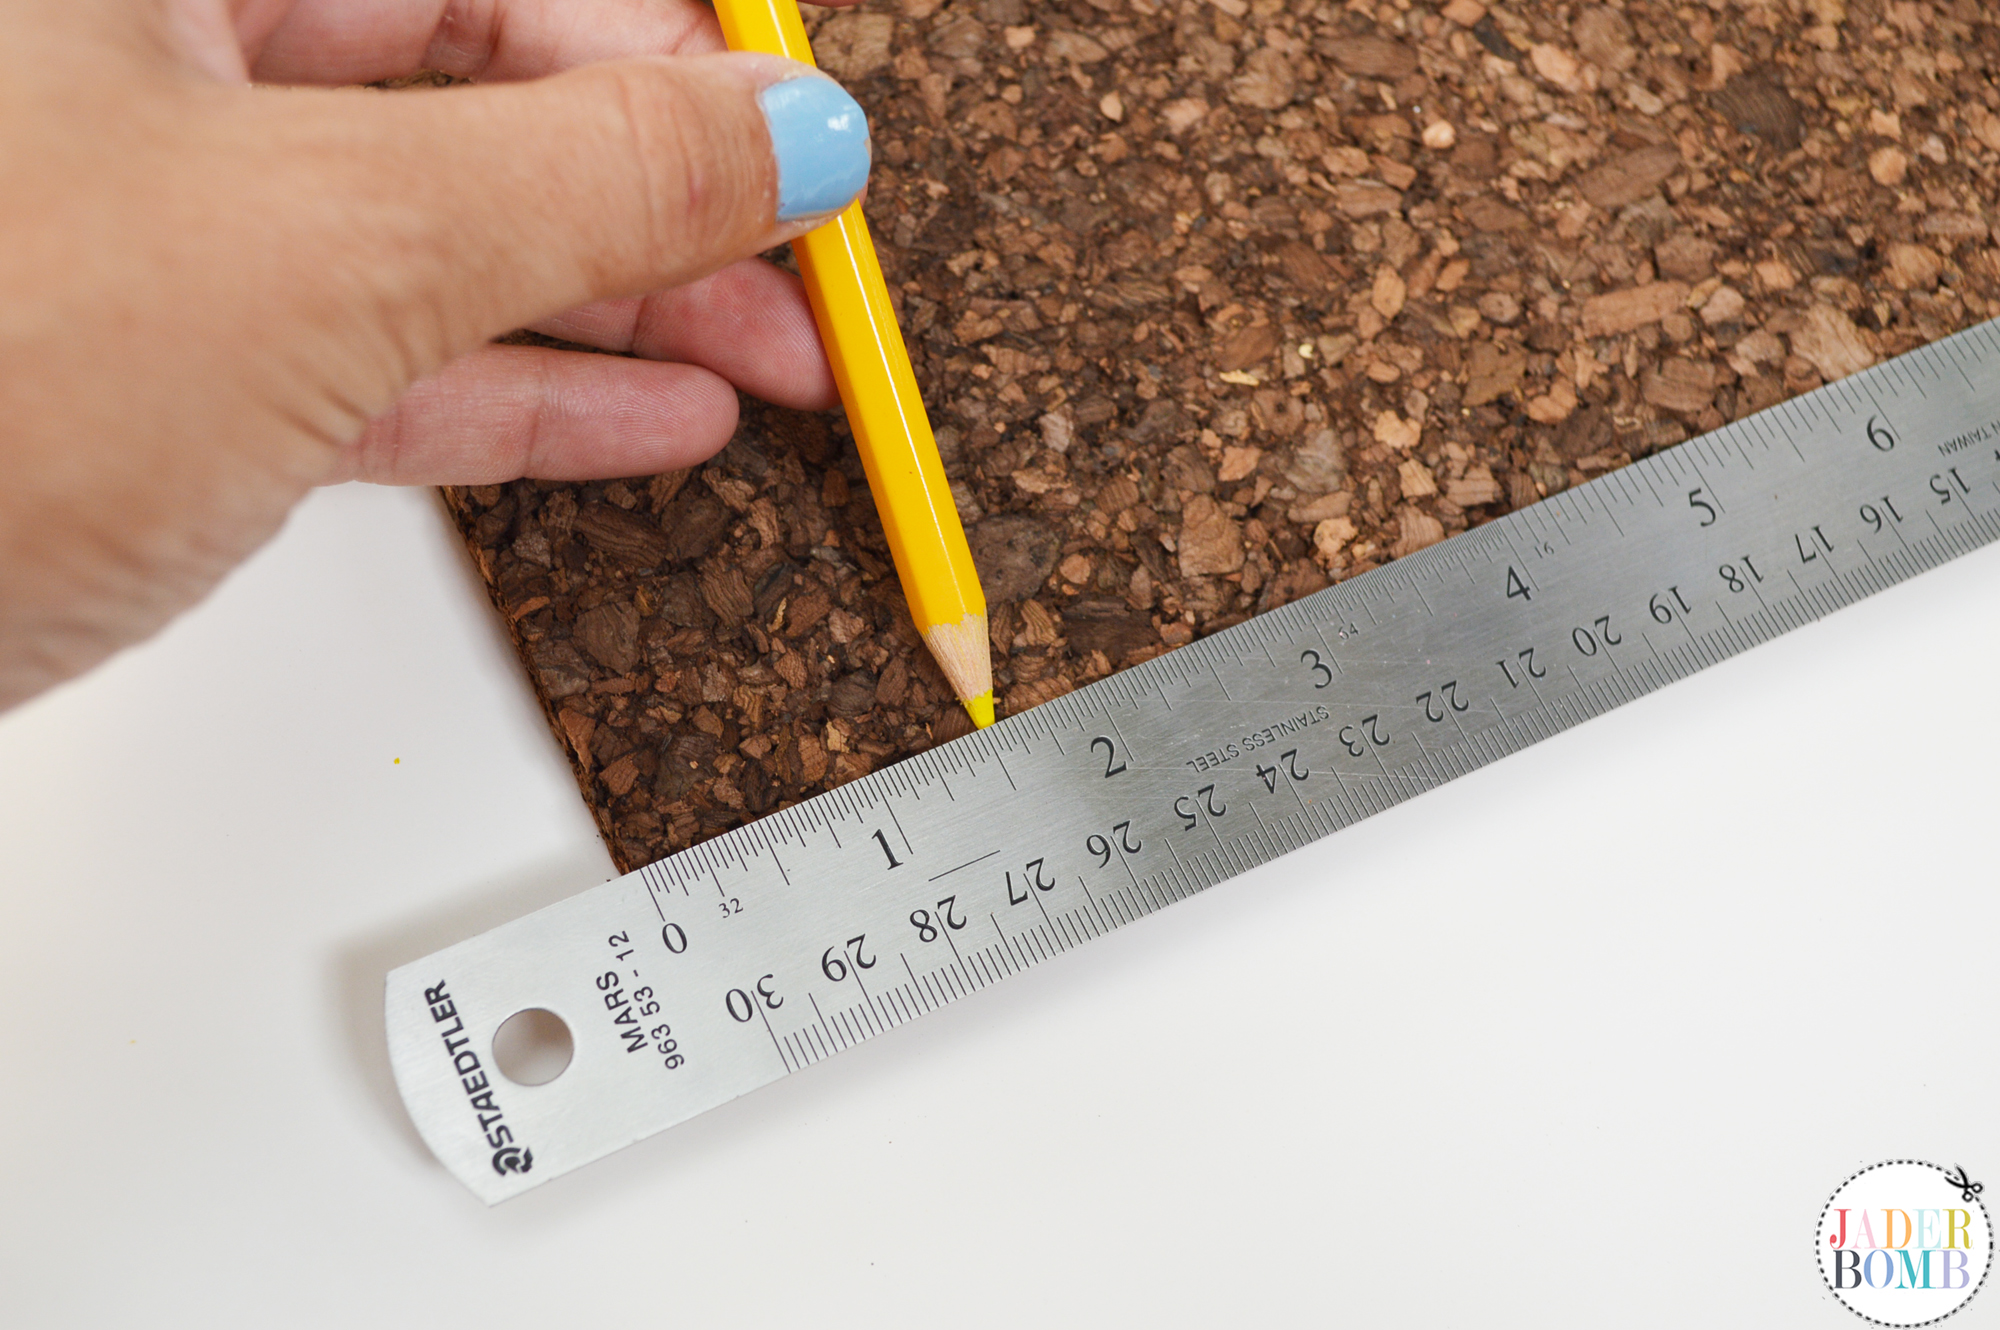
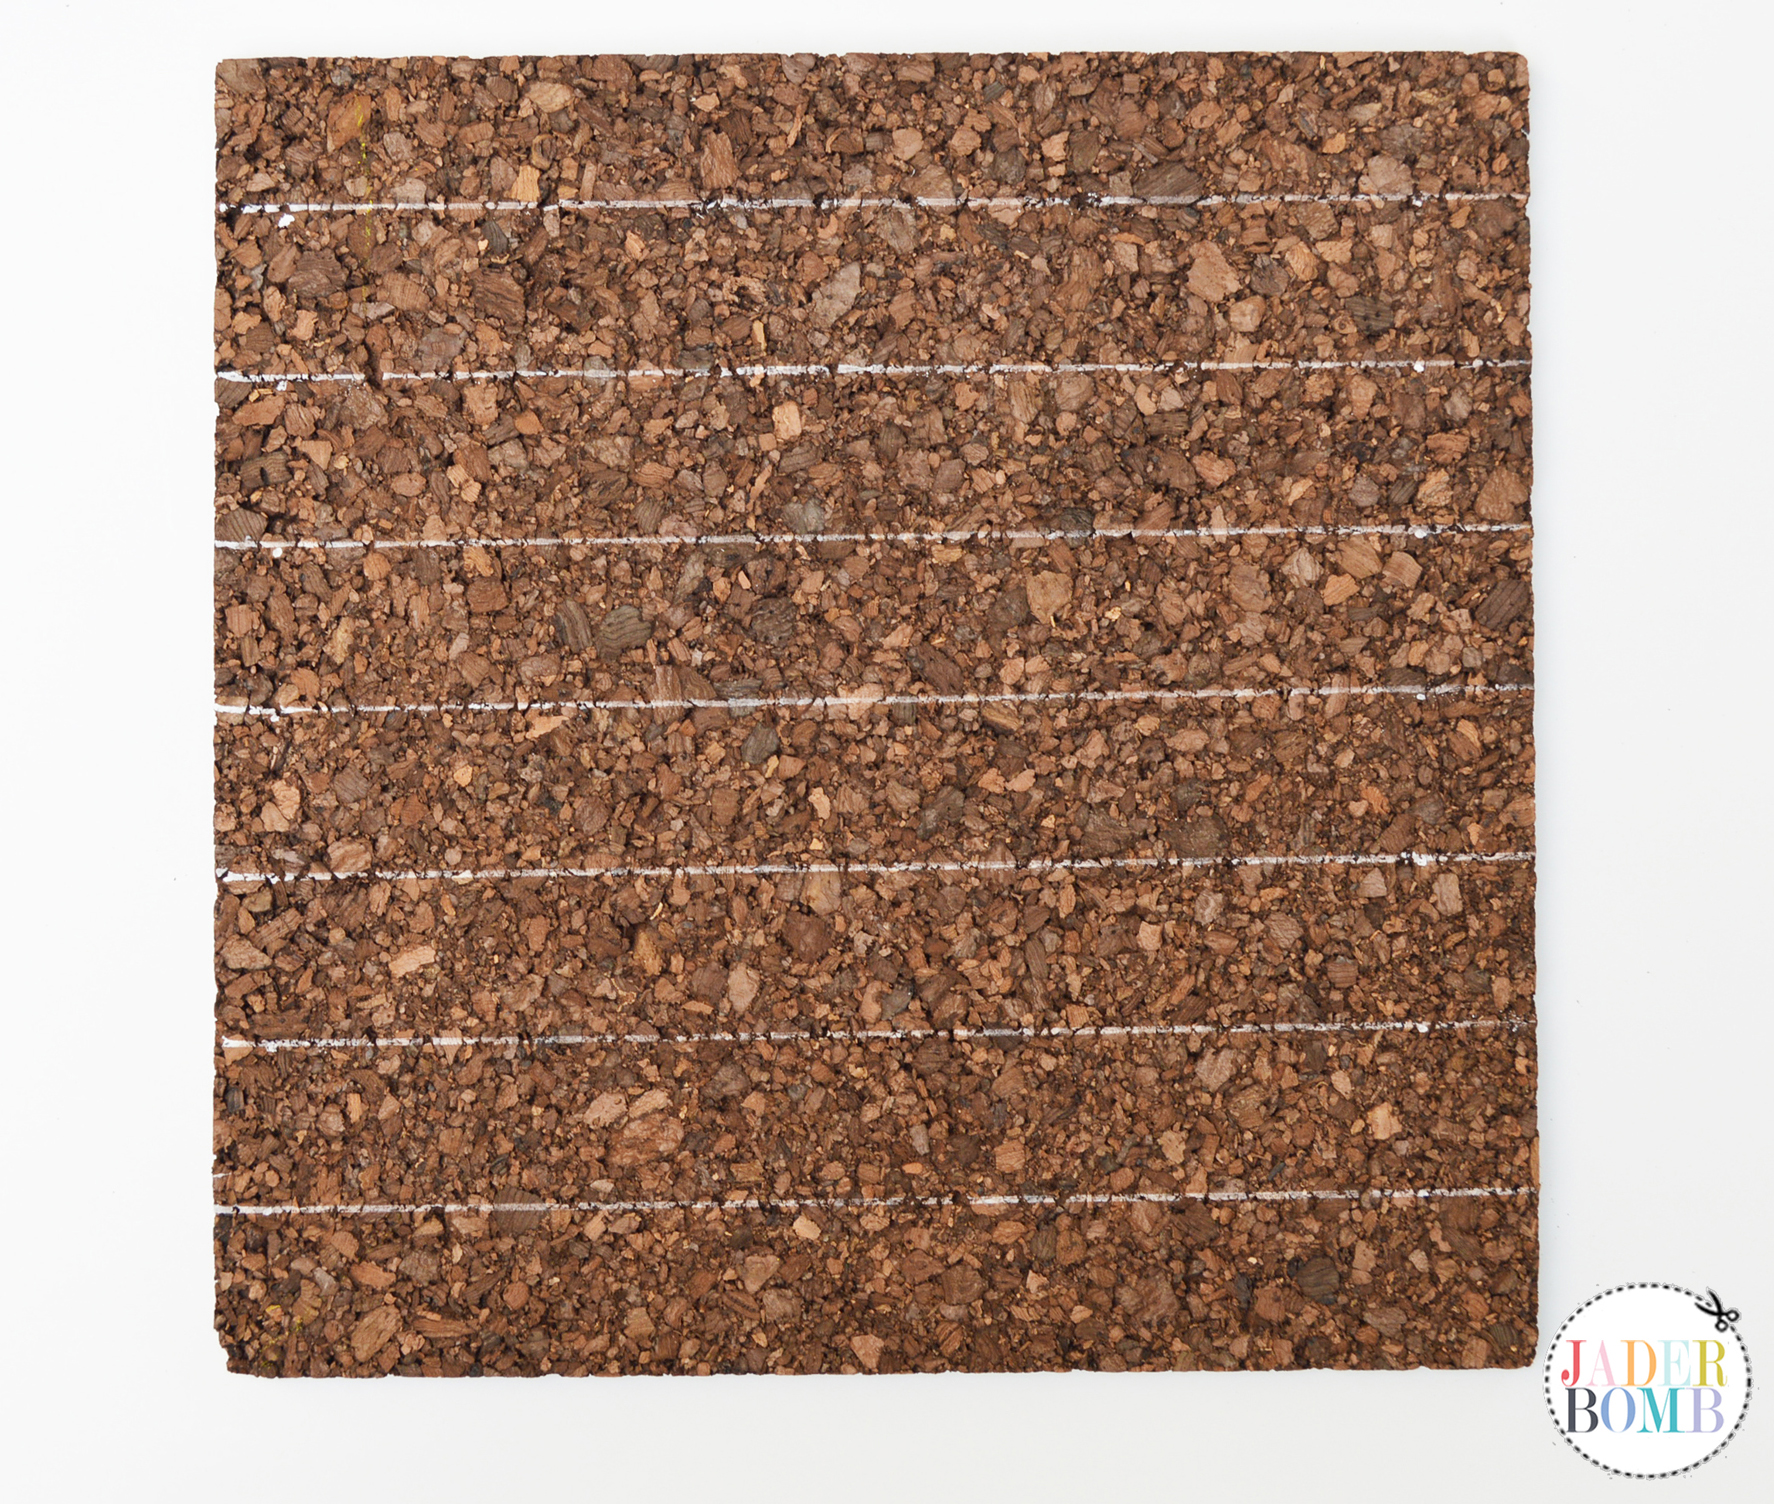
Step FIVE: Take your ruler and create angled lines in each section starting at the top and working your way to the bottom.

DSC_0299

Step SIX: The first section your lines will go downward then the next section you will make your lines go in the opposite direction. You will be creating a “chevron” appearance. DSC_0300 DSC_0302

DSC_0303
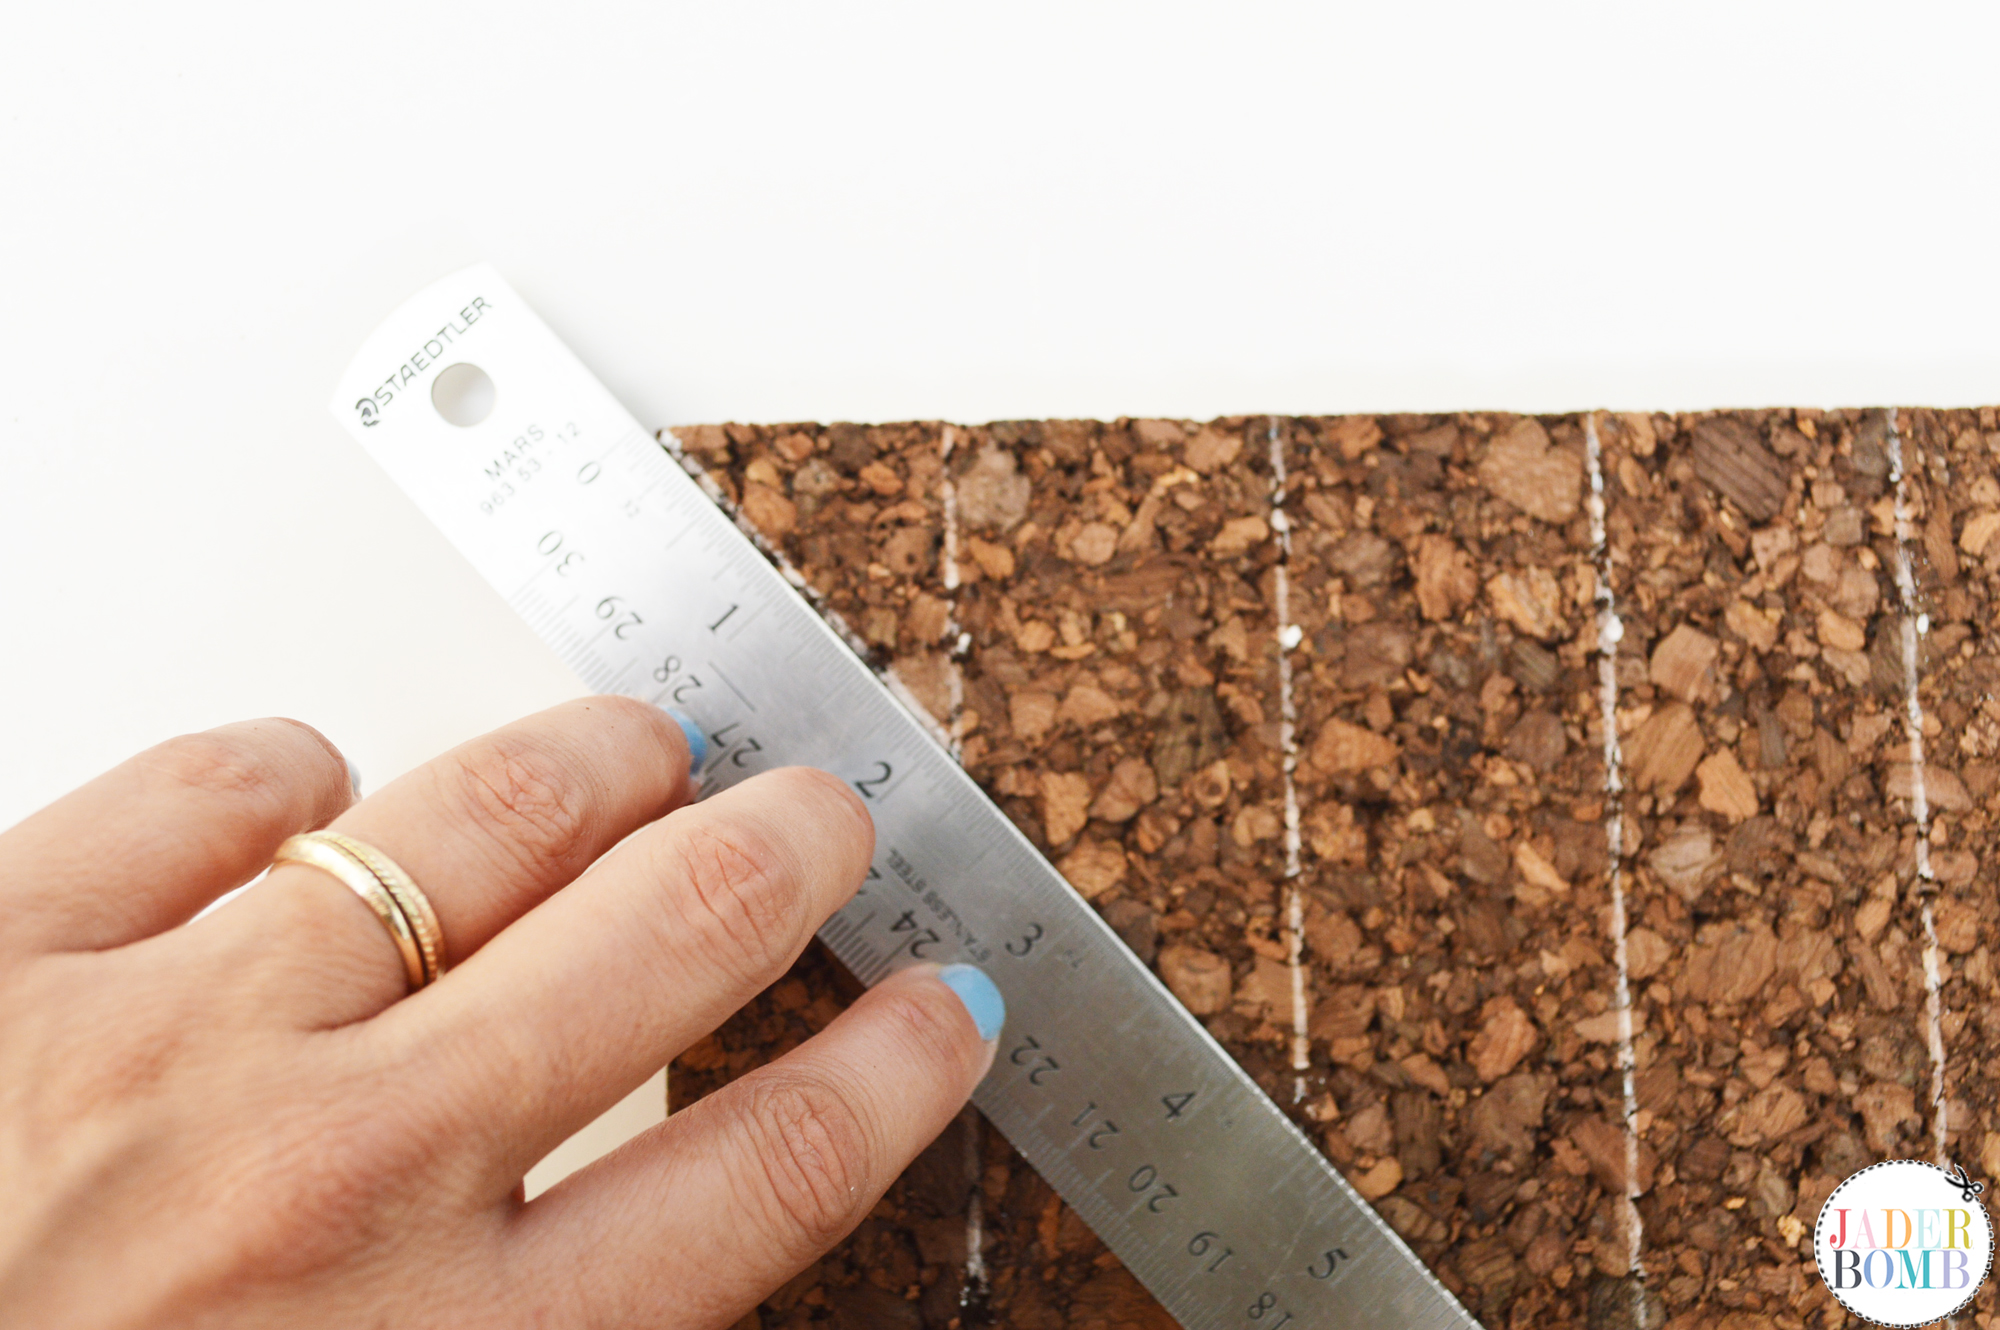
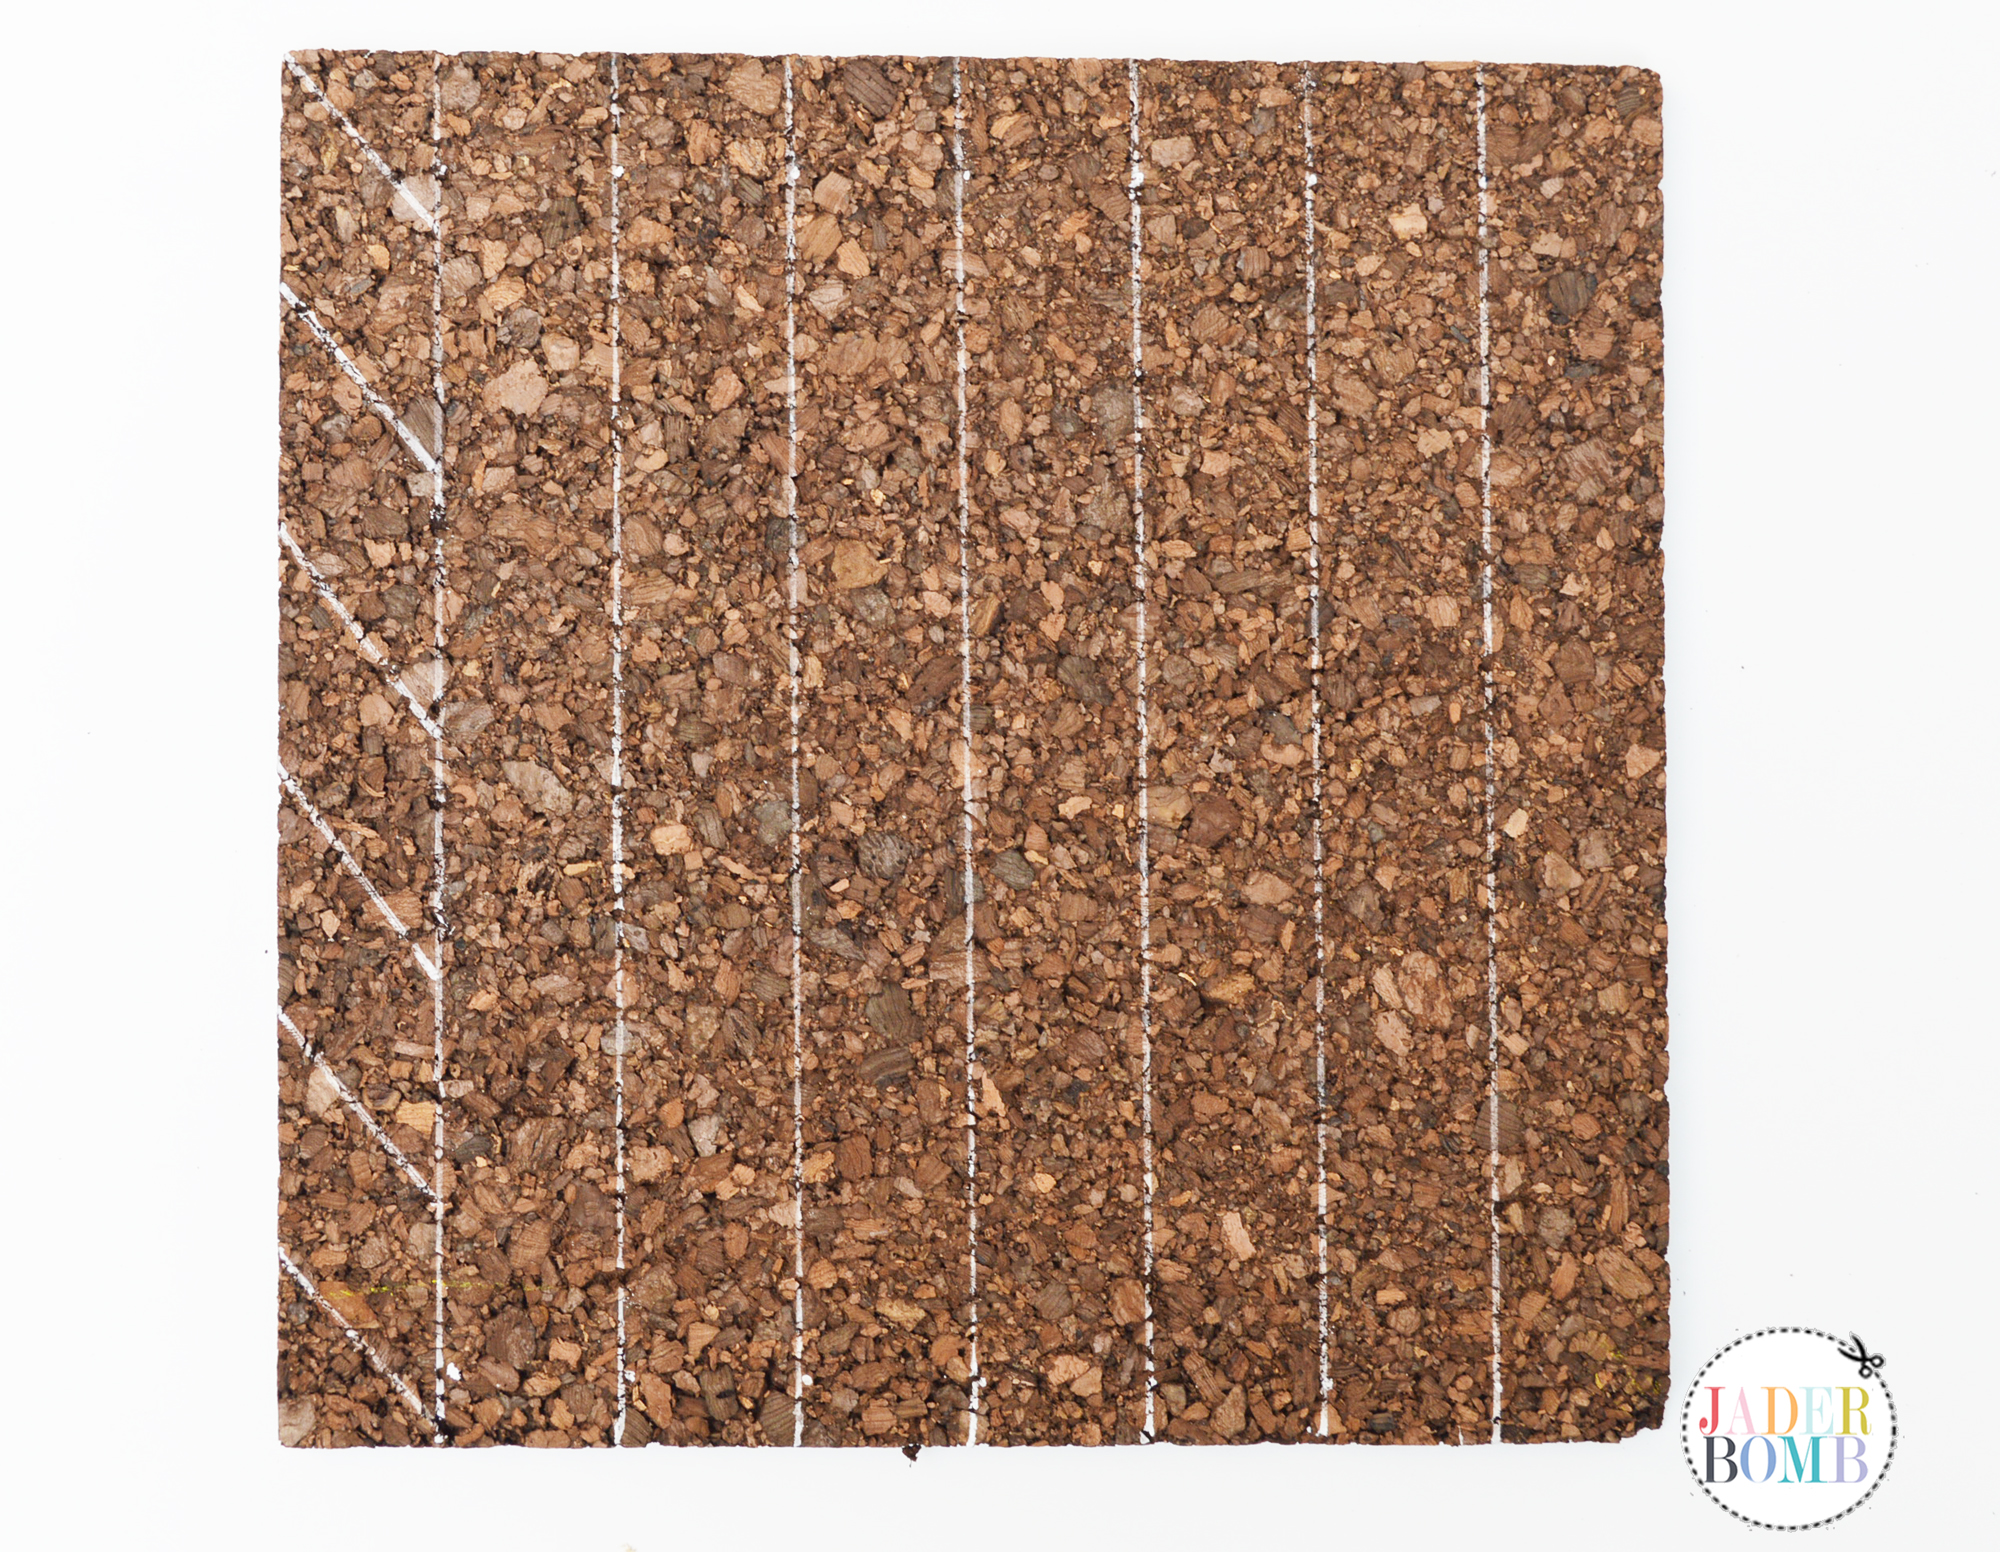
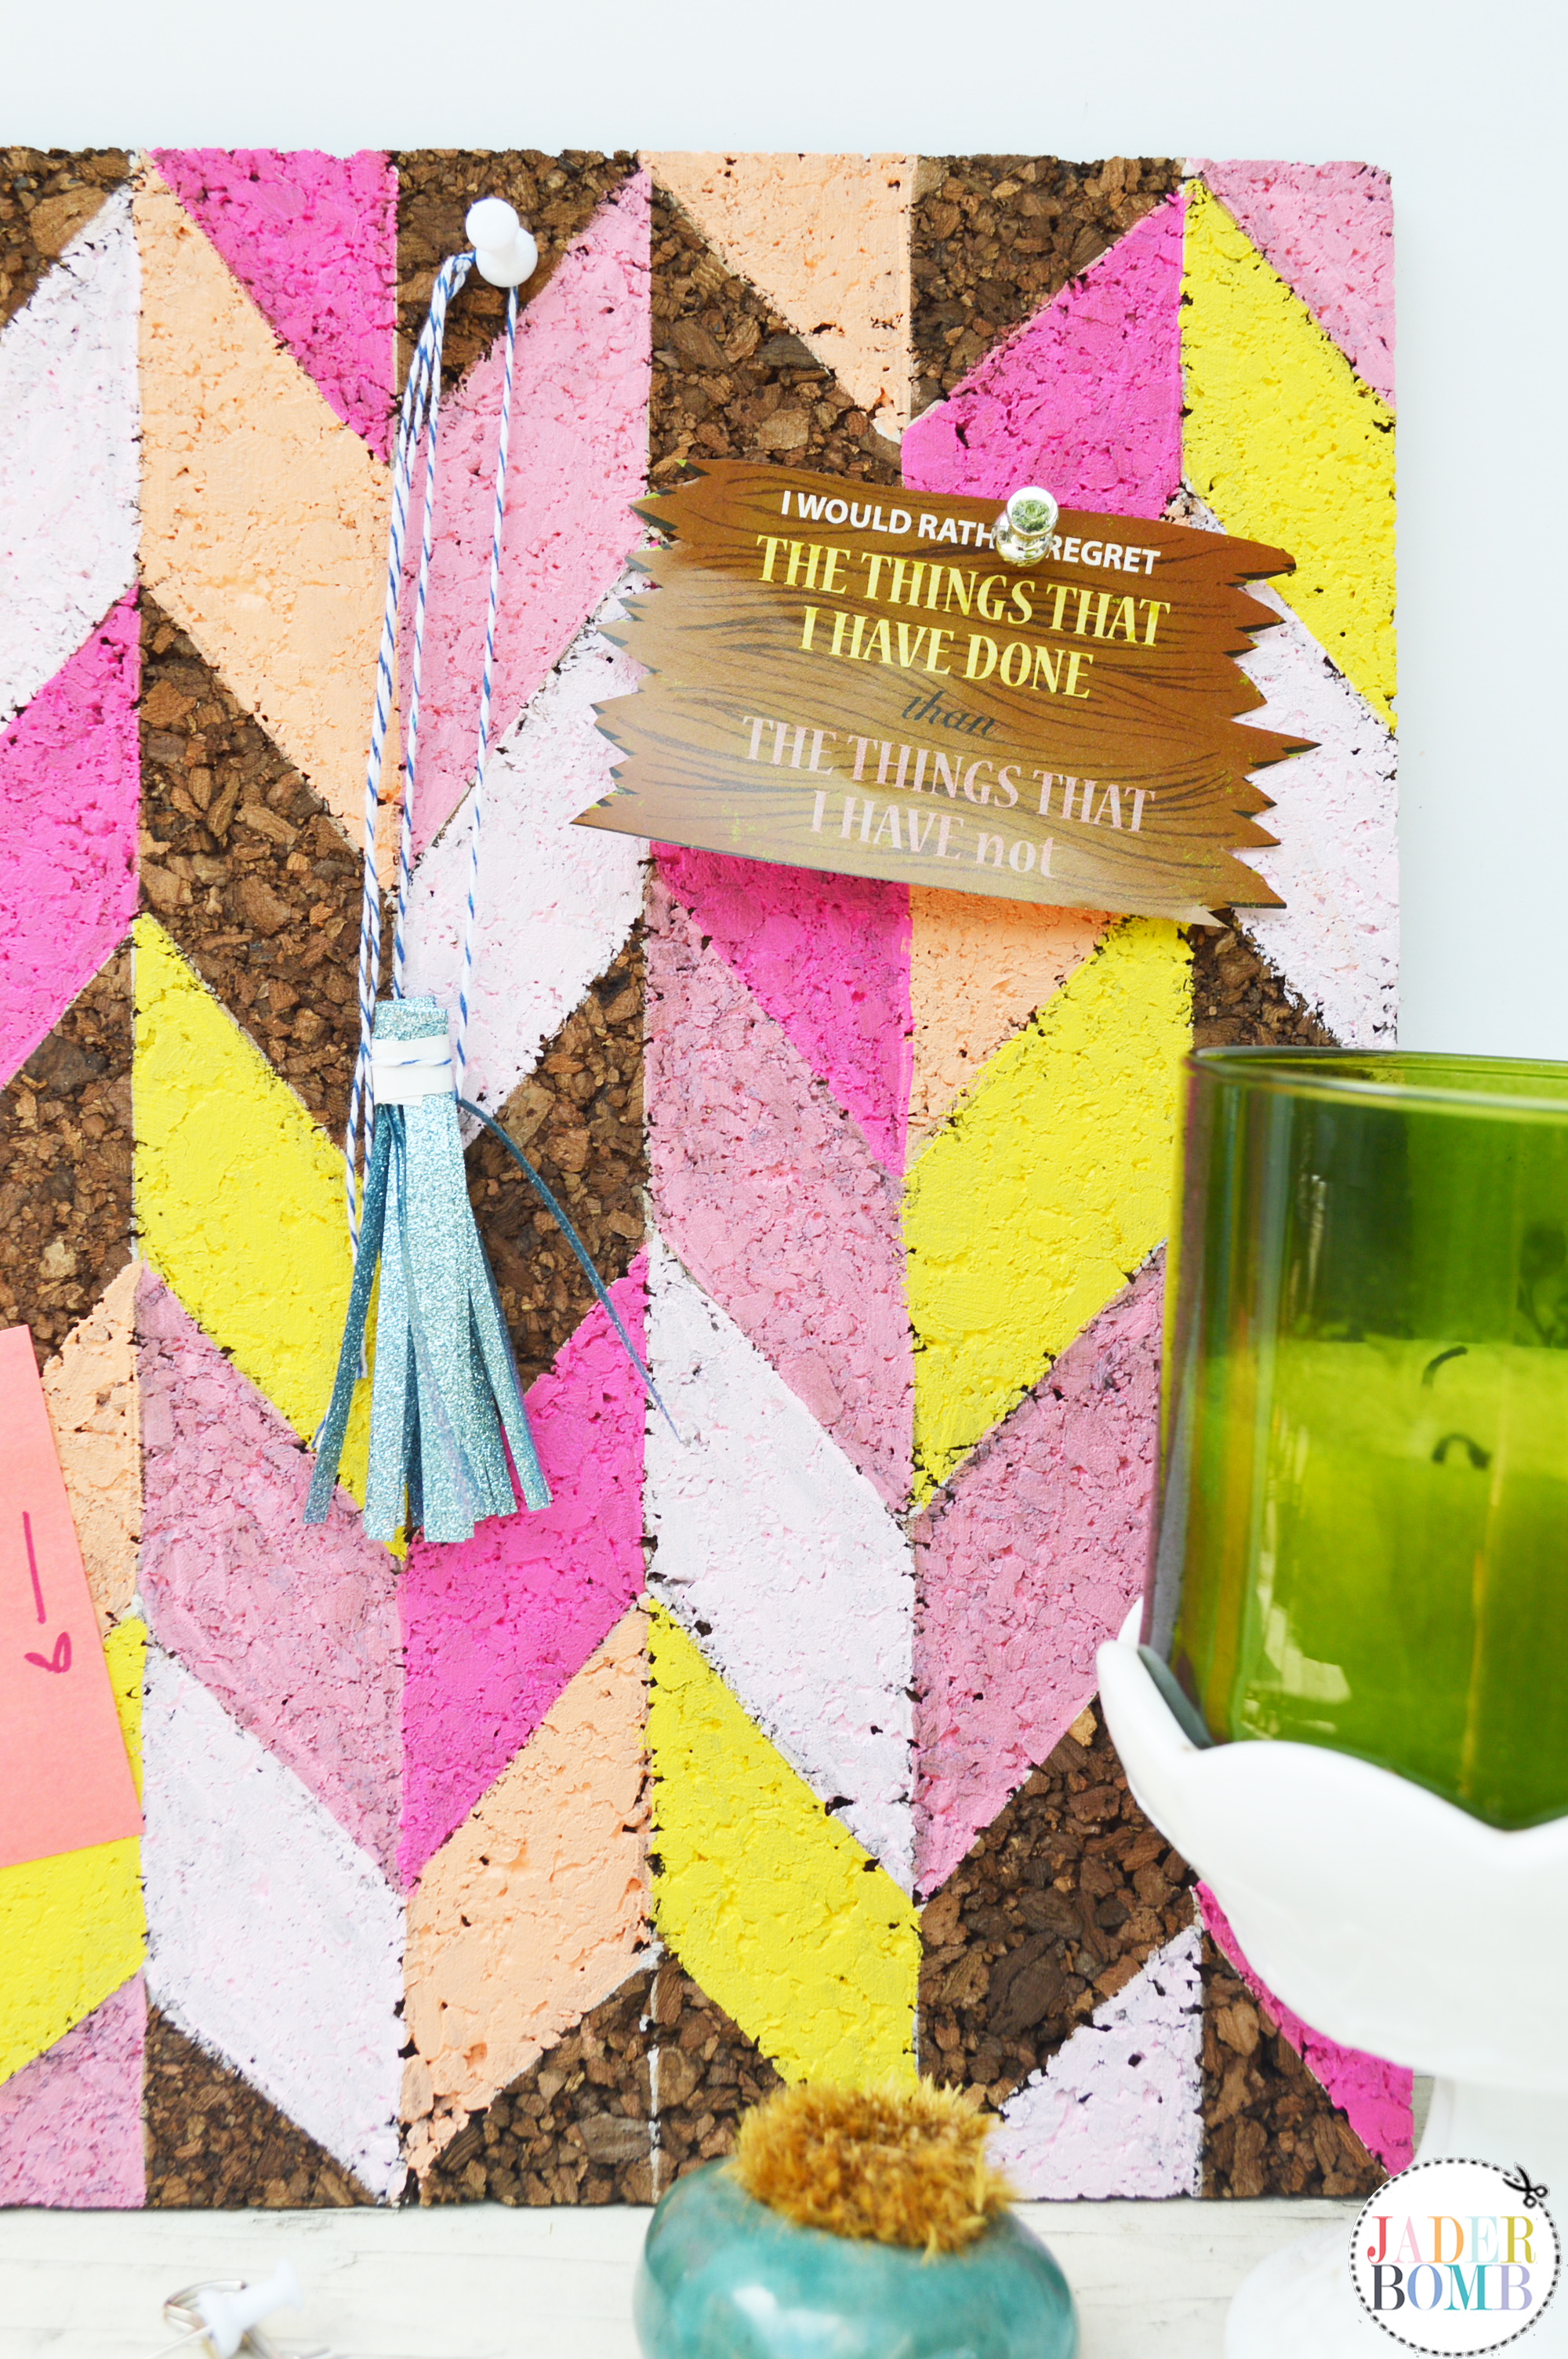
I am loving these colors! This alone is ART!DSC_0308
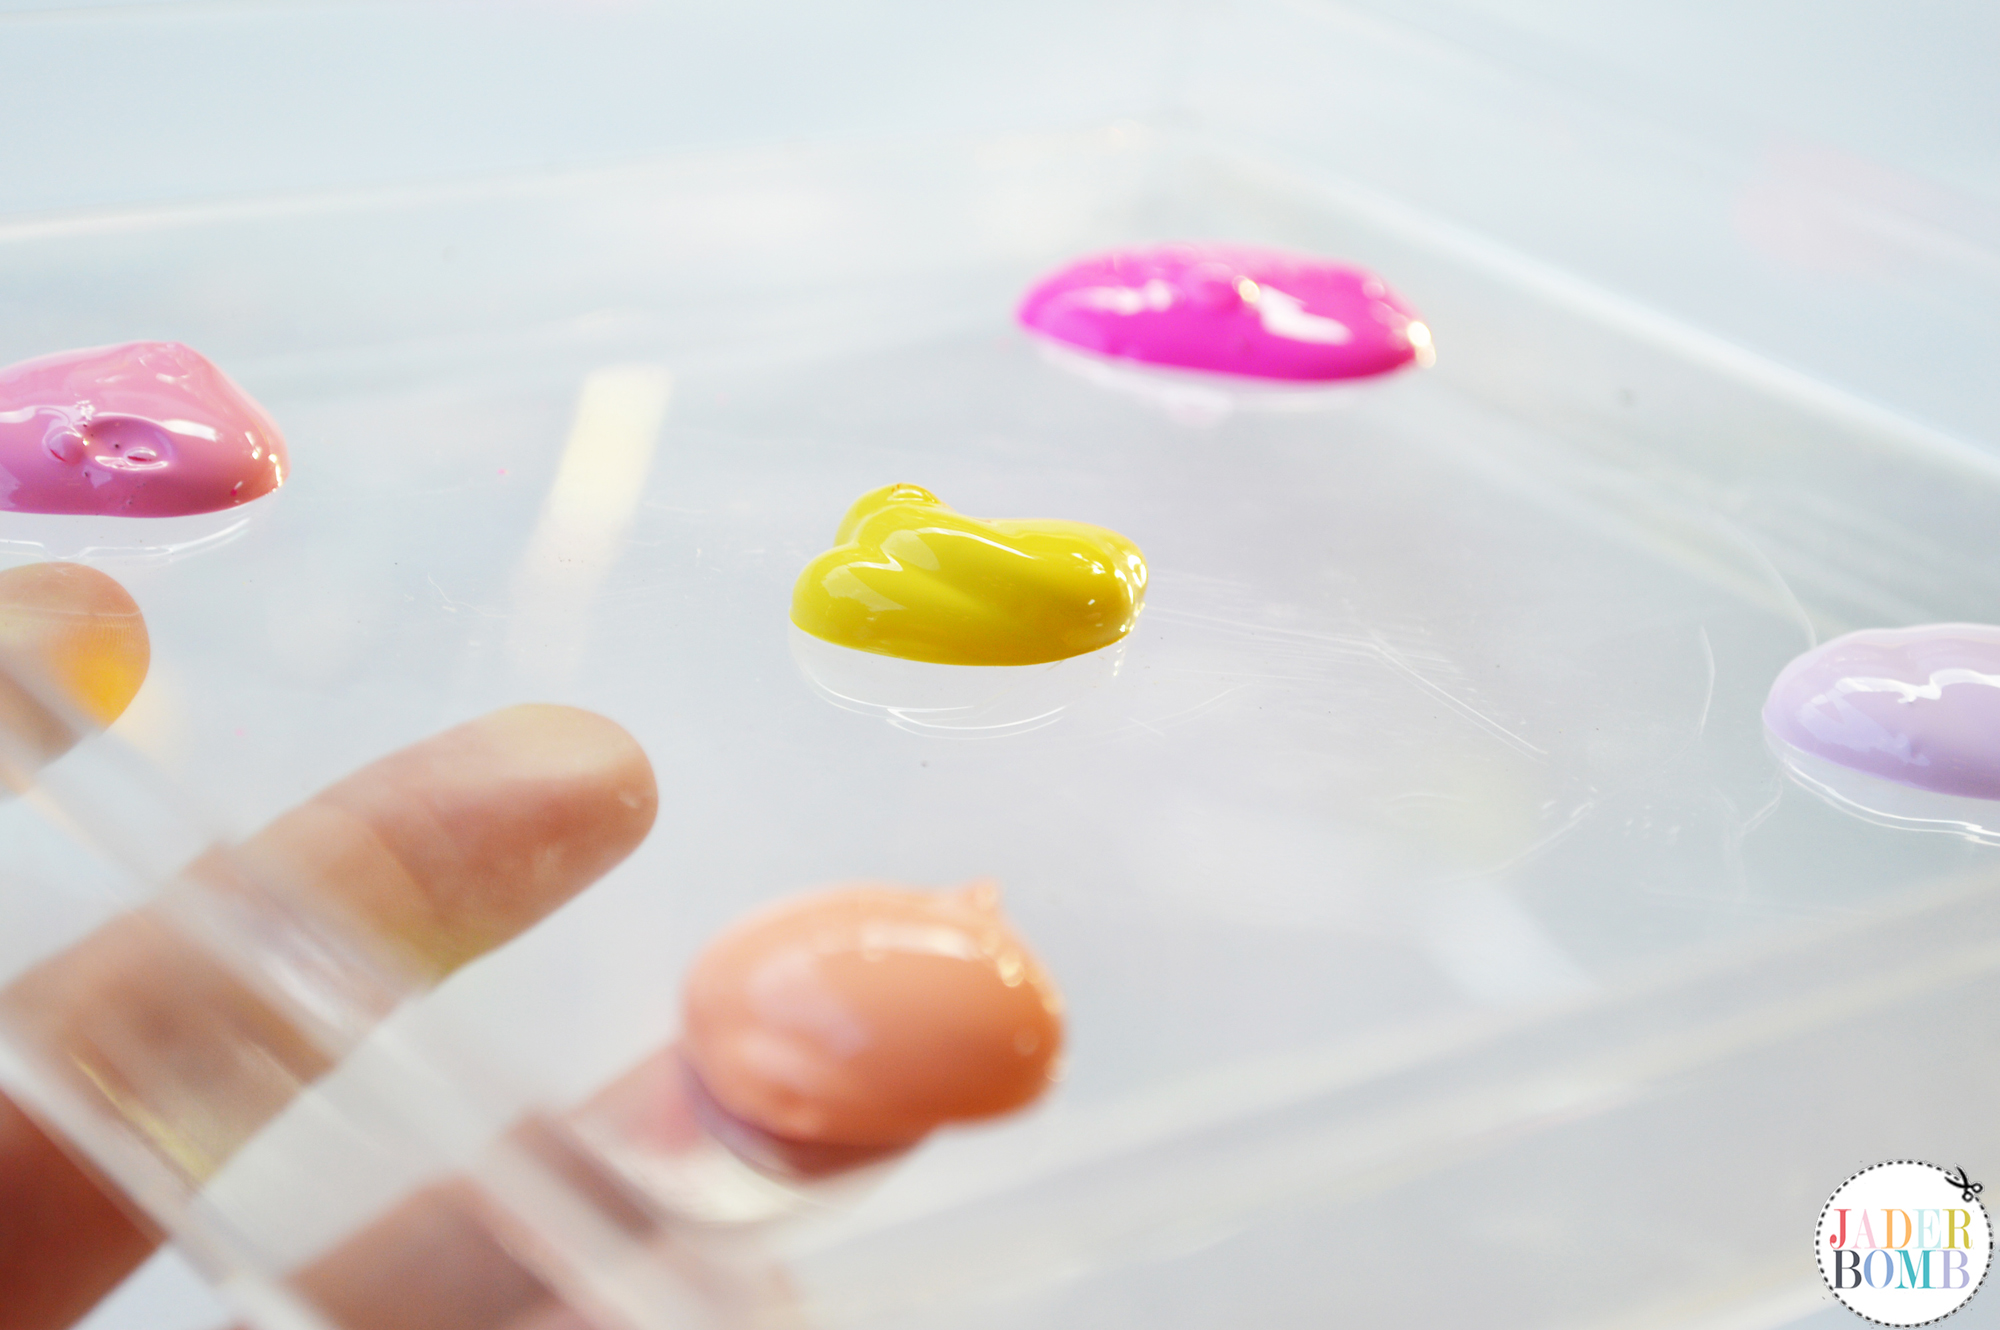
Step SEVEN: Start painting each section with your paint. I will tell you when you use a dark cork board like I am using you might have to put two or three coats of paint, depending on how opaque you want it. DSC_0314

DSC_0116

I am very pleased with the way they turned out. I created one board with the entire board painted and the other one I allowed some brown pieces to come through. I thought each look came out completely different and gave off a different vibe. DSC_0113DSC_0122

DSC_0118

Don’t forget to connect on social media! Make sure to use use the hashtag #JADERBOMB on Instagram or Twitter or Facebook so I can keep track of all your awesome creations! HAVE A GLITTERY DAY! ♥, Jade

P.S. If you LOVE printables then check out my site where you can download hundreds of FREE printables!

DIY-PHOTO-CREDIT-Photography: Jaderbomb // DIY tutorial by: Jaderbomb // Cork Board : Michael’s //  Paint: Michael’s // Chalkboard Marker : Michael’s // Affiliate Links: Amazon I do get a percentage from the links you can order from, so thank for helping me buy tons and tons of glitter!

HASHTAG LOGO


I am so stoked about my latest post for the I Love to Create Blog where I will show you how to paint stripes. I always have fun using Tulip products and for some strange reason this project made me feel super duper inside. Check out these too!

I think I may have a slight addiction to color, as you can see here. If I had to explain to you in this moment what COLOR does to me it’s like kids that sit down at the table to eat and the entire time they sorta “dance” with their legs under the table. You know what I am talking about? I can always tell when I cook a good meal if I feel the floor shaking a little.

Now when the floor doesn’t shake. I just take an extra sip of wine and go cry in the bathroom. Well not really but you get it, RIGHT!

These napkins represent a big juicy hamburger from your favorite joint. Maybe with extra pickles and a good coke! Make sure to click at the bottom for the FULL tutorial ♥
How to Paint Stripes

CLICK HERE TO SEE FULL TUTORIAL
Enjoy and have a GREAT weekend!HASHTAG LOGO

Don’t forget to connect on social media! Make sure to use use the hashtag #JADERBOMB on Instagram or Twitter or Facebook so I can keep track of all your awesome creations! HAVE A GLITTERY DAY! ♥, Jade

Today we are getting all urban country making a Stencil 1– Deer Stencil Table Liner using my best friend Ed Roth’s banging stencil line.

Check out these rainbow coasters I made using some of his stencils with Plaid! OH WAIT: Check out this ginormous yarn bombed deer that will stare at you till you are blue in the face. Literally.

Ed Roth Stencil 1_jaderbomb

Not only does he have the cutest face on the planet but he gives the best hugs in the world.

Now if you know me then you know I live in the South, specifically Louisiana which means everyone here loves a good deer in their life. I sometimes pretend I am living in New York with the sounds of horrific traffic in the background and the only chance I will see any deer is by using a stencil like this. I guess I’m not the kinda girl who likes to eat them or hang them on my wall as “decor” but more power to those that do. Today I am showing you how to use this stencil in a spectacular way. So put on your boots because we about to get COUNTRY, urban country that is. On another note check out this business that really is called “Urban Country”. It’s legit.


 Stencil1 has collaborated on DIY events with high-profile brands, like The Gap, Converse, Sharpie, and Etsy, to engage their customers and grow their base through interactive, creative, hands-on experience. Ed is an engaging host who knows his stuff and is equally comfortable in front of a crowd and a camera.

Stencil 1- Deer Stencil Table Liner

YOUWILLNEEDEd Roth Deer Stencil // Book // Craft Paint // Glitter // Craft Knife // Scissors // Tape // Pouncer // Fiskars Paper Punch
DSC_0015
Step ONE: 
Tear out a few pages from a book. You can use any book that you have laying around but for some reason I always crafts with pages from Twilight. I guess I am still a die hard fan. Yes. I still dream of turning into diamonds like Edward did. Go ahead, judge.

You can rip the pages out or use your crafting knife to get a nice fine line. If you don’t have one just grab your trusty pair of scissors.

Step TWO: Get your paper punch and punch those pages till they can’t be punched anymore. Notice I am only doing the sides of the sheet. It’s kinda like edging your hairline or your yard. I think. I don’t edge either of those so it’s just a guess.

Step THREE: Line the pages up on top of each other and tape them down on the back side.

book page paper punch
Step FOUR: Grab your deer stencil and place it on the bottom of your “book sheet table liner”. Grab your dauber and pounce your little heart out with your color of choice.Continue doing this until your get to the end of your liner.  I liked the masculine look of orange or I just thought it’s was sorta “Urban Country” looking. While your paint is still wet sprinkle a little bit of glitter on top and let it dry till the cows come home. That is about 20 minutes.

Or if you are impatient like me you could blow dry that baby.
book page table runner deer head stencil

craftgawker1

Note cards are always fun to make which is why you have to see what I made on some precious rainbow cards!

Don’t forget to connect on social media! Make sure to use use the hashtag #JADERBOMB and you might see your stuff on Instagram or Twitter or Facebookor Pinterest.
HAVE A GLITTERY DAY! ♥, Jade

HASHTAG LOGO