Well..It’s already that time of year and I sit here shaking my head in disbelief. I can’t believe it “really” is that time of year.
How did Thanksgiving already come and go? Have I been asleep all year? I remember when I was a kid I used to overhear my parents say things like ” Boy, time goes so quick the older we get”… What does that really mean? I get that times goes as fast but come on. Nobody ever said it would fly by quicker than you can digest the turkey you ate a few days ago.
To get in the spirit I will be making a lot of fun new Christmas Tutorials for you on here, sharing Christmas ideas, featuring other amazing Christmas crafts and kicking out some fun printable’s.
Do you ever walk around the stores WISHING you could buy everything because it all looks so good in that one spot at that exact moment. I am totally that person however over the years I transformed the way my brain thinks. I get that something I make will not have a “label” on it BUT it will prolly cost me 3/4 less and will be made the way I want it. Sometimes it’s hard to break something down in your head and re-make it. So I will be doing all of the dirty work (figuring the break down process) for you and posting it in easy steps.
I wanted to add a pop of color on my mantle in the living room so I thought mini Christmas trees would be perfect.
Yes, I was one of the crazy people out on black friday shopping. I only went to 2 stores though. One of the stores was Joanne Fabric and craft store and there I purchases these little cardboard cones for around .75 cents. (I know!!!) I know they sell these at any craft store so it should be easy to find. Let’s get started.
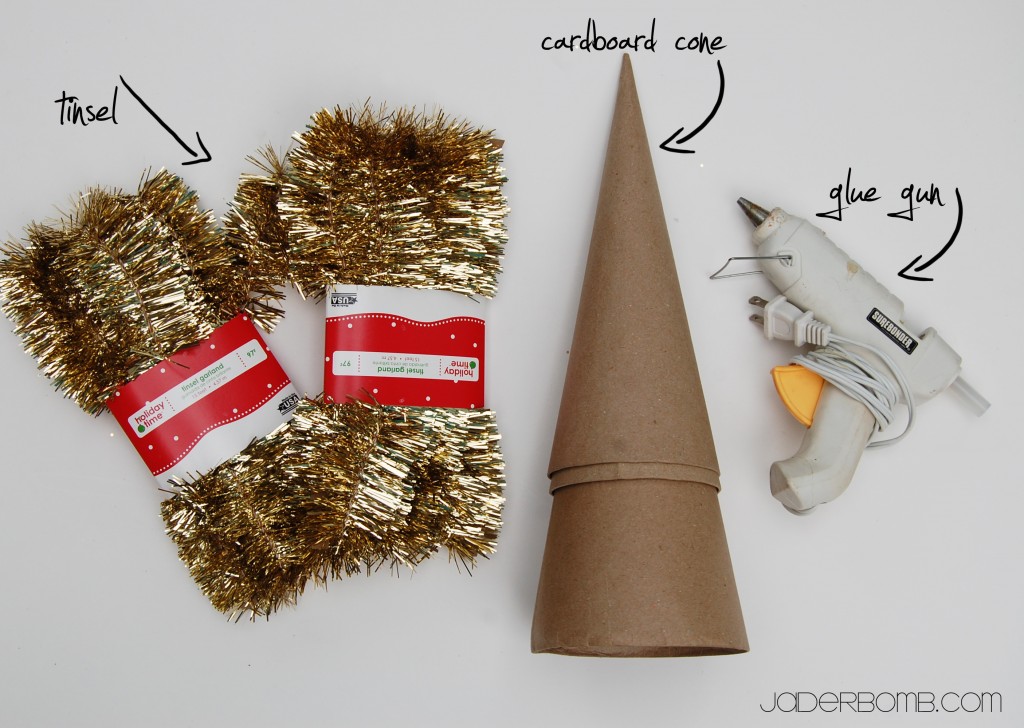
INGREDIENTS:
*Tinsel
*Cardboard Cone
*Glue Gun
TWhat I love the most about this craft is that you can get tons of garlands and make like 40 of these babies. I actually saw one like this in Albertson’s the other day and it was $39.00. Granted the tinsel on those were a little fancy but I purposely wanted to use the “vintage” looking tinsel garland. It add’s a retro feel to the room.
The first thing you will do is add a little dot of hot glue on your cardboard cone.
Carefully start wrapping your garland around the cone.
Keep going until you get to the very bottom…..
VOILA! It’s that simple. The three cones may have cost me $3.00 and the garland was $3.99 at Wal-Mart. These look so cute on the mantle and I am proud that I took something that was WAY over priced and made it affordable and ridiculously cute.
I hope you enjoyed this tutorial, make sure to come back tomorrow to see some easy DIY Christmas tree decor.
Don’t forget to make it a DIY kinda day,
© Copyright jaderbombllc, All rights Reserved. Written For: JADERBOMB


Just wanted you to know….I was at a craft fair yesterday and one of these trees with lights on it was selling for $25. It was very pretty, but being a crafter, I knew one could be made for much less, and then here was your post!!
Thanks for ALL of your wonderful ideas!
Michelle: That makes me happy! Thanks for the comment!
Pingback: JADERBOMB - Glittered Cardboard Letters – Tutorial
Beautiful trees, Jaderbomb!
Thanks Johnnie!
Pingback: Mini sapins de Noël - mini trees DIY round-up | PLUMETIS Magazine
Love this! So pretty and simple. And I totally agree time really is going fast–I feel like it was just Easter!
Thanks for sharing, I pinned it!
Barbara at Chase the Star
Barbara! I am sure before we know it Christmas will be all over! It’s crazy! Glad you came visit my blog!