Tag Archives: DIY crafts

The Simple Secret to making a Teachers Gift! 

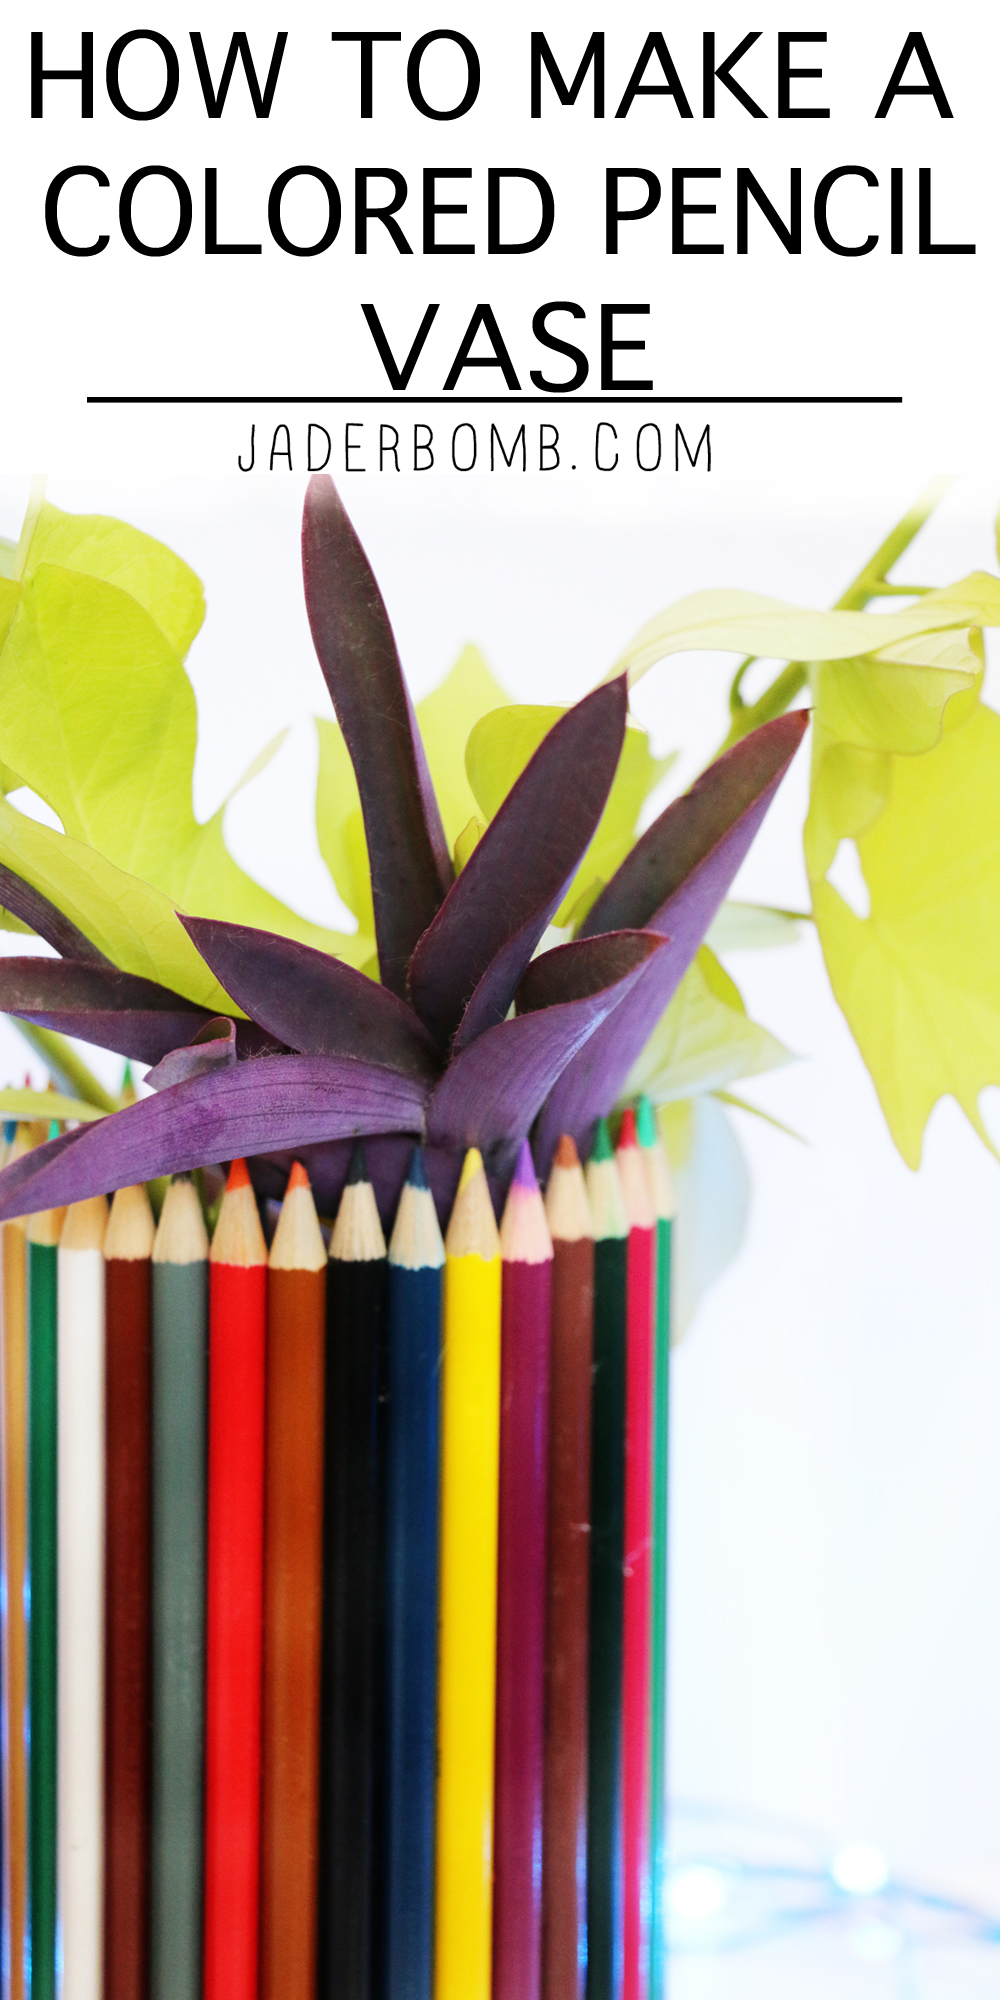
Today I will show you a fun and quick tutorial teaching you how to make a fun Pencil Vase DIY. Now I know everyone has already started school but it’s never too late to give your teacher a handmade gift. Frankly if you ask me, I would like to give this to my teacher on a random day they are not expecting a gift. 

I wanted to create something that can be used daily so it doesn’t get shoved into a closet or on a shelf! Today’s Pencil Vase DIY can be used to put flowers in (yes it holds water) or you can stick things like pencils, markers, highlighters or brushes in them. Did I mention how bright and whimsical they are in general! Let’s get started. 

As a kid I used to play “school” with all of my stuffed animals, yep you heard that right. I always thought I wanted to be a teacher when I grew up however things shifted and I realized I didn’t have enough patience for that at all, at least not as a full time job! 

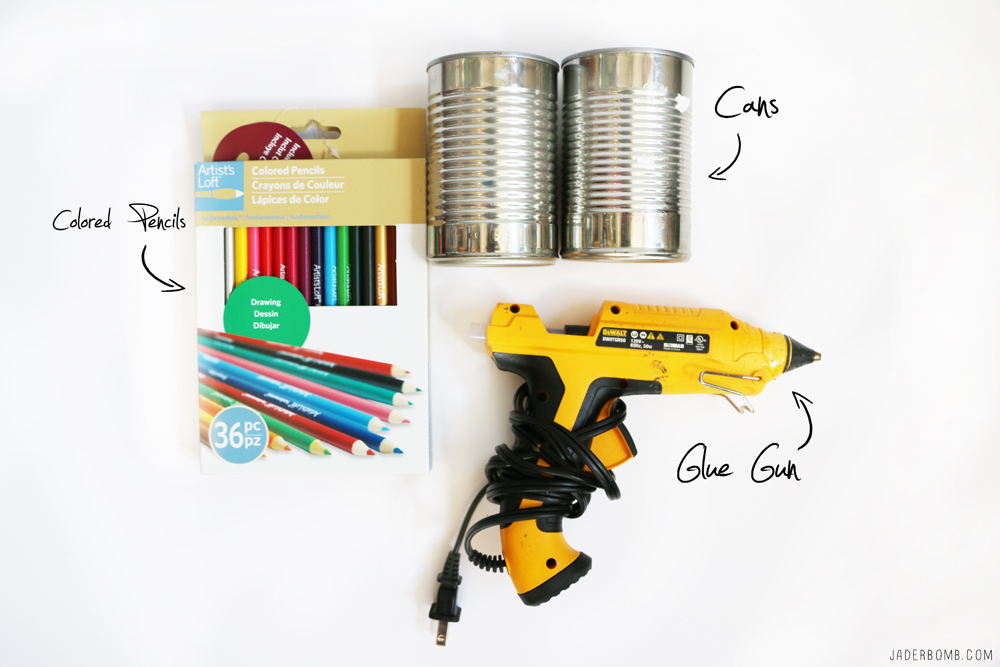
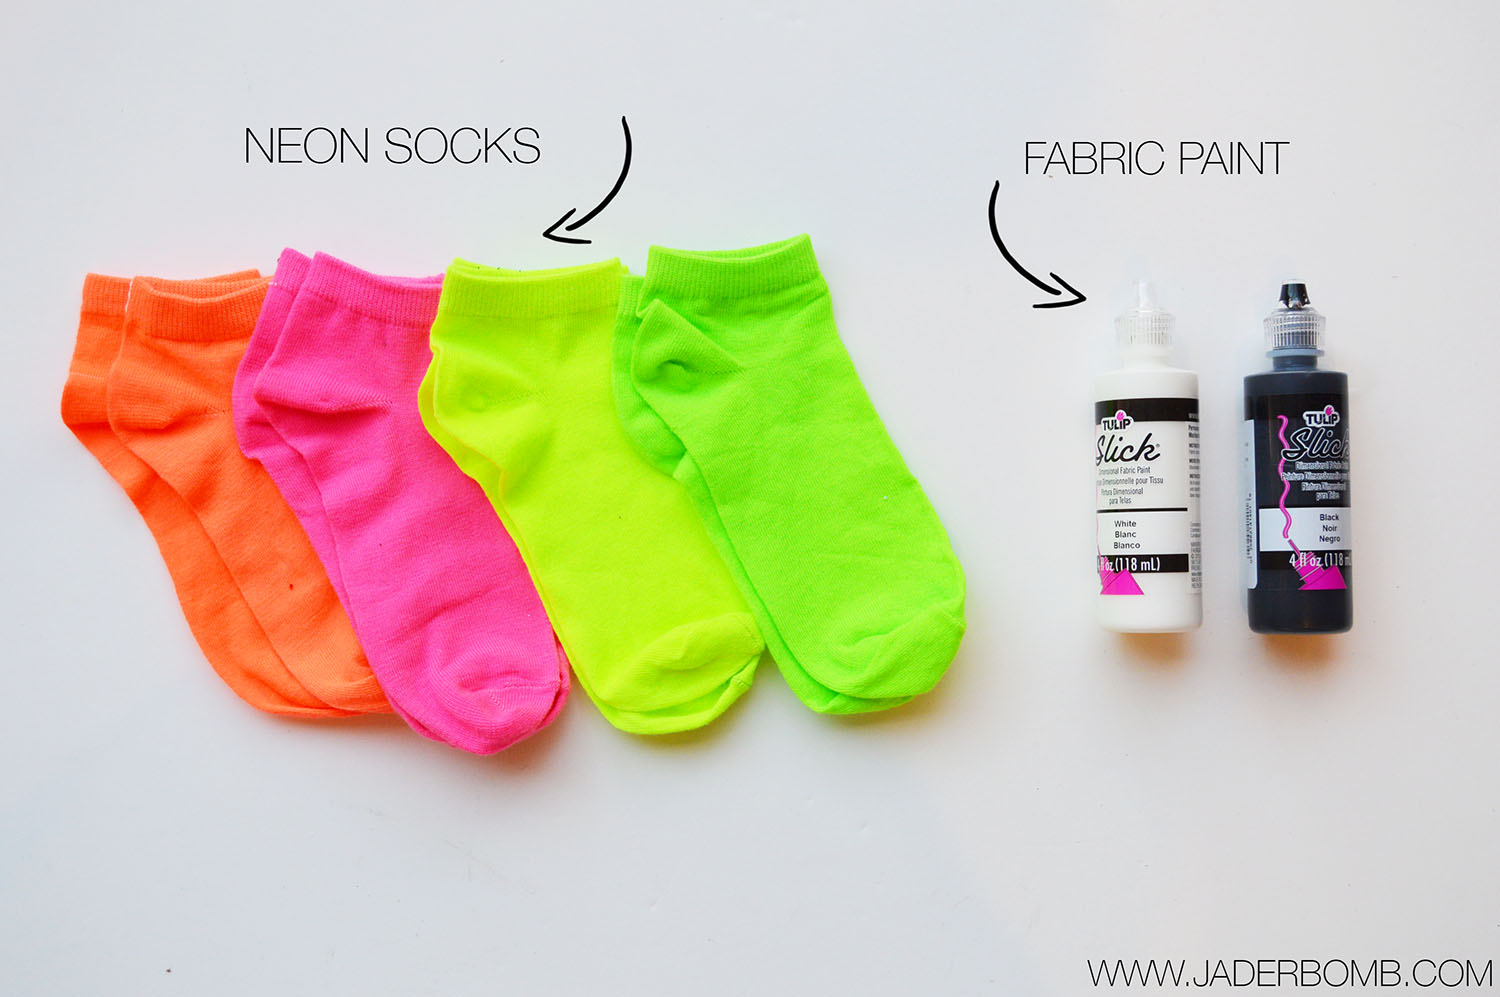
For this project you will need: 
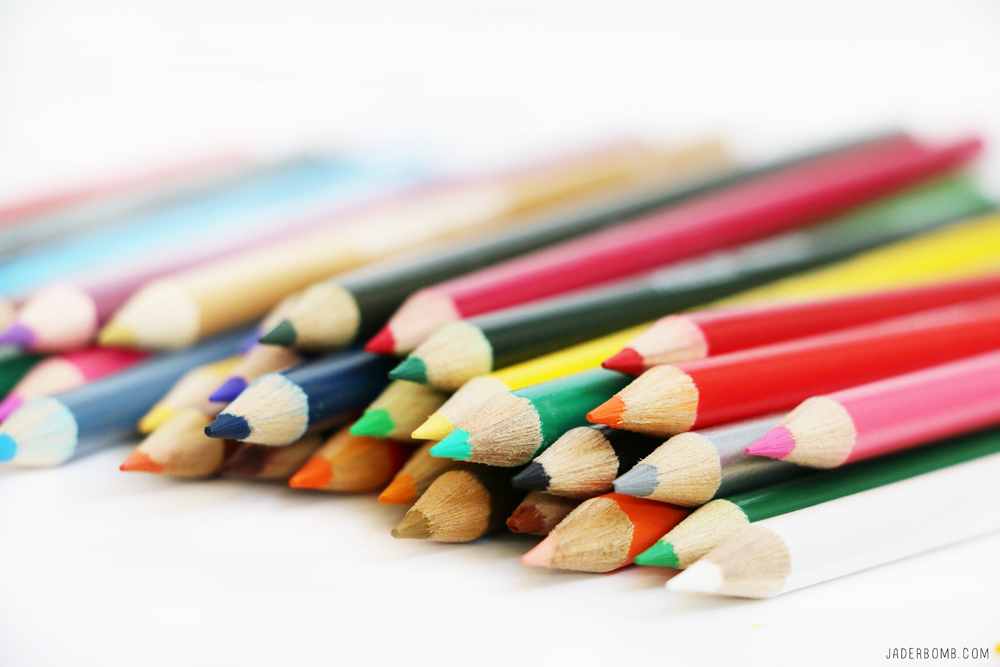
Colored Pencils | Cans (Clean Veggie Ones)  | Glue Gun 

To make your life easier I attached links above so you can purchase all of the products I used in this post above! See, you don’t even have to leave your house to shop. Win/Win for the world of bloggers! If you are lucky you might already have most of these! 

*These are affiliate links*

Step One:

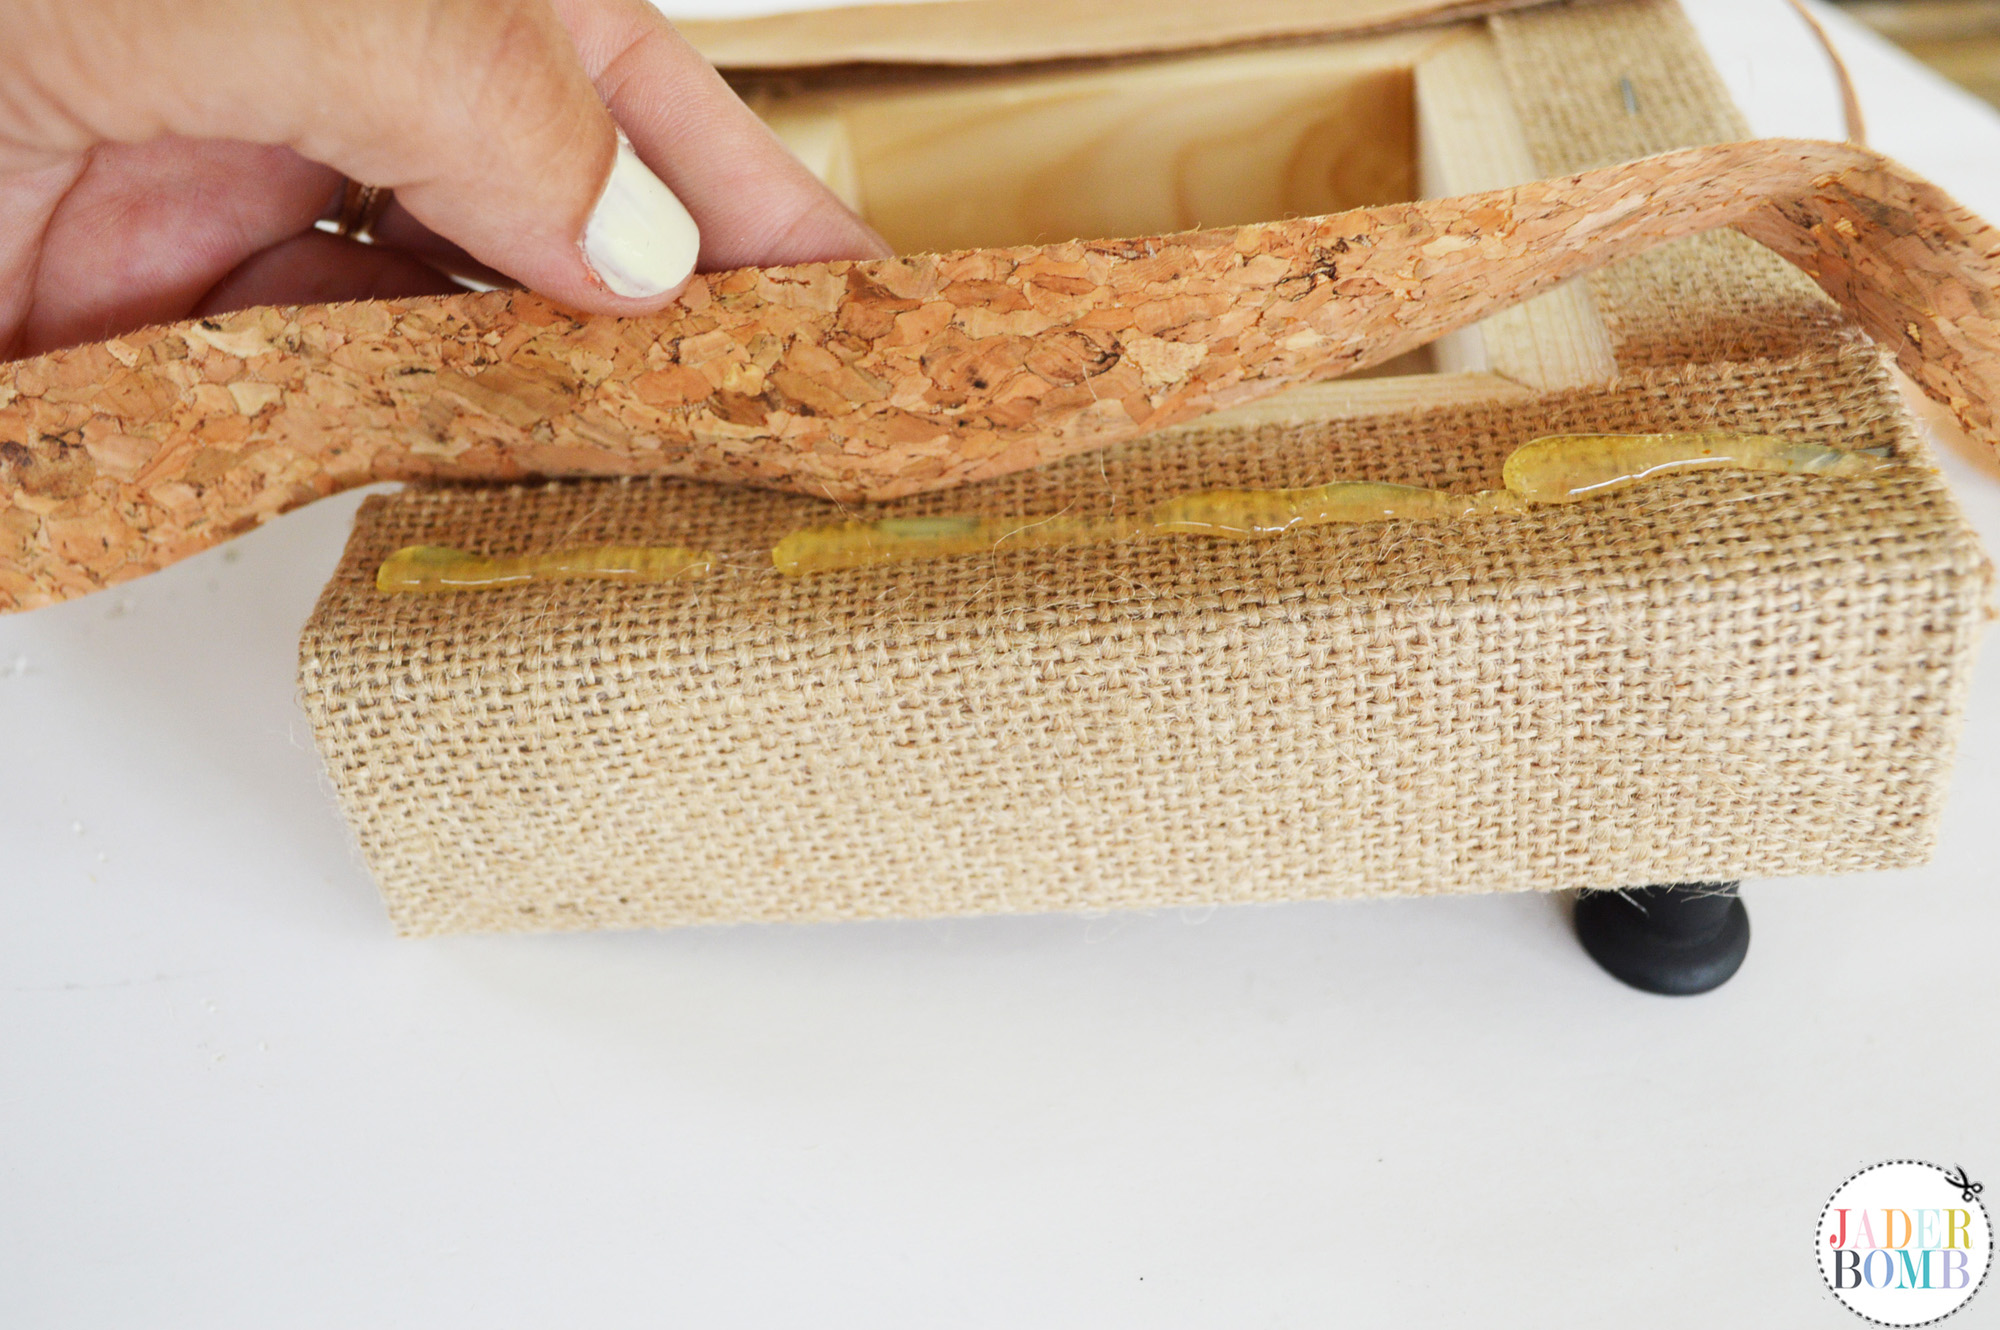
Add a strip of hot glue to your can and quickly place your colored pencil on top of it. Do this quick you want the glue to be hot as possible when you put pencil on it. 

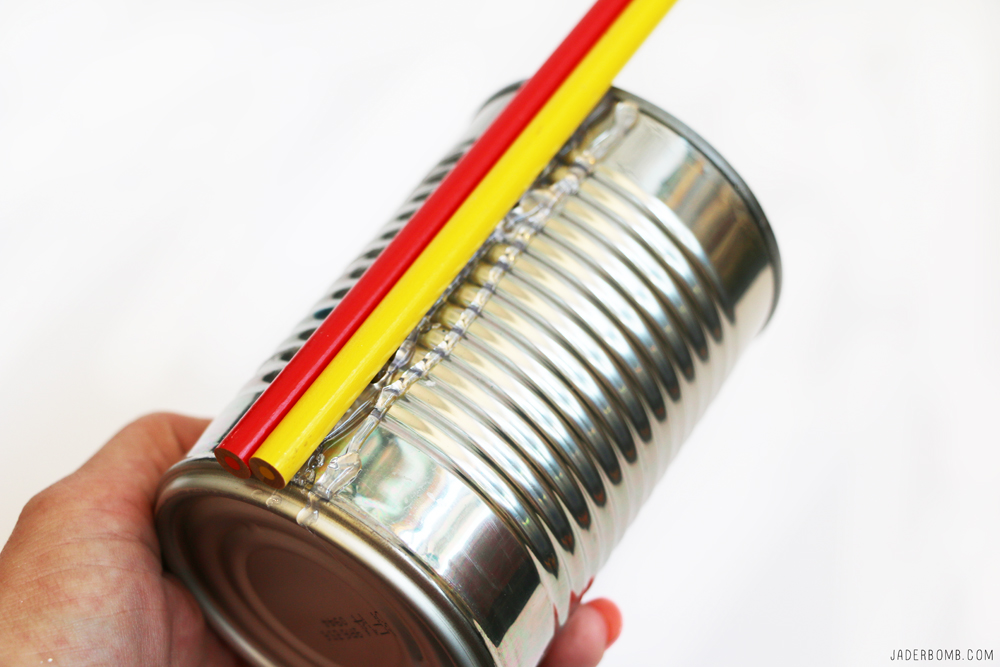
Continue lining the can with the colored pencils! It’s already looking beautiful!
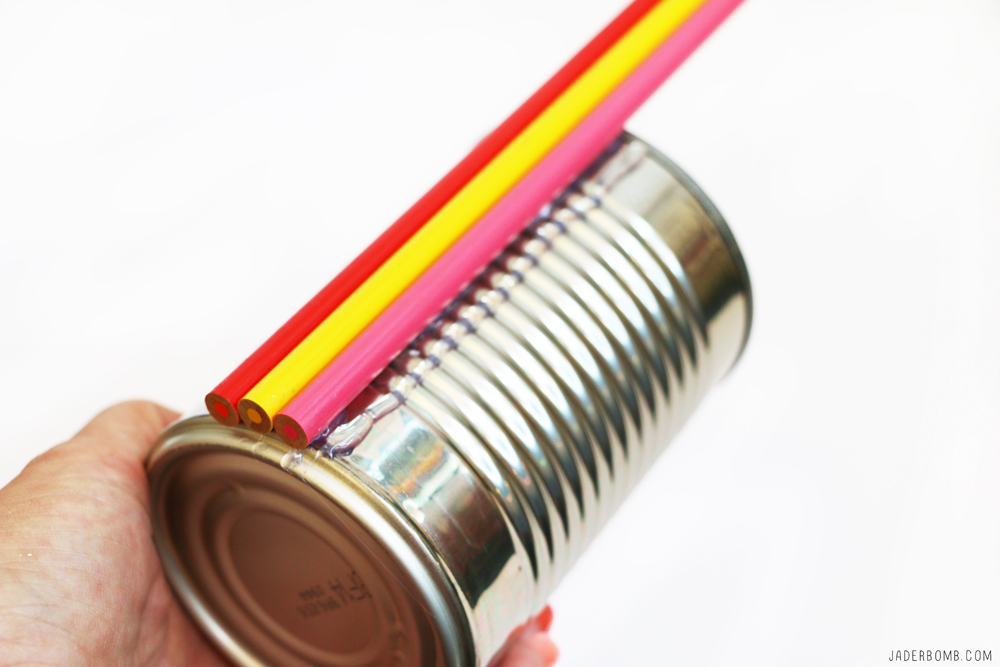
  So quick and easy.

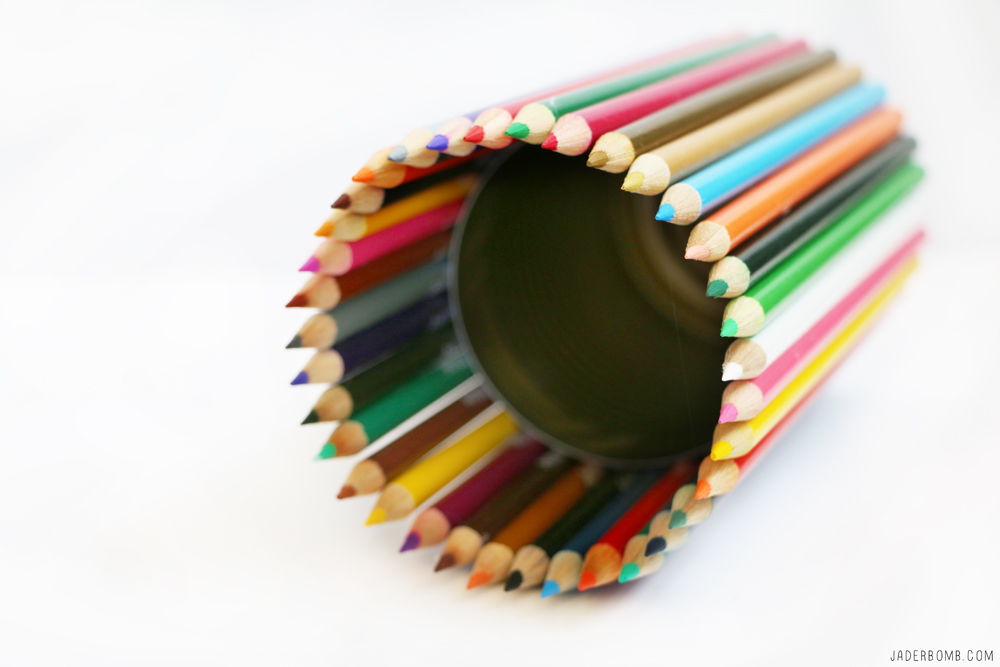
These vases are also super easy to make and make the best gifts. 

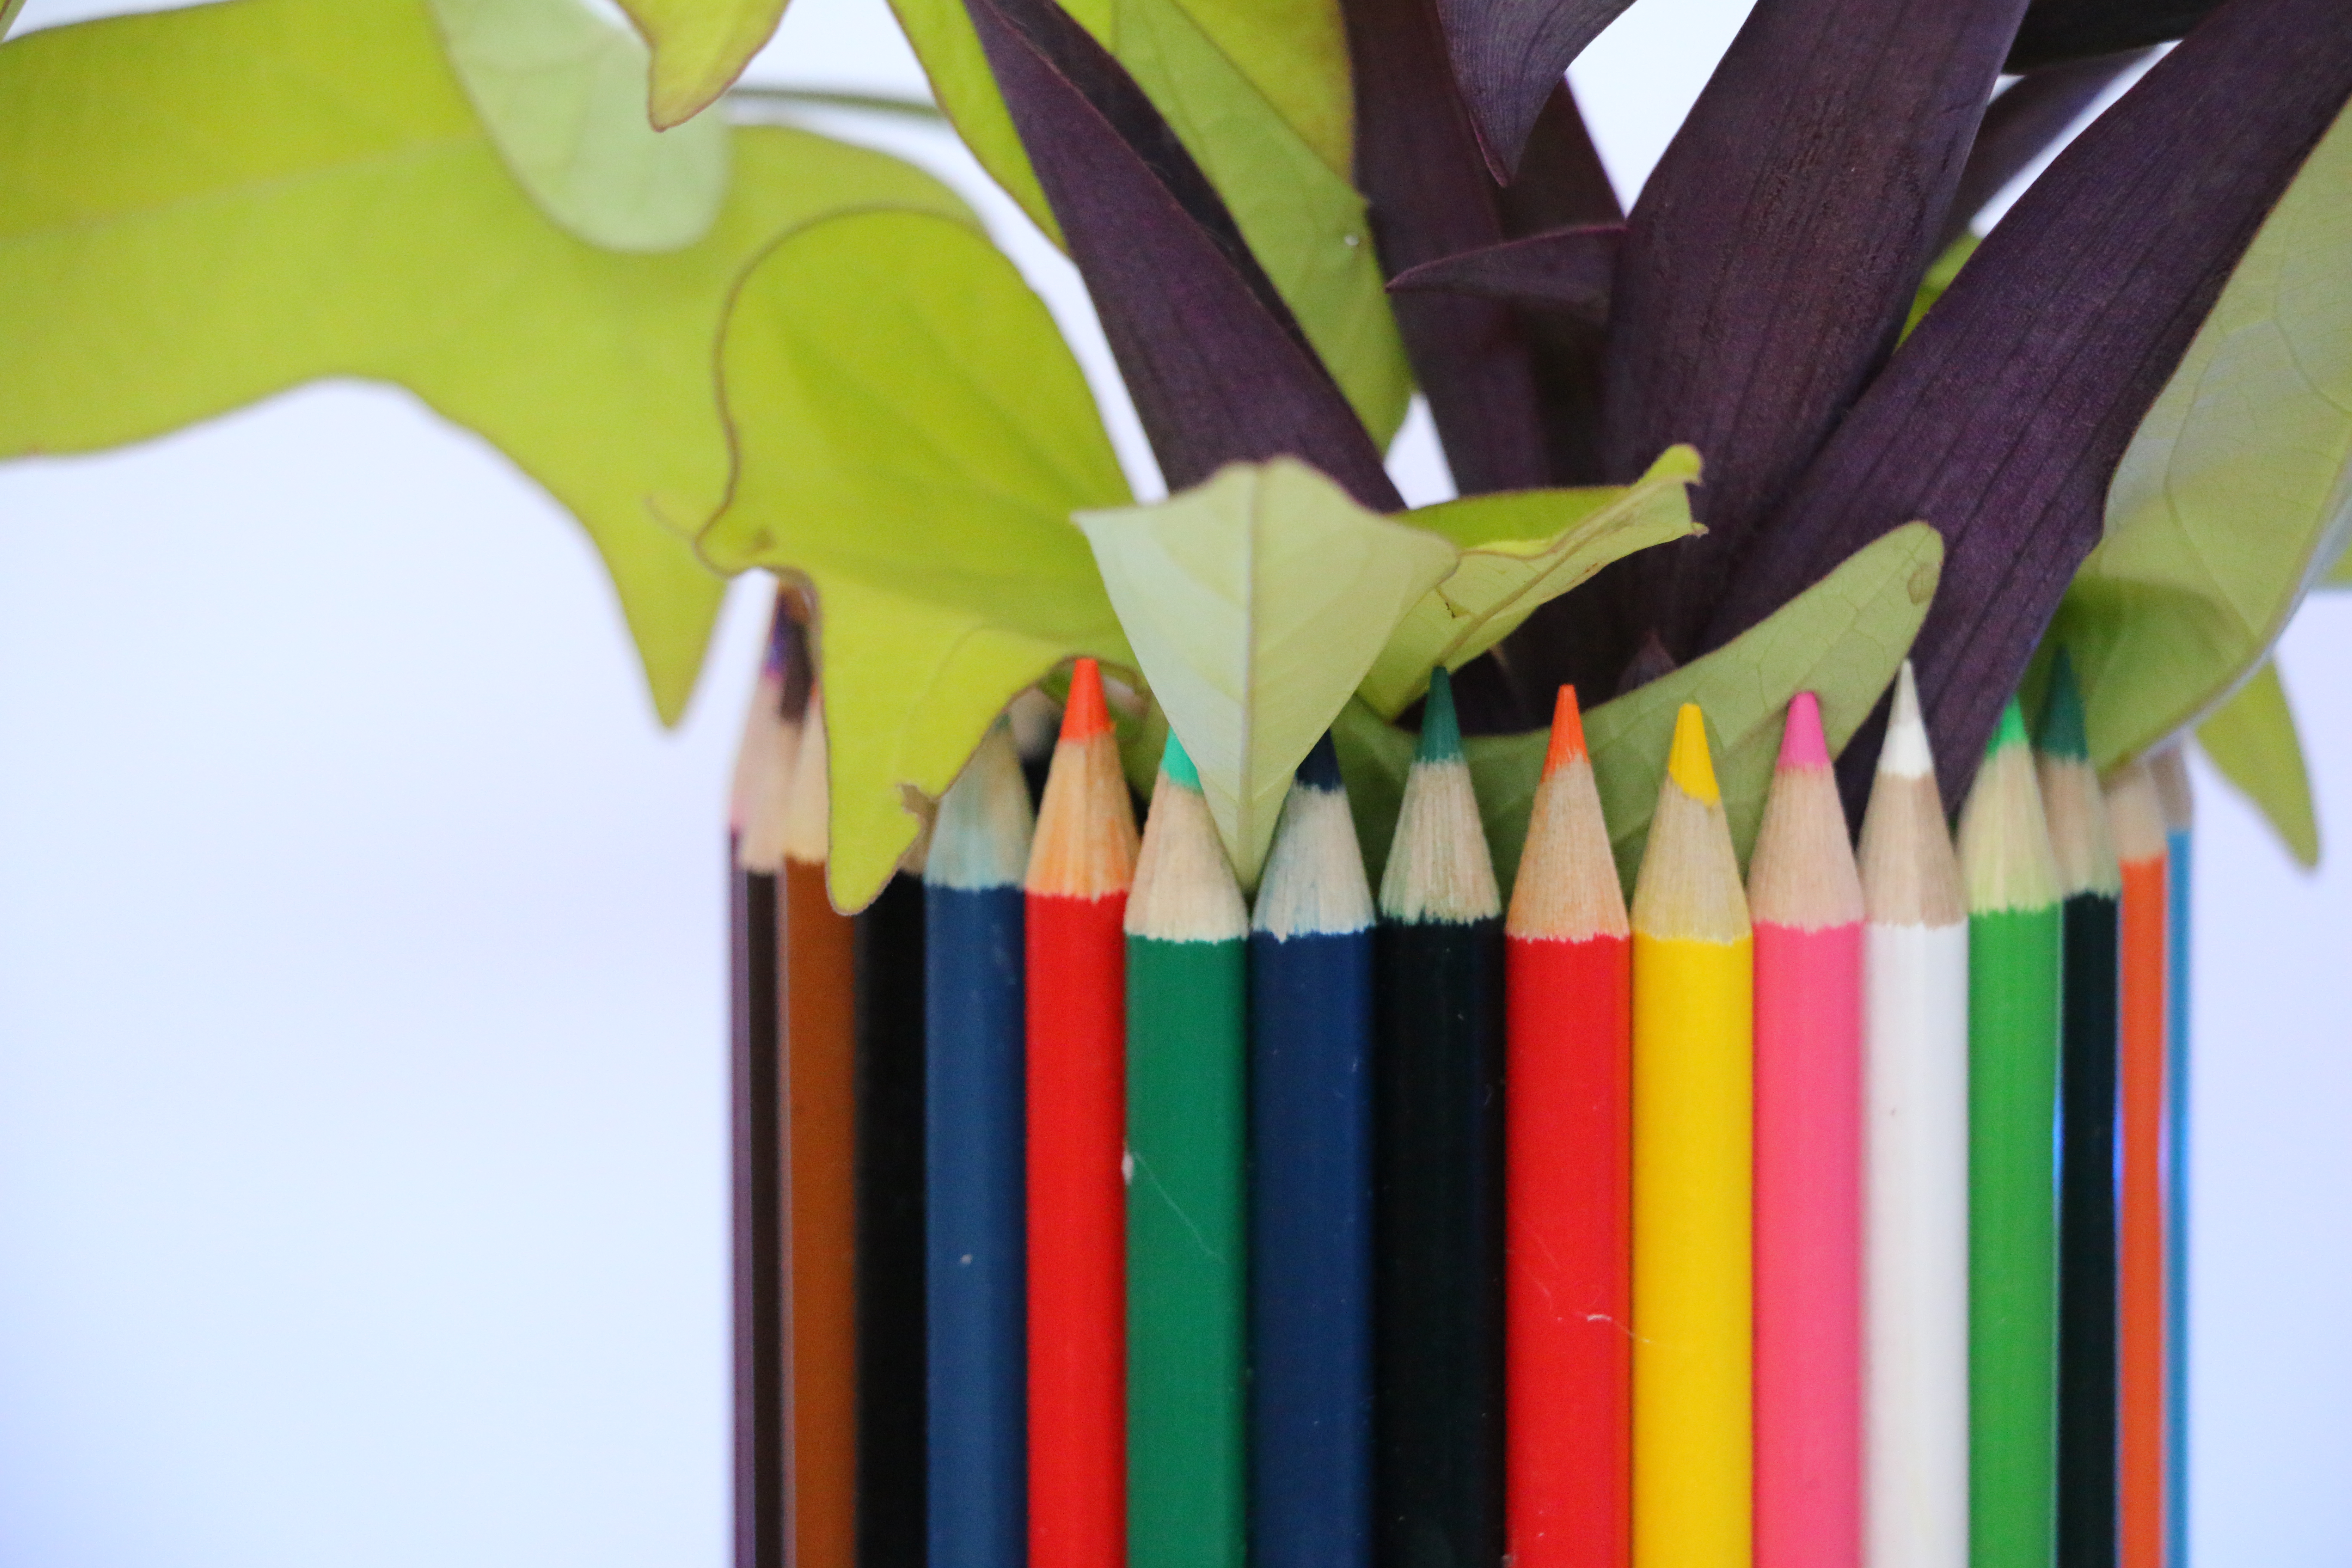
Purchase a pack of 36 pencils and you will only have one left over. You can now fill them with water and put daily cuttings in them to brighten up any space.  
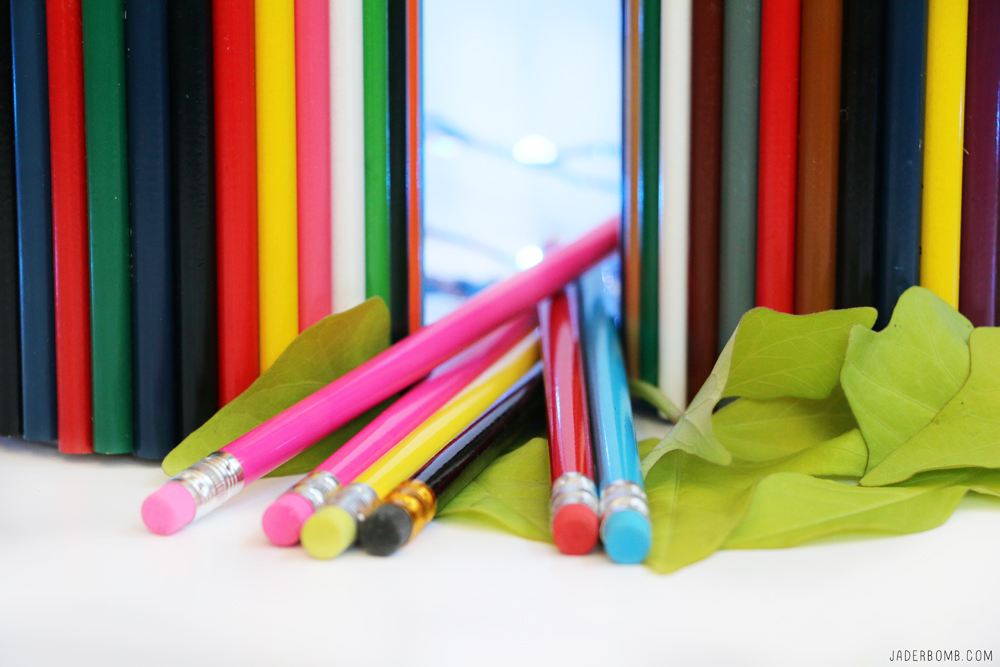
Another thing you can do is stuff these babies with paint brushes! I think even adding utensils in the kitchen would look great in them!

Want to make another bold statement, check out this DIY backpack I created last year. 

Another great back to school gift for anyone are these hand painted journals that I made a while back, you definitely want to check these out! Don’t forget to pin these images to your boards to reference for later on when you are ready to make them. 

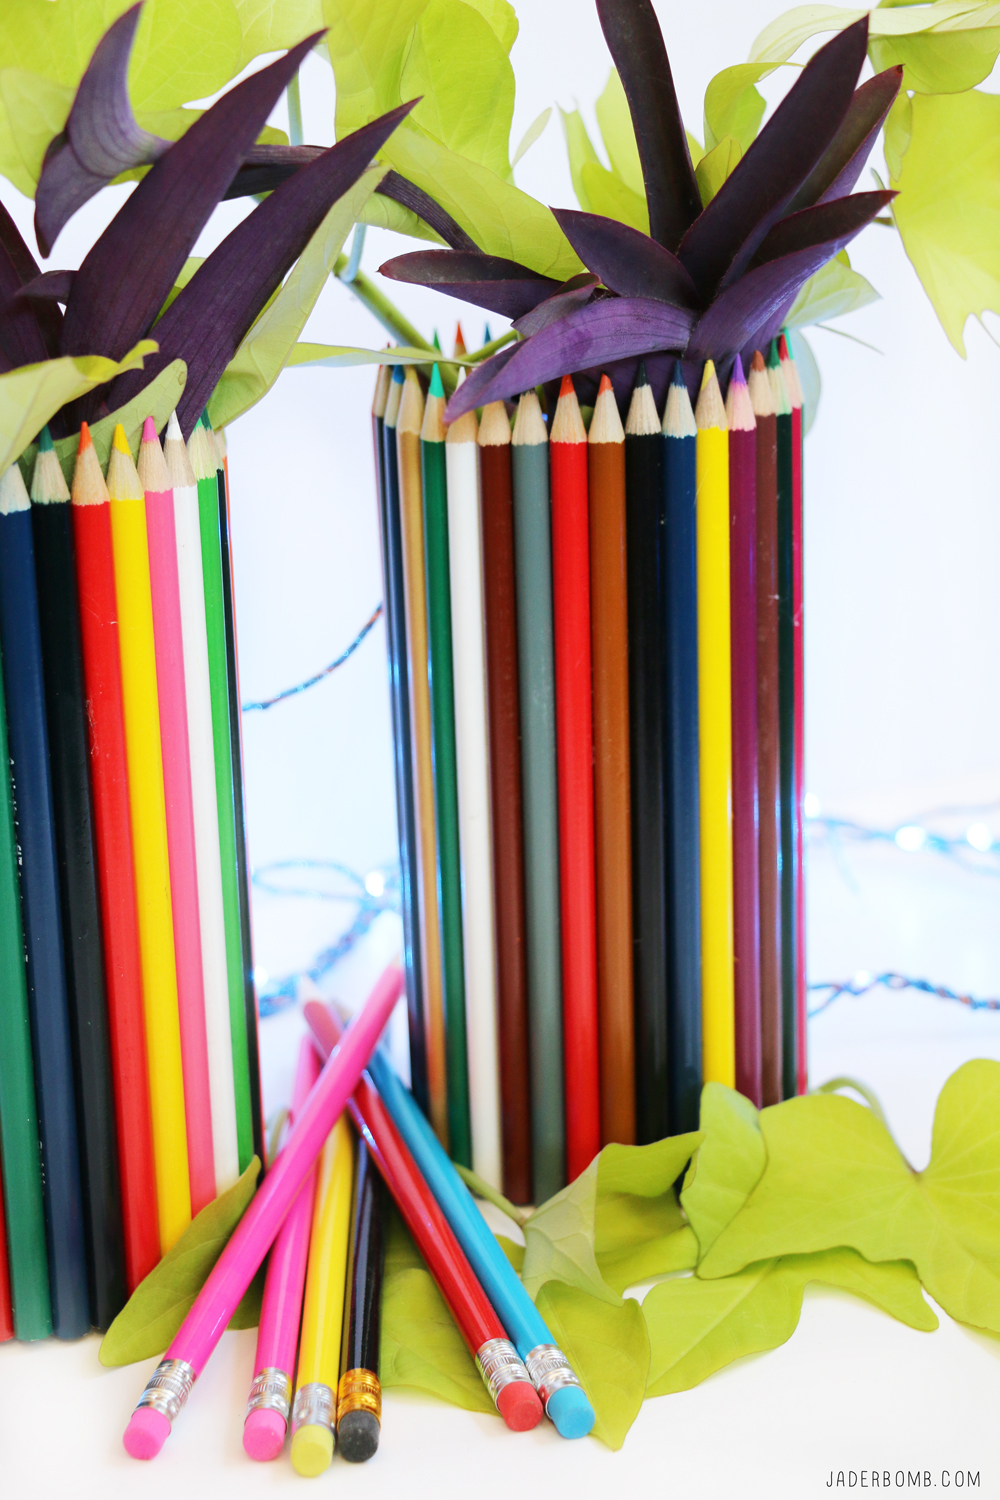
I hope you enjoyed this project and I can’t wait to see you in my next post! Until then, huge hugs from my computer to yours!!!!

Don’t forget to follow me on all of my social media channels because I love all of you to pieces!!!! 

FACEBOOK | INSTAGRAM | TWITTER | PINTEREST 

Happy Painted Neon Socks Day! It’s been a hot minute since I made an appearance on the blog and I promise that was temporary! I have been so crazy busy lately and I am now back in the groove of things! It’s kinda funny how life can get so overwhelming, but in a good way! Check out this NEON DUCK TAPE bag I made it would go perfect with these socks!

I have this “SLIGHT” obsession with socks. Anytime I go into a store and I run across socks with prints I go nuts. I am not sure why because you will rarely find me wearing tennis shoes. I am a Birkenstock kinda gal so the sock things is kinda odd. Yes, I have a drawer full of neon, colorful, printed, patterned and anything else you can think of socks.  Which brings me to THIS post. I found this pack of socks at……Michaels! Yes, Michaels. I was kinda shocked at first but I can’t lie my insides kinda had a party inside when I saw them. I immediately grabbed one of each color as fast as I could. I am really proud of myself that I didn’t grab 3 of each color, seriously! I knew I wanted to jazz them up but I wasn’t sure how.

These pretty babies stayed in my studio for a hot minute… ok they got lost in my studio but when I finally ran across them my insides had a party all over again. That day I was into my Tulip Dimensional paint so the Universe answered my design question for me. I realized this was something anyone can do, especially kids. Let’s face it – kids love to create! Adults do too! Let’s get started so I can show you how to enhance your socks in 10 minutes!

PUFFY PAINT CLOTHES

you will needPlain Socks | White Tulip Slick Paint | Black Tulip Slick Paint 

You can click on the links above to order all of the products I used in this tutorial.

P to the S : These are affiliate links which mean when you click on them and order your products from Amazon you help me feed all of my baby chickens. Seriously. So, thank you! Plus I am totally making your life so easy, right!

neon socks

I could tell you this project is super hard but I would be lying. It’s actually super easy! I wanted to create very subtle geometric designs on my socks so I only did the top part of them…. They turned out fabulous and unique. Every time I wear them I get stopped…well not really BUT I have had a few people ask me where I got them. Remember, I am a Birkenstock chica so you won’t really find me wearing socks!

On a whole other note my better half signed me up for a tennis league. Yes. A tennis league. I am not sure why I am telling you this but I guess this will be the perfect opportunity to show off all of my snazzy socks. I am so glad she has more faith in me than my socks do, haha! I am however super stoked about all the tennis clothes I will be wearing. I guess if I don’t play that good the least I could do is look cute on the court right… Stay tuned I will keep you updated, or I will NEVER mention this again. #fml

NEON GREEN SOCKS
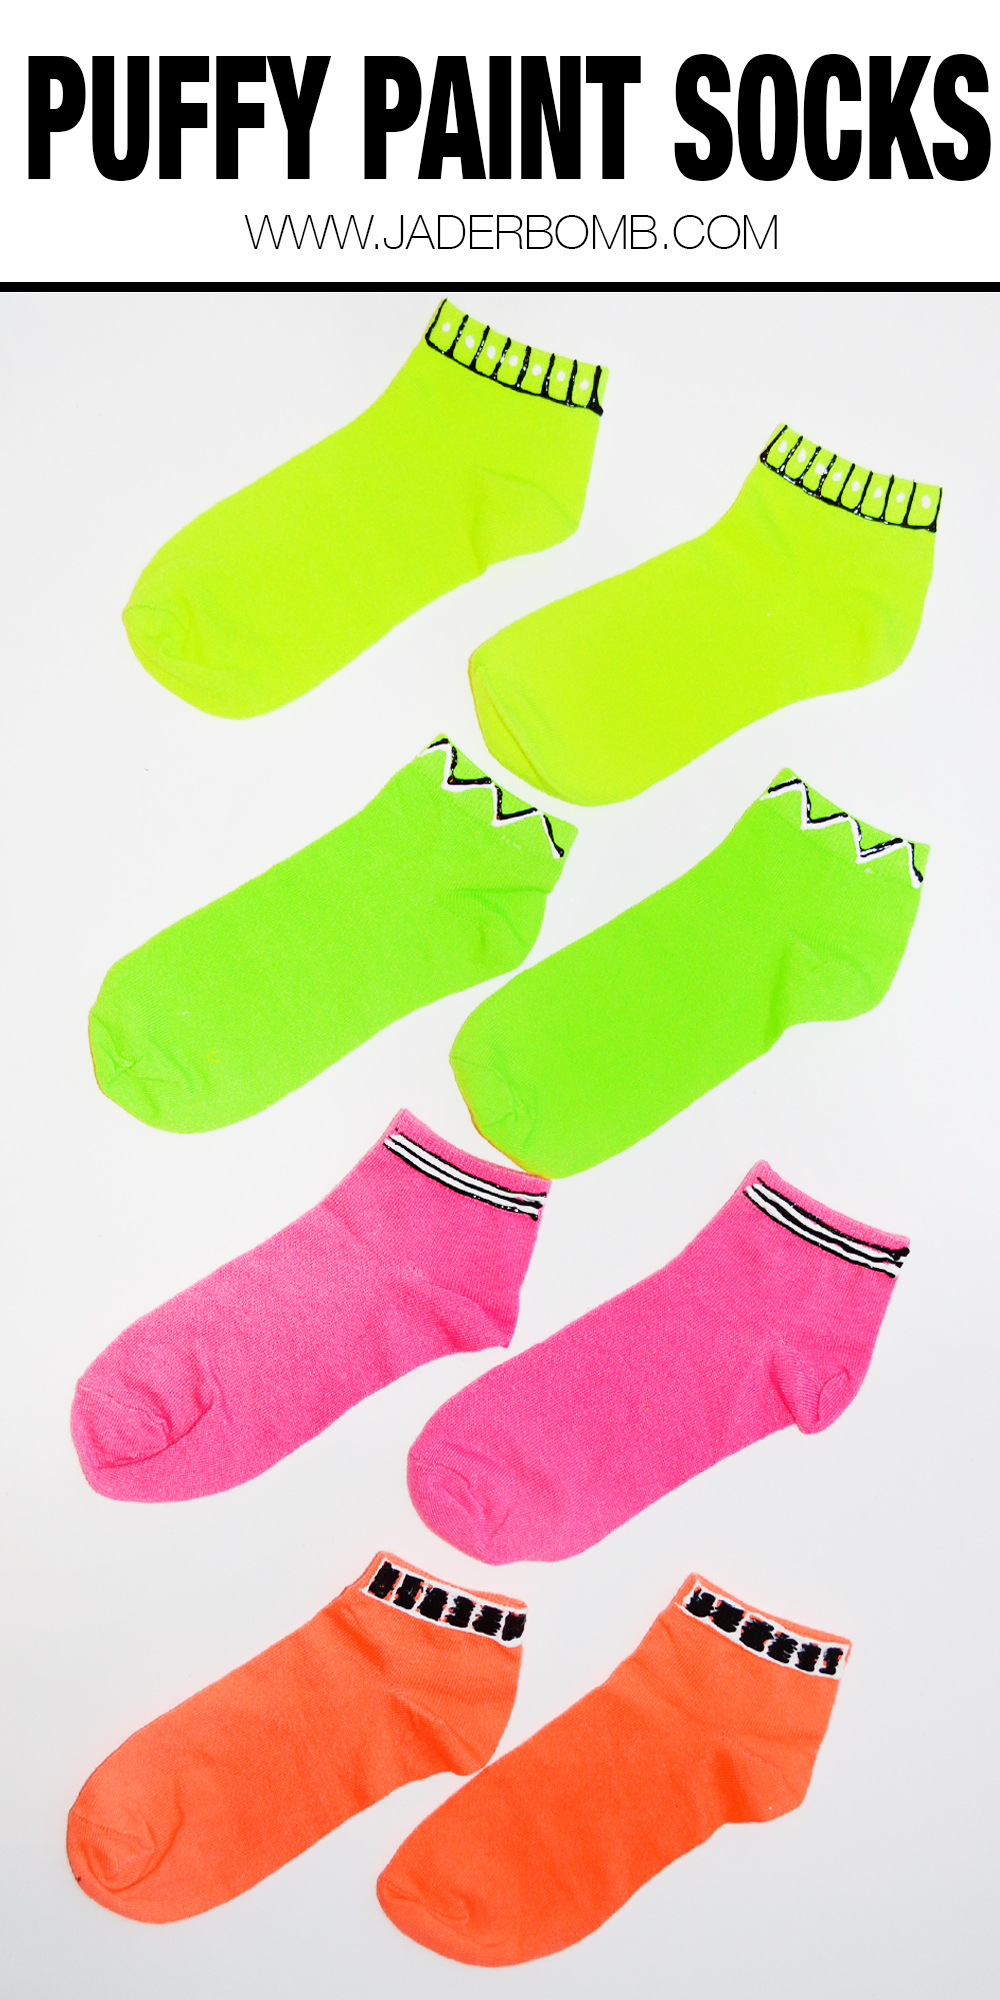
I kinda fell in love with each pair but I absolutely love the pink with black and white stripes. Leave a comment in the comment section telling me which pair is YOUR favorite. DIY SOCKS

Since I love NEON so much I thought I would share with you this neon fashion roundup I did a while back. Yes I still love every single thing in the picture below even though this post was done a few years ago. Neon Statement

in other news

  • Check out I Love to Create’s new website! It’s cracking and you can check out my page on the blog dedicated to just MWAHHHHHHH HAHAHAHAHAH (yes I am saying this in my best austin powers voice)
  • I got asked to continue my contract with Michaels to be a Michaels Maker!!! Can I get a Wuhhh Wuhhhhhhh (that would be Jay -Z baby)

I hope you enjoyed this post! See y’all tomorrow where I will be showing you my last post for this years Michaels Makers program! I will give you a hint… You will see lots of black, teal and yellow!
HUGE HUGS FROM MY COMPUTER TO YOURS!  JADERBOMB


I am so stoked about my latest post for the I Love to Create Blog where I will show you how to paint stripes. I always have fun using Tulip products and for some strange reason this project made me feel super duper inside. Check out these too!

I think I may have a slight addiction to color, as you can see here. If I had to explain to you in this moment what COLOR does to me it’s like kids that sit down at the table to eat and the entire time they sorta “dance” with their legs under the table. You know what I am talking about? I can always tell when I cook a good meal if I feel the floor shaking a little.

Now when the floor doesn’t shake. I just take an extra sip of wine and go cry in the bathroom. Well not really but you get it, RIGHT!

These napkins represent a big juicy hamburger from your favorite joint. Maybe with extra pickles and a good coke! Make sure to click at the bottom for the FULL tutorial ♥
How to Paint Stripes

CLICK HERE TO SEE FULL TUTORIAL
Enjoy and have a GREAT weekend!HASHTAG LOGO

Don’t forget to connect on social media! Make sure to use use the hashtag #JADERBOMB on Instagram or Twitter or Facebook so I can keep track of all your awesome creations! HAVE A GLITTERY DAY! ♥, Jade

raw-bar-header

 Burlap Canvas Display 
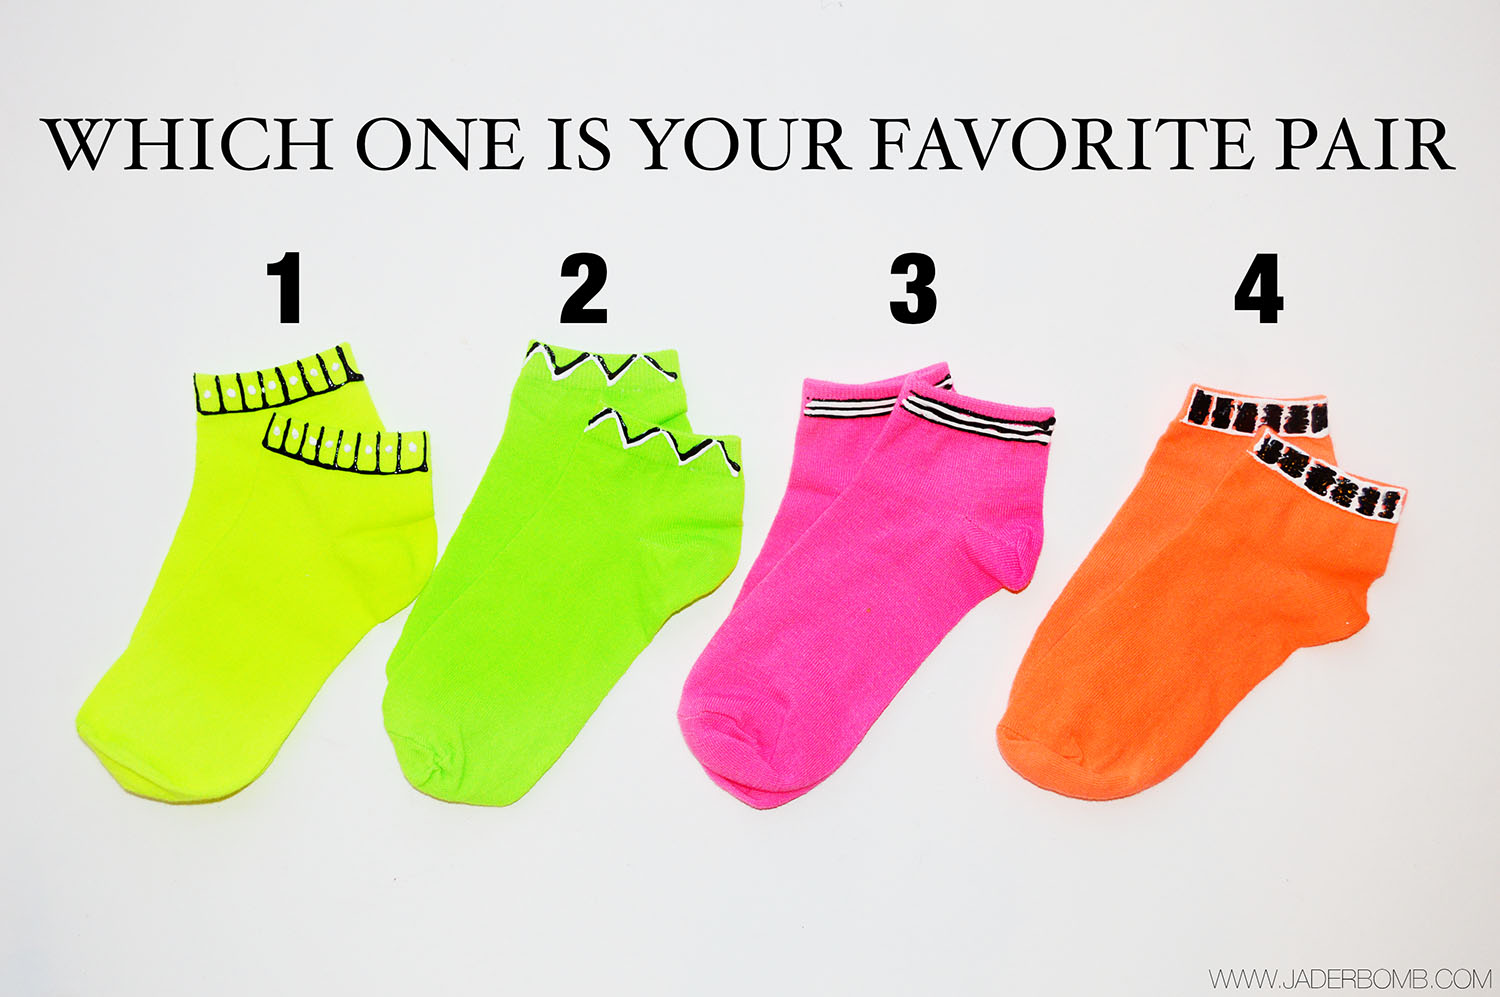
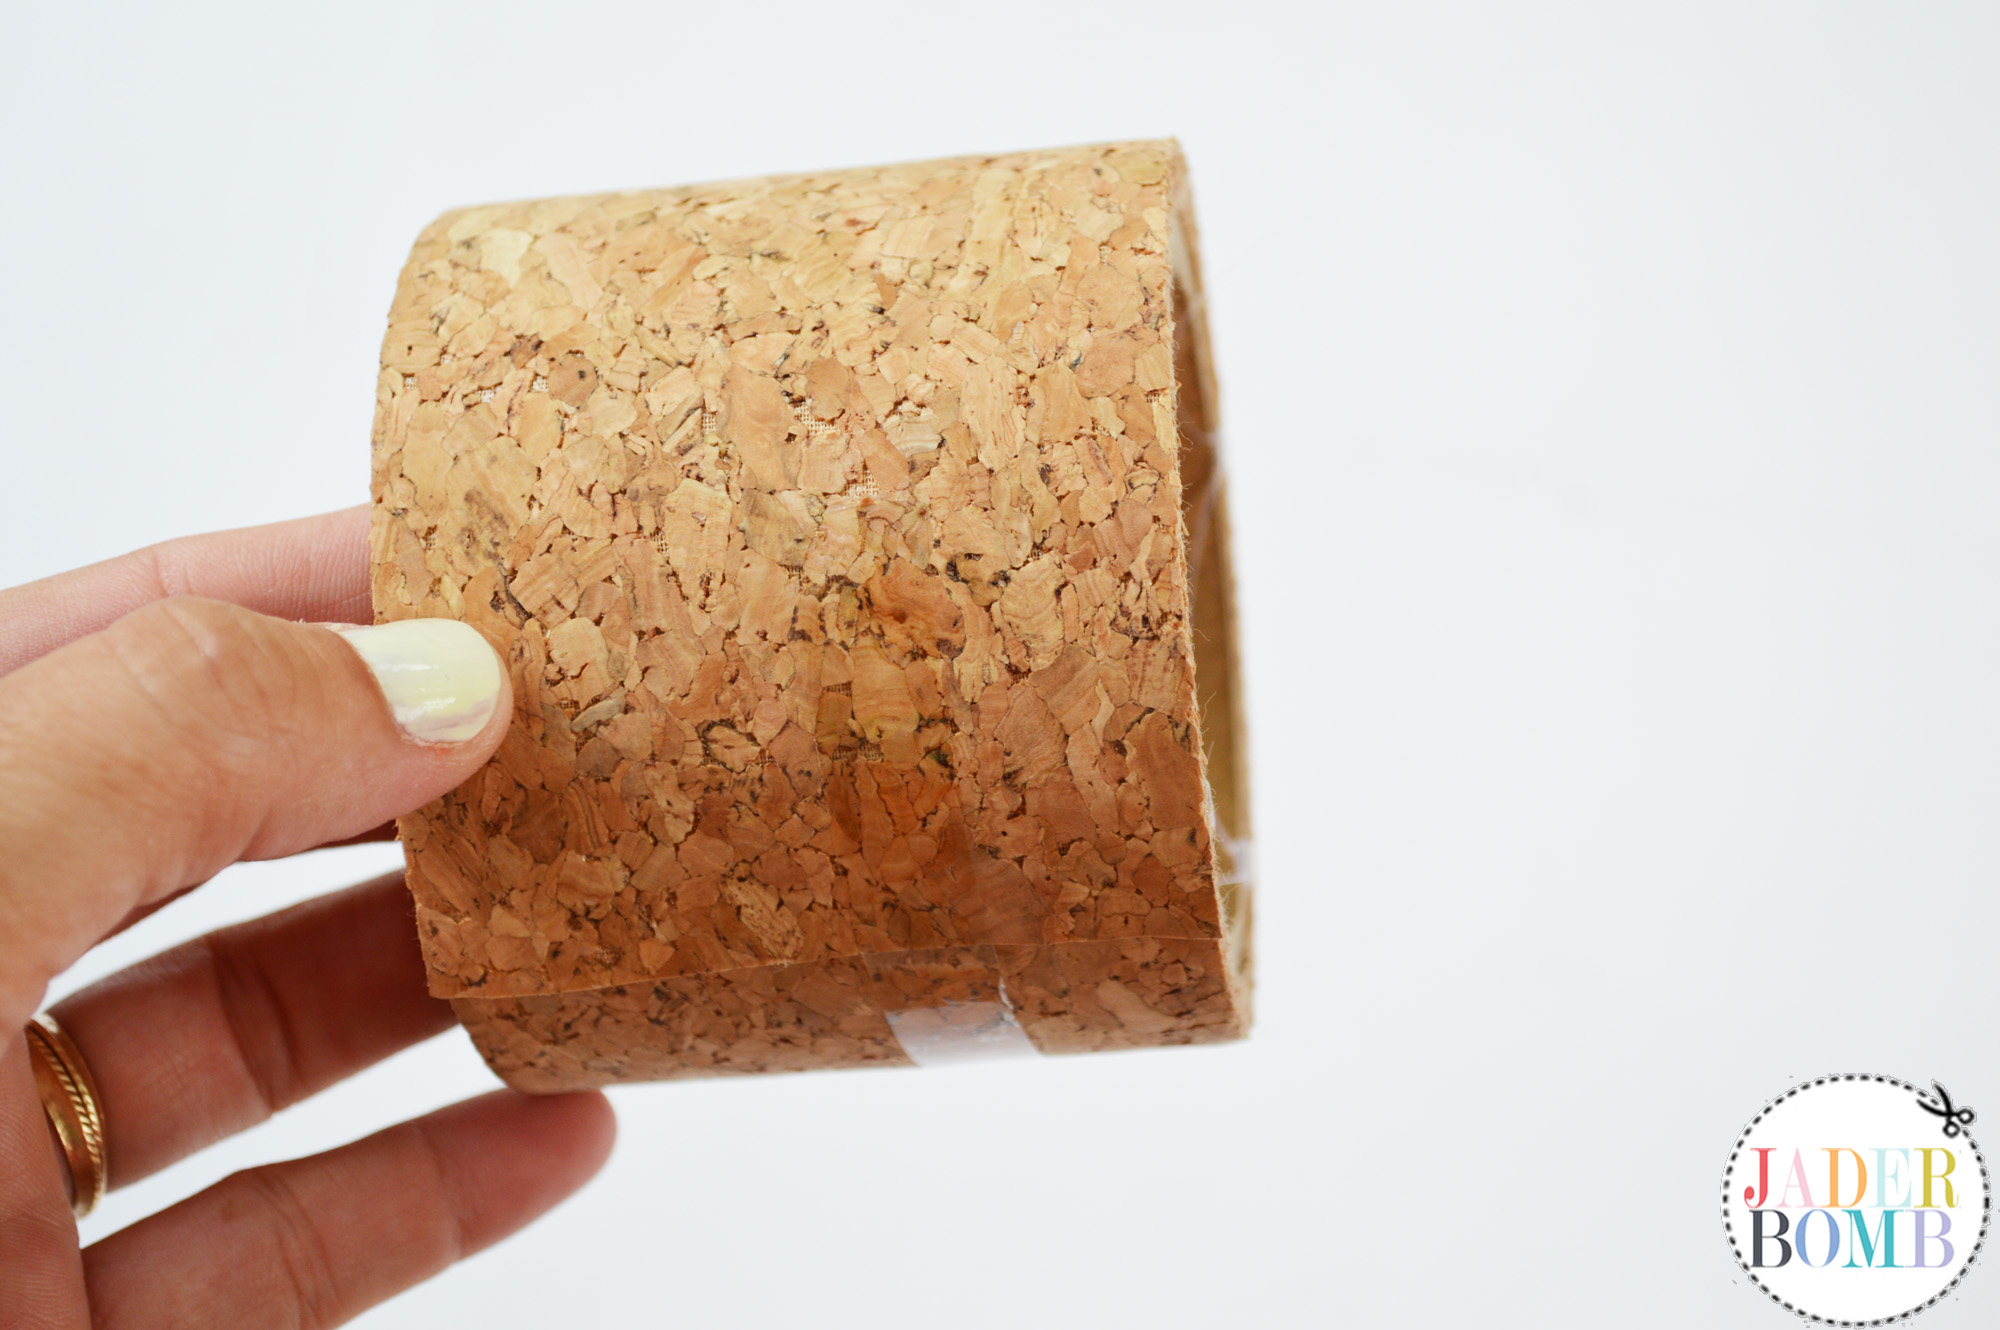
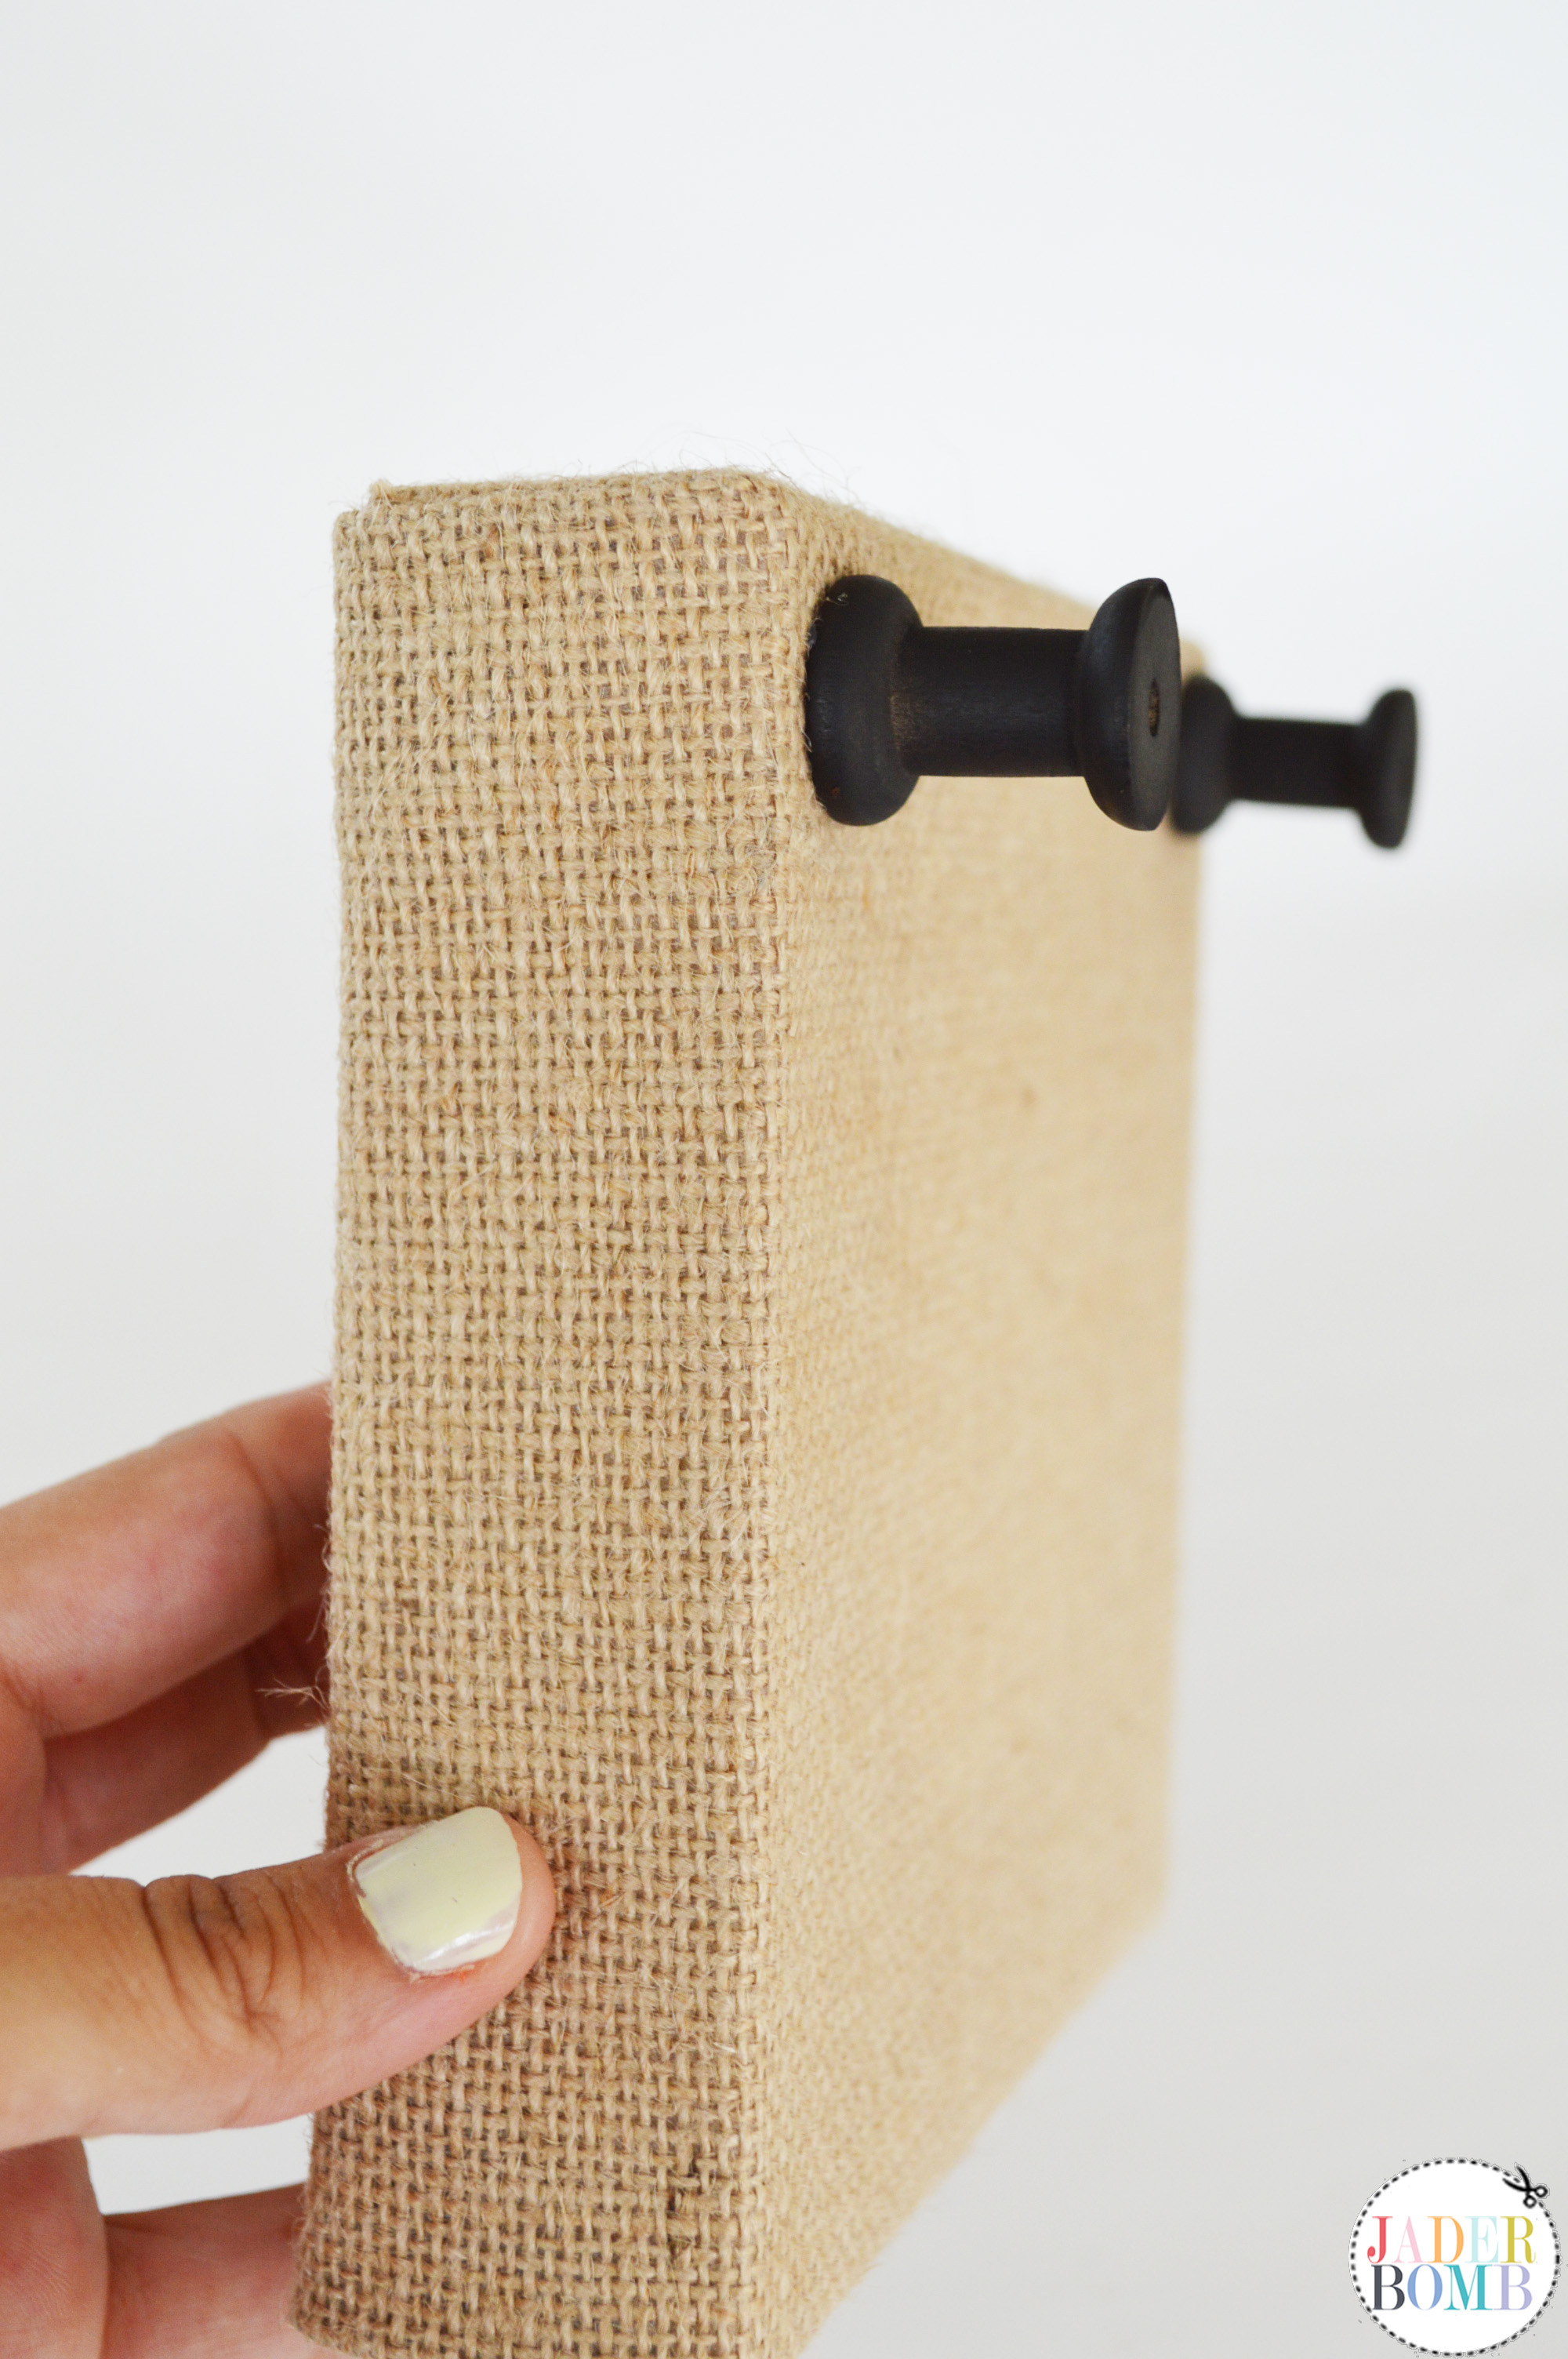
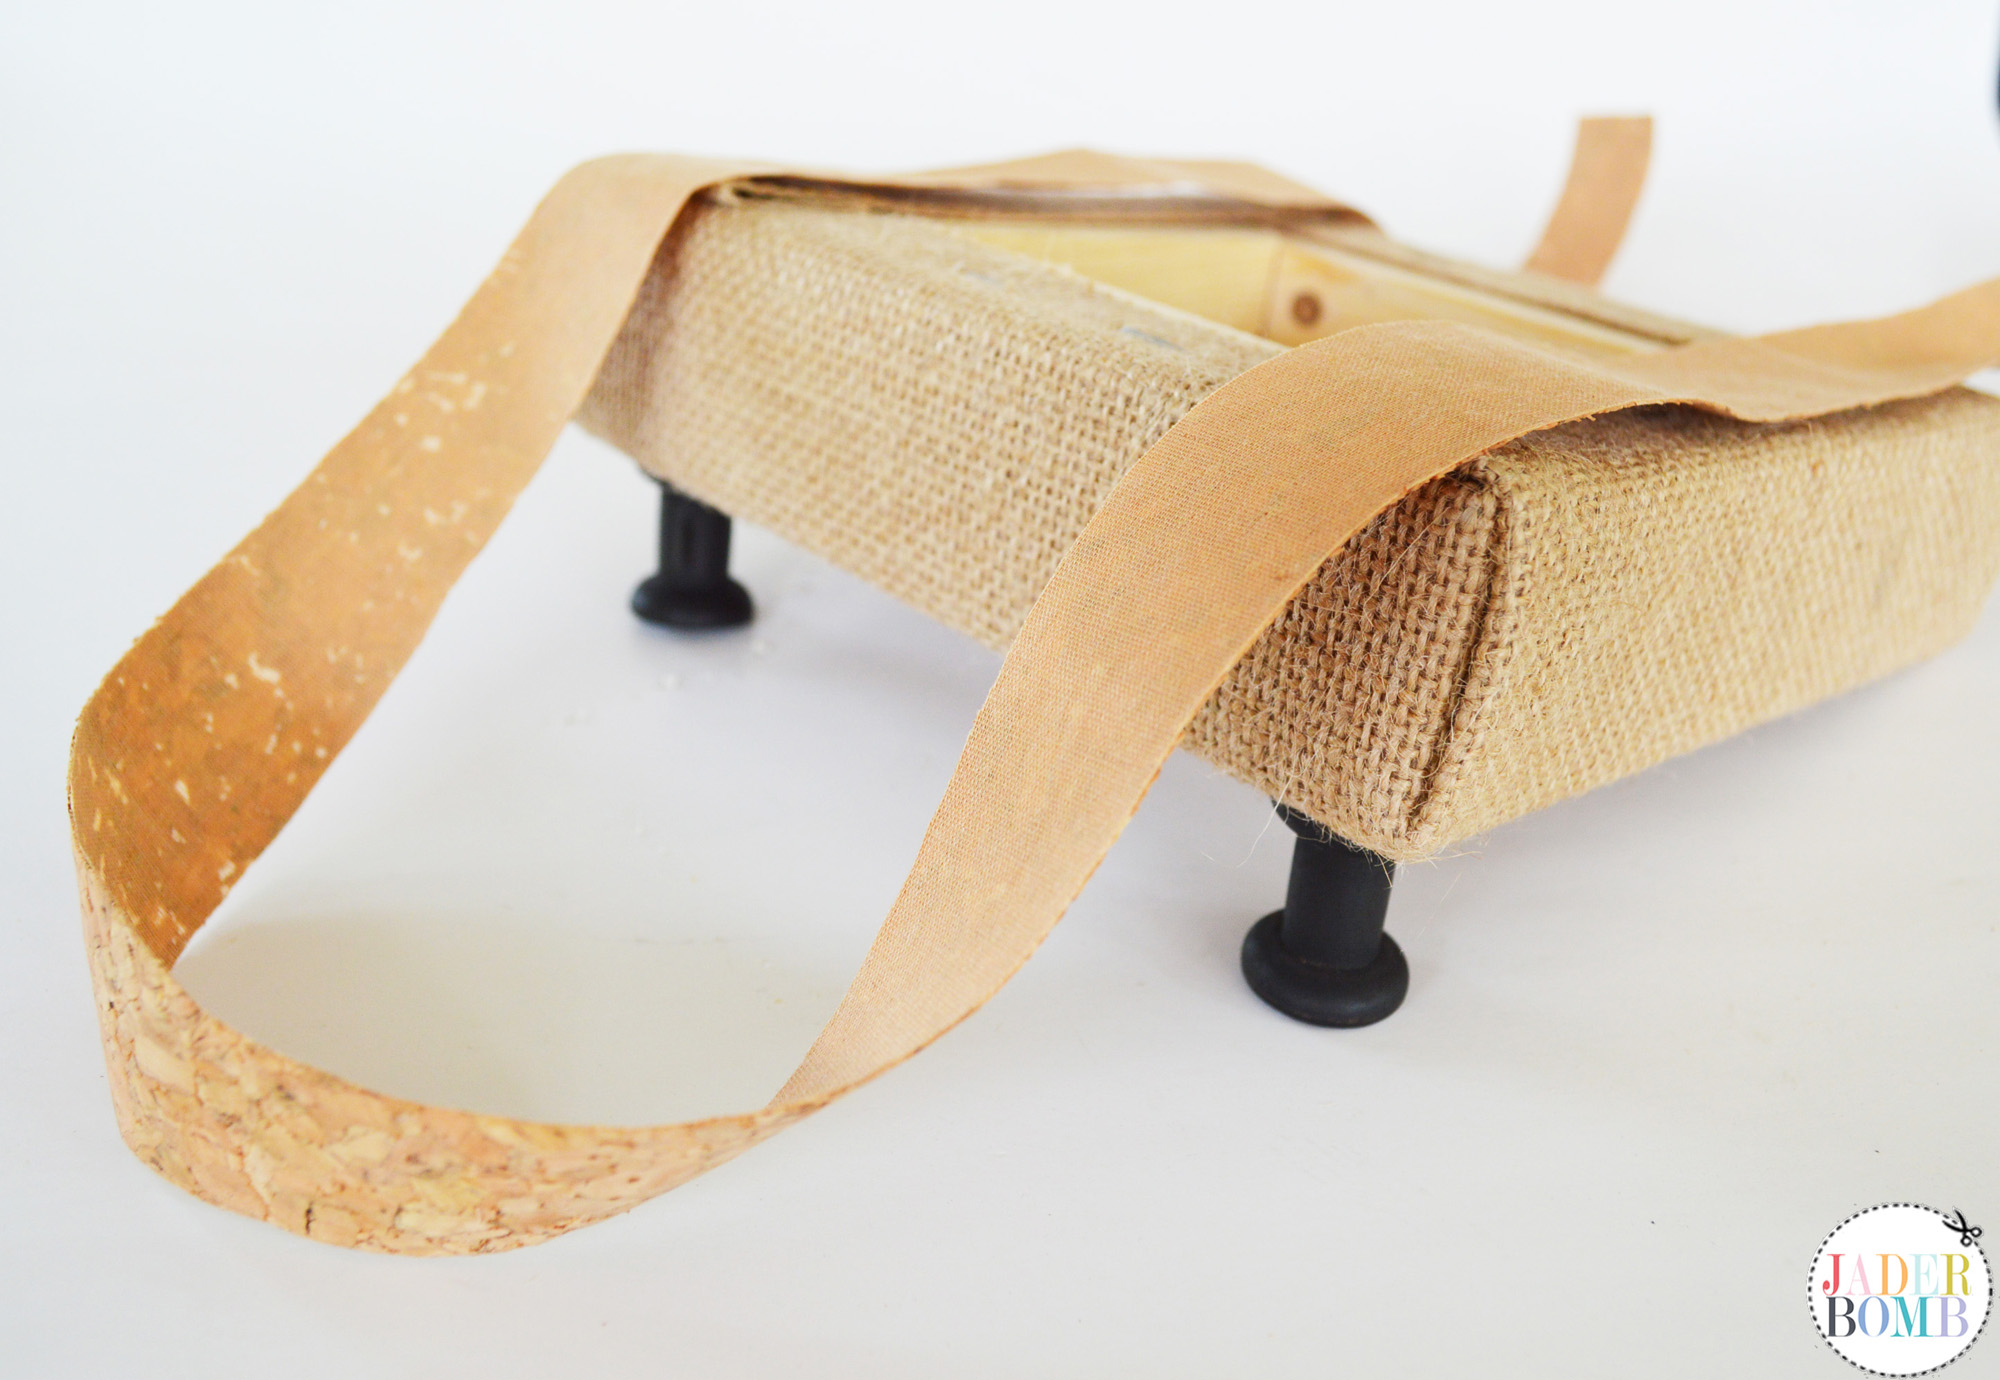
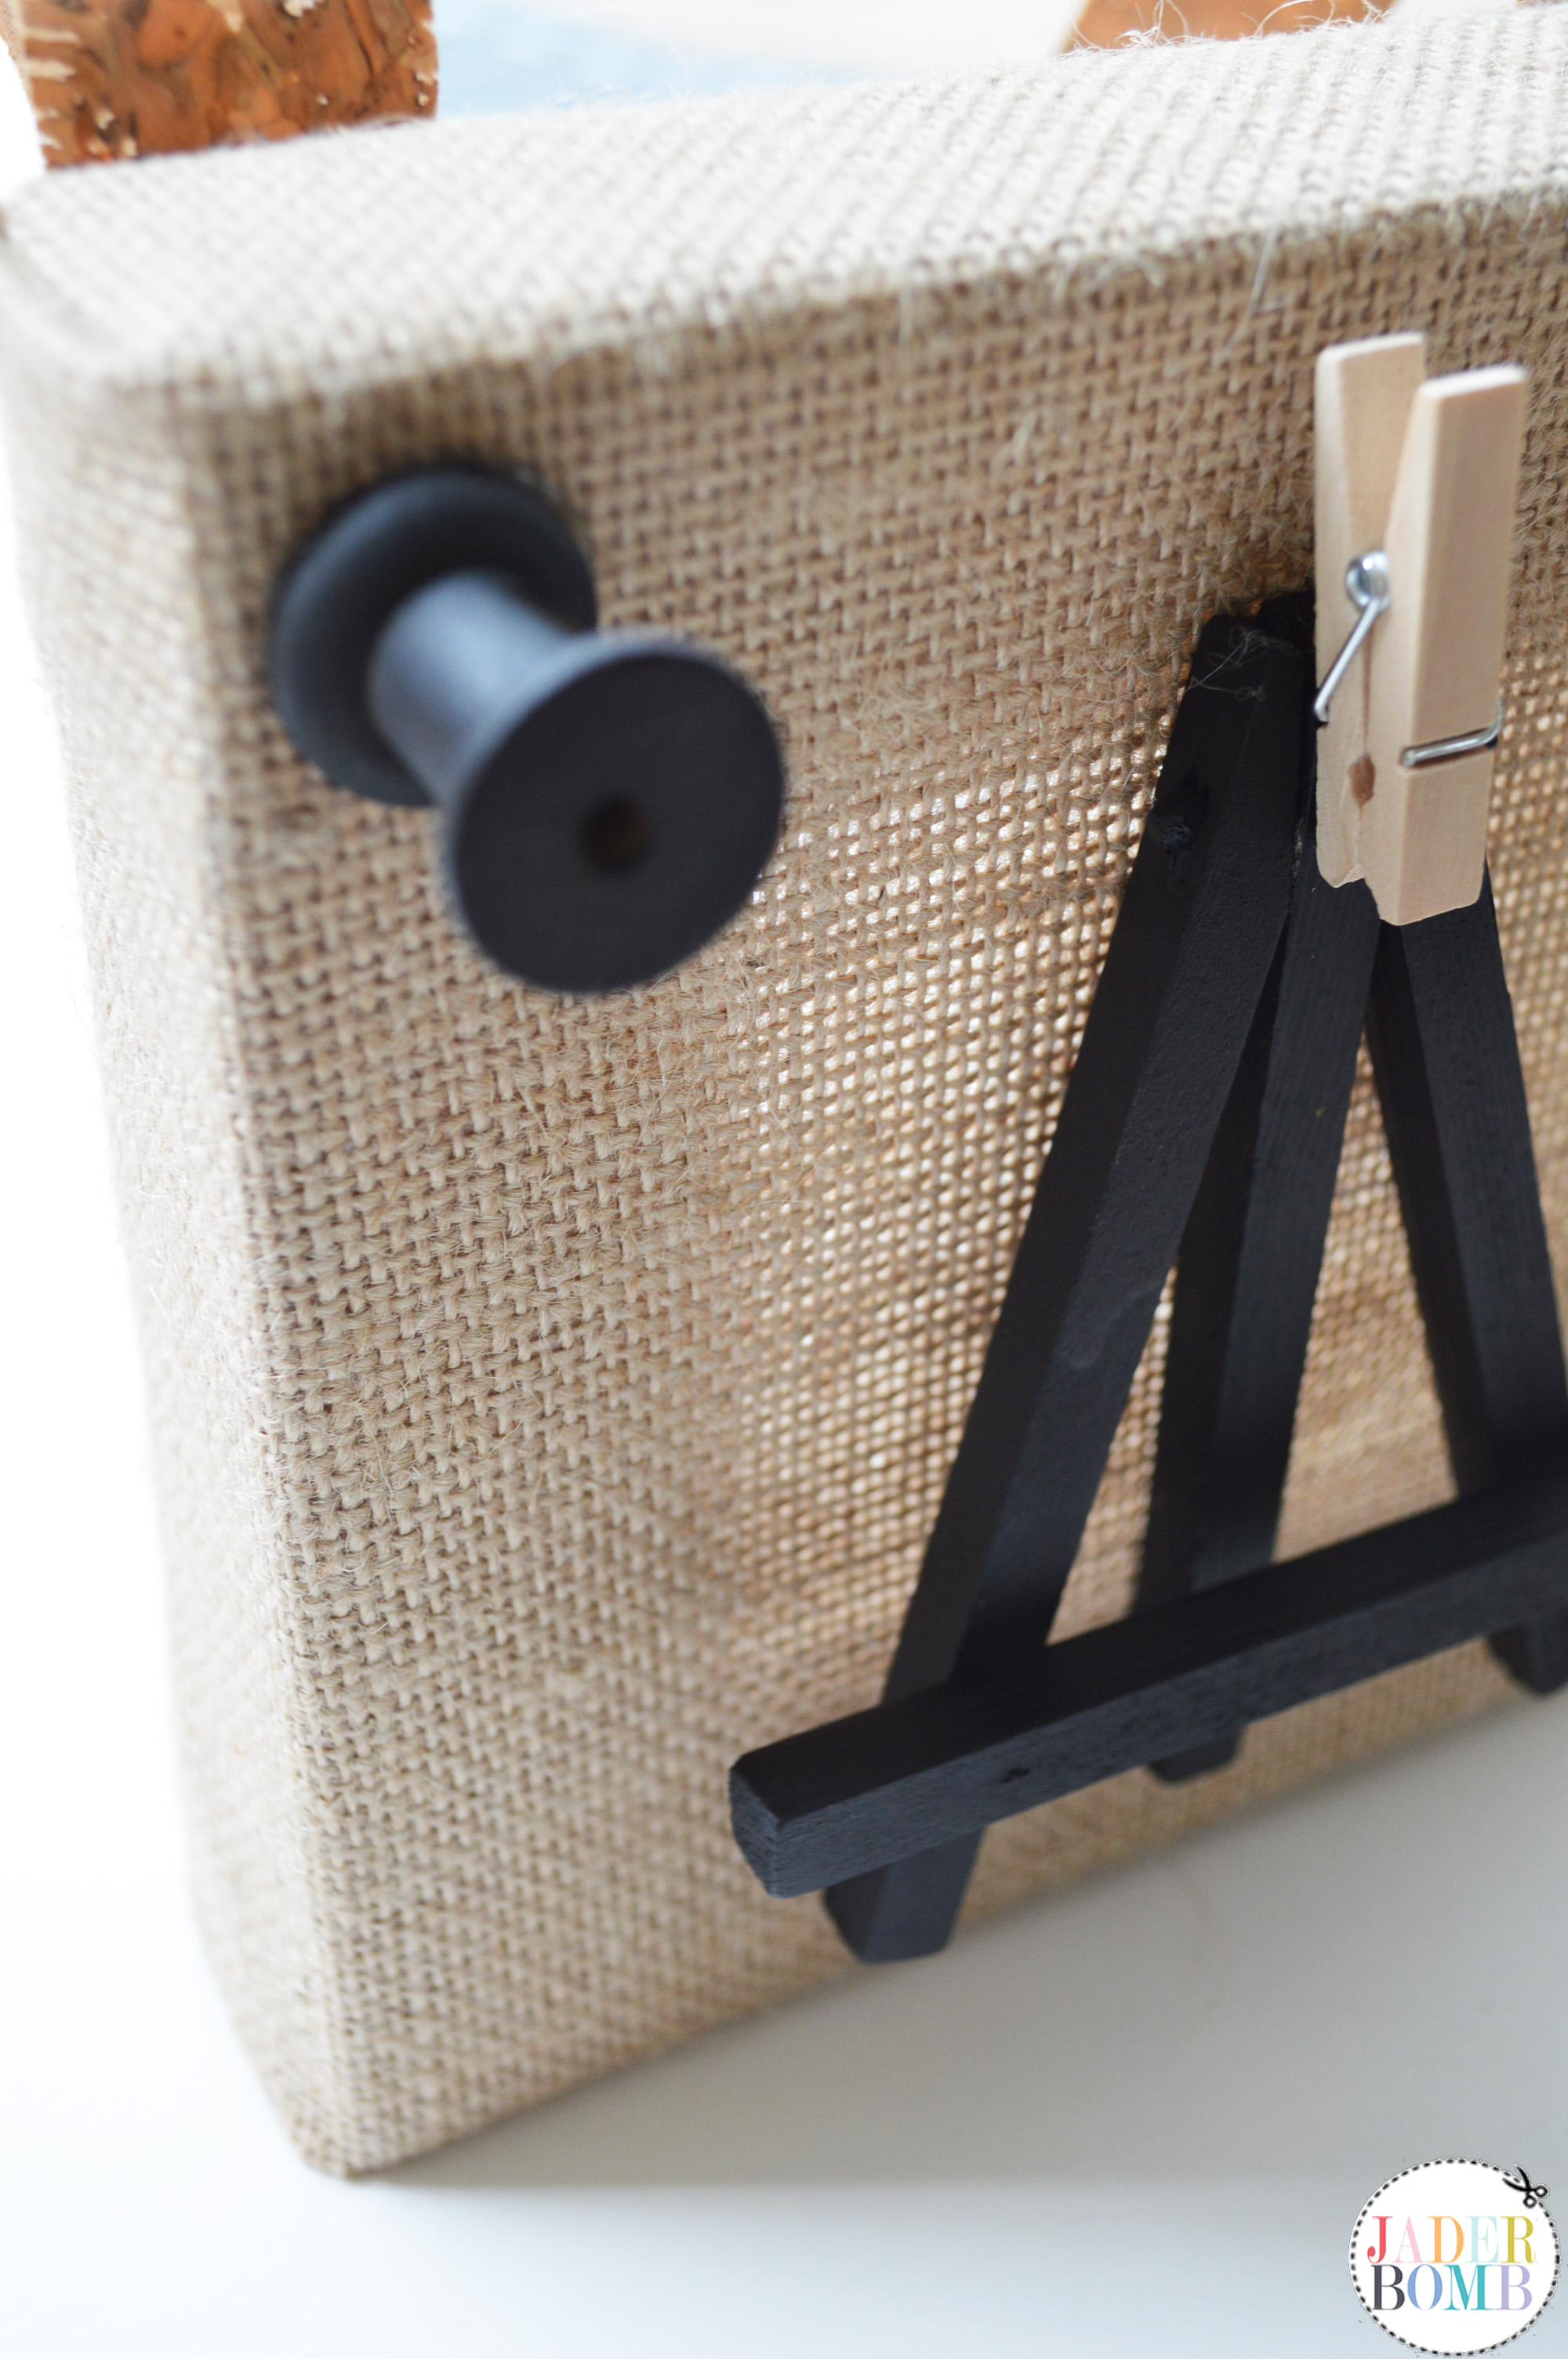
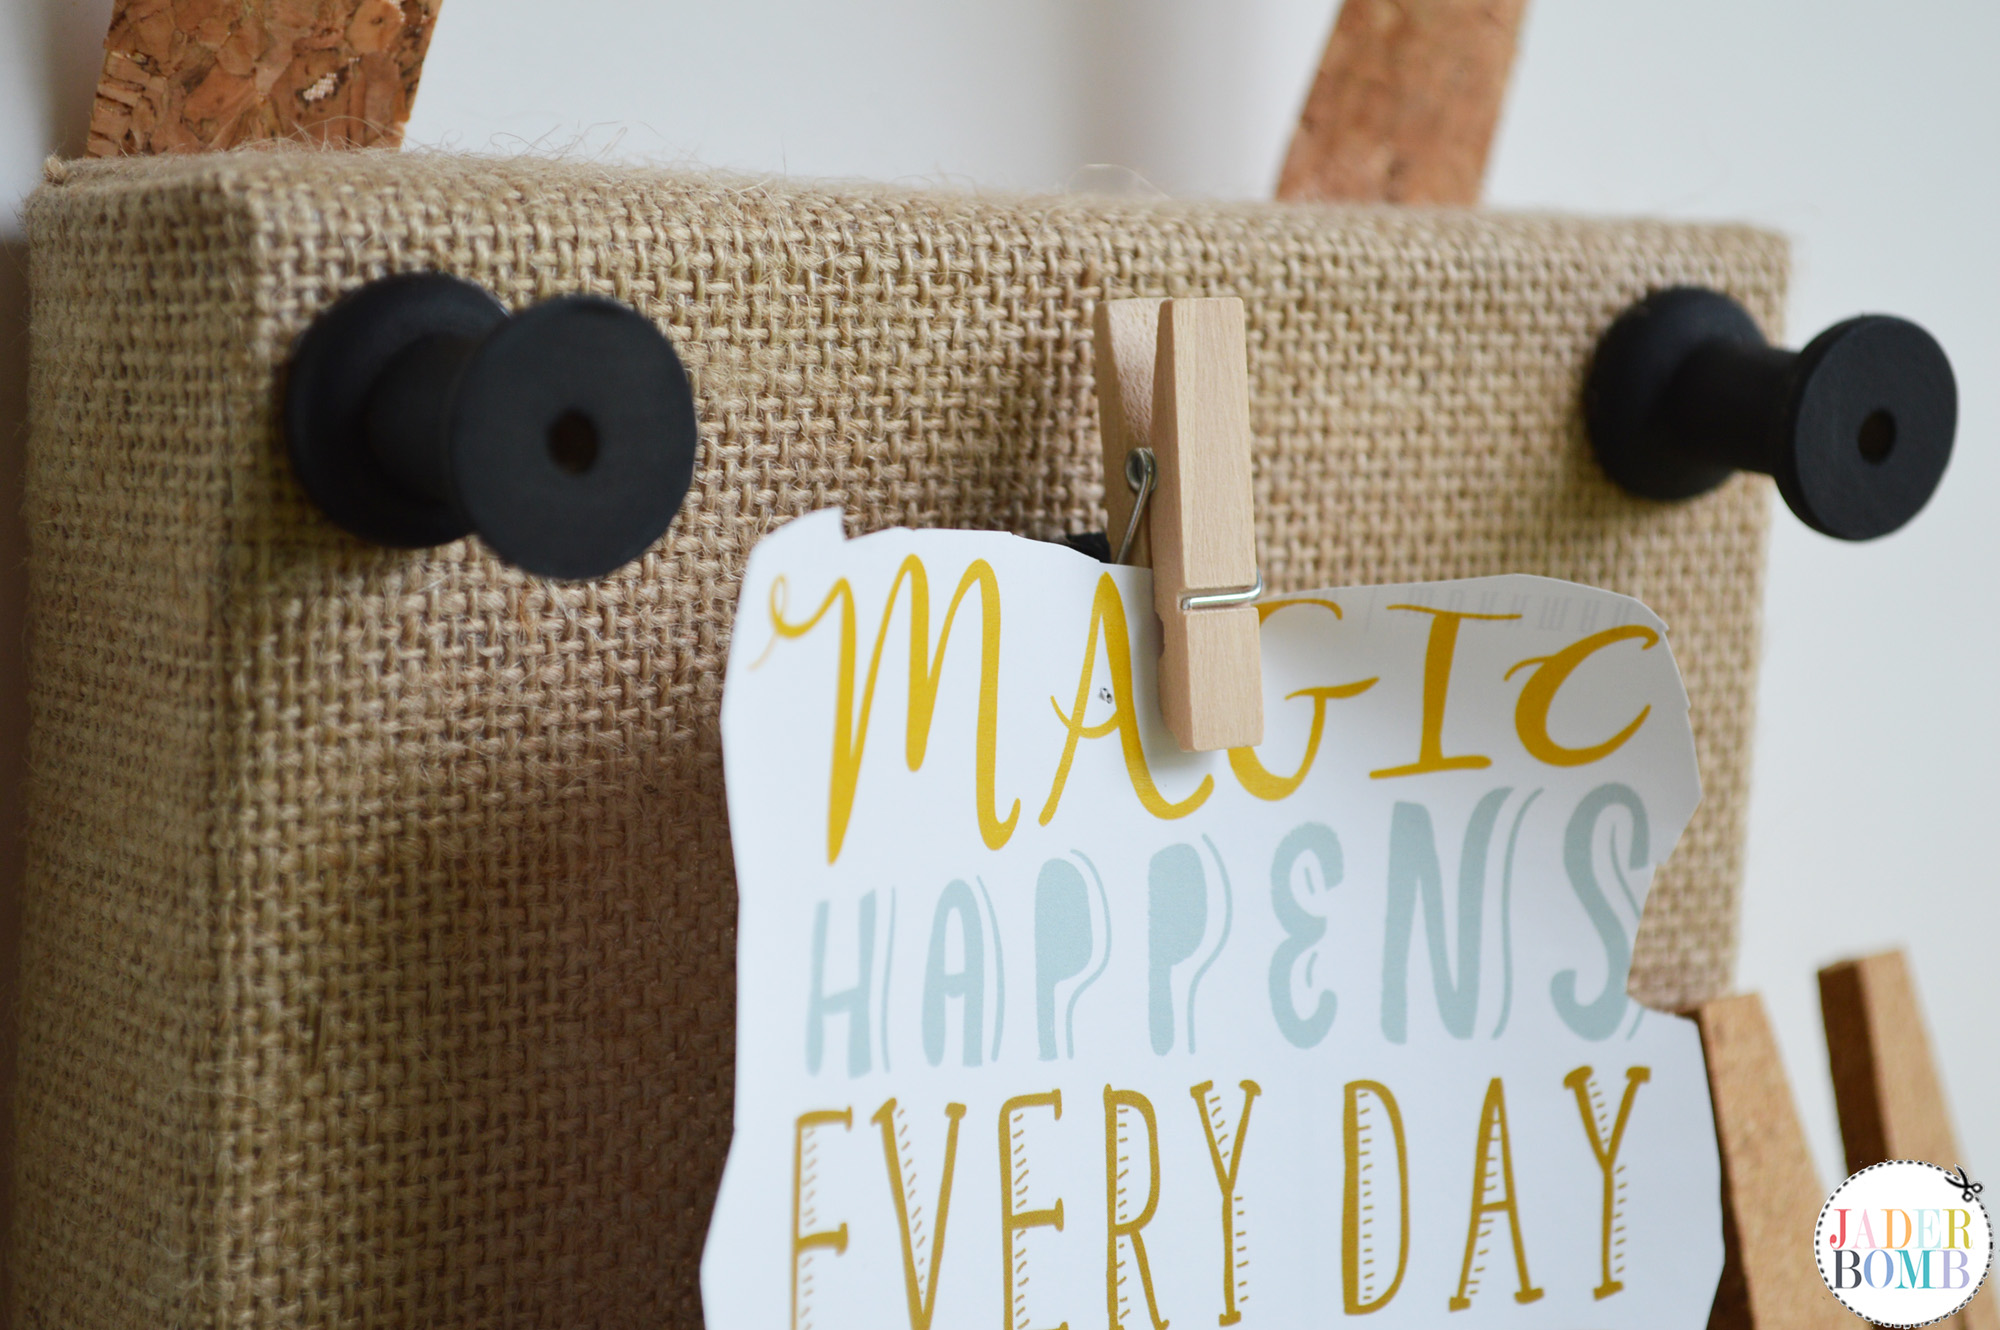
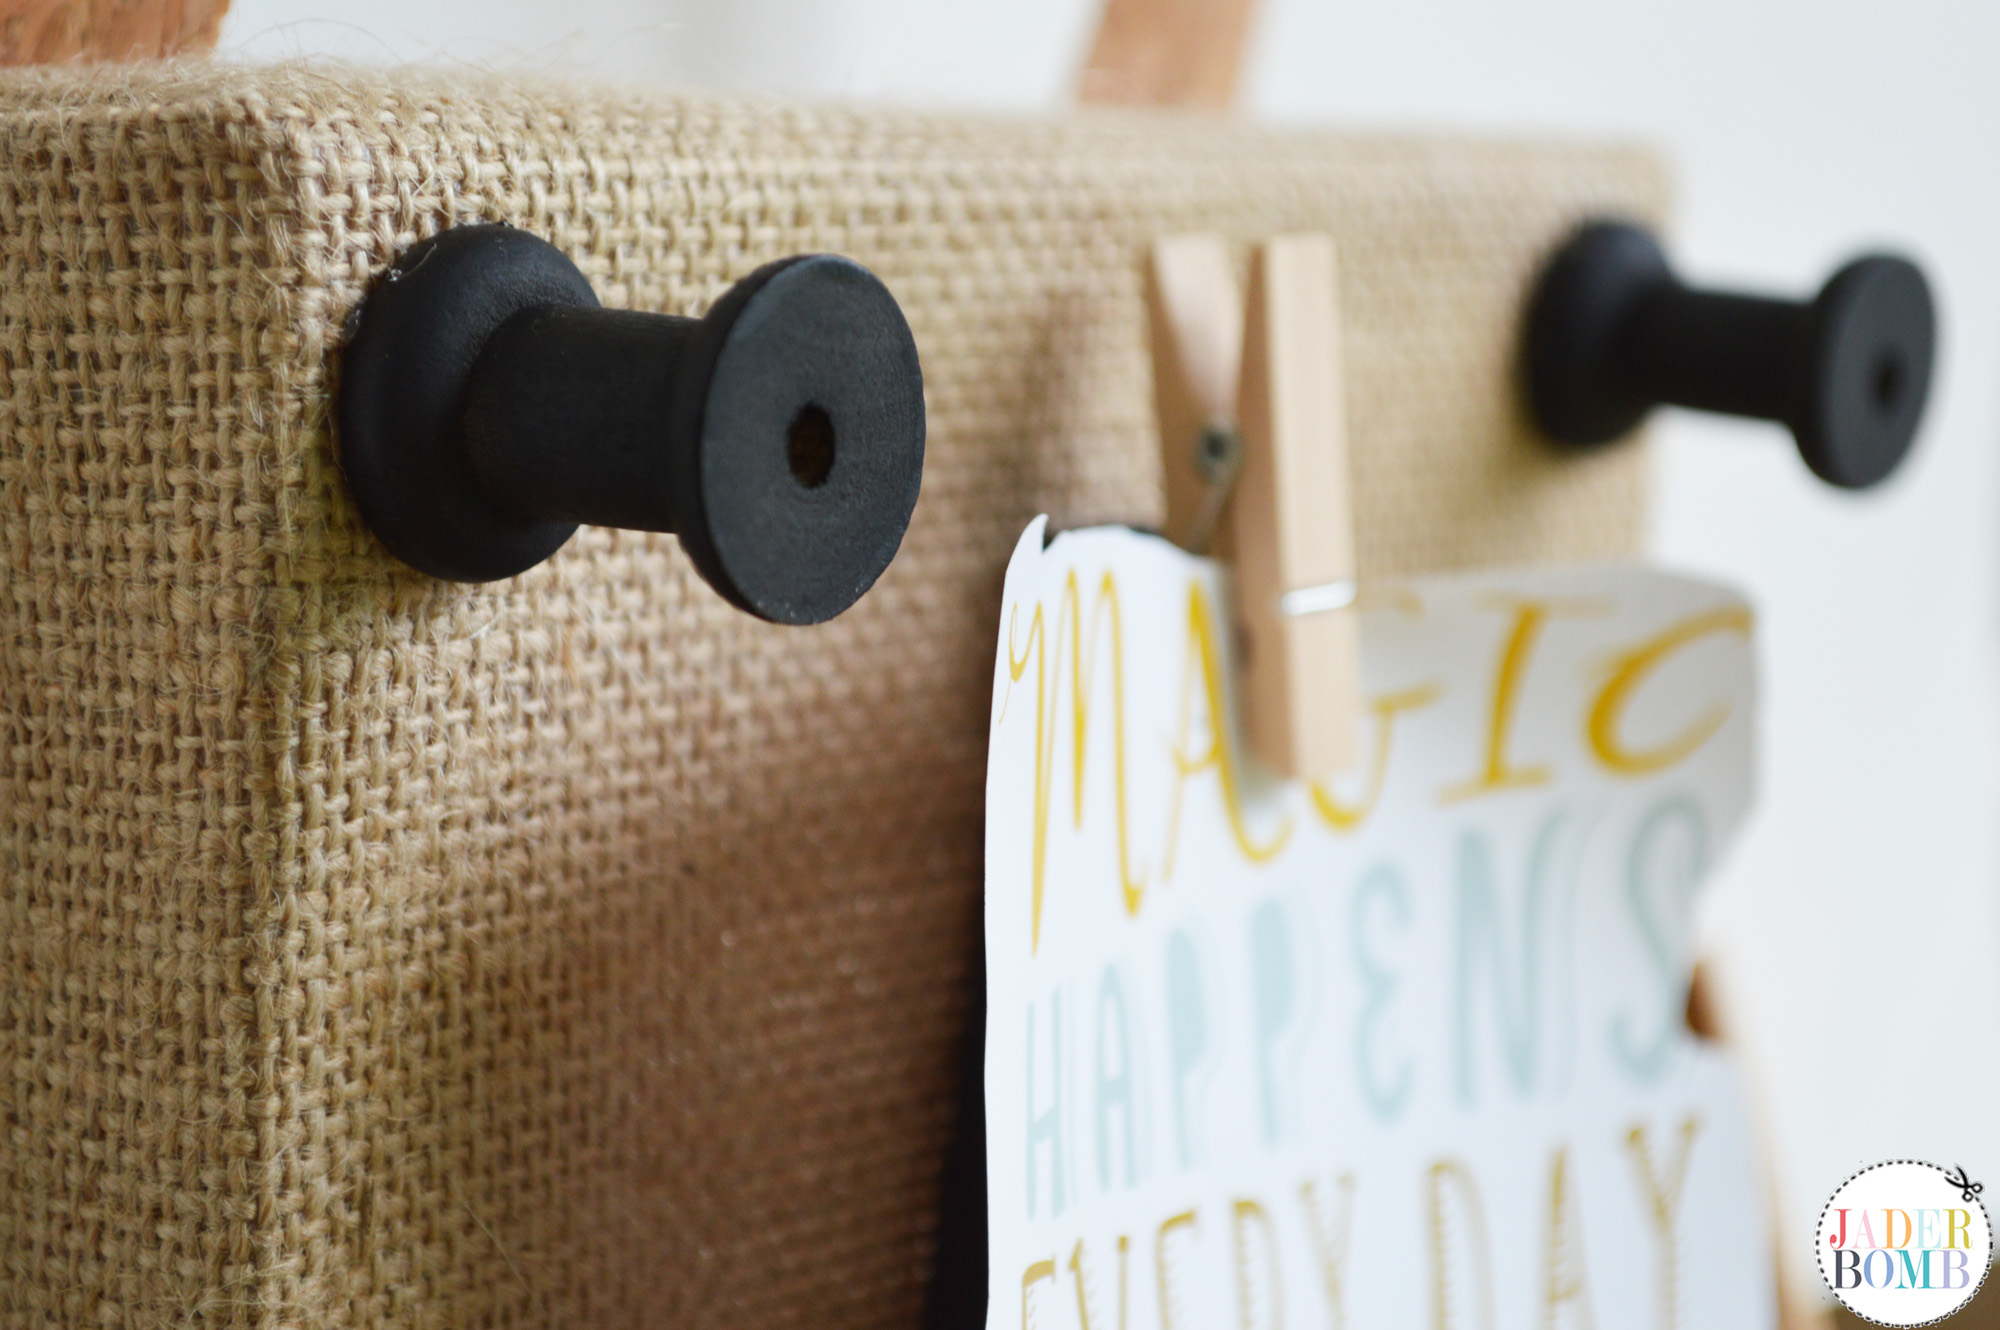
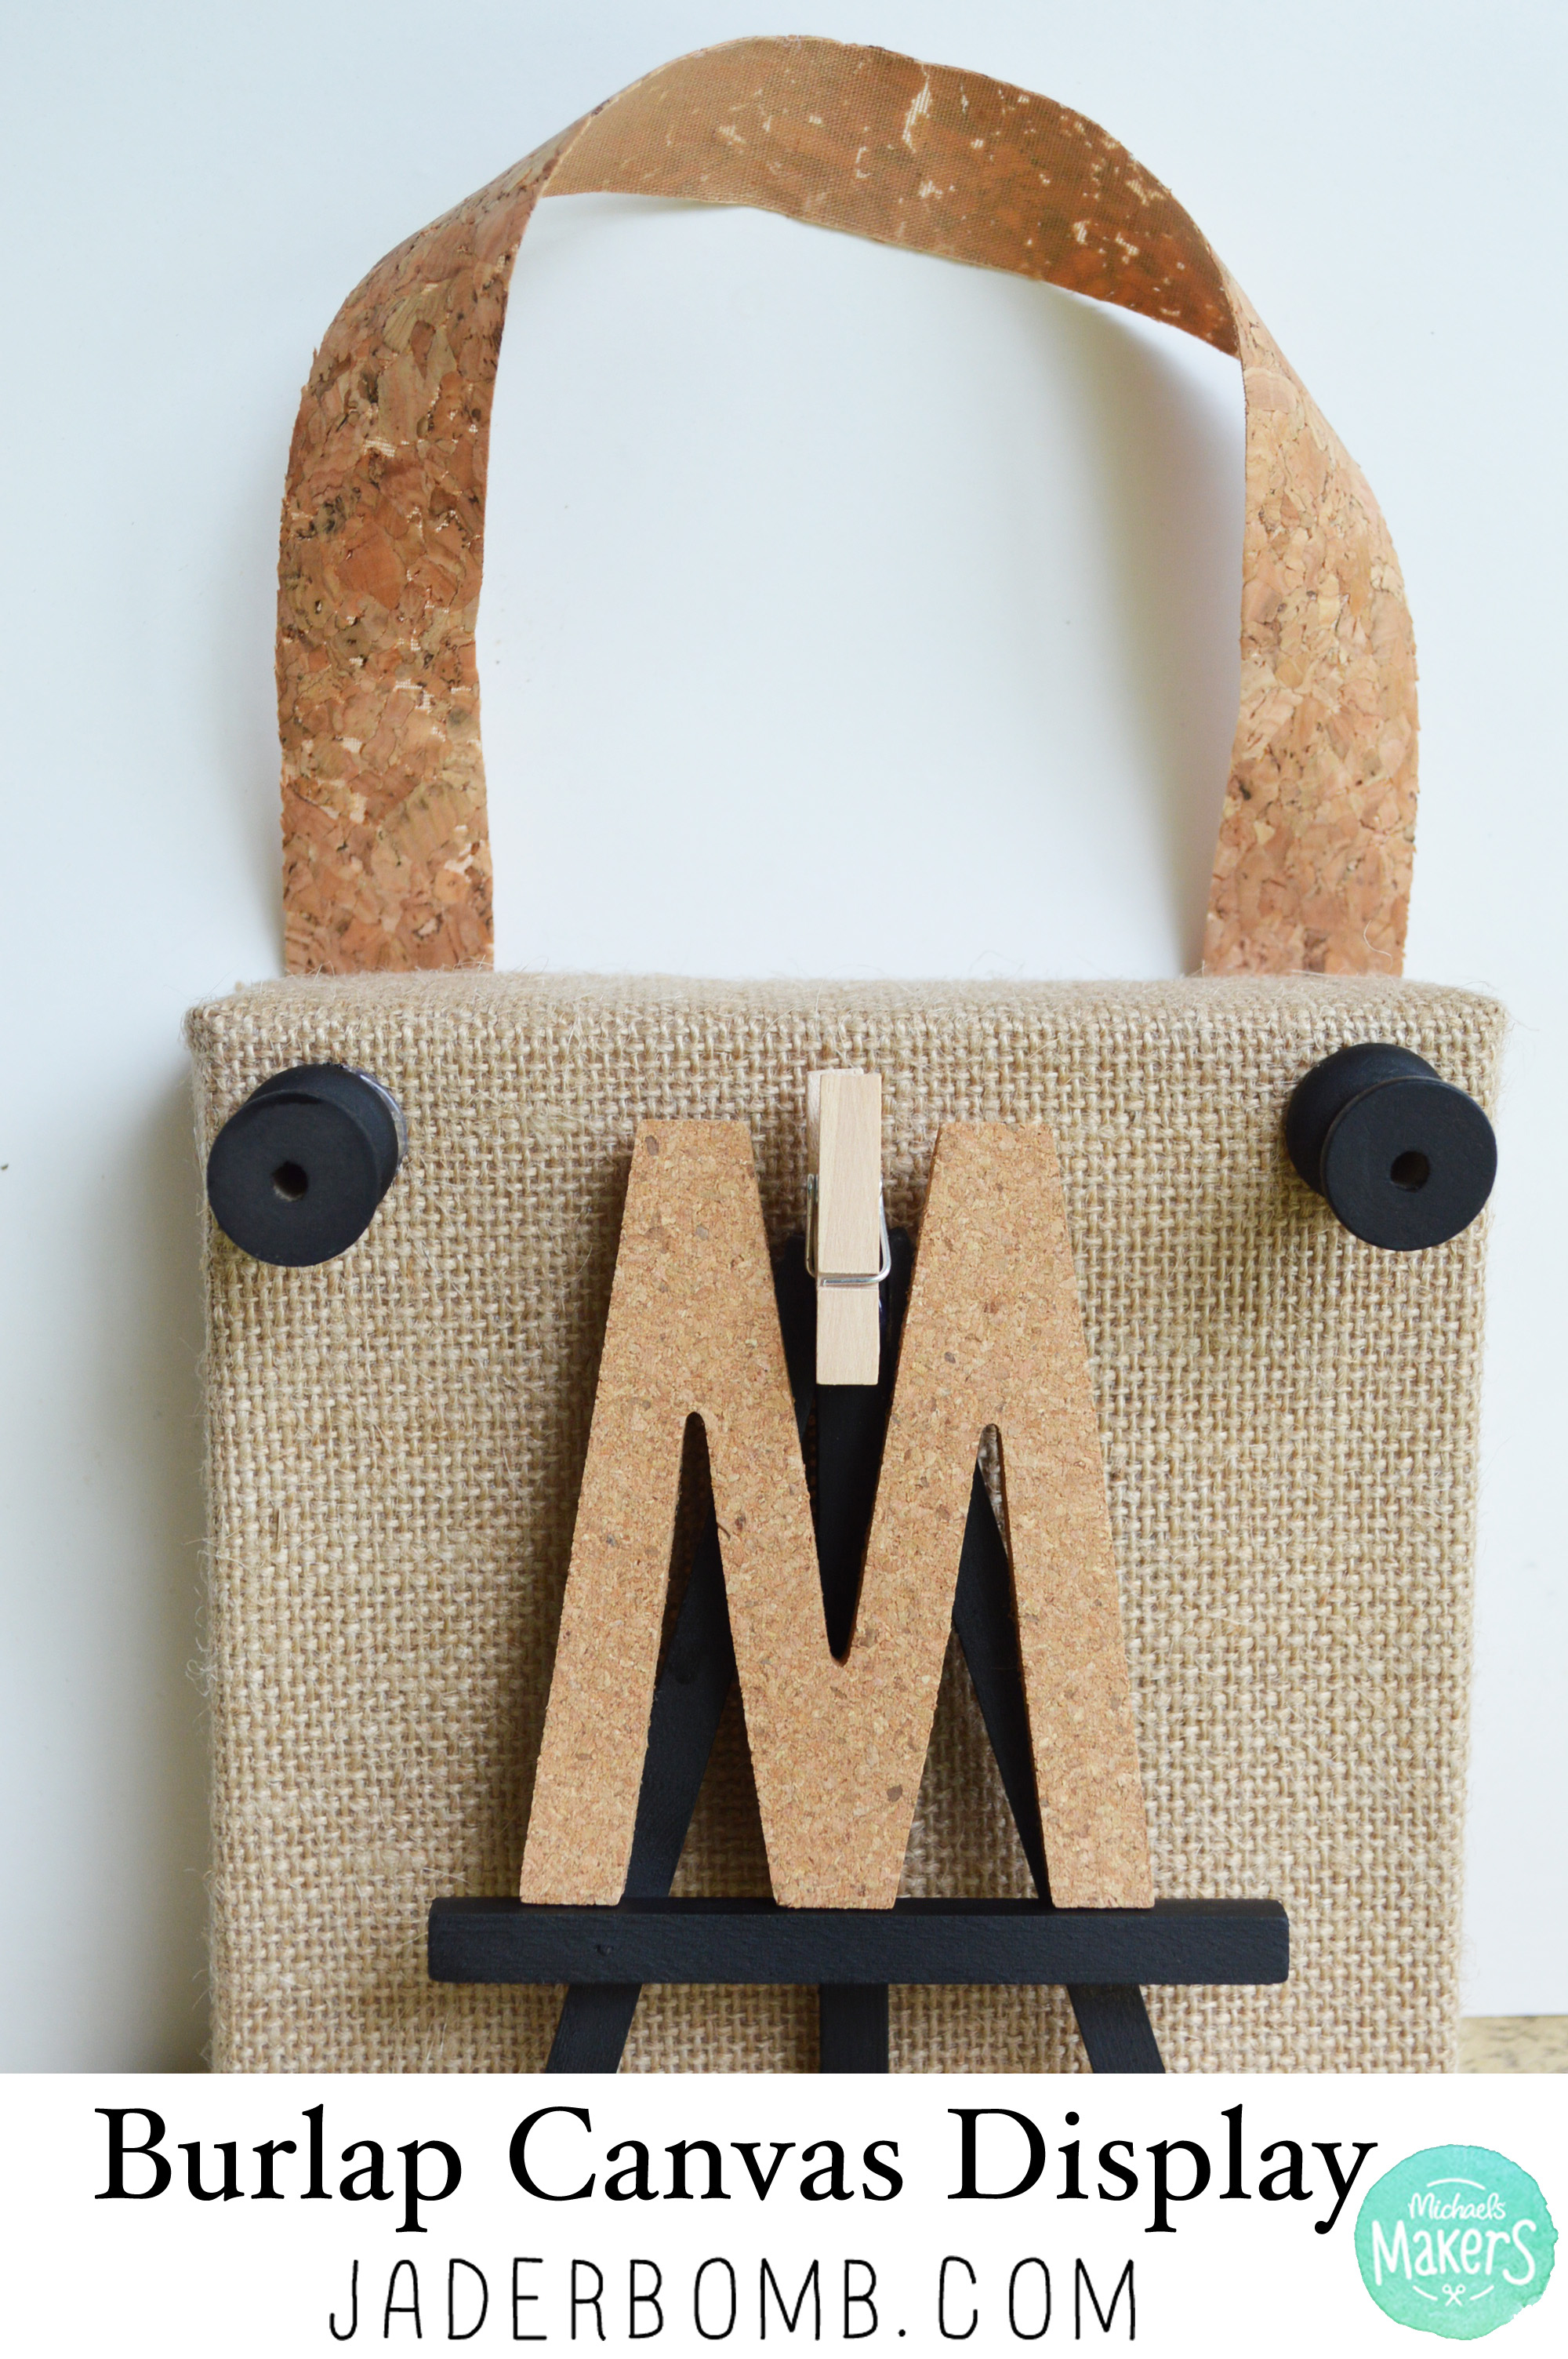
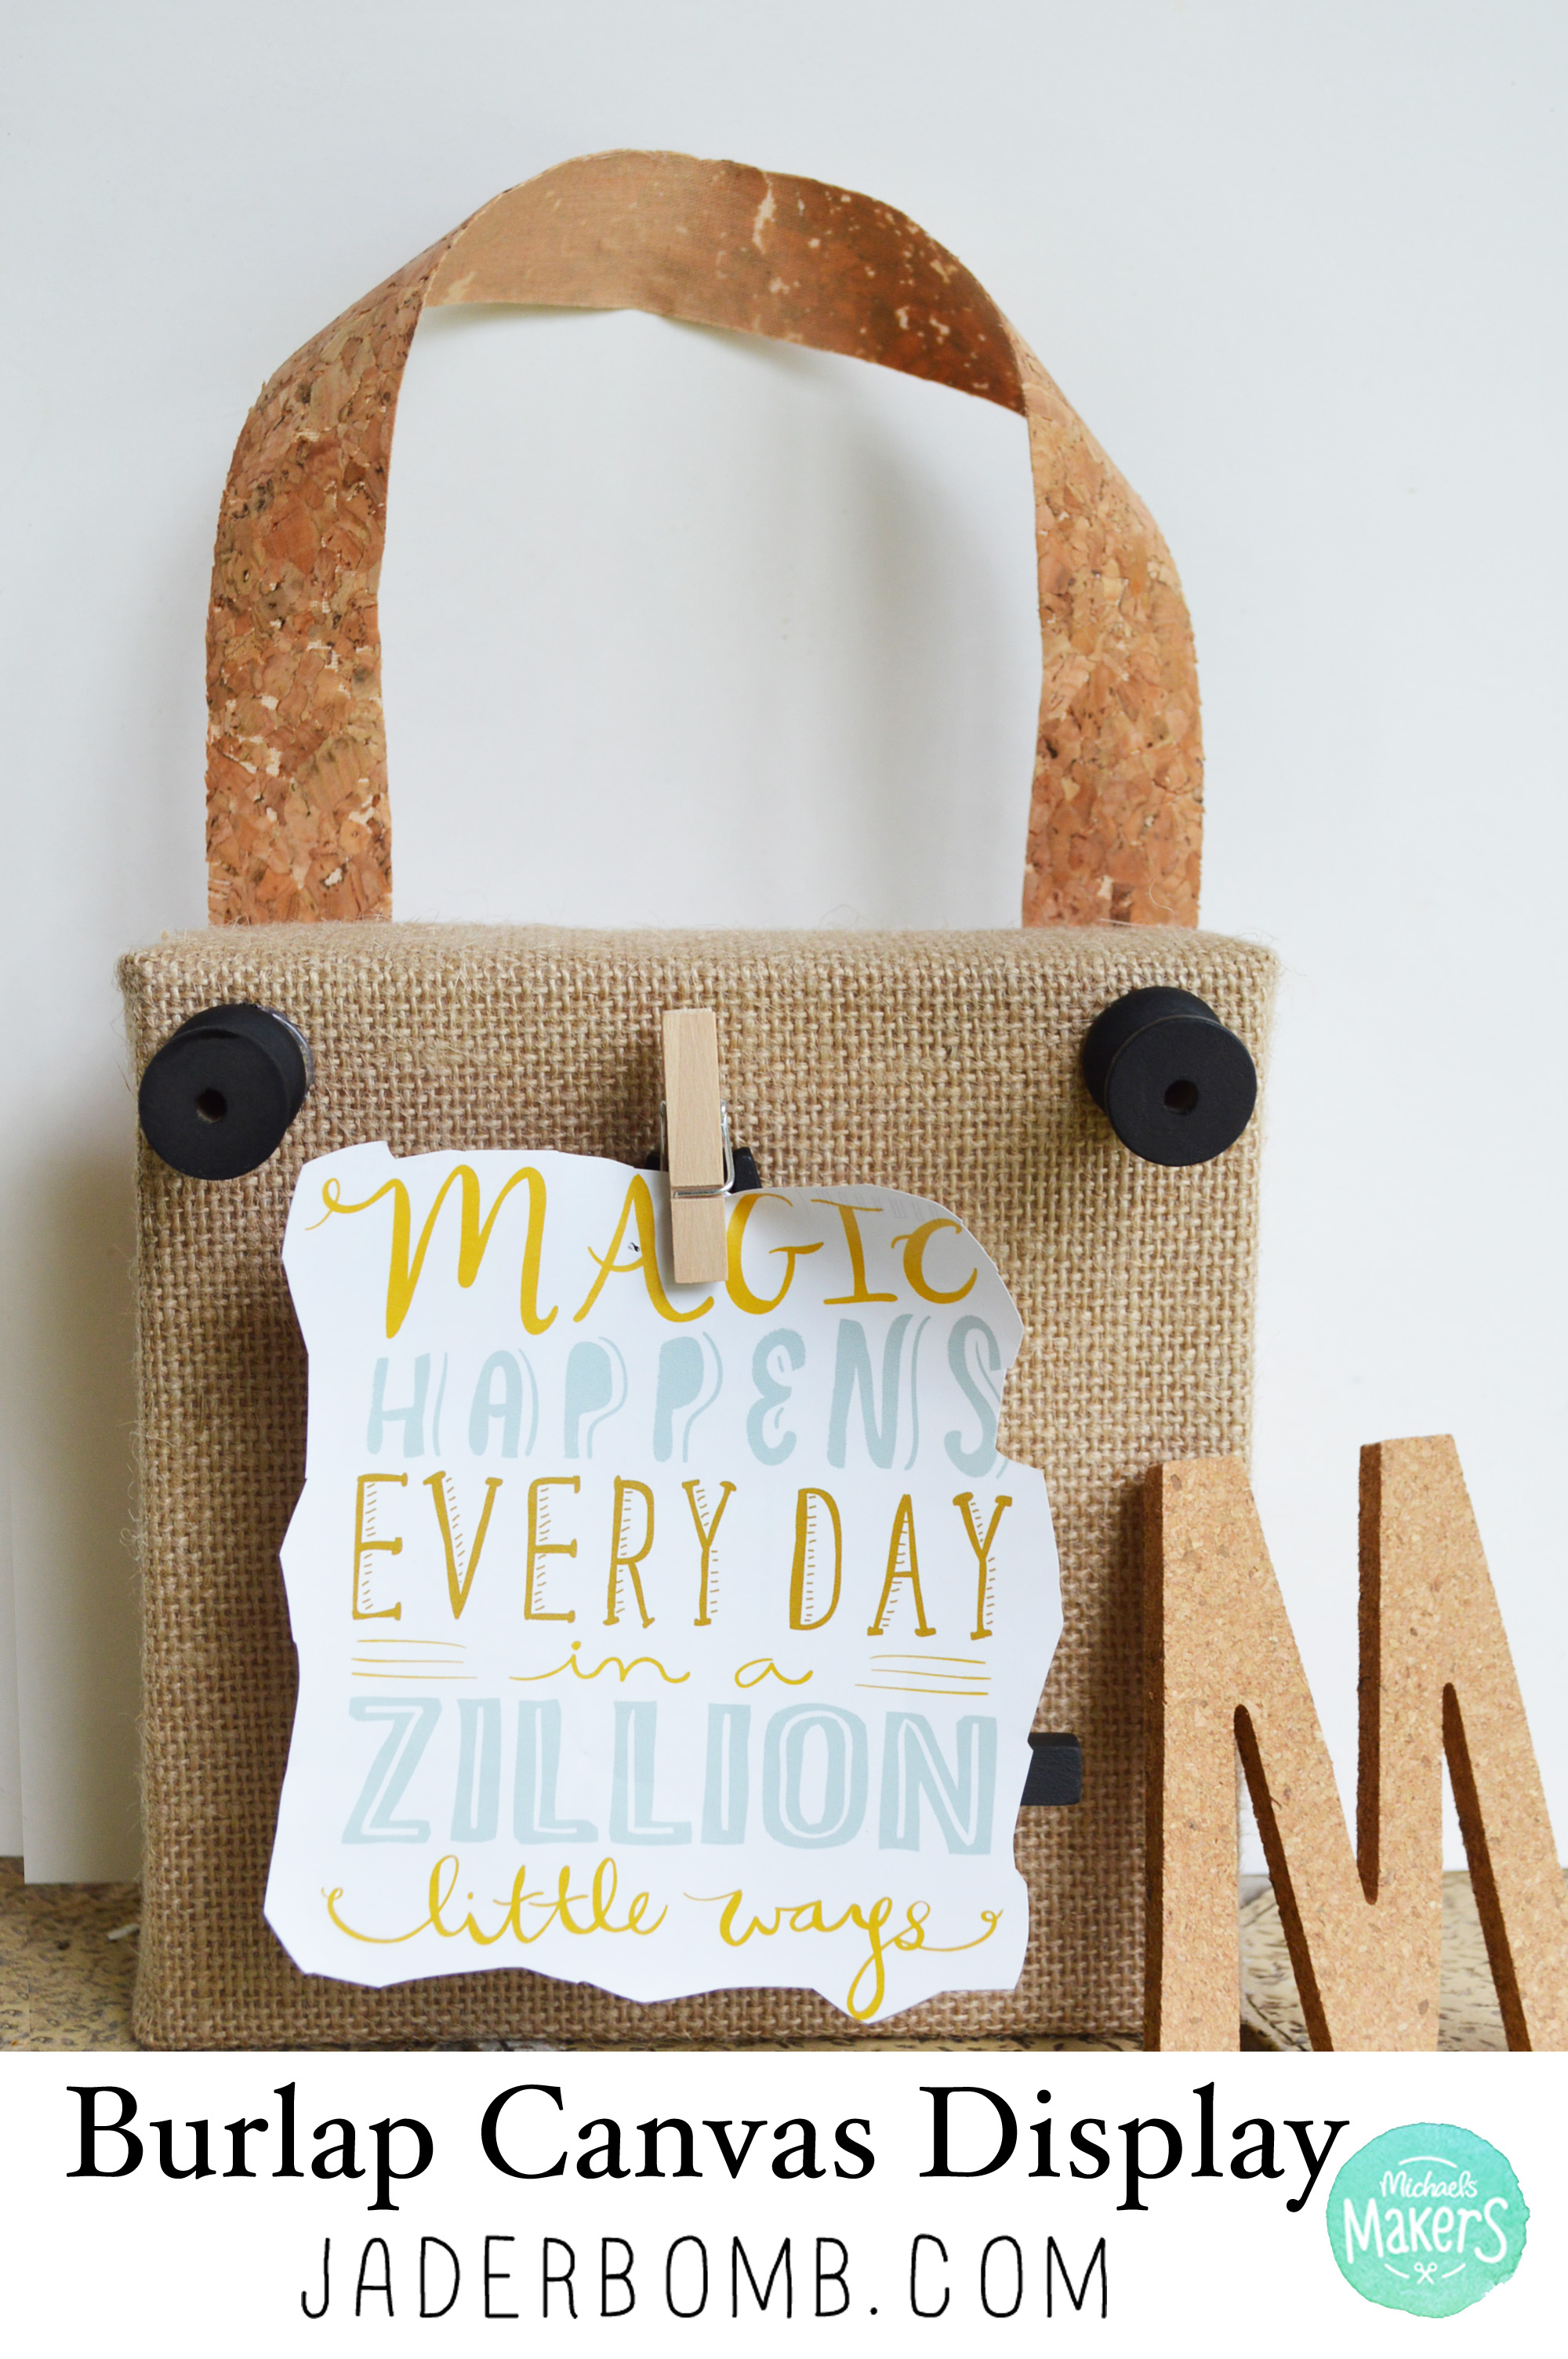
As part of the Michael’s Makers team I will be creating crafty challenges each month. The challenge this month was to choose a product from the raw bar and and I chose the burlap stretched canvas to create a  Burlap Canvas Display.

Next month Michaels Stores is releasing a new line of products called Raw Bar and guess who got a little sneak peek, ME! I can’t wait for you to see this line so be on the lookout starting on August 8th because it will be available in all Michaels stores nationwide.  Michaels created the Raw Bar because customers requested raw surfaces that are unfinished and easily craft-able.

The Raw Bar is made by materials that are completely inspired by nature and some of the surfaces include wood, metal, canvas, chalkboard, cork, and burlap. Are you in mad love yet?

You will need:
♥Canvas Burlap
♥Cork Ribbon
♥Chalkboard Spray Paint
♥Miniature Easel
♥Wooden Spools
♥Twine
♥Scissors
♥Glue Gun
DSC_0482

I know what you are thinking when you see this cork ribbon, “where has this been my whole life”… I will say it’s not thick enough to stick a tack through and hold something up but it’s very pliable and easy to work with. It’s truly the perfect “natural” touch to add to any craft you are working on!DSC_0479

I purchased this miniature easel from Michaels and they are so precious. DSC_0485

Step ONE ♥ Spray paint your easel and wooden spools. You might have to spray one side and wait for it to dry before you move on to coat the rest.
DSC_0486

Step TWO  ♥ Once your wooden spools are dry you can add a dab of hot glue to one side of the spool. DSC_0489

Step THREE  ♥ Carefully place the wooden spools on the top two corners of your canvas. These can be used merely for decoration or you can hang trinkets from them. Very versatile. DSC_0487

I love the contrast of the black chalk paint against the burlap canvas. It’s very natural and shabby chic. DSC_0491

Step FOUR ♥ Tear off a piece of cork ribbon. You will flip when you feel how awesome this ribbon is. I can see little girls already with cork bows in their beautiful hair. DSC_0496

Step FIVE ♥ Once you cut a decent length of ribbon off of the roll, you will fold it up a few times like below. You will then get your scissors and cut directly in the middle. DSC_0497

Step SIX ♥ Turn your burlap canvas over and place your cork ribbon along the back side to figure our how long or short you want your hanger to be. DSC_0498

Step SEVEN ♥ Once you decide on the length of your ribbon add a line of hot glue down the back side of your canvas and quickly place the ribbon on top of it. Careful not to burn yourself! Or if you do just yell really loud and you will feel MUCH better! DSC_0500

This is what your canvas will look like once you are done with the ribbon. DSC_0501

Step EIGHT ♥ Make sure your easel is sprayed completely with the chalkboard spray and once it’s dry add hot glue to the back side of the easel. DSC_0502

Step NINE ♥ Place the easel directly in the middle of the canvas. How cute is this!DSC_0505

Step TEN ♥ This is optional but I added a little clothespin that is a part of the line at the very top of the easel. I’ll tell ya, hot glue is like magic ♥

Now we can hang things from the spools, clip something with the clothespin or open up the easel and place a picture or anything that makes you happy on it. DSC_0507

DSC_0510

DSC_0511

I think this would be so cute in a bathroom, bedroom, office space or in a spot where you want to display cute things. burlap canvas display

HASHTAG LOGO

Don’t forget to connect on social media! Make sure to use use the hashtag #JADERBOMB and you might see your stuff on Instagram or Twitter or Facebook or Pinterest.
HAVE A GLITTERY DAY! ♥, Jade

July Challenge: Raw Bar


sponsored-post-1

Duck Tape Organizing Caddy 
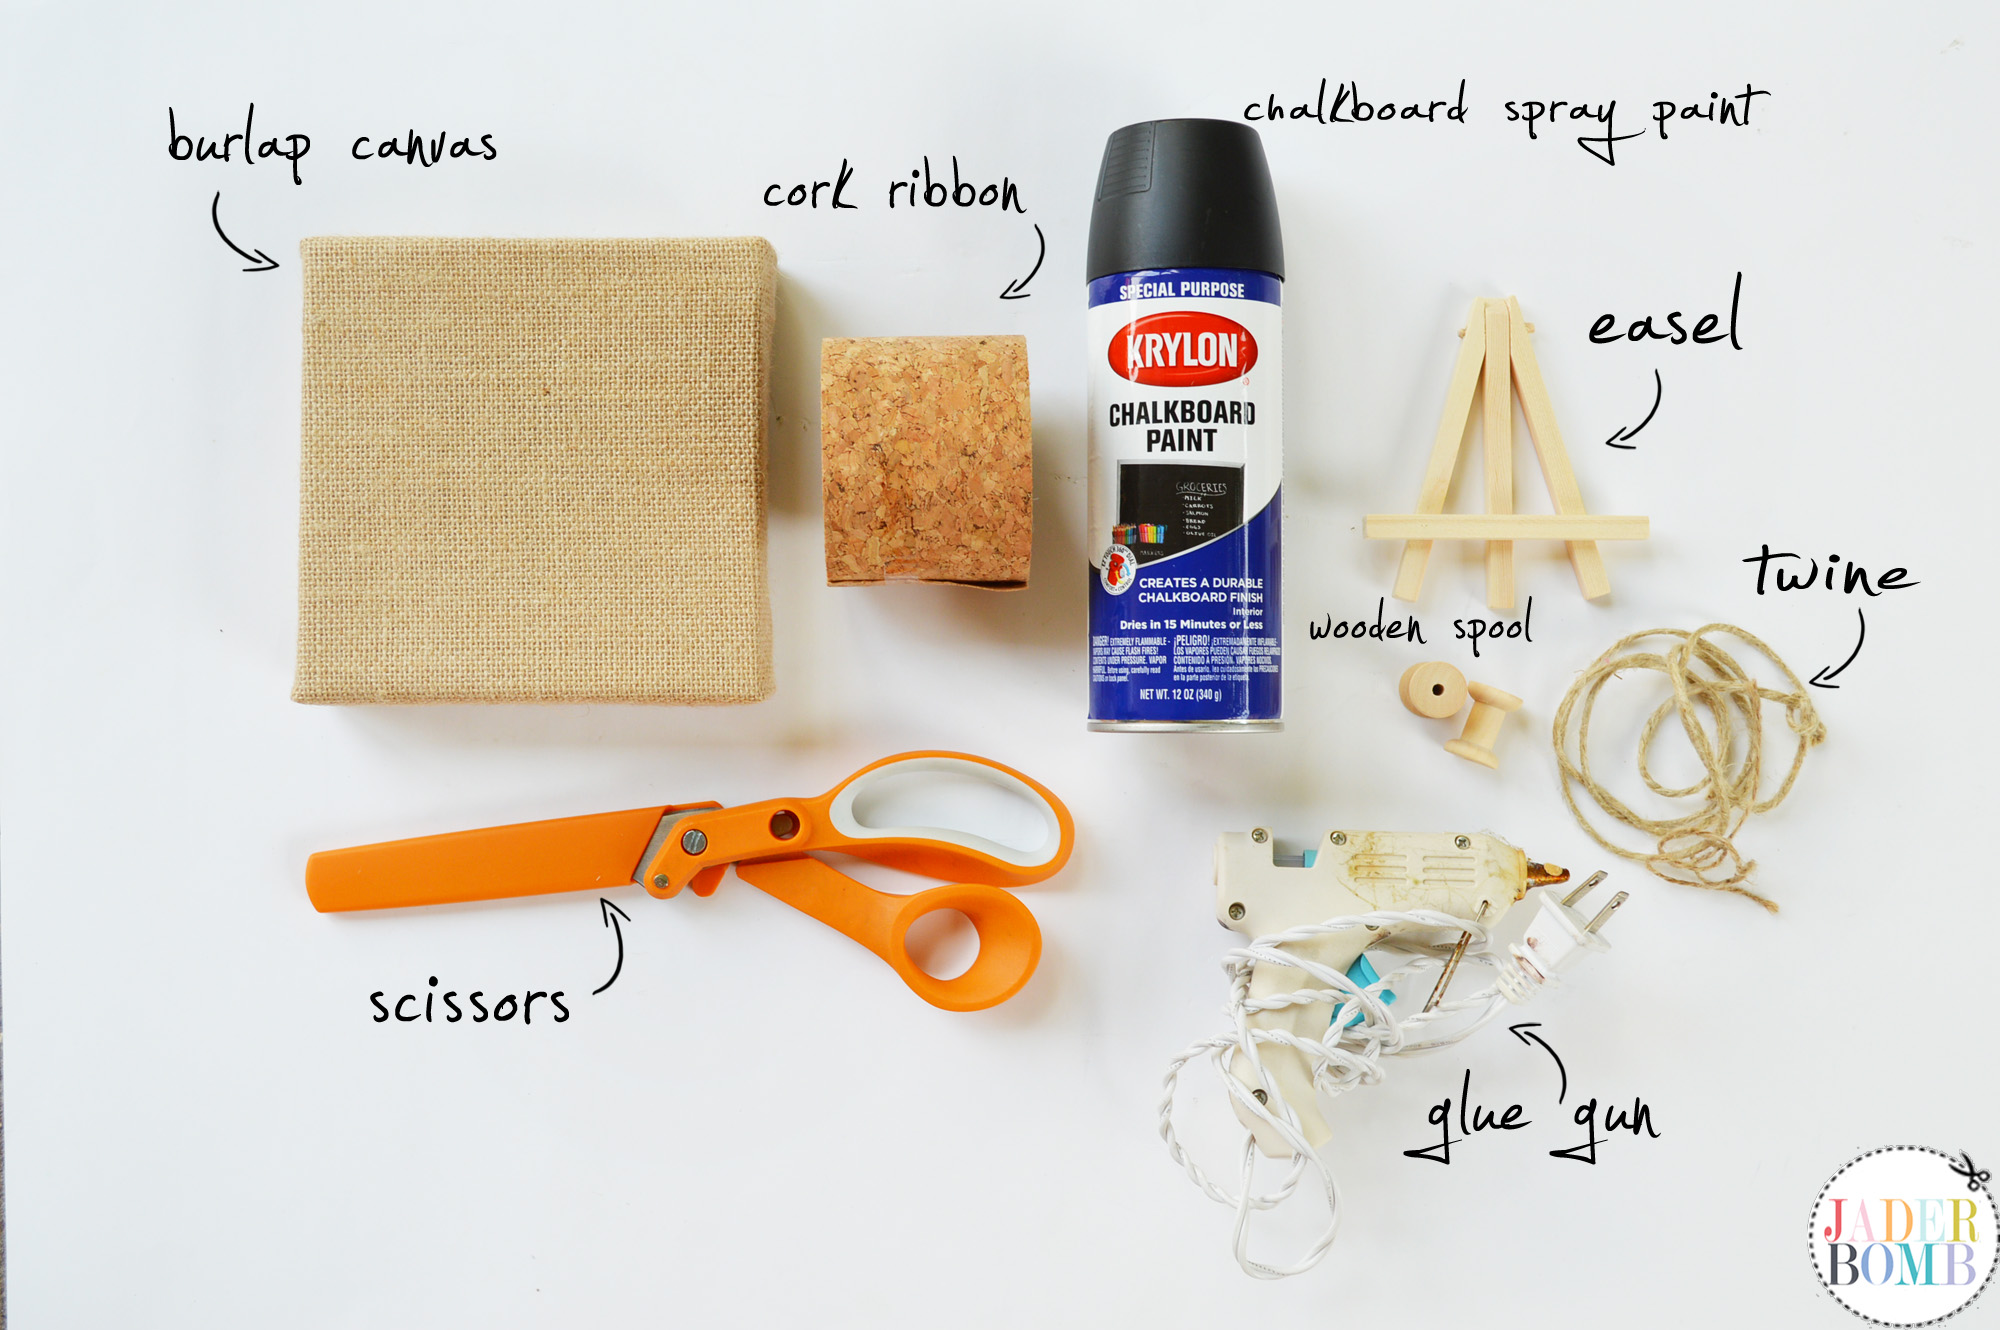
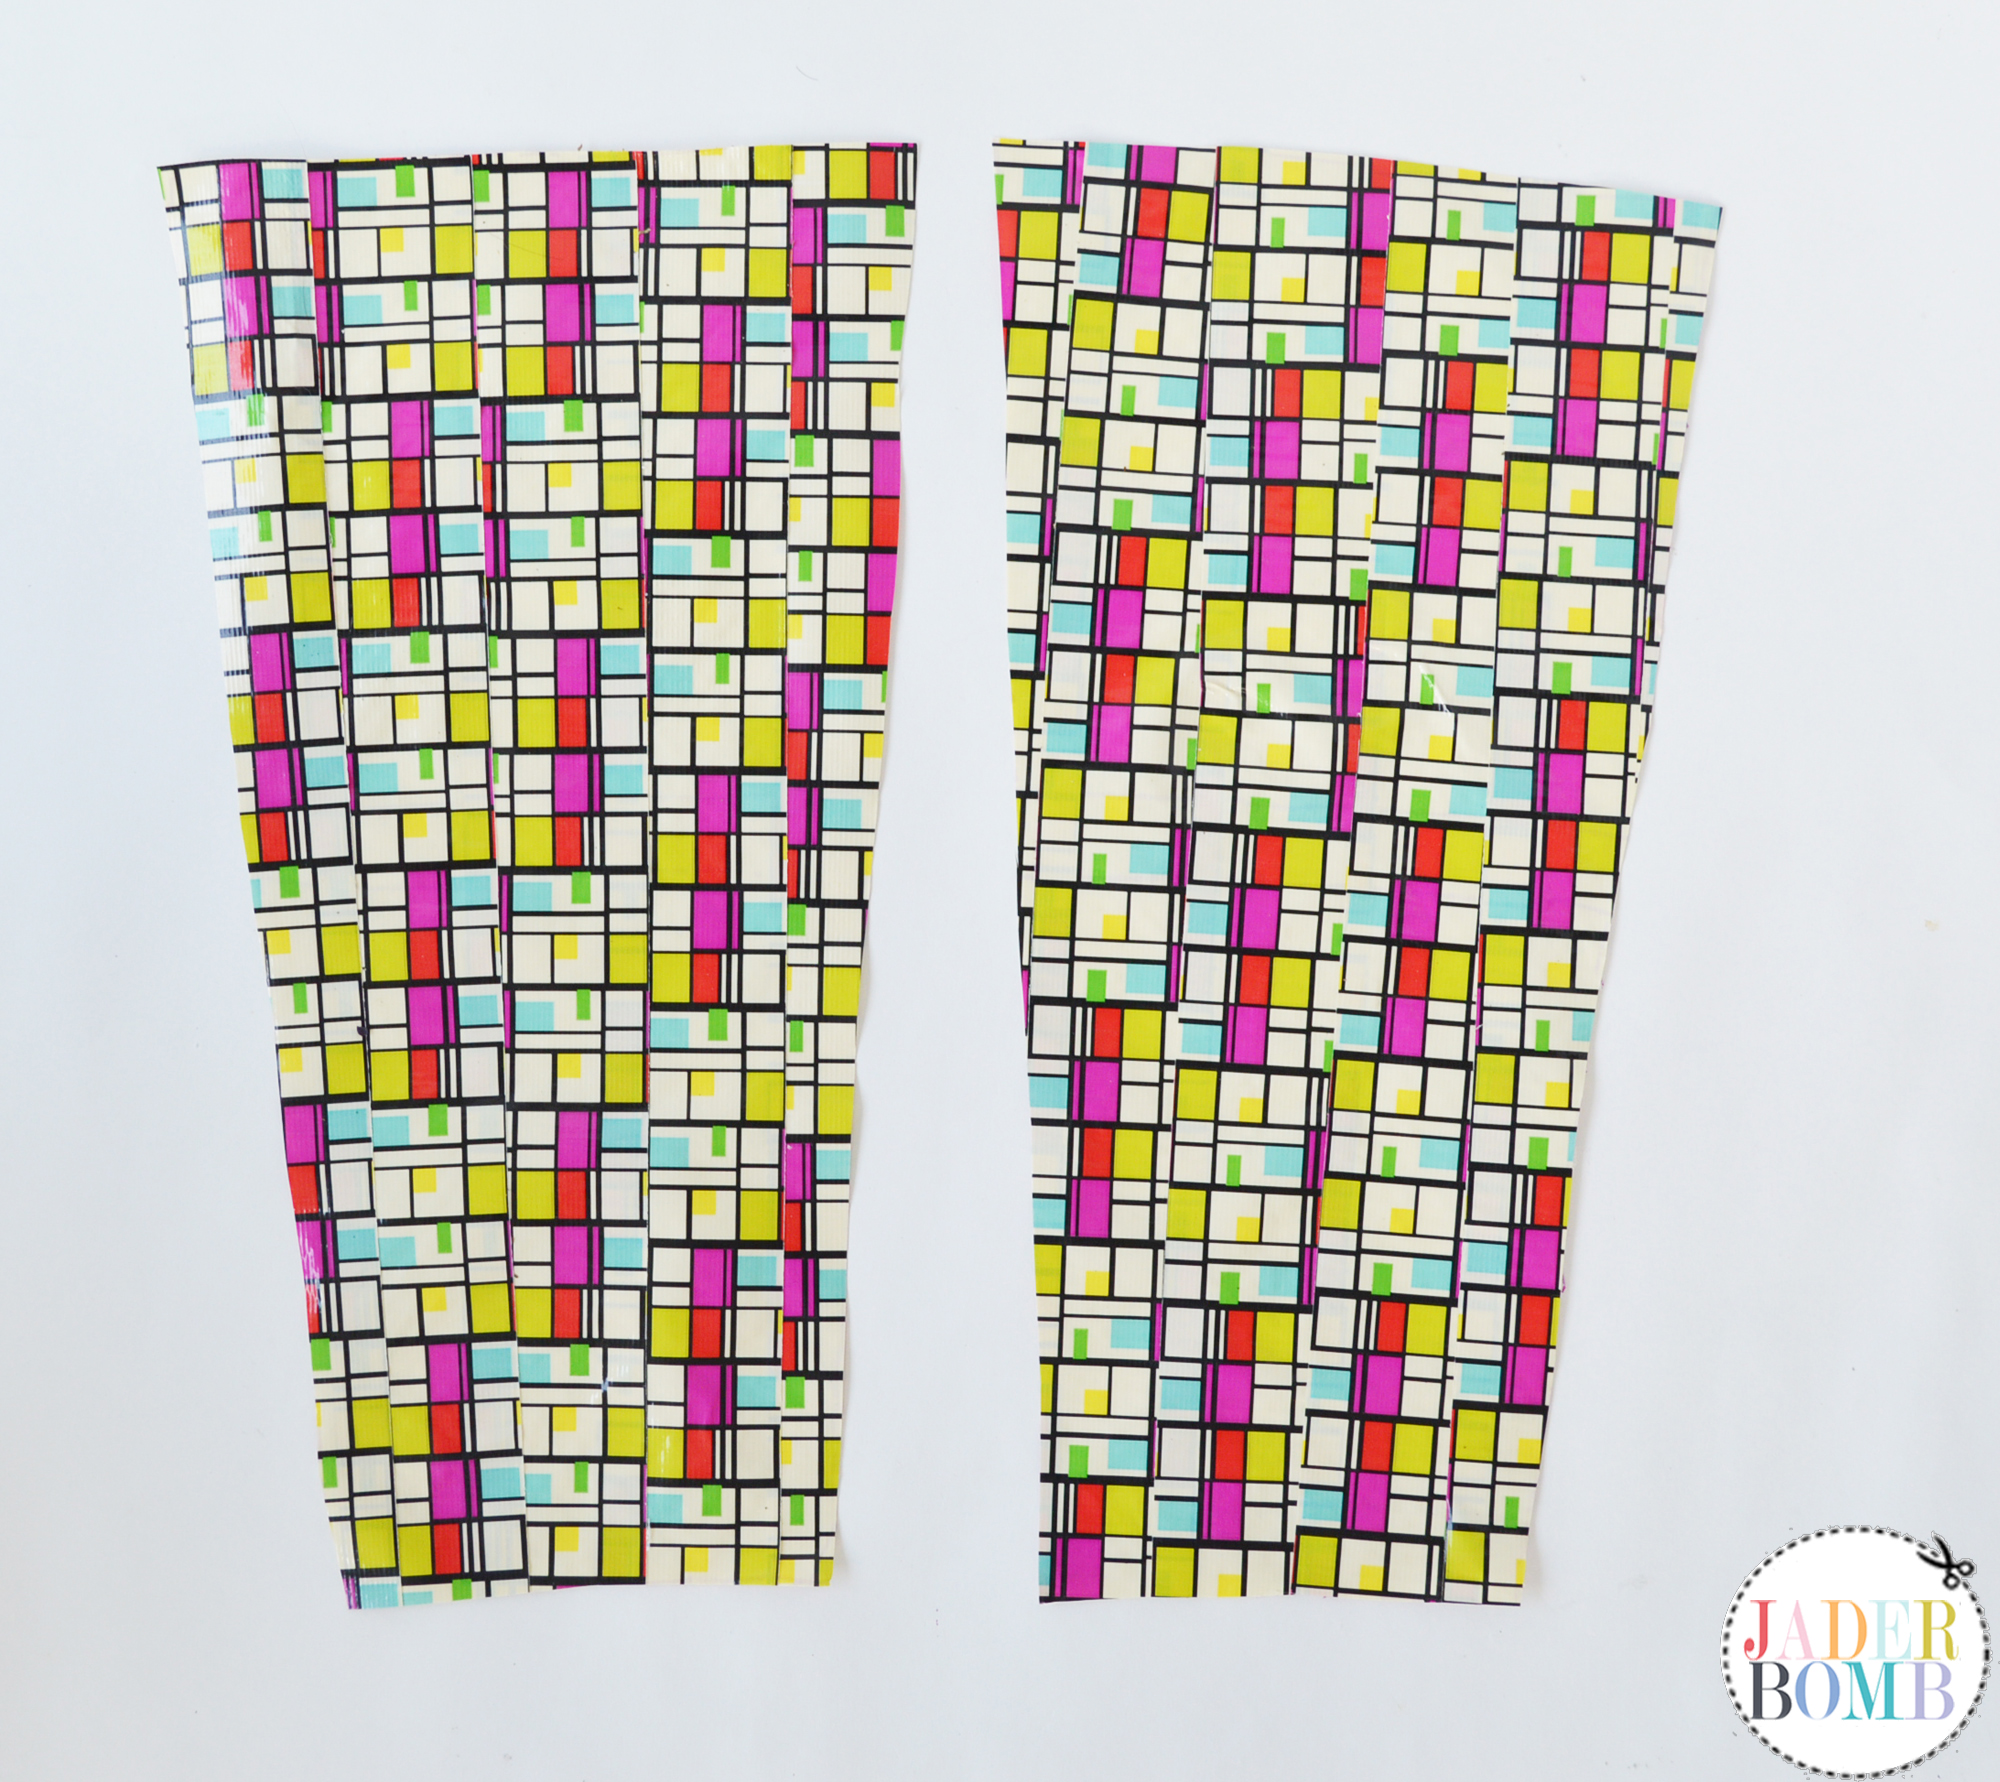
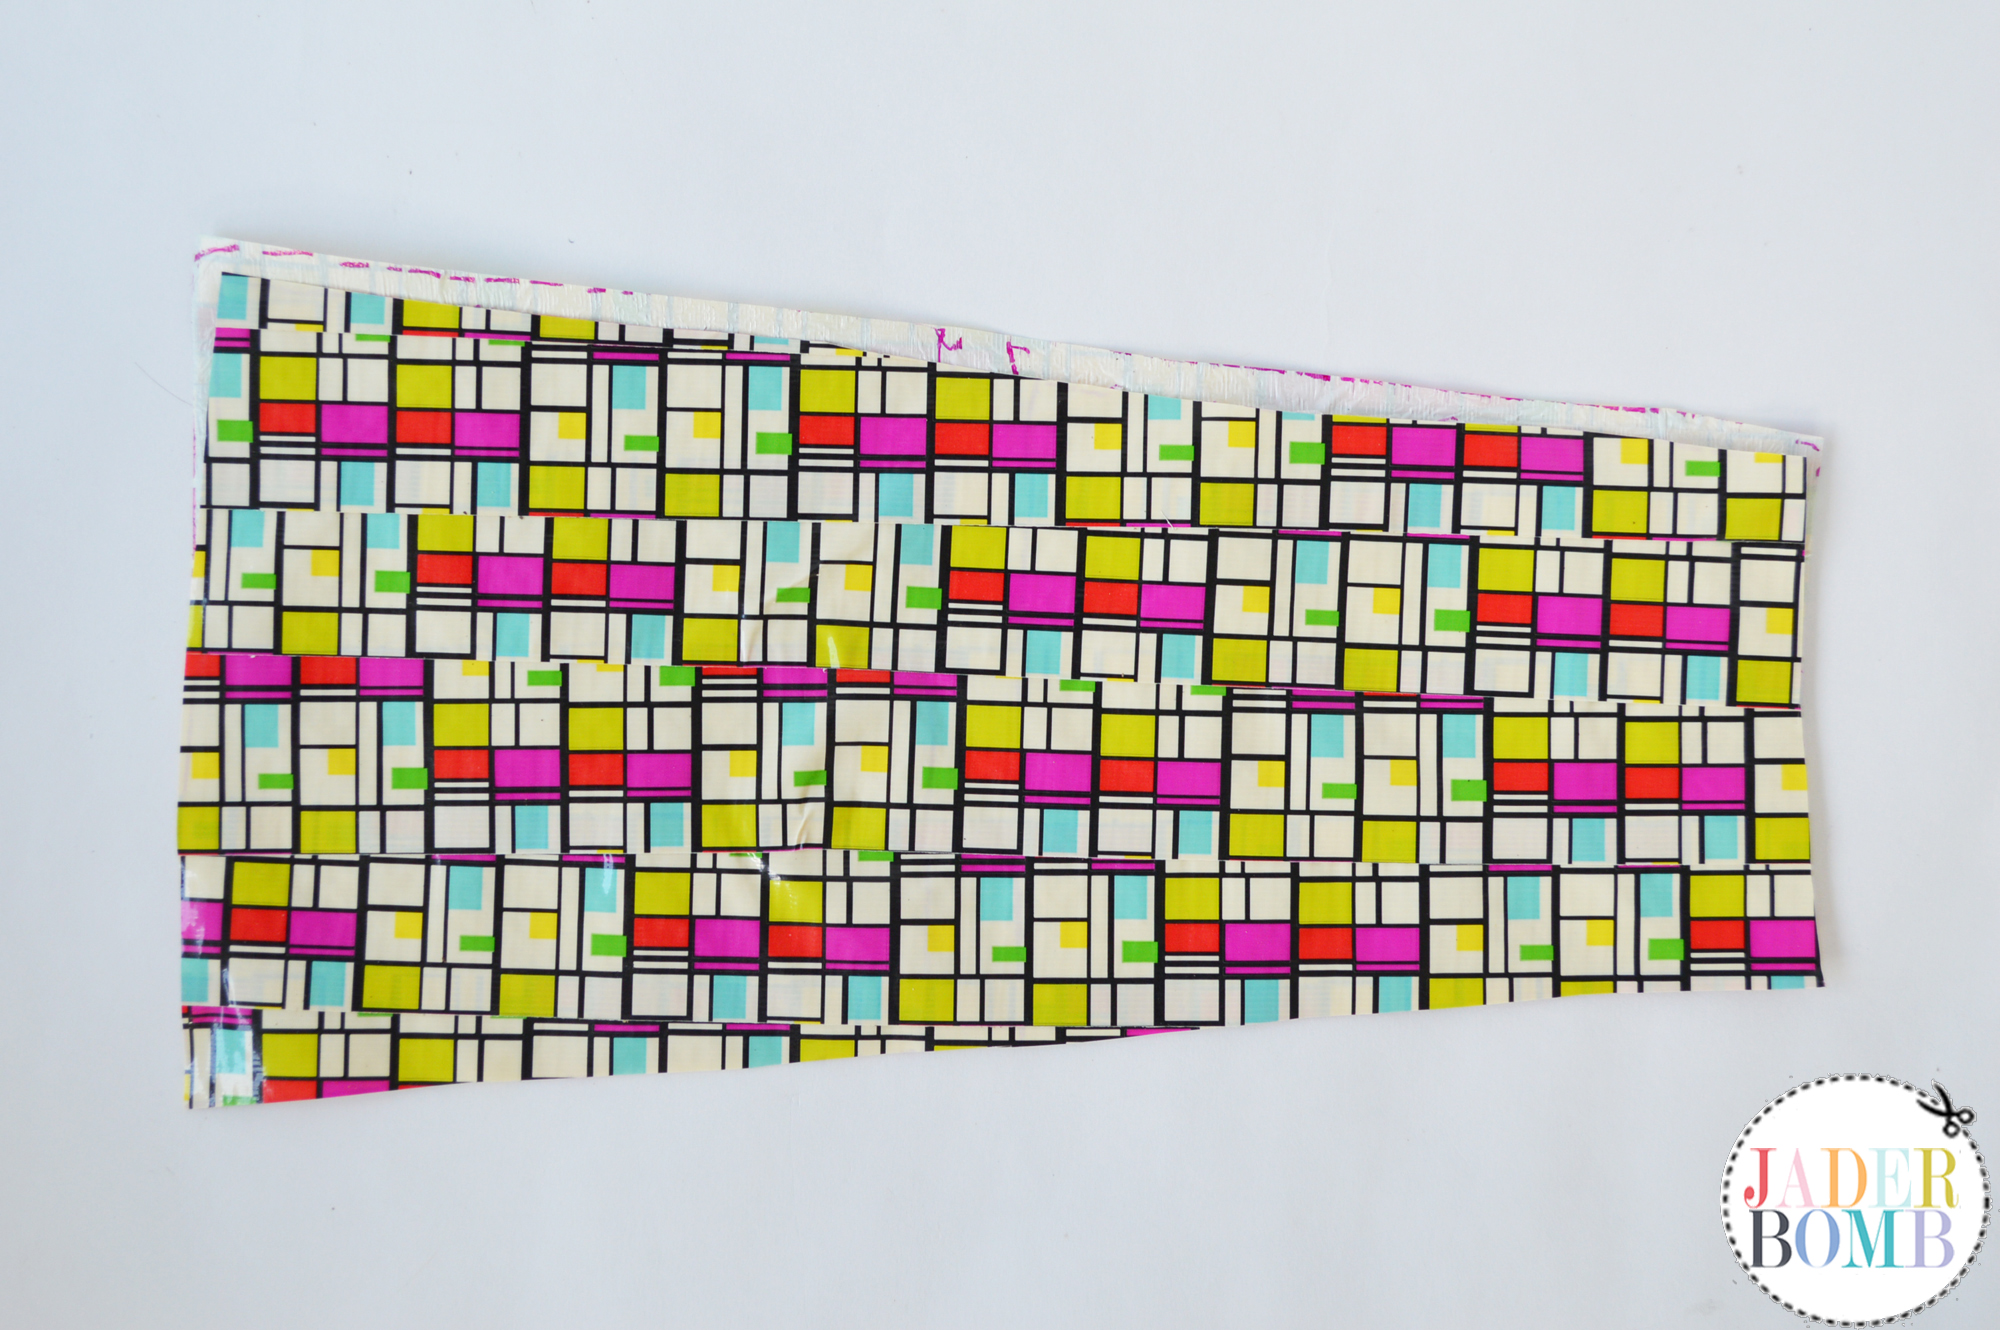
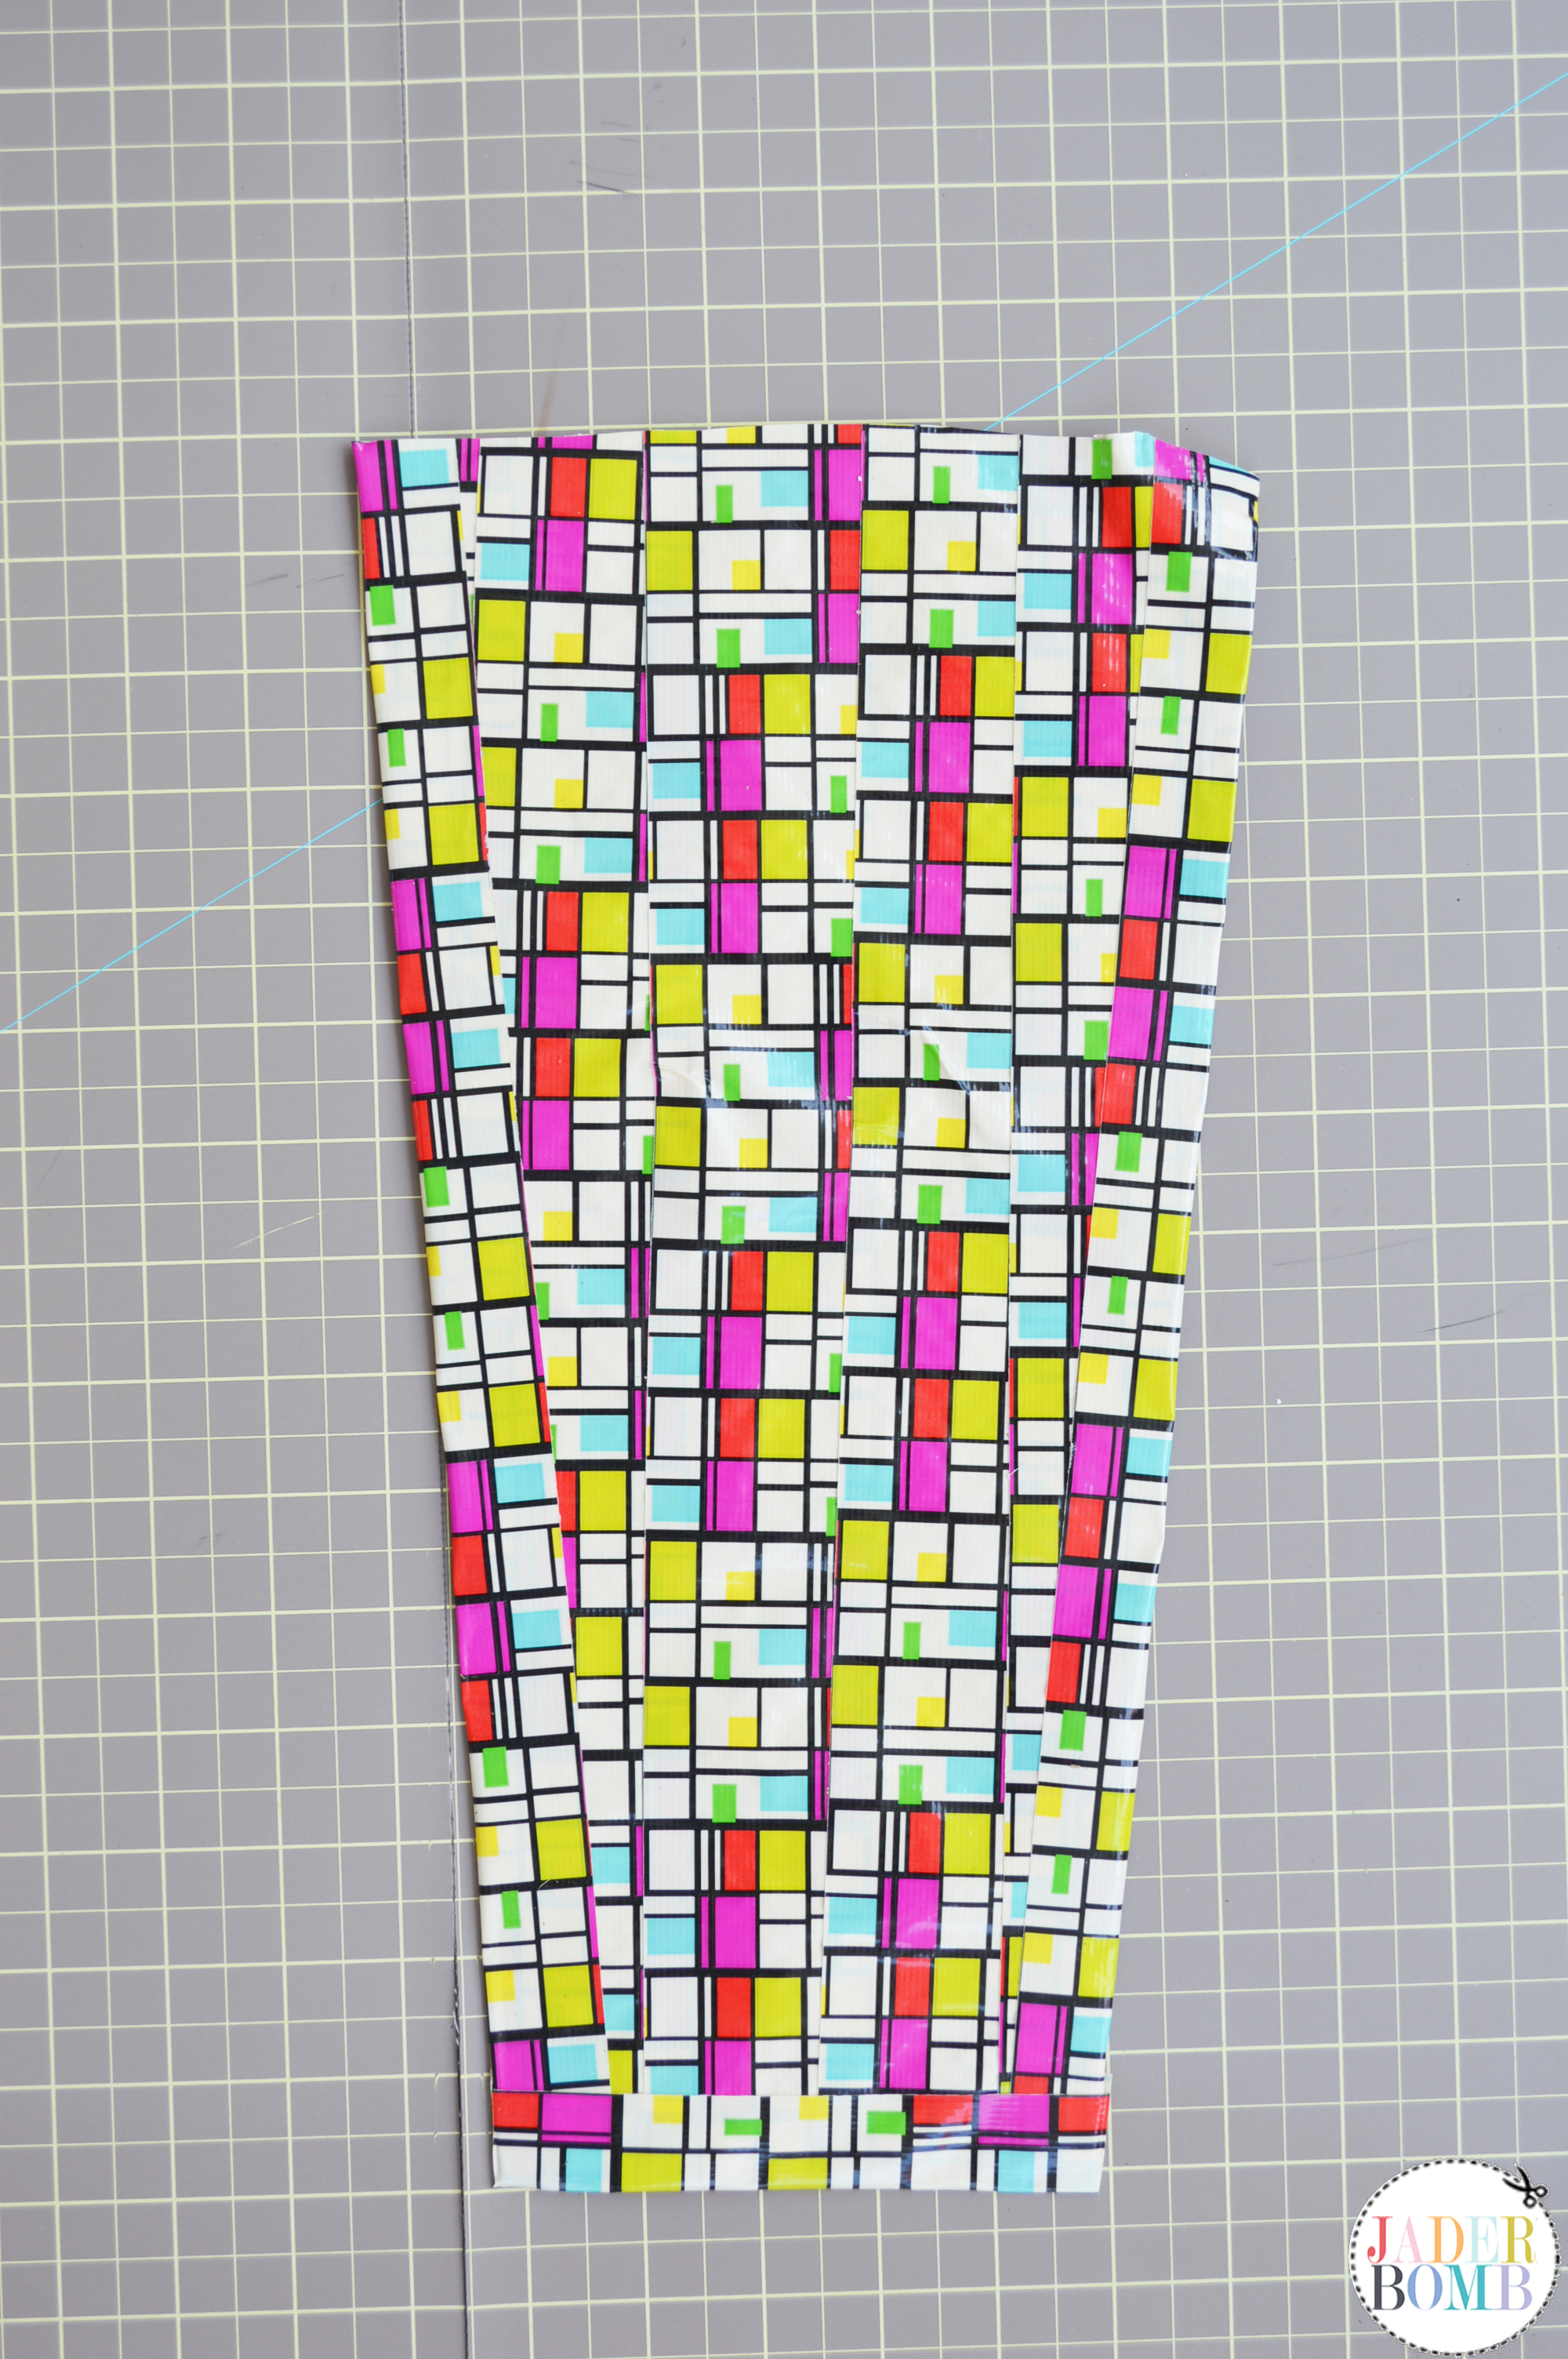
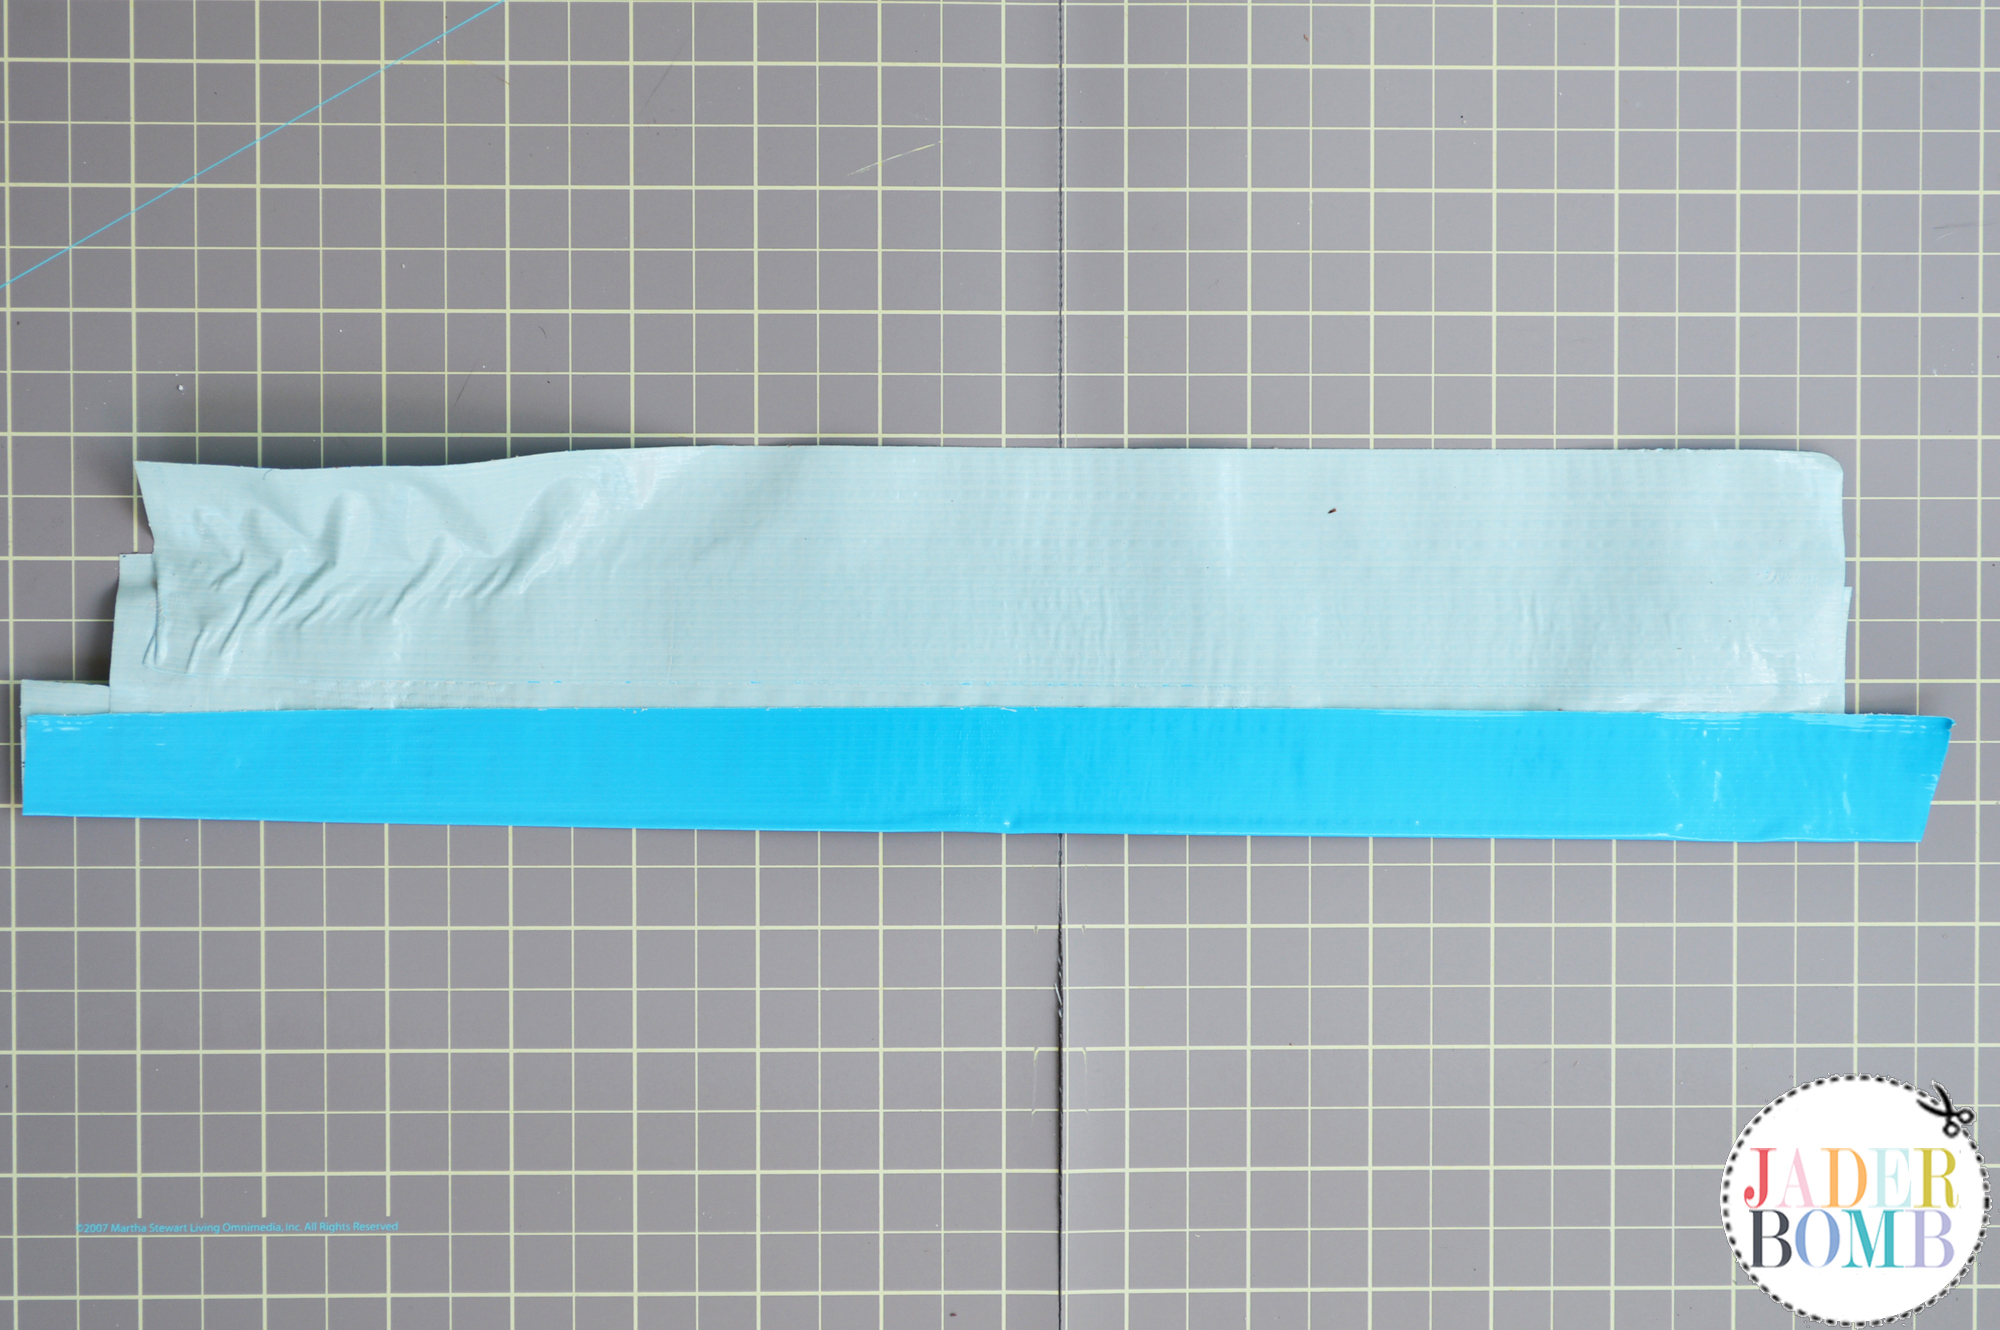
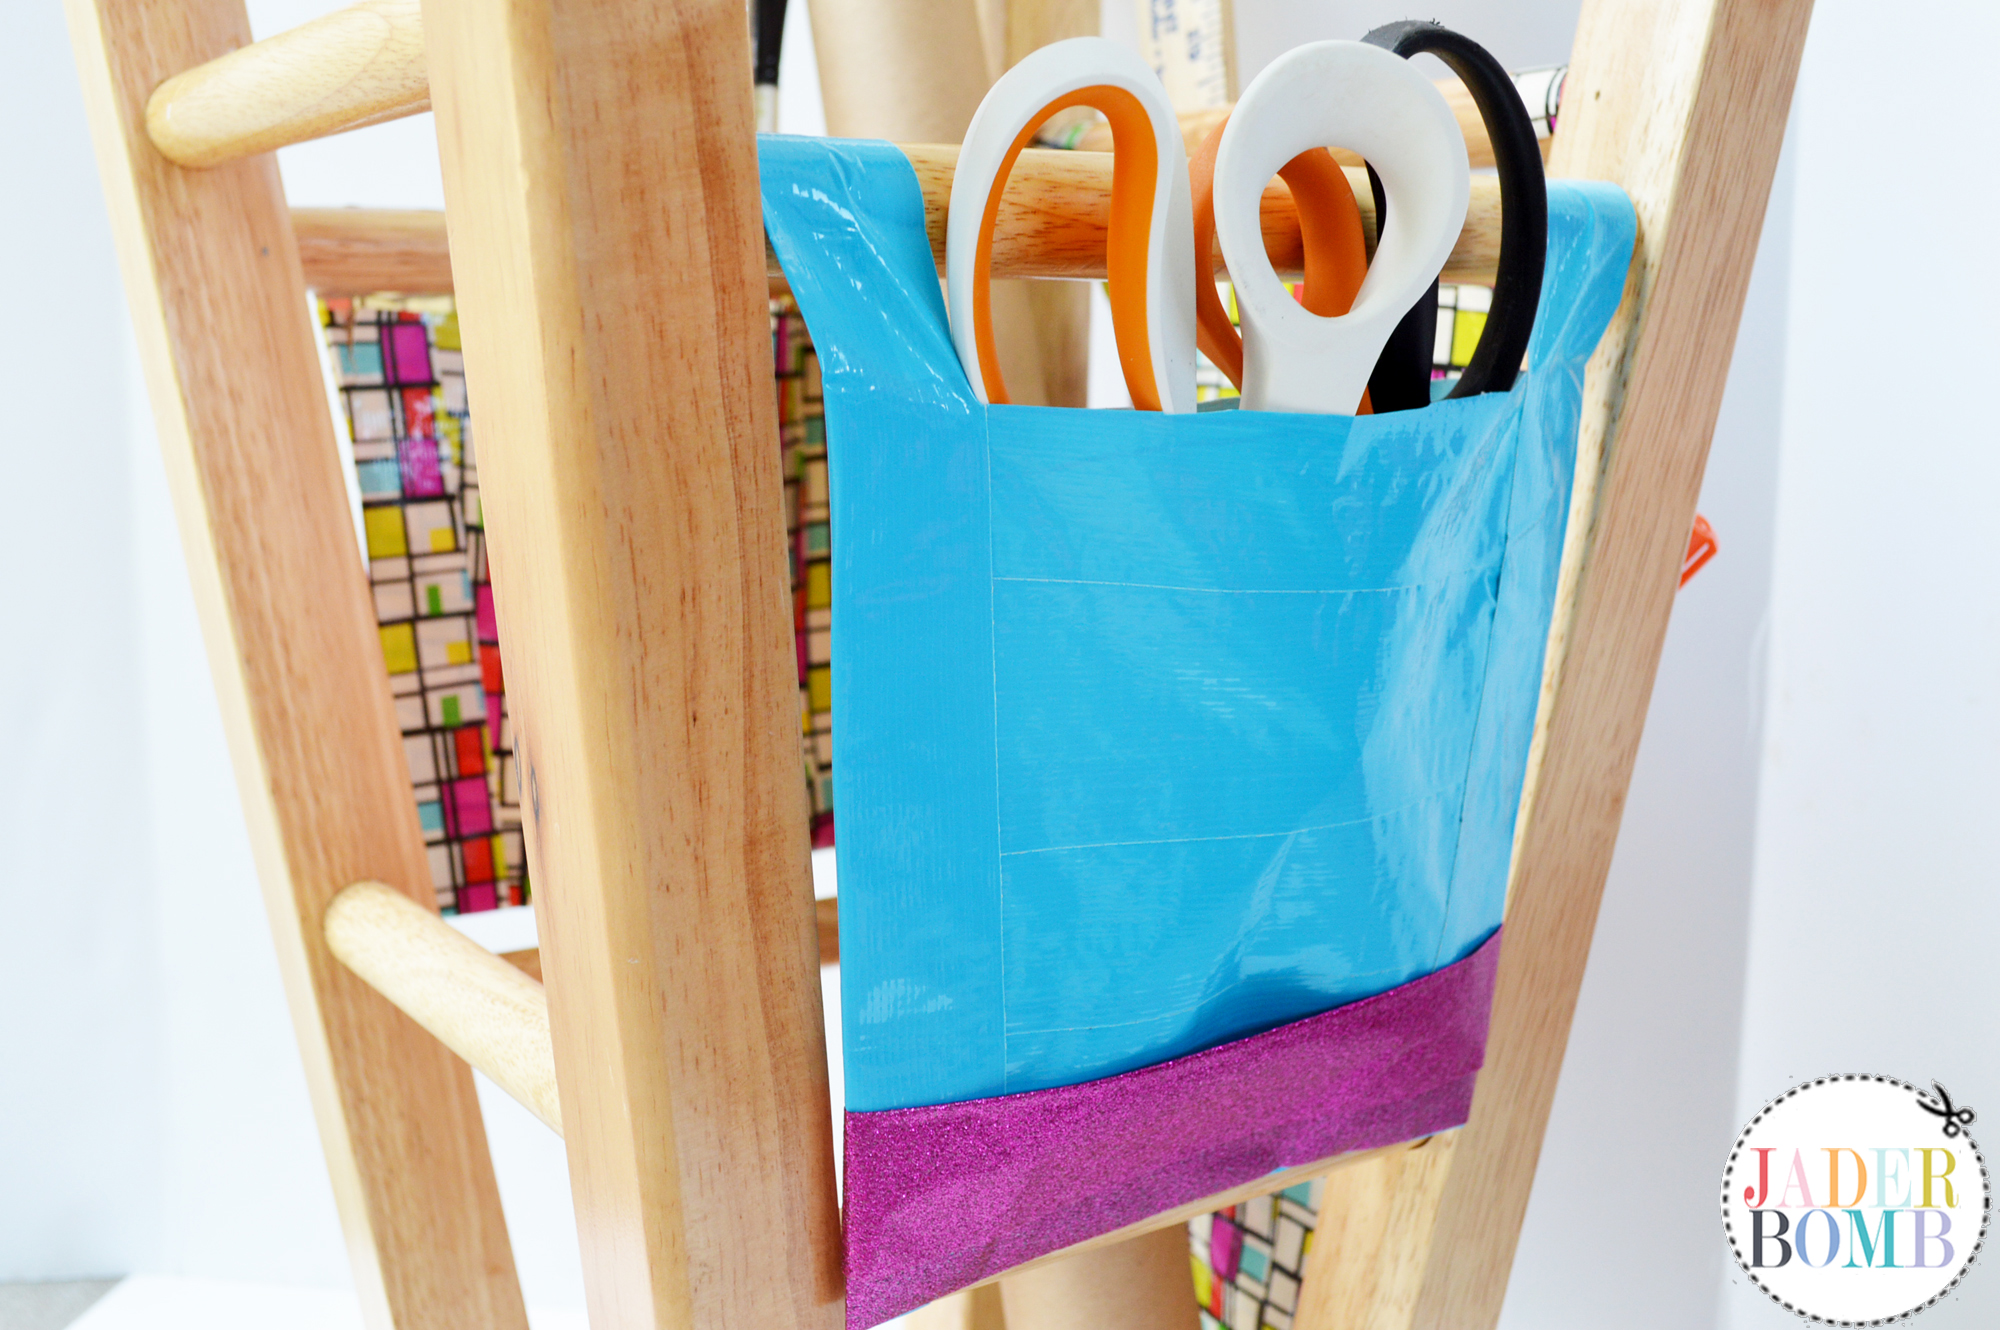
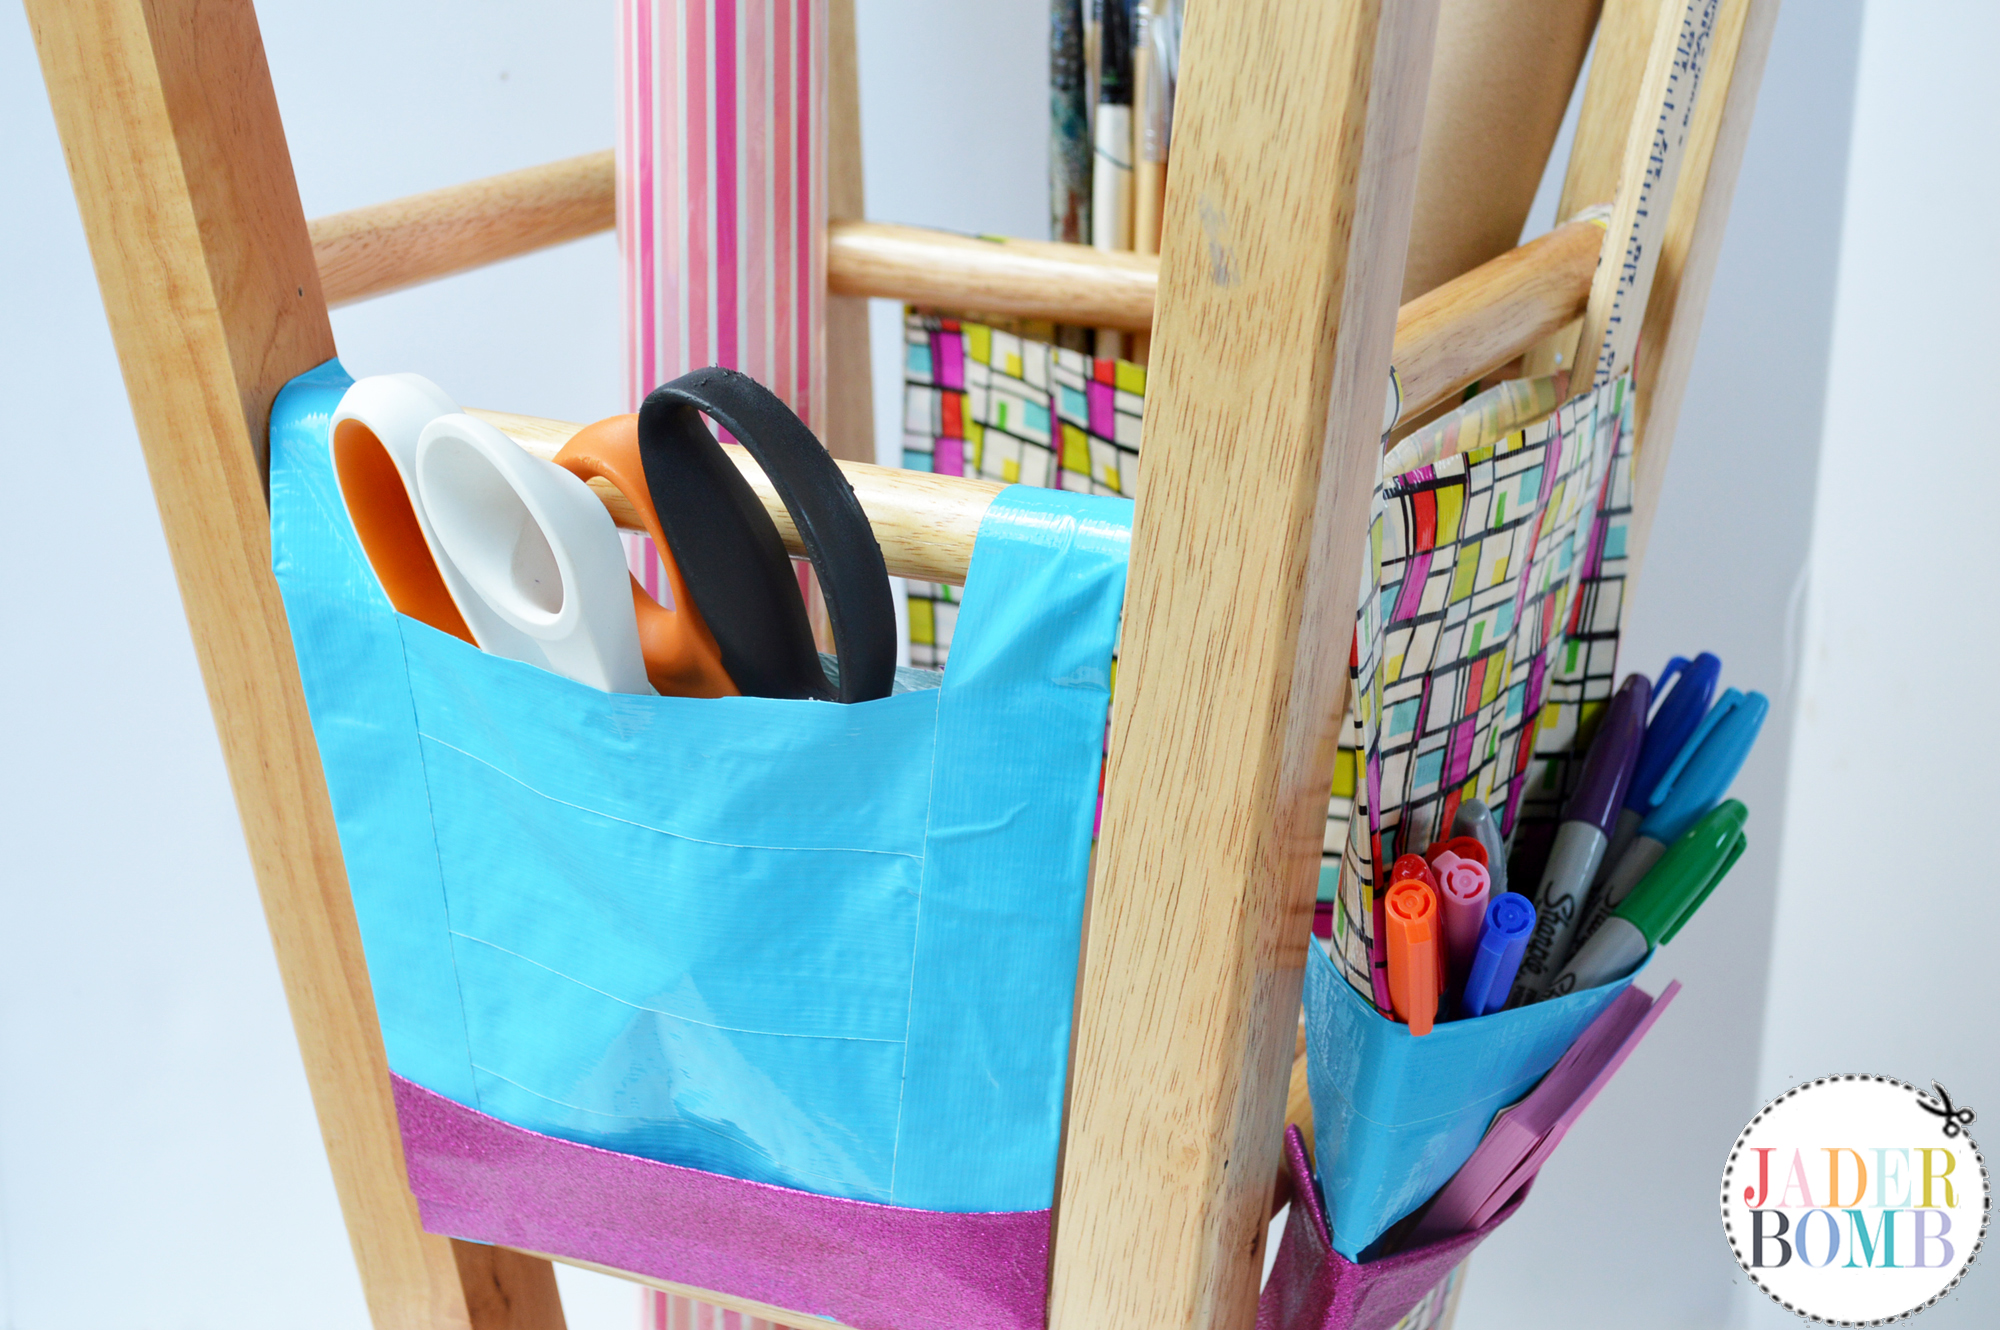
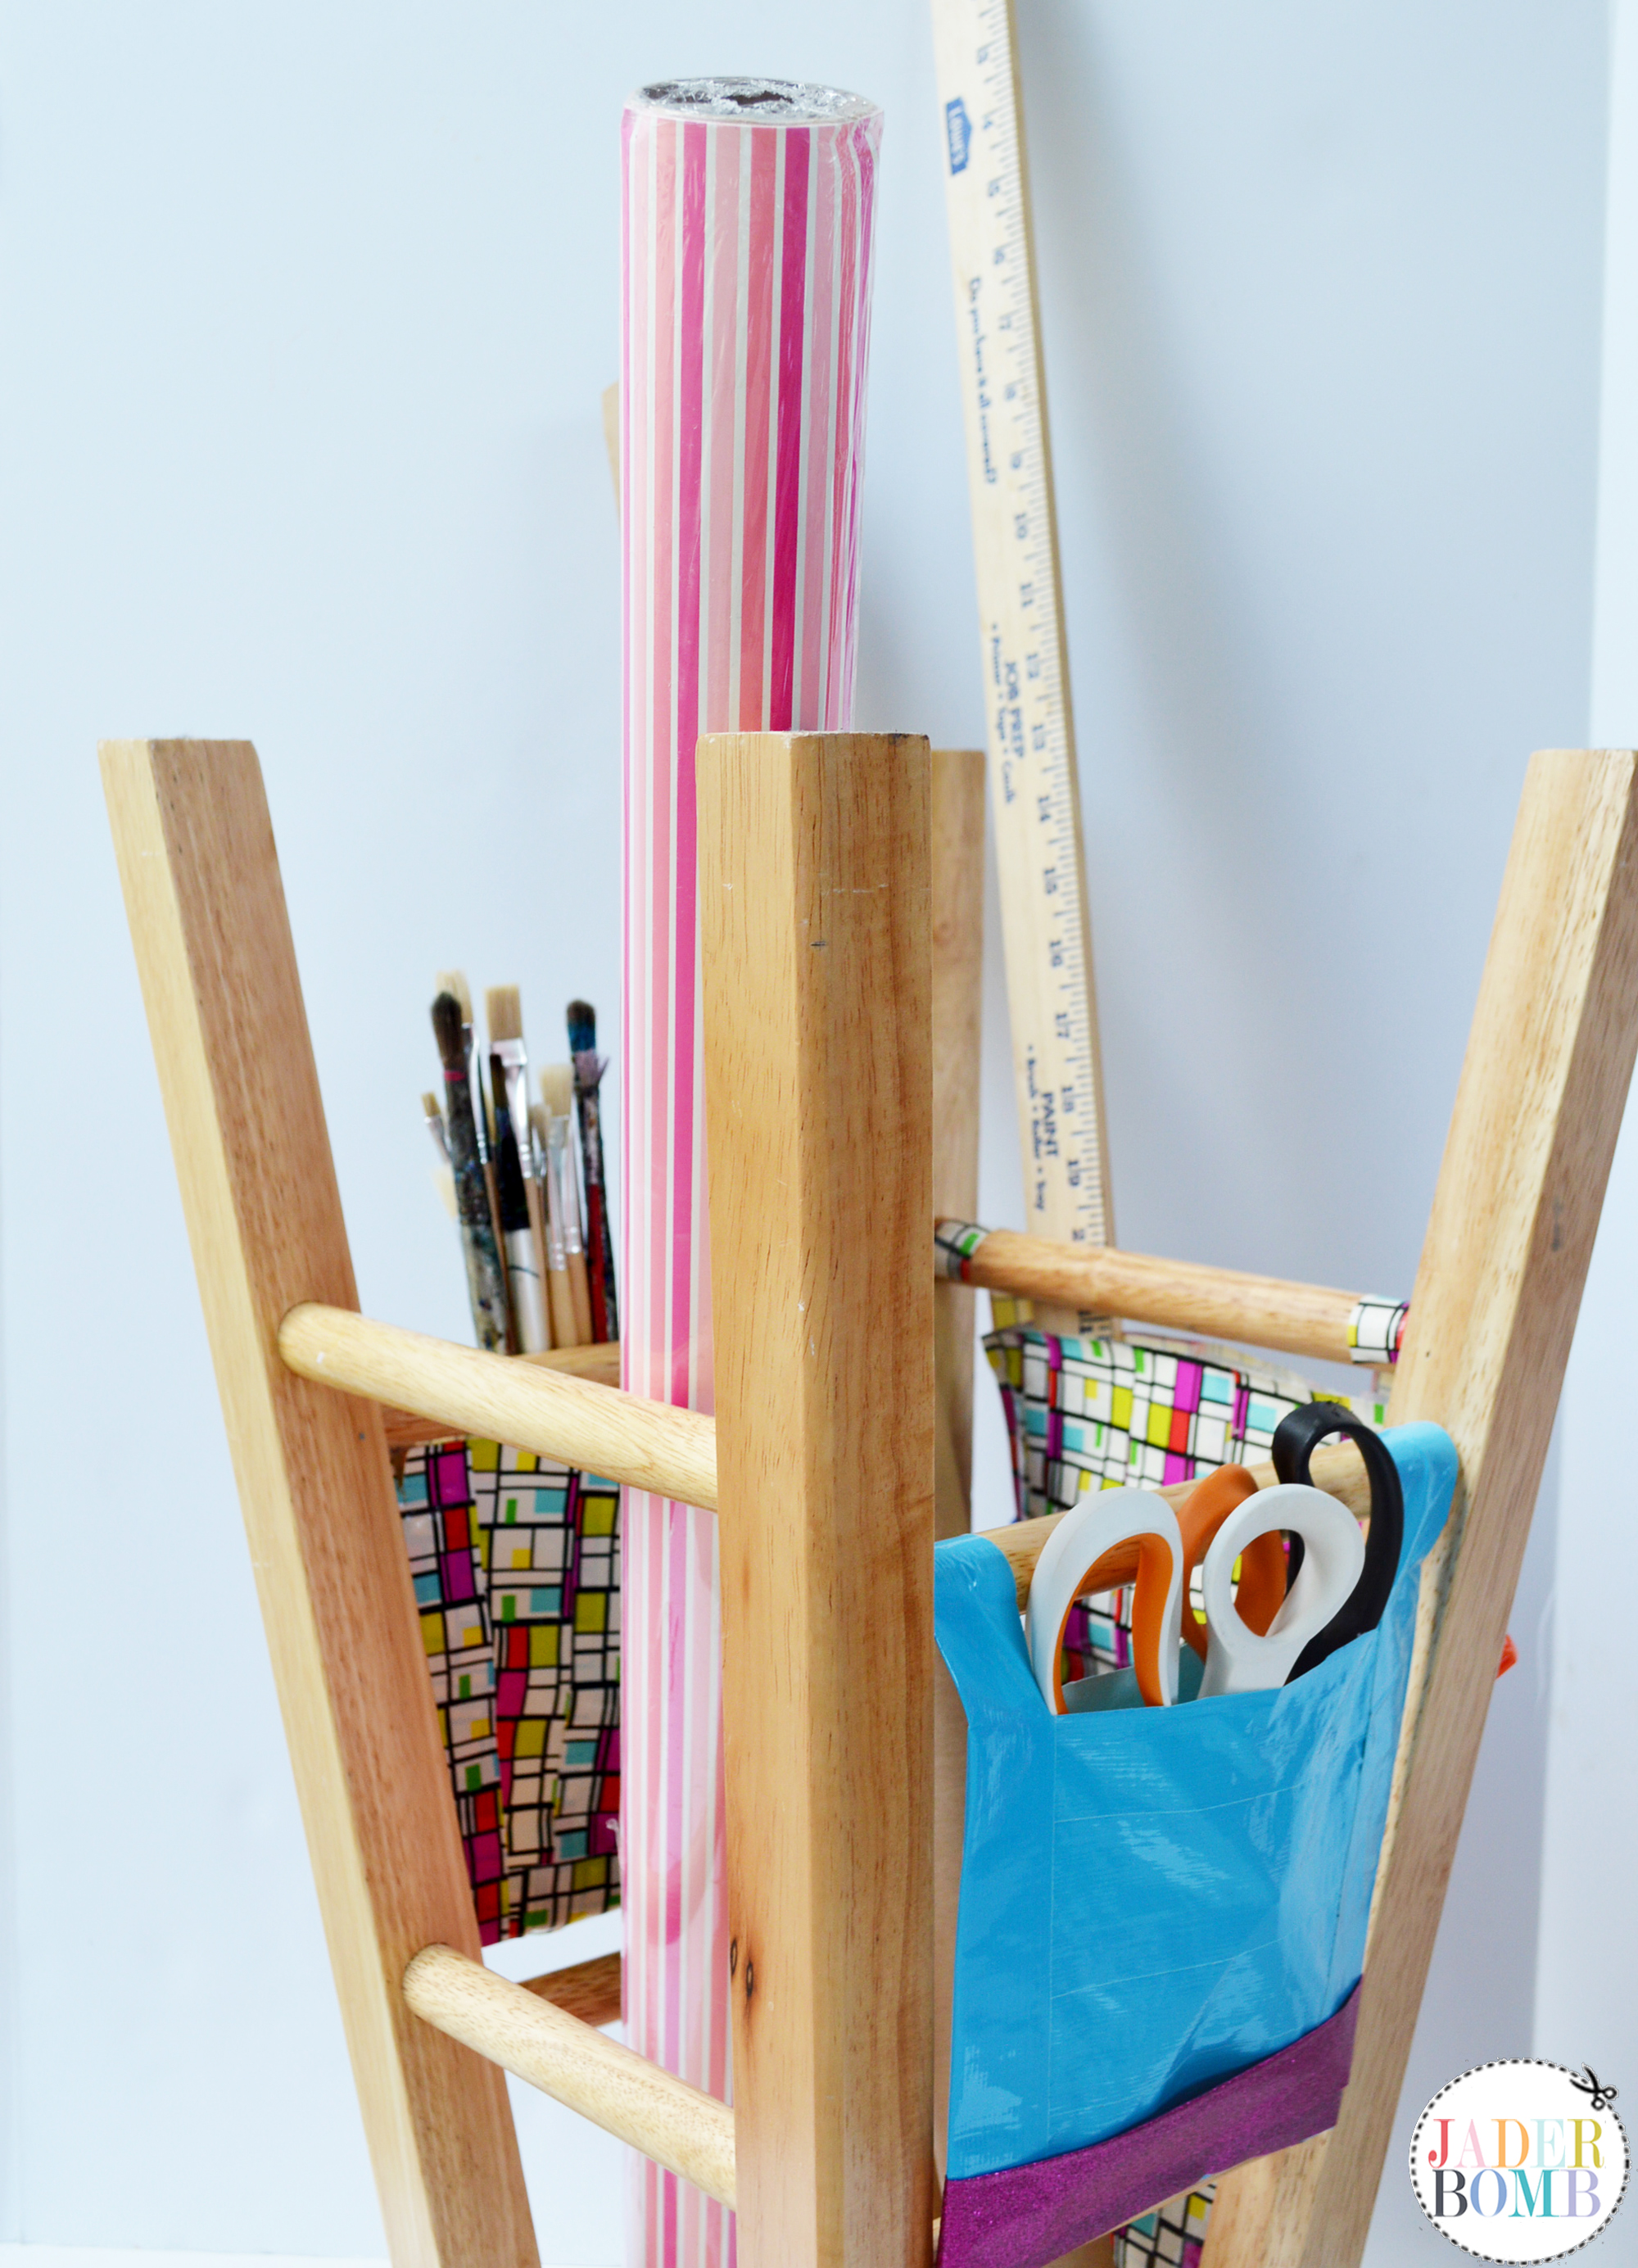
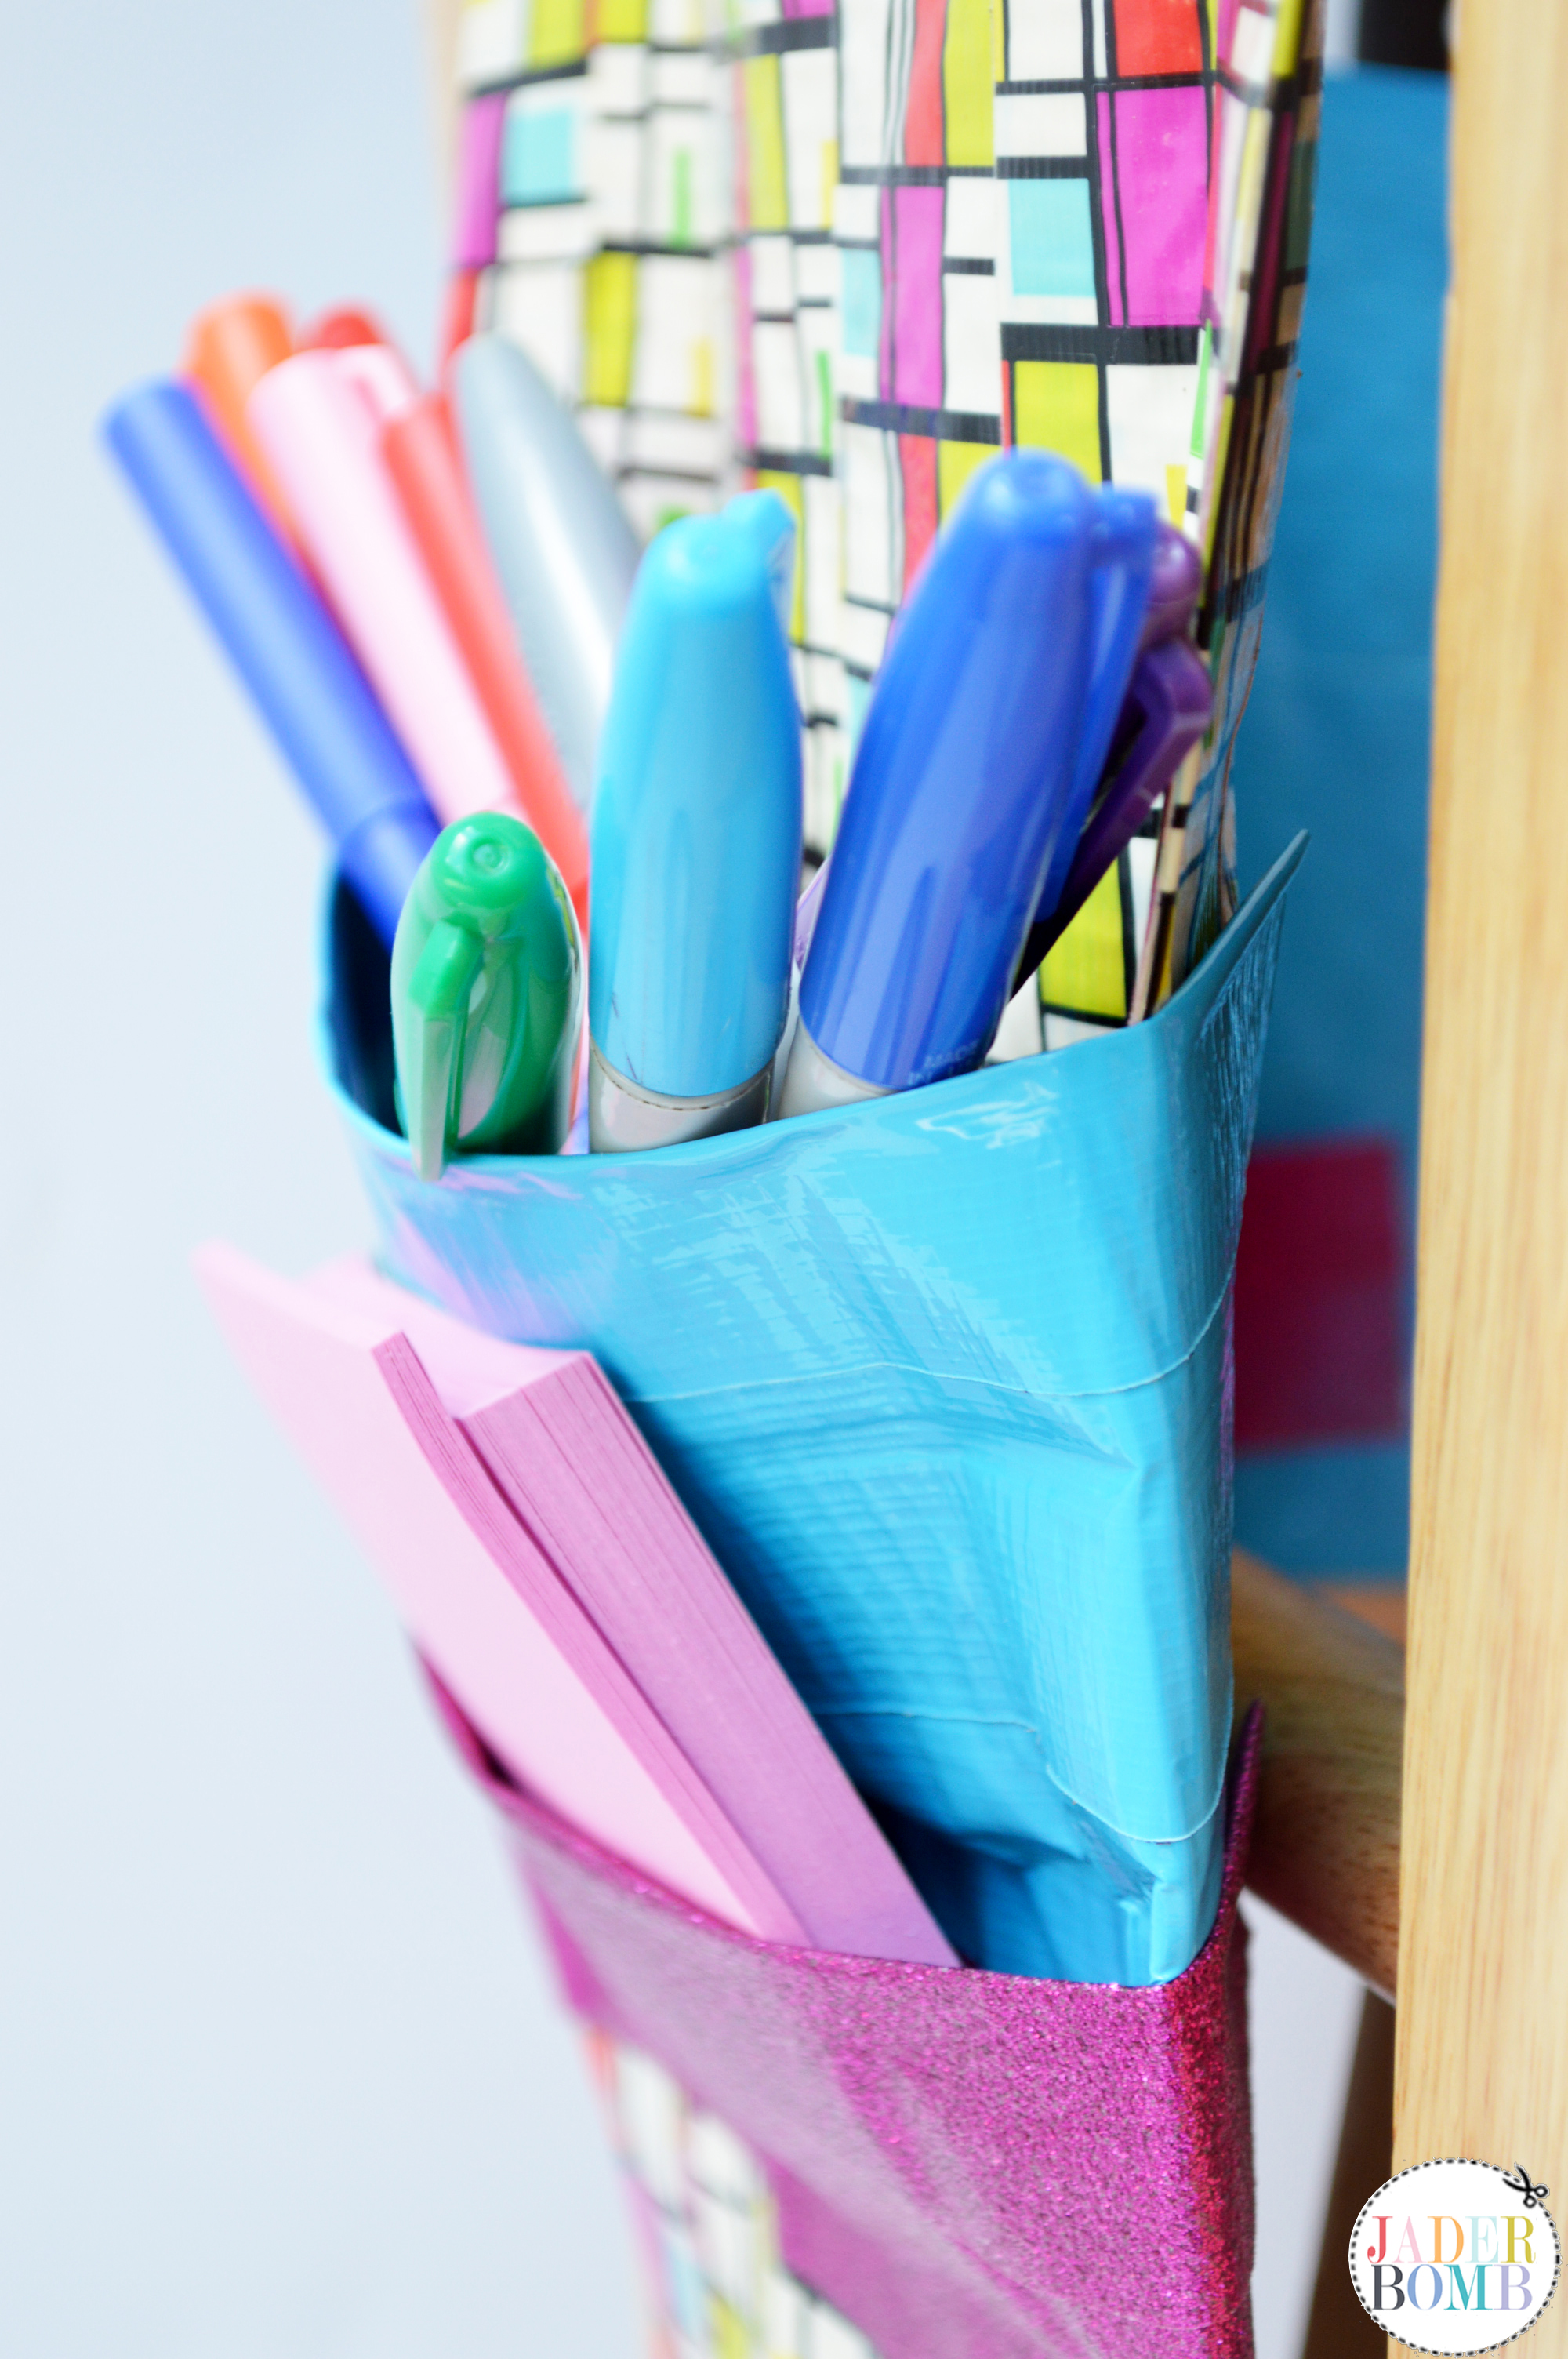
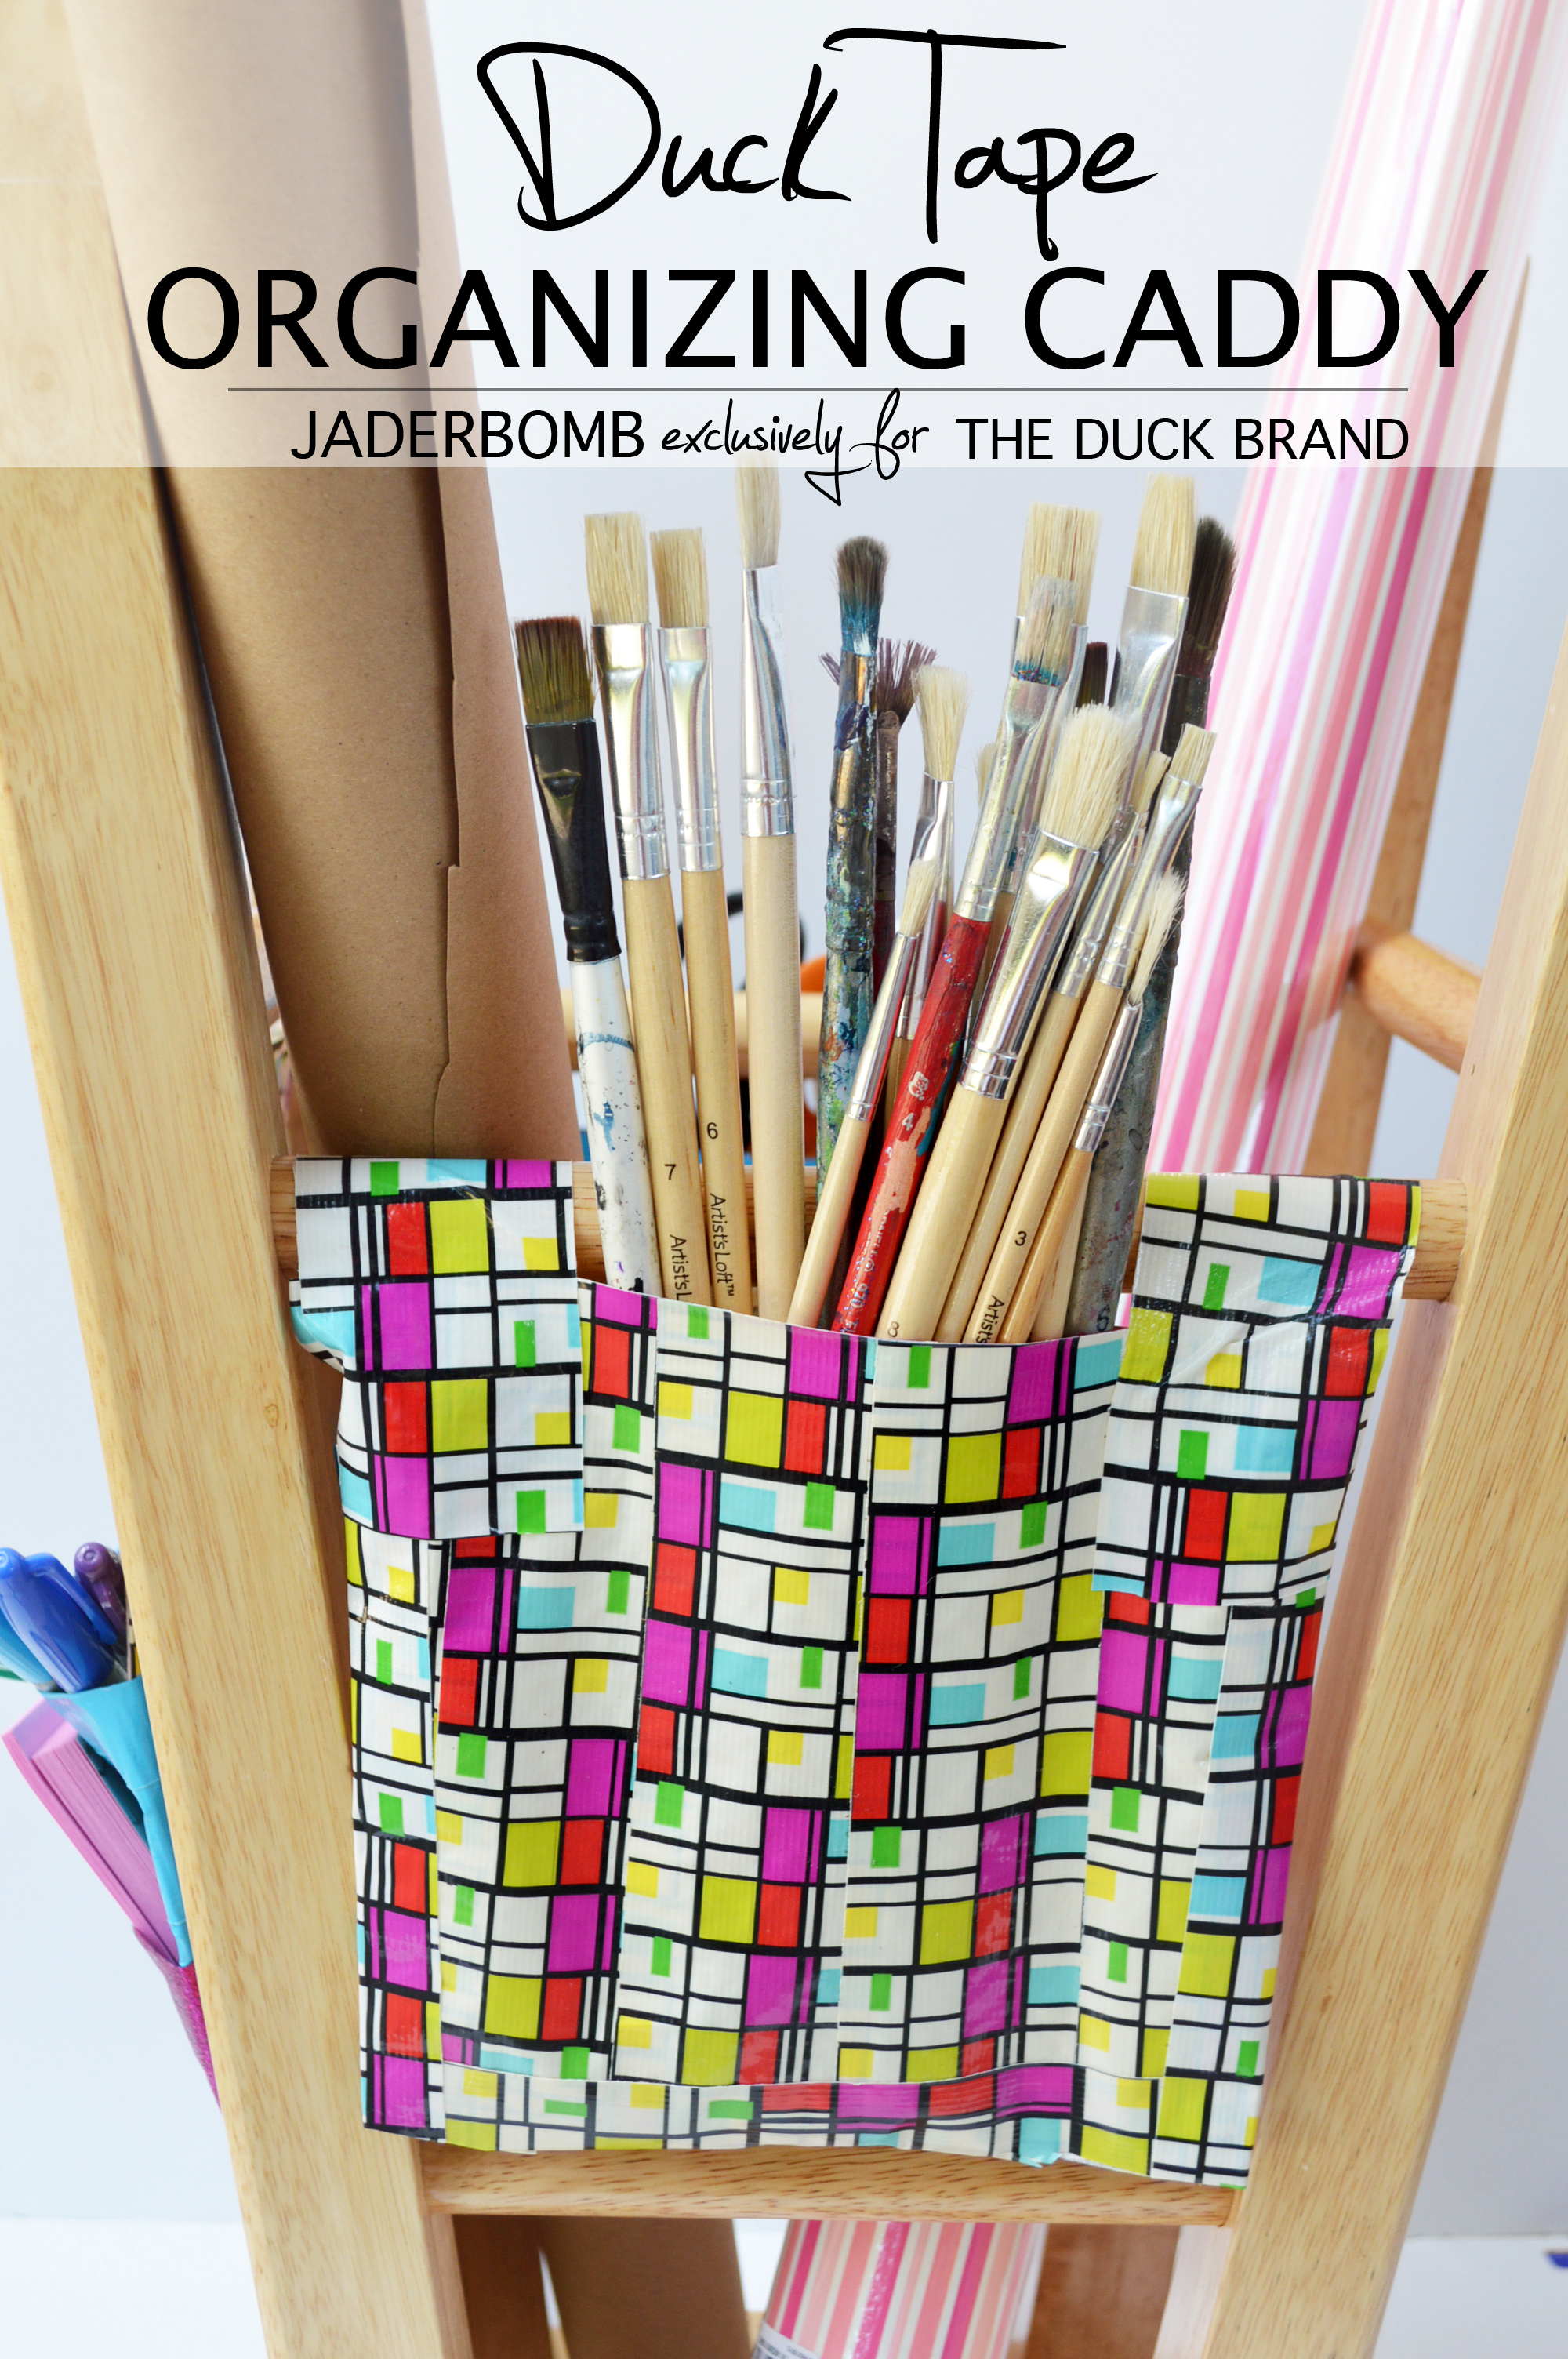
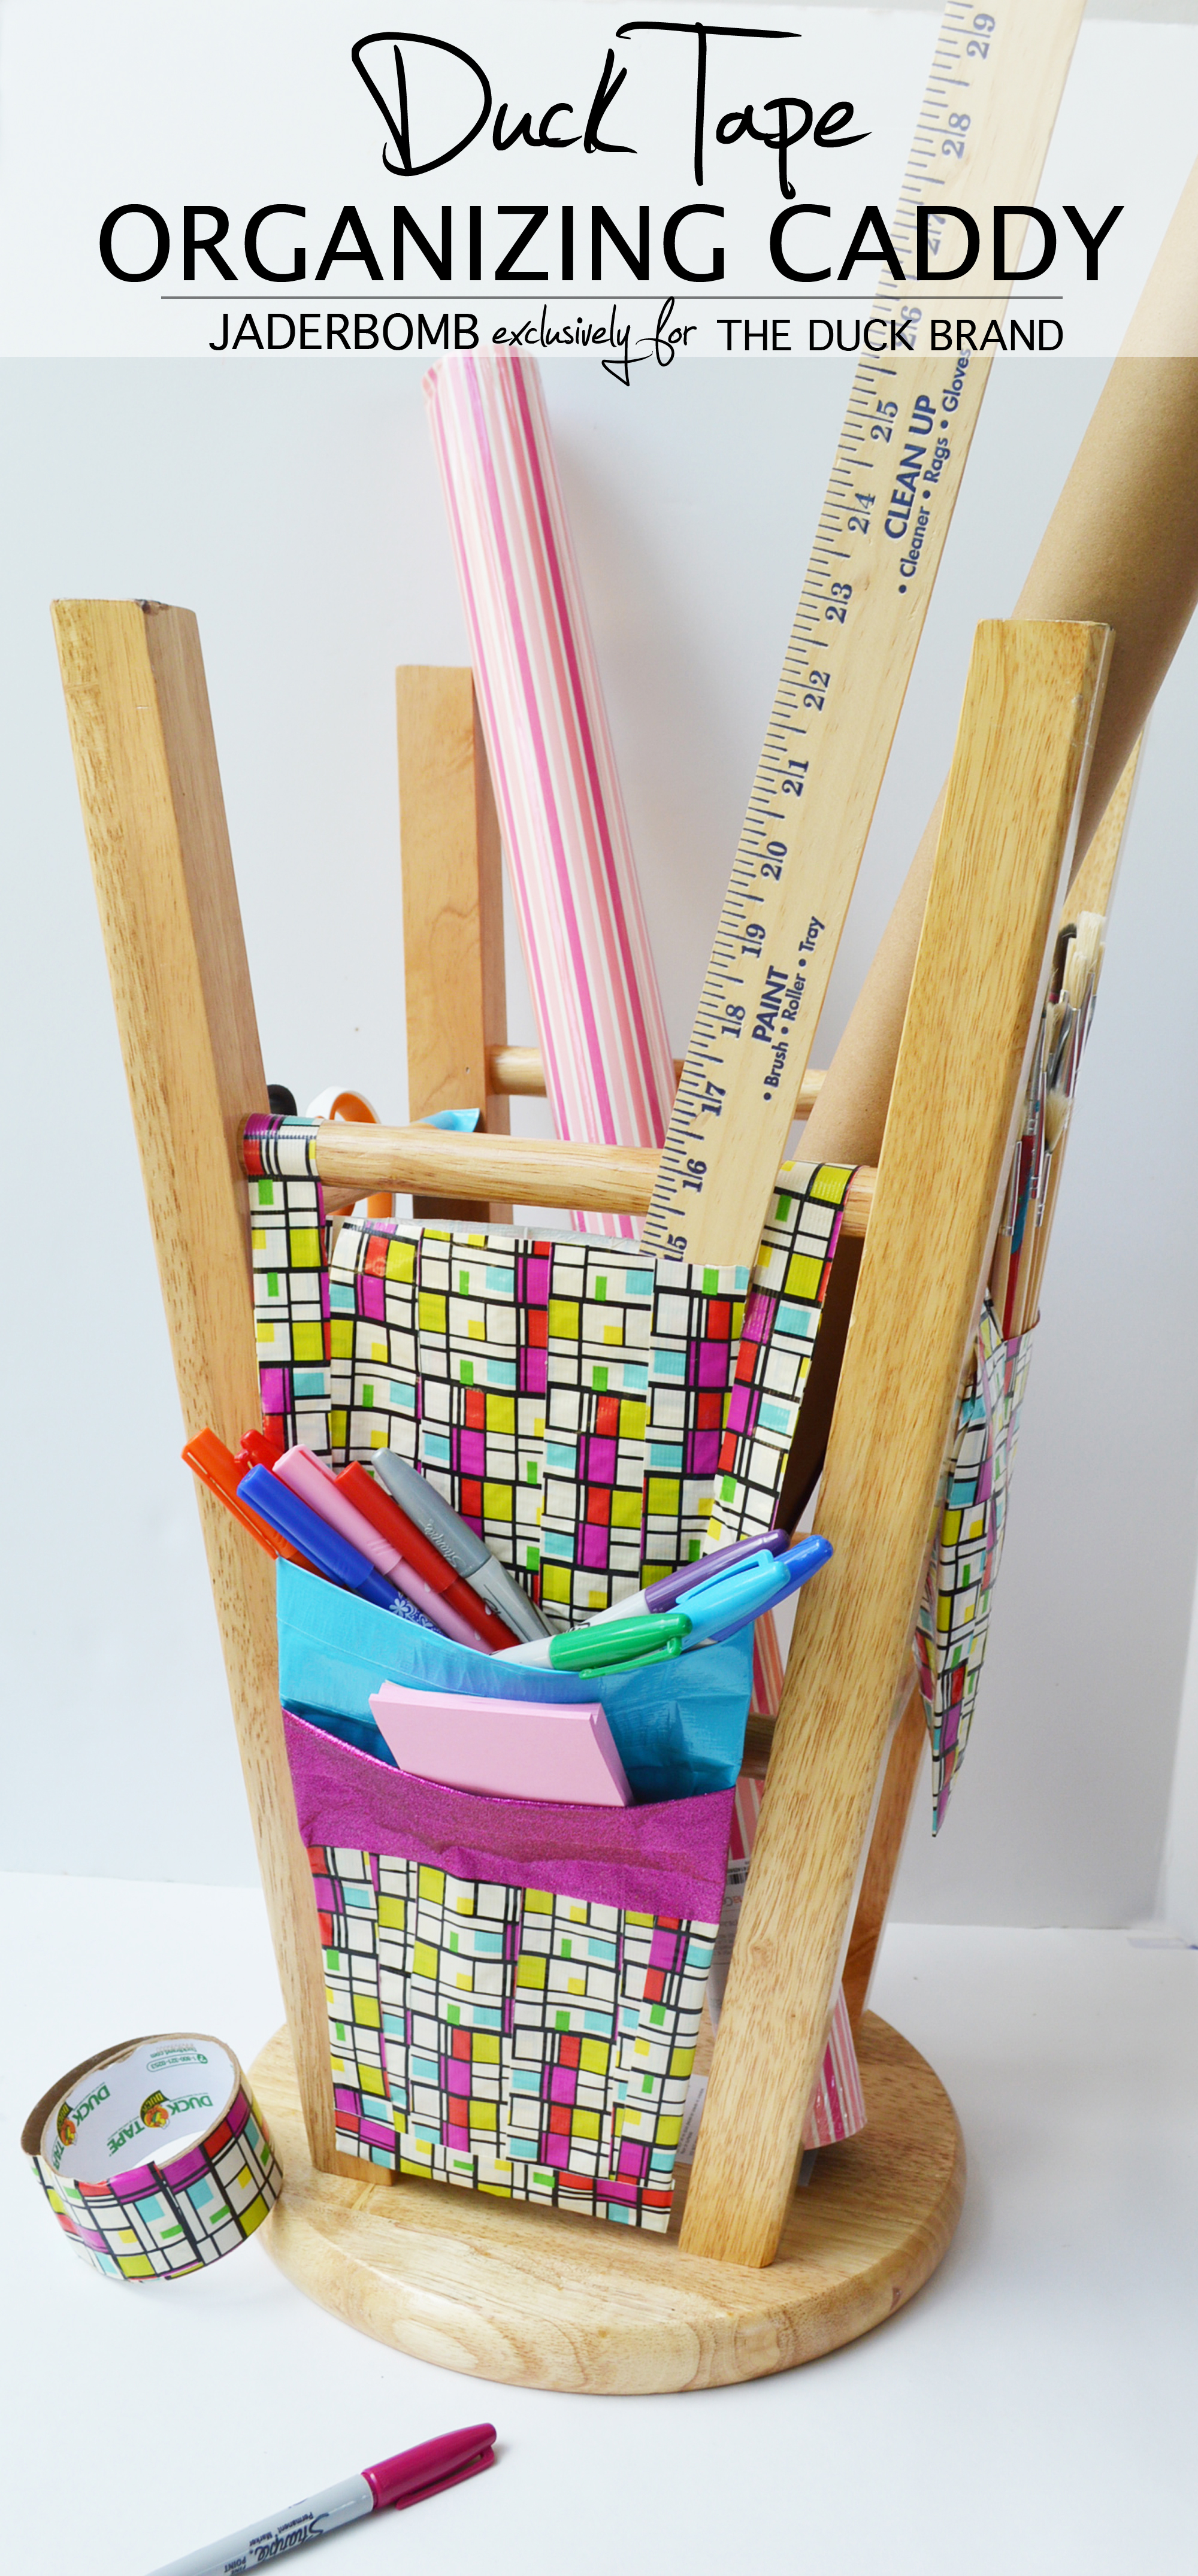
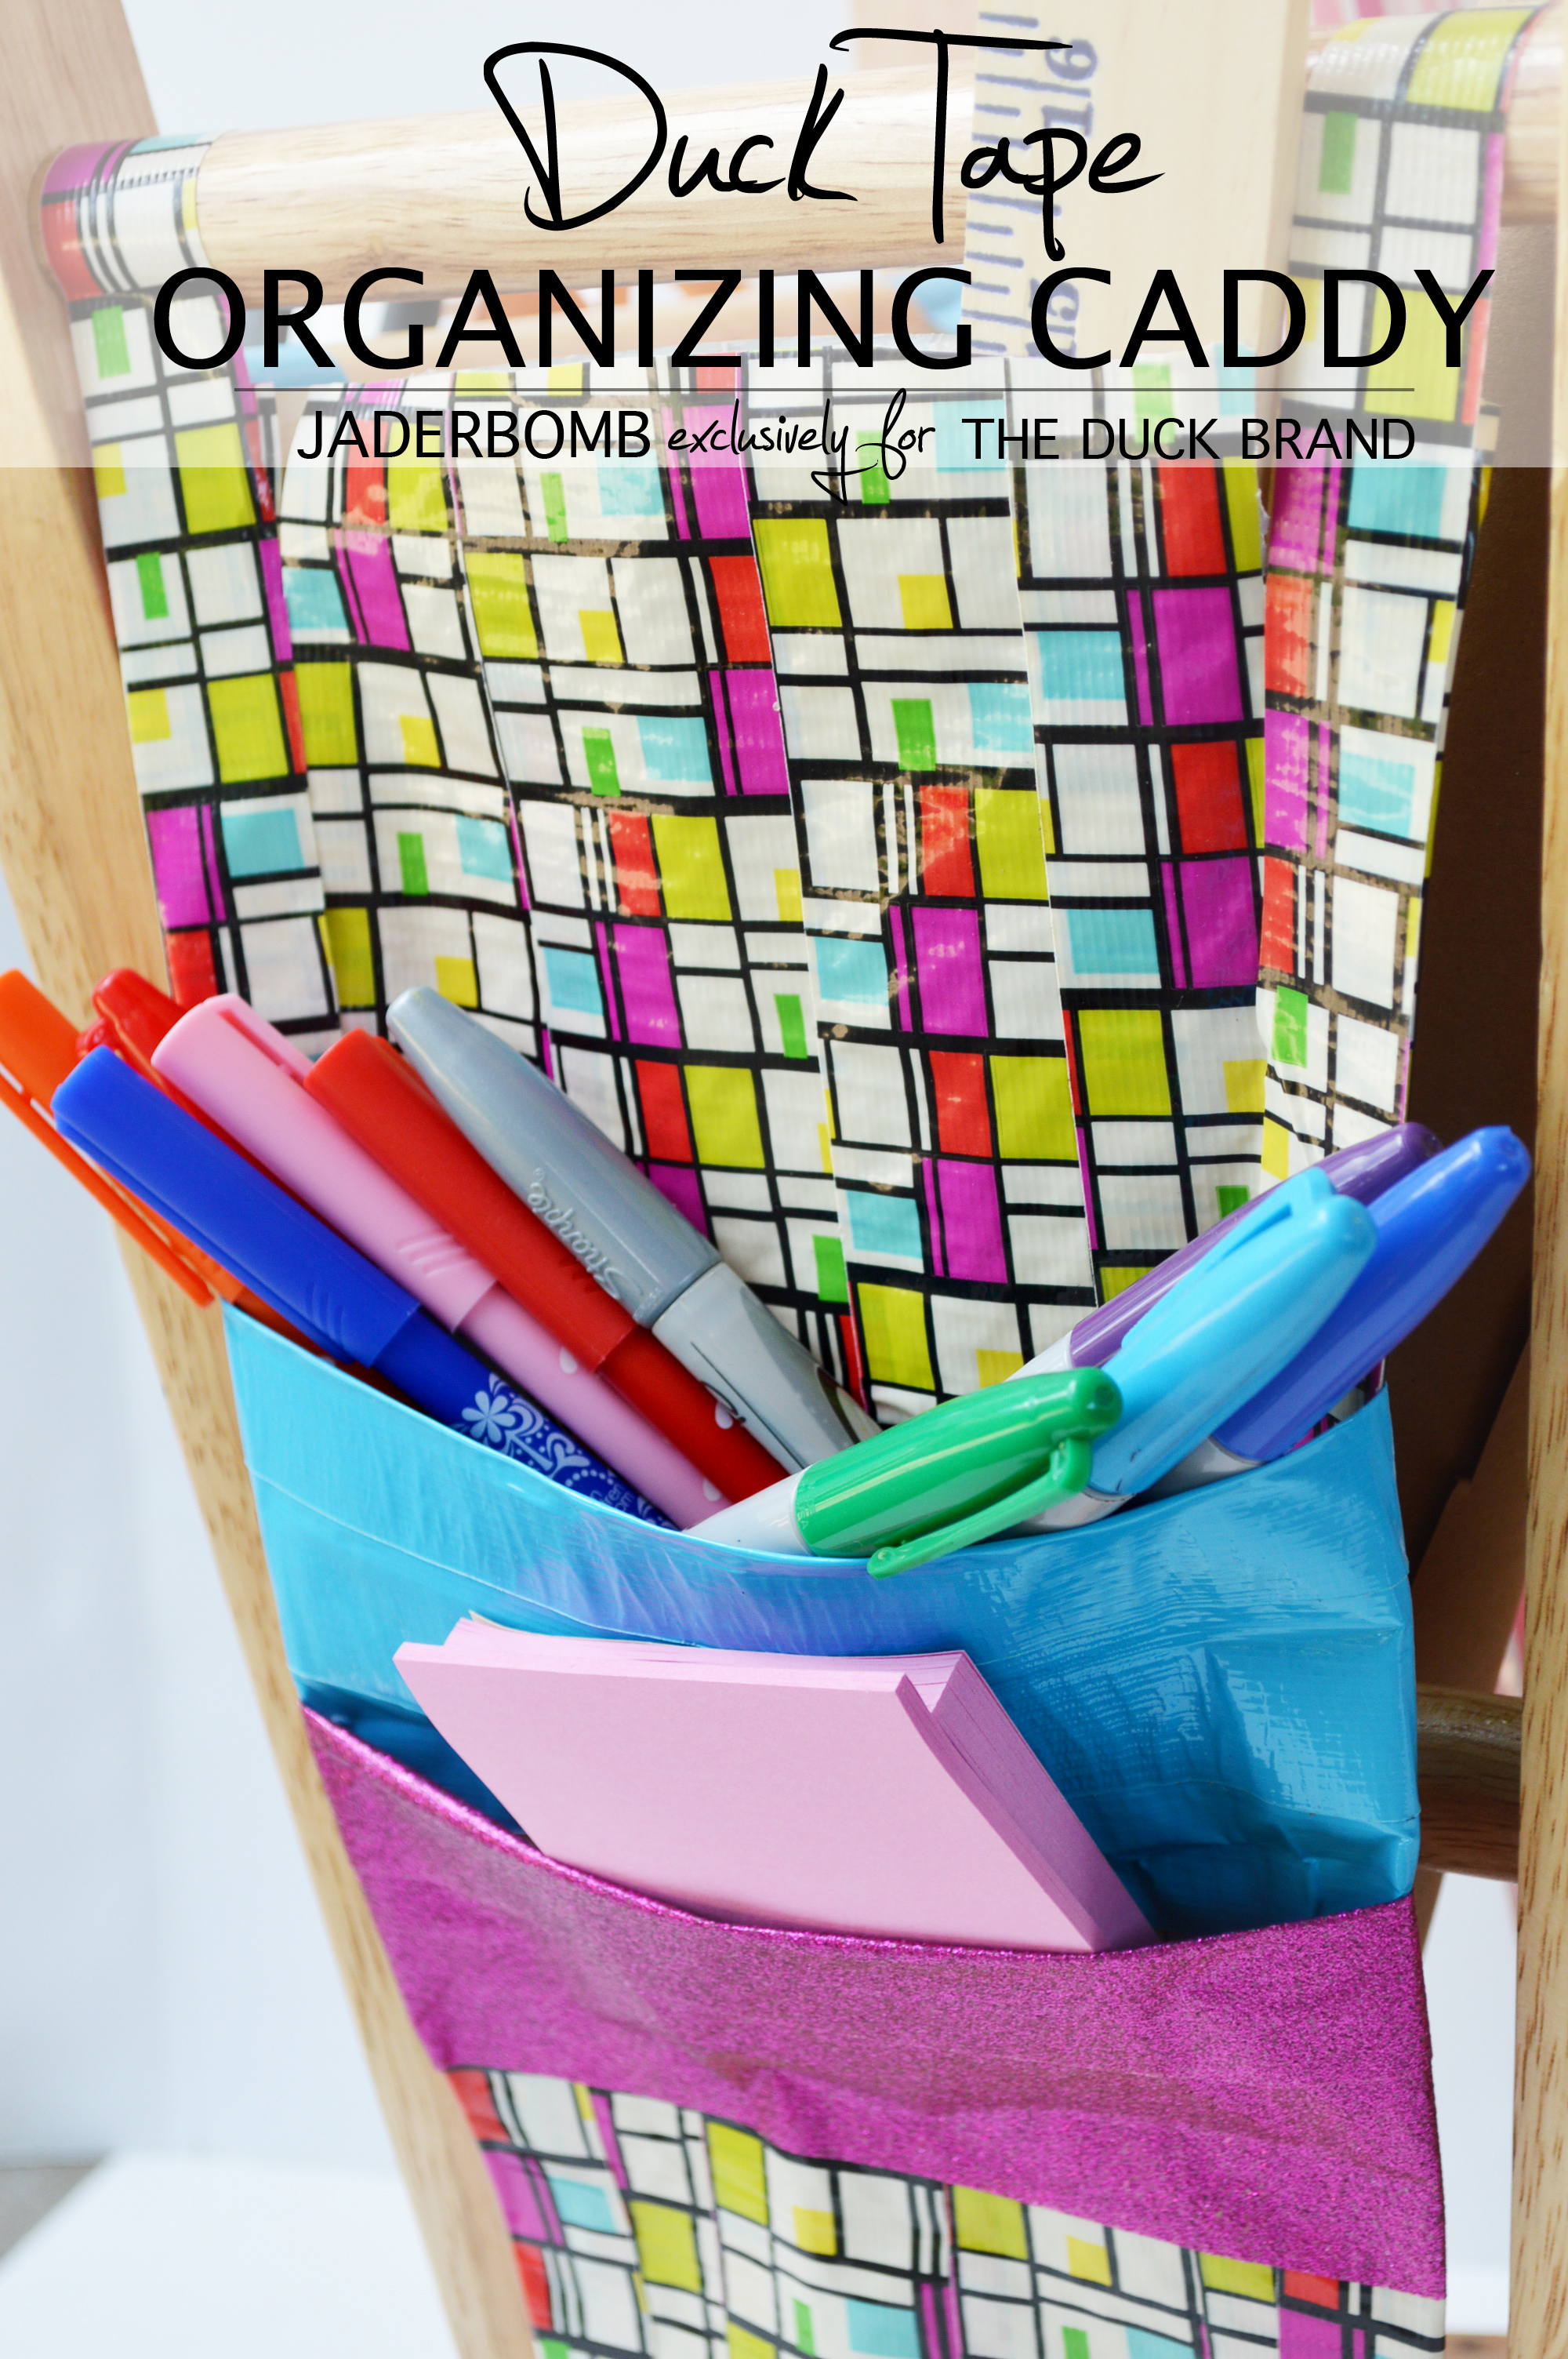
I don’t know about you but I absolutely love mini organizing stations. Sometimes a good one can be hard to come by which is why today I am going to show you an easy way to create a duck tape organizing caddy. One that can go in any space,literally. The one thing I love about this caddy is you can choose the exact design or color of Duck Tape that you want! You can use this for a craft station, wrapping station, art station or a toy station. Let’s get started!

You will need:
Wooden Stool ( I am using a natural color but you can paint them if you want)
Duck Tape (your choice of color)
Fiskars Non Stick Scissors
Trash Bag (any color)

DIY CADDY

duck tape caddy
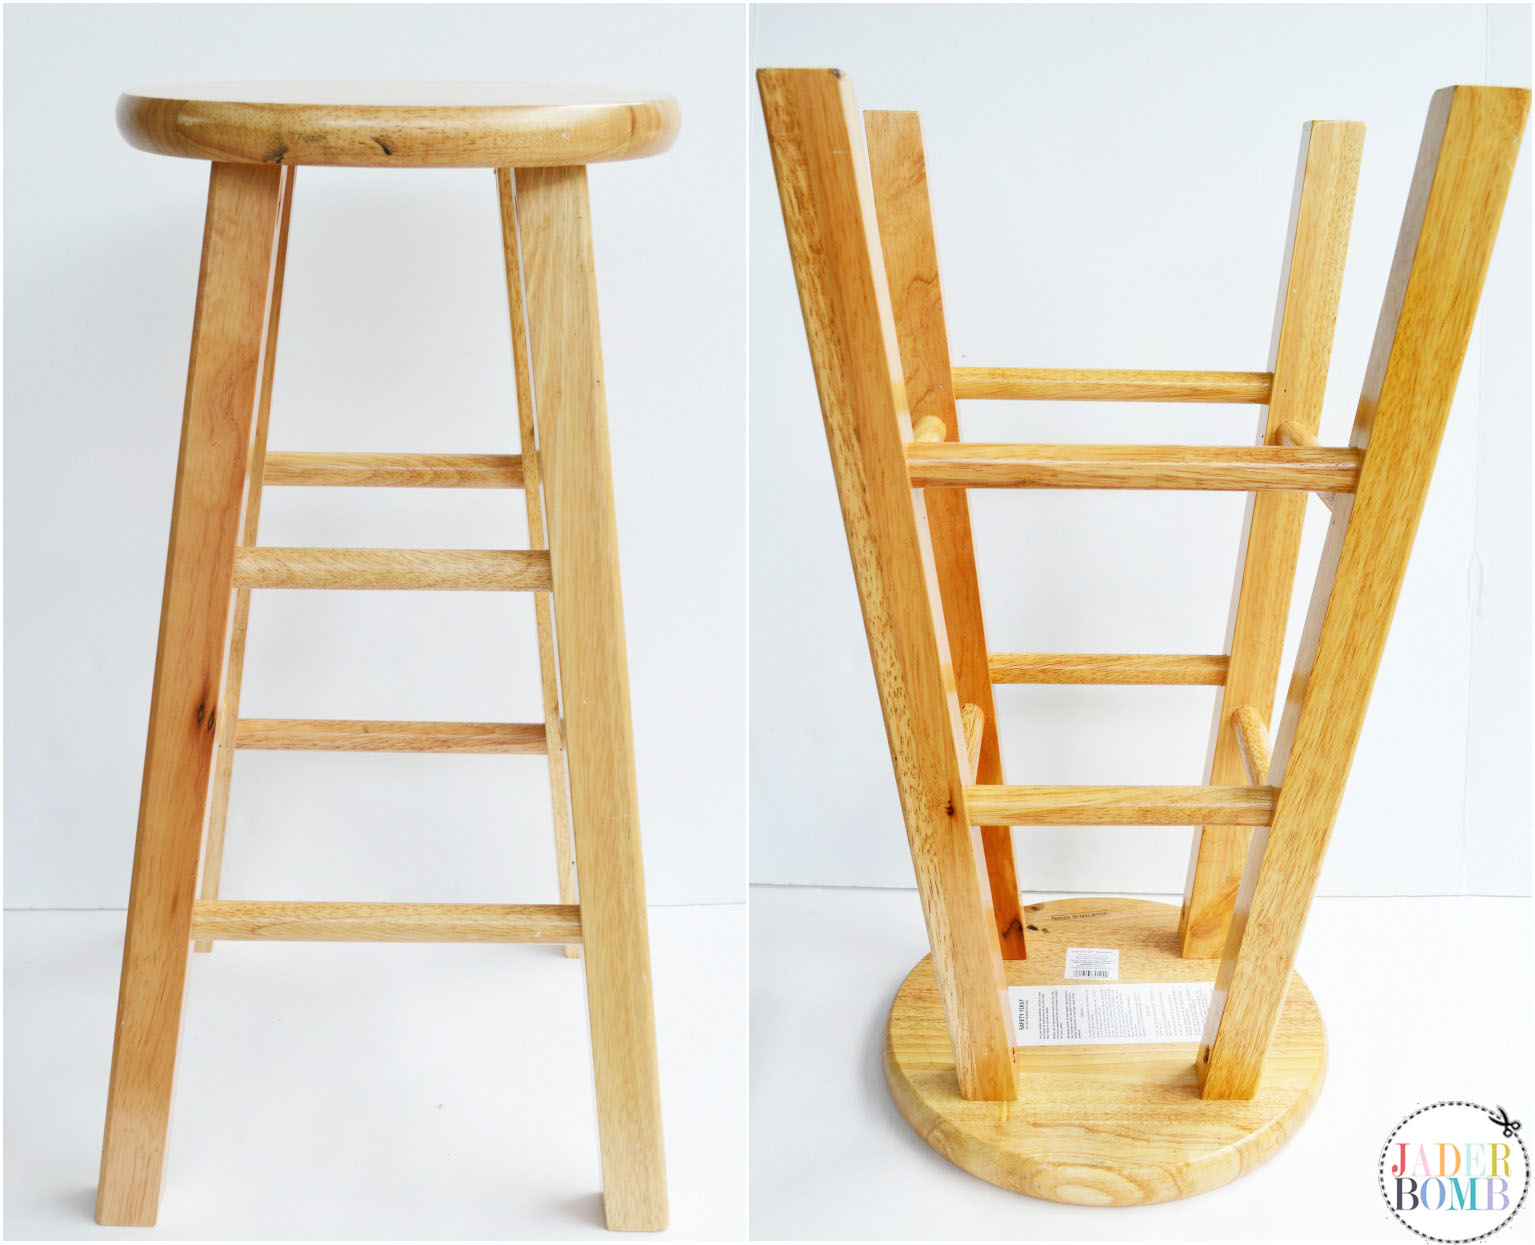
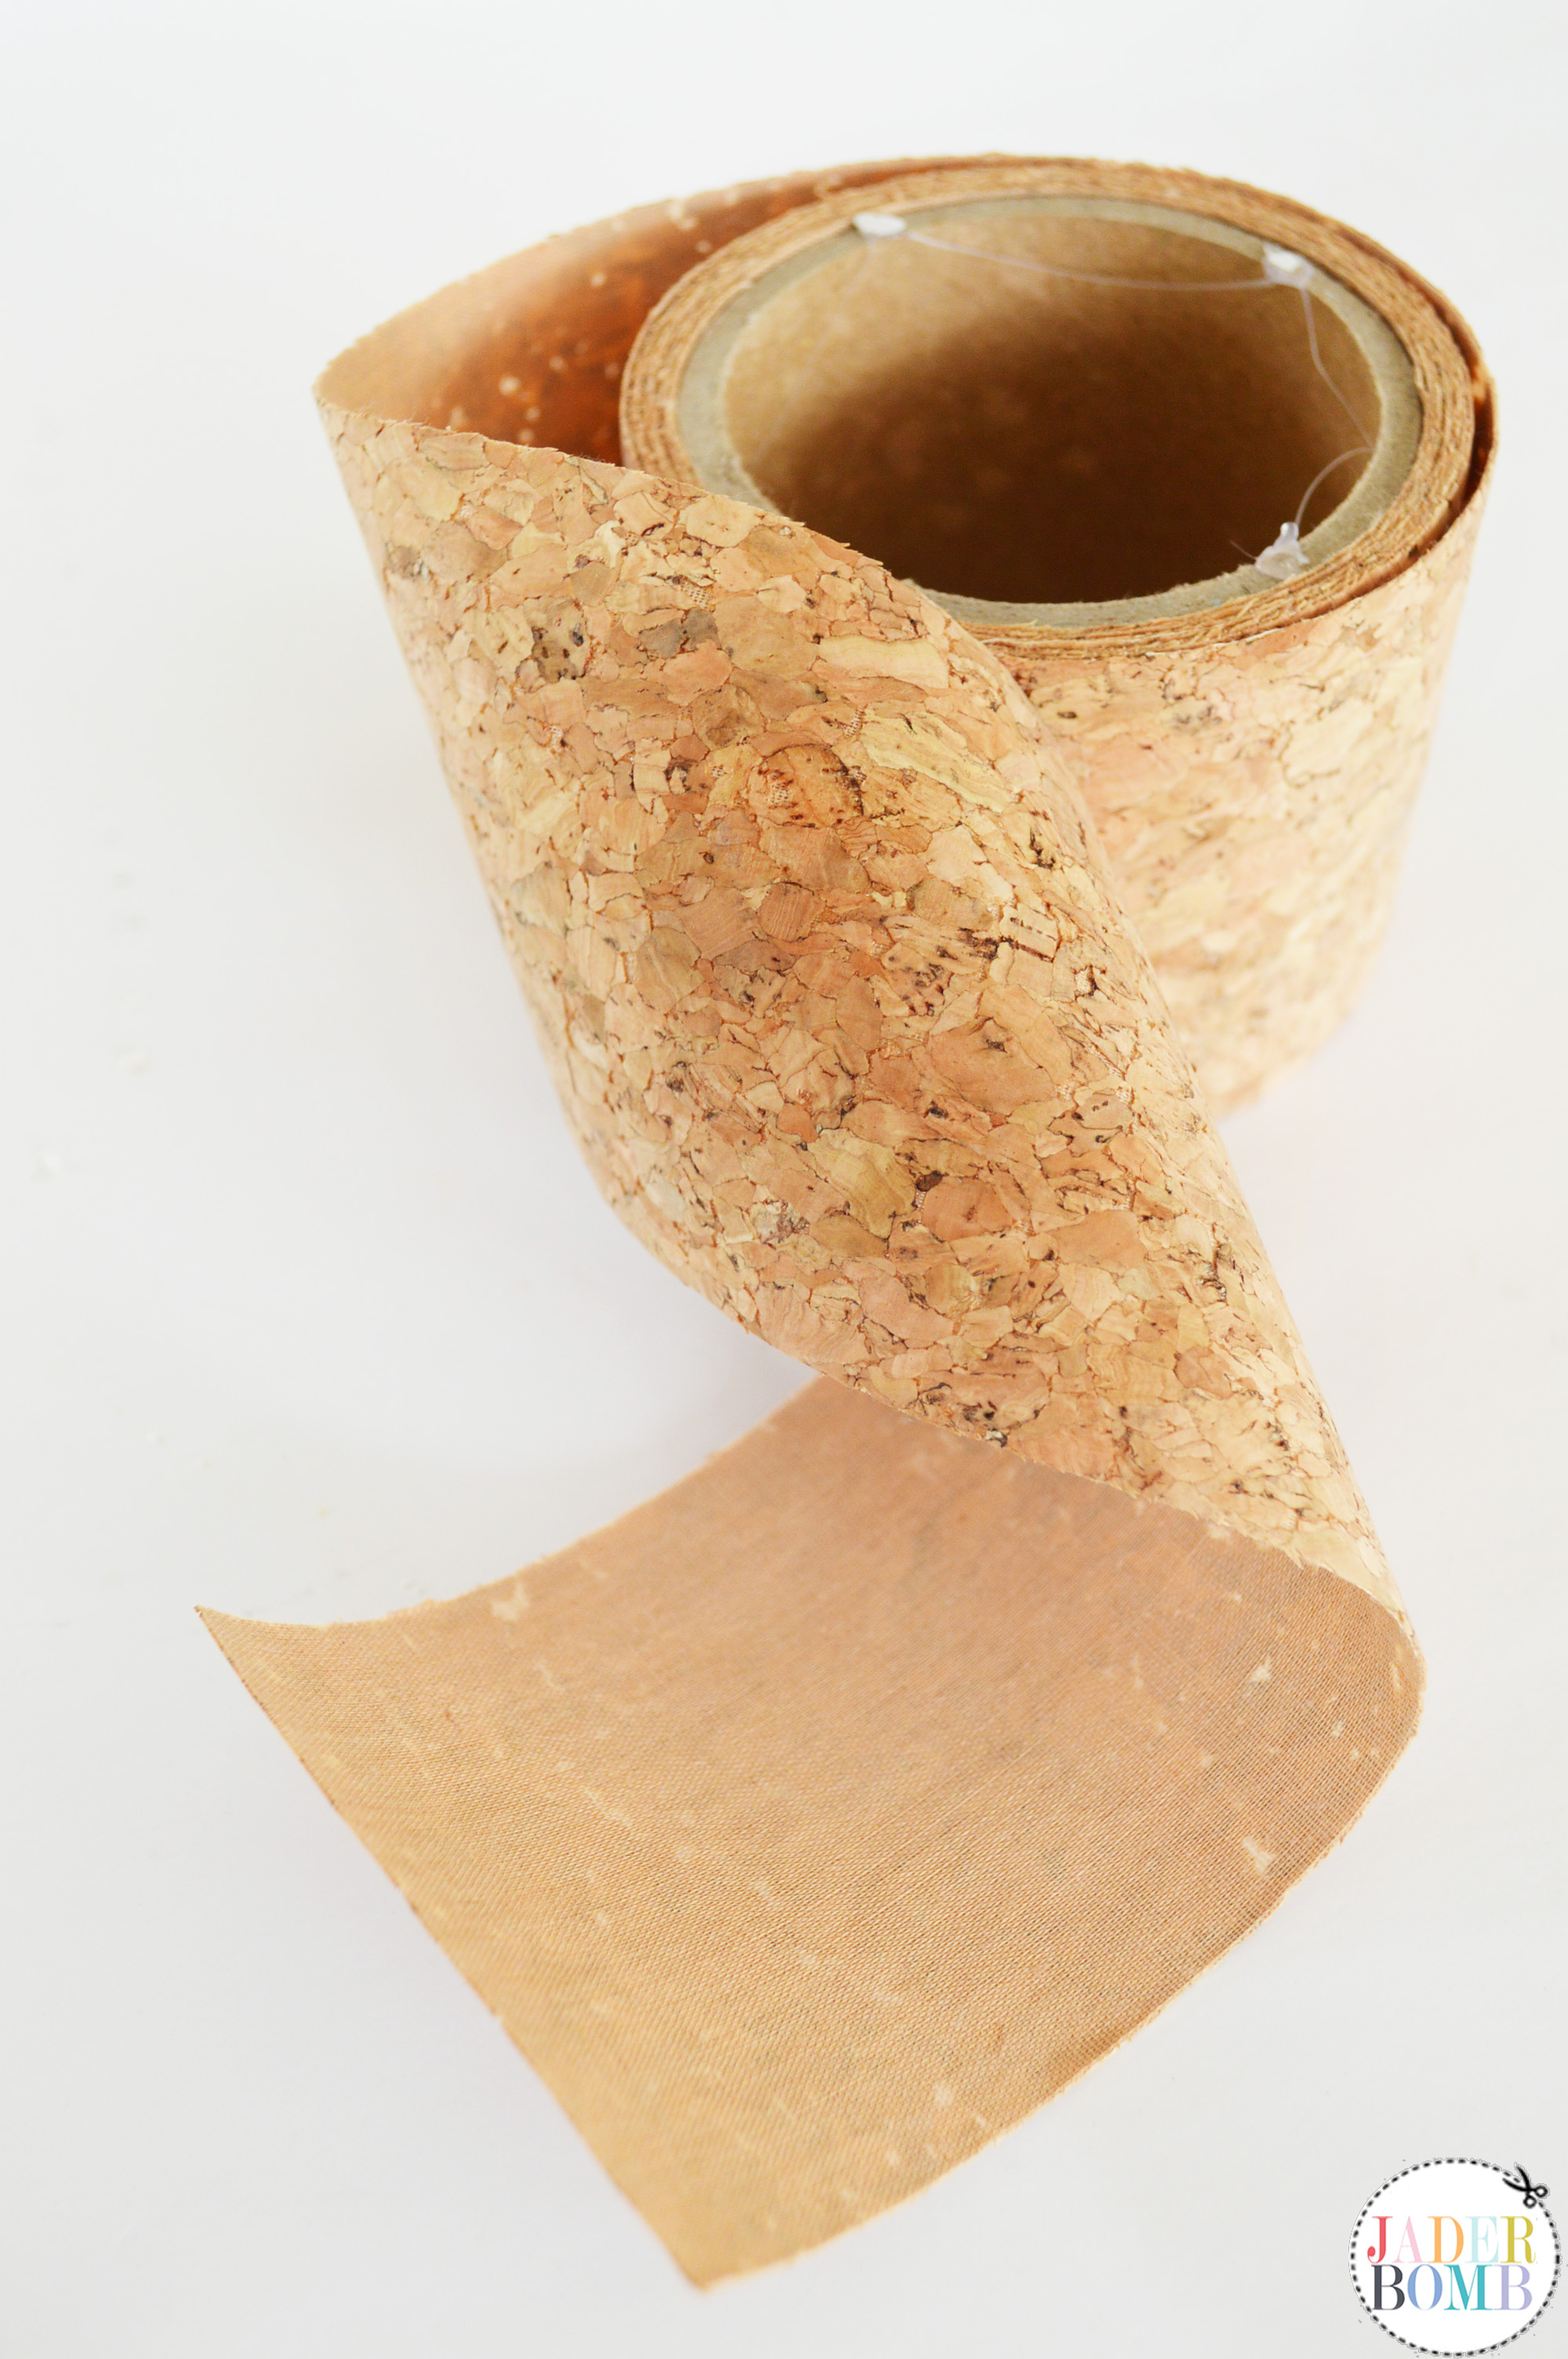
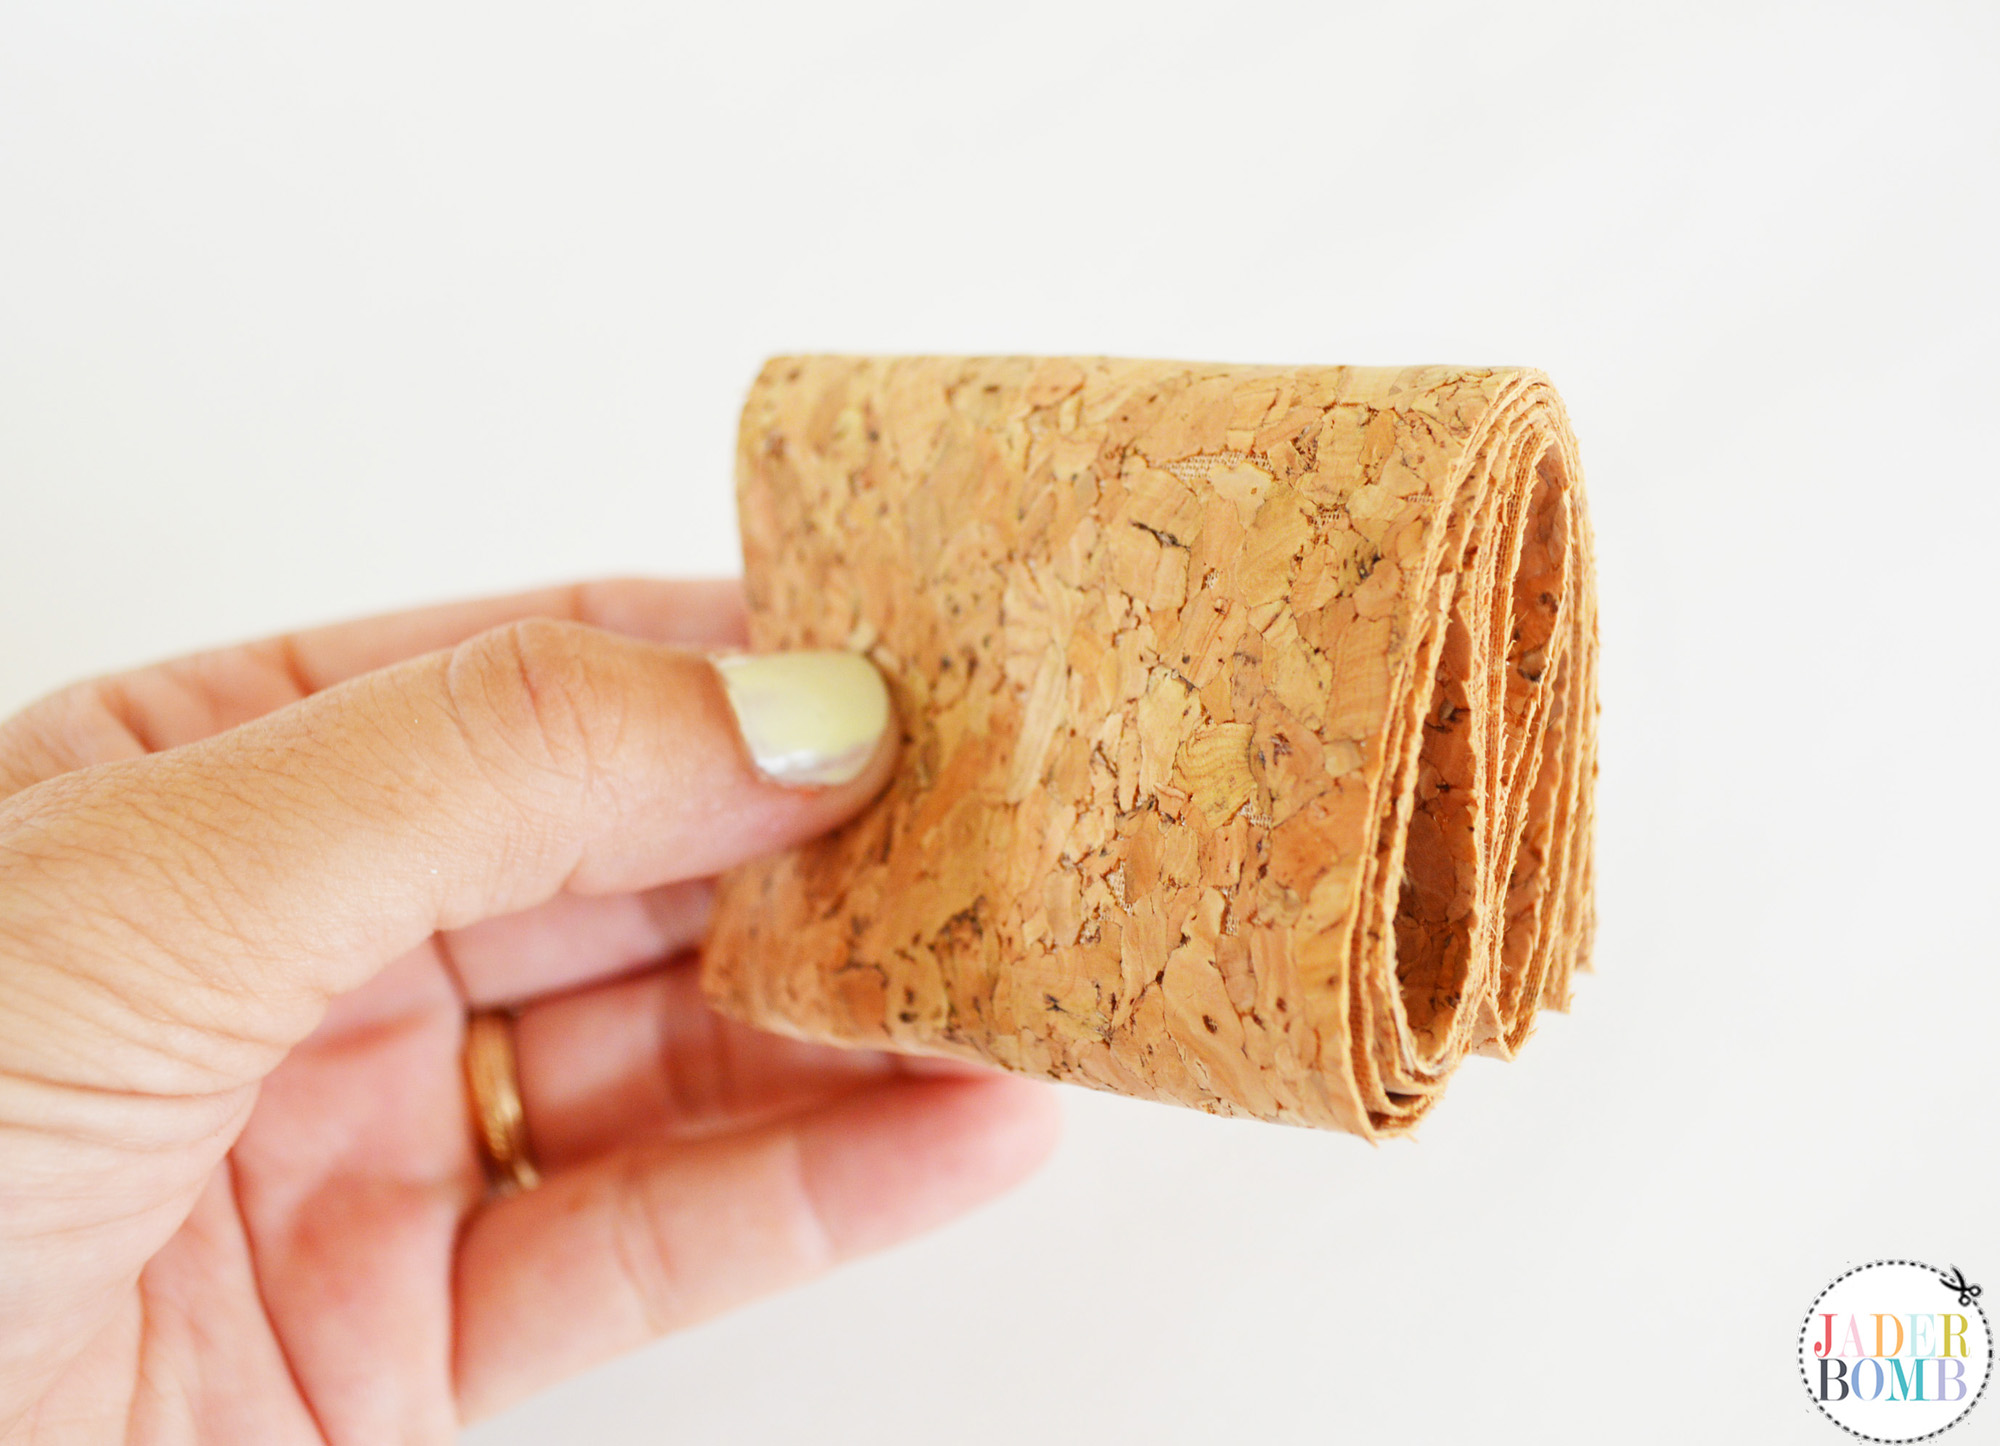
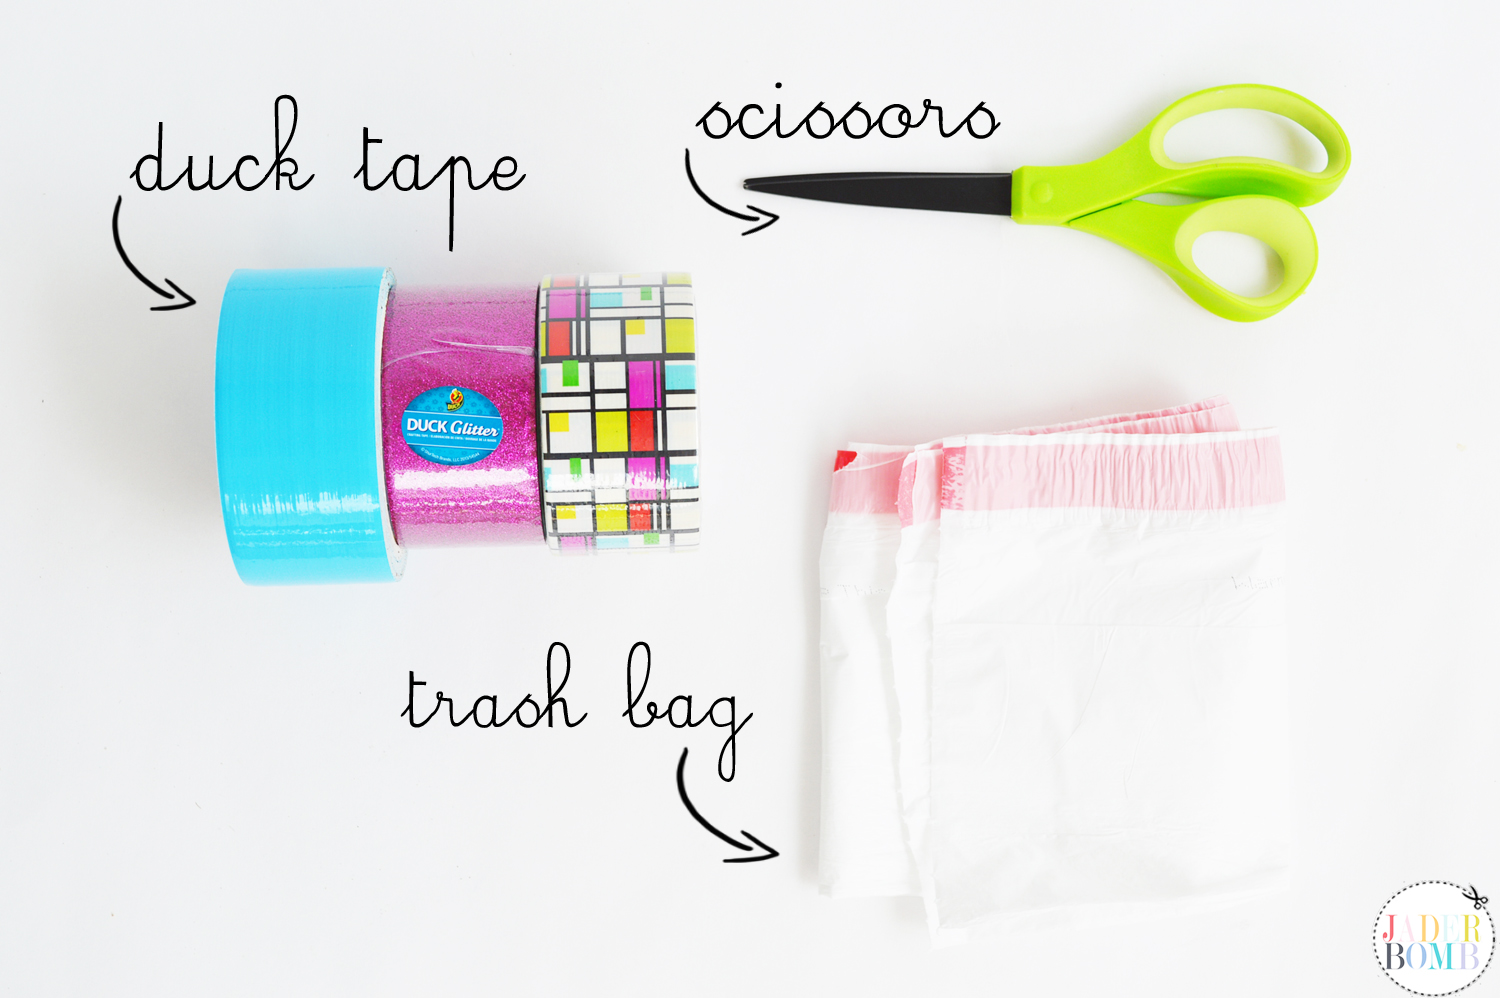
The great thing about this crafts is choosing the colors you want! The Duck brand has so many options now I am certain you will not get stuck in that department.

I will tell you if you are a duck tape fan these scissors are a must. They glide through the tape without sticking and we all know that makes our crafting a dream come true. Fiskars created these scissors specifically for The Duck Brand. They come in two different sizes and you won’t regret getting both sizes!

duck edition fiskars scissors

DIY VINTAGE BOTTLE LABELS
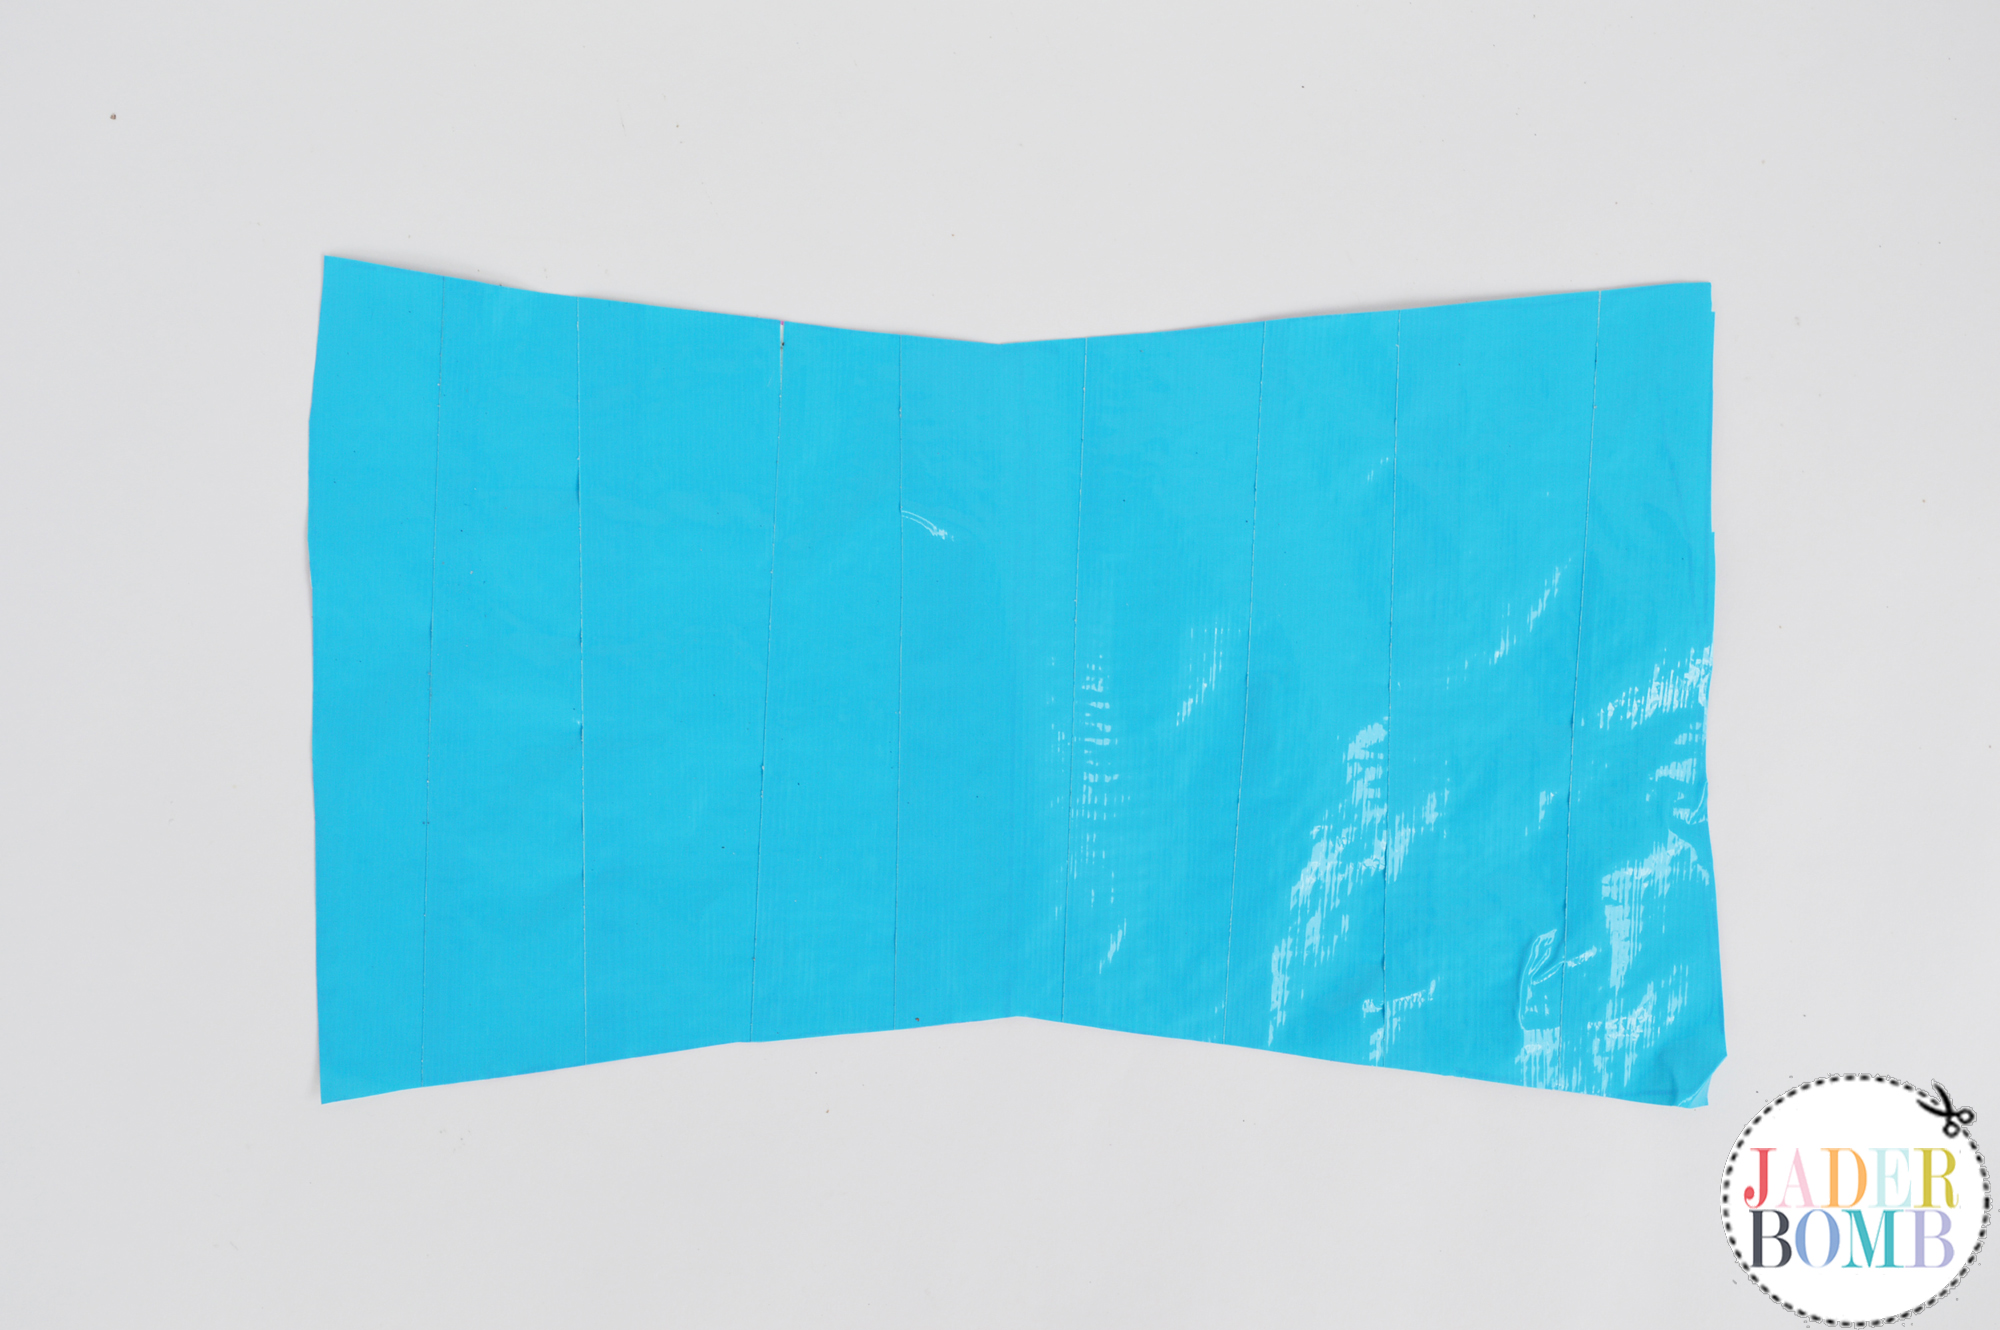
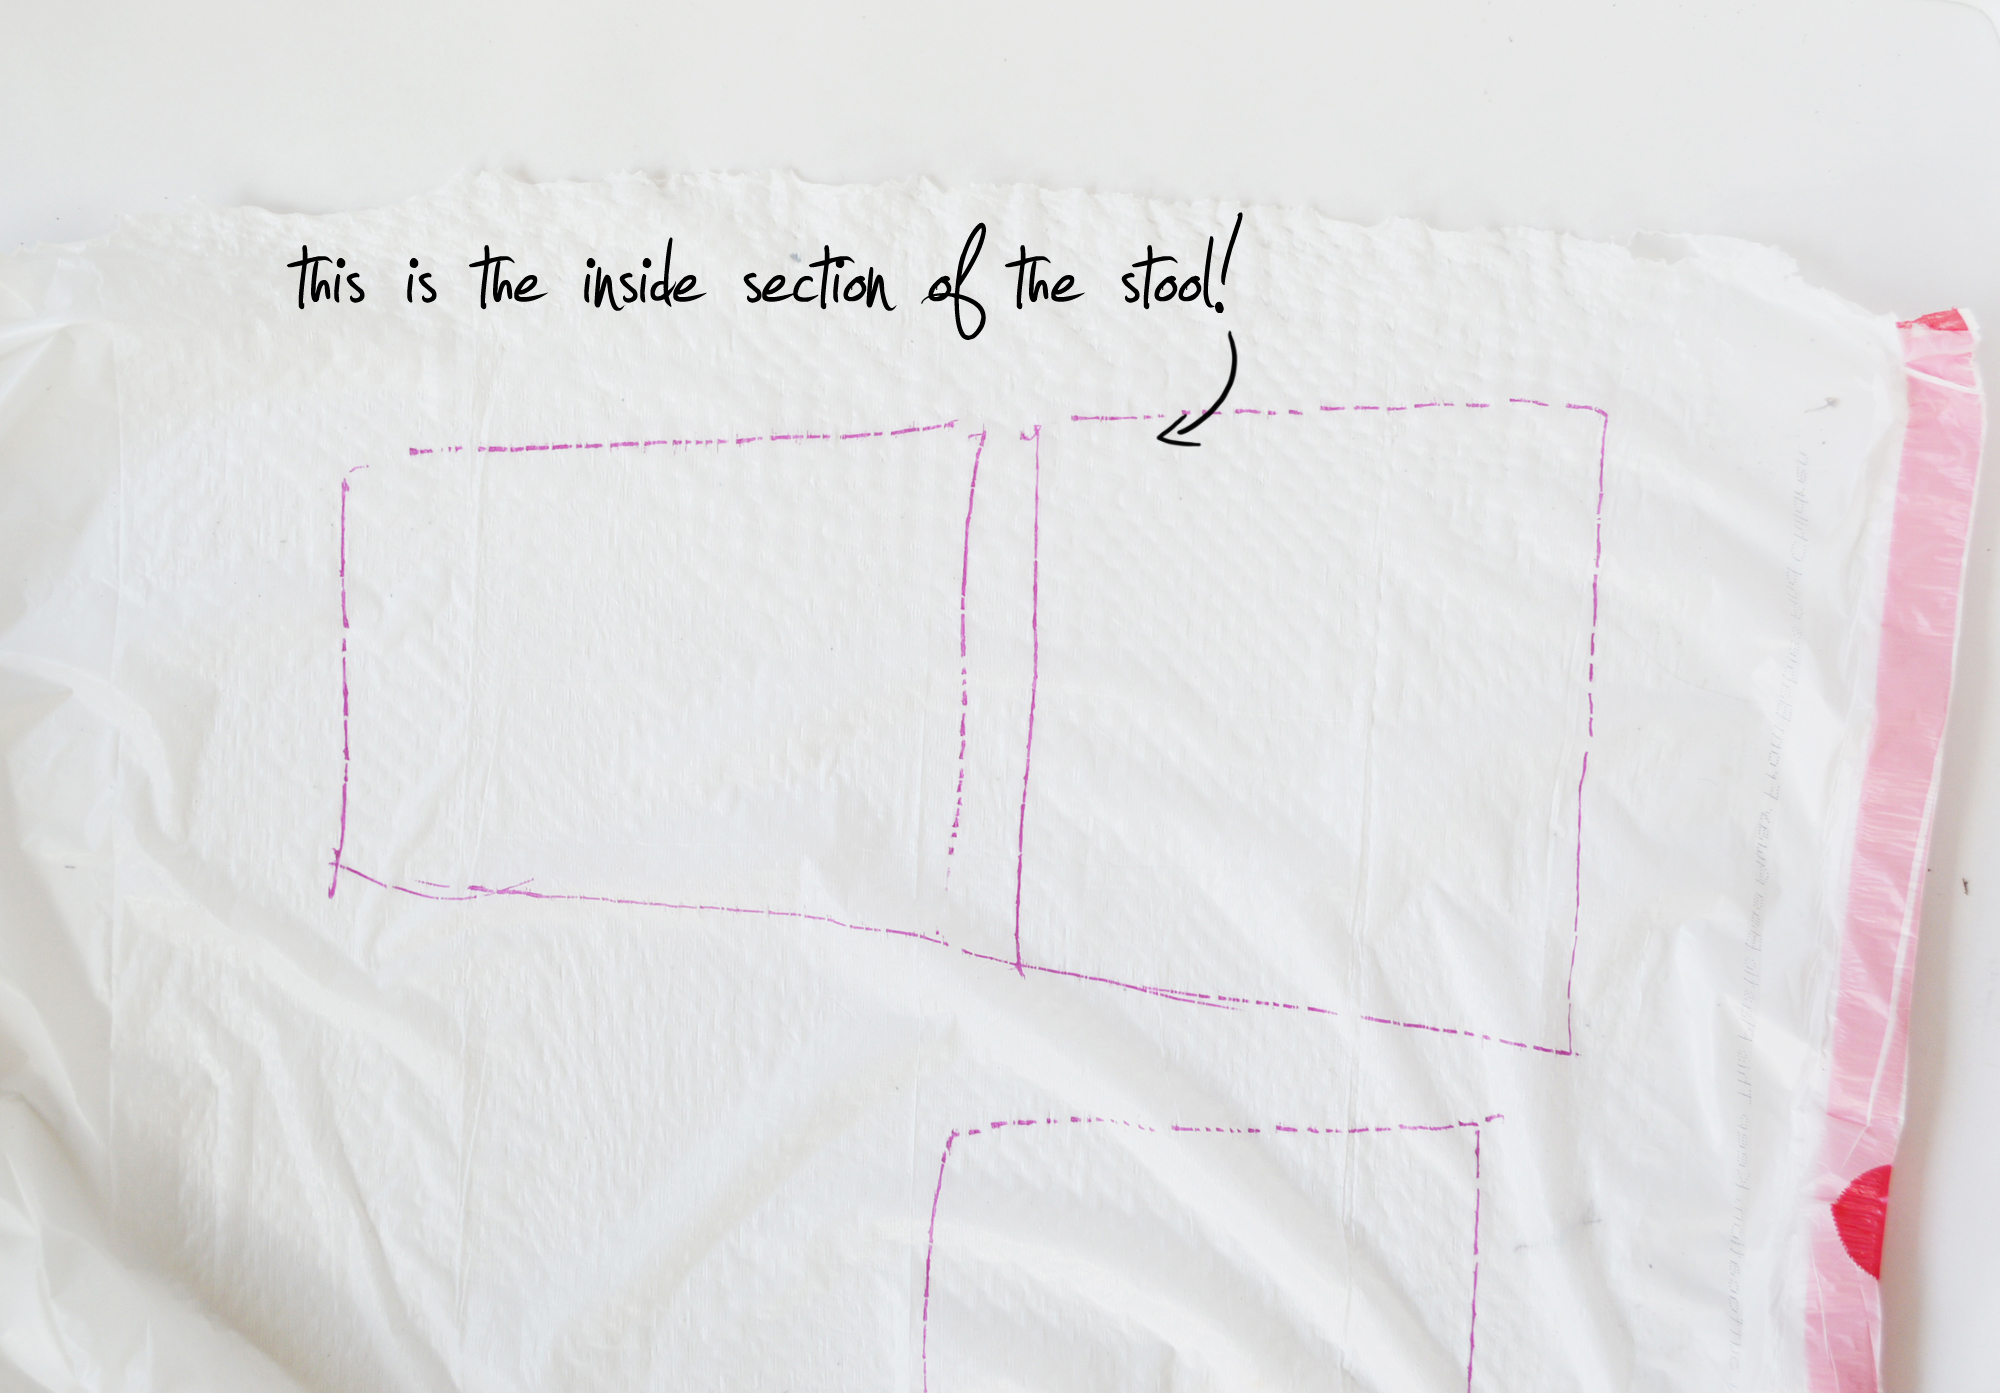
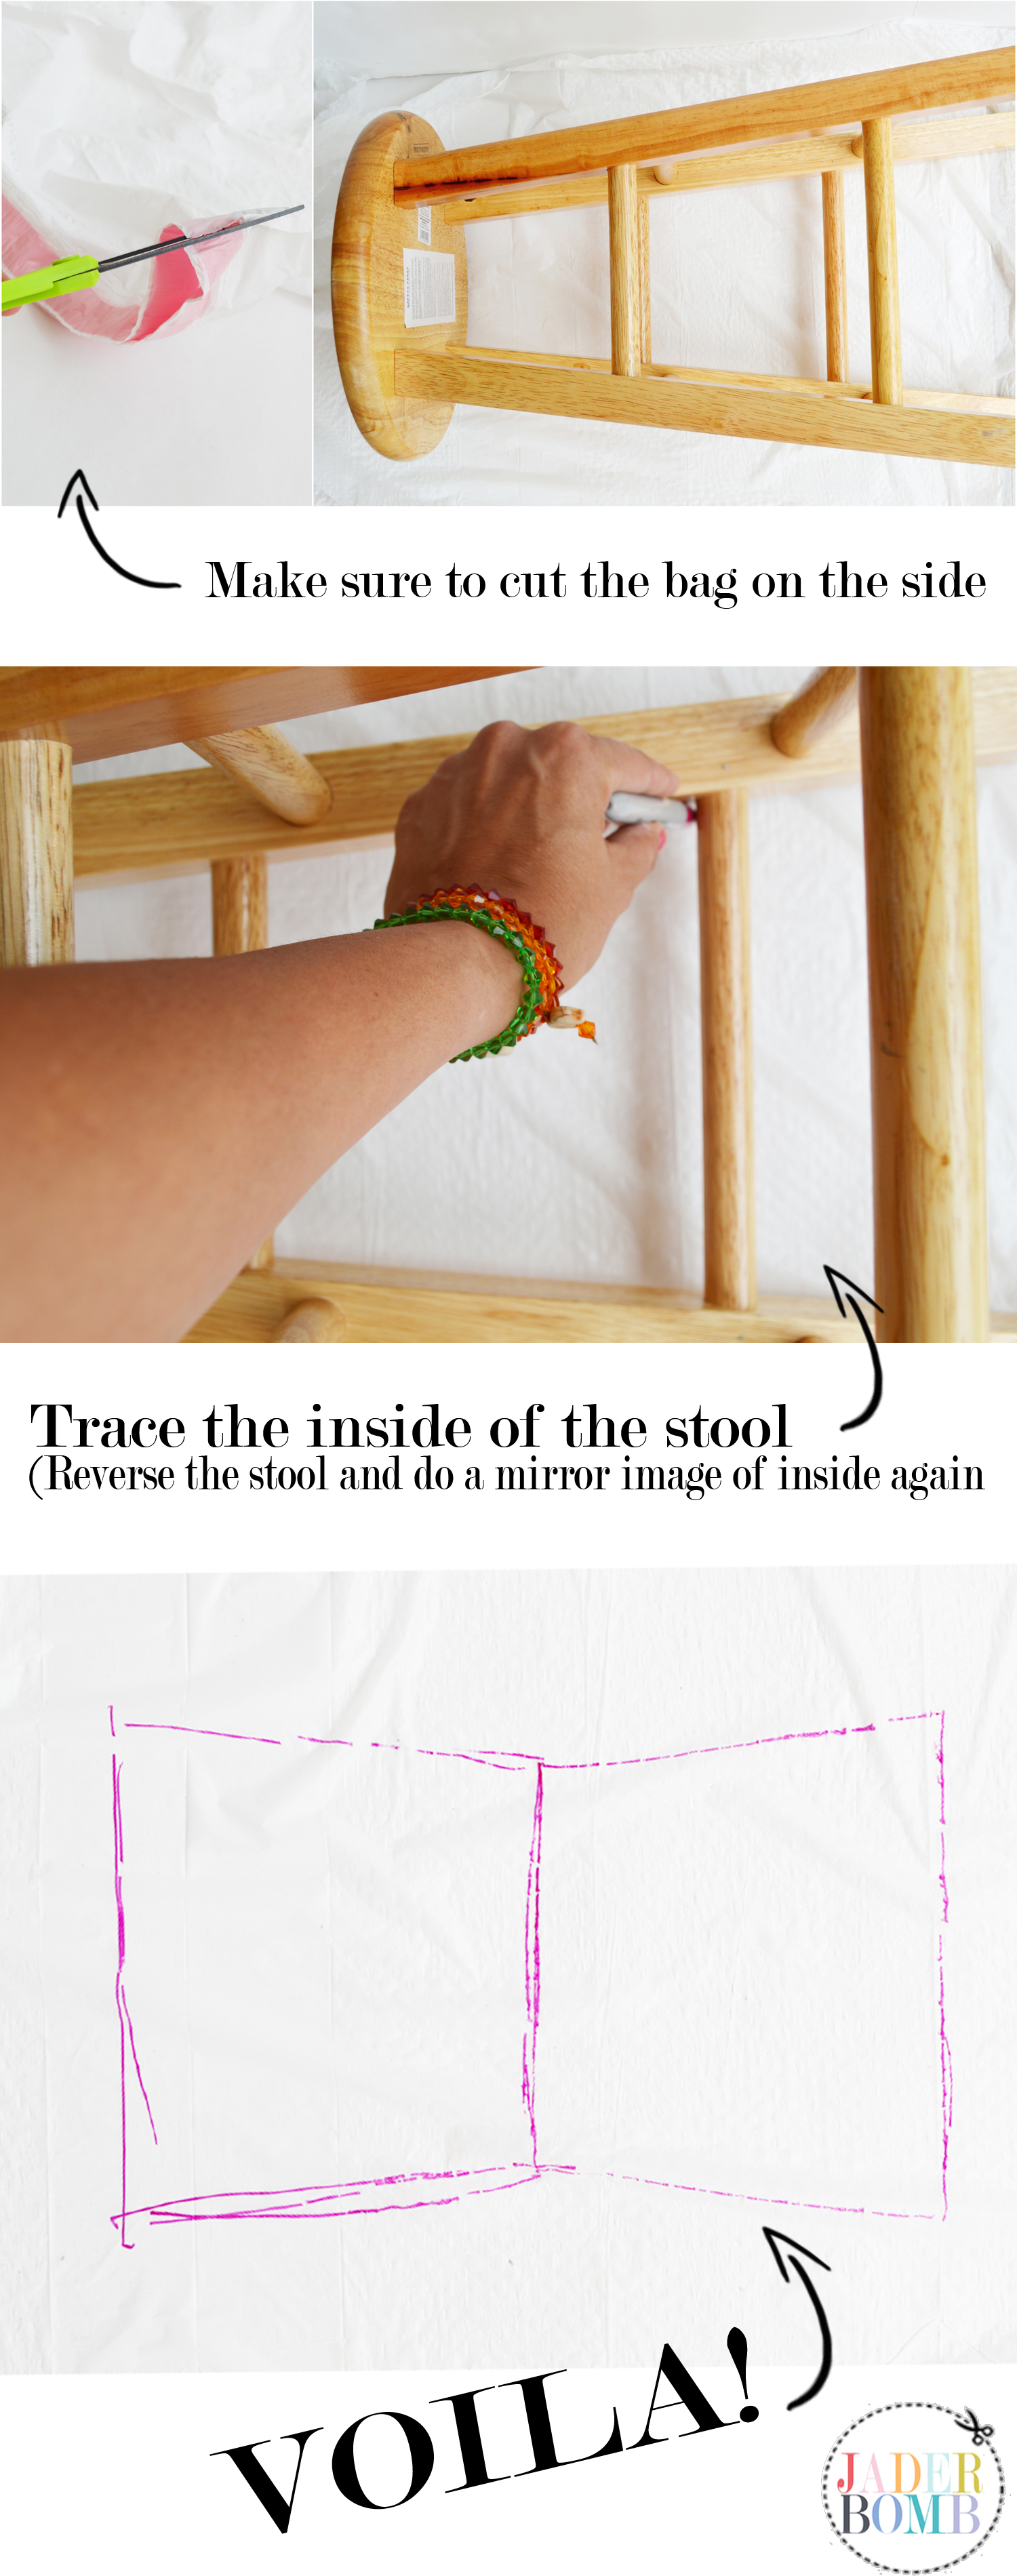
Step 1: Cut the sides of your trash bag and lay it out on a flat surface.
Step 2: Lay your stool on it’s side. It does not matter which side you work with initially.
Step 3: Grab a marker and trace out the “inside” of the side section.
Step 4: Reverse the stool and trace the same section like below.
Step 5: Cover the entire section of your outline with duck tape. It’s ok if the tape runs over the outlines. DSC_0958
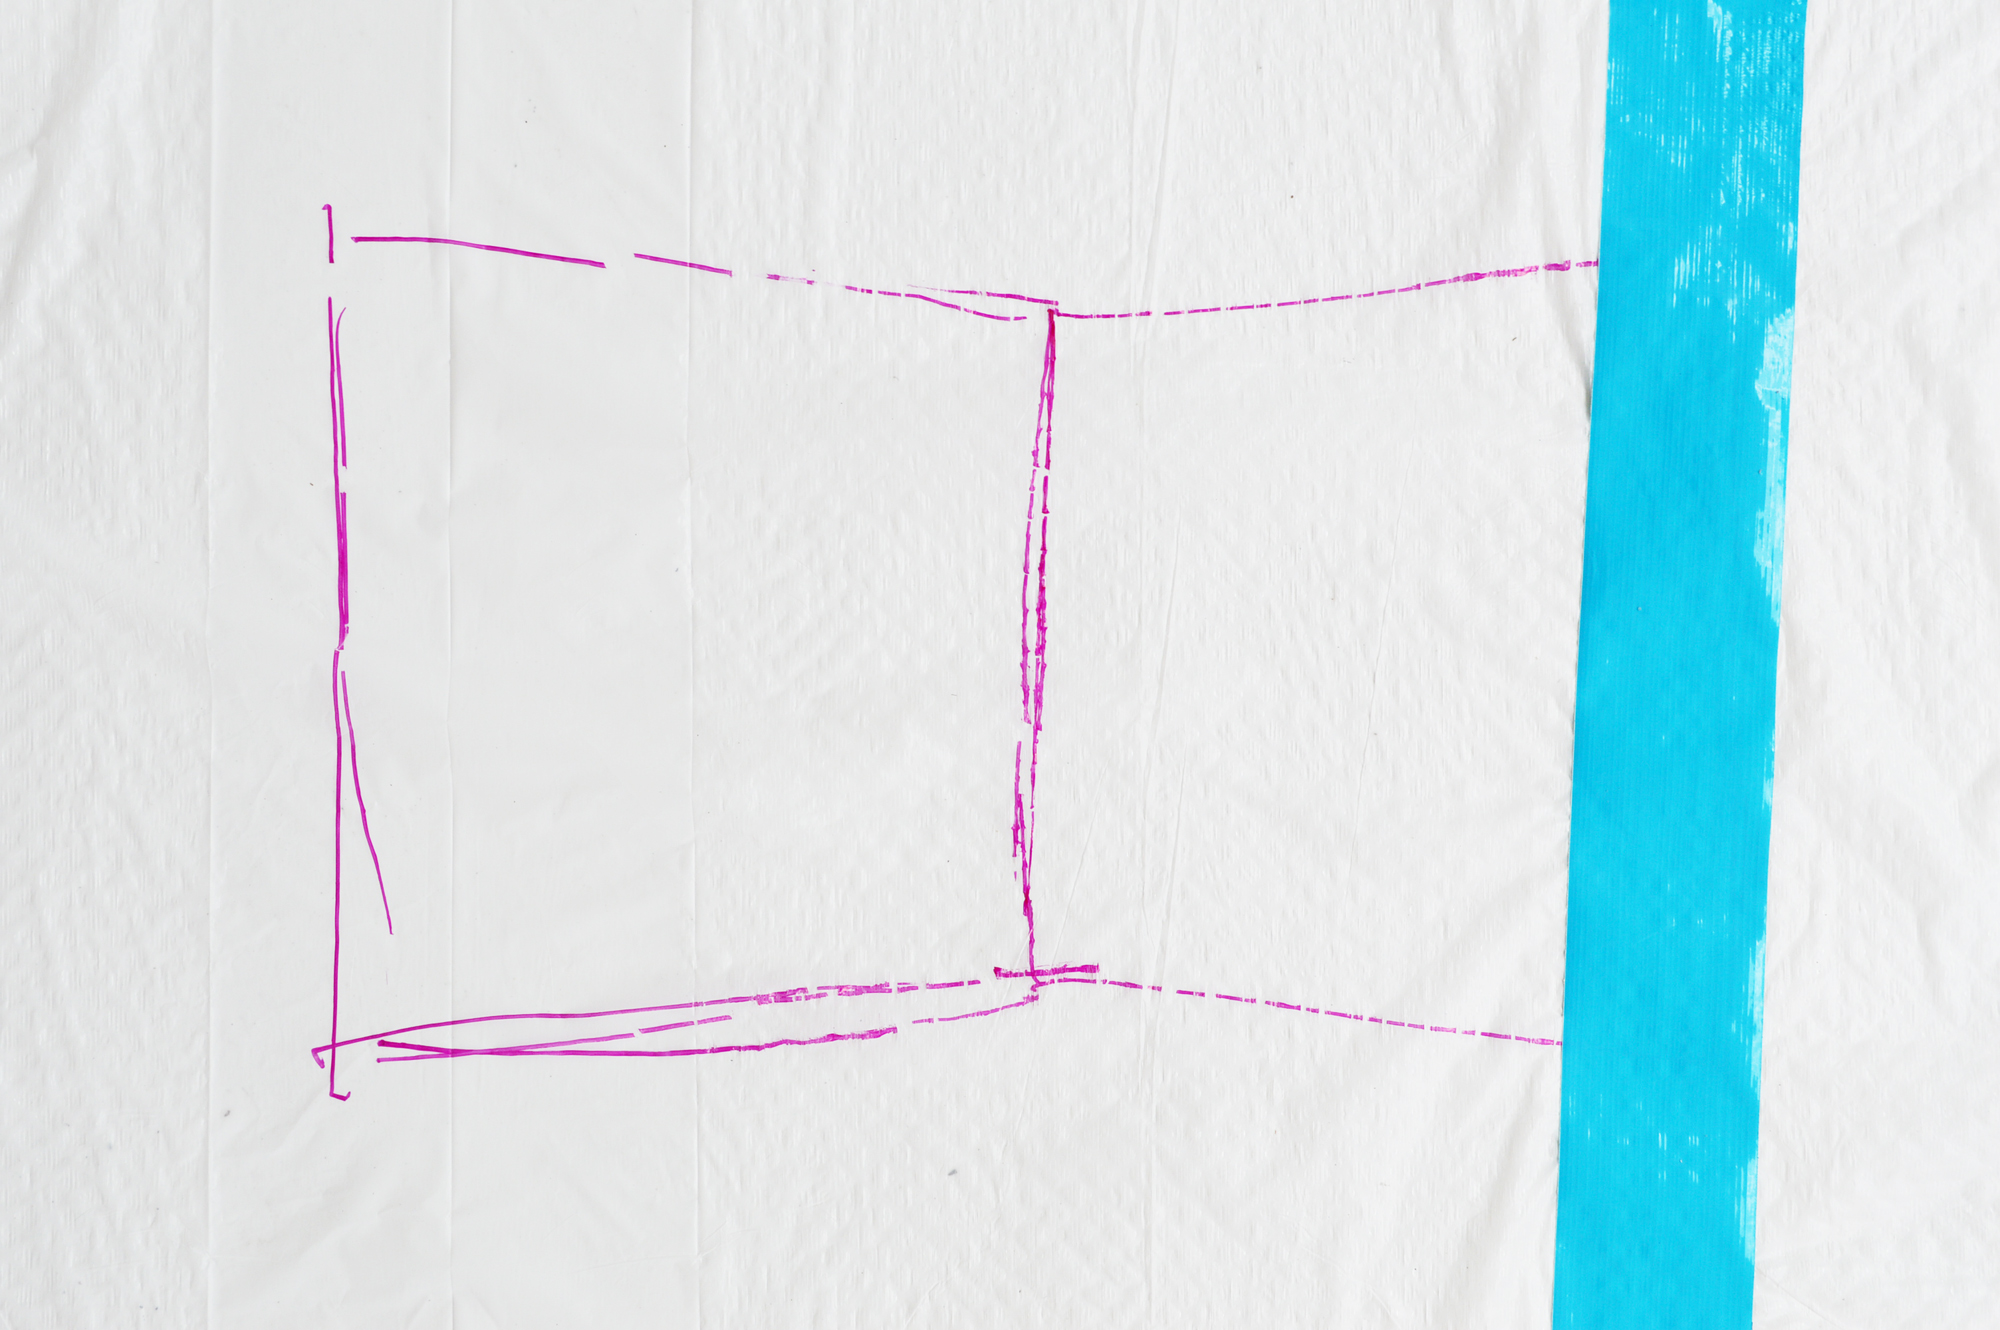
This is what it will look like when it’s done completely filled.

duck tape crafts
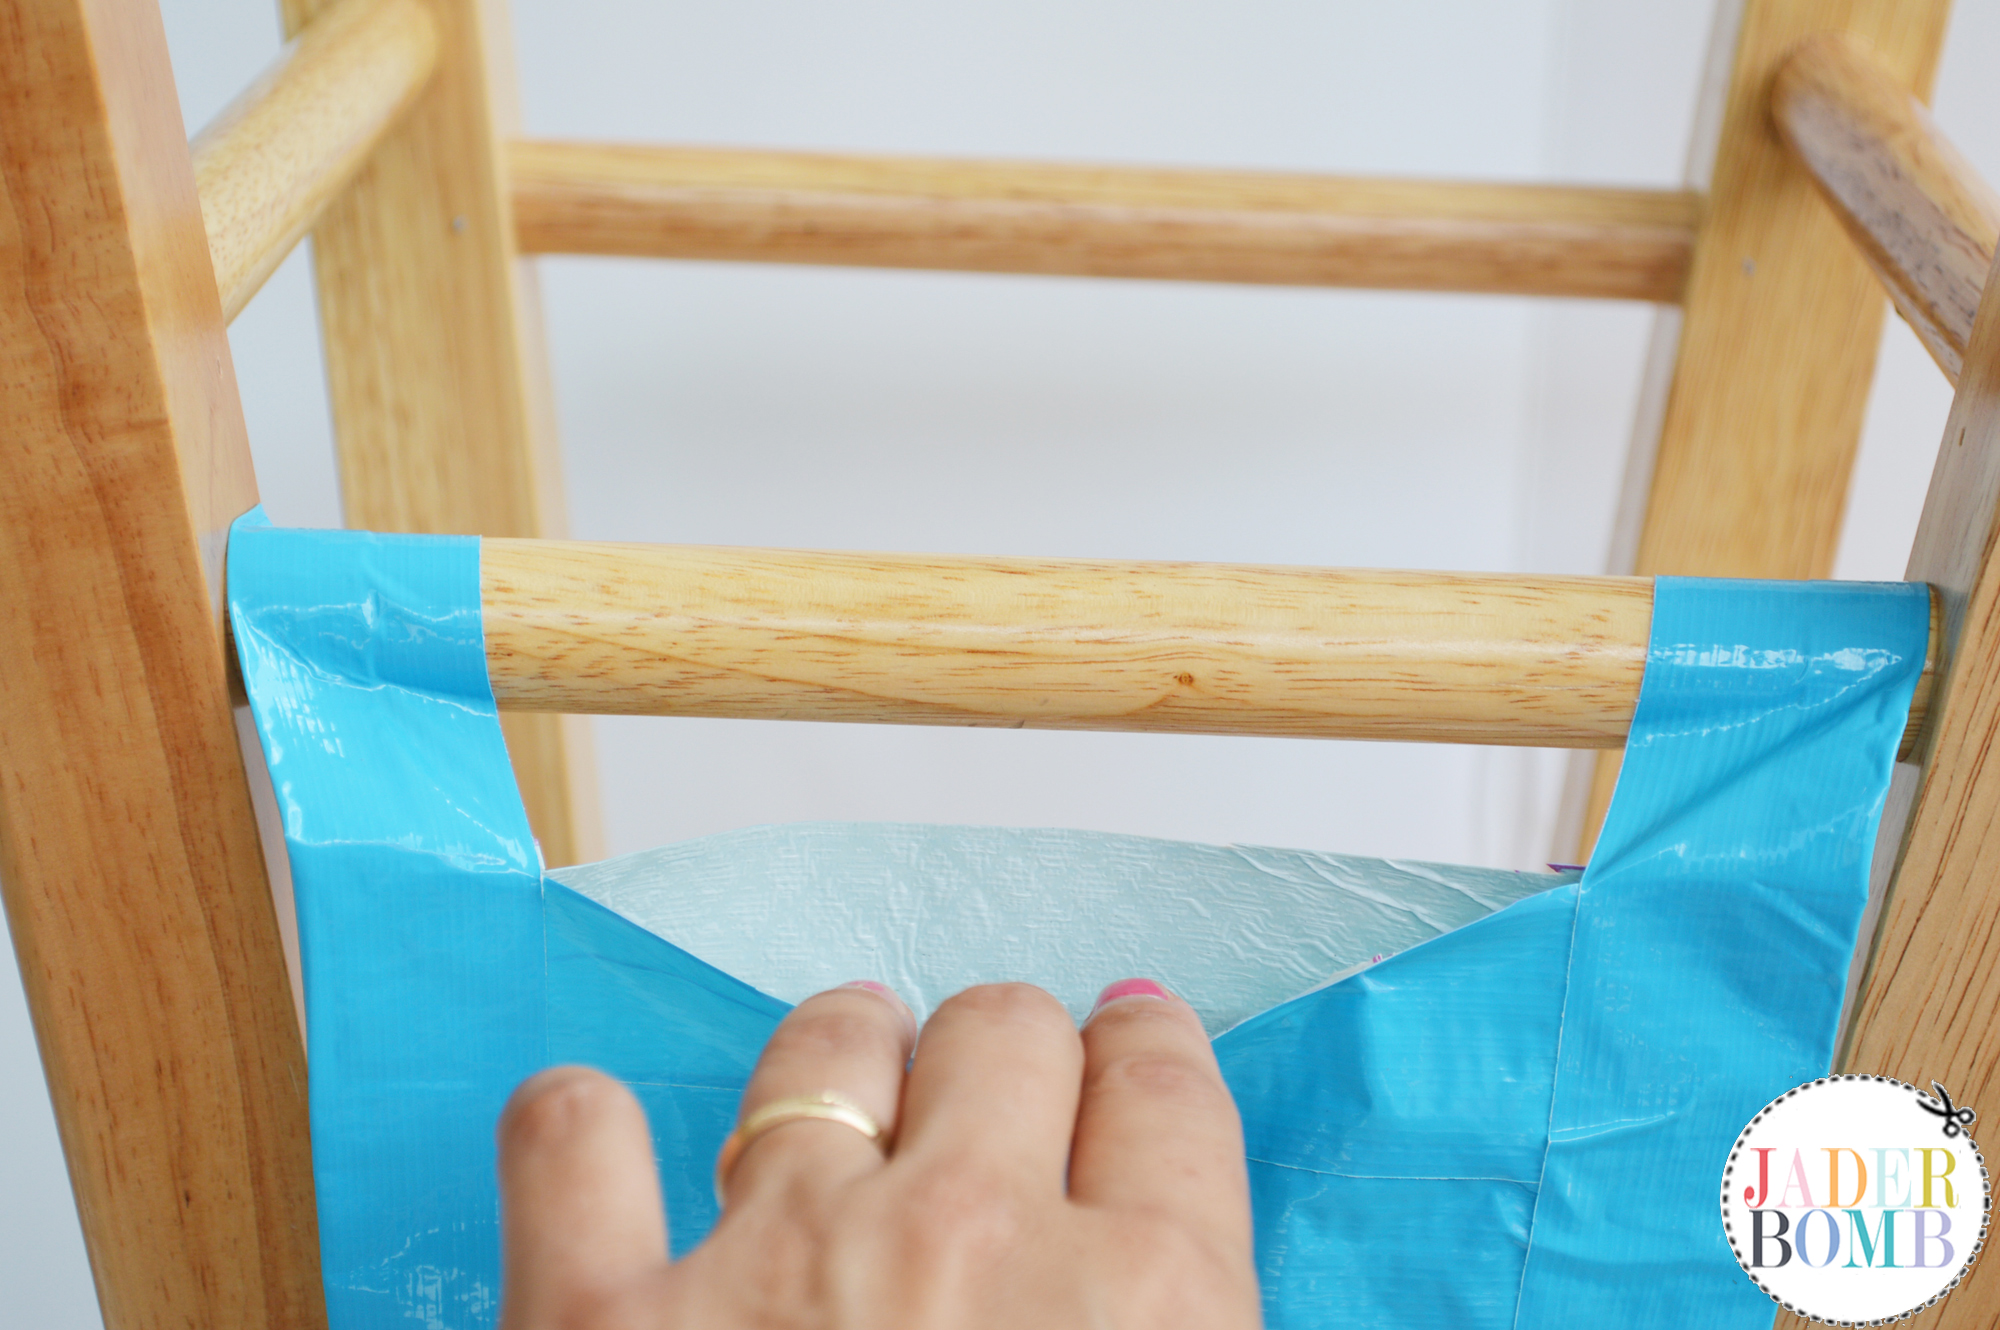
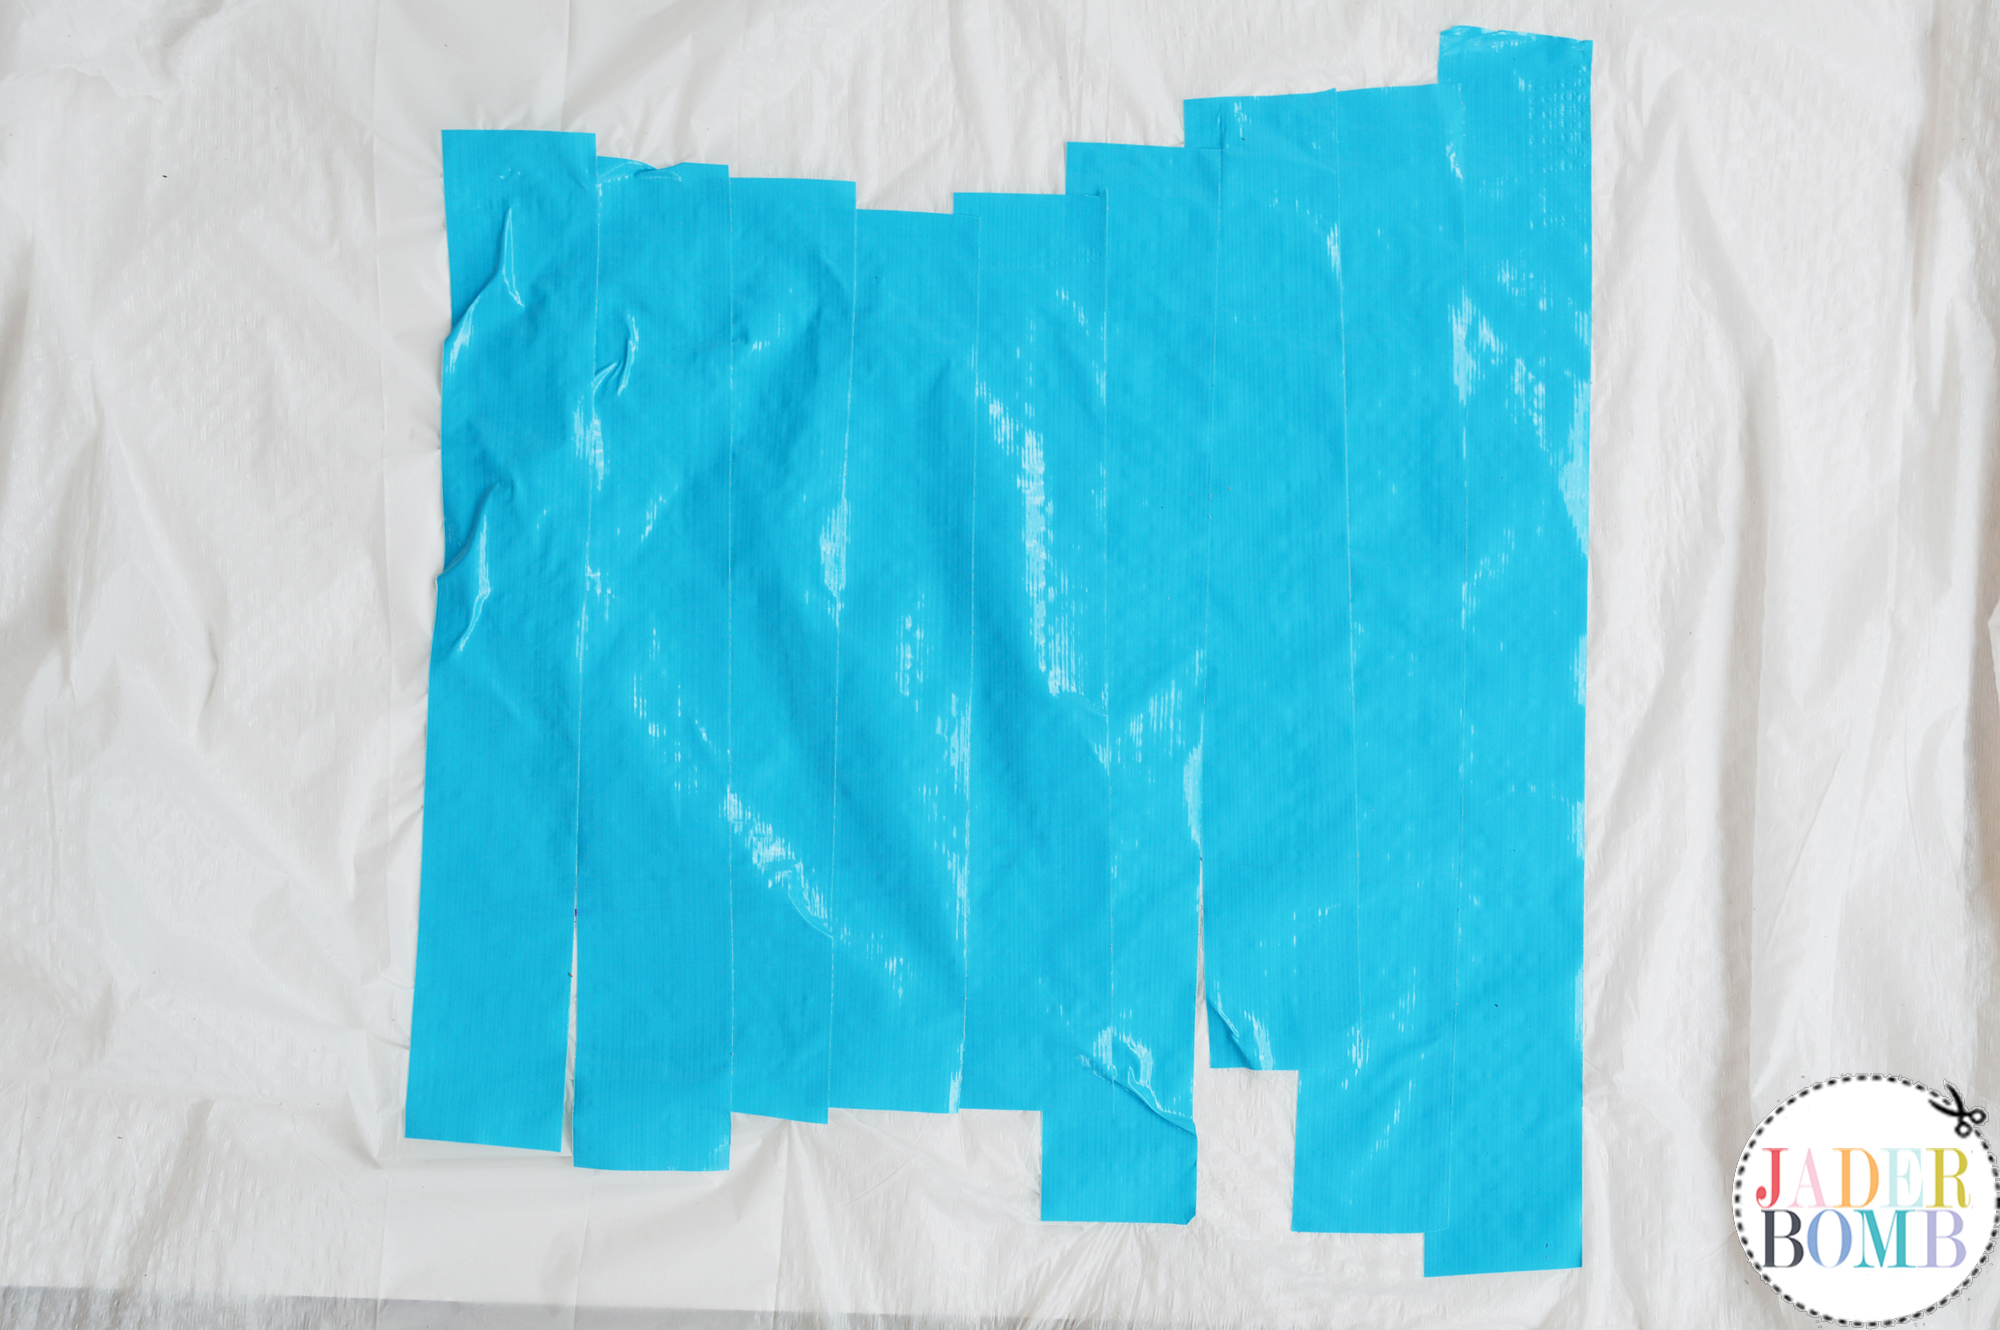
Step 6: Flip your trash bag over. You will still see your sharpie line even when flipped over. Kinda cool huh!
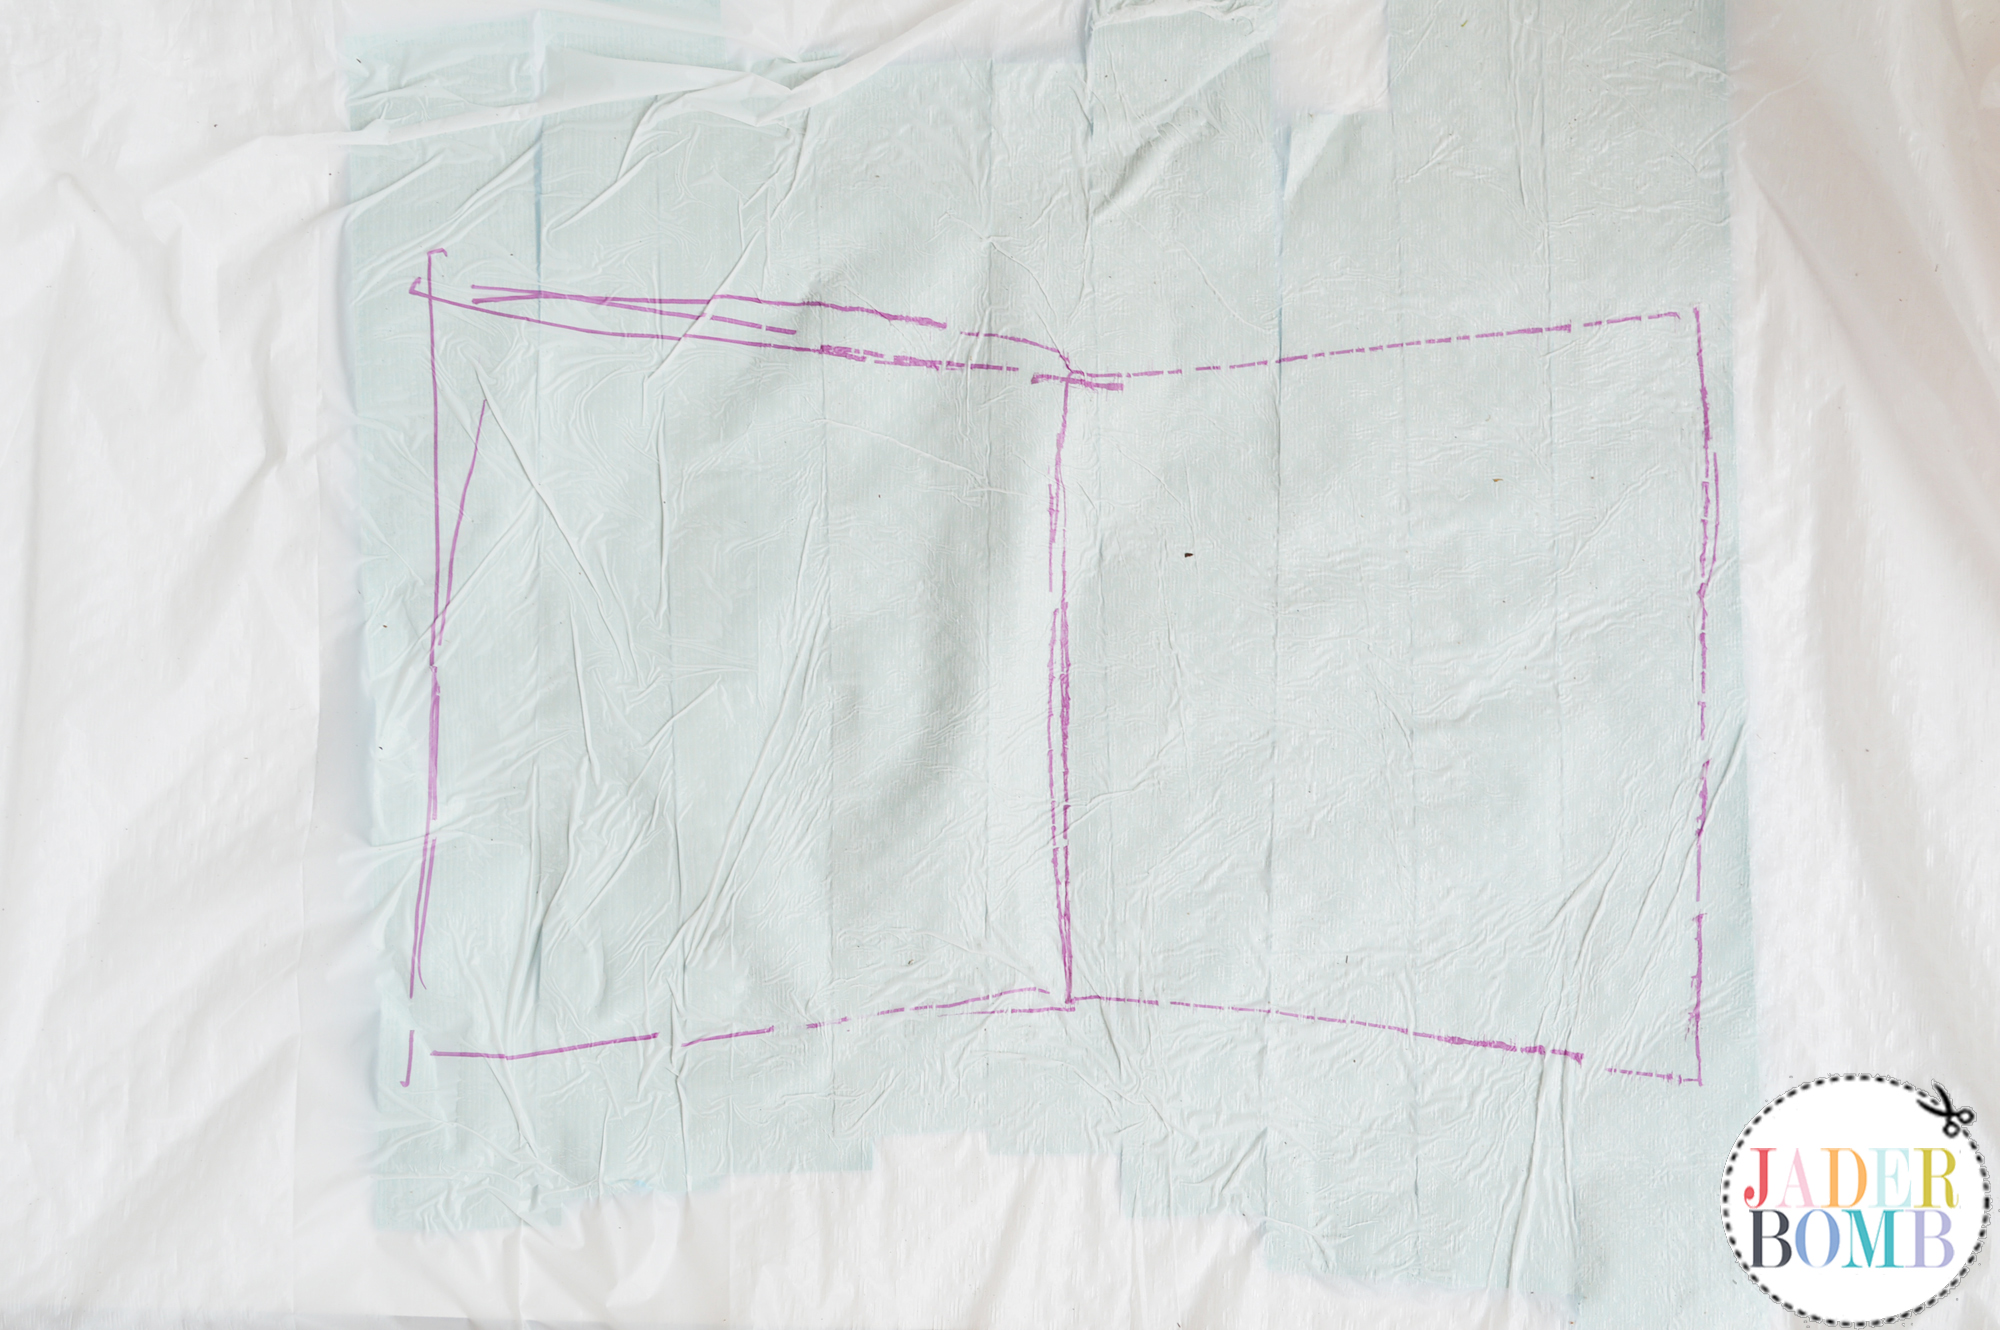
duck tape craftsStep 7: Grab your Fiskars duck edition scissors and cut along the lines.  duck tape pouch

duck tape fashion
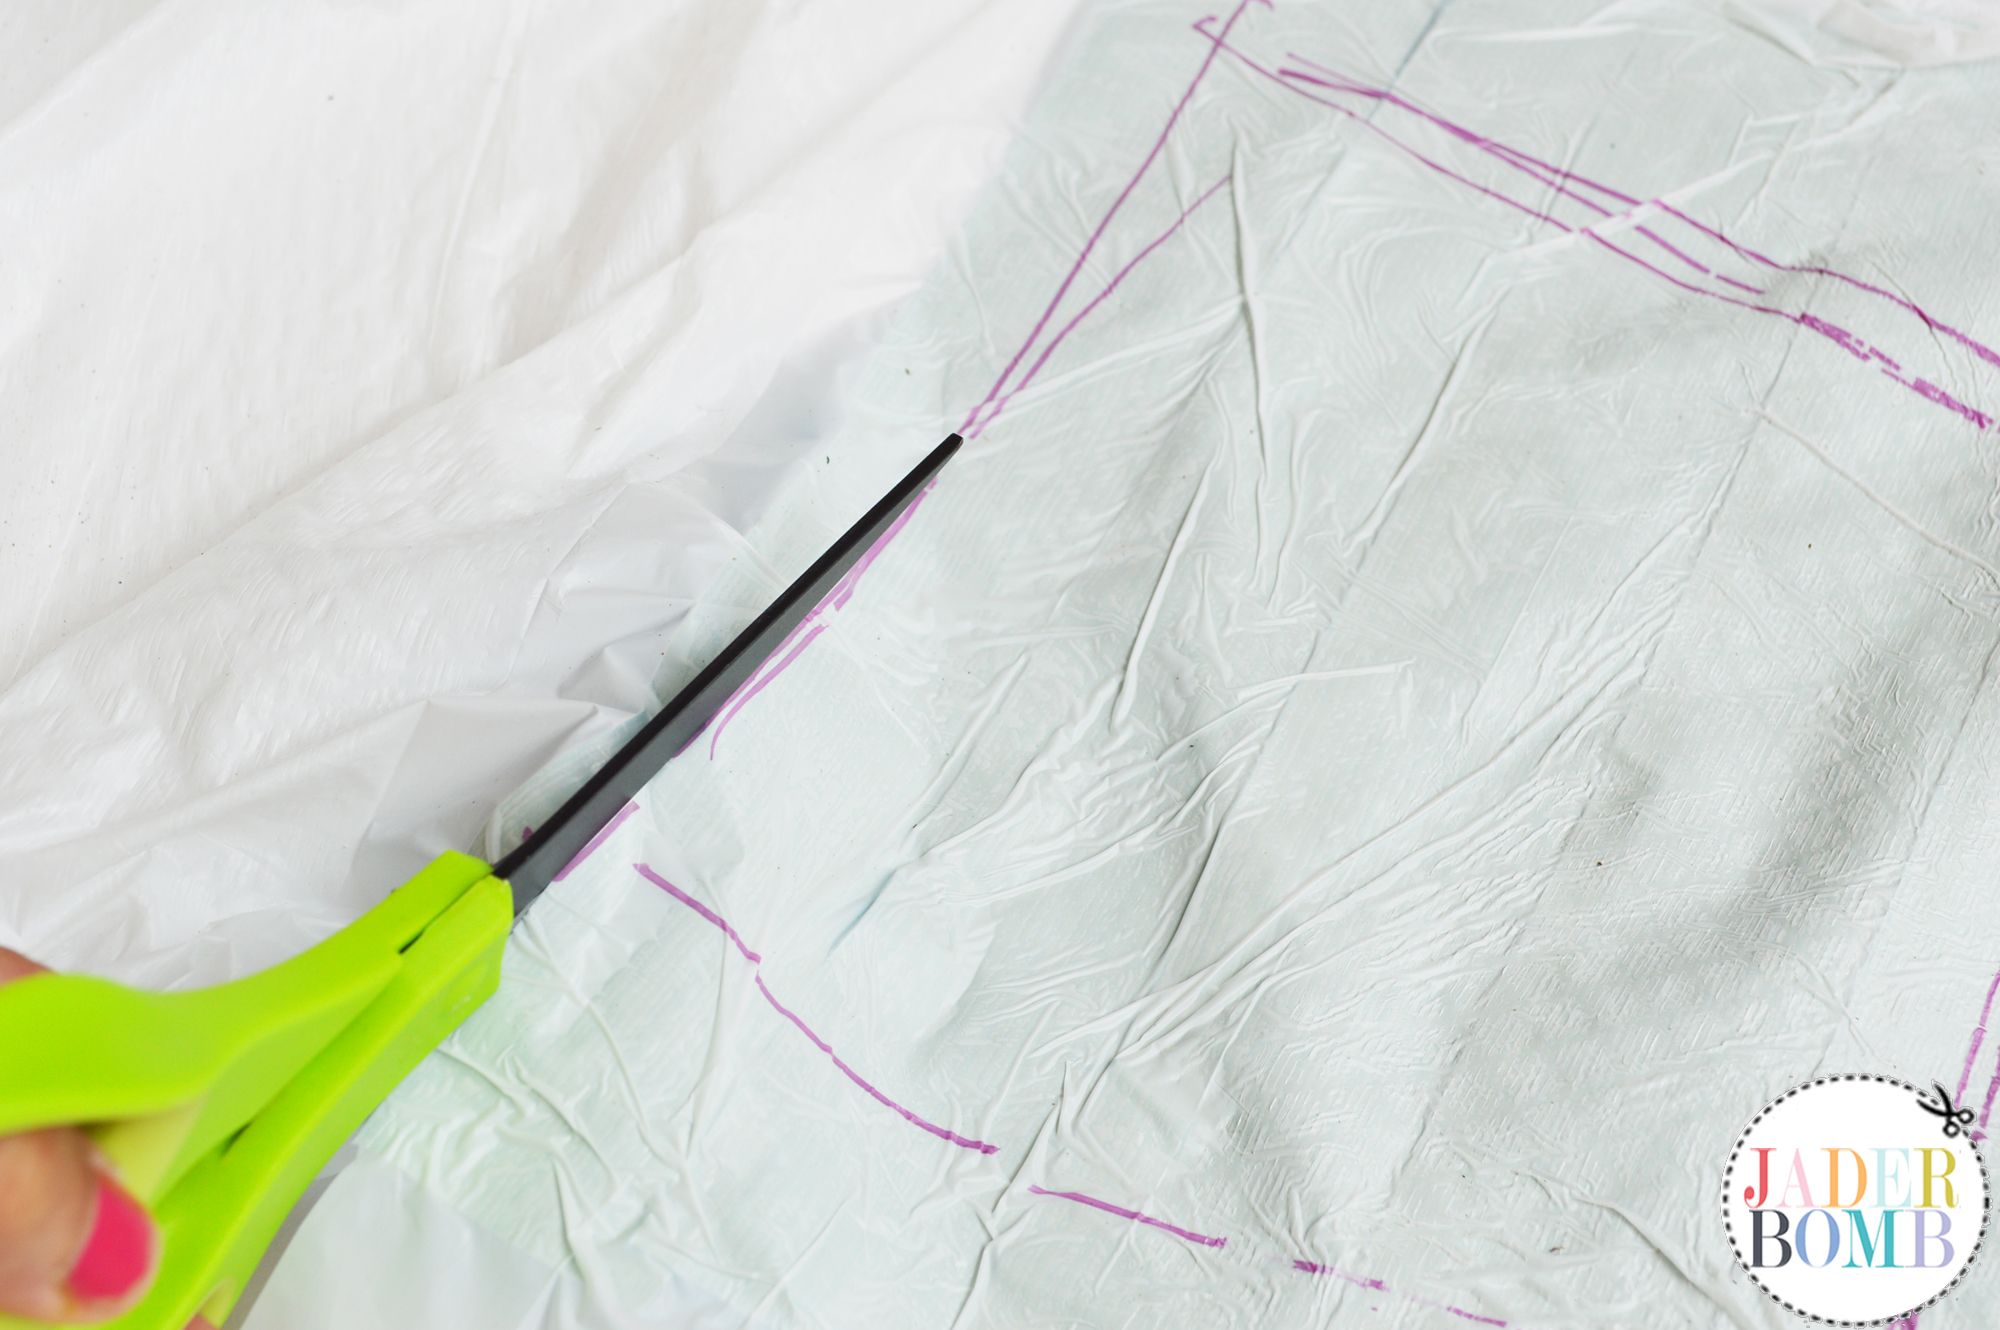
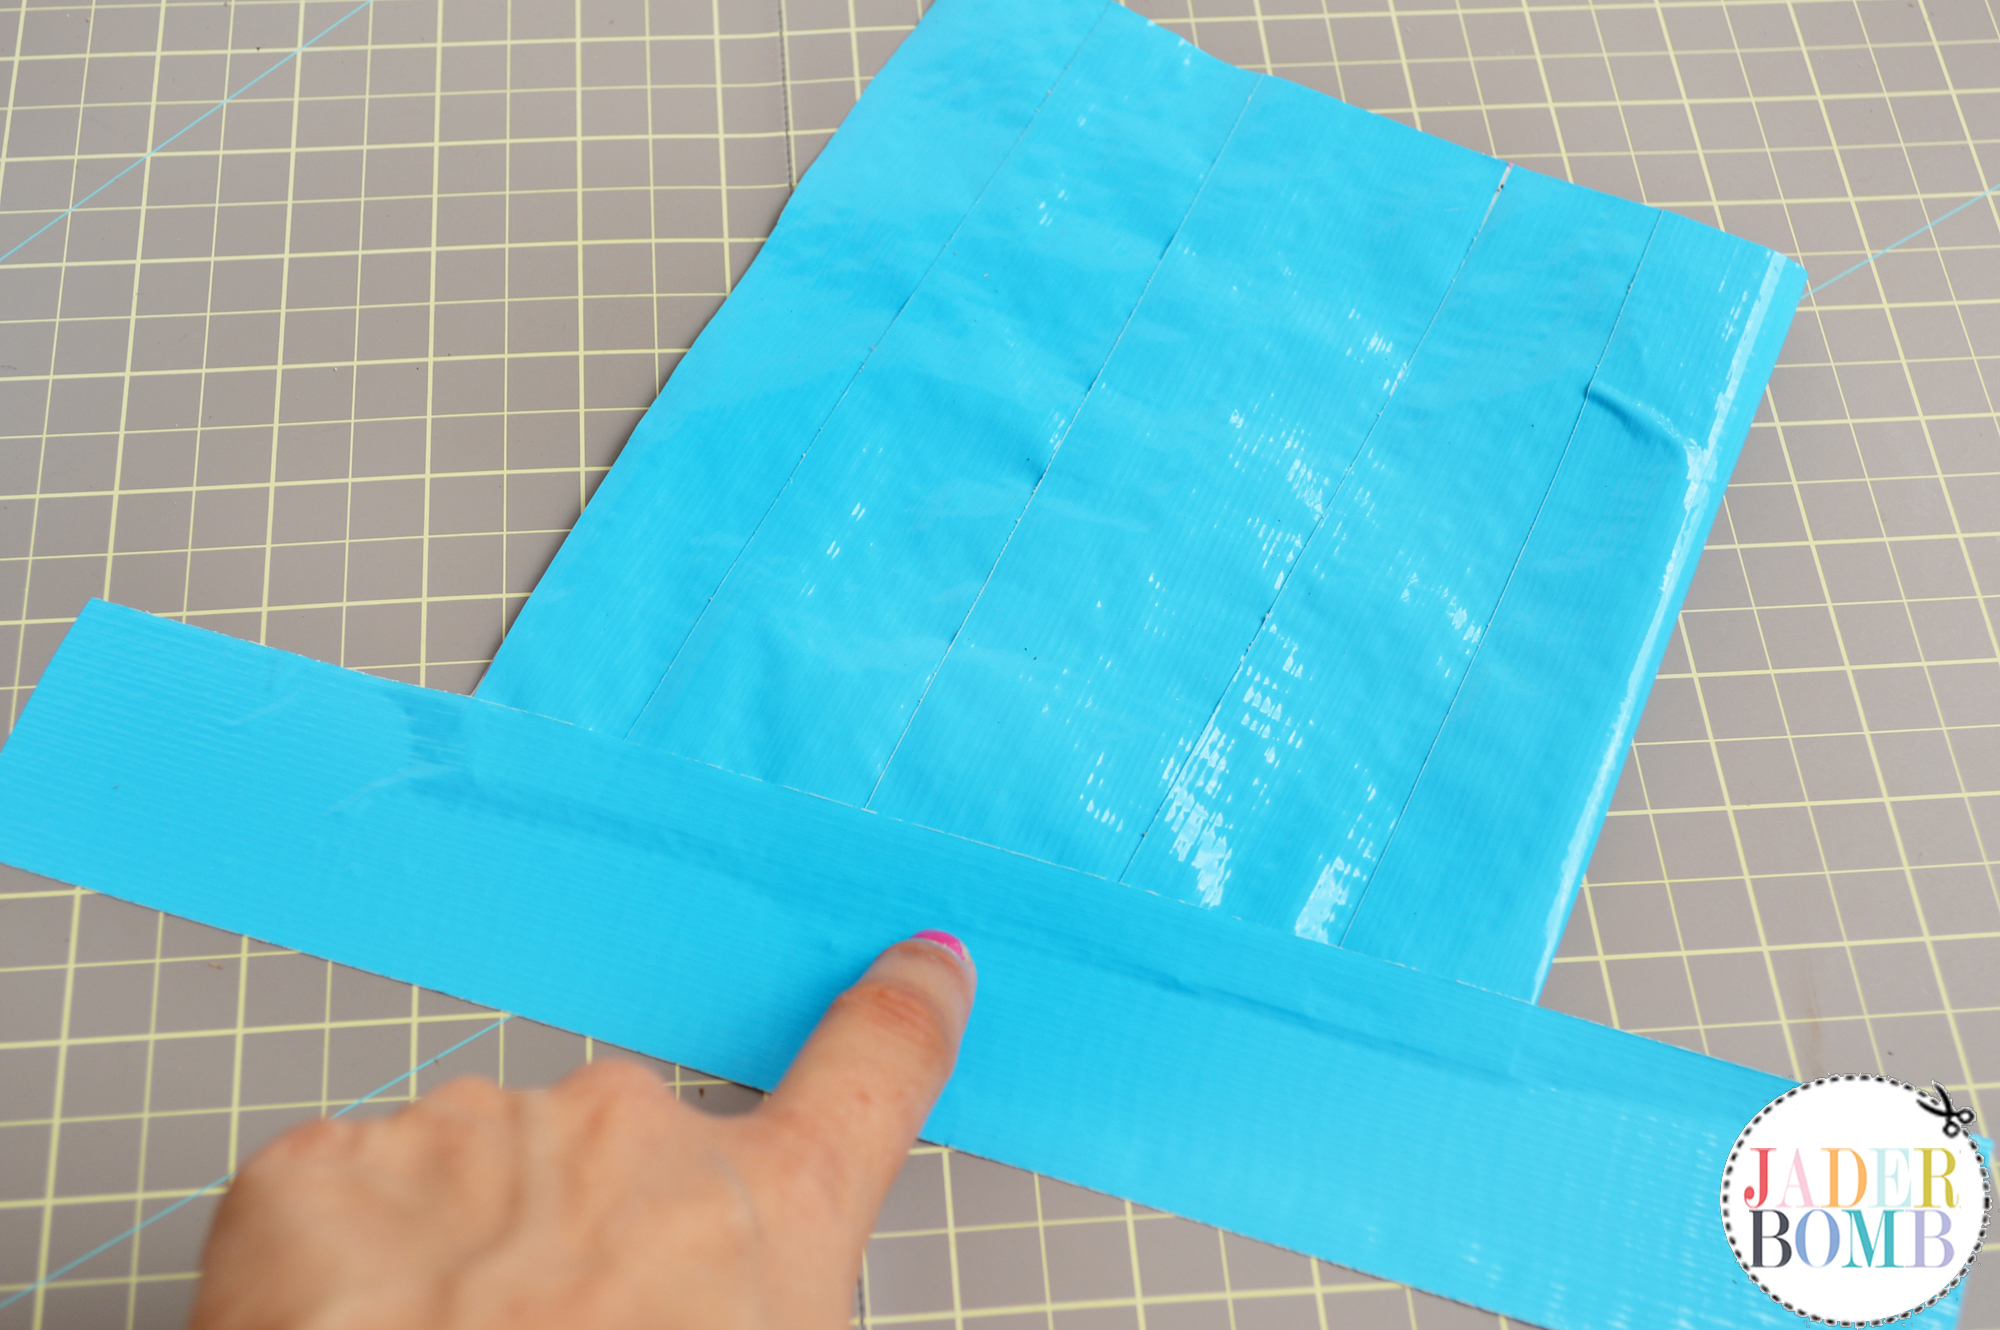
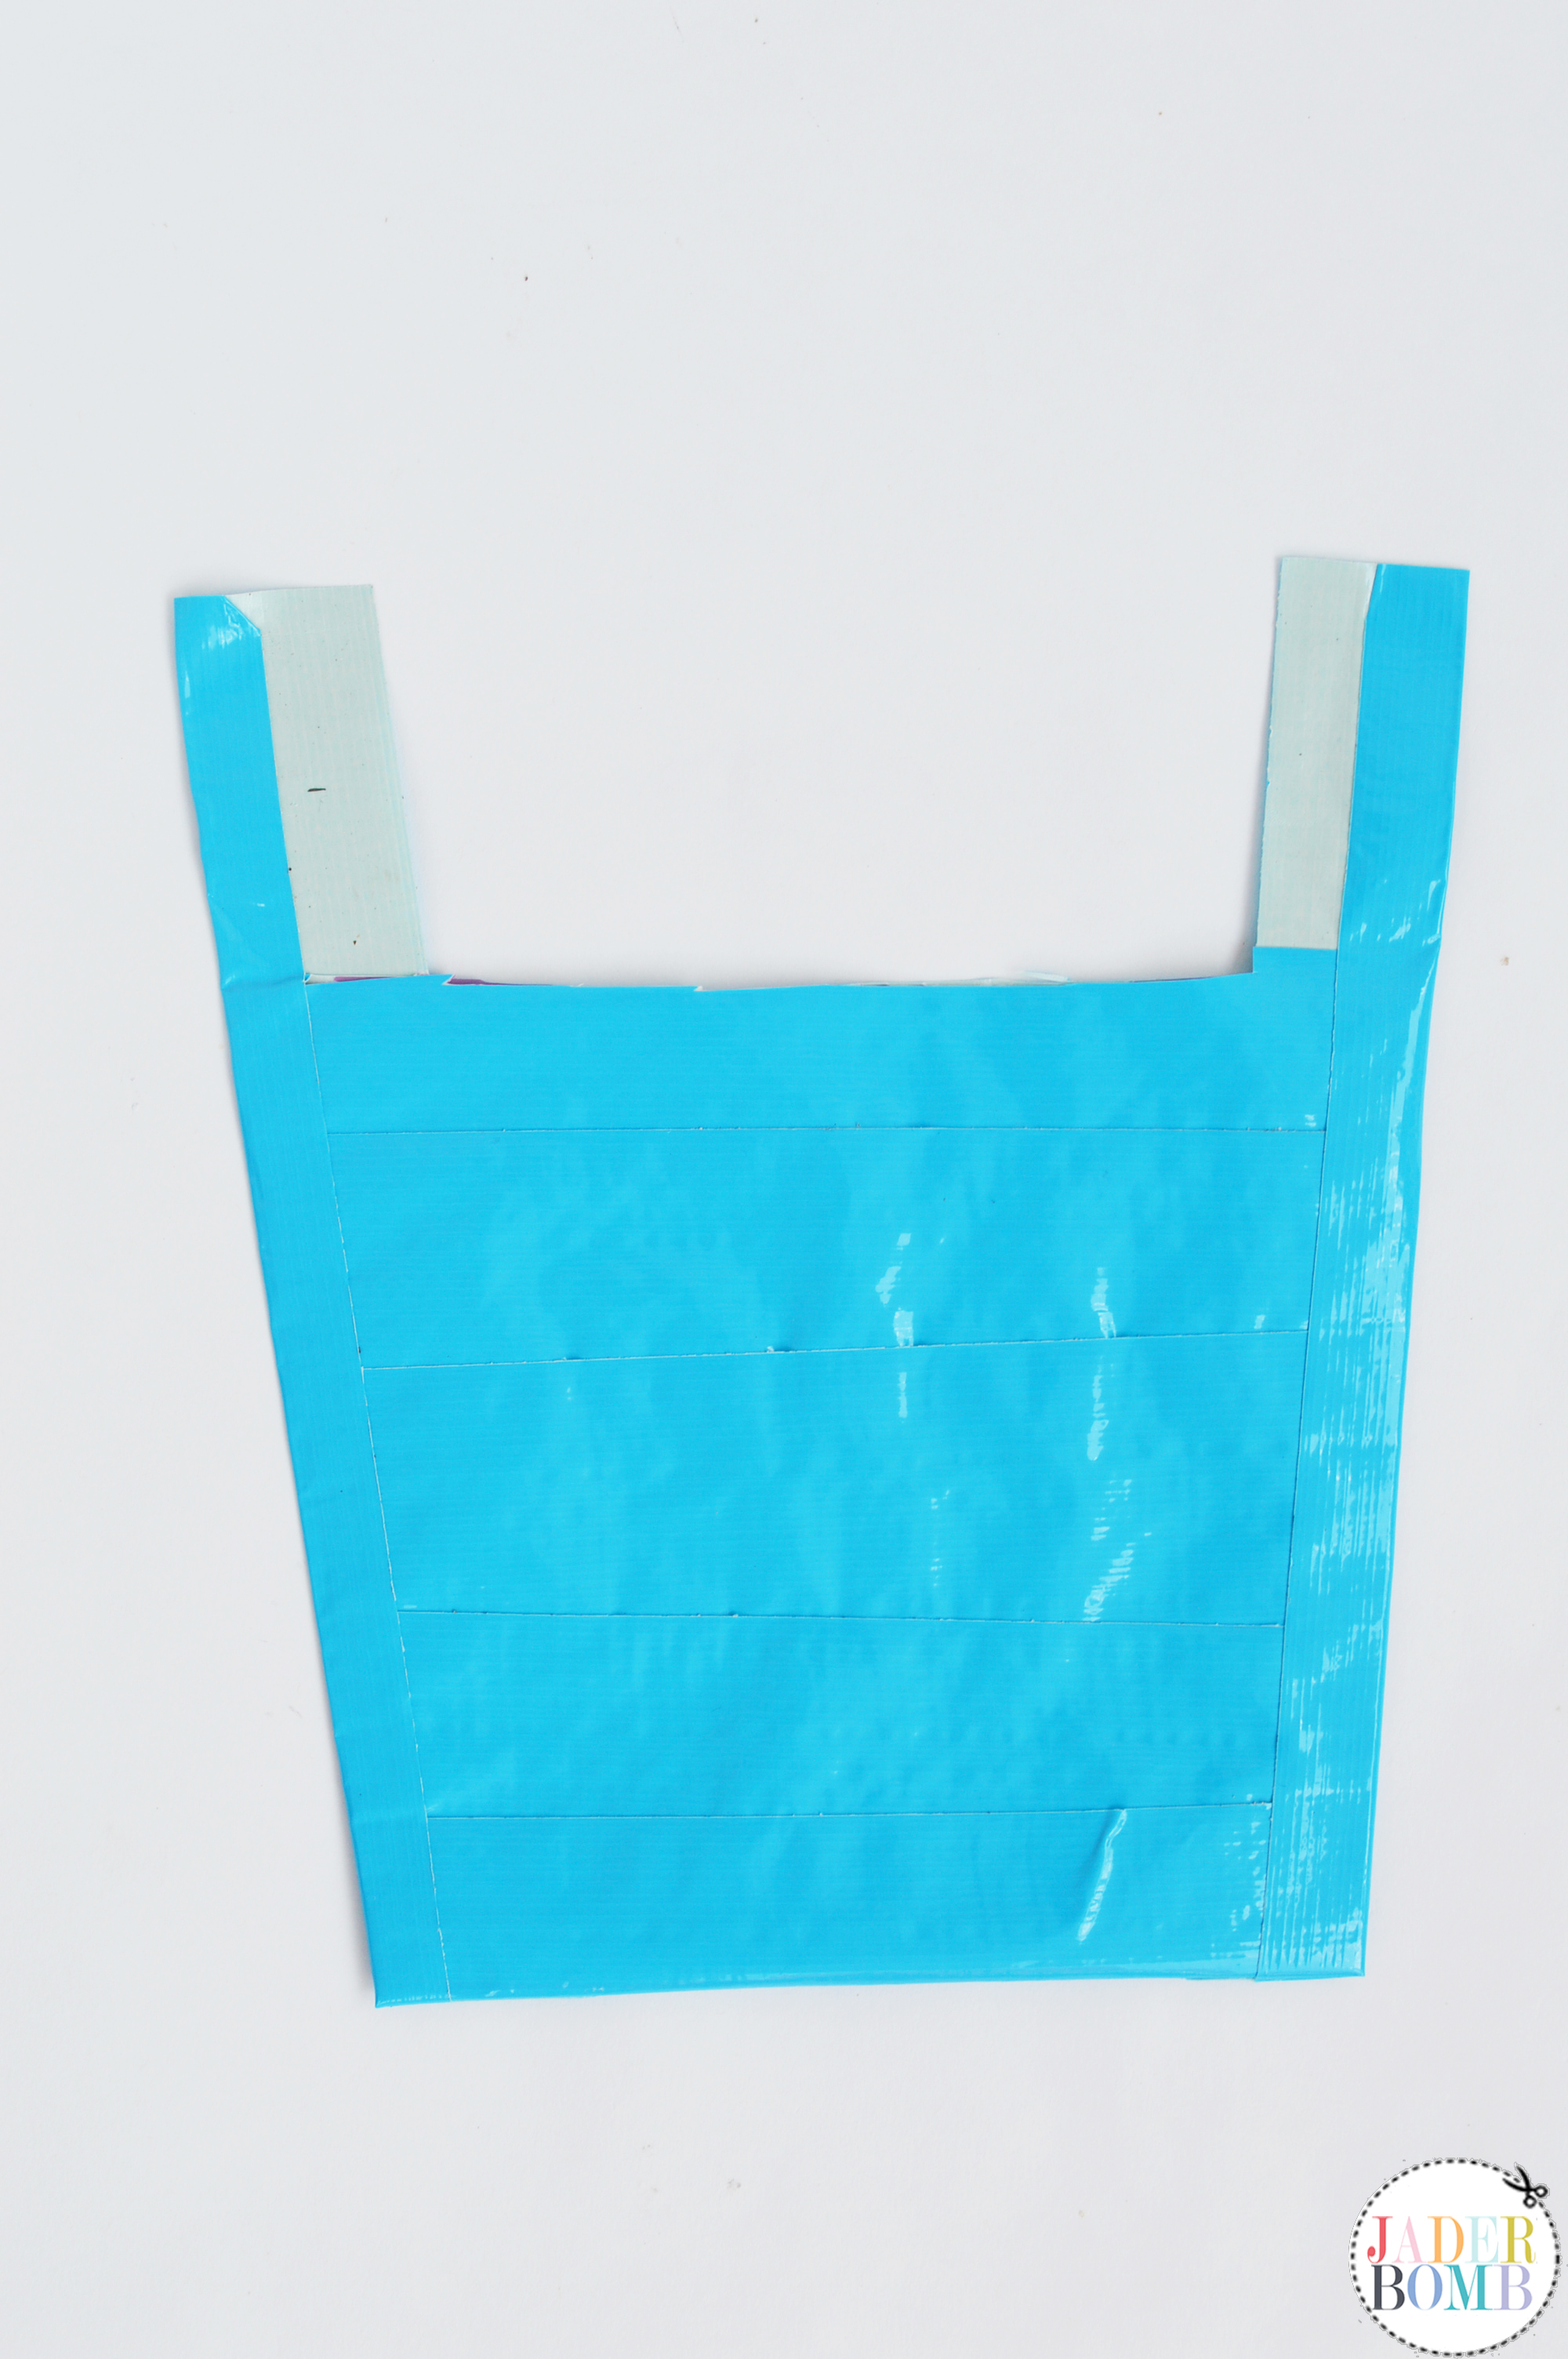
Step 8: Fold your cut out in half. This is the start of a bag that will hang on the stool.
bags made with duck tape
Step 9: Place a strip of duck tape along the side of the bag leaving enough hanging over the edge to fold on the other side. duck tape bag

Step 10: Cut off the excess along the “bottom” of the bag. DO NOT cut the top pieces off.
fiskars duck edition scissors
These are the top straps. Because there is some sticky tape exposed we will use this to hang the bag onto the stool. plastic bag craftshanging basket diy

If you want to make a large bag do the same thing. Lay the stool out sideways and trace out the top and bottom section, twice. stool ideas
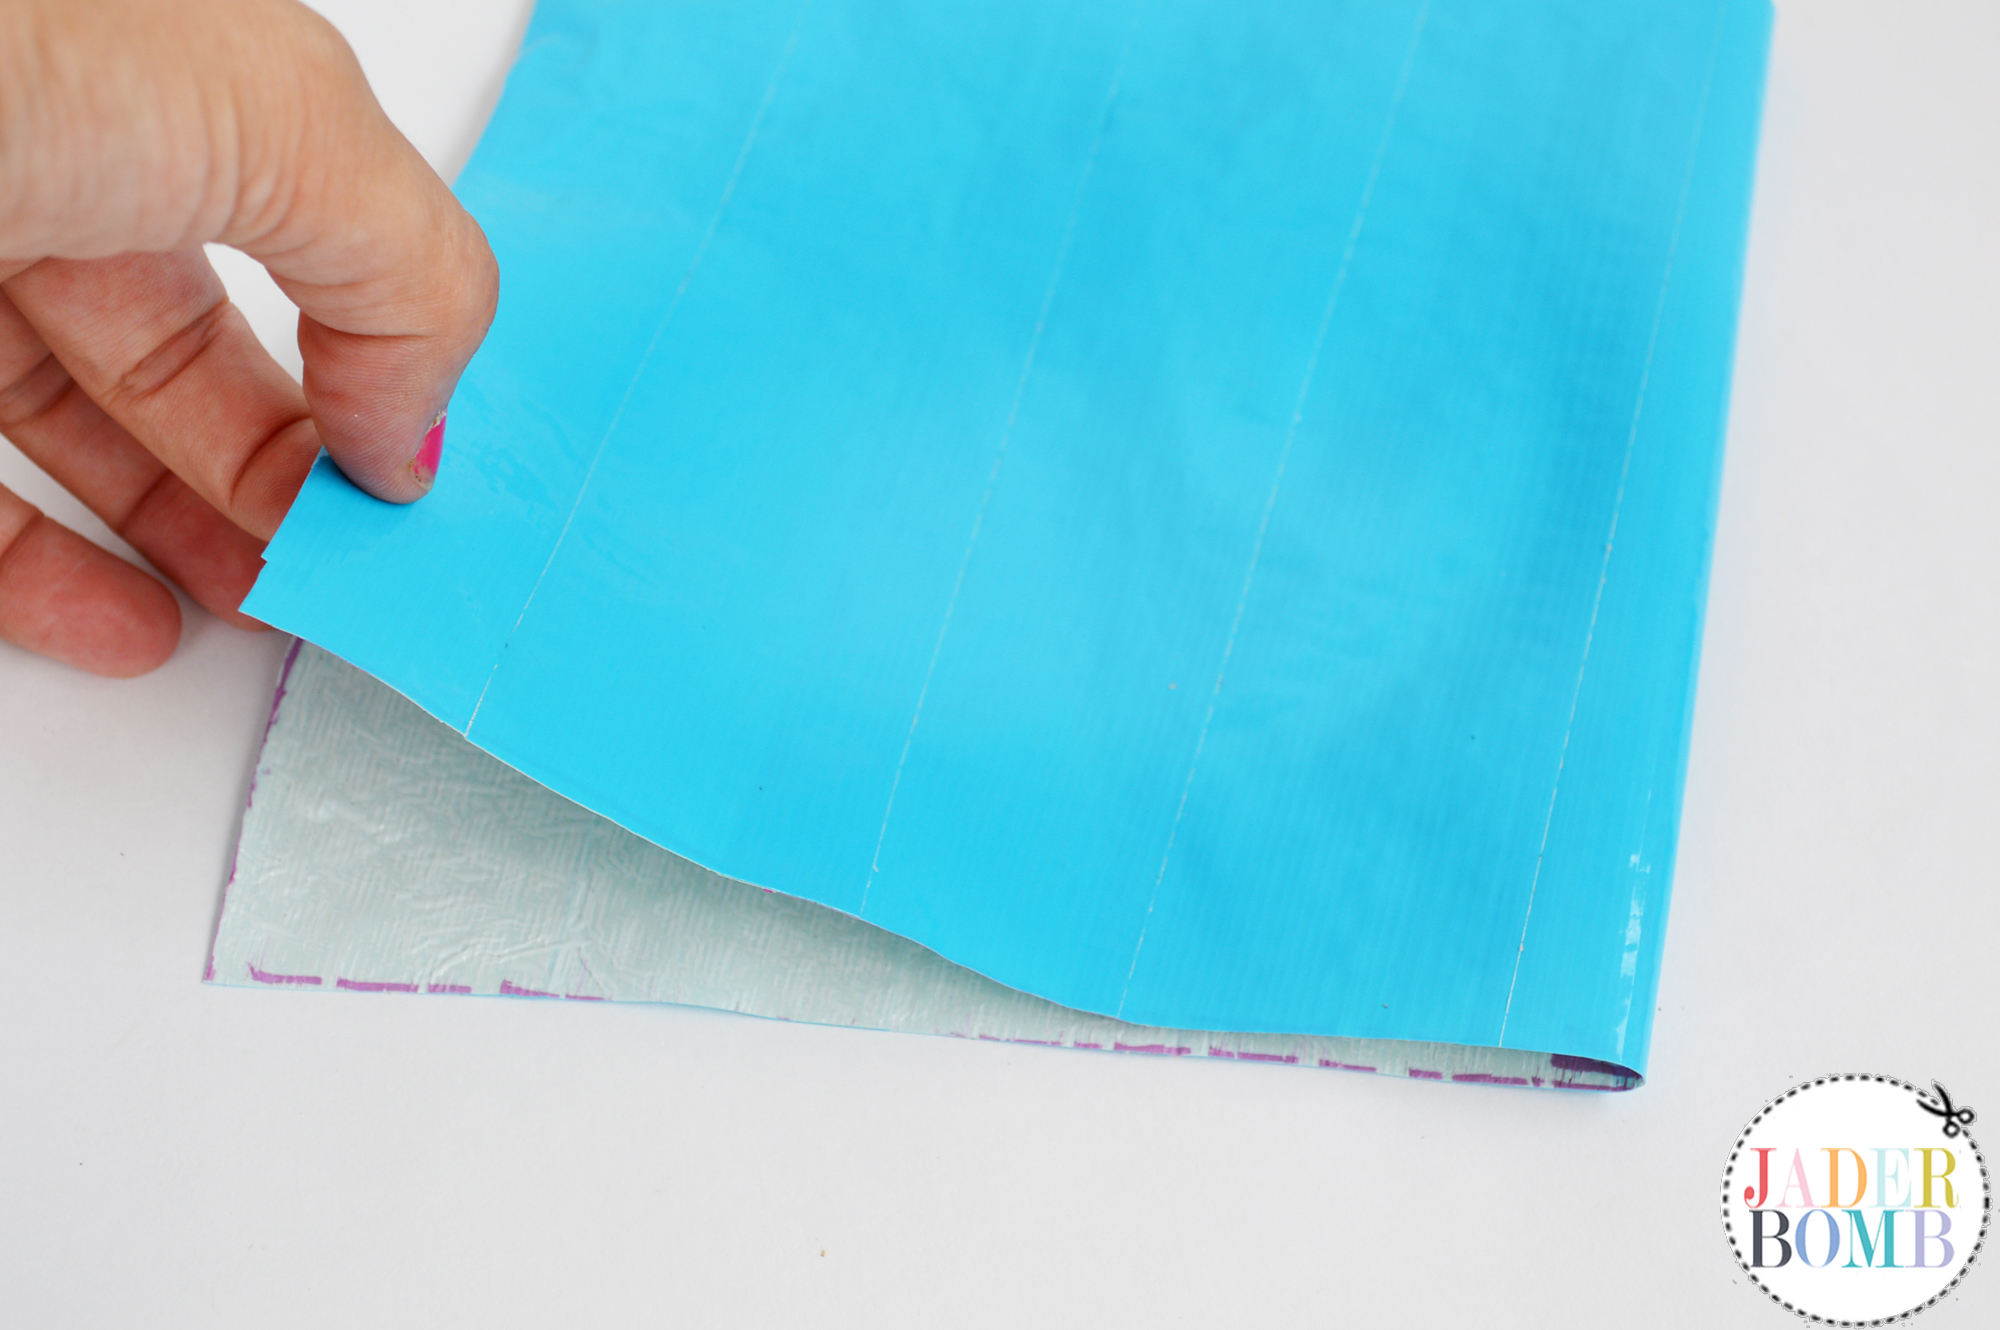
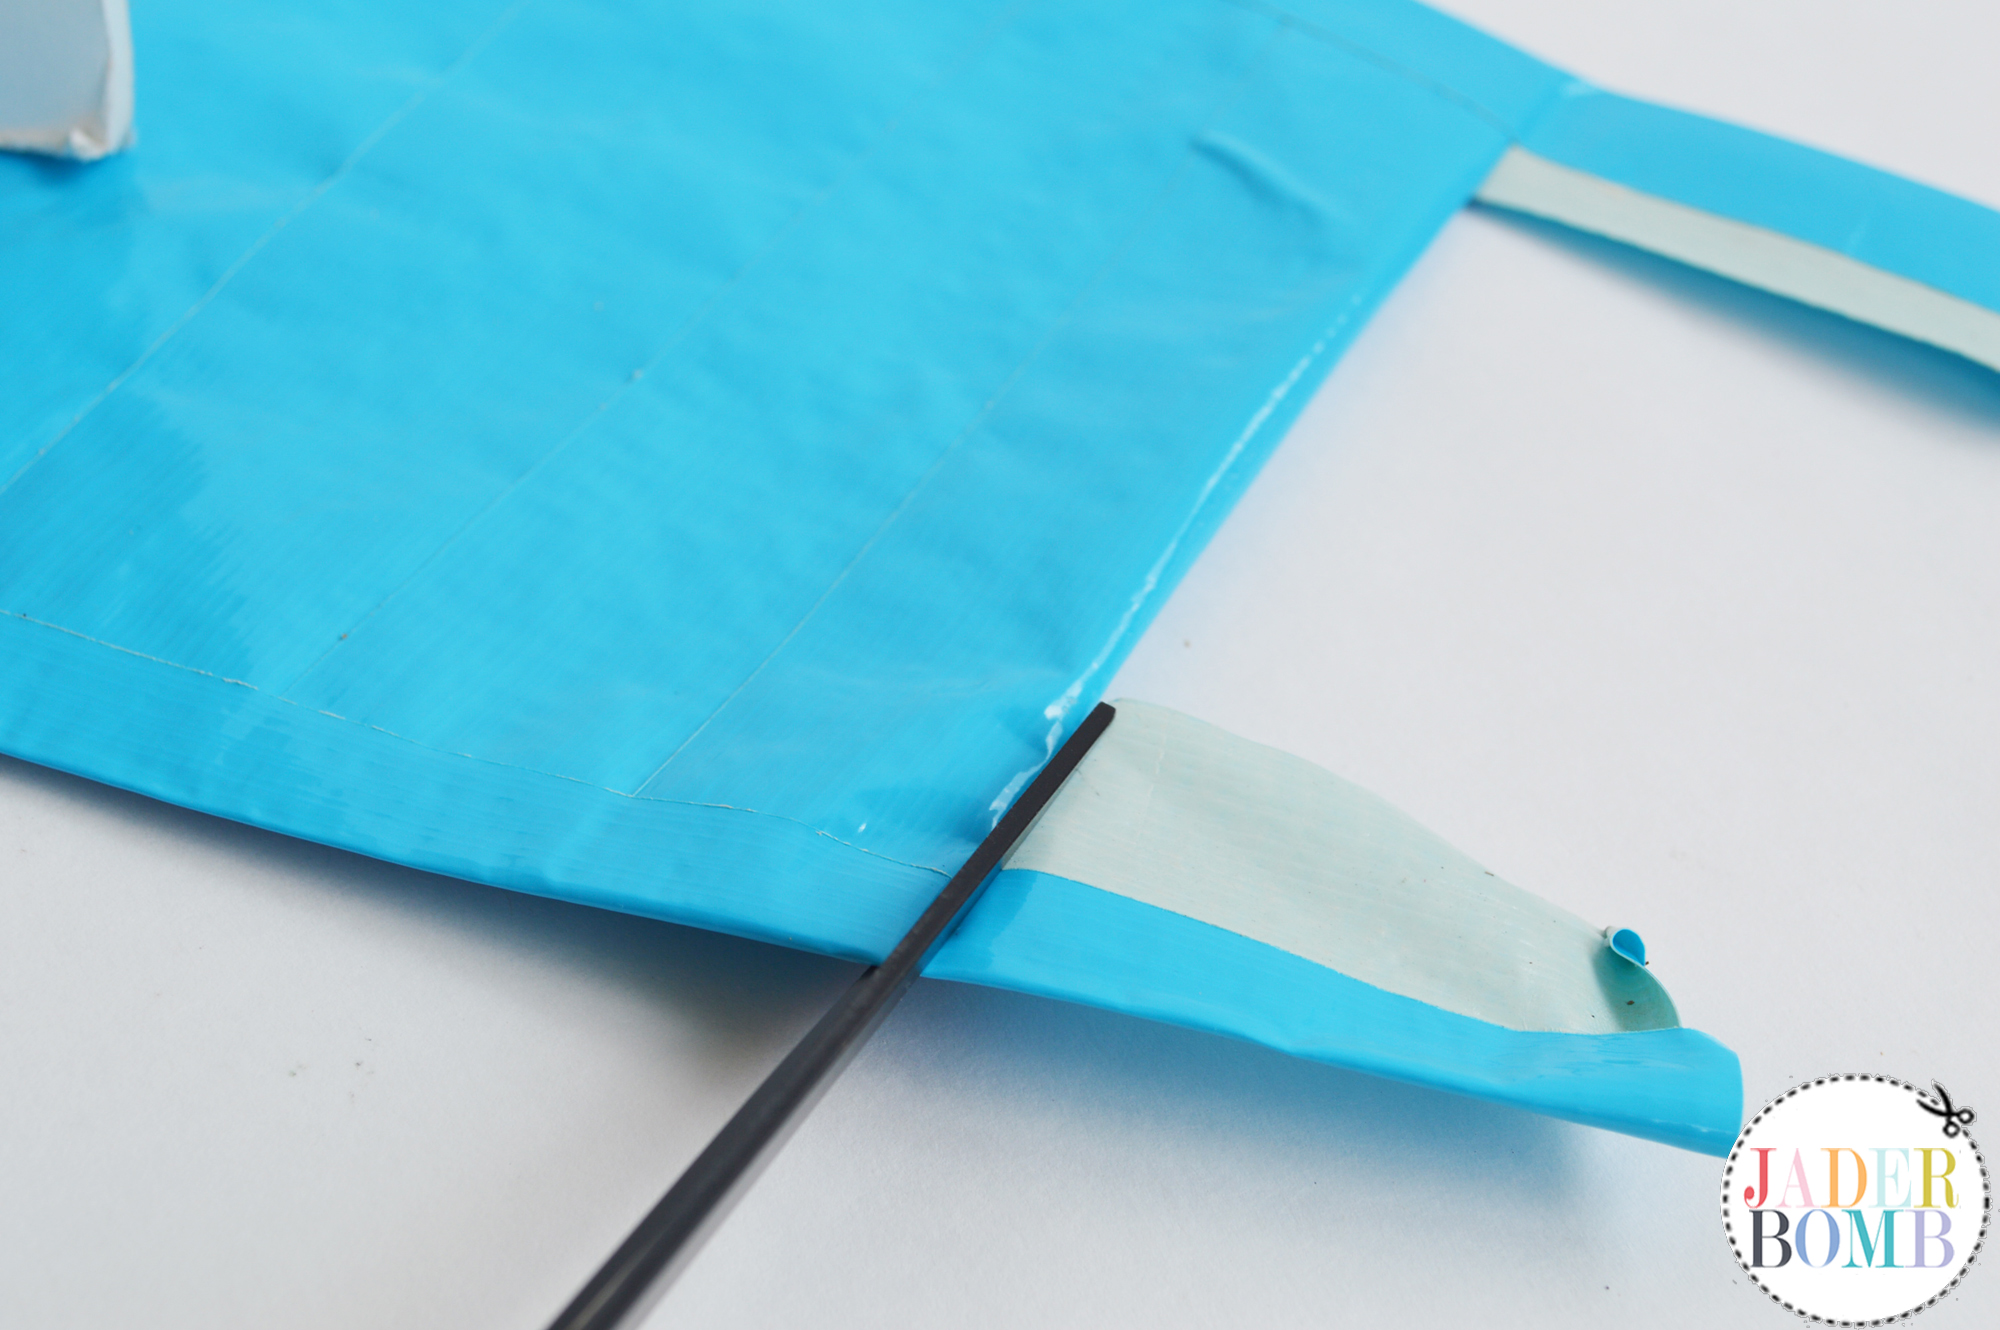
Fill in the space like you did earlier for the small bag.how to make a bag
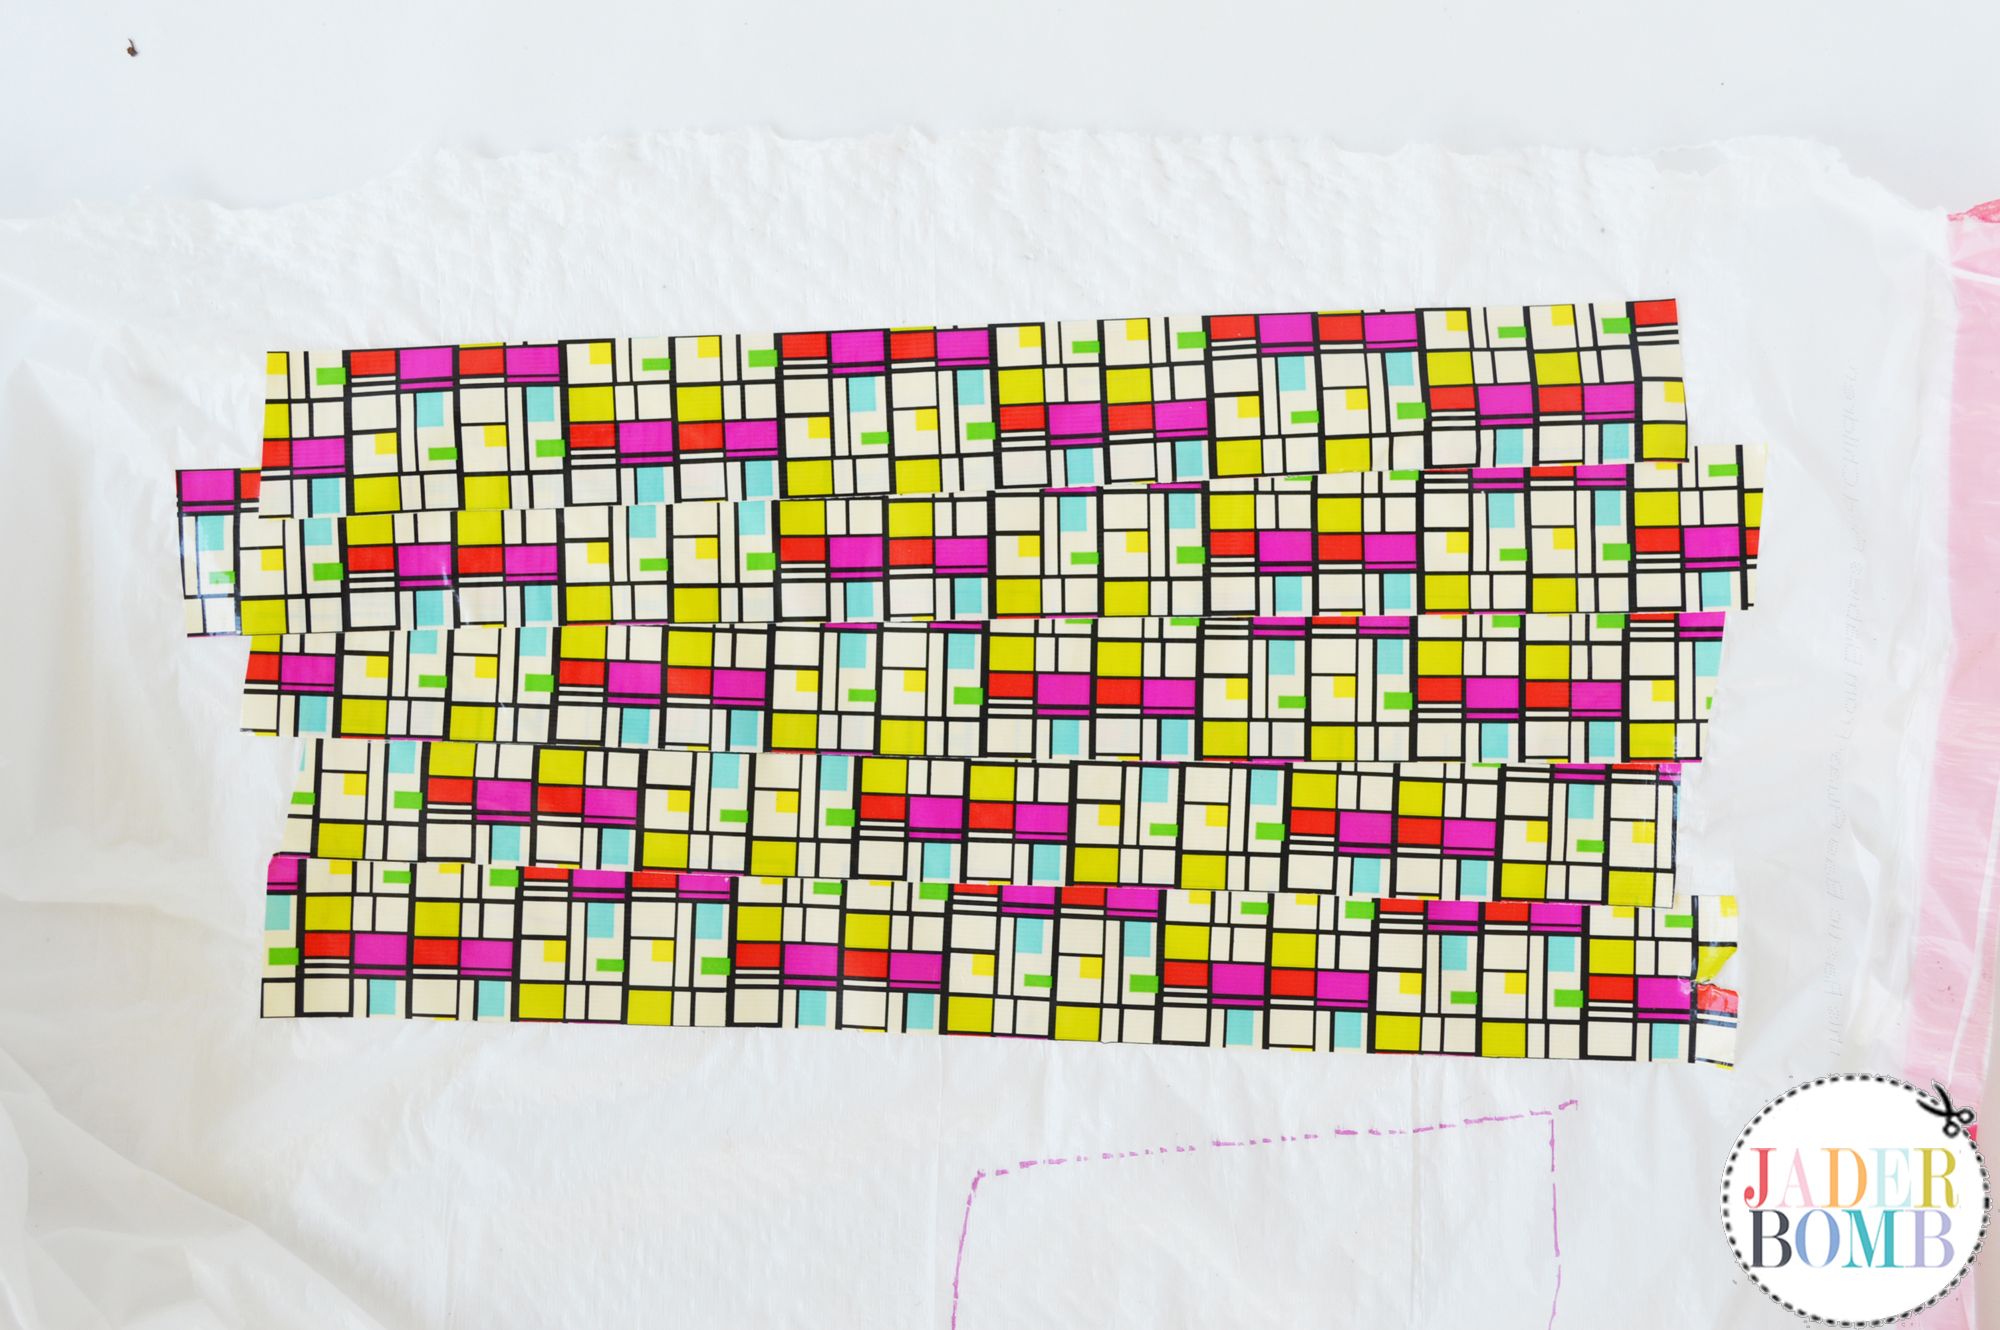
Cut out your pieces making sure to not cut the sections in half. We want this bag to be long! We are doing the same steps as we did for the small bag. Pretty simple ey!duck tape fashion crafts
Place one piece on top of the other. If you have any piece that looks too long you can trim it now.
decorative duck tape
Tape up the sides and bottom, trimming the excess when done. For this bag I cut the top straps because I will show you how to make your own straps. patterned duck tape bags
To make the straps take a strip of duck tape and cut it in half. You can just place these on the back side of a bag you make then attach it to a bar on your stool. Once you get going on these bags they will get easier and easier.

You can spice up your bag by adding a strip of duck tape along the bottom. Take a strip fold the top part down a little then adhere it to the bag with the sticky part.
DIY PHOTO CREDIT

DSC_0979

craft stationduck tape caddy
easy crafts with duck tapehow to organize craftsDUCK TAPE CADDY TUTORIAL DUCK TAPE CRAFT STATION DIY EASY CRAFT STATION

DIY-PHOTO-CREDIT-Photography: Jaderbomb// DIY tutorial by: Jaderbomb // Craft Supplies: Duck Tape // Sponsored Post for:The Duck Brand

HASHTAG LOGO

Don’t forget to connect on social media!Make sure to use use the hashtag #JADERBOMB on Instagram or Twitter or Facebook so I can keep track of all your awesome creations! HAVE A GLITTERY DAY! ♥, Jade


I am so excited to share with you these fabulous Tie Dyed Shorts I created for the I love to create blog. I first started the project with intentions of just tie-dying but one thing led to another and next thing I knew lace made it’s way into the picture.

I totally did something different with these shorts and you won’t find out the “technique” I used unless you check out the FULL tutorial (get the link at the bottom of post)

Let me know if you like the colors, lace or the stripes. These are really versatile and you can wear them with so many things. I also believe the process of how I made these can be used for so many other projects depending on your mood.

Don’t forget Orange is the New Black premiered today so make sure to check it out on Netflix! Check out this tutorial I made for the new season! You will love it.

Tie Dyed Shorts

CLICK HERE TO SEE FULL TUTORIAL 
Enjoy and have a GREAT weekend!

DID YOU HEAR THE GREAT NEWS THAT I ANNOUNCED YESTERDAY?
Check out these other fun duck tape tutorials I did herehere and hereHASHTAG LOGO

Don’t forget to connect on social media! Make sure to use use the hashtag #JADERBOMB on Instagram or Twitter or Facebook so I can keep track of all your awesome creations! HAVE A GLITTERY DAY! ♥, Jade