Tag Archives: DIY crafts

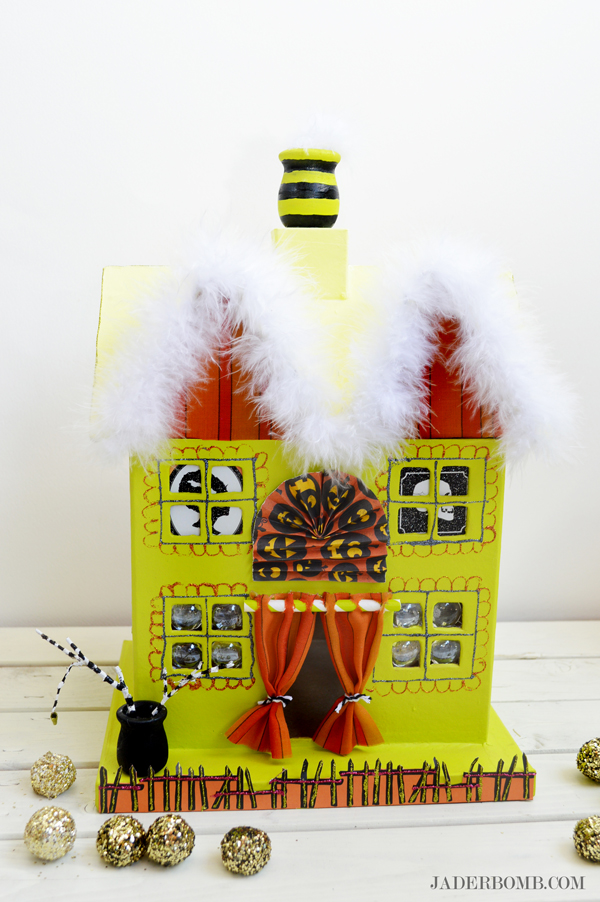
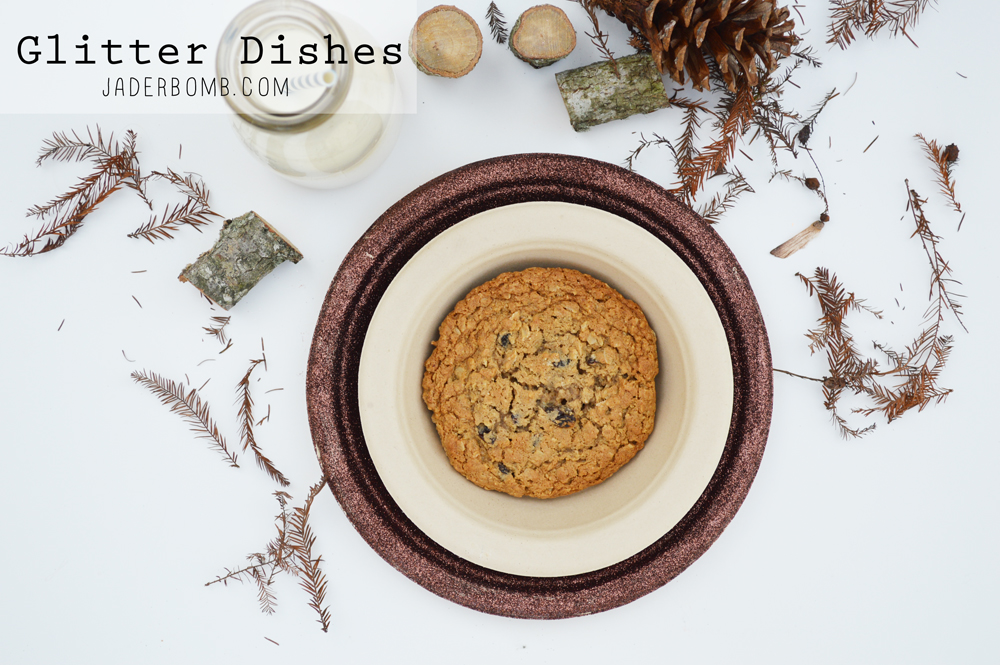
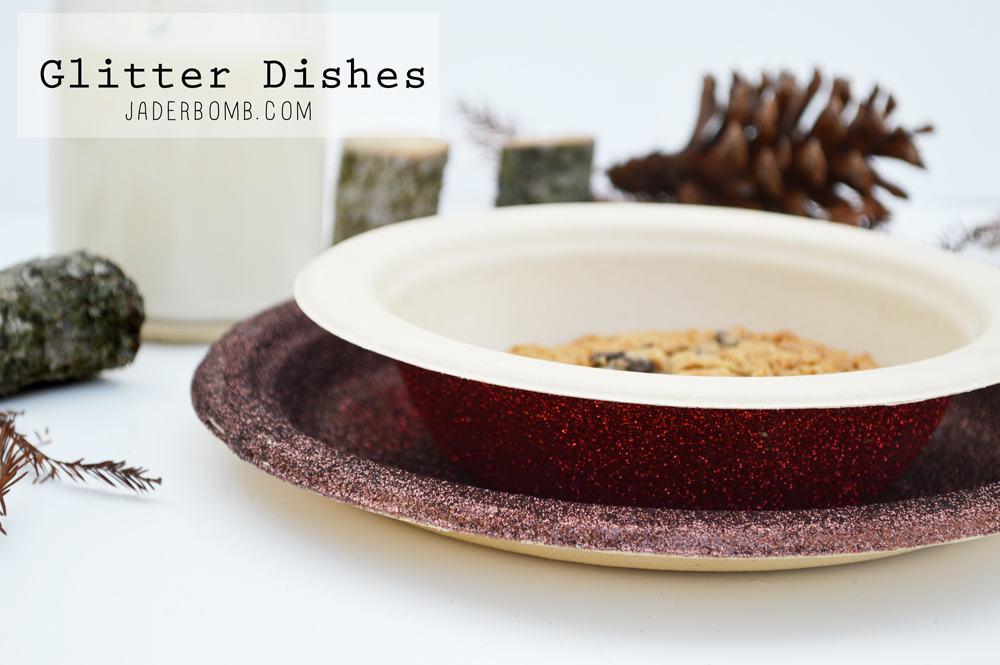
I don’t know about you but if you add glitter to anything you will put an instant smile on my face. Today we will be making Glitter Dishes!

I started playing around with paper plates a few weeks ago creating a few easy ways to “dress” them up. I think I was successful with it, what do you think?! I mean, I truthfully hate washing dishes and putting them up so why not serve anyone out of fancy paper plates. It’s not like I am having Christmas at my house but if I did I would lay all these babies out!

Check out these I made with ribbon and these with lace!

howtomakeglitterdishes

you will need*Paper Plates and Bowls   * Glitter  *Brush  *Mod-Podge  *LOVEGlitteredPlateSupplies
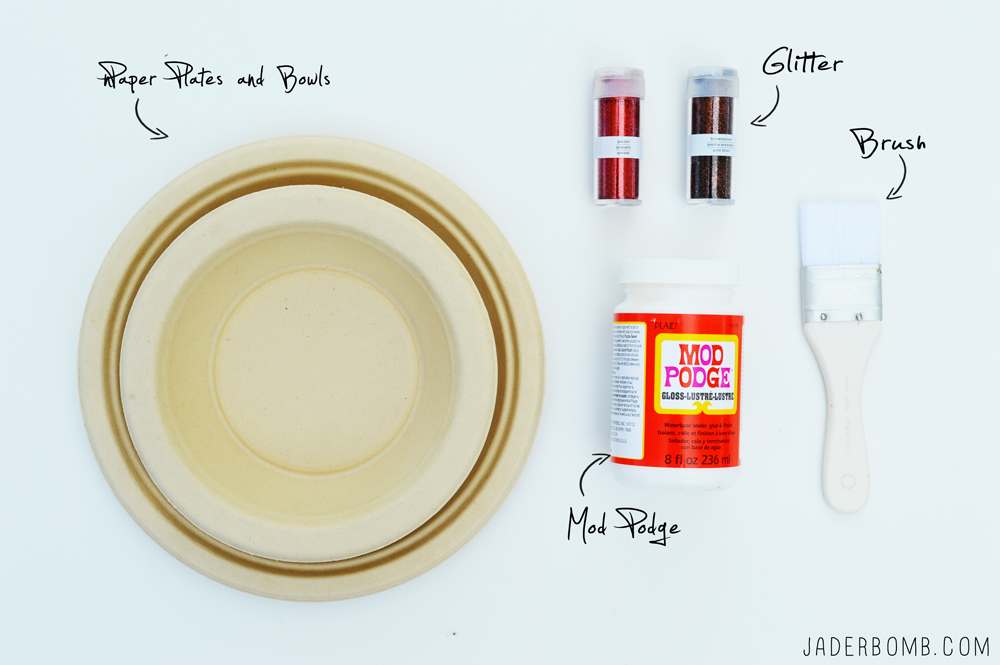
The first thing you want to do is coat your paper plate with Mod Podge. easywaystouseglitter
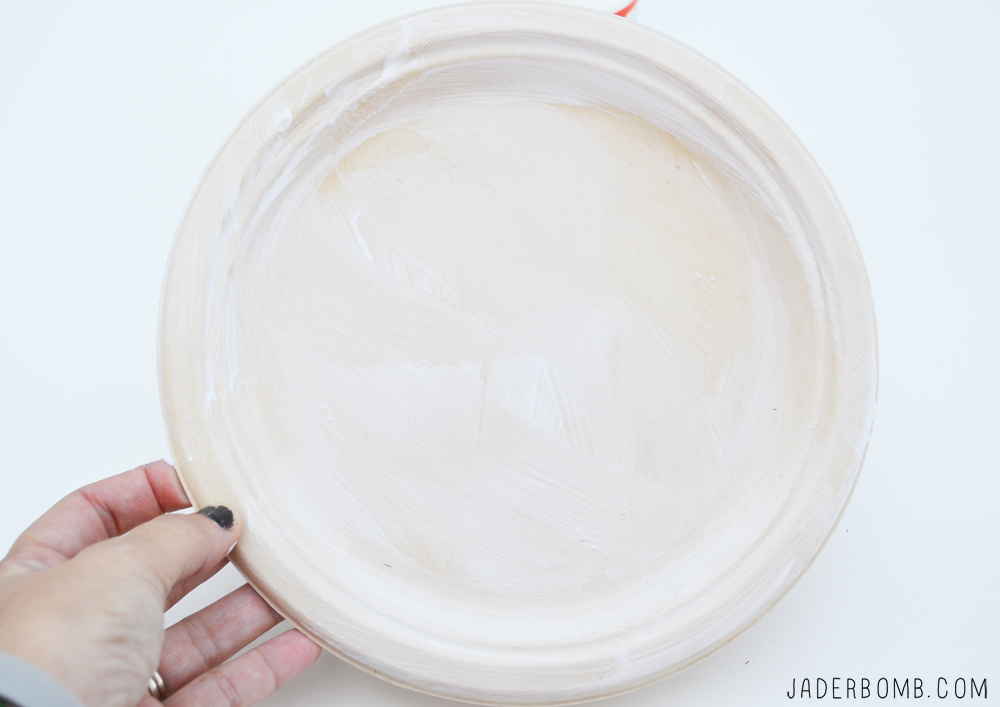
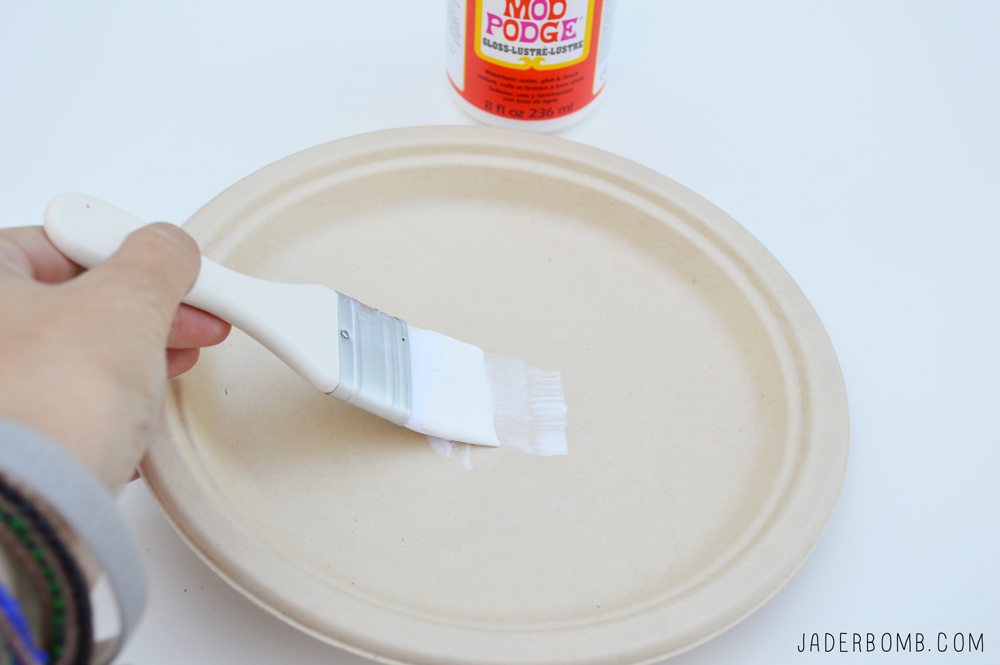
You want to work a little fast since Mod Podge dries very quick.

howtouseglitter
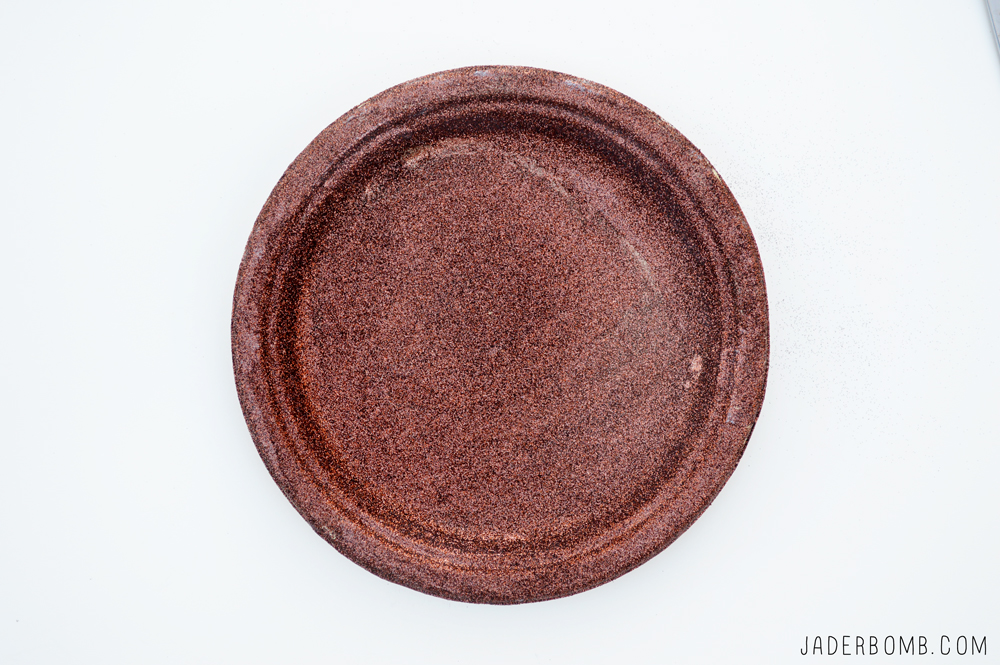
Sprinkle glitter over the wet Mod Podge. Don’t worry if it’s not perfect because after all it’s just going to be used as decoration. Did I mention you will throw it away after it’s used!
glittered plate

I coated the underneath of the bowl just to add a little more love. thingstodowithglitterglitteredplatesglitterdishes
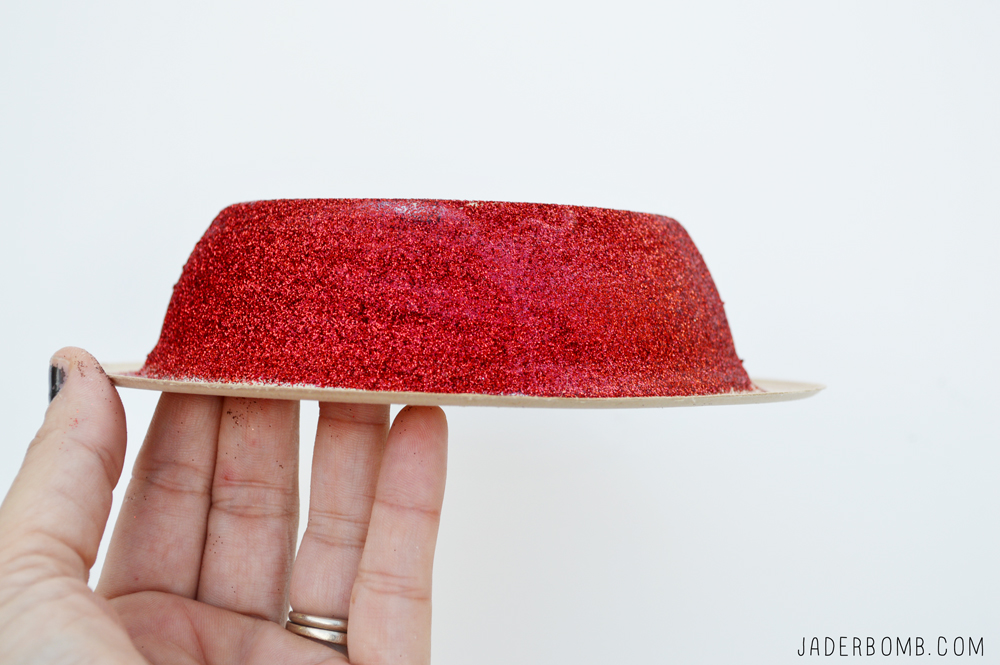
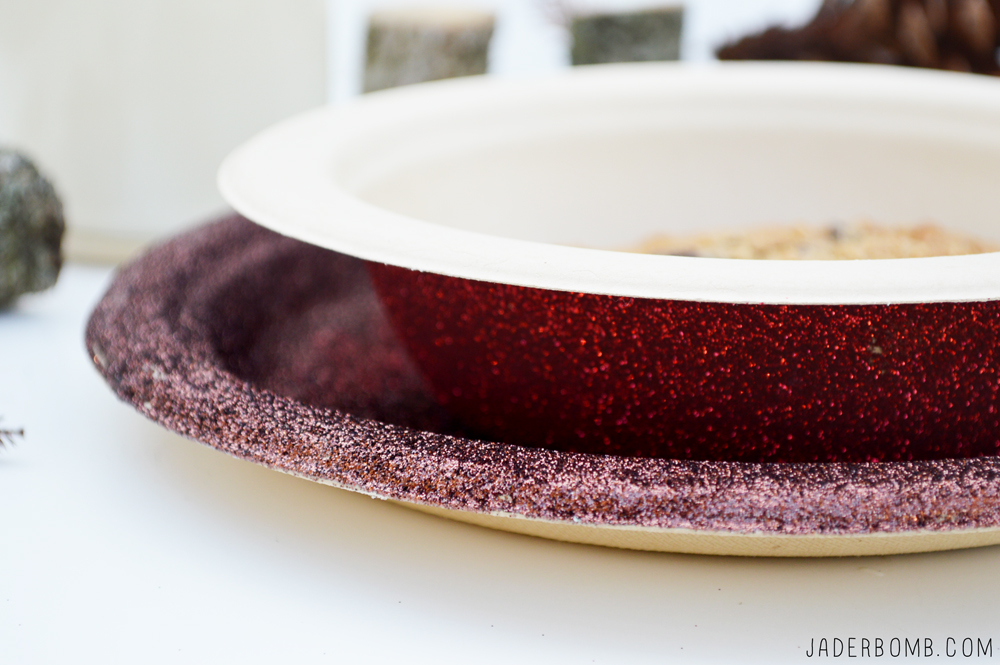
It’s seriously that simple! Fun thing is you can make them for every holiday and it will not break the bank.

What will you use your glittered bowls for?
jade

HAPPY THURSDAY! It’s bloggy love Thursday and I am so excited to share 6 fun weekend crafts with you. I love that every craft can literally get transformed into something different depending on your personal style! My friends always amaze and I hope they give you loads of inspiration! Don’t forget to share these crafts because we all give glittery hugs over the internet!

1289865_10201630454939065_1995265869_n

Crafty Chica is showing us how to paint our faces, sugar skull style!

1376097_10151950179962774_66886013_n

Margot Potter made some ridiculously cute snap bracelets that look like MONSTERS! I would snap 5 on right away!

skull-necklace-pink-turquoise-final

Cathie Filian made a bomb Southwestern skull necklace. I love the red and teal together 

1374579_599739330067740_8055767_n

Mark Montano shows us how to update a skirt with a FUN ruffle hem on the bottom. I can just see this in black and white!

804437_10151591842875807_241068497_n

Heather Mann made a cute shrink necklace of her state. I love this idea. You could do bats, pumpkins or a candy corn!

1376194_657753847592114_970146752_n

Don’t forget about my classy coffee party!

If you love Halloween as much as I do then you need to check out these houses I made. Wear these shoes while trick or treating with your kids. I am in love with these black and white kitchens. Oh and don’t forget about my 12 months of MARTHA post. Let’s just say we are mixing shic and modern with a little splash of “coffee”.

FYI: Please go vote for my friend Kelly HEREnofollow! Voting end Friday and we ALL WANT HER TO WIN!

Huge glittery hugs—See you in the next post! Visit me on FacebookTwitter,Pinterest, or Instagram!

Today is a perfect example of my motto “Why buy when you can DIY”. It’a almost Halloween and I always dress up my house and studio with DIY Halloween Houses. I love today’s craft because you can keep it when the holiday is over or toss them to avoid clutter. I know you are prolly thinking I am crazy for saying I would toss them but I am pretty over the top like that. It’s one of those things that I wouldn’t want to stuff in the attic. After all it’s not like it’s a Glitterville collectible.  With that said, you can purchase these cardboard houses from Hobby Lobby and they are really inexpensive. I think the large house was around $5 and the other two were $2 and $3 dollars. I hope you enjoy them!

P.S. Check out today’s FREE Fall printable on Free Pretty Printables.

decorated cardboard boxes for halloween

diycardboardhouses

You can purchase these from Hobby Lobby!paintcardboardhouse

I started by painting the houses with acrylic paint. I lined the roof with baker’s twine and added tissue paper to the front of house. diy halloween house

I used glass beads for the windows. For the curtain I used a paper straw and a piece of tissue paper. I let my godchild help me and I am so happy I did. It’s a fun craft that any kid can do and trust me it will keep them busy! halloweenroof

For the roof I used a little wooden planter and stuffed it with a fluffy boa! You can get these from the craft store also. I say use any fun goodies you have at home and be creative. After all that is where the fun comes in. how to decorate cardboard house

For the fence I cut a strip of Martha Stewart craft paper then added glitter to it. Just have fun with your house! halloween diy houses easy halloween diy houses

I hope you enjoyed these and you create your own magical houses for the holidays. See you in the next post!

Huge glittery hugs—See you in the next post! Visit me on FacebookTwitter,Pinterest, or Instagram!

bloglovethursday.jpg

Happy day after hump day! You know what thursday means! BLOG LOVE! My BFF’S Mark, Cathie, Heather, Kathy and Margot are working it this week! I am in love all of these DIY crafts and I am pretty sure you will too. You have to click on the links to see exactly how they made them because they have tips and tricks that will make your crafting easier. Pinky Promise, Y’all!

Mark Montano knows everyone is addicted to instagram so he shows us how to make an instant photo album for our wrist with this instagram charm bracelet. Buddy, Smart.

Cathie Filian shows us how to Sew a Diaper Changer Cover and trust me I wish I was the baby laying on there! She is so talented it’s ridiculous!

Heather Mann of Dollar Store Crafts altered bottles in just the right way! They are shabby chic with a little bit of victorian tied in!

Crafty Chica doodles her way into everyone’s hearts with her illustrated dish towels! Insert heart beating fast right here 

Margot Potter swoons the fashion world with her Neon Colorblock Cosmetic Bag. It’s perfect for the Fall season and totally HIP!

Incase you missed my latest tutorial you can check it out on thewww.ilovetocreate.com blog.

I hope you enjoy everyone’s tutorial’s! Don’t forget to drop by everyone’s blogs and give them MAD love, cause they LOVE back!
See ya next week,
Jade

Who wants boring white thumb tacks on a fun bulletin board like this? I know I don’t!

Which is why I made painted thumb tacks. Let’s be real, white thumb tacks cost .99 and colored ones in the store cost 3.99.

I simply love this  because I can change the tacks for holidays, special events or to match a room. I always have multiple bulletin boards in different spots in my house and trust me they are filled up. I use them for inspiration and daily reminders of who I am, what I love and things that always make me smile. For example yesterday was the Wifey’s birthday and she got this awesome card that is now on my board. Yep I stole it. It was a shark sitting in a recliner watching him on television. The quote said, ” It’s ME week”. You get it? SHARK WEEK!

Everyone knows I love shark week and Wifey’s birthday.

Like this board? You can get it here.

 PAINTED THUMB TACKS

spray-paint-thumbtacks

YOUWILLNEED

*SPRAY PAINT
*THUMB TACKS

steps-to-painting-thumbtacks

Lay out your tacks in a well ventilated spot and spray away.  I started with a light coat then added another one when it was dry.

painted-thumb-tacks

You have to admit this is super cute! I know for me certain colors make me happy which is why I love this tutorial. Everything on the board screams inspiration why not let the tacks do the same.

See you in the next post!

jade

I know what you are thinking, crazy it’s not Fall. I then come back and say “really, it’s not”.  You might even want to insert a crooked smile here. Someday’s I get that because of this unexpected career in blogging. I am a little ahead of my time when it comes to home decor and crafting. That is why I am sharing last year’s fall mantle crafts with you today.

fall mantle crafts

I have to be! I know this sounds cray cray but in August when you are doing back to school shopping and scouring Pinterest for ways to get organized I am trying to create new Fall and Halloween ideas for you, which you will then be seeing all over my Pinterest {click link to follow me} in September. Did I mention that in September I am already starting Christmas things?

Maybe that is why I always feel like I am in a time warp yo. Yesterday I was looking back at my Fall mantle last year and boy oh boy has things changed. For one I must have been in a Easter time warp with the turquoise walls. I mean sure, it fit’s my personality but I am still sitting here shaking my head. I will blame it on being in school full time and going nuts internally. There, I have a legit excuse. Moving on.

Aside from the “let’s pretend we are at a beach house but we are in musky Louisiana”  turquoise walls my mantle was exploding with some really fun unique crafts. Crafts in which I believe could be used for many of you and possibly in different ways. Be open and creative when you look at someone’s mantle. Don’t nit pick it because there might be ONE thing you can take away from it for your own house. For example the painted sticks could be used for Christmas, but you could spray paint them GOLD. See?

Good news! The walls are a different color now, the shelf is gone and there is no sign of fall yet. But no worries I will soon share with you my non fall mantle crafts. Just get ready because in a DIY blogger’s house things change quick! CLICK HERE TO SEE ALL OF THE CRAFTS IN ACTION.

Big huge glittery hugs from my ex mantle to yours,
jade