Tag Archives: easy crafts


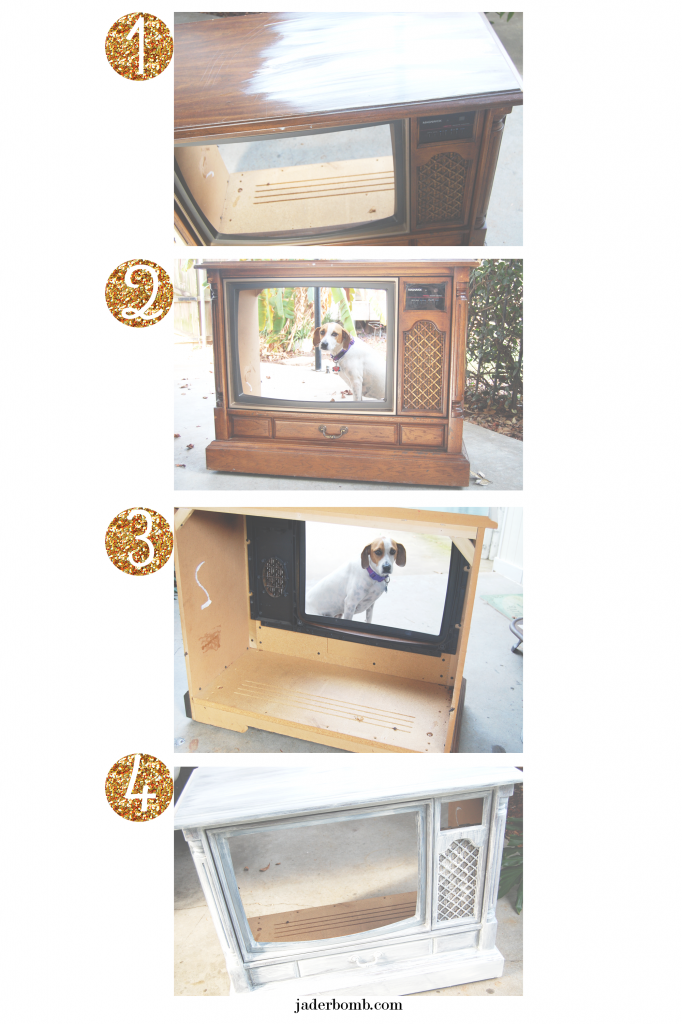
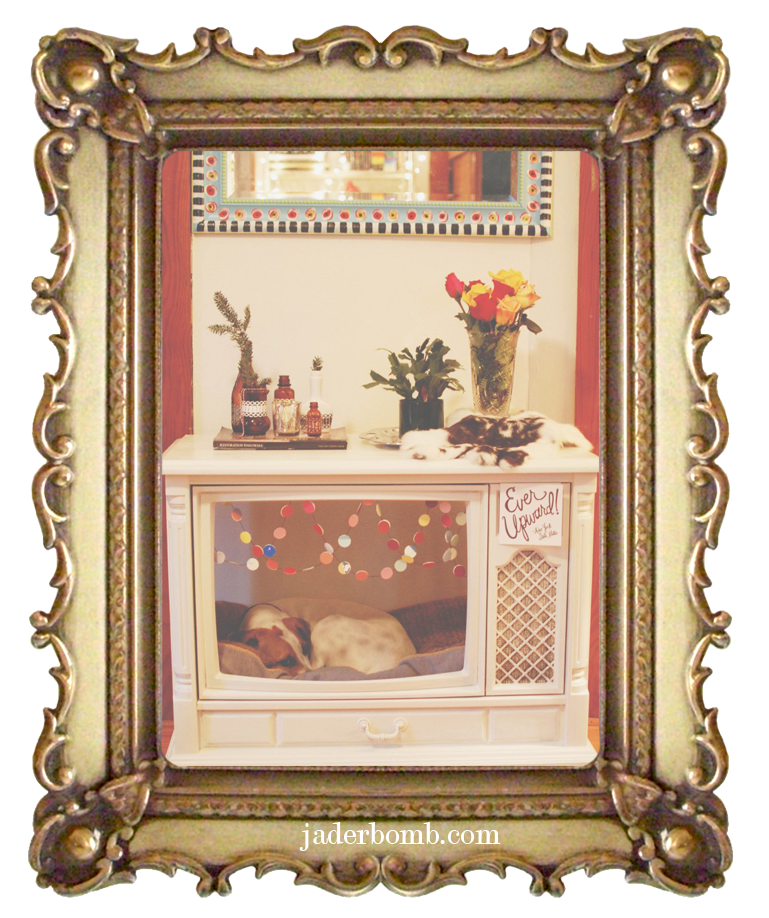
I can’t wait to show you today how I made a dog bed out of an old television. It’s the best dog bed in my eyes and I know you re going to love it. Some beds for dogs are not the coziest and I figured out a way to make a cozy one that’s great for cat’s too. It’s pretty simple to make which makes it nice. I am loving how unique it looks. Most dog beds can look a little generic but not this one. It’s a Jaderbomb dog bed!

How_to_make_a_dog_bed

How cute is Ceaux Ceaux here! She loves her new bed so much. I think certain dogs like to be in small spaces because it makes them feel safe and secure. Ceaux Ceaux is part beagle and terrier and they love being in a small spaces. I drove up one day at home and my neighbor had this T.V. at the road. I don’t know why I wanted it but I knew it would be something cute. Once I got it home I started to gut it out it. Then I realized it could be a dog bed. Right! It’s really simple to make so let’s get started!

How_to_make_a_dog_bed

1. The first thing you will do is find an old T.V.

2. See how your animal looks in it,hehe

3. Gut out the entire thing!

4. Start painting it the color of choice. I like things to look “clean and crisp” so white is what I chose.
It’s really that simple. You can also paint or decorate the inside to add your personal touch.

How_to_make_a_dog_bed

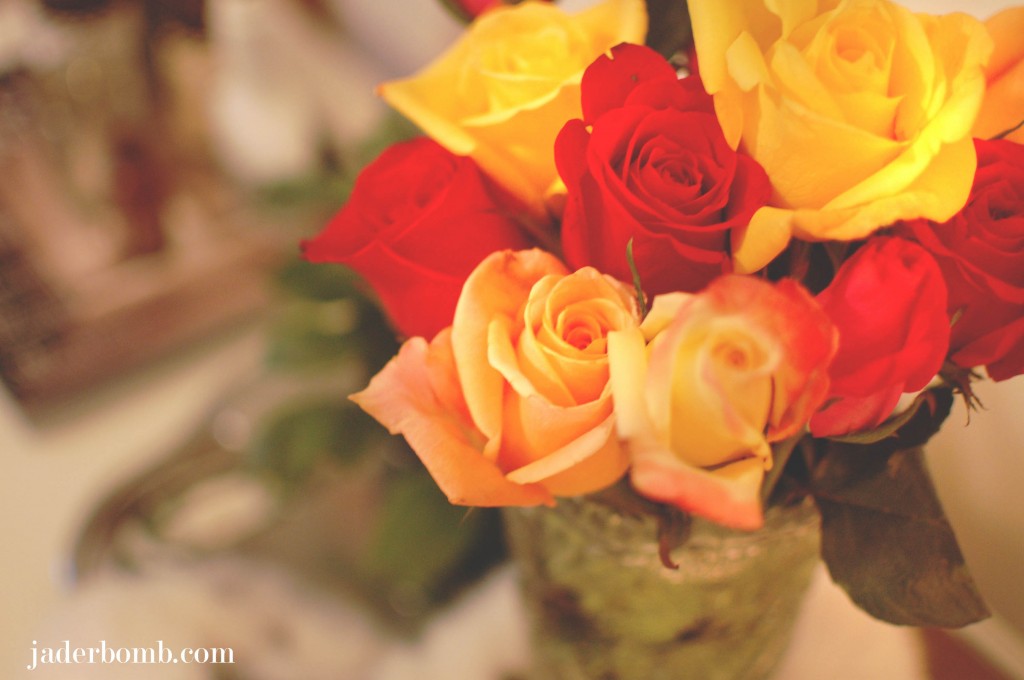
Just thought I would share with you my roses. I have this crazy habit that forces me to buy fresh flowers every week. Trust me they usually take me from 1 to 100 in about five minutes. The good thing about flowers is you can choose different ones each week depending on your mood, how you feel or colors you are attracted to. I always have different ones but my FAVORITE flower is the stargazer lily.

All.TIME.FAVORITE

How_to_make_a_dog_bed

jaderbomb

* You can get to my dog’s blog HERE and her facebook HERE
*Check out the review I wrote for FaveCrafts HERE
*Click HERE to see the homemade greeting card I made for FaveCrafts
*CHA post coming this week of my favorite new products
*Check out some of my most popular Valentines Day Posts BELOW

jaderbomb

Quote of the day:
No matter how many times you may spray paint, change wheels , clean , or customize a car to look different . It will always be the same. Same goes for people. Our appearances , actions and age may change .. But we will always be the same

Well what a day it has been already! Wait, it’s only 8:39 in the morning. Pfft. Does that ever happen to you? You wake up early and you have done more in the wee hours of the morning than a FULL day’s work. I actually love mornings like that because it makes for a great afternoon nap, hehe.

I couldn’t wait to show you this post because it was so much fun to make it. I love to spray paint EVERYTHING in my life. Depending in my “phase” I am going through. This is a little different than your normal spray painting. It’s “glass spray painting”. When I was sent this from Martha Stewart Crafts I was like… ERR MY GERRDDD, really! Just like your normal spray painting, it can leak and leave spots… only if you don’t practice before. It only took me about a minute before I figured out the pressure and how much comes out in one spray. I have not tried to OMBRE anything yet but I will, don’t cha worry.
Let’s get started!

You can click on the pictures to make them bigger if you like!

spray paint glass

Up above is what we will be making today!

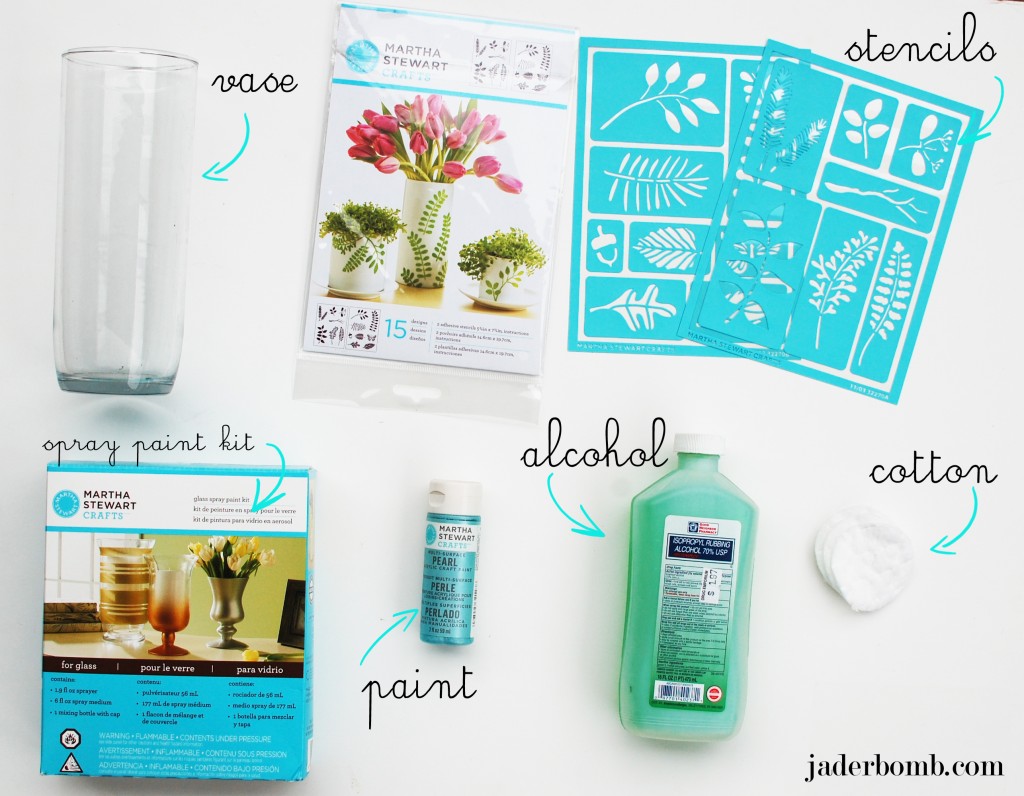
INGREDIENTS:

*Vase
*Martha Stewart Spray Paint Kit
* Alcohol
*Cotton
*Adhesive stencils from Martha Stewart, I used the one called LEAVES
*Martha Stewart Pearl Paint

FYI: You can purchase all of the materials from one spot by clicking on the links in the ingredients.  

spray_painted_vase_jaderbomb

If you are painting on glass it’s important to use a gloss, metallic, or pearl paint. It works the best. Most of the other ingredients you may have floating around your house. Let’s get it started, y’all.

spray_painted_vase_jaderbomb

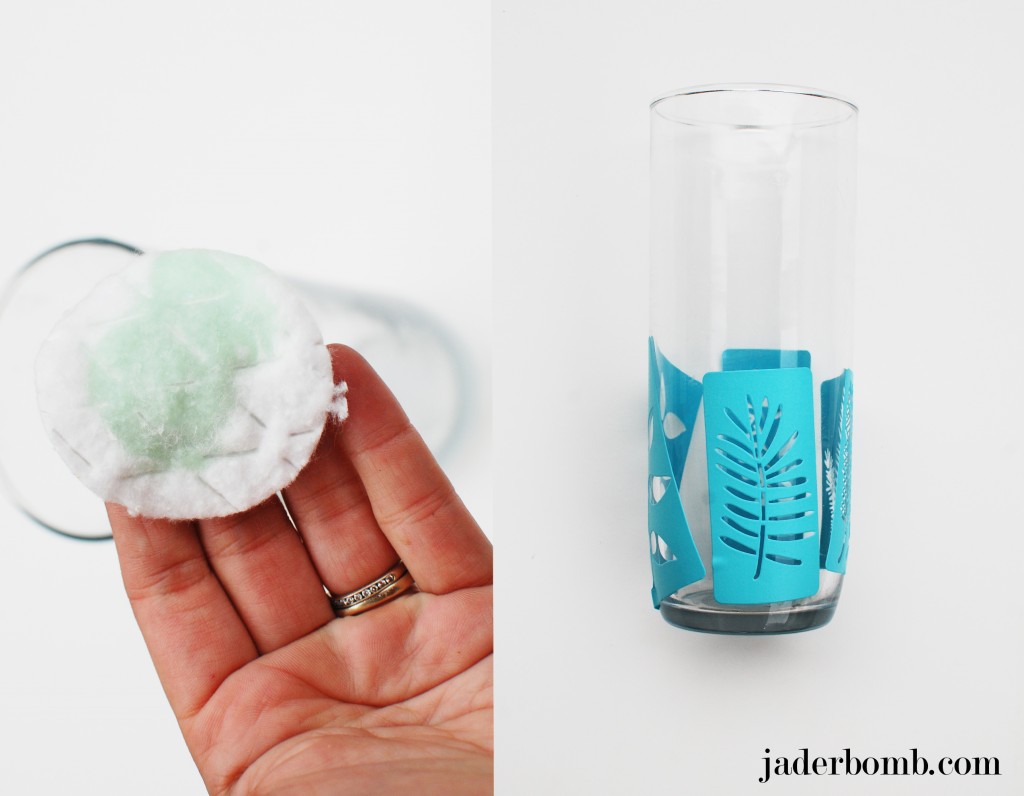
The first thing you will do is clean off your glass with alcohol and let it air dry. This will get off any oil residue that may be on the glass. Once it is completely dry stick your adhesive labels where you want them.

spray_painted_vase_jaderbomb

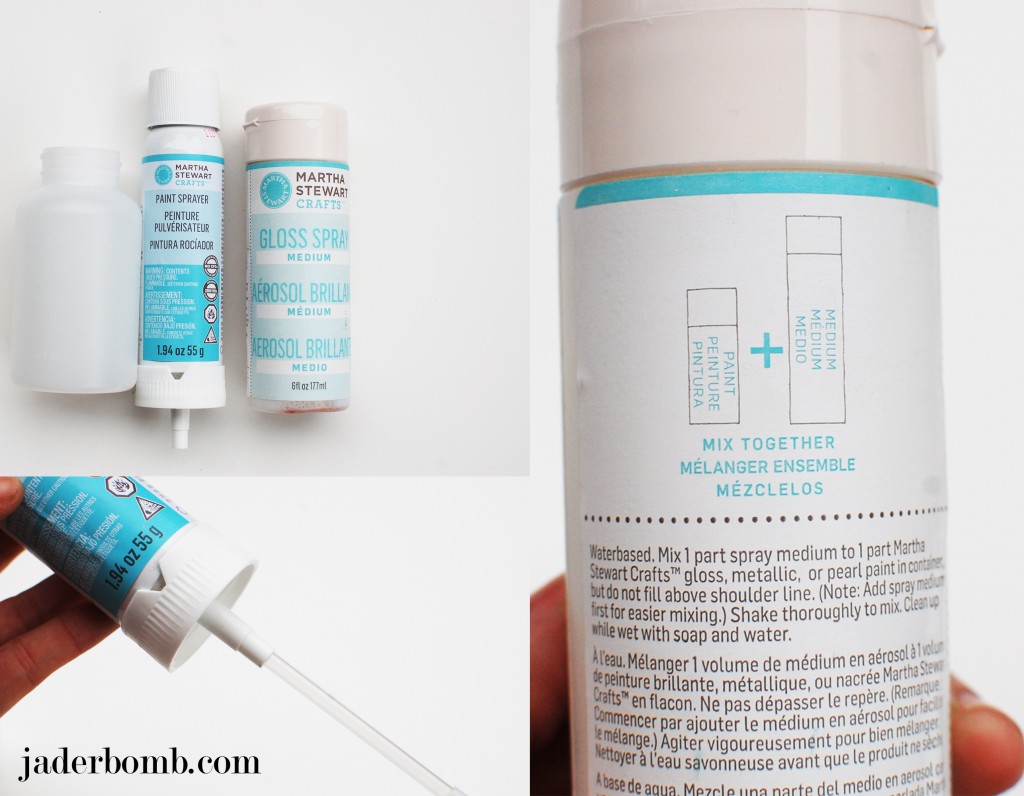
When you get your kit it will come with a few things. The first thing you will need to do is take the clear plastic tube and connect it to the bottom of the spray can. I put a picture above so you can visually see what I mean. Next we will mix our paint in the container. Notice on the back of the gloss spray medium it says to mix 1 part medium to 1 part gloss, metallic, or pearl paint. They have lines on the container so you can measure correctly. Lightly swirl the paint and medium (BEFORE) you attach but do NOT shake. You don’t want to create bubbles inside.

spray_painted_vase_jaderbomb

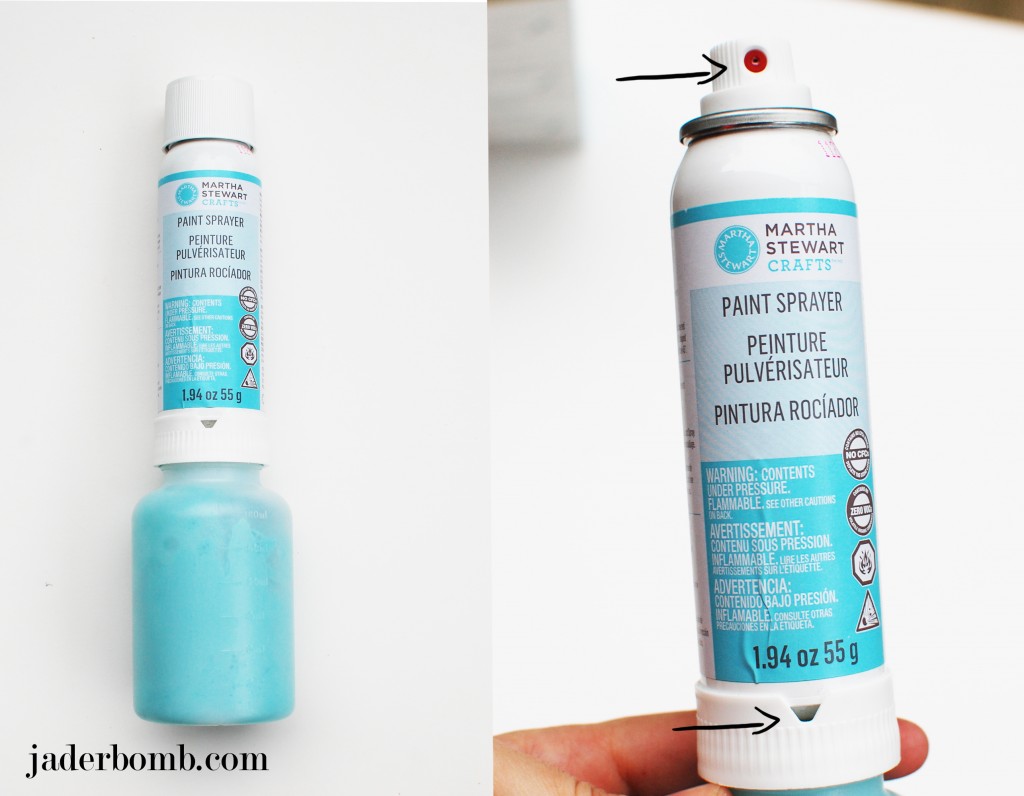
You will now just screw the container onto the spray can. The most IMPORTANT thing ever is to line up the  red nozzle with the little opening at the bottom of the can. If this is not lined up it will not spray.

spray_painted_vase_jaderbomb

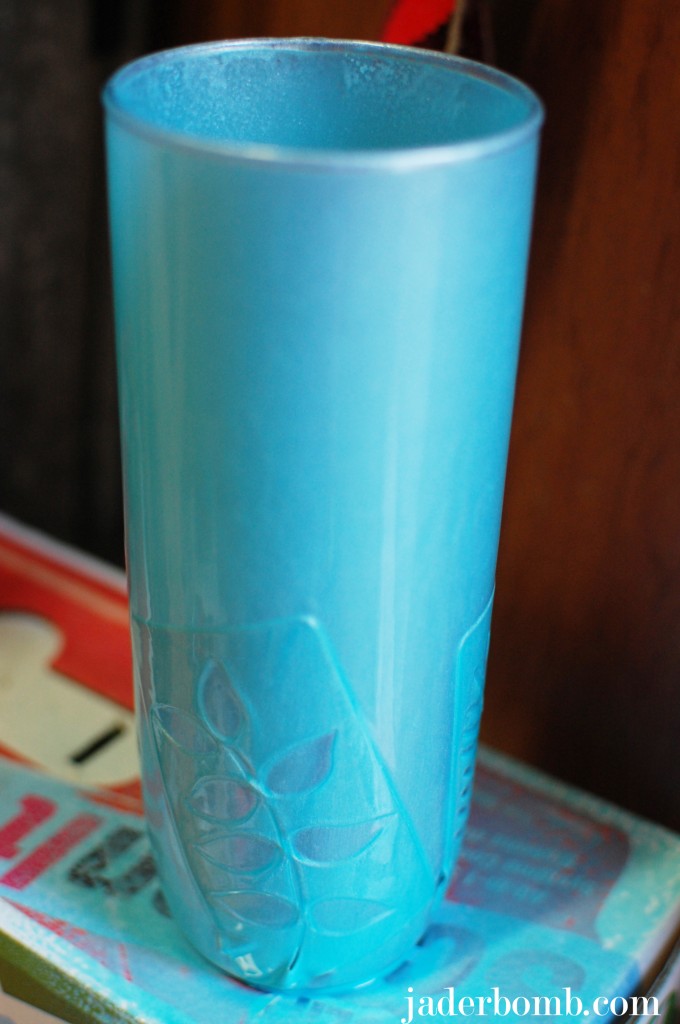
Make sure you are in a well ventilated spot before you start spraying. You want to add a light coat and let it dry, repeat until you are happy with the look. I coated mine as much as I could. I didn’t want to see through the vase at all.  If you notice on my stencils they have the image that is cut out and around it it looks like a rectangle. The reason why I spray painted it this way is because I knew I wanted to see the water in some spots so I created a blocked print with the stencil.

spray_painted_vase_jaderbomb

When I was done I added water, then a little food coloring ( to spice up my water) then added some pretty tulips. You can add any color you want which makes it super fun. If you stick this baby in a window you will just stare at it for about 16 minutes strait. Fa REEL!
Remember these tulips?

Well, I hope you enjoy this tutorial as much as I did! Huge glitterbomb hugs from me to you!

jaderbomb.com

Quote of the day:
Dear George: Remember no man is a failure who has friends.
Thanks for the wings!
-Letter to George Bailey from Clarence the angel, in It’s a Wonderful Life.

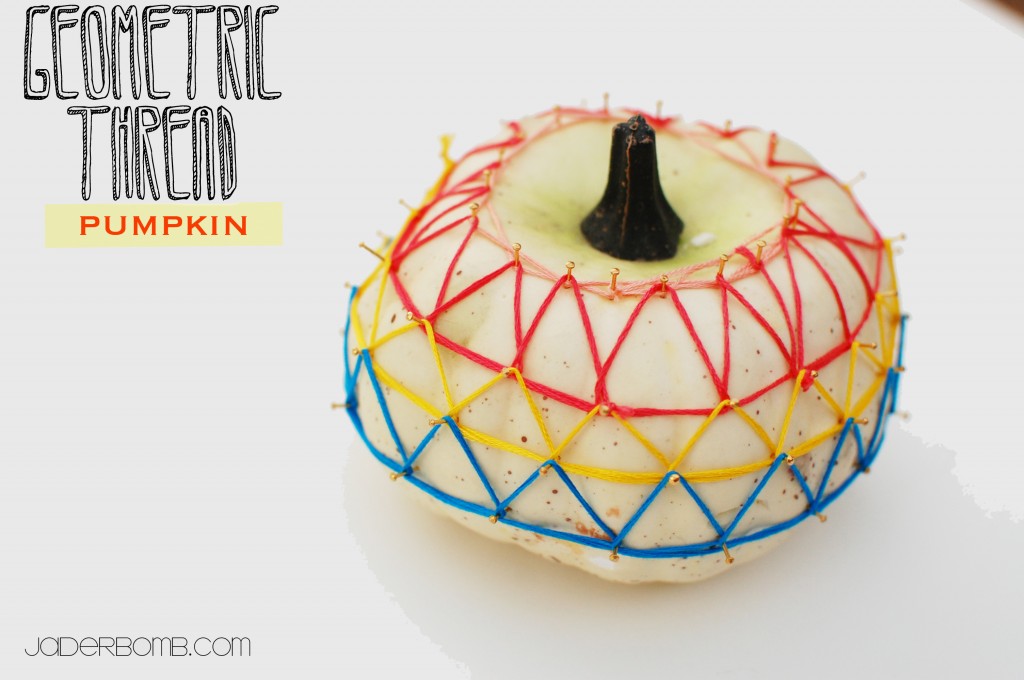
\I hope everyone had a great weekend! They have a huge “FRANKENSTORM” brewing on the East coast so all of my peeps there please be safe. I was really excited the other day when I thought about doing this tutorial. I have seen a lot of pumpkins decorated with yarn but I have not found any with a distinct design on them like this Thread Pumpkin

I mean doesn’t everyone need a thread pumpkin decorated with thread? It’s a must have, fa real.P.S. the good thing about this craft is you can decorate with ANY color thread and it will look good ALL YEAR LONG. Use Fall colors for your table decor, pure happiness there I tell ya!

Let’s get started!

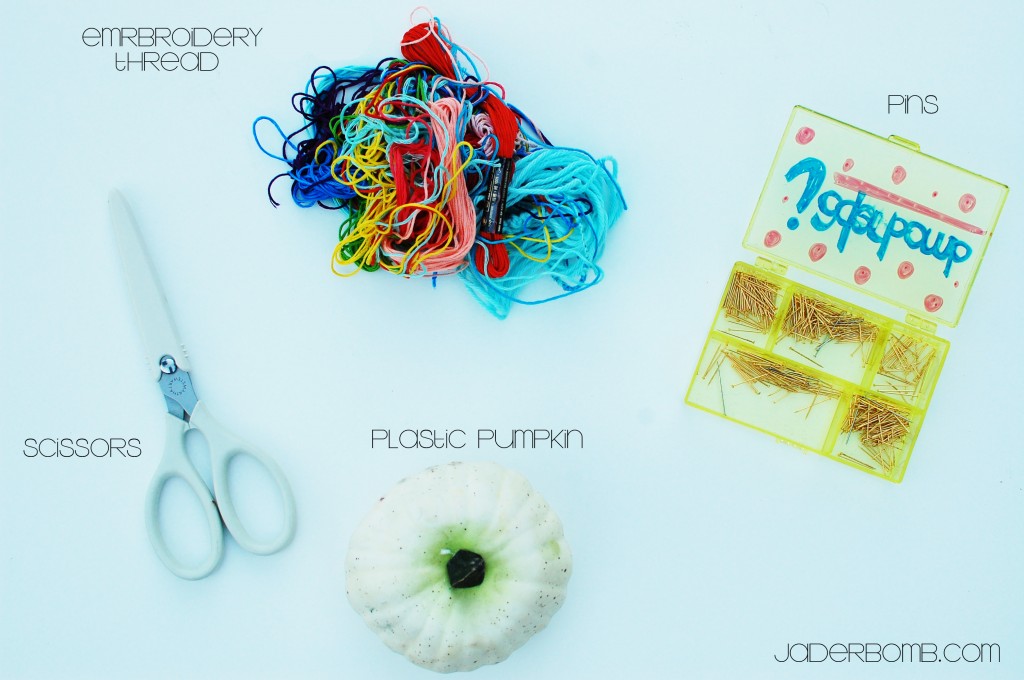
INGREDIENTS:

Thread Pumpkin

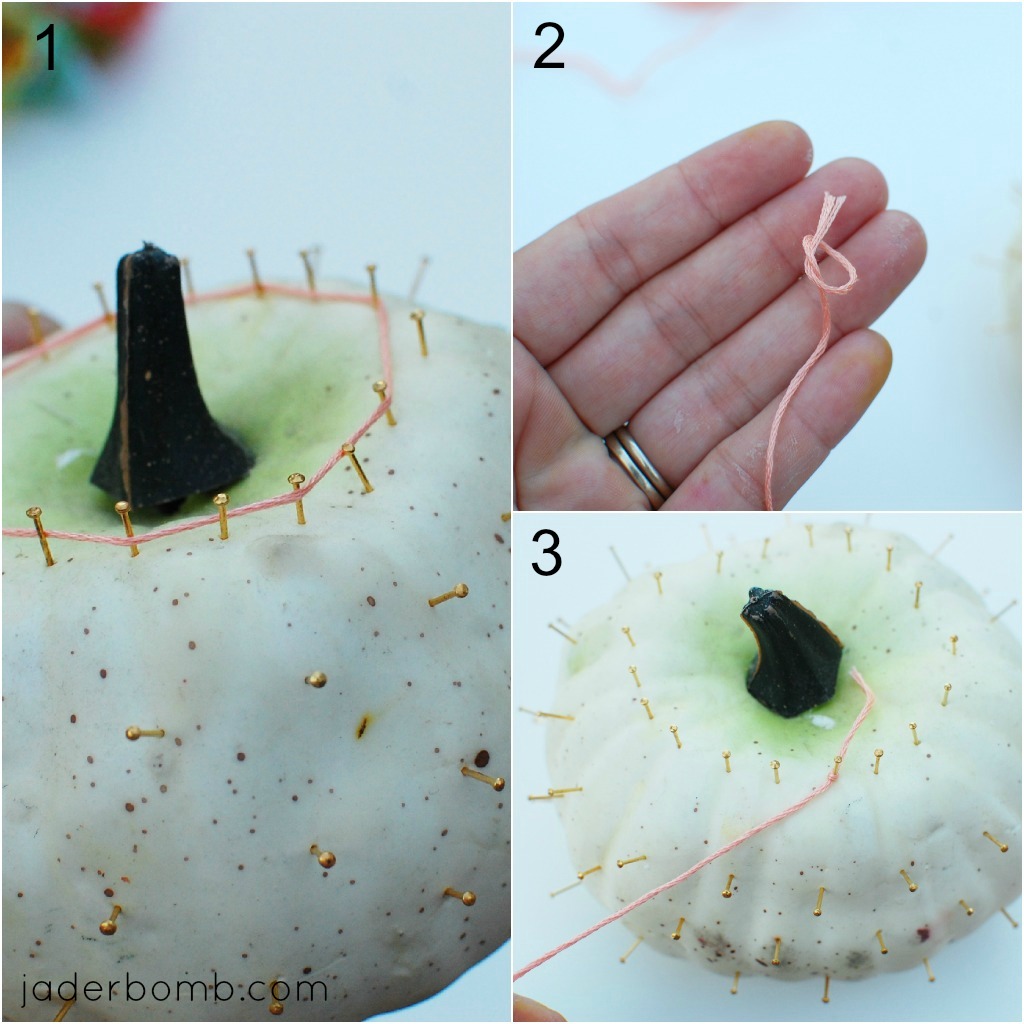
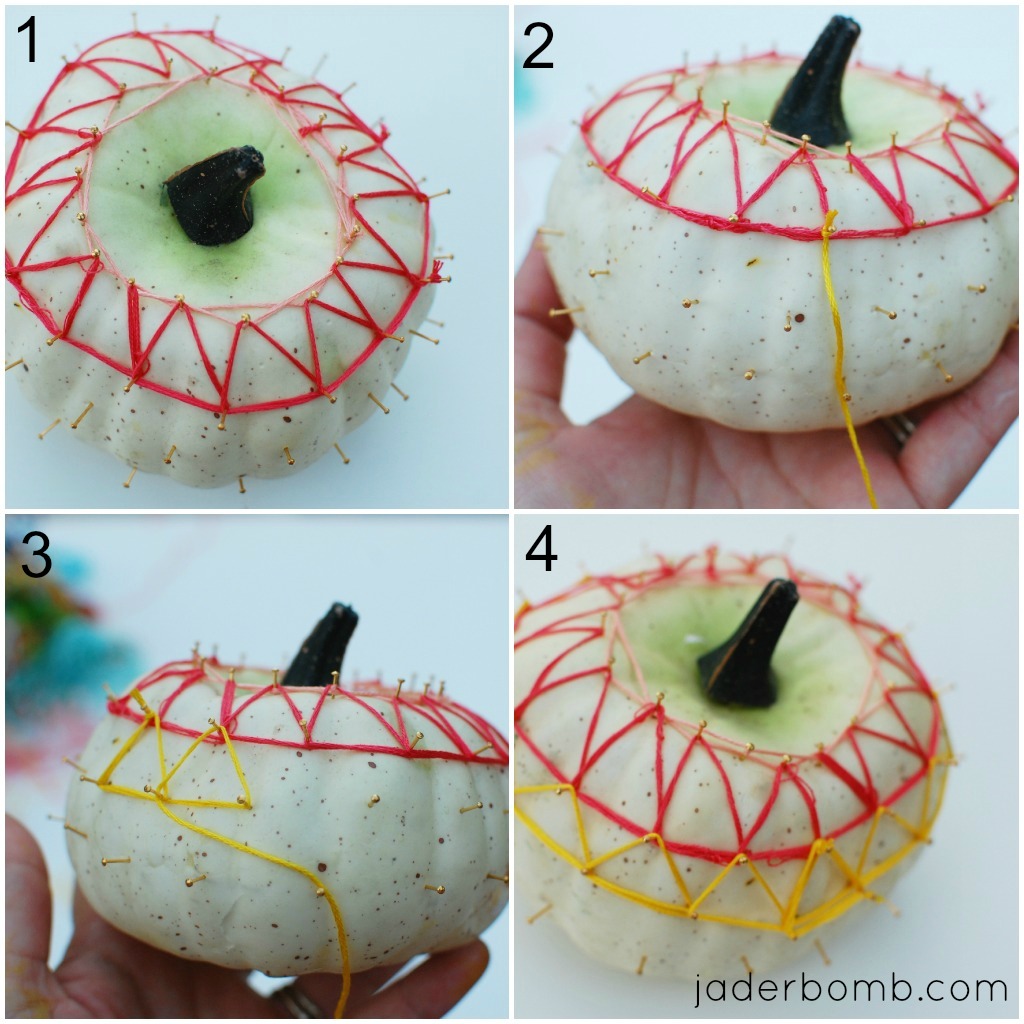
Here is the first thing you will do. Notice the order of numbers, this part is very important. You want to start by making a ring around the top with the  pins. Then go down some and put another ring of push pins. However you will put the pins in the center of the ones above it. You want to start seeing a triangle from layer to layer.

When you are done with the pins, tie a little knot around the top of thread and put on a pin.

Start wrapping your thread around the pins! Once you get started you will figure our your pattern. You can go over the triangle a few times to make it look layered!

I hope everyone had a good weekend! Oh and btw: this yarn pumpkin is good for ANY time of the year.

I hope you enjoyed this tutorial, see ya in the next post! Make sure you come visit me in these places too! (look below this line, hehe)

Facebook Twitter Gplus Pinterest YouTube E-mail RSS

Get your DAILY dose of DIY delivered in your inbox! Just put your email address below!

Enter your email address:

Delivered by FeedBurner

Jaderbomb!

Make a Paint Sample Lamp Shade

Hey my little Jaderbugs!!! I totally have been MIA lately and you can now slowly walk out of the closet and stop crying… why? Because I’m back you little suckers. I tell ya, life seems to get crazy hectic all at the same time. RIGHT!!!! The other day I was “mopping” (yes I am OCD) and I noticed a lamp that looked {{boring}}. I mean don’t get me wrong, it was super cute and prolly one of my favorite lamps at one time, but that “time” is long gone.  While mopping I was thinking of something I could do to dress it up but at the same time keep it cute and sassy. By the time I finished mopping I STILLLLLLLL didn’t think of what I could possibly do UNTIL I opened a drawer. I tell ya, I have never had a drawer sing to me like this one did! As I slowly opened it I saw a HUGE stack of paint samples and the universe answered me.  I hope you enjoy this craft and remember, it’s not stealing if you get 1000 paint samples 🙂 I promise because I had like 2000.  Also, remember that you can do a lampshade in one particular color but in different shades of it and I bet that would be cute as a button!!

Seriously. How cute is this.  I know you can’t see it but when the light is ON it lights up in the coolest way. It’s almost like a “cheap” tiffany lamp{{{heheheheh}}}
Until next time
peace. love. jaderbomb

Linked up HERE