Tag Archives: jaderbomb

I have to admit I love everything about this time of year. Pumpkins on porches, windows open (well not yet), soups and the smell of yummy cinnamon in the air.

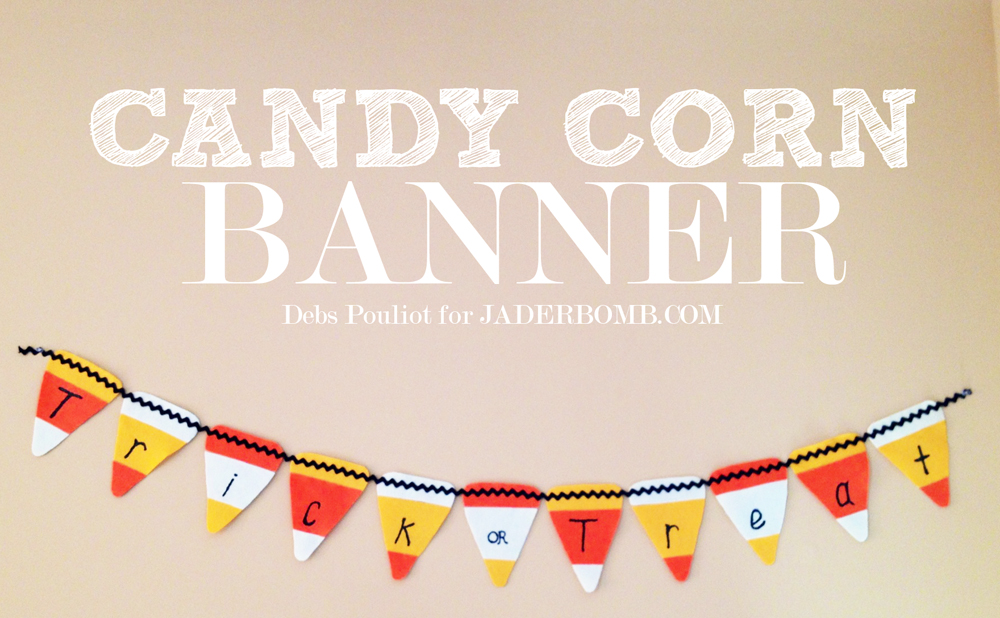
You can’t lie, you love this too.  Oh, and I love candy corn and this candy corn banner!

So I did something really stupid this weekend. I am just like “Whuh”…. I made this wall art and did NOT take any pictures. I have NO idea what was going on in my brain but I figured it was cute and easy enough to explain without pictures.

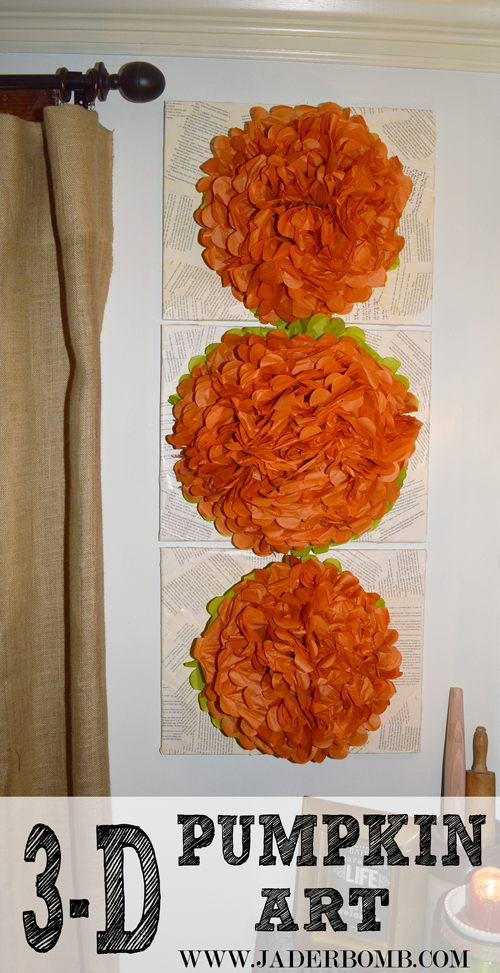
It’s very cute and ads a little dimension to your walls. What I love about this is I can replace the tissue pom pom’s for different occasions.
3-D PUMPKIN ART

you will need

*Pumpkin Pom Poms
*Canvases
*Old Books (I used one of my twilight books)
*Martha Stewart Decoupage: Multi-Surface Durable Gloss Finish
*Paintbrush
*Hot Glue

  • Get three blank canvases.
  • Tear pages out of a book and secure them on the canvas with your decoupage. Allow time for this to dry (3-4 hours)
  • Create your paper pom pom and secure it on the canvas with hot glue. If you purchase this set from the link above the instructions are in it. Super easy.

If you are interested in making your own tissue paper pom pom check this out. These tissue pom pom’s are meant to hang but I left the back flat so I could place it on the canvas.

Huge Hugs and Glittery Love,

jade

Happy Sunday Y’all! I took a break today and my friend Deb’s will show you how she made her “Candy Corn Banner”. It’s super cute and I know you will just swoon over it. I am super excited today because Martha Stewart featured my candy corn lamp on her website.

Candy Corn Banner

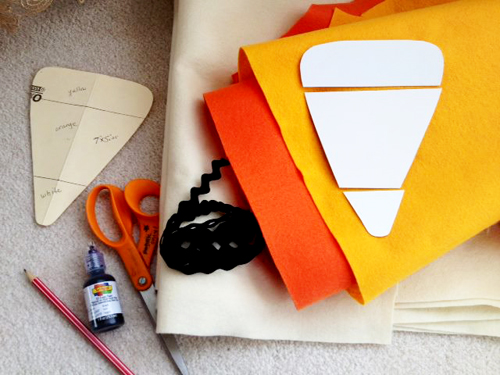
you will need

1/4 yd of yellow felt
1/4 yd of orange felt
1/4 yd of white or off white felt (I used off white)
2 yds black medium ric rac or other ribbon
1 small bottle of black dimensional fabric paint
Fabric scissors and paper scissors
2 pieces of cardboard (can use a cereal box or manilla folder)
Pen or marker tape
Candy Corn Template Candy Corn Template


CANDY CORN SUPPLIES

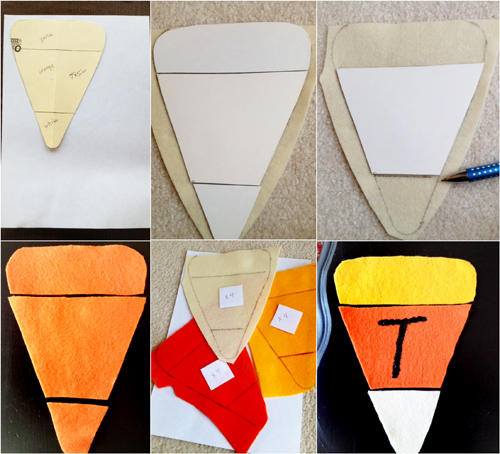
  1. Print the candy corn template to be about 7″x5.25″
  2. Trace and cut out two candy corn shapes on cardboard (cardboard is sturdier to draw around over the felt). Leave one template whole and cut the other into thirds as shown in the pic.
  3. Trace around cut templates on felt until you have four felt candy corns in each color for a total of twelve (Even though my banner was only 11 pieces I used an extra candy corn to write “or” on).
  4. Lay out the shapes alternating colors as shown to form the candy corns.
  5. Use tape to attach candy corns together from the back (you can also sew them together with a zigzag stitch).]
  6. Glue or sew on the ric rac along the tops, connecting them all side by side to create the banner.
  7. Write T-r-i-c-k- or T-r-e-a-t with the dimensional paint, let dry and then display on wall or in doorway.
  8. Note: you can also make these from card stock or if you want to display your banner outdoors, you can use vinyl/waterproof fabric.

DIY CANDY CORN BANNER FALL

I got the felt from Joann’s. It was reg $4.99 per yd on sale for 40% off and I only purchased 1/4 yd of each colour (felt squares may cost a bit more). Since I already had the dimensional paint and tape, the entire project cost less than $5! I hope you enjoyed my craft! You never know, you might see more of me on here! XOXO, DEBS

Check out these Fall and Halloween tutorials.


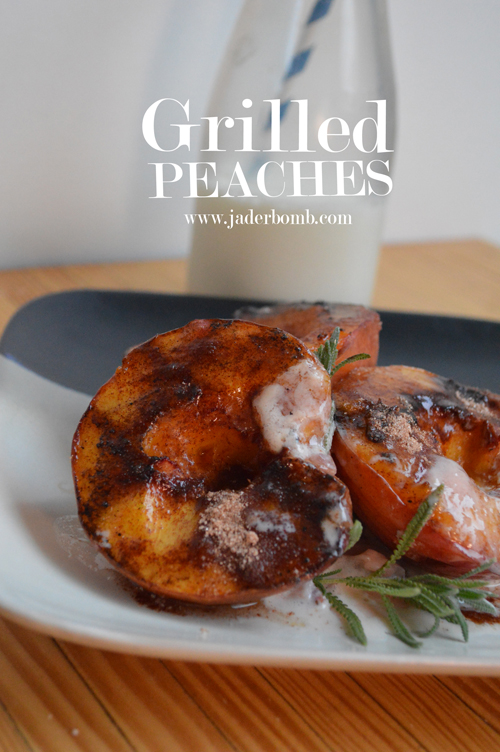
It’s FOODIE FRIDAY! We are cooking grilled peaches and they are yummy and addicting. It’s weird because they might not look the greatest but your belly will be doing cartwheels for sure.

The other night I went to the grocery store and they had a huge section of fresh peaches. No, they were not on sale. Yes, I bought way to many. What can I say I am a sucker for fresh fruit. I am a dork because anytime I cook with fruit I think about the person that picked it and if they would like my recipe. They probably don’t want a peach near their mouth.

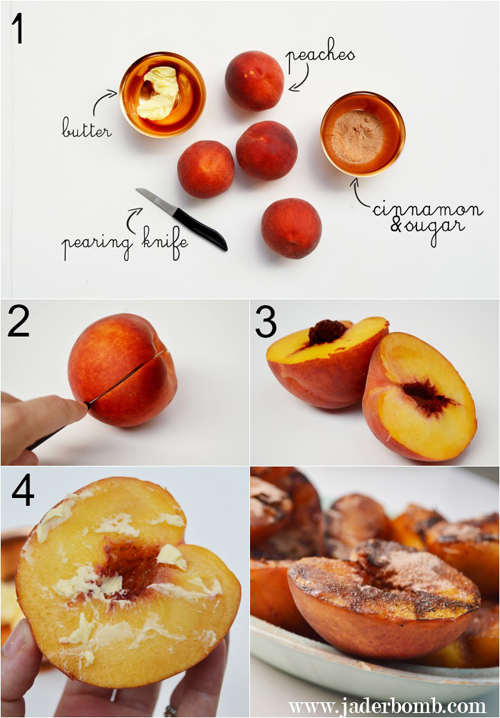
What I love about this recipe is how simple it is. You can pop a brewsky and by the time you are done drinking it they will be ready to eat. I guess that say’s a lot about how fast I drink?!?! When my peaches were ready I put a little strawberry blue bell on top.

Grilled Peaches

howtogrillpeaches

[amd-zlrecipe-recipe:2]

Peach Recipes


Here is a fun video that I made incase you are visual person like myself. This was a fun recipe and I can’t wait to show you next weeks recipe! Check out my food and dessert recipes. I don’t recommend viewing if you are hungry. Happy FRIDAY!

Make sure to come back tom to see what I did with this table. Come stalk me on FacebookTwitter,Pinterest, or Instagram!

HUGE LOVE AND GLITTERY HUGS,

jade

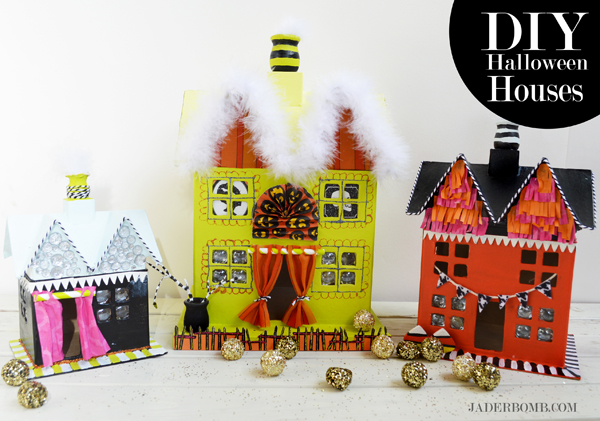
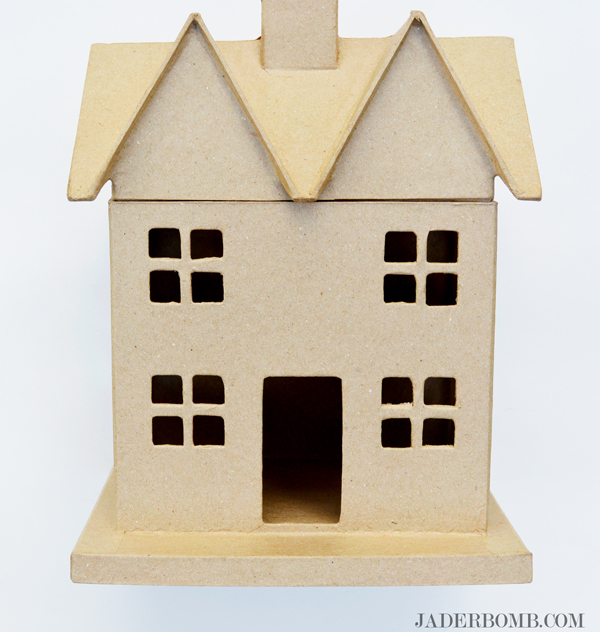
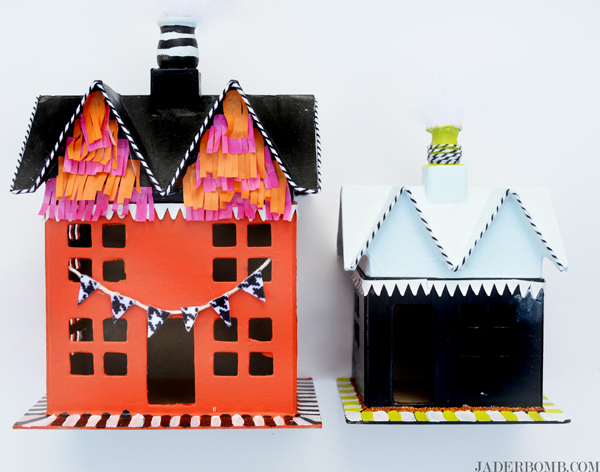
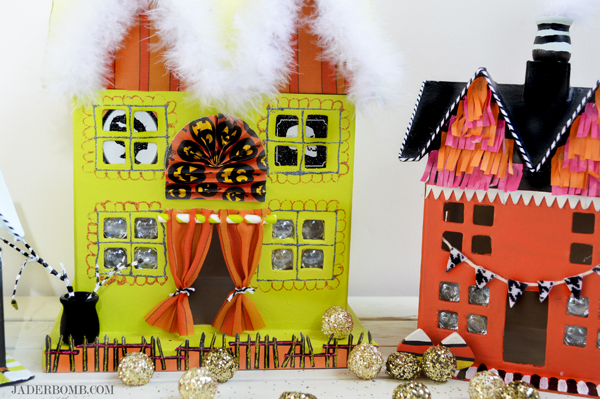
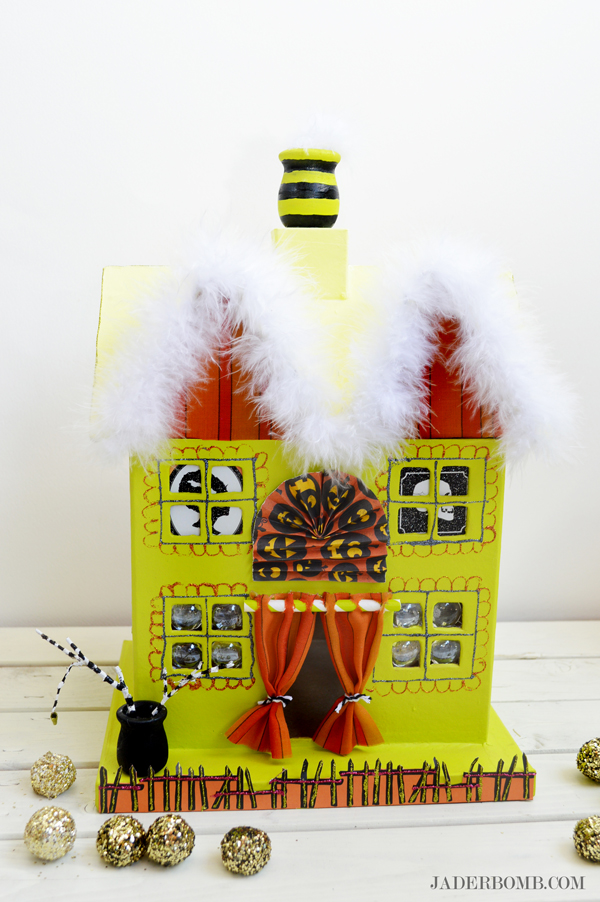
Today is a perfect example of my motto “Why buy when you can DIY”. It’a almost Halloween and I always dress up my house and studio with DIY Halloween Houses. I love today’s craft because you can keep it when the holiday is over or toss them to avoid clutter. I know you are prolly thinking I am crazy for saying I would toss them but I am pretty over the top like that. It’s one of those things that I wouldn’t want to stuff in the attic. After all it’s not like it’s a Glitterville collectible.  With that said, you can purchase these cardboard houses from Hobby Lobby and they are really inexpensive. I think the large house was around $5 and the other two were $2 and $3 dollars. I hope you enjoy them!

P.S. Check out today’s FREE Fall printable on Free Pretty Printables.

decorated cardboard boxes for halloween

diycardboardhouses

You can purchase these from Hobby Lobby!paintcardboardhouse

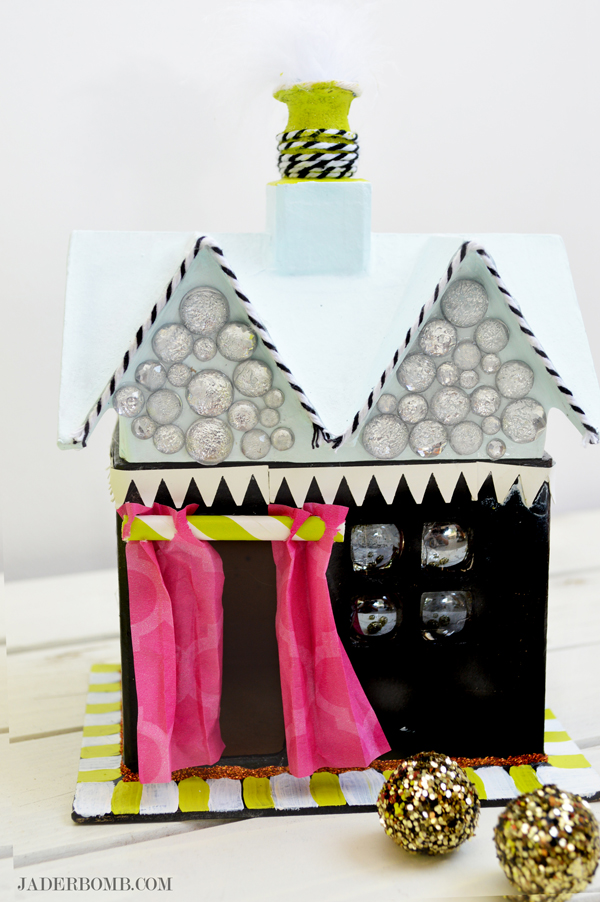
I started by painting the houses with acrylic paint. I lined the roof with baker’s twine and added tissue paper to the front of house. diy halloween house

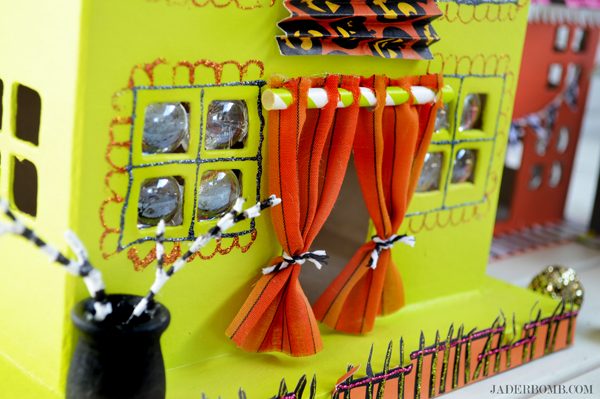
I used glass beads for the windows. For the curtain I used a paper straw and a piece of tissue paper. I let my godchild help me and I am so happy I did. It’s a fun craft that any kid can do and trust me it will keep them busy! halloweenroof

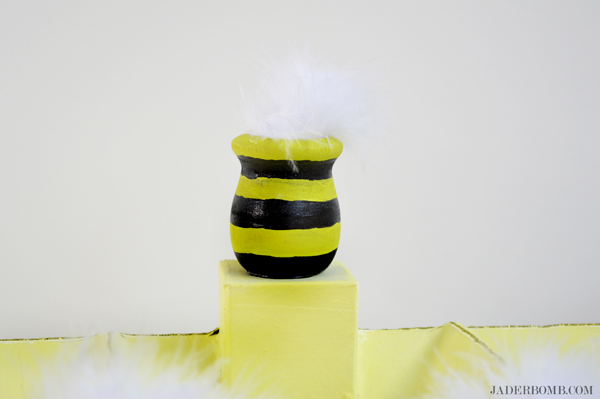
For the roof I used a little wooden planter and stuffed it with a fluffy boa! You can get these from the craft store also. I say use any fun goodies you have at home and be creative. After all that is where the fun comes in. how to decorate cardboard house

For the fence I cut a strip of Martha Stewart craft paper then added glitter to it. Just have fun with your house! halloween diy houses easy halloween diy houses

I hope you enjoyed these and you create your own magical houses for the holidays. See you in the next post!

Huge glittery hugs—See you in the next post! Visit me on FacebookTwitter,Pinterest, or Instagram!

This is a sponsored post and I did receive product but all opinions are 100% my own, pinky promise.

I have to start by saying I am super stoked about the products in this post. You know I am all about DIY and I always need a good drill or circular saw to get those projects completed. Ryobi and Jaderbomb decided to get married at Haven this year.

No worries I will be posting about my experience at Haven this week on the blog.

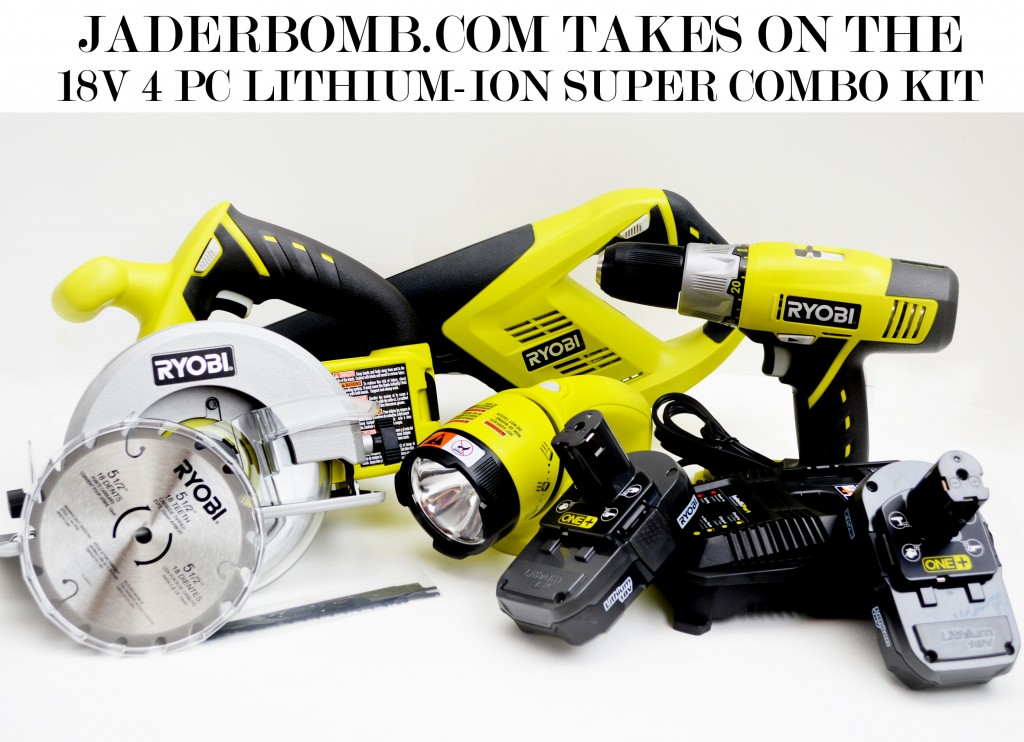
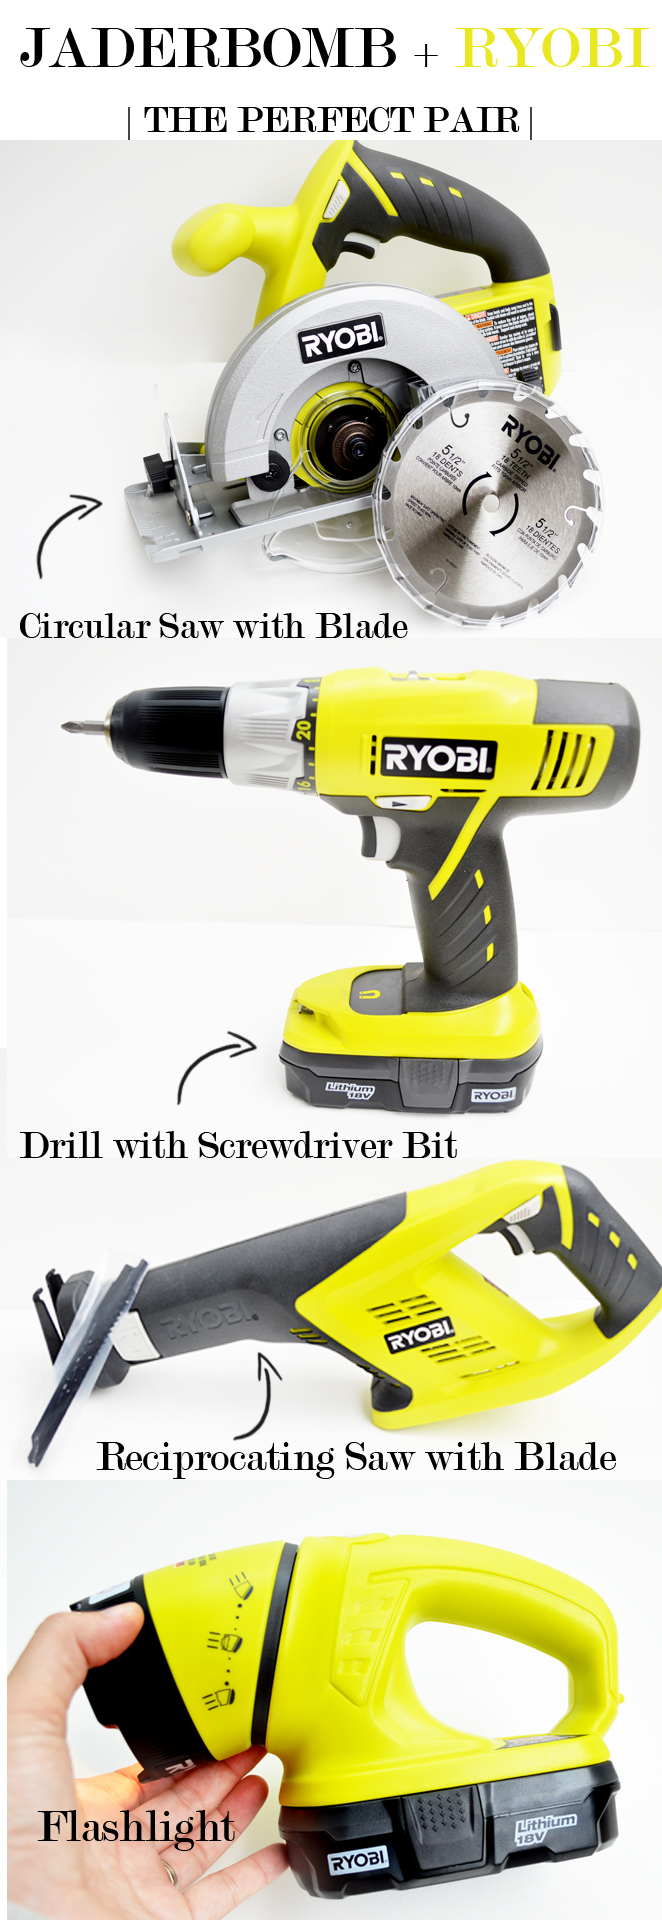
Purpose of this blog post. To show you how sexy my new tools are and to let you know that you will be seeing these babies in some upcoming posts! Just like I told my Ryobi boys, “this shade looks great against my skin tone” so with that said here is a preview of what comes in the SUPER COMBO KIT.

Want one? Click here to see how to make that happen.

RYOBI COMBO KIT

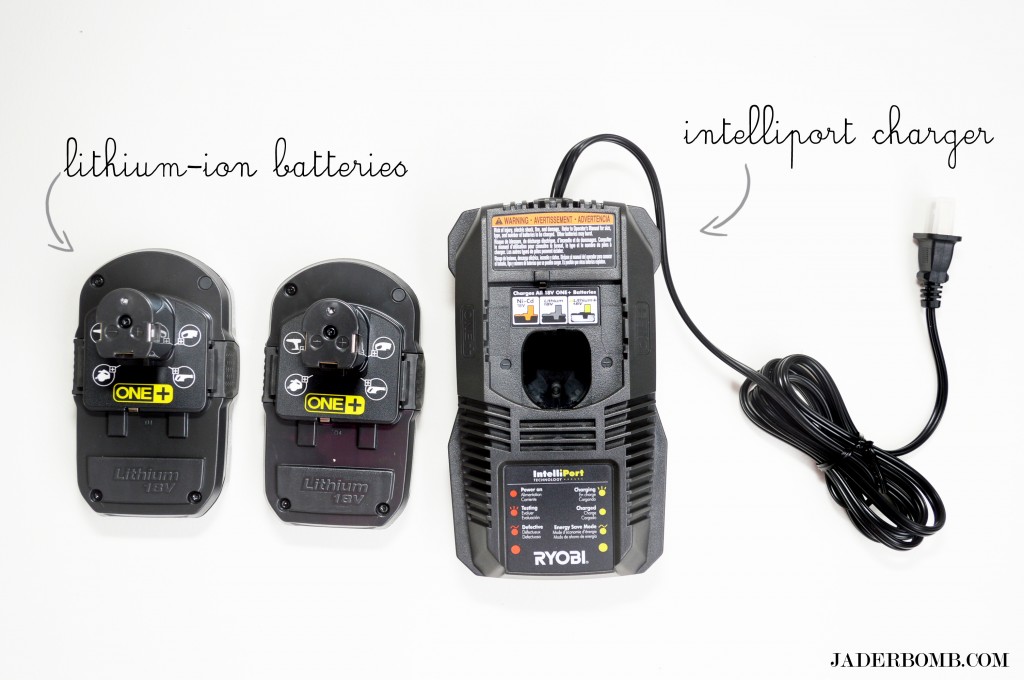
RYOBI® 18V ONE+™ introduces lithium-ion performance at Ni-Cd prices. This kit is powered by new lithium-ion batteries, the very best value in lithium-ion performance. They offer up to 20% more runtime, hold a charge 4X longer and are 45% lighter weight than Ni-Cd batteries. Batteries stored on the IntelliPort™ charger are conditioned for peak performance. The drill includes a 1/2 inch heavy-duty single sleeve, keyless chuck with a 24 position clutch to match your drilling and driving needs. The reciprocating saw is great for demolition and general cutting of a variety of material. The circular saw has a 5-1/2 inch, carbide tipped blade to rip through 2-by material and sheet goods. The work light has a swivel head that directs light where needed.

jaderbomb and eclecticallyvintage

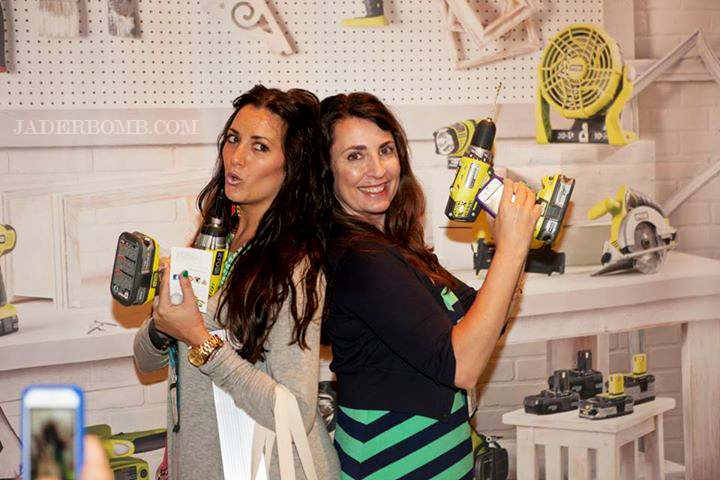
Me and my roomie Kelly from Eclectically Vintage. Every time I look at this picture I just laugh. We were trying to look Charlie’s Angel-ish but I think I failed in that department.

I am not sure what to think when I look at this picture. I can tell ya, I was trying to “blow” the tip of the drill like it was on fire!?!?!? EPIC FAIL.

Moving on.  Check out these great tools!

RYOBI-LITHIUM-COMBO-KIT-JADERBOMB

ryobi-lithium-ion-batteries

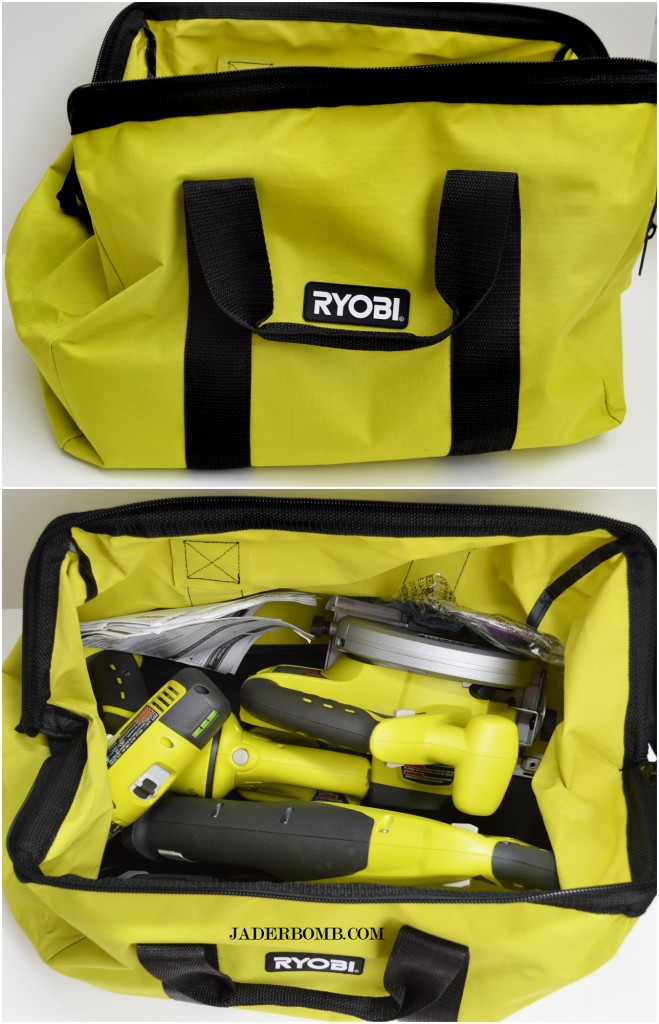
ryobi combo kit bag

Well, there ya have it. I am simply amazed at how well designed these products are and how they perform. This is the real deal kids! My favorite thing about this kit is the bag! Everything fits in the bag, y’all. Marvelous.

Stay tuned you will be seeing these a lot in some up coming diy tutorials.

Huge glittery hugs—See you in the next post! Visit me on FacebookTwitter,Pinterest, or Instagram!

sponsoredpost

This month the world came to a sudden halt with the launching of this product —> Martha Stewart Decoupage.

Decoupage on glass? Why yes, this will become your next secret addiction.

This is not like your everyday decoupage, y’all. It’ the cream of the crop.
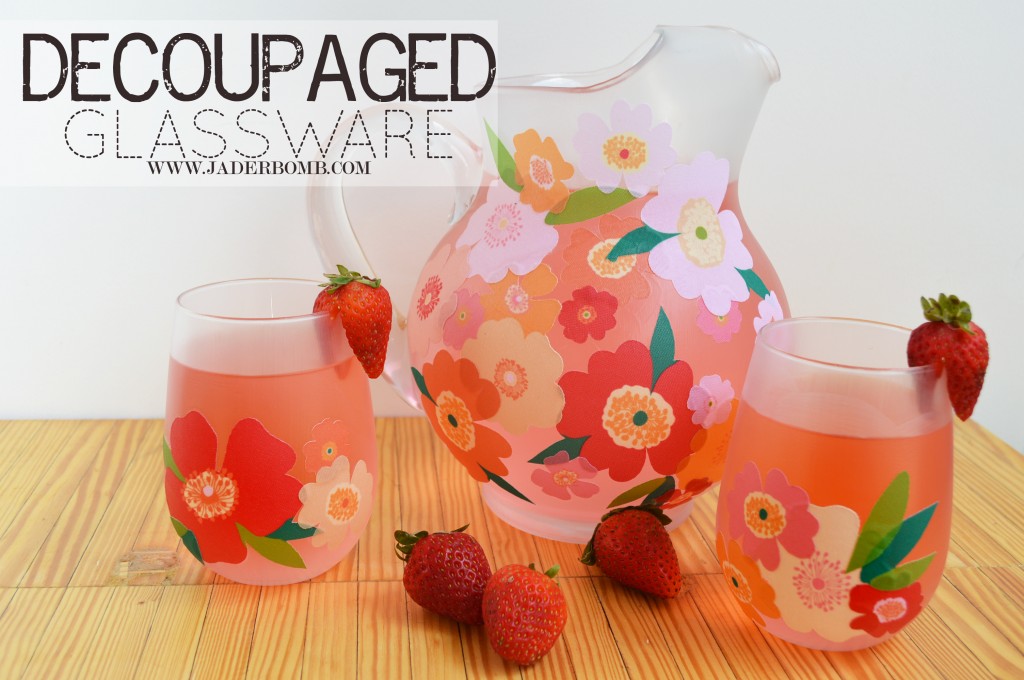
Decoupage on glass

YOUWILLNEED

*Martha Stewart Decoupage Soft Bristle Brushes
*Martha Stewart Decoupage Fabric Appliques
* Martha Stewart Multi Surface Durbable Matte Finish (found at Michaels)
*Alcohol
*Glass Pitcher and Glasses
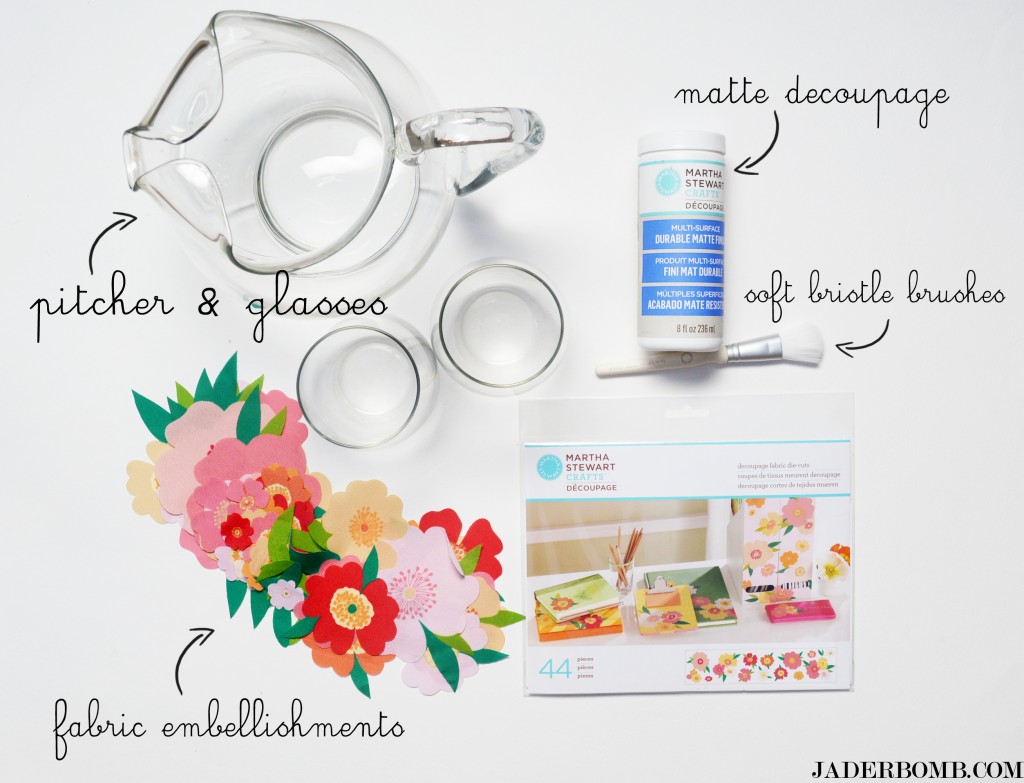
decoupage-pitcher-supplies

I purchased my pitcher and glasses from Target and they were completely affordable. That is always nice, incase you mess up 3 times.

I have to admit, Martha Stewart consistently impresses me but she really did it with these fabric flower embellishments. Pre-cut, why YES THEY ARE!
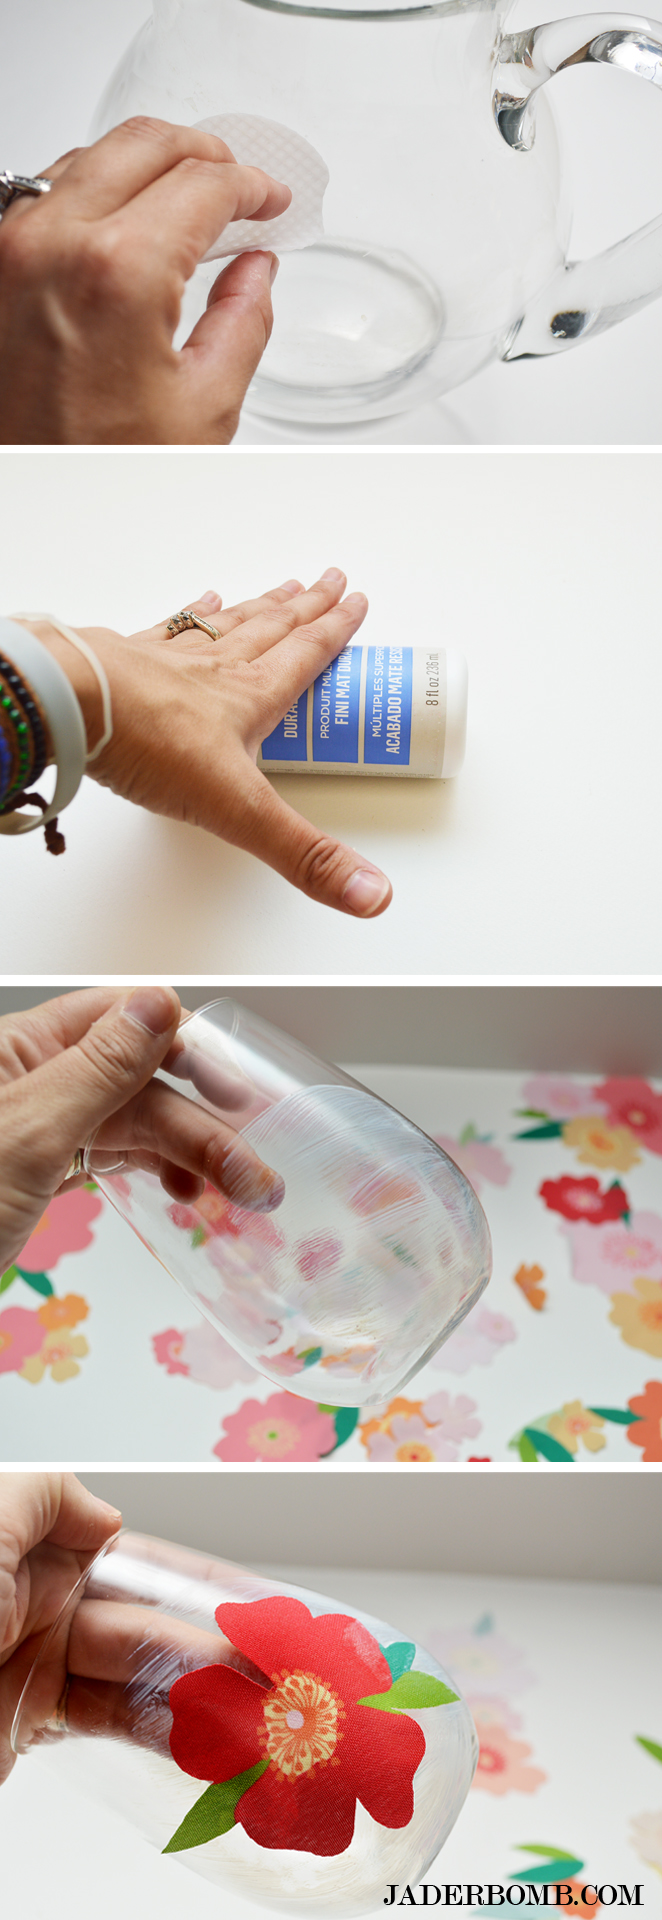
decoupaged-pitcher-cups

1) The first thing you will do is grab a little rubbing alcohol clean the surface. This will take care of those greasy little fingers that just touched it.  Wear gloves if you feel like touching it.

2) Grab your Durable Matte Finish Decoupage and roll that sucker on a flat table to mix it up. Please, for the sake of all the bubble makers out there don’t shake. We want to keep the bubbles in bubble-land not in the decoupage bottle.

3)Grab your soft bristle brush and apply a thin layer over the section you will be placing your flower. Don’t over do it, we just want to apply where the flower is going to be placed.

4)Quickly grab your flower and place it on top of your thin layer. Brush a light coat of decoupage on top to make sure it’s secure. Apply as many flowers as you want. Make sure you work at a good pace so the decoupage does not dry. The fabric embellishments are easy to put on however if you decide to use paper make sure to rub your finger over them to get any hidden air bubbles out. Set aside and let dry 1-2 hours.

When dry, the Durable Matte Finish Decoupage looks just like frosted glass. I almost flipped in my chair when I went back to look at them. I may have blurted out a few curse words that were purely out of excitement.

5) When you are finished applying your flowers get the 1 1/2 in 3.81 cm soft bristle brush and apply a thin coat over the entire glass. It’s important that you brush in the same direction when applying your final coat.

6) When done let them air dry 2-3 hours.

7) You can put as many layers as you want just make sure you allow drying time in between each layer. 

8) Set this aside for 21 days to cure completely and guess what, this will be dishwasher safe!
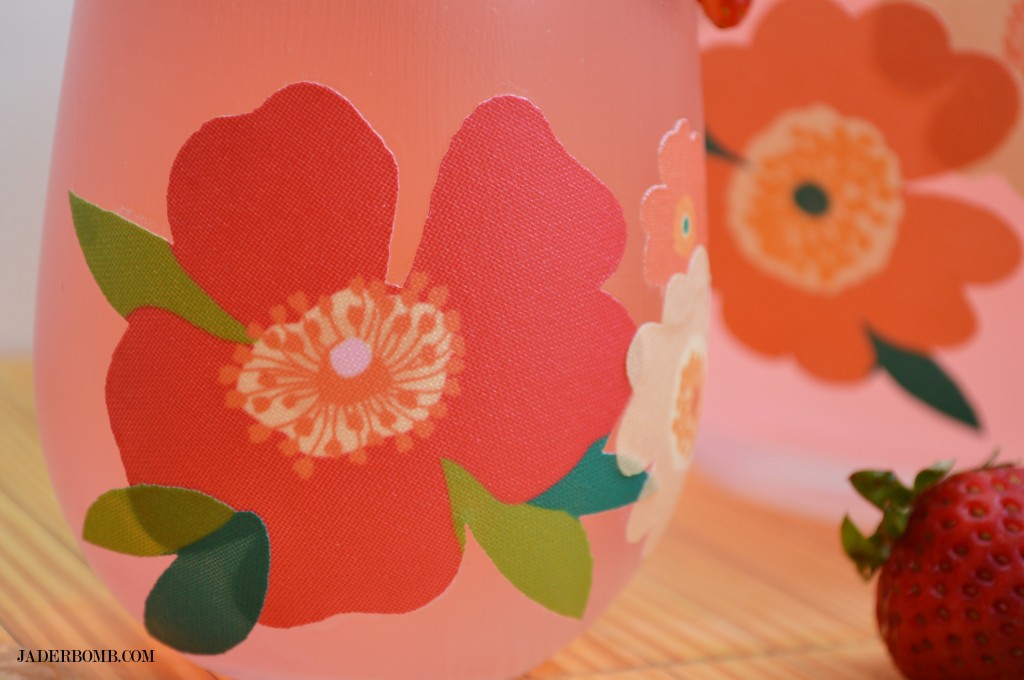
flower-decoupage

You can really see in this picture how the decoupage looks like frosted glass. It is beautiful!
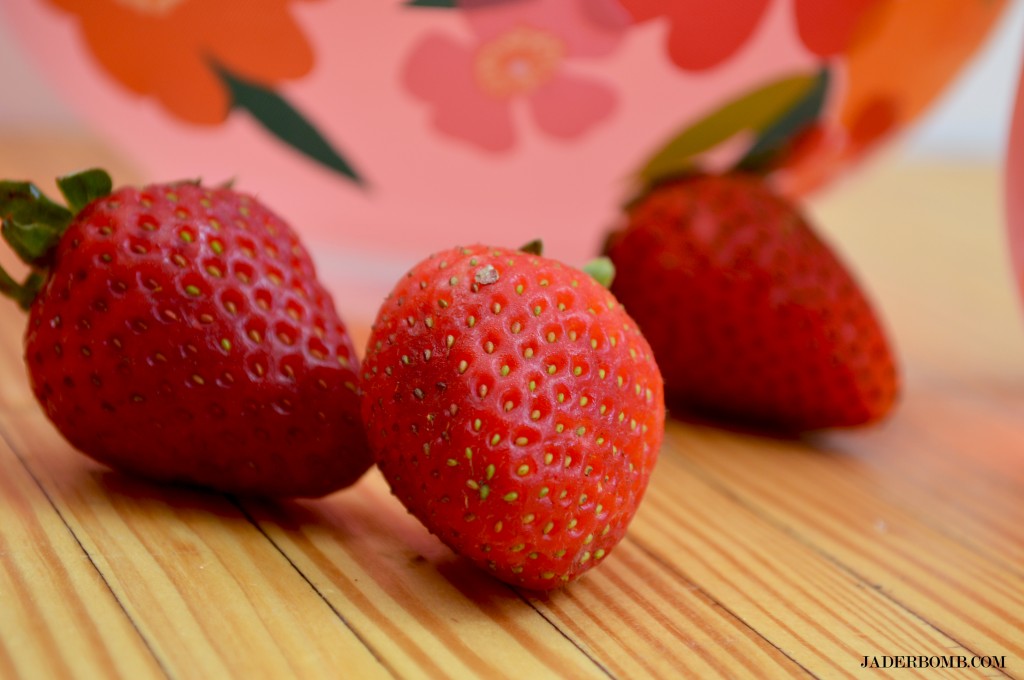
decorate with strawberries

I ate these while I crafted and they were yummy. Want one?
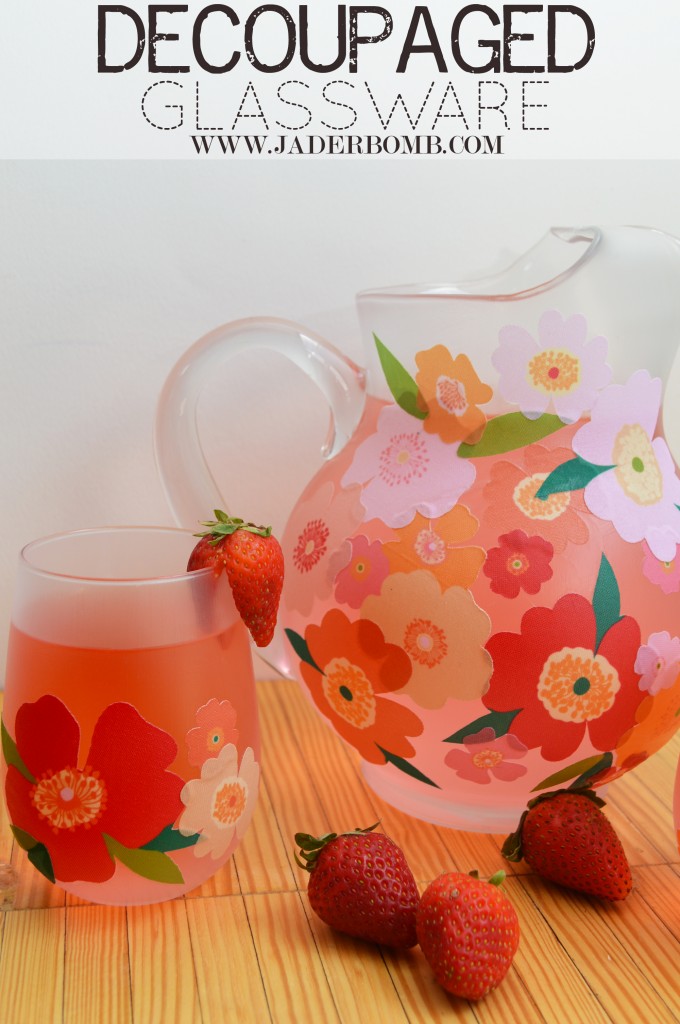
how to decoupage on glass

decoupaged glass that is dishwasher safe

I hope you enjoyed this post. I had a blast playing with these new products. BTW: these decoupaged glasses look cute on anyone! 

Huge glittery hugs—See you in the next post! Visit me on FacebookTwitter,Pinterest, or Instagram!

This is a sponsored post through Blueprint Social and Plaid but all opinions are 100% my own.

For the complete line of Martha Stewart decoupage at Michaels.  Visit Plaid on FacebookTwitter,Pinterest, or their blog. Trust me they post great things daily!