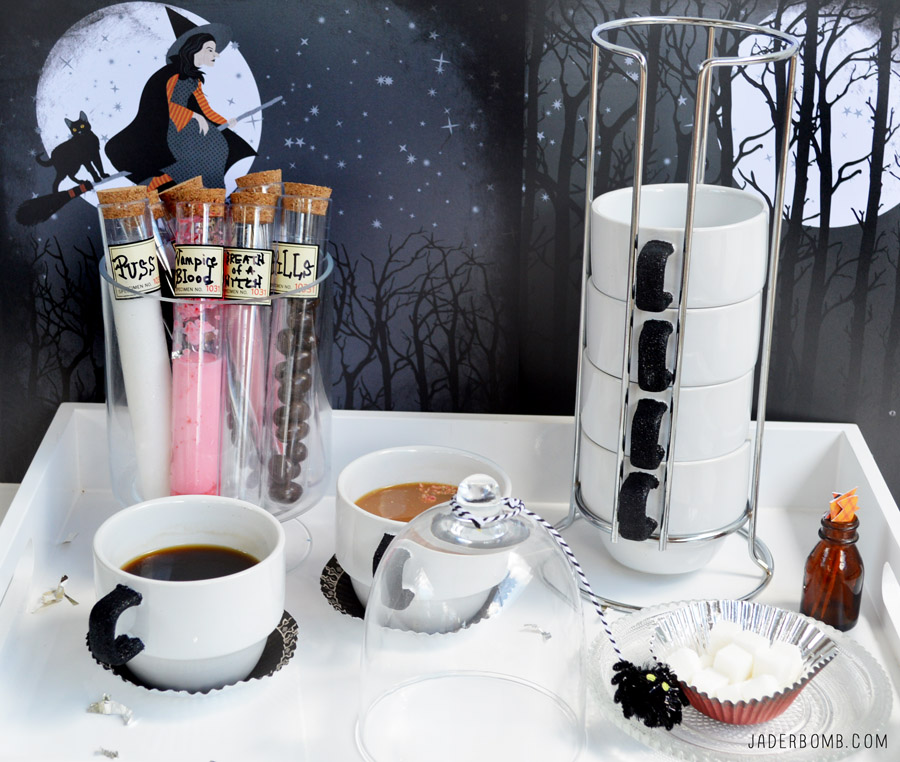
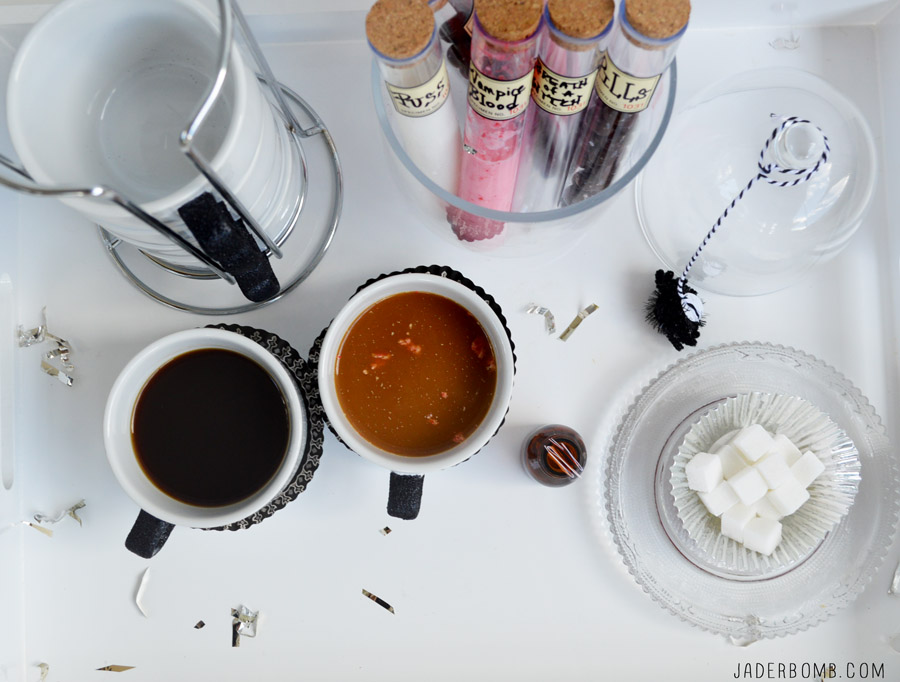
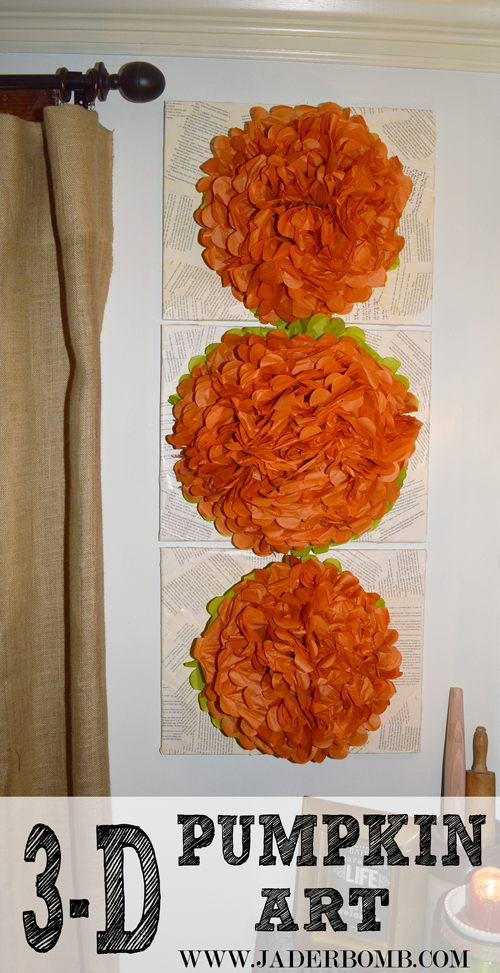
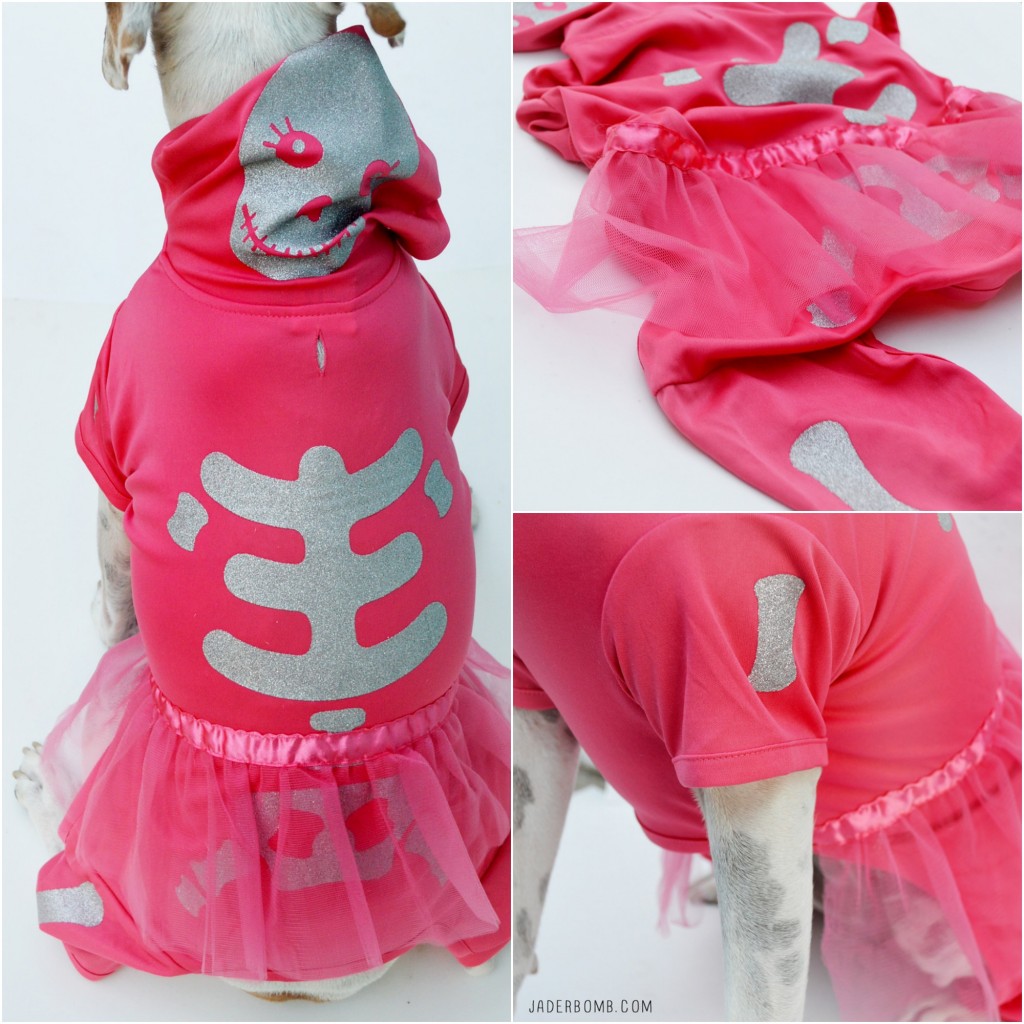
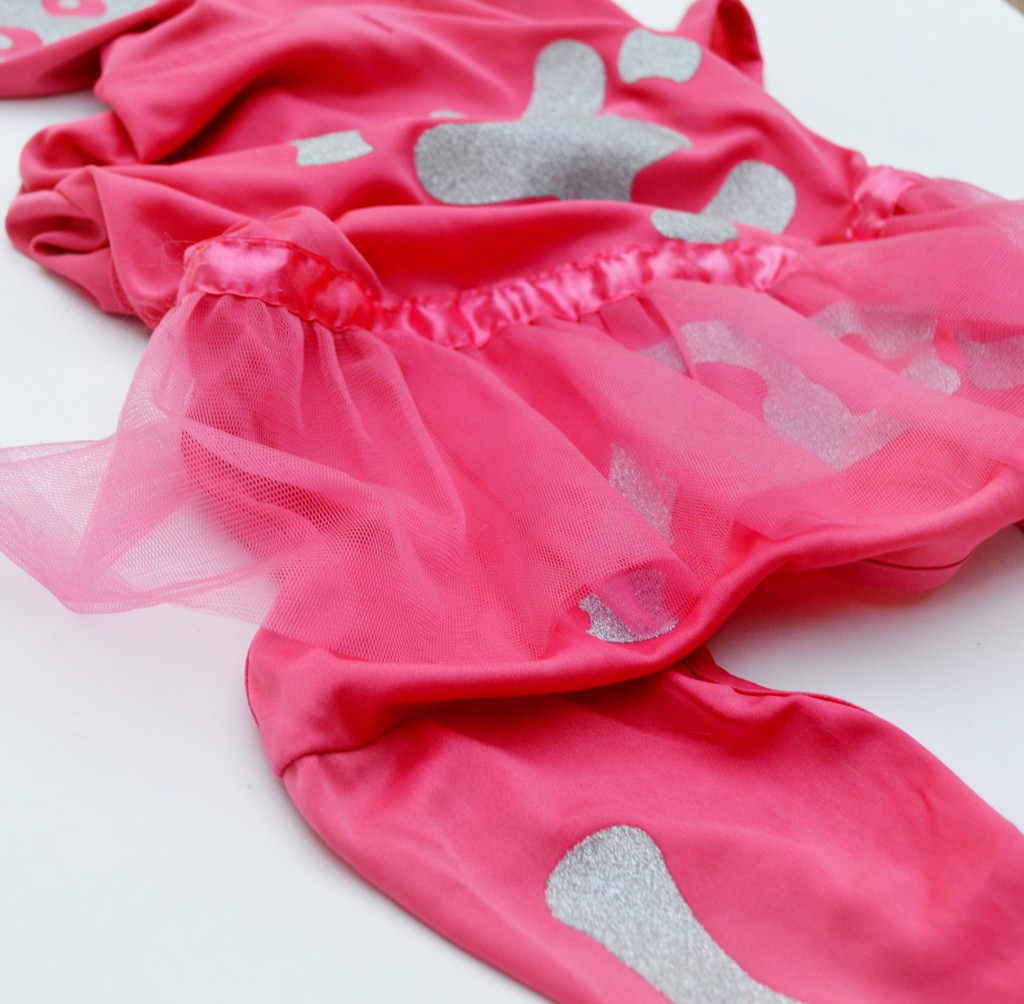
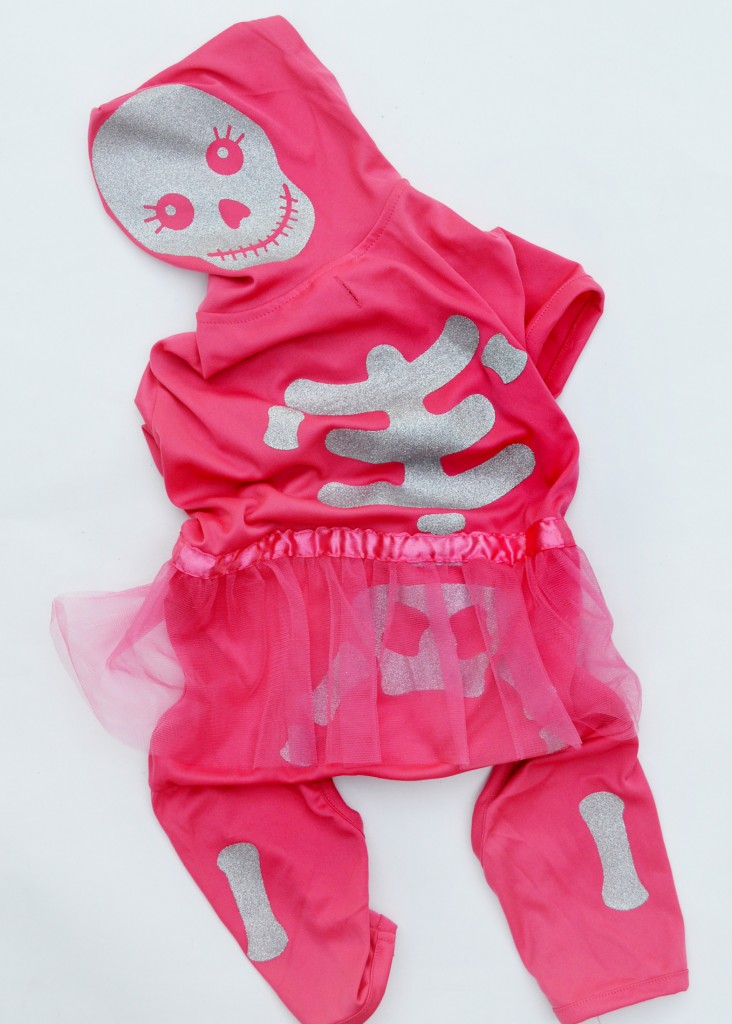
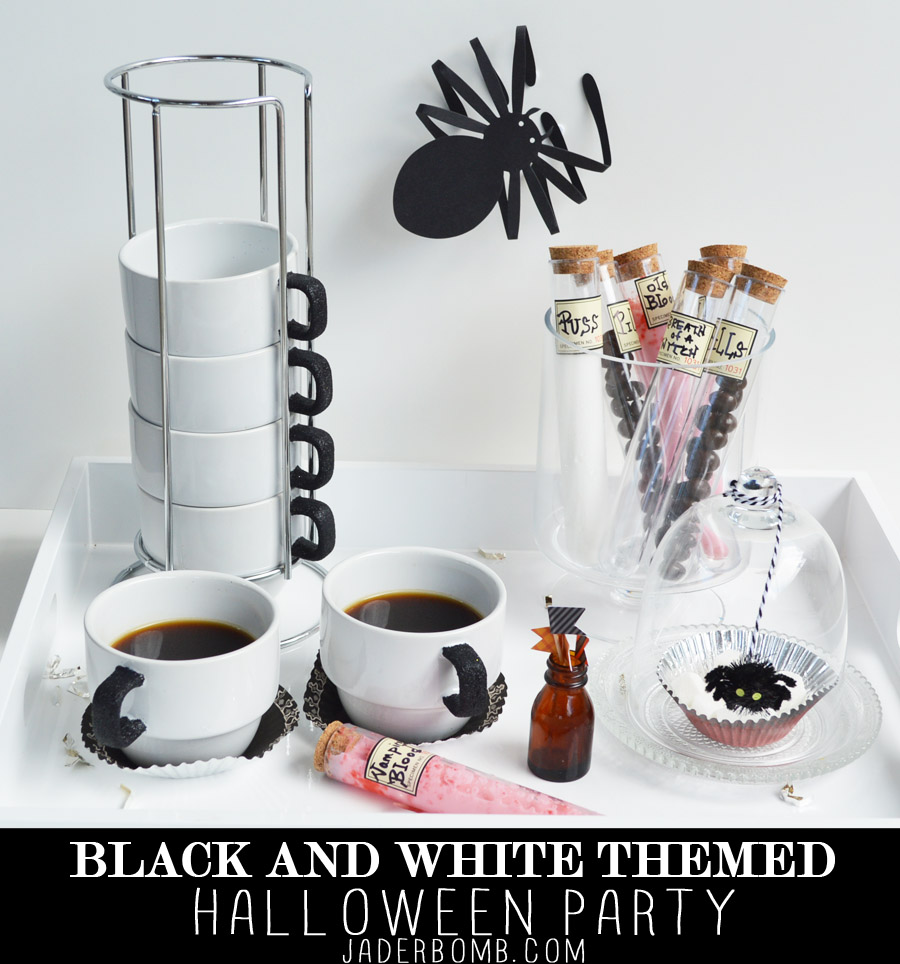
Tag Archives: martha stewart

ST_12_months_of_Martha_Logo-1How to make a Paper Cone

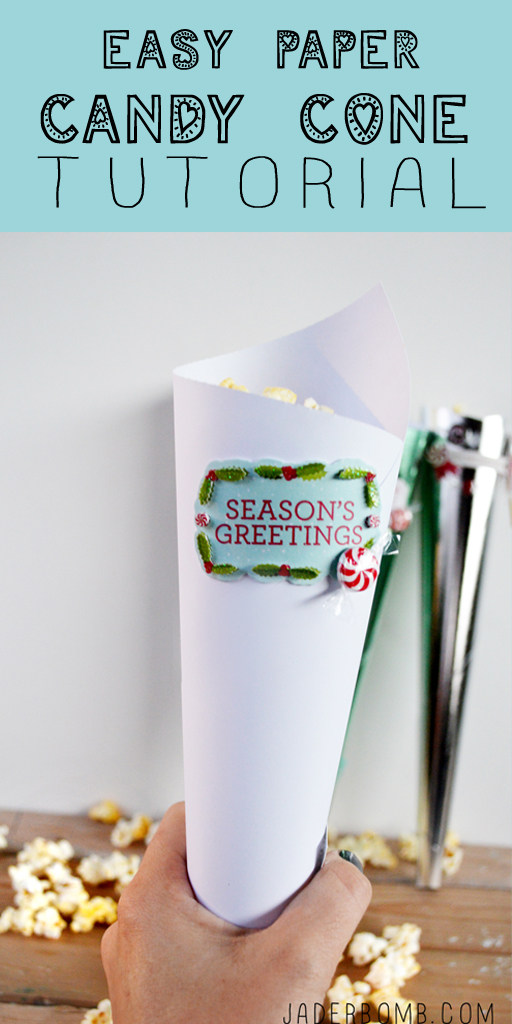
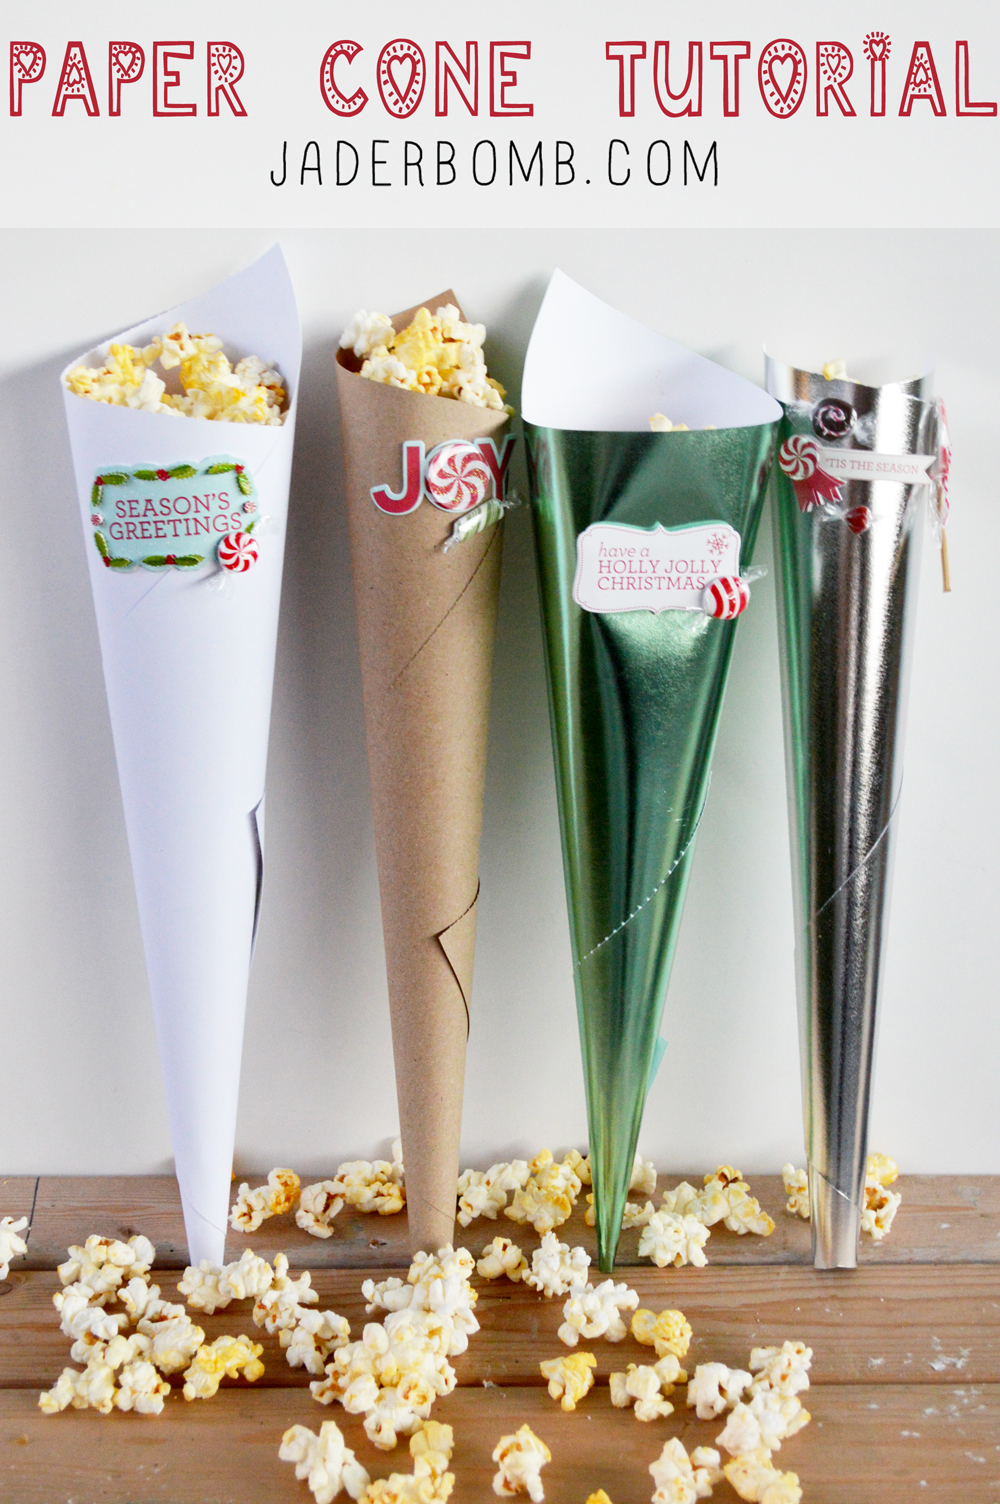
What’s better than Popcorn? Getting Popcorn in a paper cone, y’all!

Now before you flip out with excitement I will need you to put on your Christmas shirt and grab a movie. Preferably UP. Wait, did you see my post I did yesterday on the I love to create website? Check it out Here.

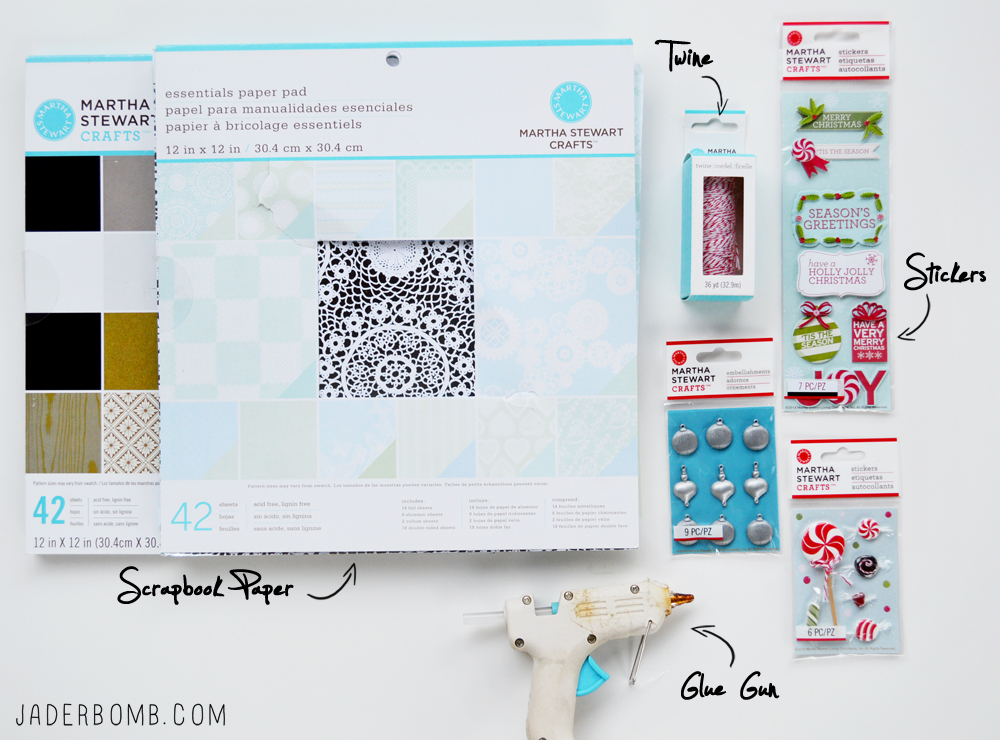
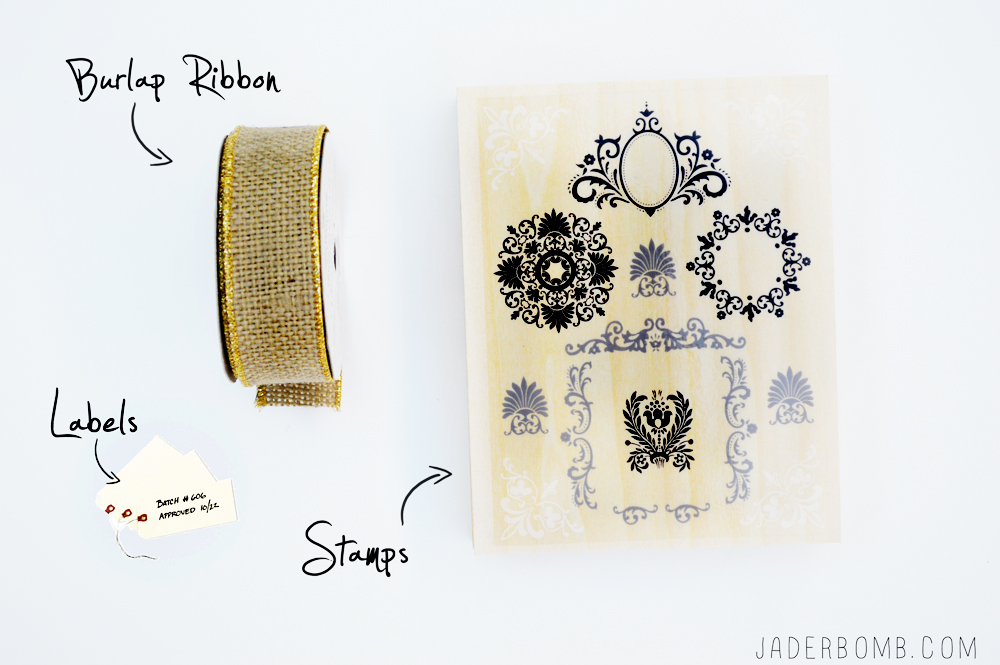
Let’s get started because I am eating all of the popcorn. YOUWILLNEEDMartha Stewart Craft Paper | Baker’s Twine (optional) | Christmas Stickers | Glue Gun | Love
DIY SNACK CONTAINERSThe first thing you will do is lay a sheet of paper out flat and start rolling from one corner to the next. It might feel awkward at first but you will get the hang of it. howtomakeapapercone
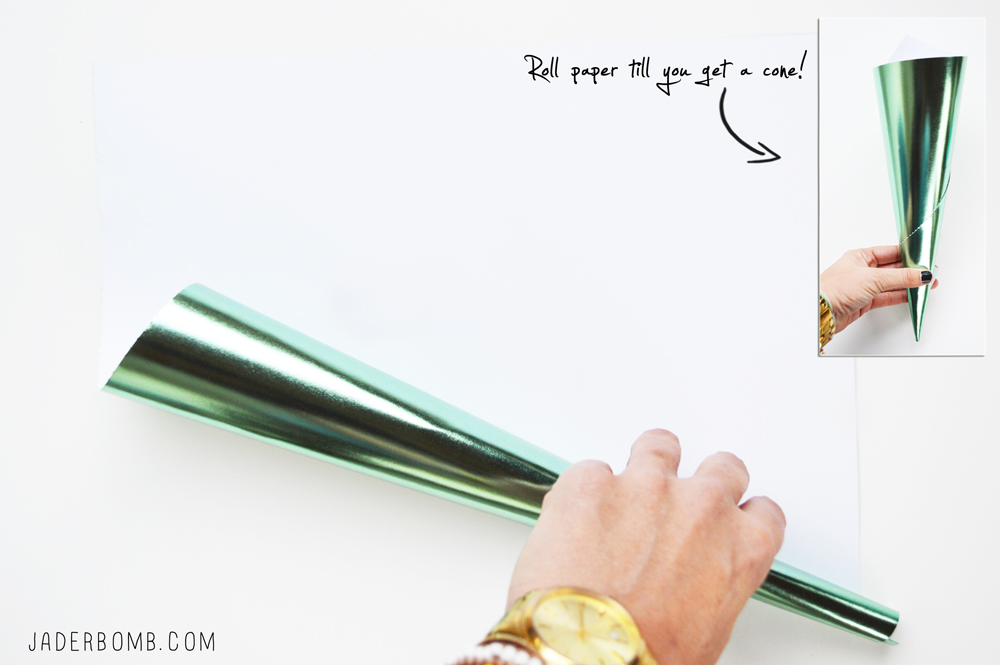
It will start to look like this on the end. With a little practice (maybe a minor heart attack) you will get a nice pointed tip.

Whatever you do, don’t ask me how how many times I threw that sheet of paper down on the ground while walking away like a mad little kid <——– teehee. make a paper cone snack containers
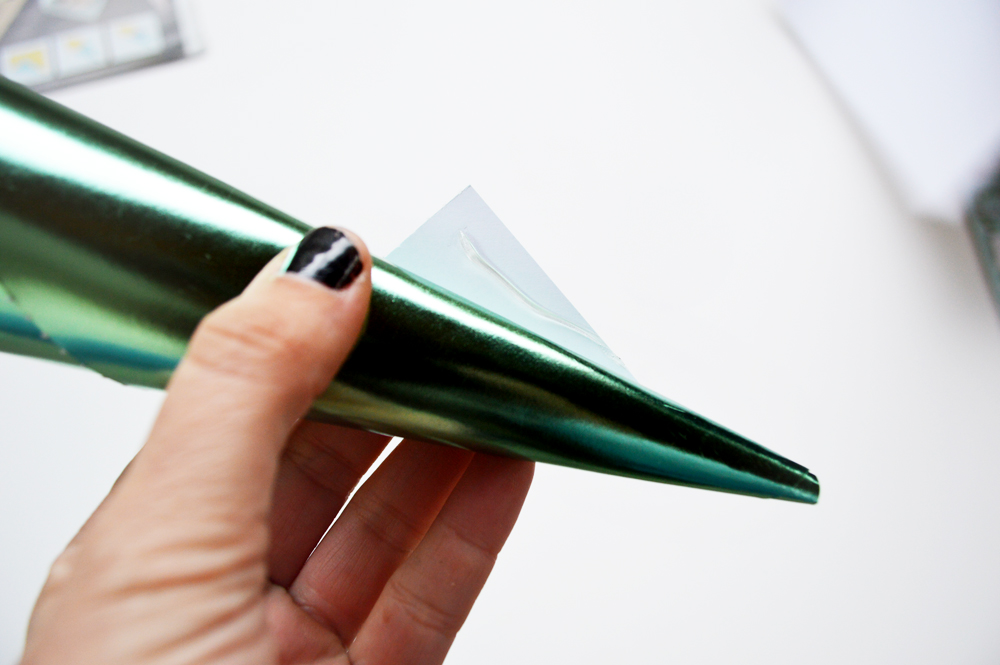
When you are done rolling your paper you will have this little piece of paper hanging off of the top. Don’t worry it’s supposed to be there. If it’s big enough you can fold it down and clip it with a button or something. You can use a hole puncher and attach with baker’s twine also. paper container
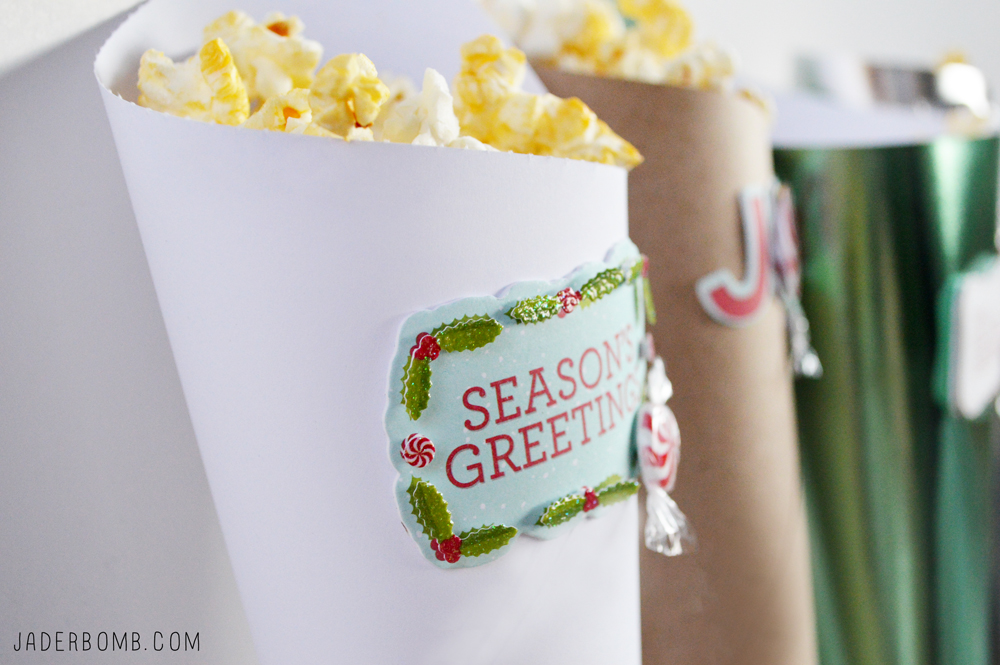
I used Martha’s new stickers on my paper cones. I love how they add just enough to the cones. marthastewart peppermint stickerspopcorn holder paper cone
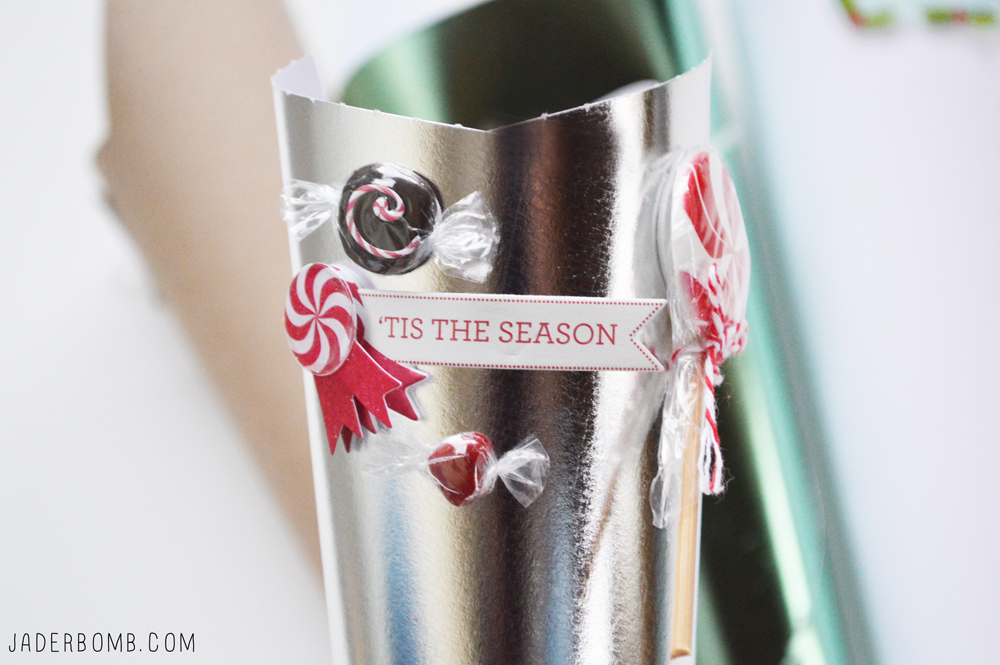
You can fill these with anything your little heart desires. I wanted to hand out popcorn to my family and thought that would be the perfect filling. diy paper conesdiypaper cone craft
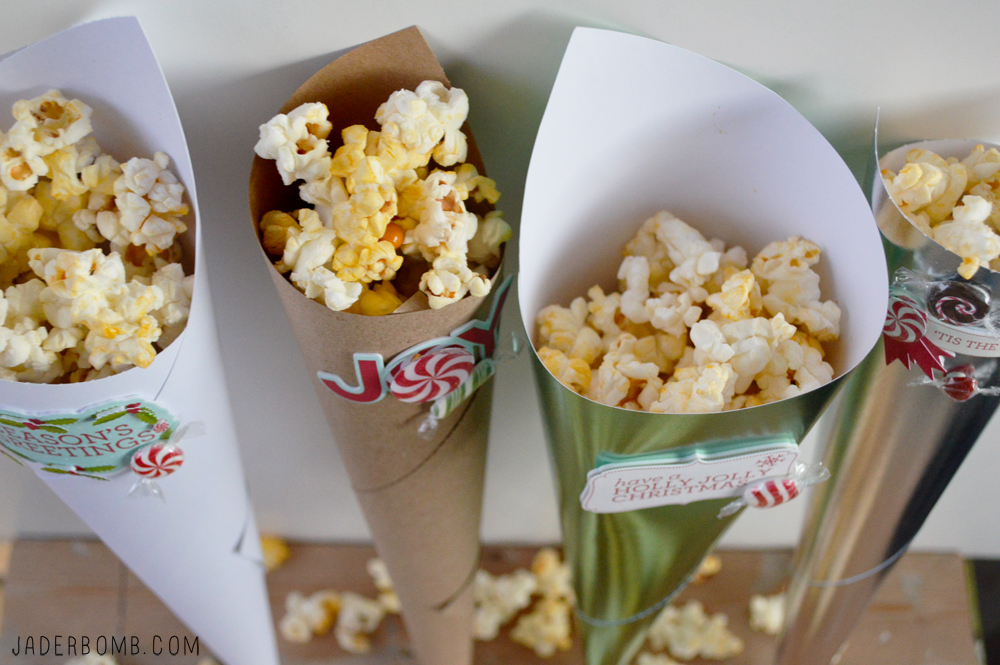
Disclosure:  I’m part of the 12 Months of Martha program. What does that mean? Well, my stop mom “Martha” sends me a box of yummy goodies each month and in return I create fun tutorials just like the one today for you.

Happy Holiday’s from my little golden heart to yours! What will you fill your cones with?

jade

This is a sponsored post from Avery & Martha Stewart, but all opinions are mine! <— scouts honor!How to make Printable Labels

I don’t know about you but I love to make labels for everything. Whether it’s a gift card, present, table setting, or a good ole envelope.

Call me OCD and I will nod gently up and down while staring at you in the eyes. I would like to clarify that a little. Let’s just say I am obsessive and I like things to be consistent.

Now grab your Santa hat because I am about to show you how to make printable labels, the easy way! homeofficeaverylabels

The good news is all you have to do is grab someAvery (Martha Stewart) holiday labels from Staples download the template to your computer, write what you want in the labels and VOILA! It’s that easy.

I love the ones below because they are clear and if you have a print on an envelope you can still see the background through the label. How stinking cool is that!

averychristmaslabels 
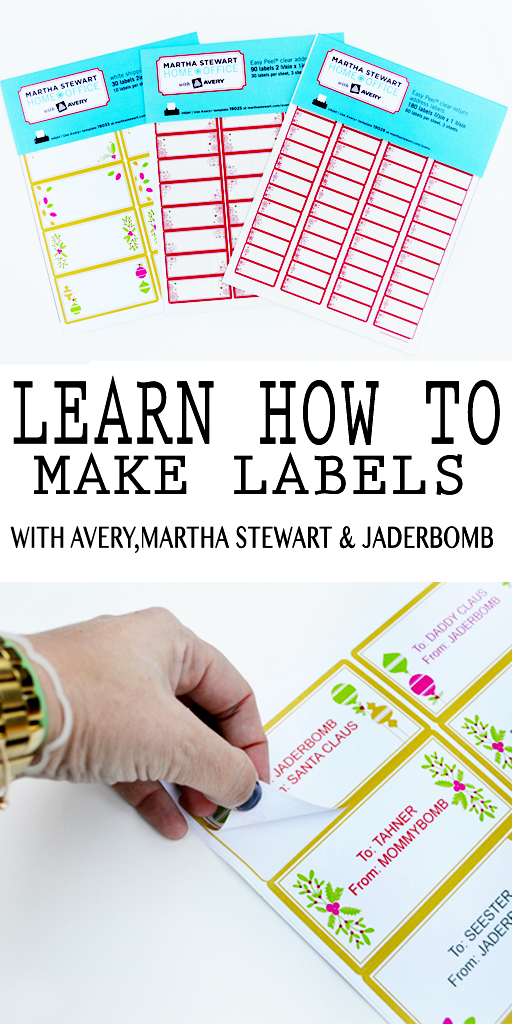
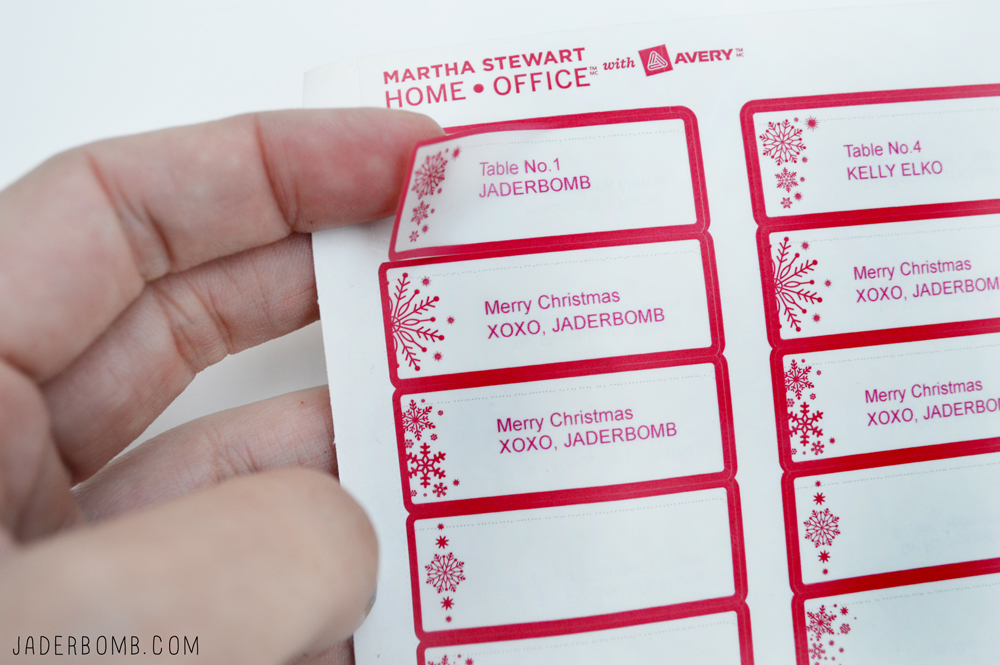
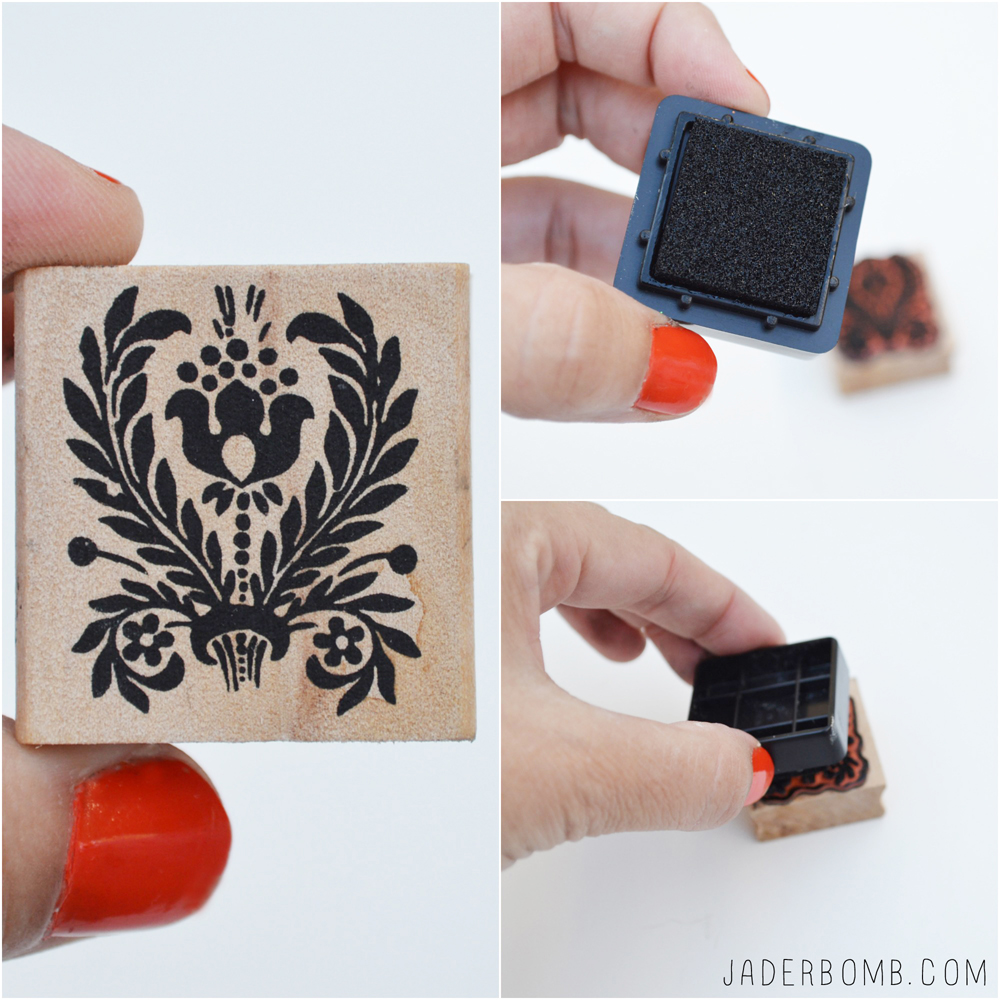
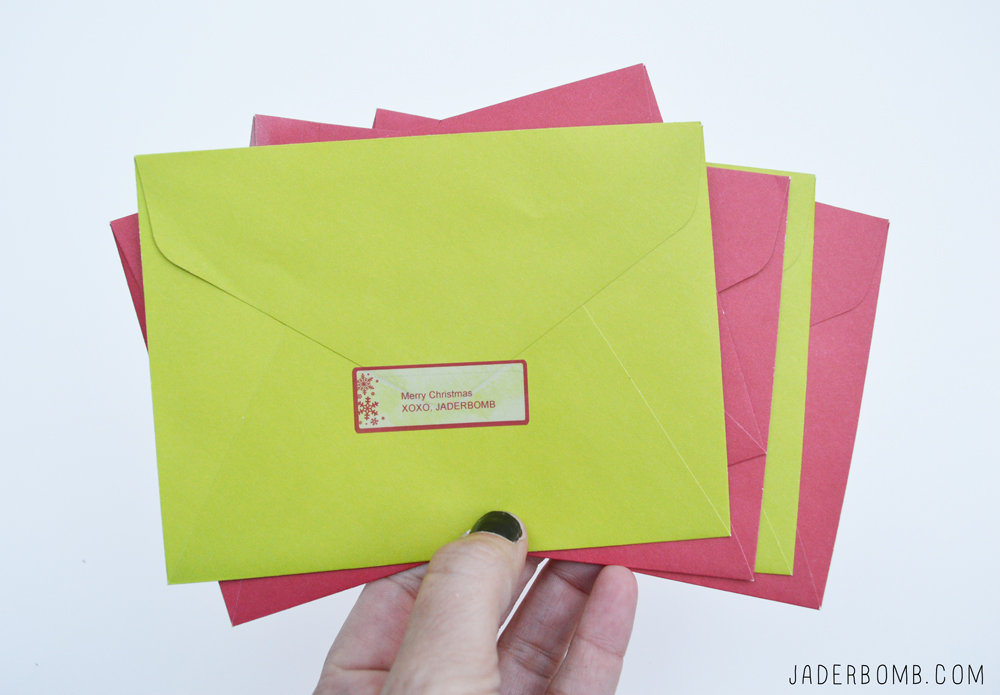
I like to give everyone cards for Christmas and these printable labels make anything look real “Fannncyyyy”. Everyone will think you spent hours hand carving their label (not really), but it sounds nice! averylabels
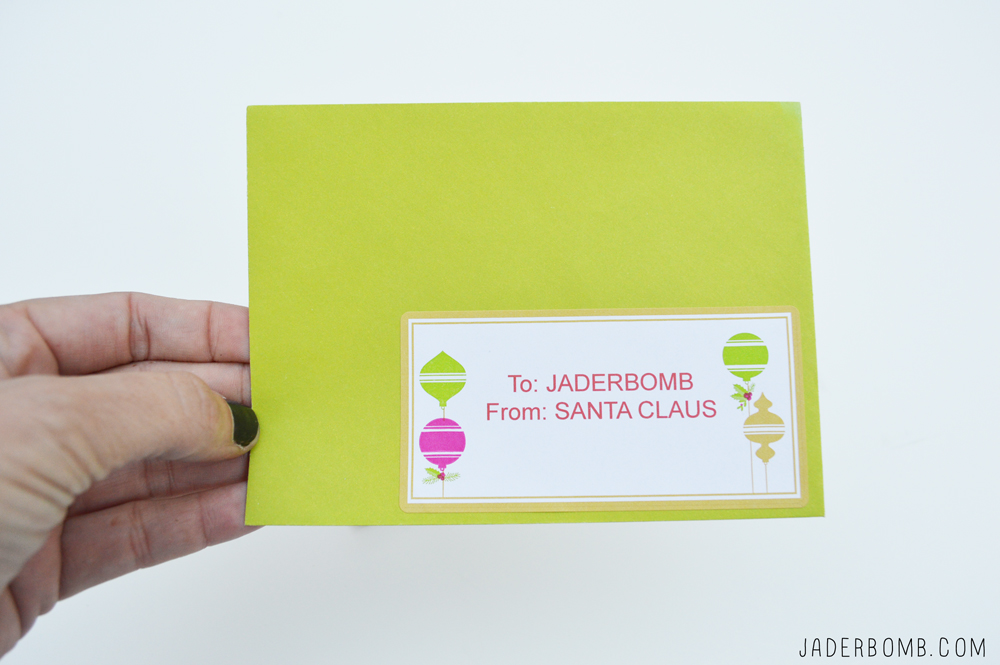
I guess now I have to fill envelopes with globs of money. I will just put more in mine and open it in my closet when everyone is sleeping. Hopefully the Santa won’t catch me.

If you mail out cards for Christmas these will save your life, for real. Just incase you forgot where to get these babies hop on over to the Staples site and pick out your favorite ones.

P.S. Santa if you read this I am still waiting on my Land Rover. Happy Holidays from my heart to yours!

ending1


ST_12_months_of_Martha_Logo-1

I was so excited when I got this month’s box of goodies in the mail! I actually had ton’s of ideas once I started going through everything but I went with my gut instinct on this one.

The holiday’s are coming up and let’s face it, nobody likes store bought tags. I wanted to show you a simple and affordable way to achieve a “fannn-cyyy” look for a “fannn-cyyy” price! <—- yes say it like it’s spelled. I even threw in how to stamp your own ribbon.  This year we will make it all about personalized gifts.

Now your gifts will be bursting with DIY’ness.

Personalized Gifts

YOUWILLNEED

Tags | Burlap Ribbon | Martha Stewart Flourish Rubber Stamps | Love
***You can purchase all of these fabulous items in one spot by clicking on my affiliate links!

stenciled fabric supplies

Pure love is what I felt when I saw how this flourish rubber stamp set was packaged. Shoots I would buy it just for the box, y’all! It comes with 10 stamps and 3 colors of ink. Black, White & Silver. Perfect for any holiday decor. how to use a stamp

Since my tags were fairly small I decided to use a stamp that would fit perfectly on them. I also used a big stamp that went off the edges of tag and it came out so cute!

how to stencil fabric jaderbomb

Since your packages or bottles of wine will have a fun tag hanging from them why not add a little embellished ribbon to go with it.

I mean, it would really top things off. You could also wrap this stamped burlap ribbon around a candle or add it to any wreath for a pop of DIY.

How to print on burlap

Stenciled Labels 12 months of martha jaderbomb

These can be used for practically anything. I will be using them as gift tags for Christmas but I wanted to show you how you can use them as part of your display also.Stenciled Fabric

Personalized Gifts DIY 12 months of martha

I hope you enjoyed this 12 months of Martha post. Check out what else I made for Martha. If you are on Instagram, Twitter or Facebook make sure to search or share my pics by using this hashtag #12monthsofmartha and #jaderbomb

Wanna really stalk me? Come visit me on Facebook, Twitter, Google+, Pinterest or Instagram.

ending

Thank you to Martha Stewart Pets for sponsoring today’s post on the Martha Stewart Pets Halloween Costume Contest!

halloween-popup-mspets-halloween_vert

Hey everyone! It’s that time of year where we dress up our furry balls in exciting things!  I am so excited to show off Ceaux Ceaux’s (Co-Co) new Halloween costume from Martha Stewart’s line at Petco. I was truly stumped when I had to pick out this year’s costume. I ended up choosing the Glitter Skeleton Costume. Did I mention they are really affordable too!

I think Ceaux likes it because she actually started running around the room when I took this out of the box. It’s like she knows it’s for her. When I say “come see baby girl” she sit’s right in front of me.

PicMonkey Collage.jpg

When it comes to pet’s it’s important to put them in things that are soft and comfortable. 

I am always impressed with Martha’s line at Petco. Everything is thought out perfectly from the fabric to how it fits. Let’s look at how stinking cute this costume is.

I love the way the sleeves are made and the precious tutu on it. Don’t worry, this tutu is extremely soft so it will not scratch your pet.

If you think you get “ooh’s and ahhh’s” now, just wait.

DSC_0414

DSC_0413DSC_0393

I also love how snug it fits! Isn’t she just adorable.

Martha Stewart Pets Halloween Costume Contest

Show off your dog’s trick-or-treat style! Submit a photo of your pet wearing a Martha Stewart Pets costume today through October 18, 2013 in the Martha Stewart Pets Halloween Costume Contest for the chance to win a Martha Stewart Pets Halloween prize package and to be featured on MarthaStewart.com!

How cool if your pet would end up famous! Hurry to Petco and grab your favorite one.

Don’t forget to tweet and instagram your pictures and use hashtag #marthastewartpets. You can also tag @ma_living and #Petsmart

ending

12monthsofmarthaHALLOWEEN PARTY DECOR

Boo-Yah!  I don’t know about you but I love HALLOWEEN PARTY DECOR. What do I love about it? EVERYTHING.

It doesn’t always have to be bloody and dark, ya know. Even though that’s the real way to celebrate this holiday.

I wanted to throw a black and white themed coffee party and I know you will love all of the little details. Witches “brew” is what we will call it.

If you love Halloween as much as I do then you need to check out these houses I made. Wear these shoes while trick or treating with your kids. I am in love with these black and white kitchens.

BLACK AND WHITE HALLOWEEN PARTY DECOR

I know I would love to attend a spooky “brew” party, what about you? If you can’t find the items I used in this post you can click on ANY of the links below the pictures and order from one site! Hey, I am just trying to make your life easy.

I think everything looks clean and crisp. Kind of reminds me of a sterile hospital room.

Still want coffee?

HOW TO DIY YOUR HALLOWEEN PARTY DECOR

I purchased these mugs from World Market and dressed up the handle with glitter. Glitter will always make things better.

EASY DECOUPAGE ON GLASS TUTORIAL PARTY MUGS 
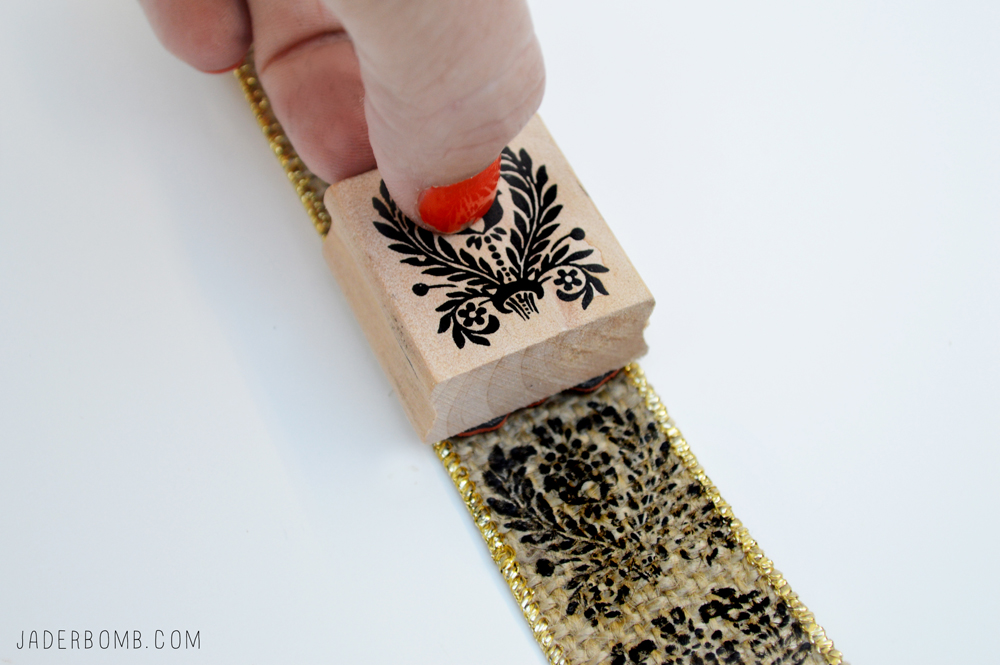
To start you will place stencil tape around your handle. Coat the handle with a nice coat of Martha Stewart’s new decoupage. Sprinkle your favorite shade of glitter on the wet decoupage.

Of course I used classic black. Carefully peel the tape off before it dries. You can clean up your mug now easily. Check out what else I decoupaged.

HOW TO DECORATE FOR HALLOWEEN PARTY

Once I removed the tape I sprinkled some more glitter on them before they dried. When they are dry just dust them off with a brush. Remember to let these cure for about 28 days then you can wash them by hand or in the dish washer.

They will stay fully glittered if cured correctly. HOW TO DECOUPAGE ON GLASS

To add a little spark to the bottom of my mugs I decoupaged some insects to the bottom. When someone lifts their coffee mug a nice bug will be displayed on  the bottom! I think this is my favorite part of the party.

HALLOWEEN PARTY GLITTER MUGS DIY

HALLOWEEN PARTY DECOR

How clever are these test tubes! They come with sticky vintage labels that you can write on. I added a few different things inside of the tubes like chocolate covered coffee beans, strawberry milk and coffee cream. Anything that goes with a coffee party will work. HALLOWEEN PARTY DIY

ORANGE AND BLACK HALLOWEEN PARTY DECOR DIY

I used some halloween adhesive paper to make flags. I wrapped a piece around a toothpick then cut the paper on the end. These are what my guests’ will stir their coffee with.

SPOOKY HALLOWEEN PARTY

I used some cupcake liners  to put my sugar cubes in. Smart right!SCARY HALLOWEEN PARTY DECORATIONS DIY

To create a coaster for you super chic mugs take a cupcake liner and fold it inside out.

Easy and fun. HALLOWEEN PARTY FUN INVITATIONS

If you are like me then you send out invitations for everything. These animal masquerade invitations are the cutest thing since sliced bread.  Even the inside is decorated with black and white stripes. WITCH THEMED HALLOWEEN PARTY

EASY HALLOWEEN SCARY COFFEE PARTY

Pull out a few sheets of scrapbook paper to dress up your coffee platter background. I got these from the animal masquerade pack.
5 WAYS TO DECORATE FOR A HALLOWEN PARTY

I hope you enjoyed this post and it gives you a push to throw your own coffee party. Check out all of my 12 months of Martha posts’ here.

FYI: Please go vote for my friend Kelly HERE! Voting end Friday and we ALL WANT HER TO WIN!

Huge glittery hugs—See you in the next post! Visit me on FacebookTwitter,Pinterest, or Instagram!

ending

I have to admit I love everything about this time of year. Pumpkins on porches, windows open (well not yet), soups and the smell of yummy cinnamon in the air.

You can’t lie, you love this too.  Oh, and I love candy corn and this candy corn banner!

So I did something really stupid this weekend. I am just like “Whuh”…. I made this wall art and did NOT take any pictures. I have NO idea what was going on in my brain but I figured it was cute and easy enough to explain without pictures.

It’s very cute and ads a little dimension to your walls. What I love about this is I can replace the tissue pom pom’s for different occasions.
3-D PUMPKIN ART

you will need

*Pumpkin Pom Poms
*Canvases
*Old Books (I used one of my twilight books)
*Martha Stewart Decoupage: Multi-Surface Durable Gloss Finish
*Paintbrush
*Hot Glue

  • Get three blank canvases.
  • Tear pages out of a book and secure them on the canvas with your decoupage. Allow time for this to dry (3-4 hours)
  • Create your paper pom pom and secure it on the canvas with hot glue. If you purchase this set from the link above the instructions are in it. Super easy.

If you are interested in making your own tissue paper pom pom check this out. These tissue pom pom’s are meant to hang but I left the back flat so I could place it on the canvas.

Huge Hugs and Glittery Love,

jade