Tag Archives: martha stewart

sponsoredpost

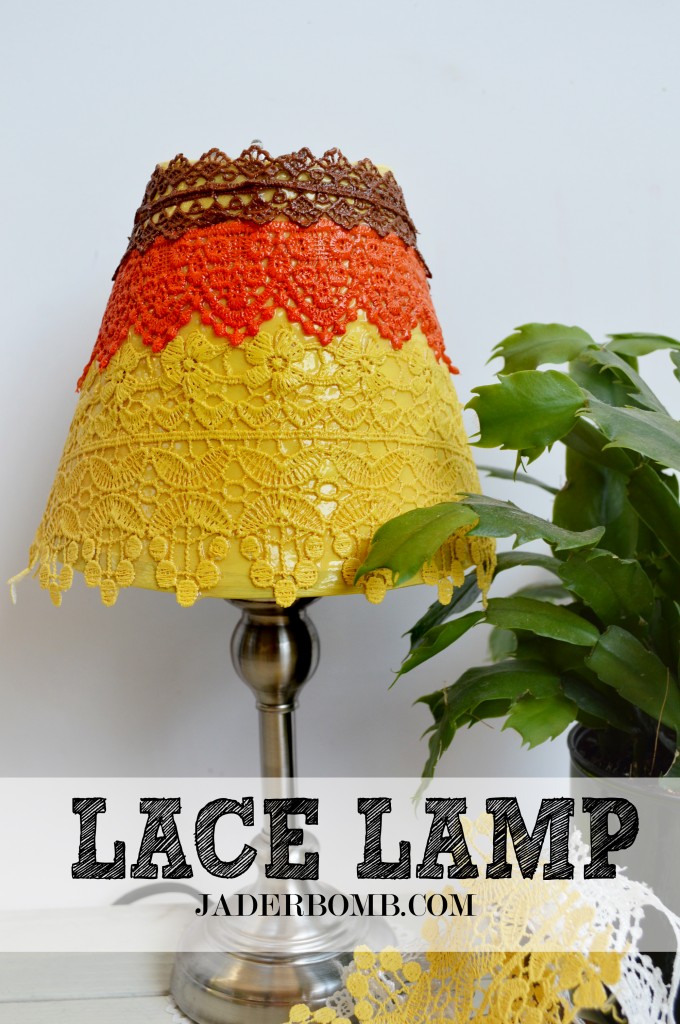
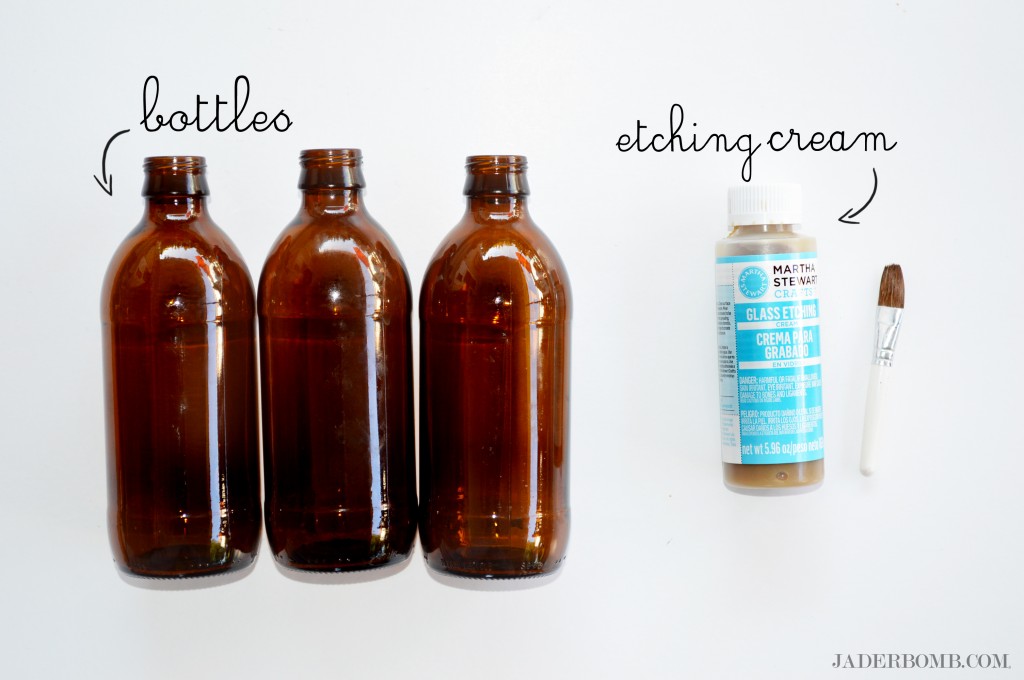
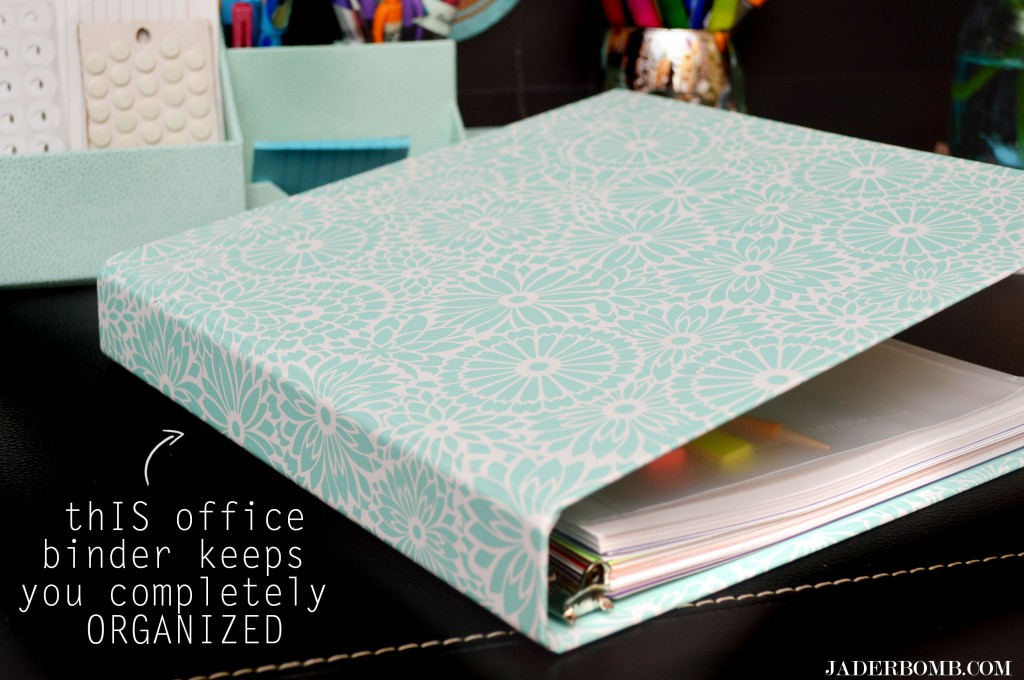
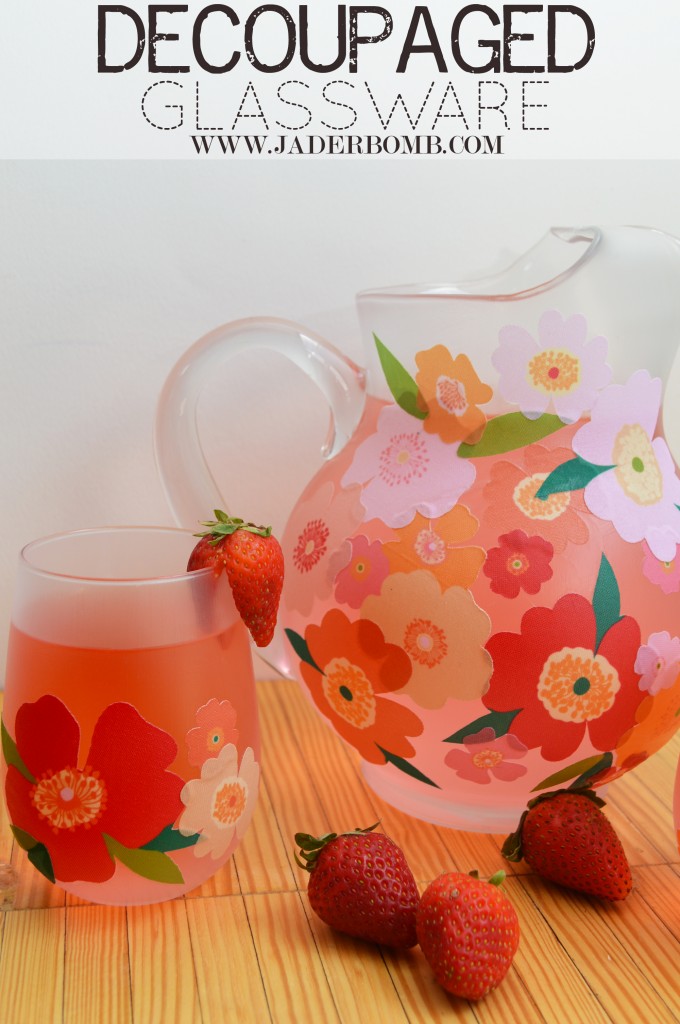
This month the world came to a sudden halt with the launching of this product —> Martha Stewart Decoupage.

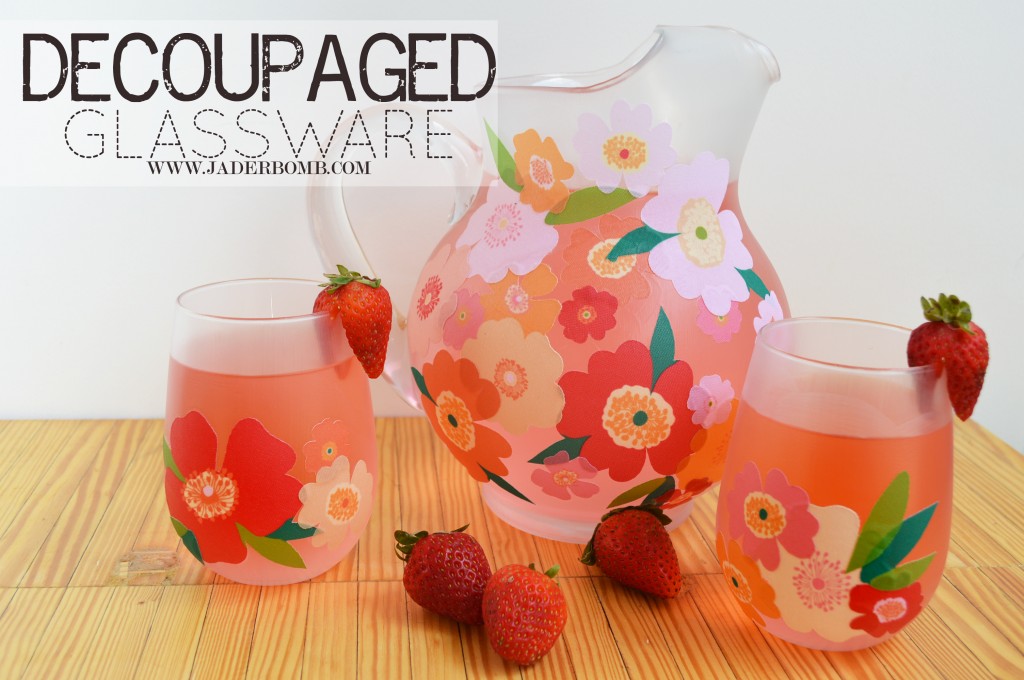
Decoupage on glass? Why yes, this will become your next secret addiction.

This is not like your everyday decoupage, y’all. It’ the cream of the crop.

Decoupage on glass

YOUWILLNEED

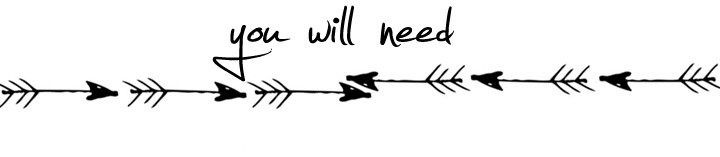
*Martha Stewart Decoupage Soft Bristle Brushes
*Martha Stewart Decoupage Fabric Appliques
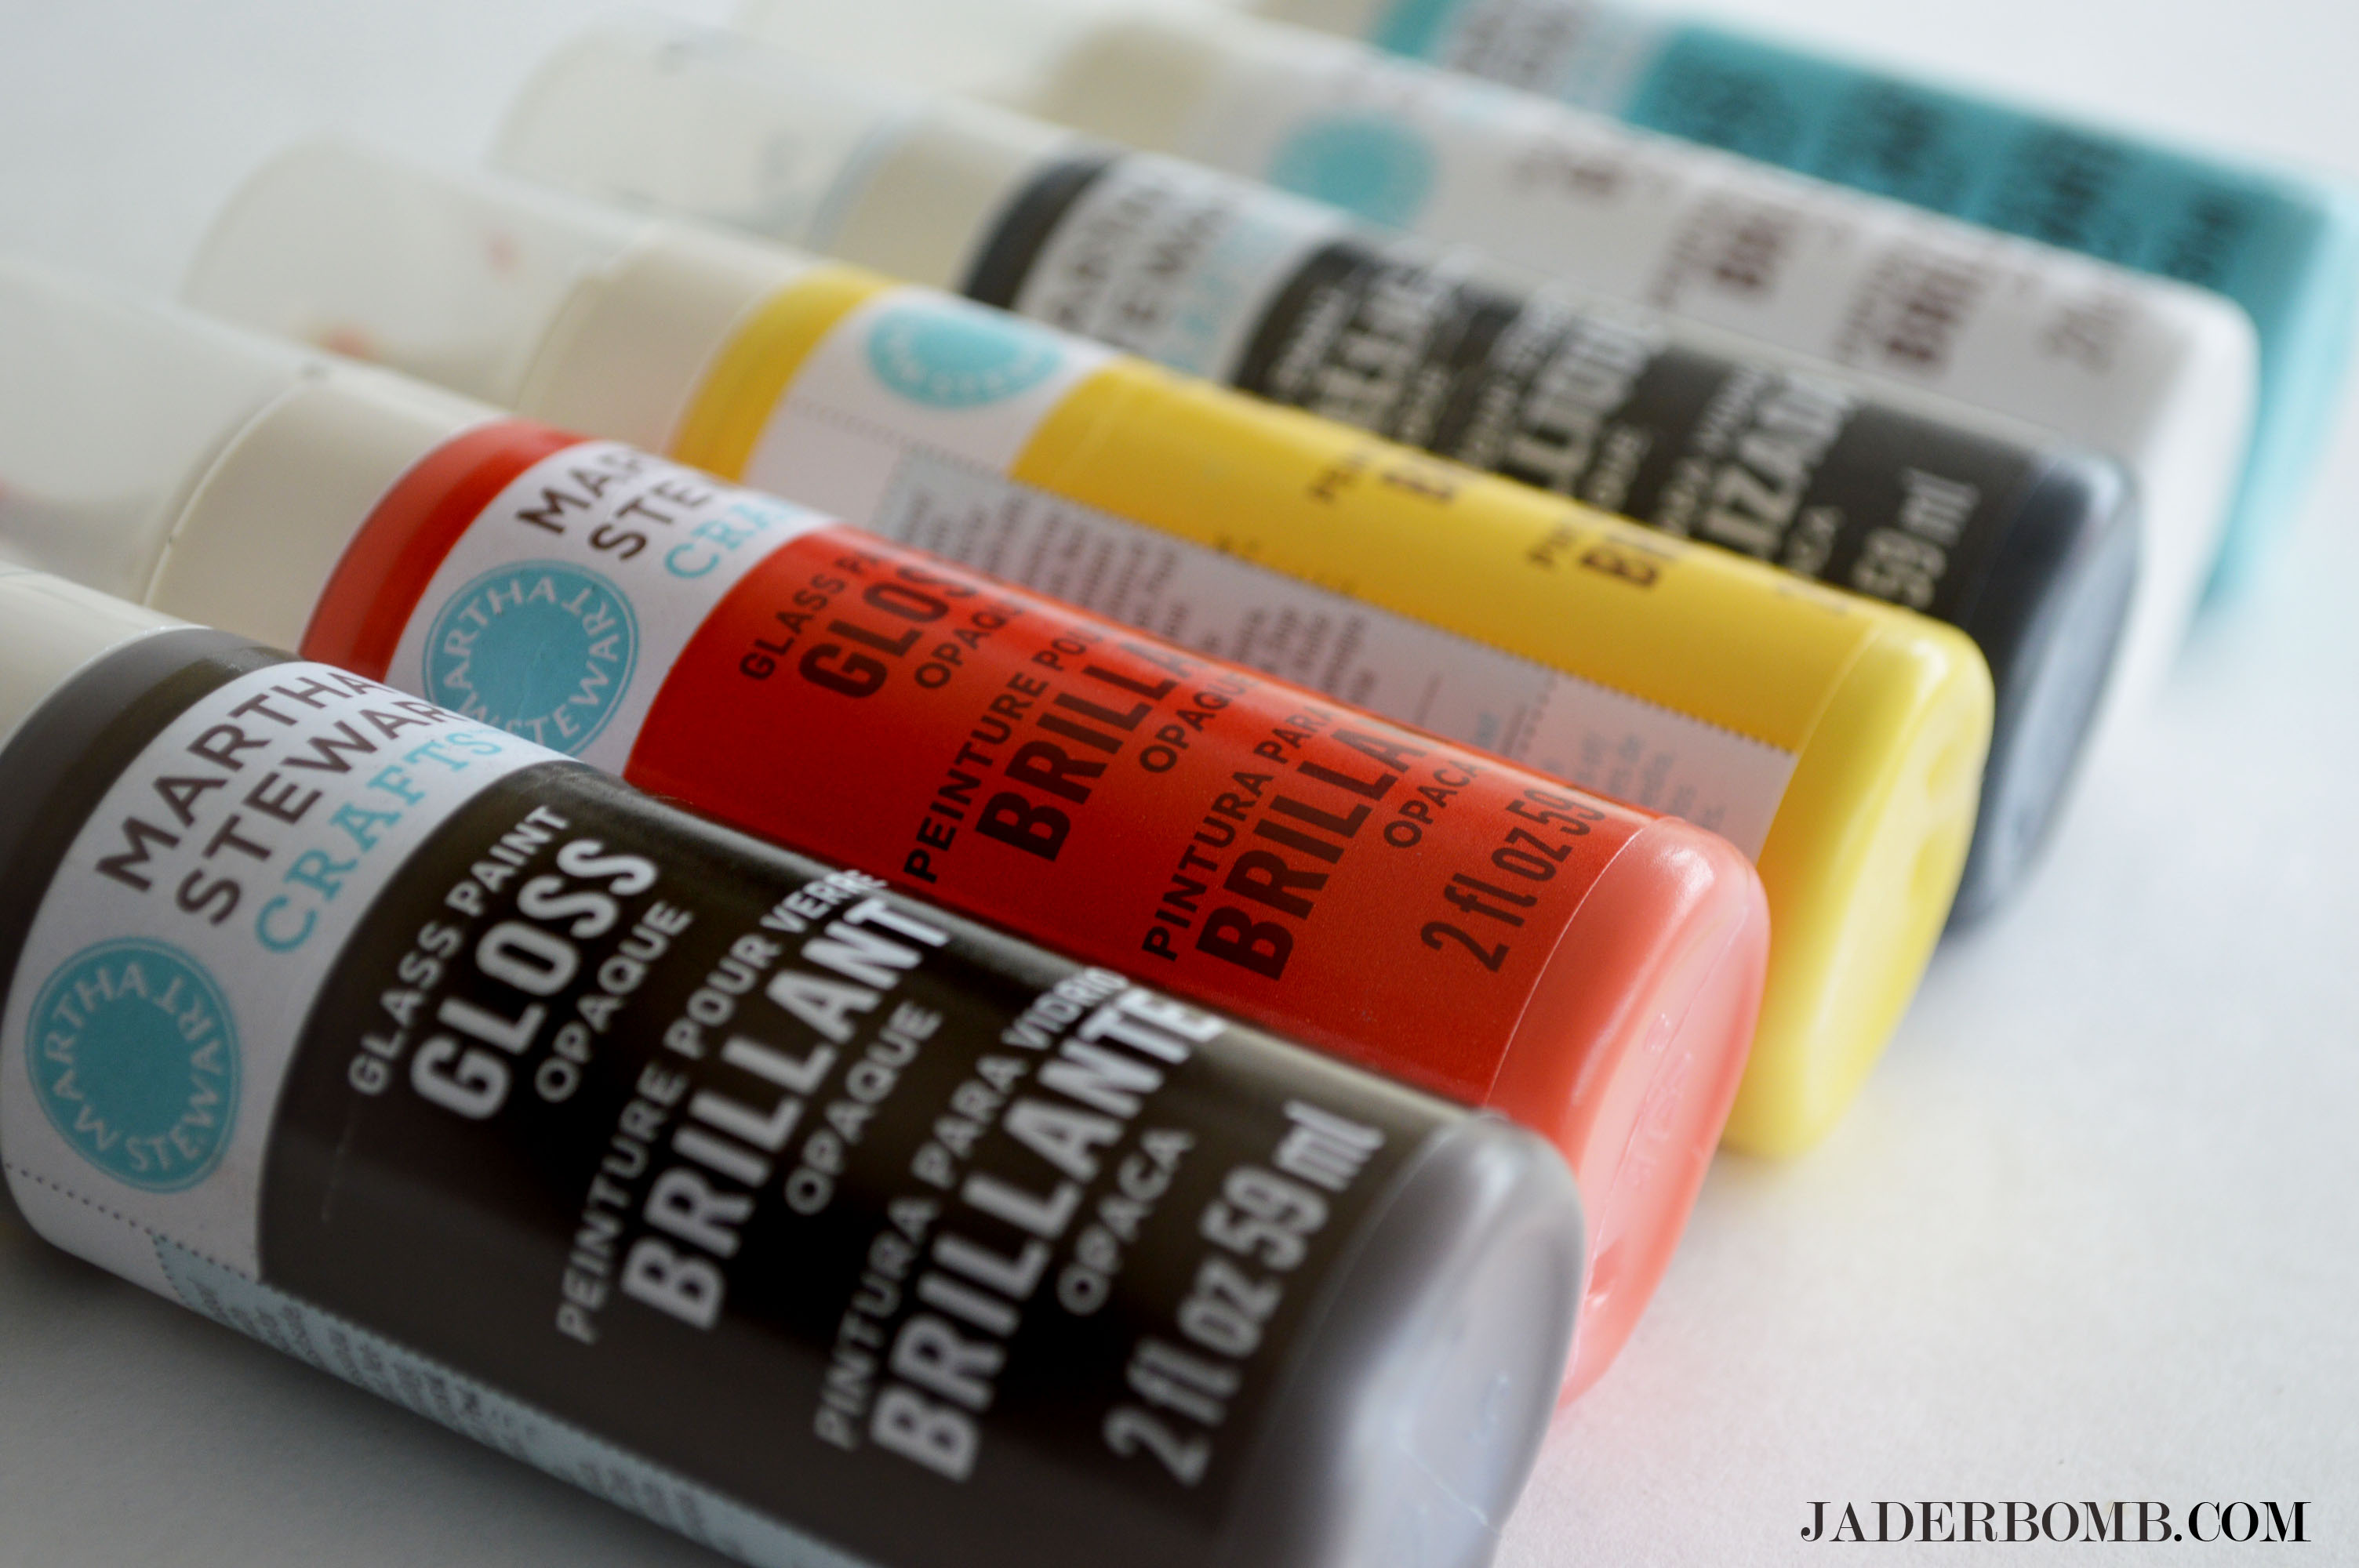
* Martha Stewart Multi Surface Durbable Matte Finish (found at Michaels)
*Alcohol
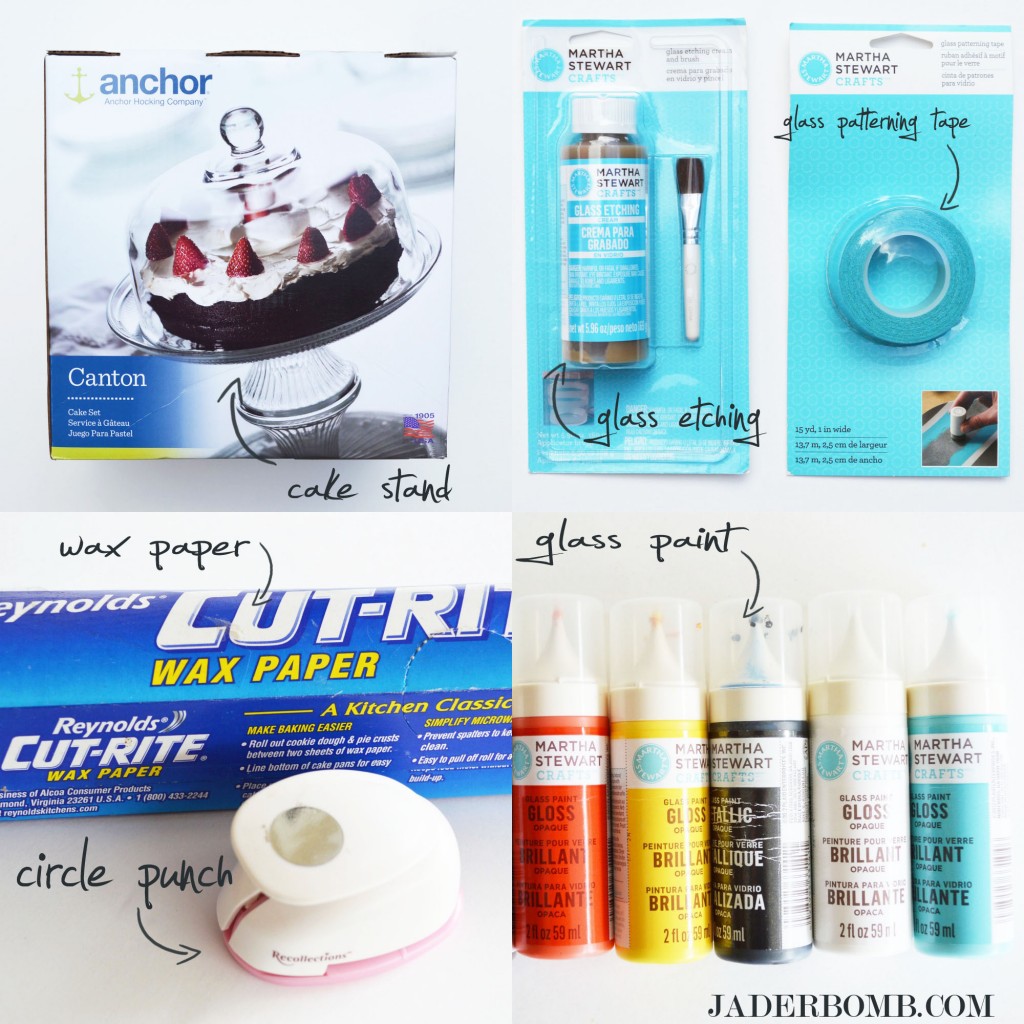
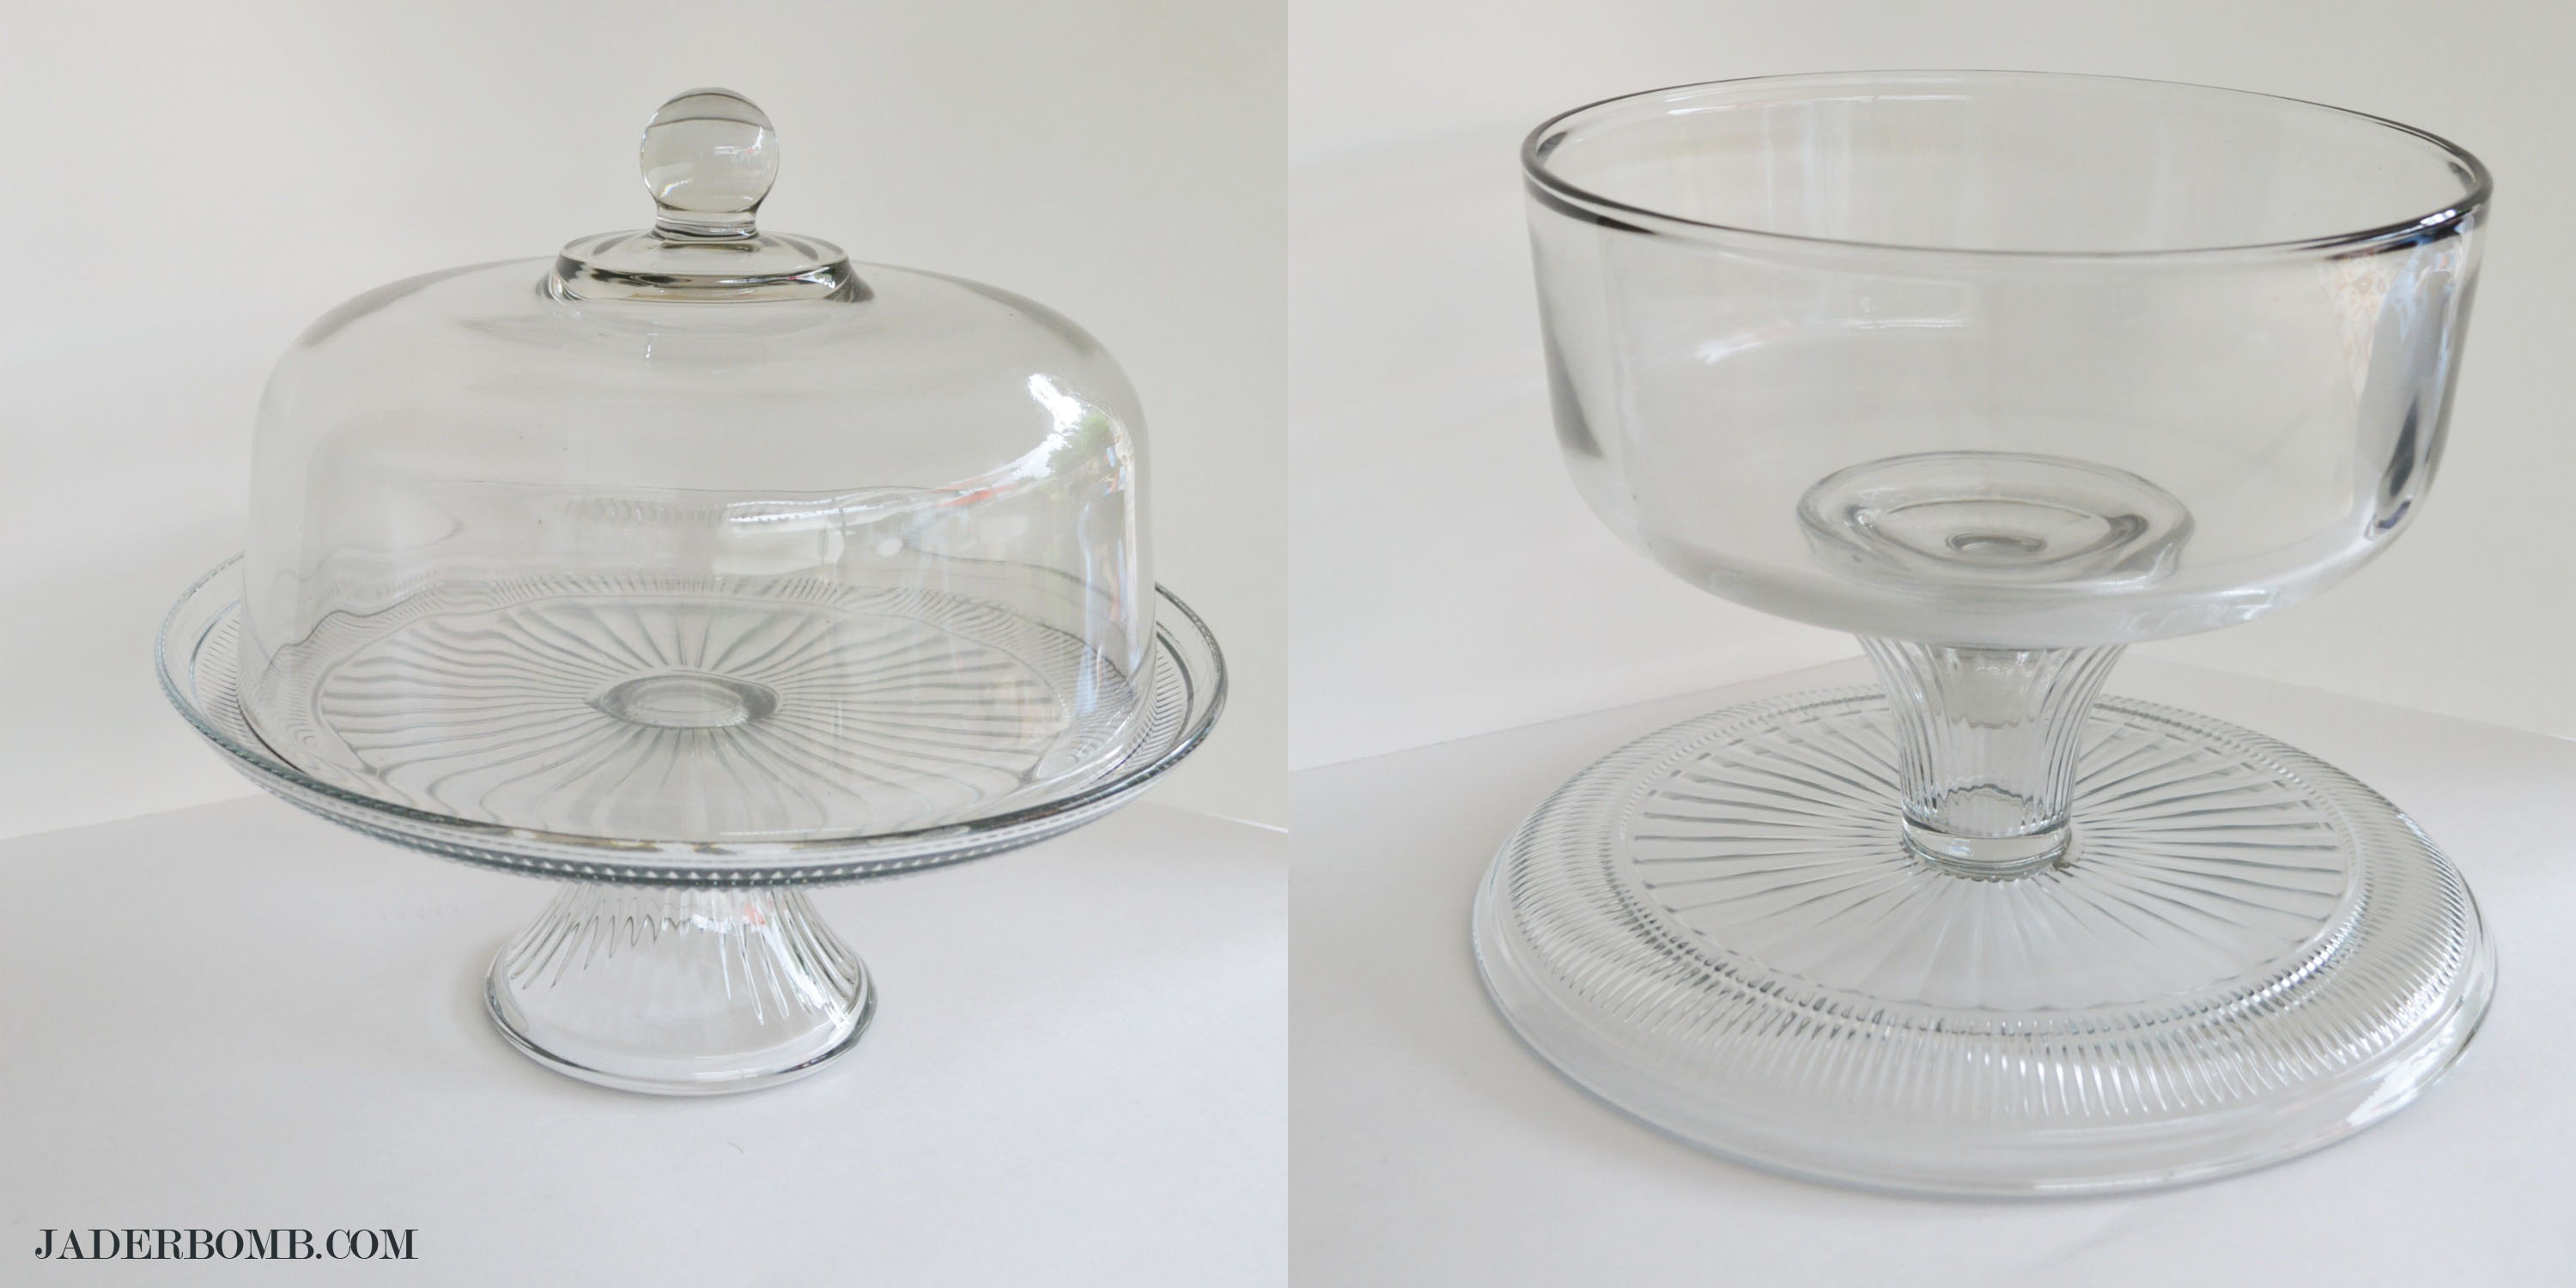
*Glass Pitcher and Glasses

decoupage-pitcher-supplies

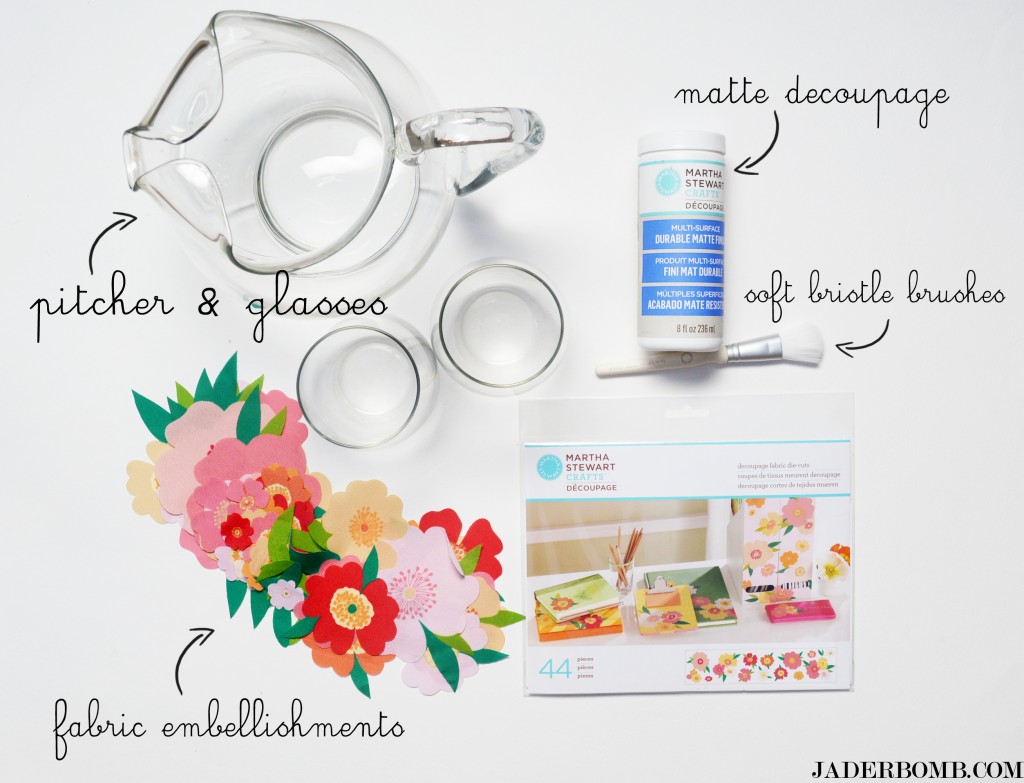
I purchased my pitcher and glasses from Target and they were completely affordable. That is always nice, incase you mess up 3 times.

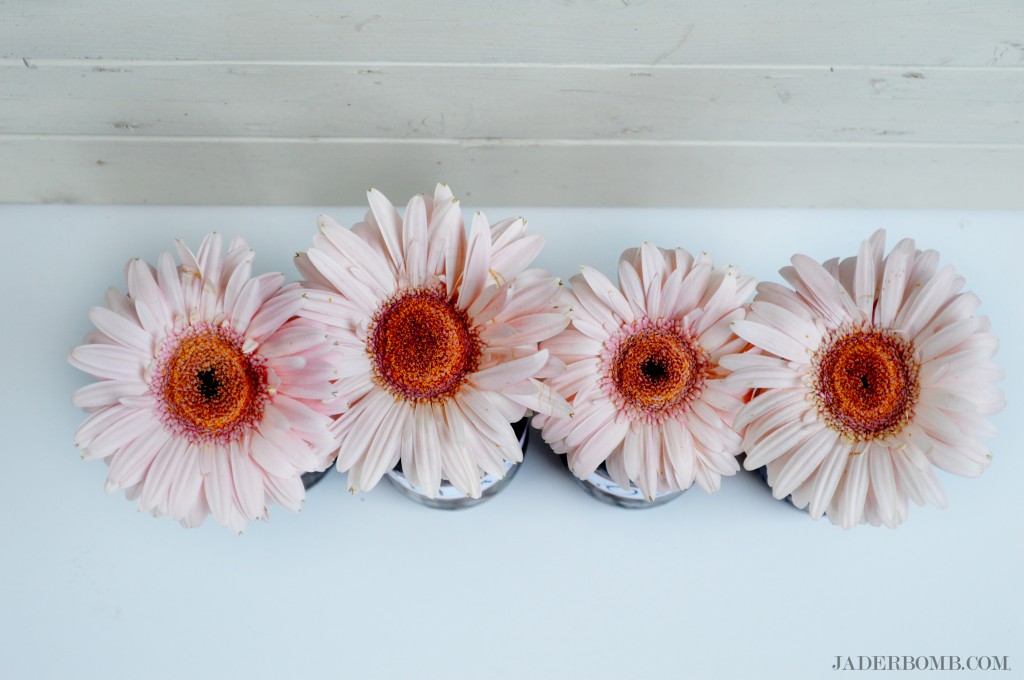
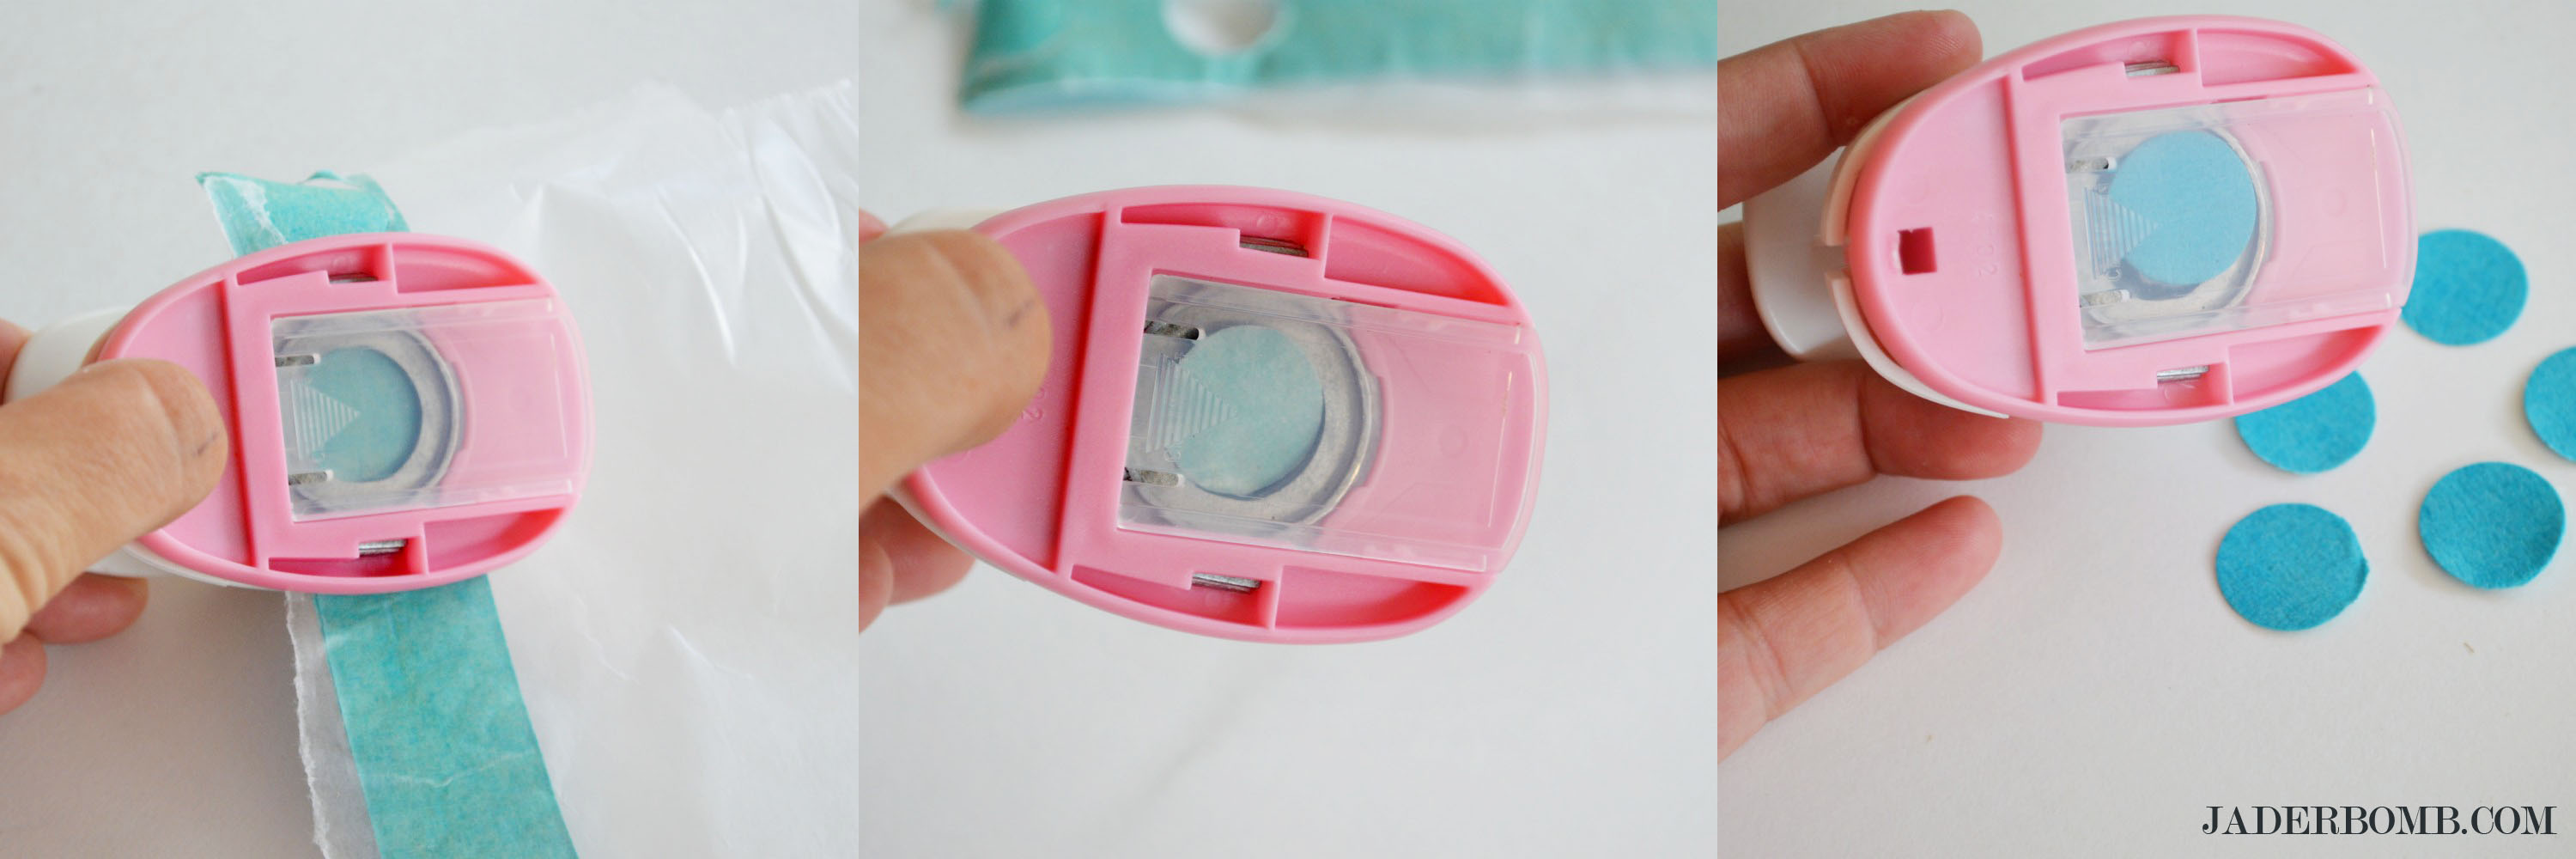
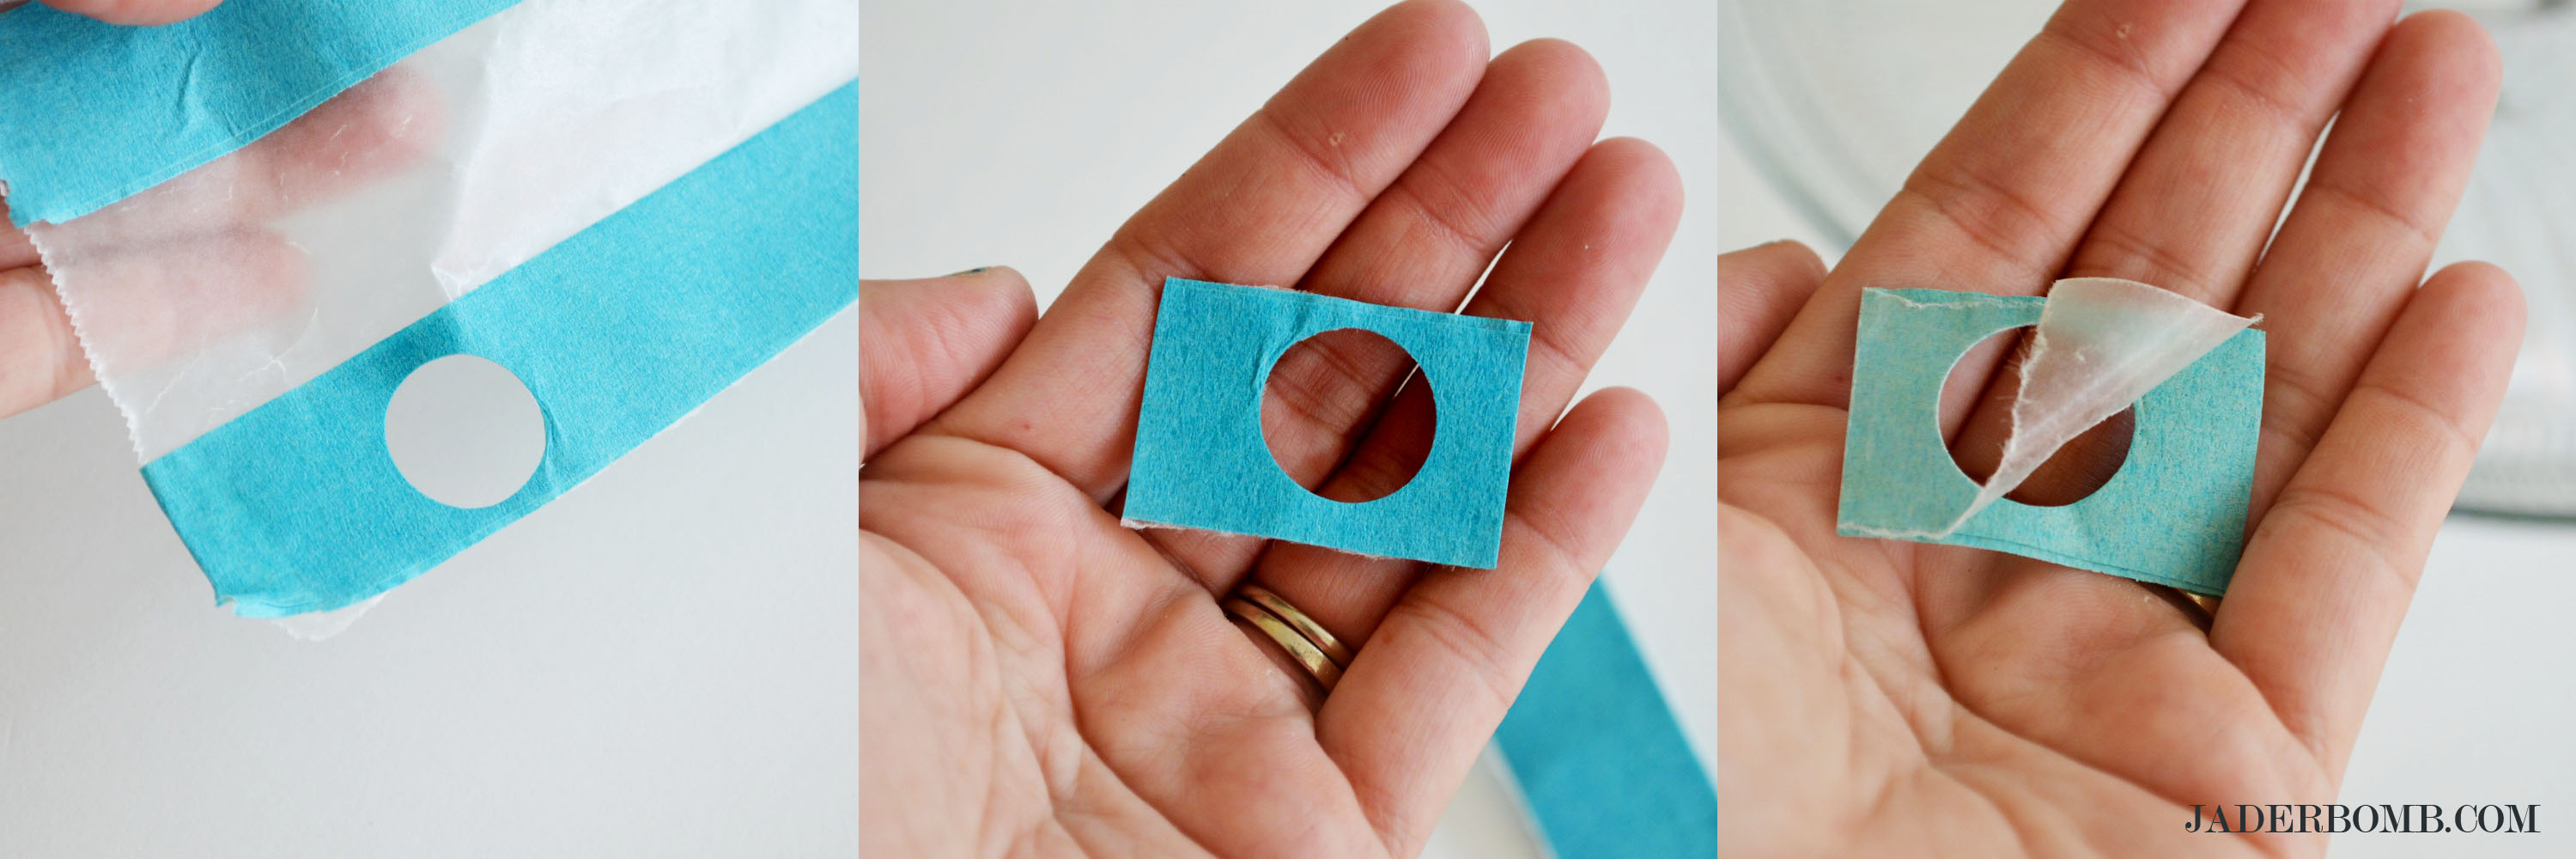
I have to admit, Martha Stewart consistently impresses me but she really did it with these fabric flower embellishments. Pre-cut, why YES THEY ARE!

decoupaged-pitcher-cups

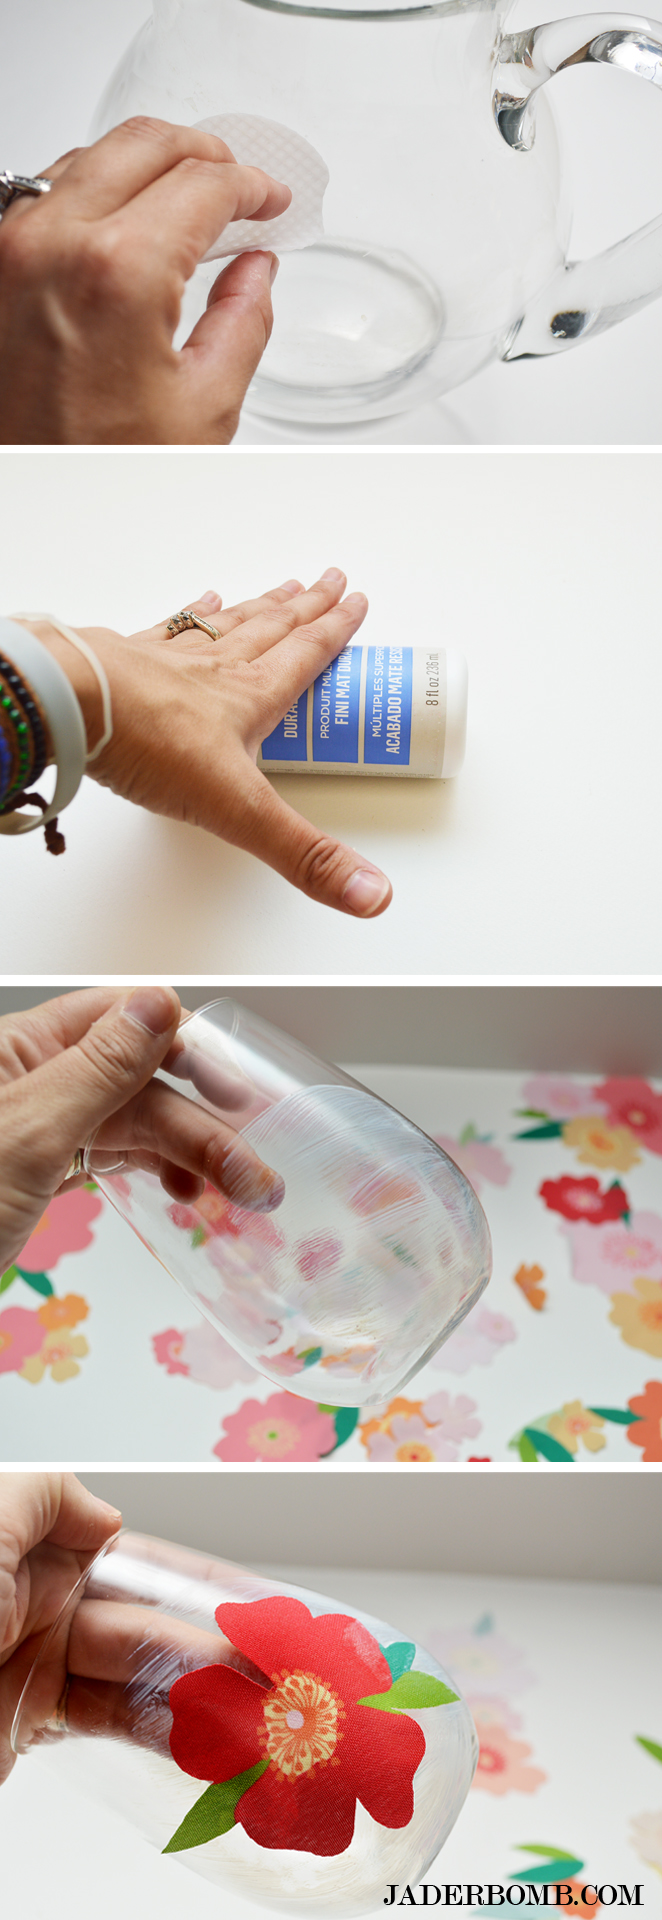
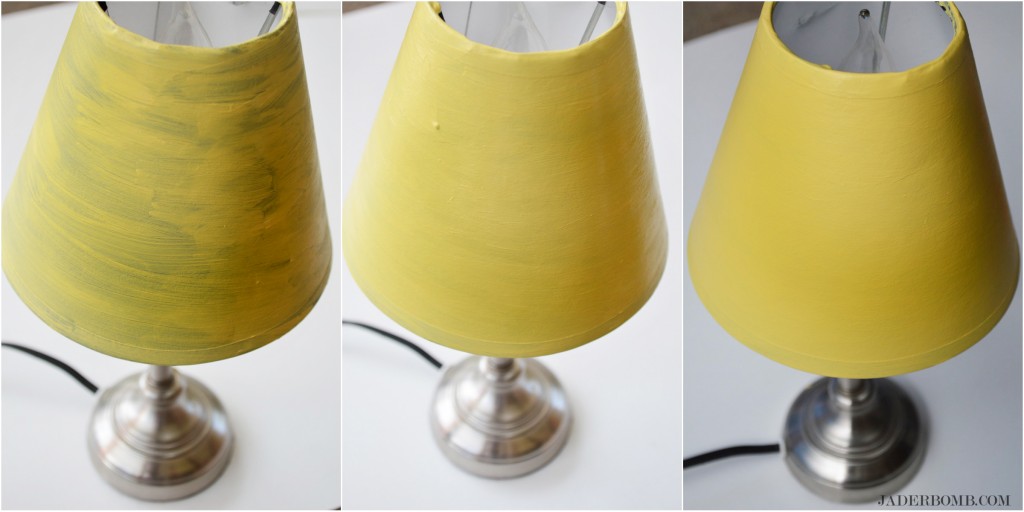
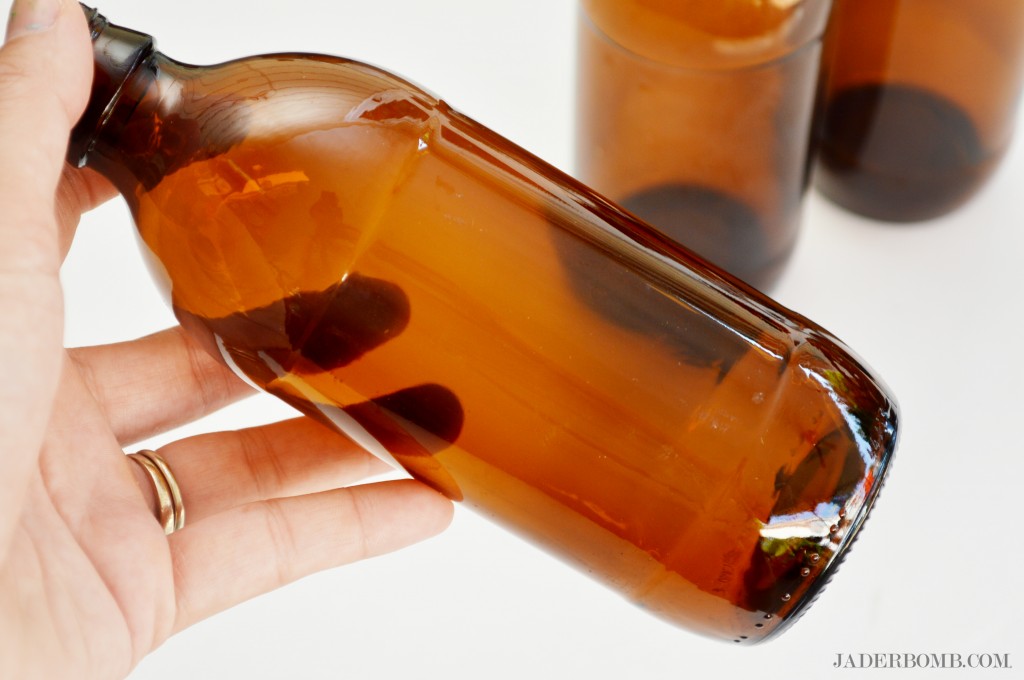
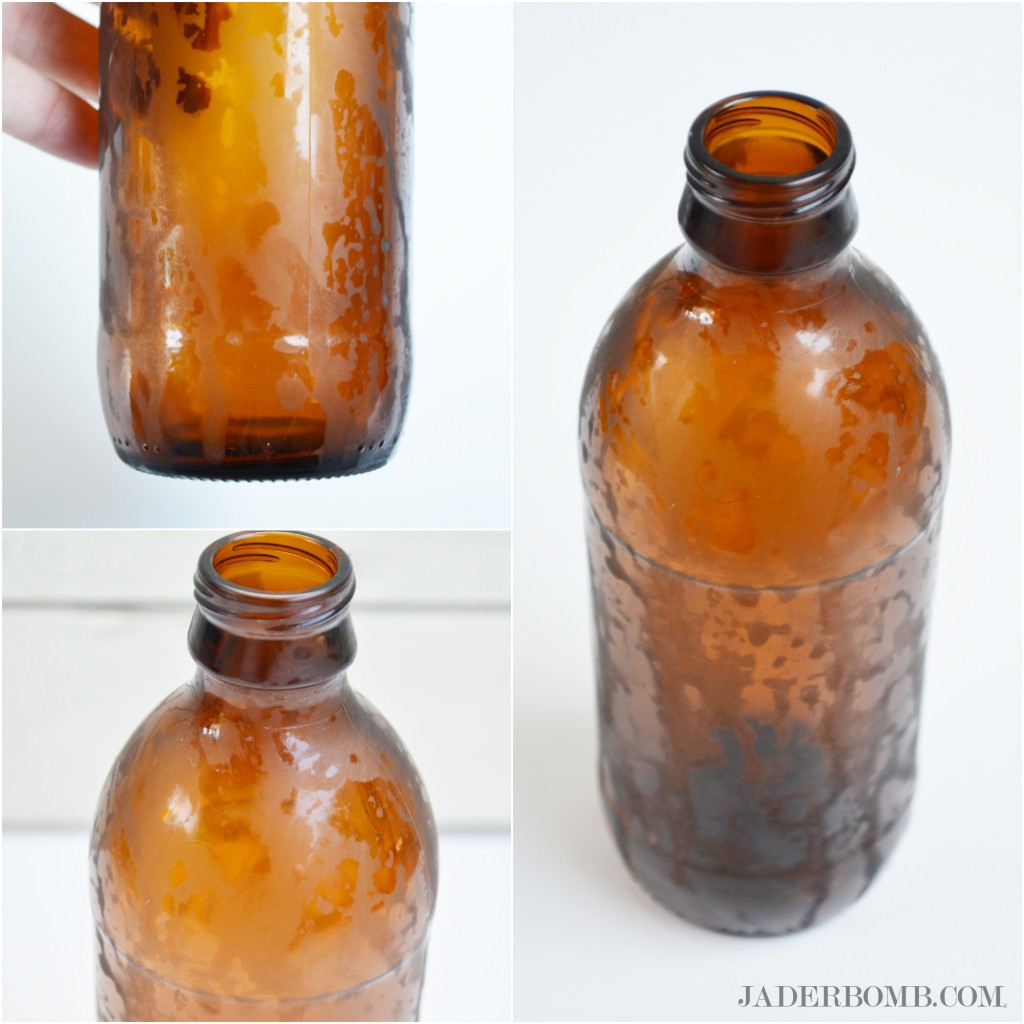
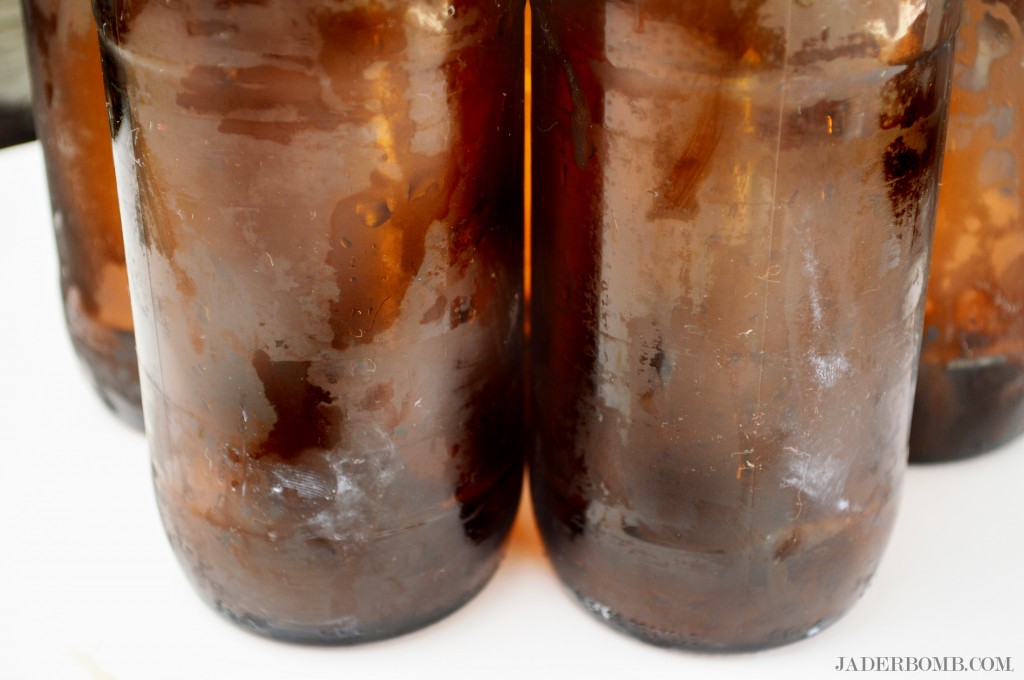
1) The first thing you will do is grab a little rubbing alcohol clean the surface. This will take care of those greasy little fingers that just touched it.  Wear gloves if you feel like touching it.

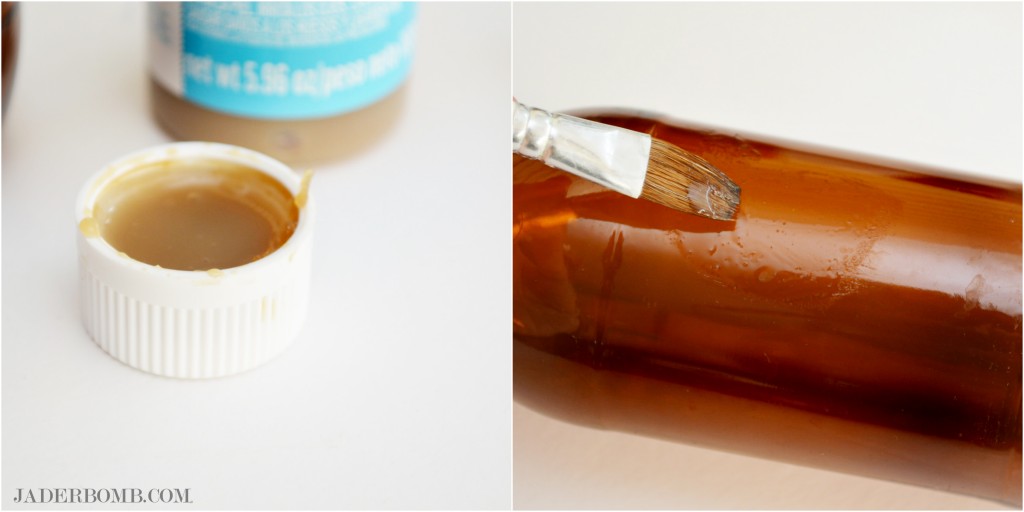
2) Grab your Durable Matte Finish Decoupage and roll that sucker on a flat table to mix it up. Please, for the sake of all the bubble makers out there don’t shake. We want to keep the bubbles in bubble-land not in the decoupage bottle.

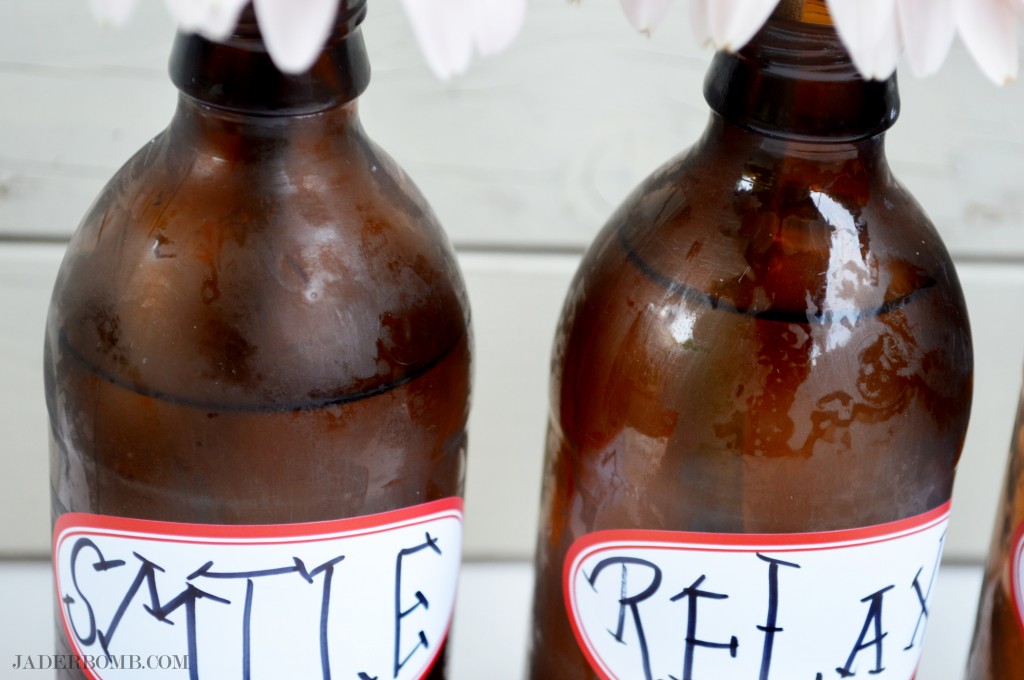
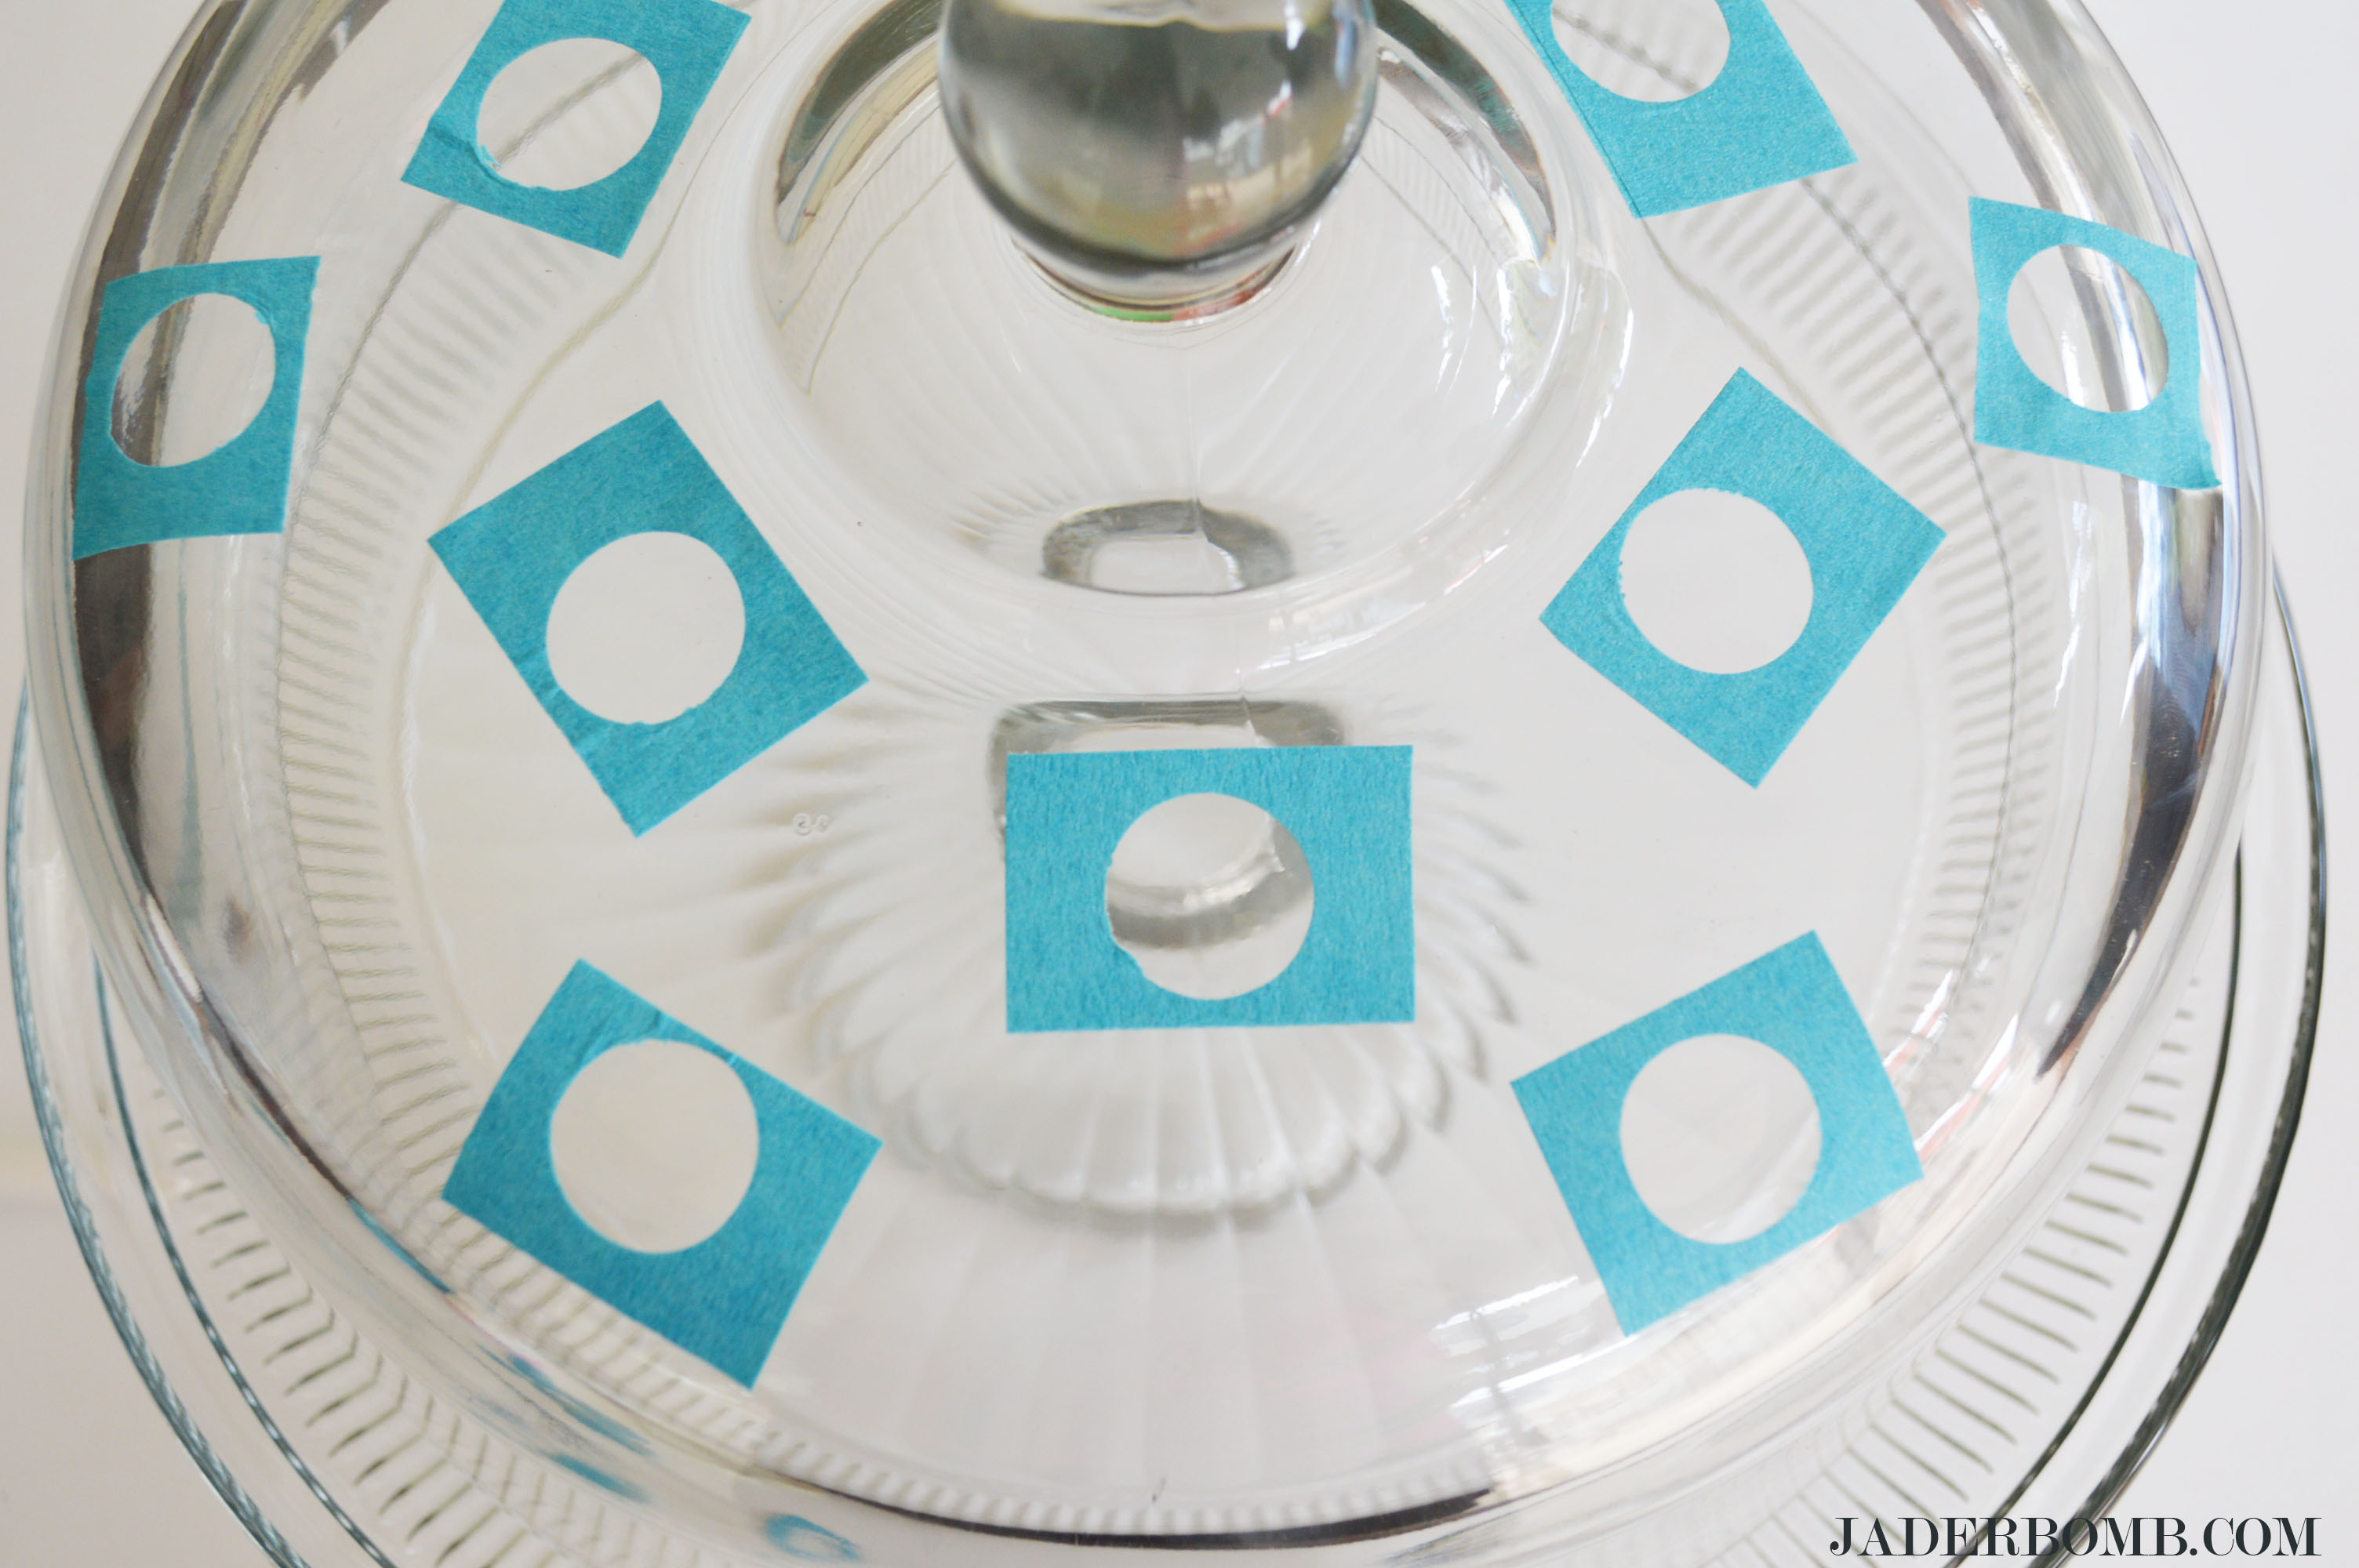
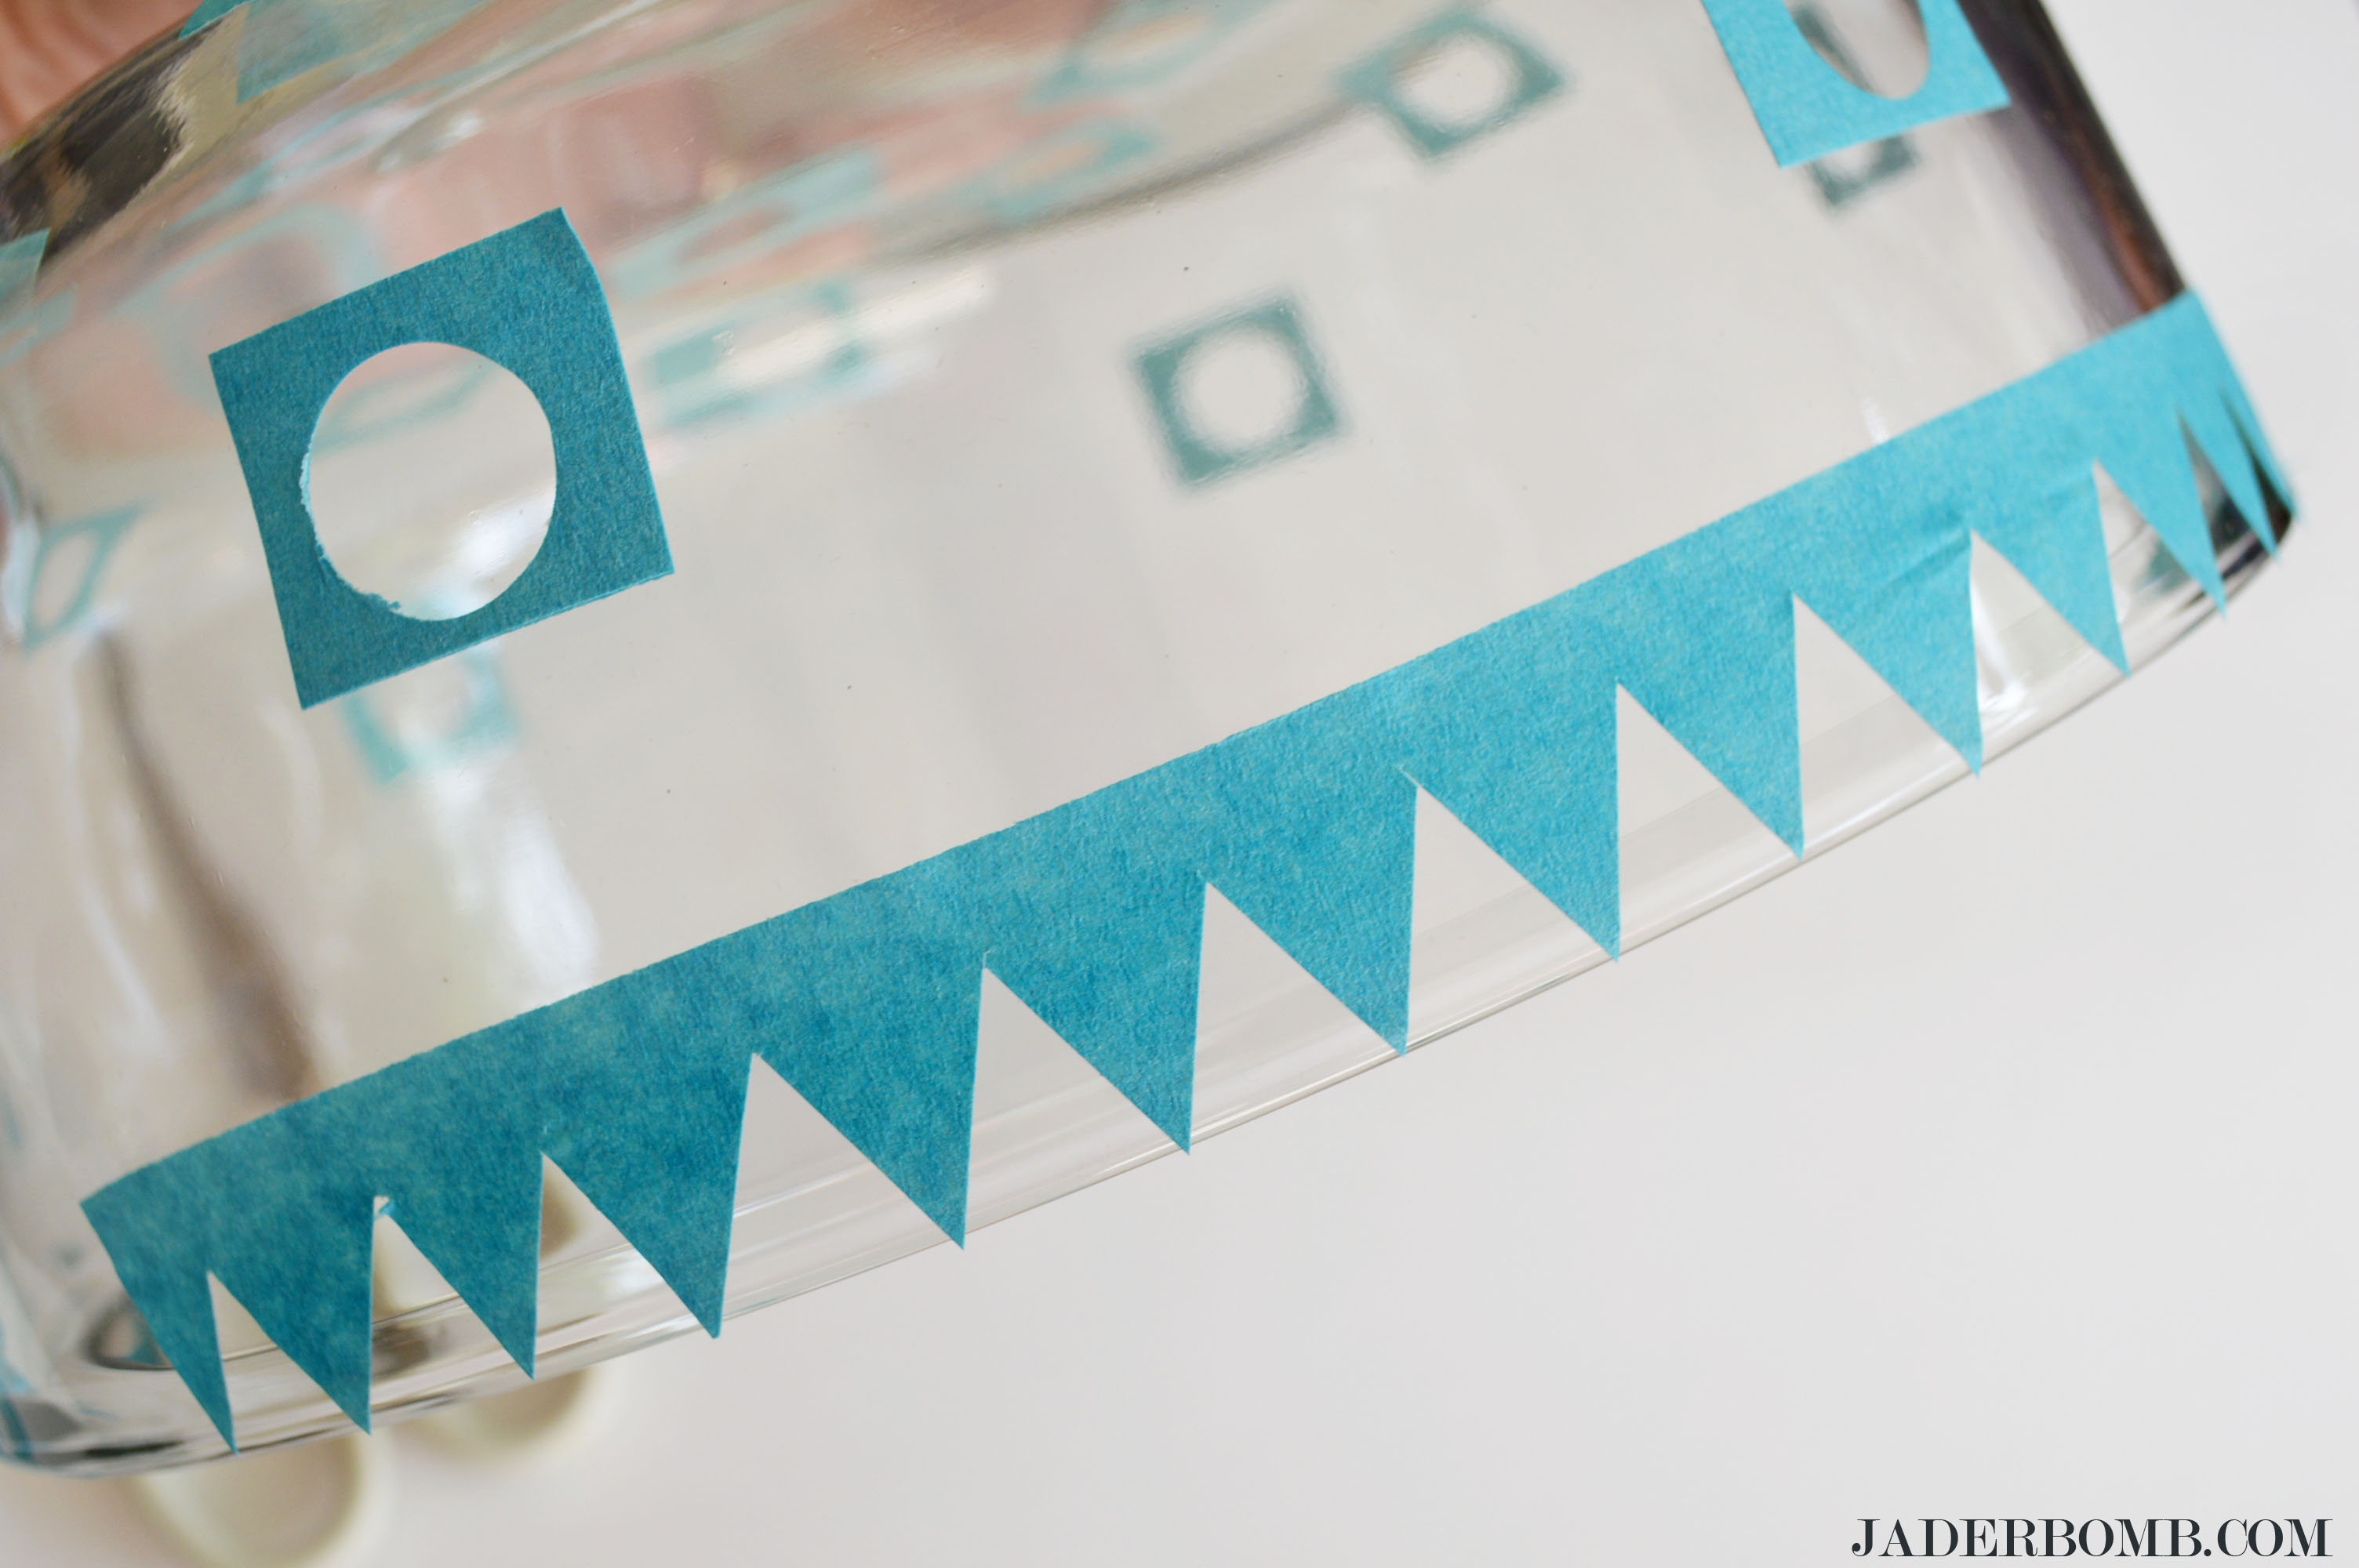
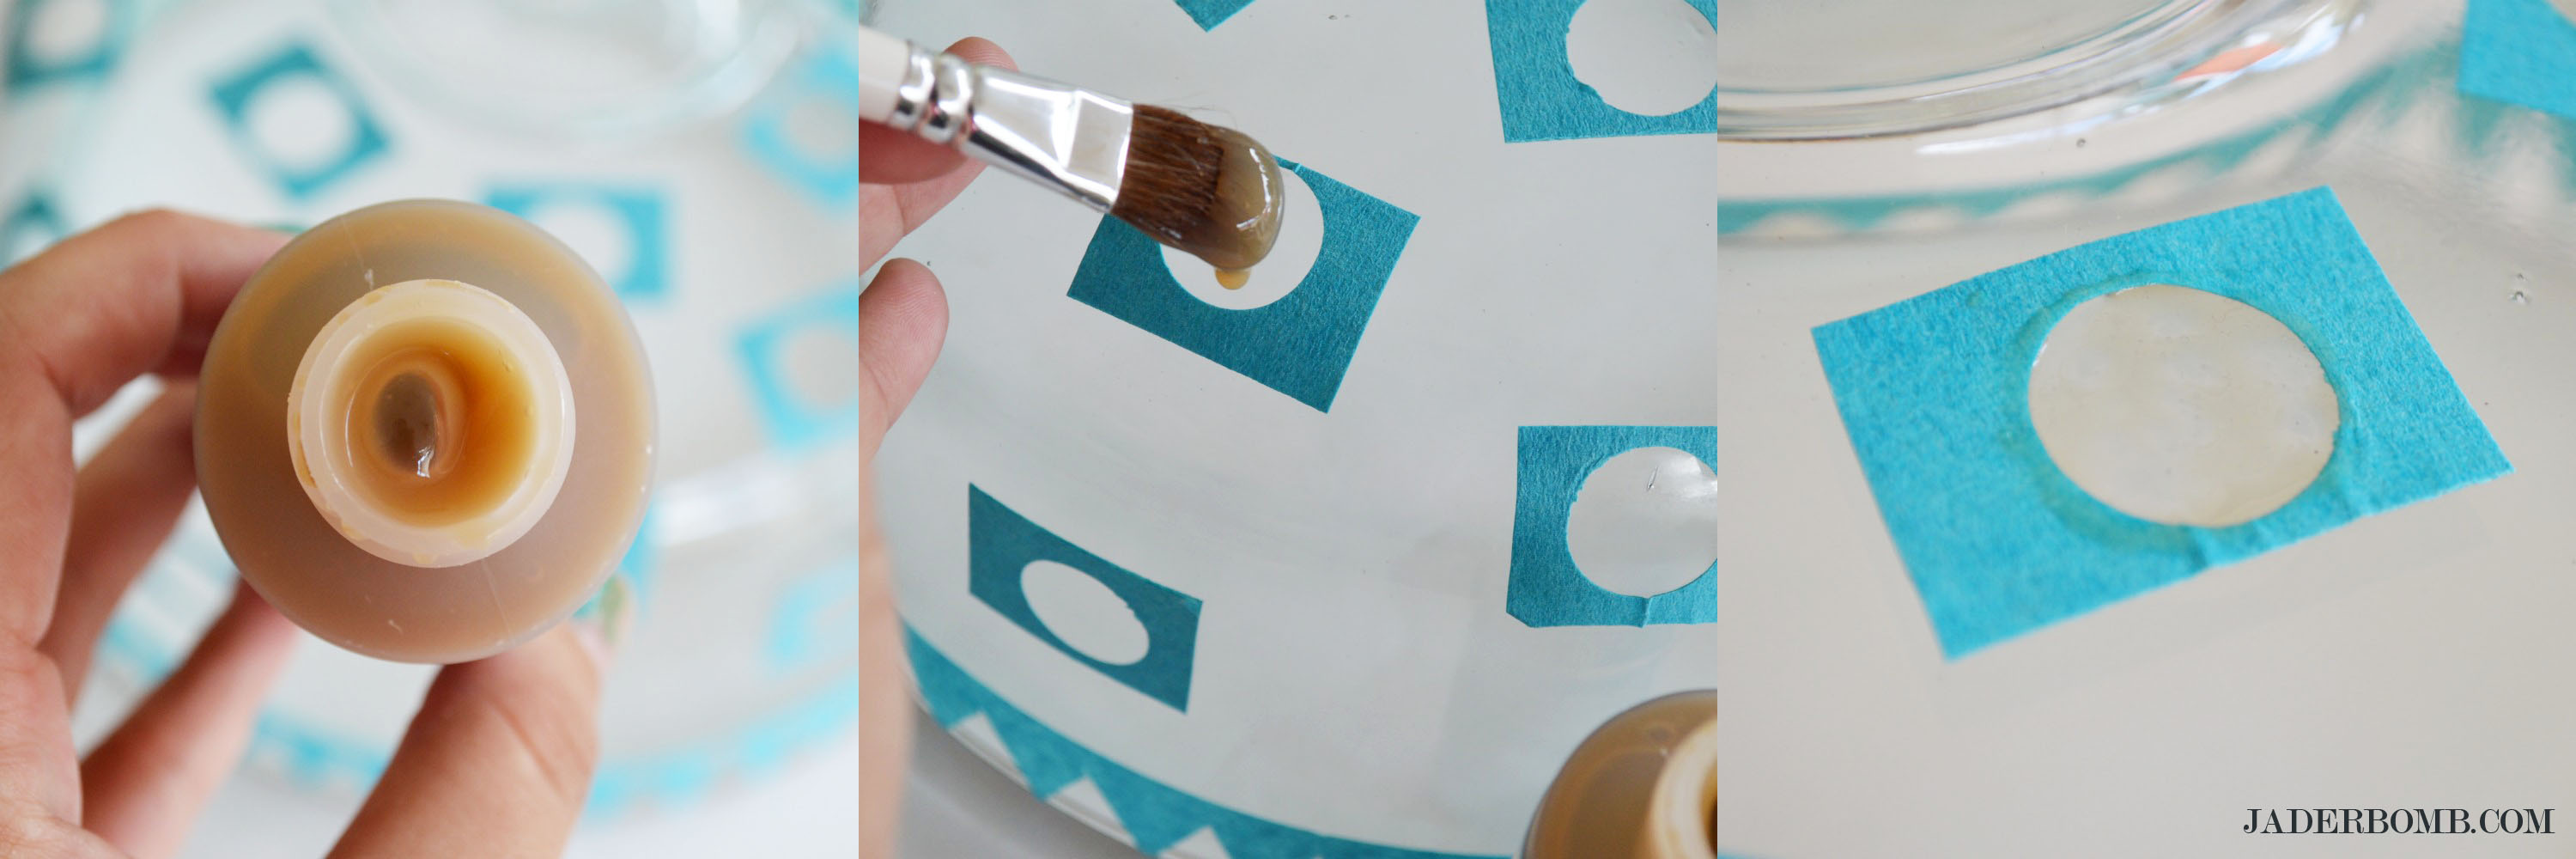
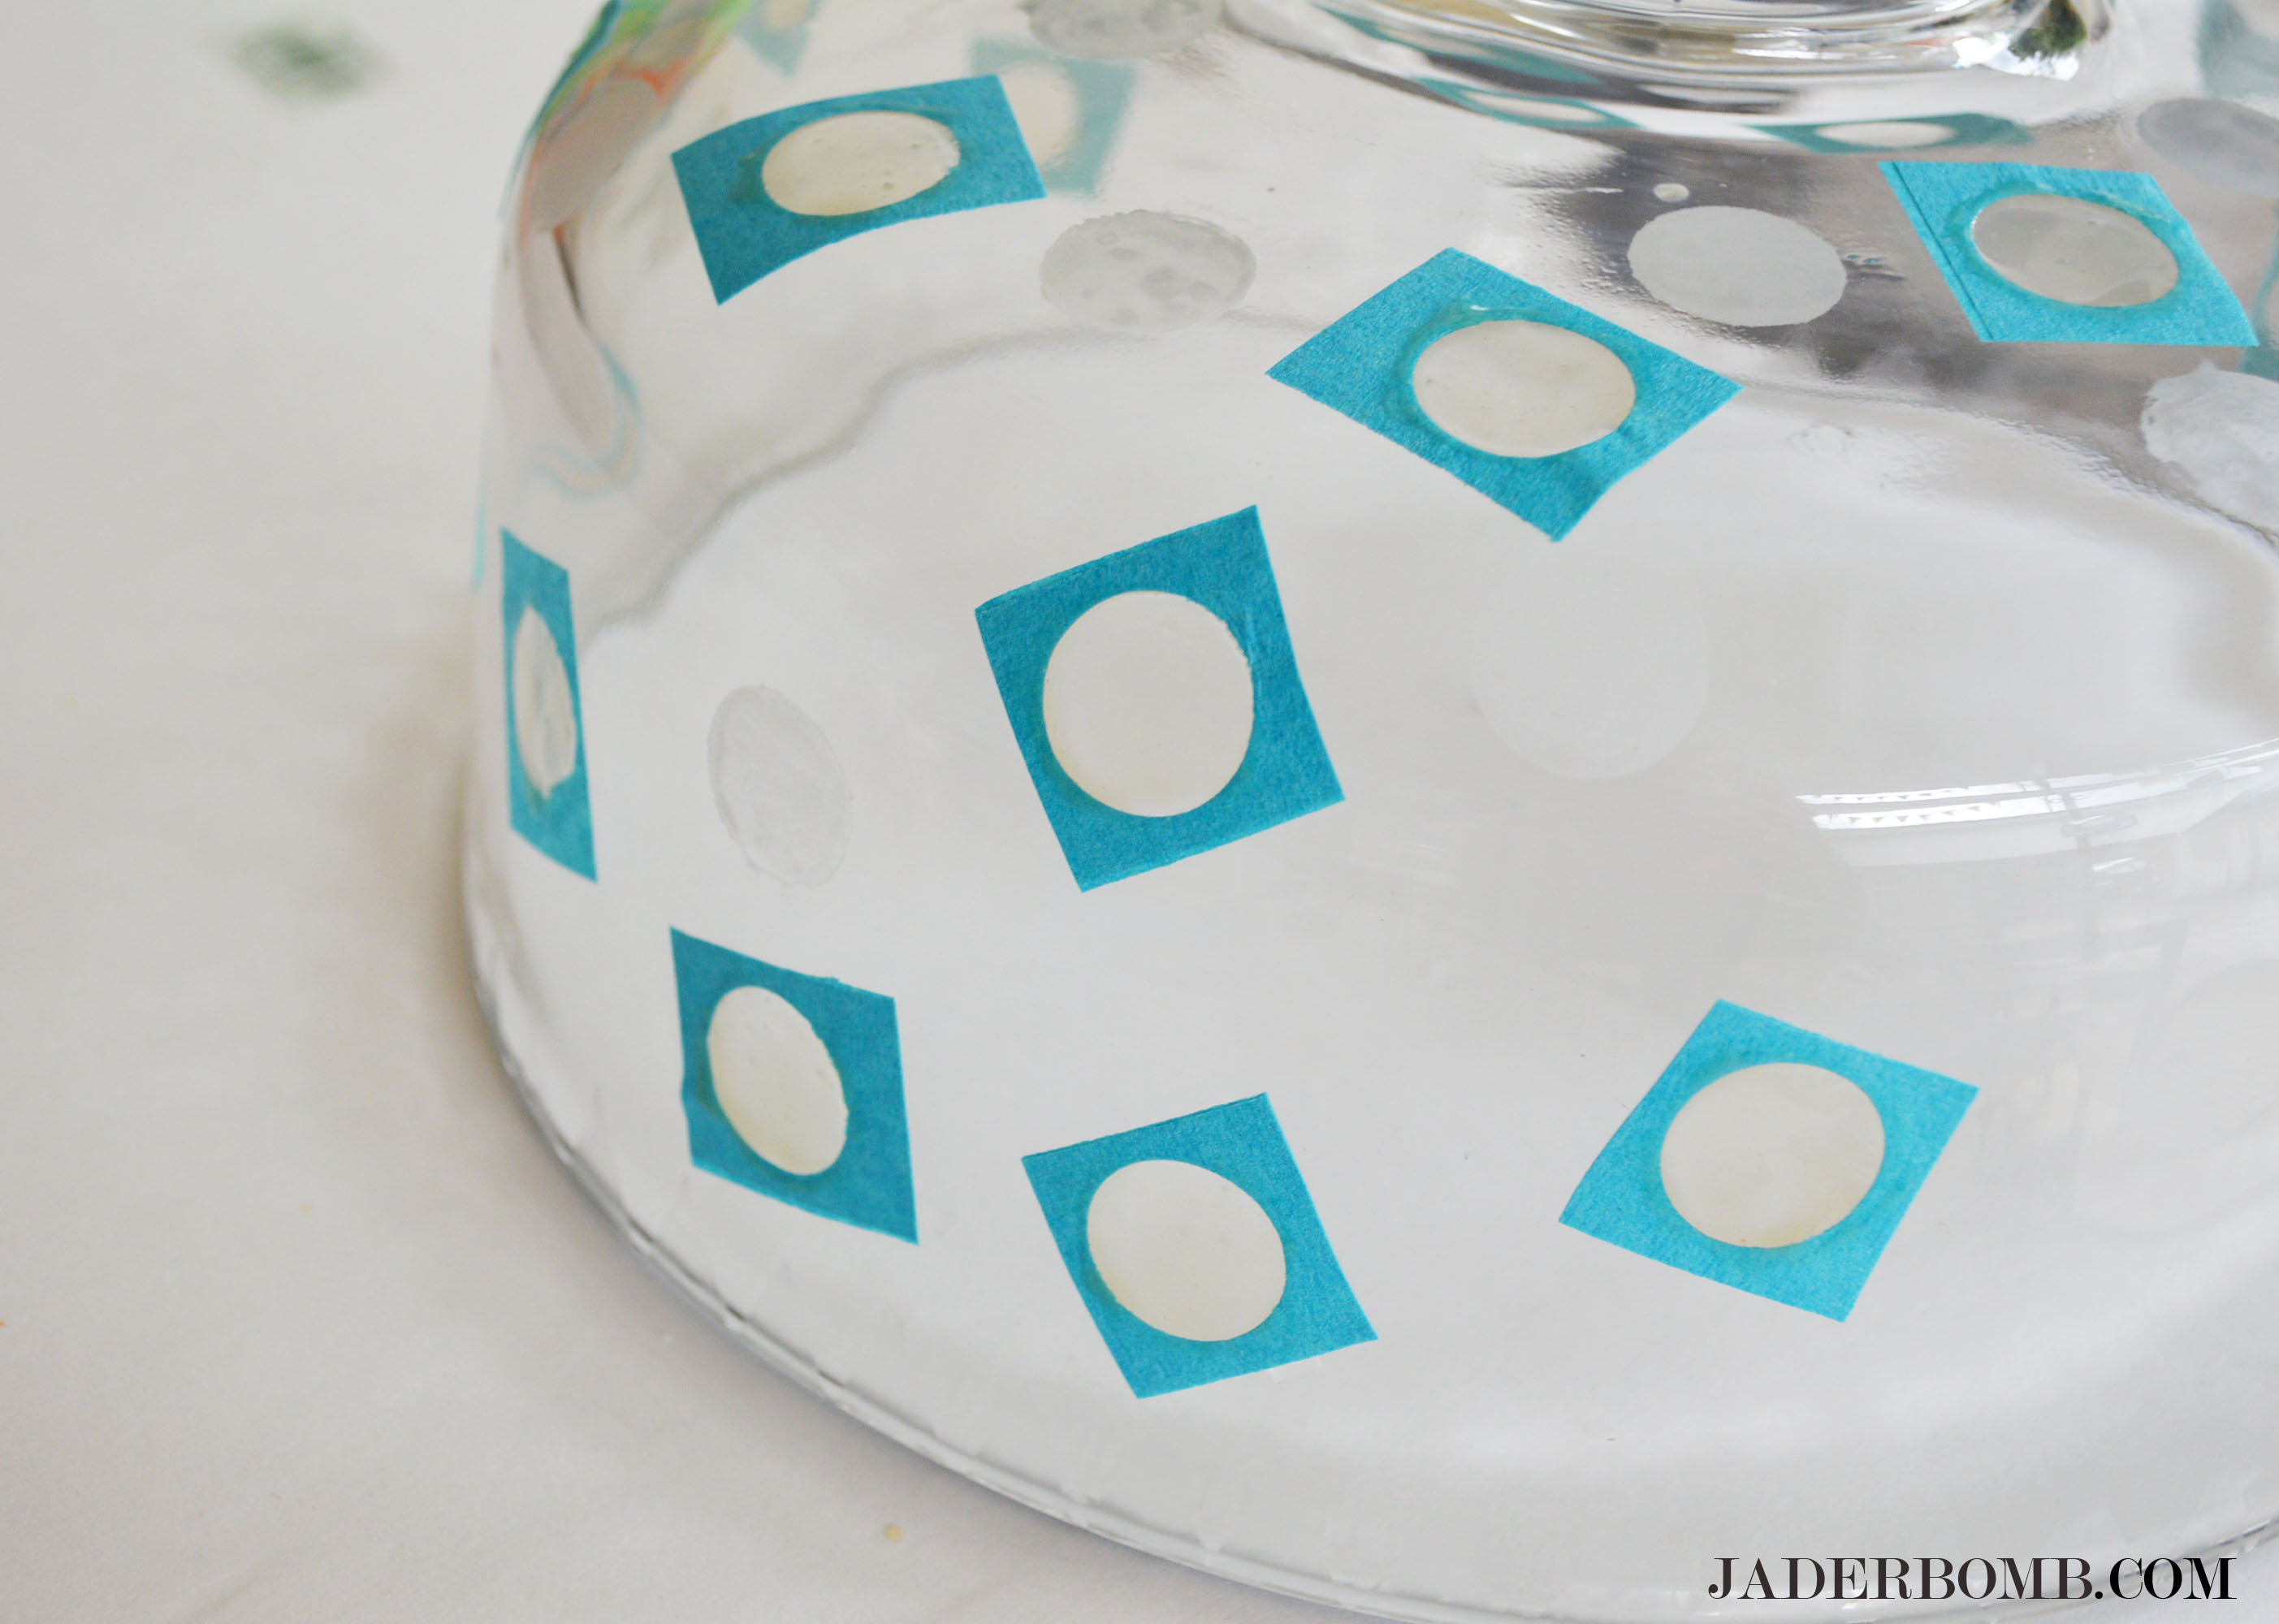
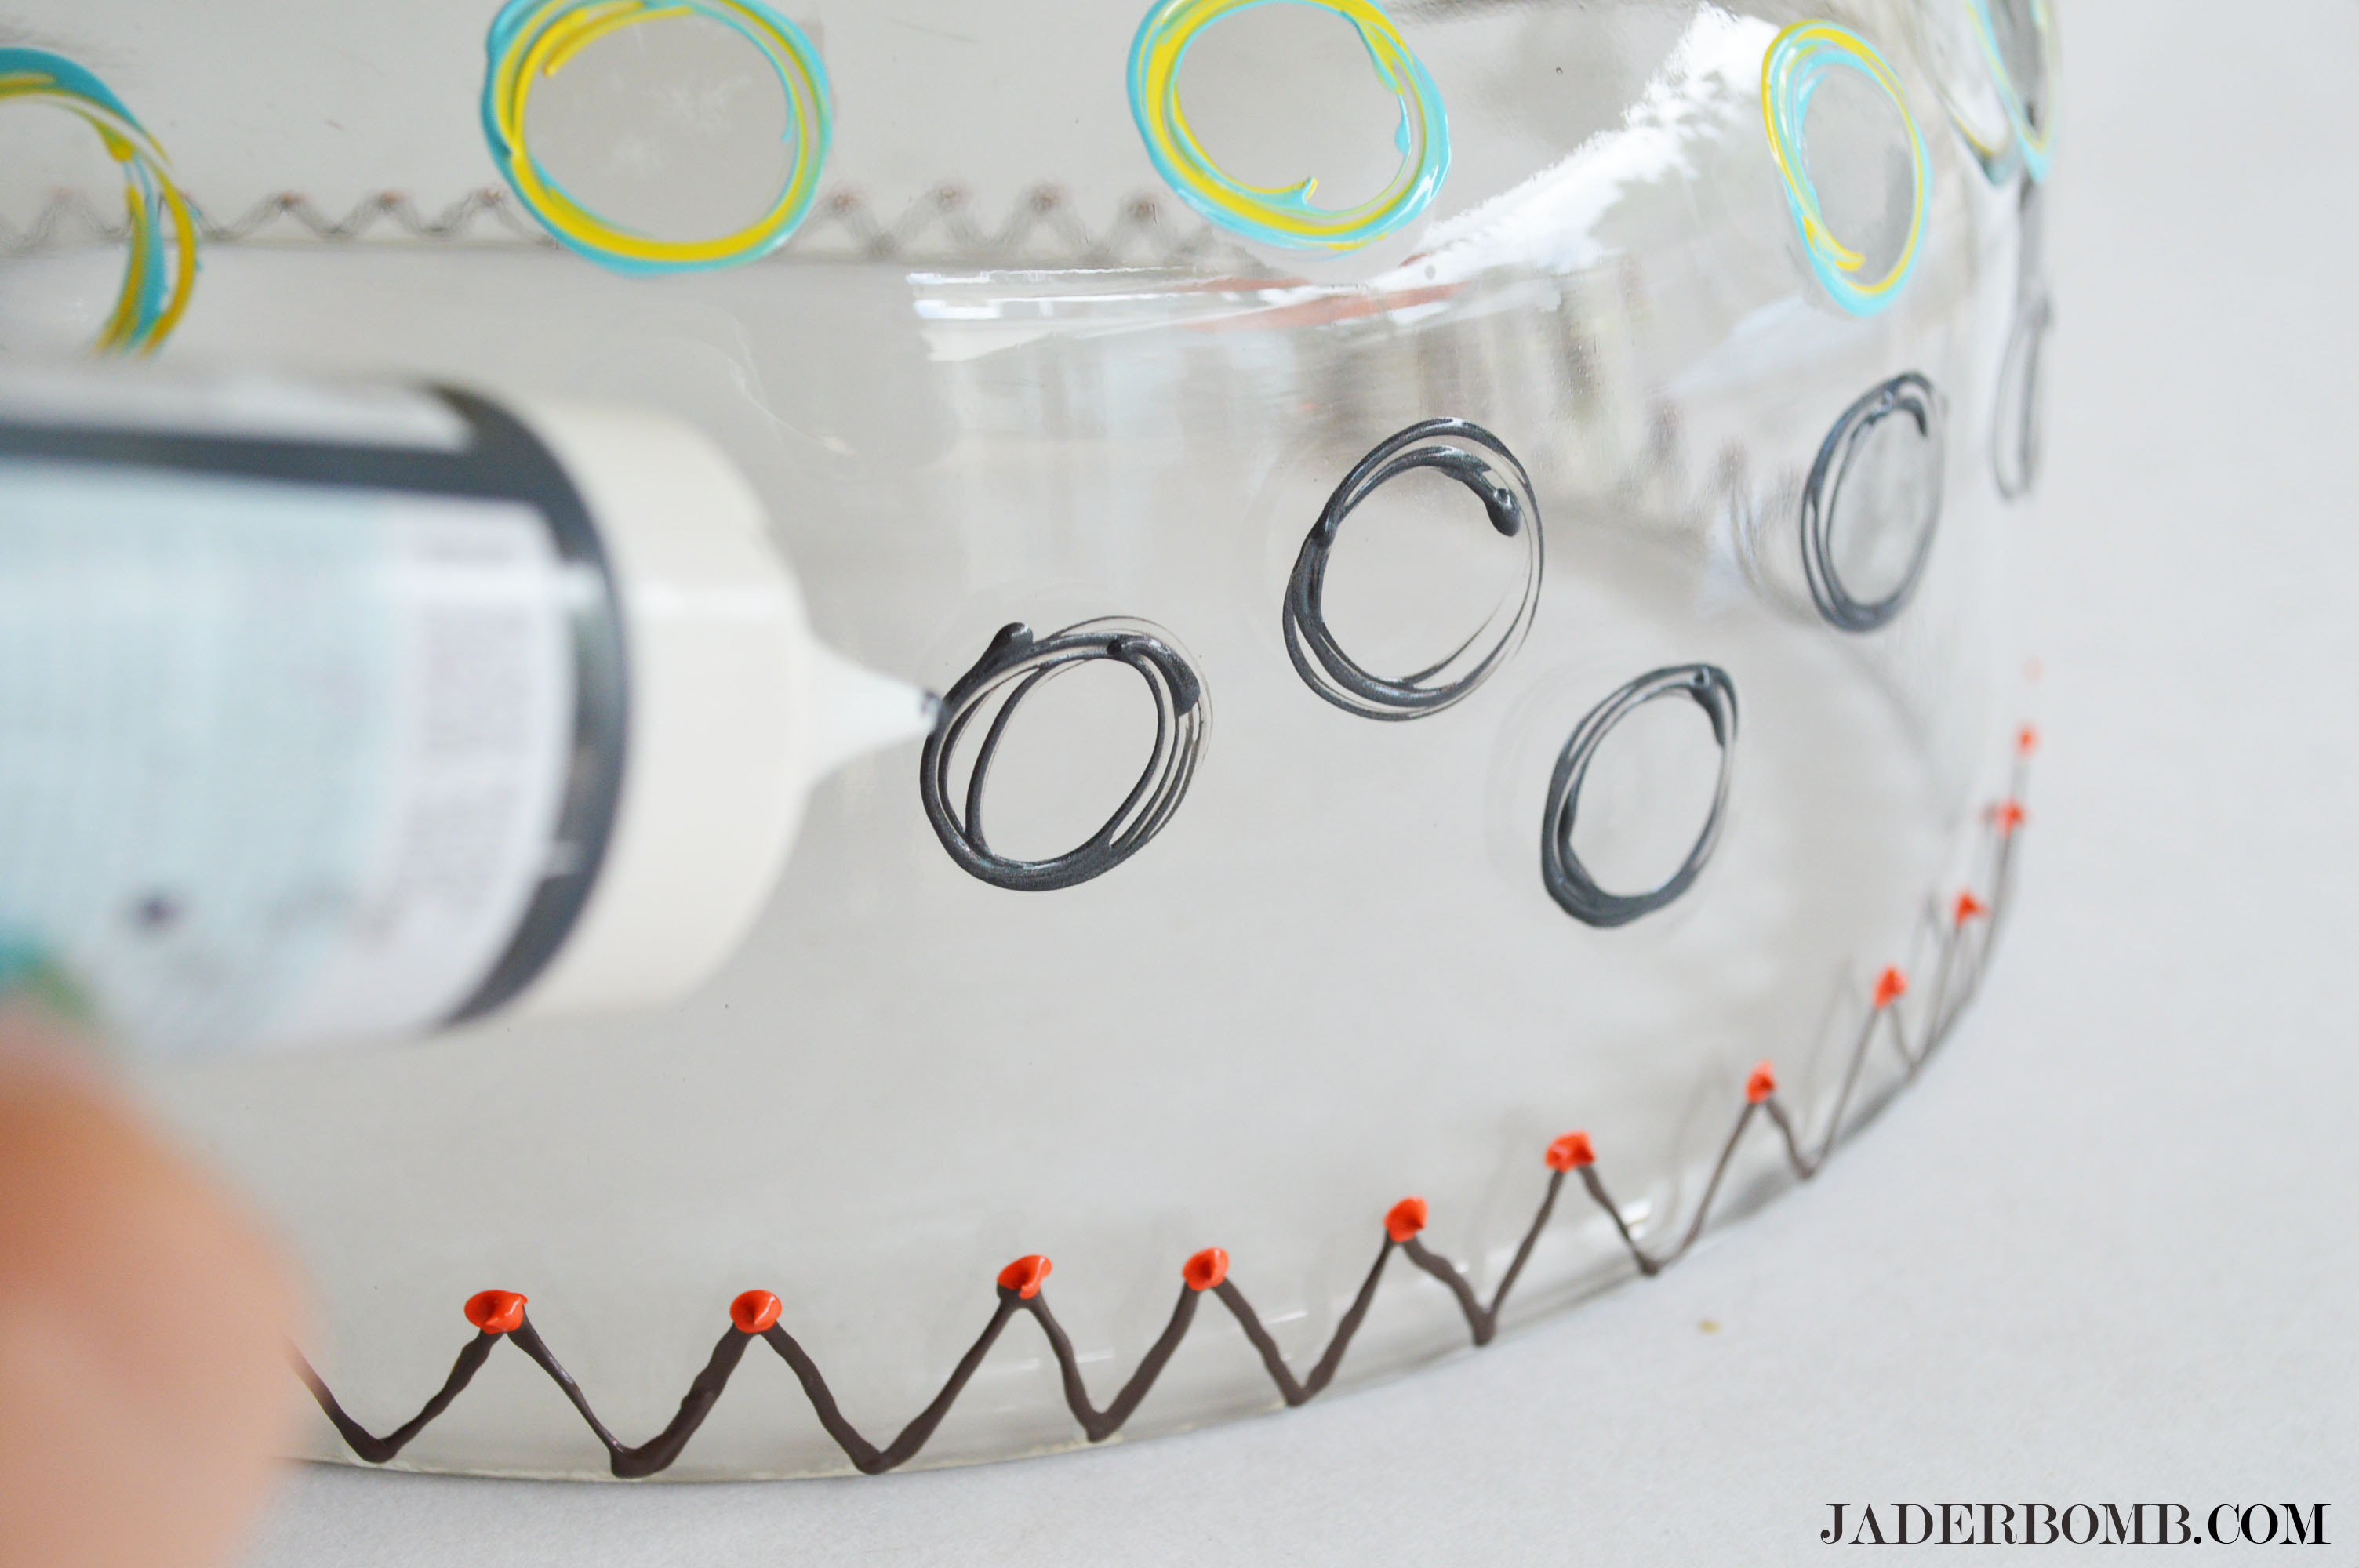
3)Grab your soft bristle brush and apply a thin layer over the section you will be placing your flower. Don’t over do it, we just want to apply where the flower is going to be placed.

4)Quickly grab your flower and place it on top of your thin layer. Brush a light coat of decoupage on top to make sure it’s secure. Apply as many flowers as you want. Make sure you work at a good pace so the decoupage does not dry. The fabric embellishments are easy to put on however if you decide to use paper make sure to rub your finger over them to get any hidden air bubbles out. Set aside and let dry 1-2 hours.

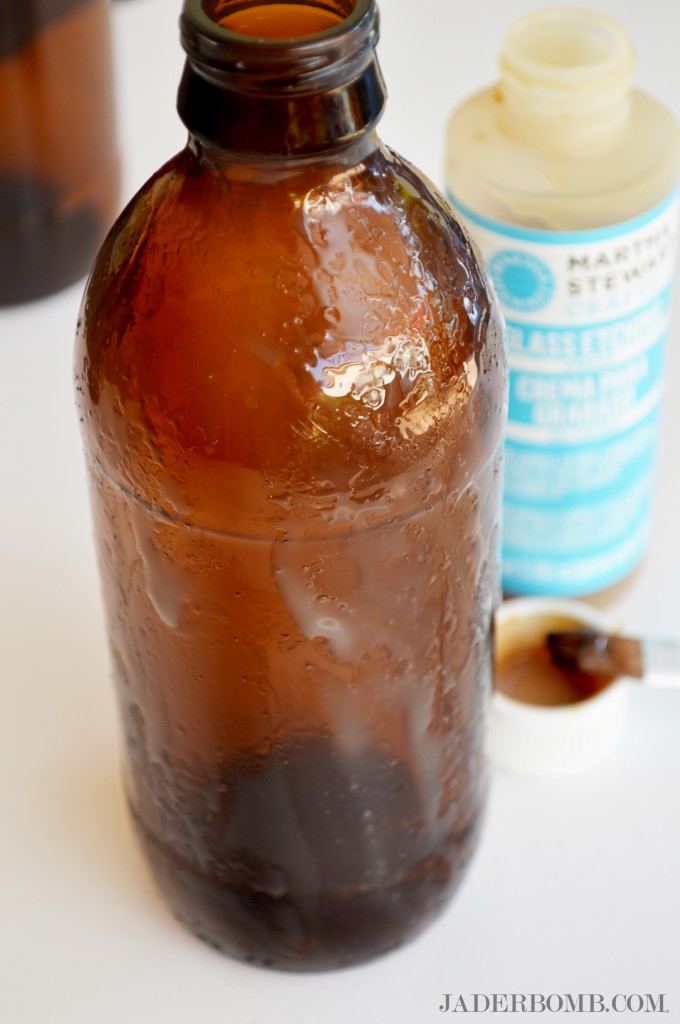
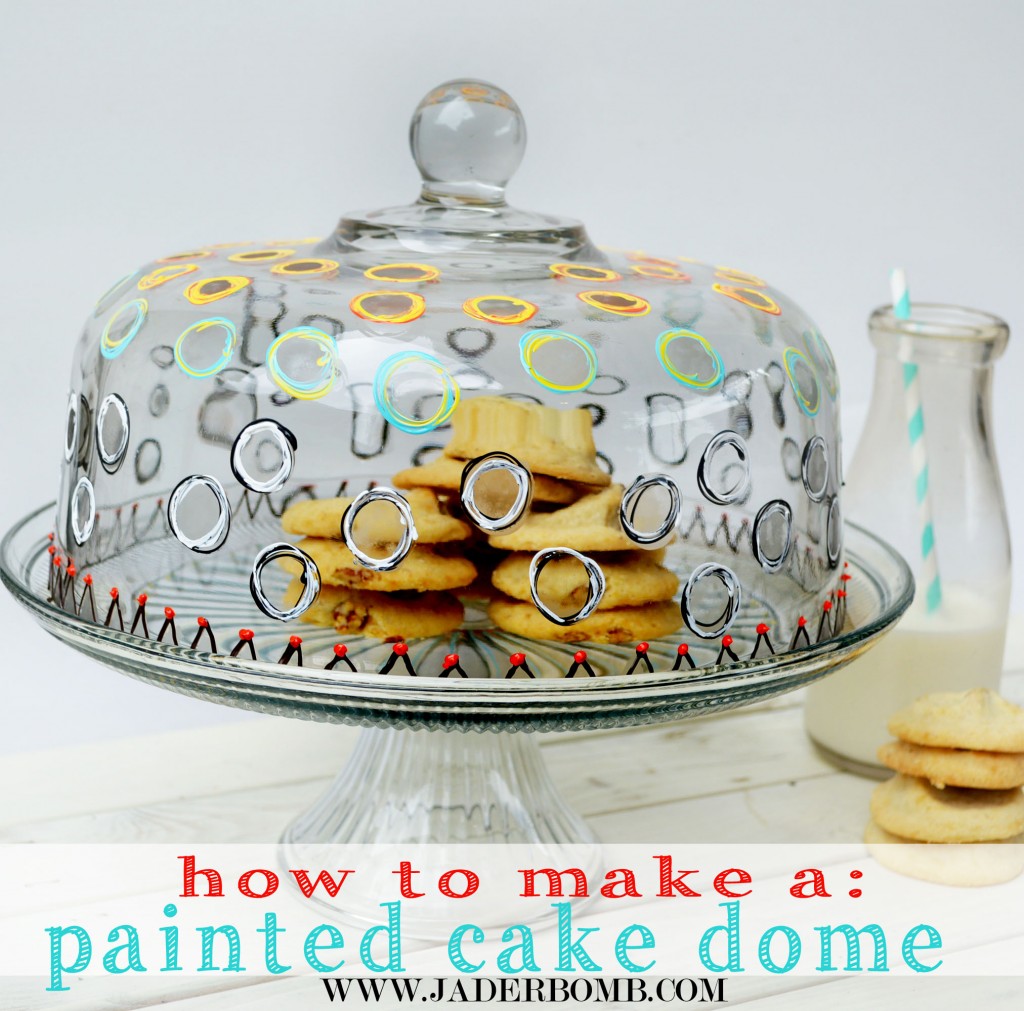
When dry, the Durable Matte Finish Decoupage looks just like frosted glass. I almost flipped in my chair when I went back to look at them. I may have blurted out a few curse words that were purely out of excitement.

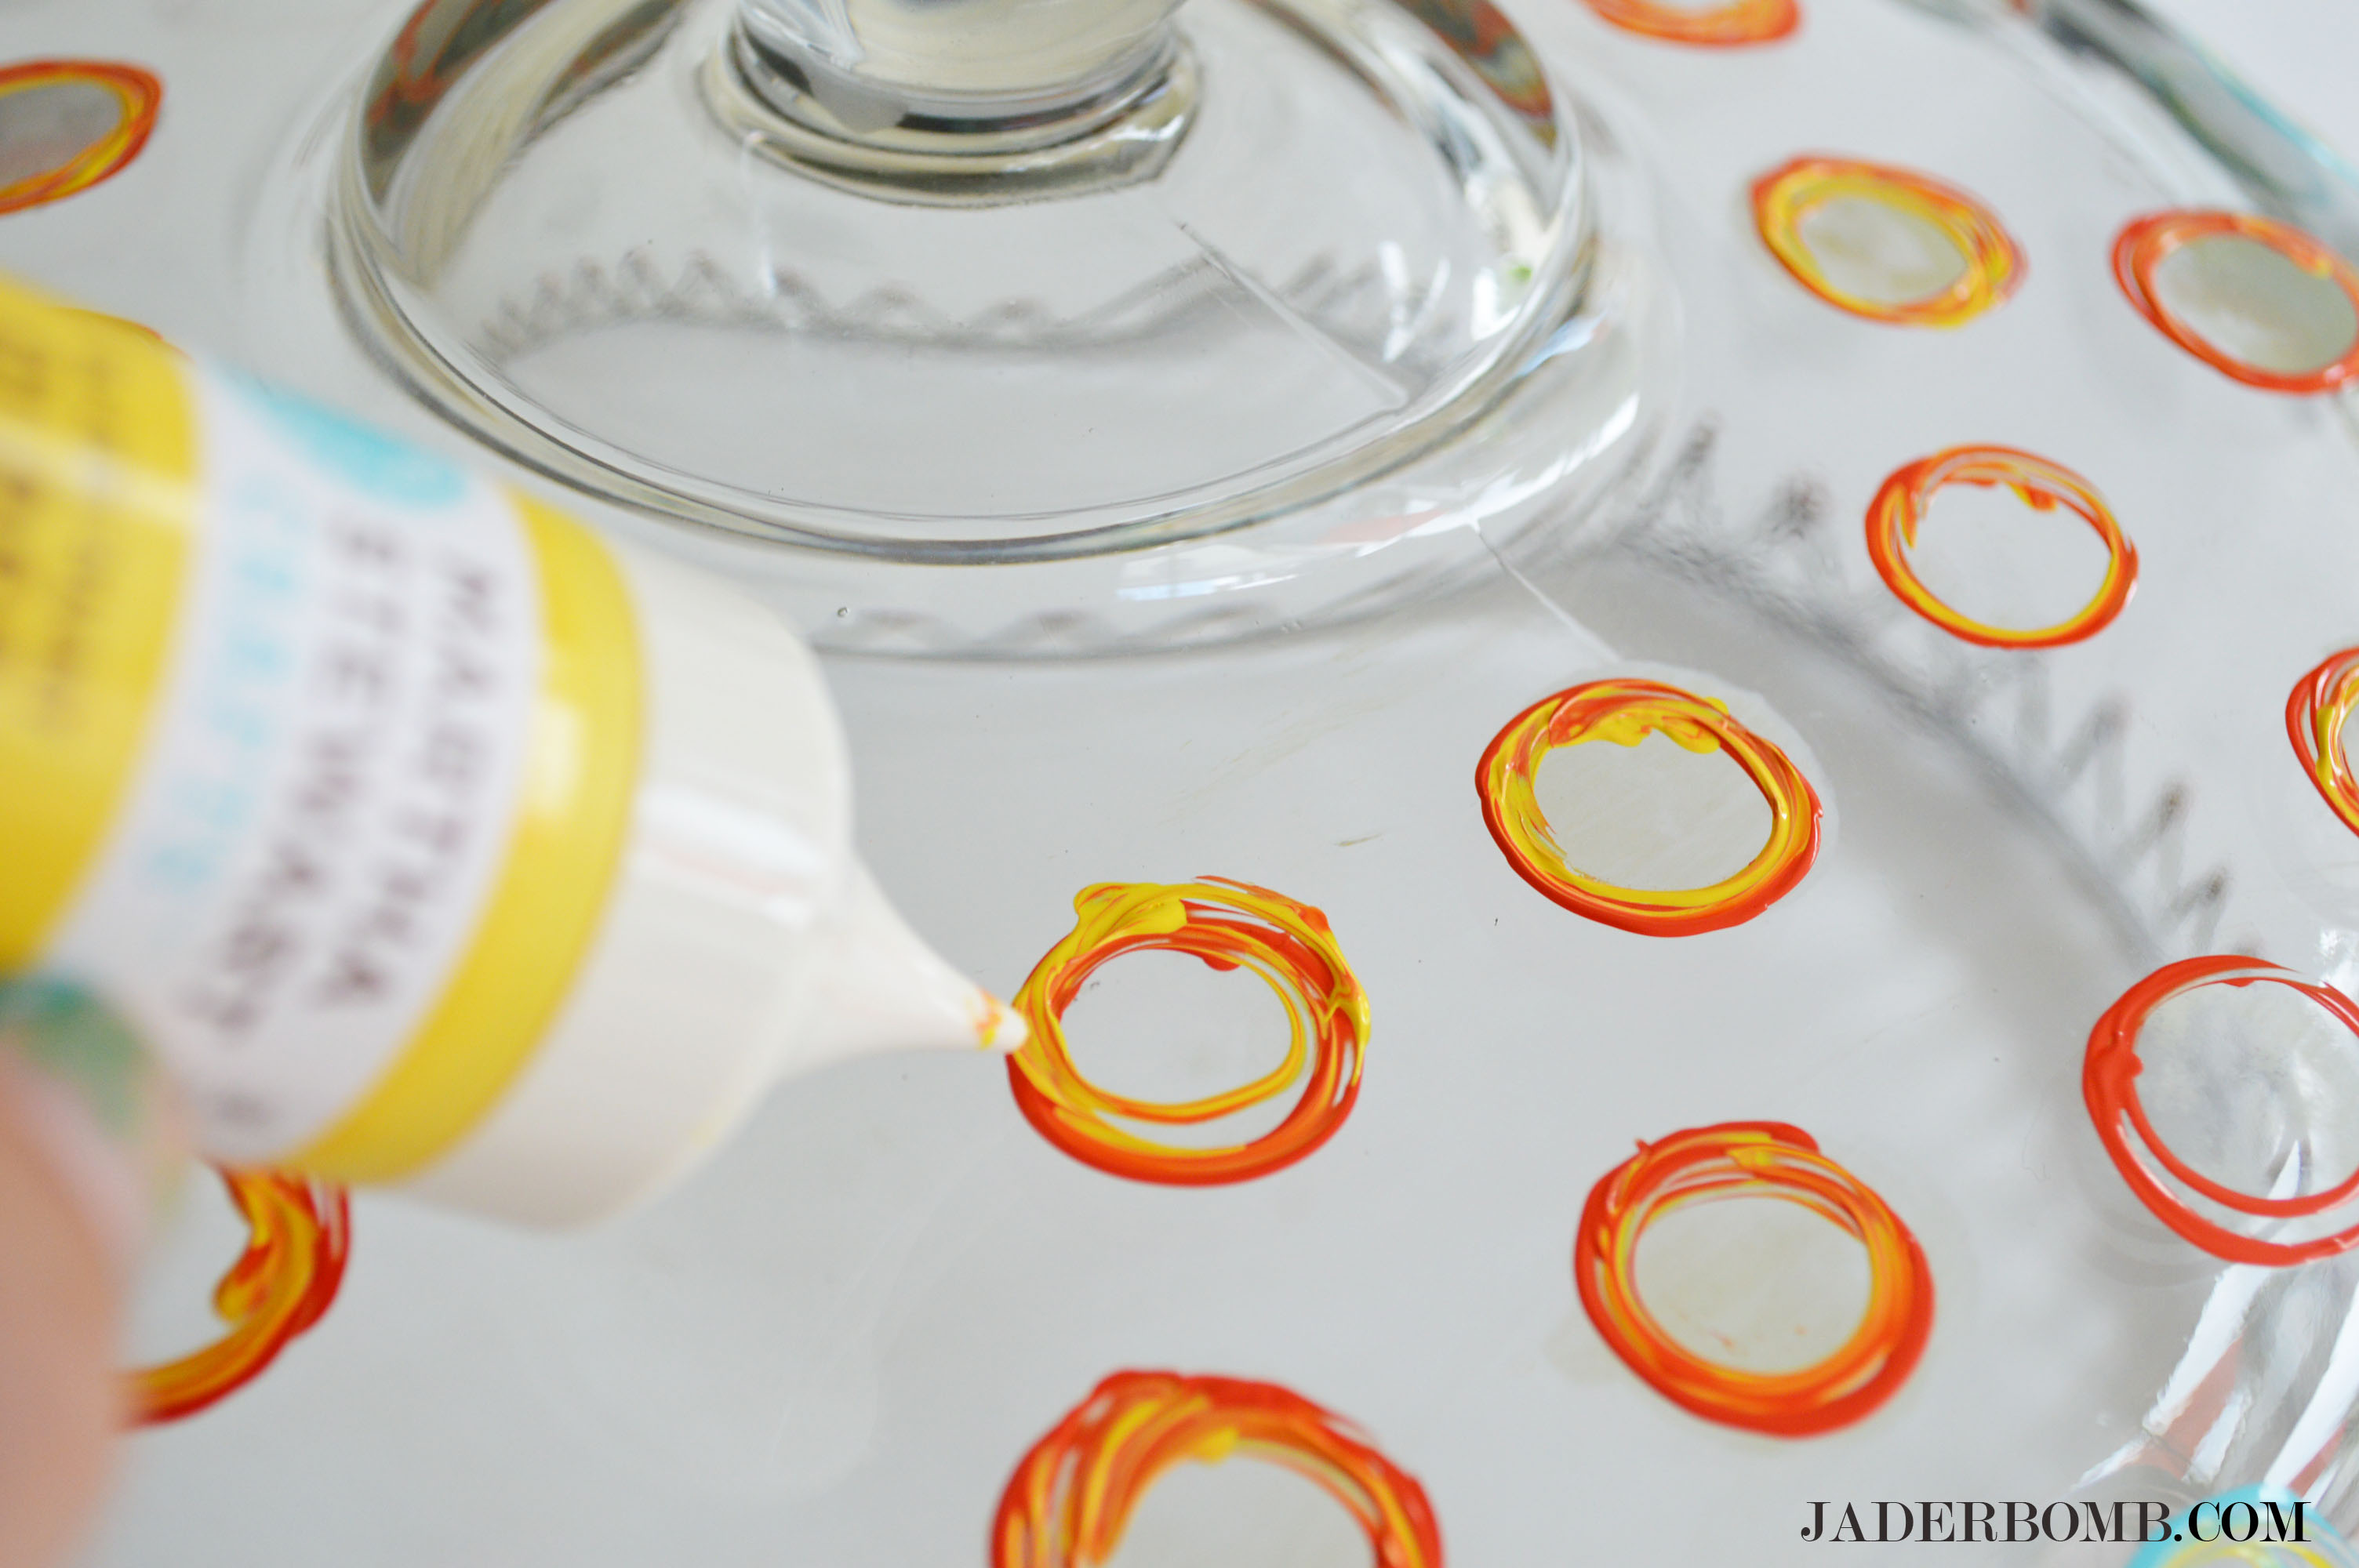
5) When you are finished applying your flowers get the 1 1/2 in 3.81 cm soft bristle brush and apply a thin coat over the entire glass. It’s important that you brush in the same direction when applying your final coat.

6) When done let them air dry 2-3 hours.

7) You can put as many layers as you want just make sure you allow drying time in between each layer. 

8) Set this aside for 21 days to cure completely and guess what, this will be dishwasher safe!

flower-decoupage

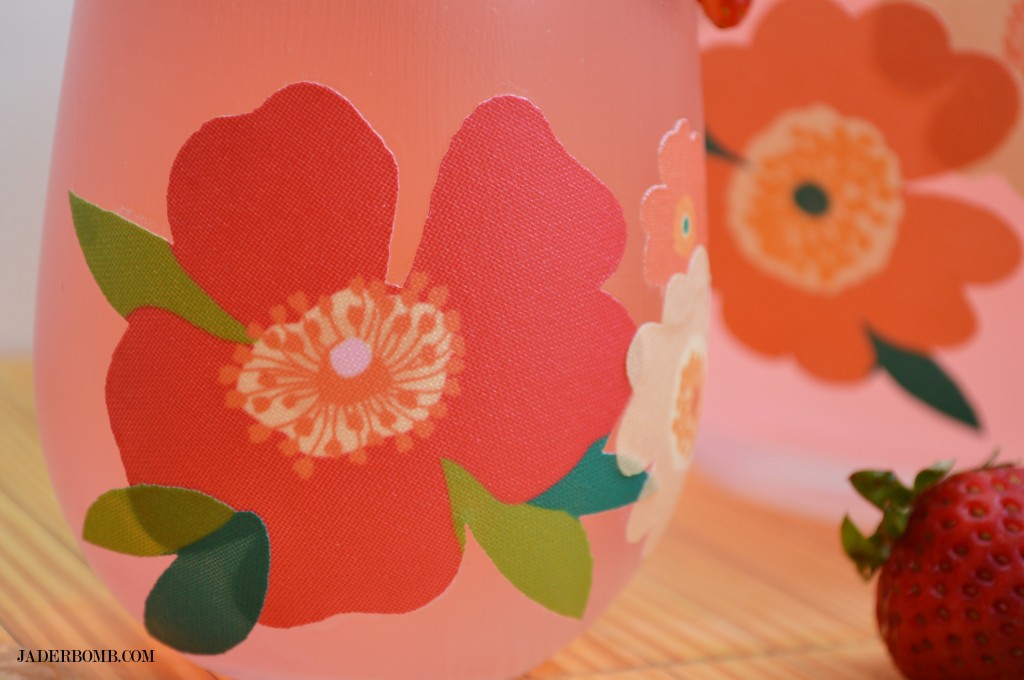
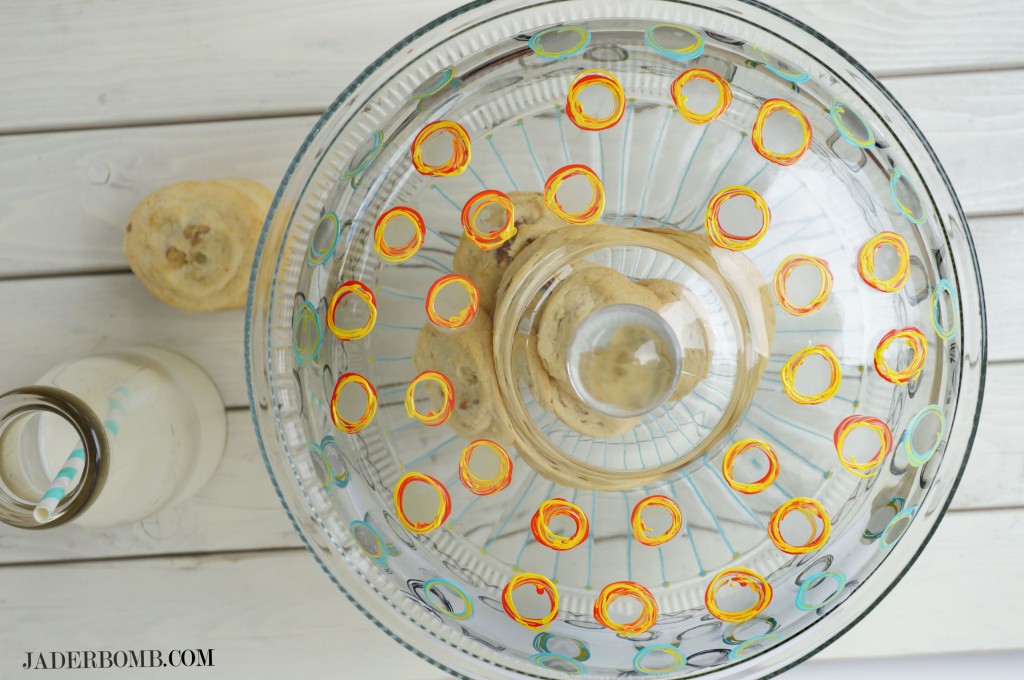
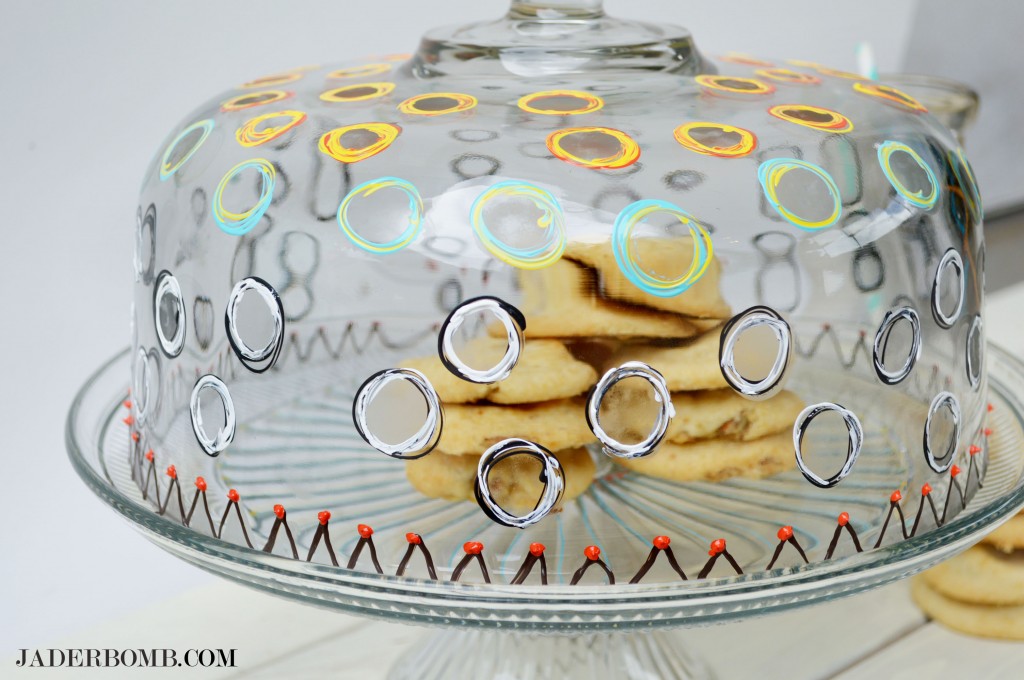
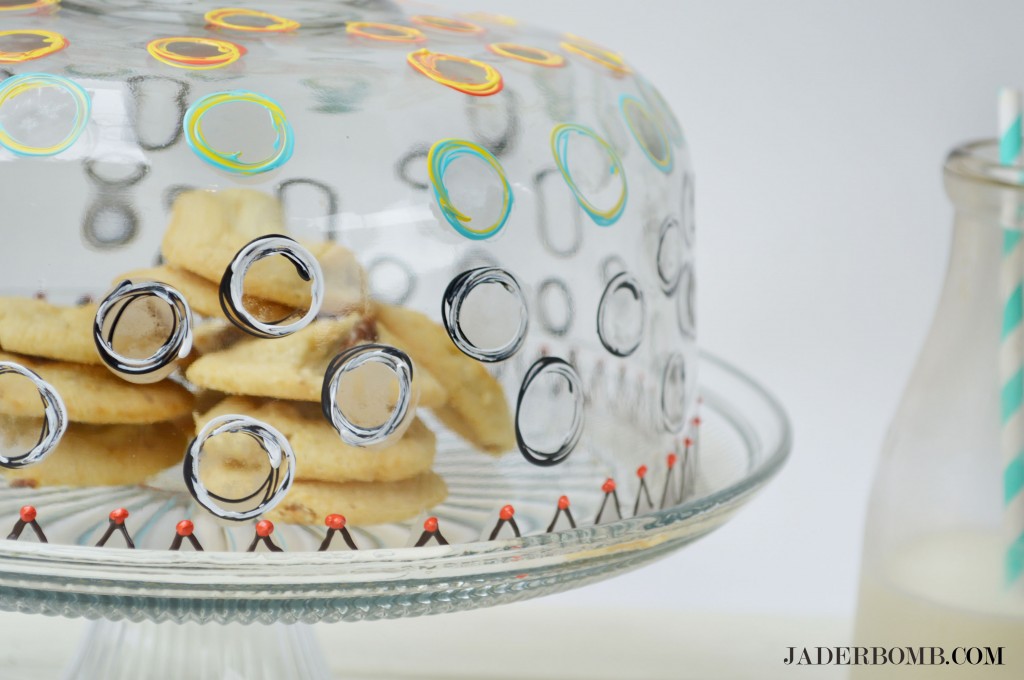
You can really see in this picture how the decoupage looks like frosted glass. It is beautiful!

decorate with strawberries

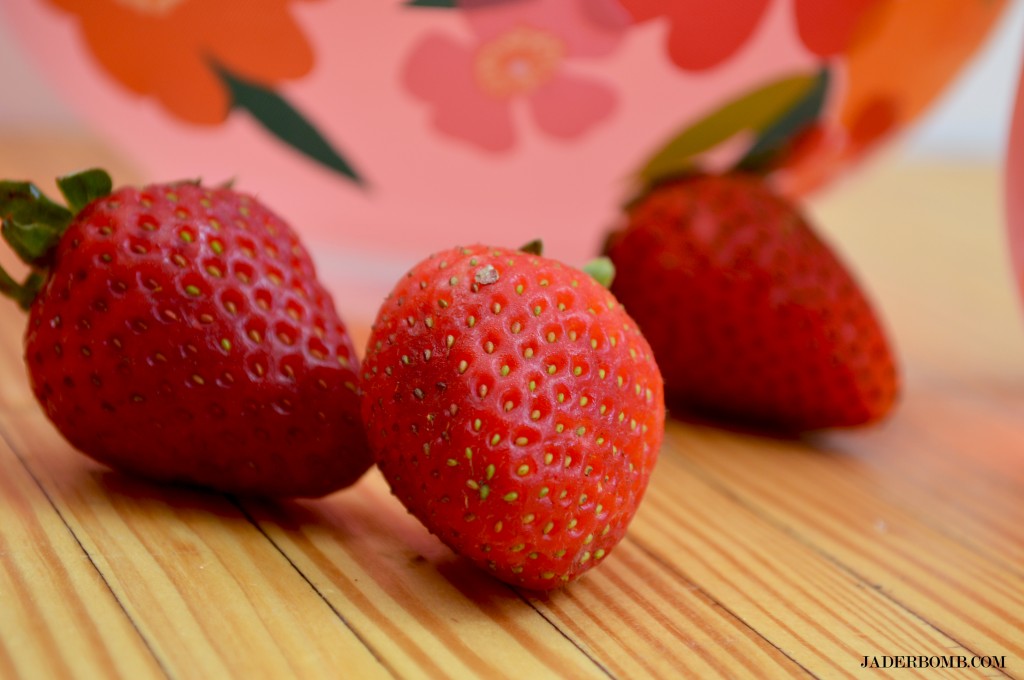
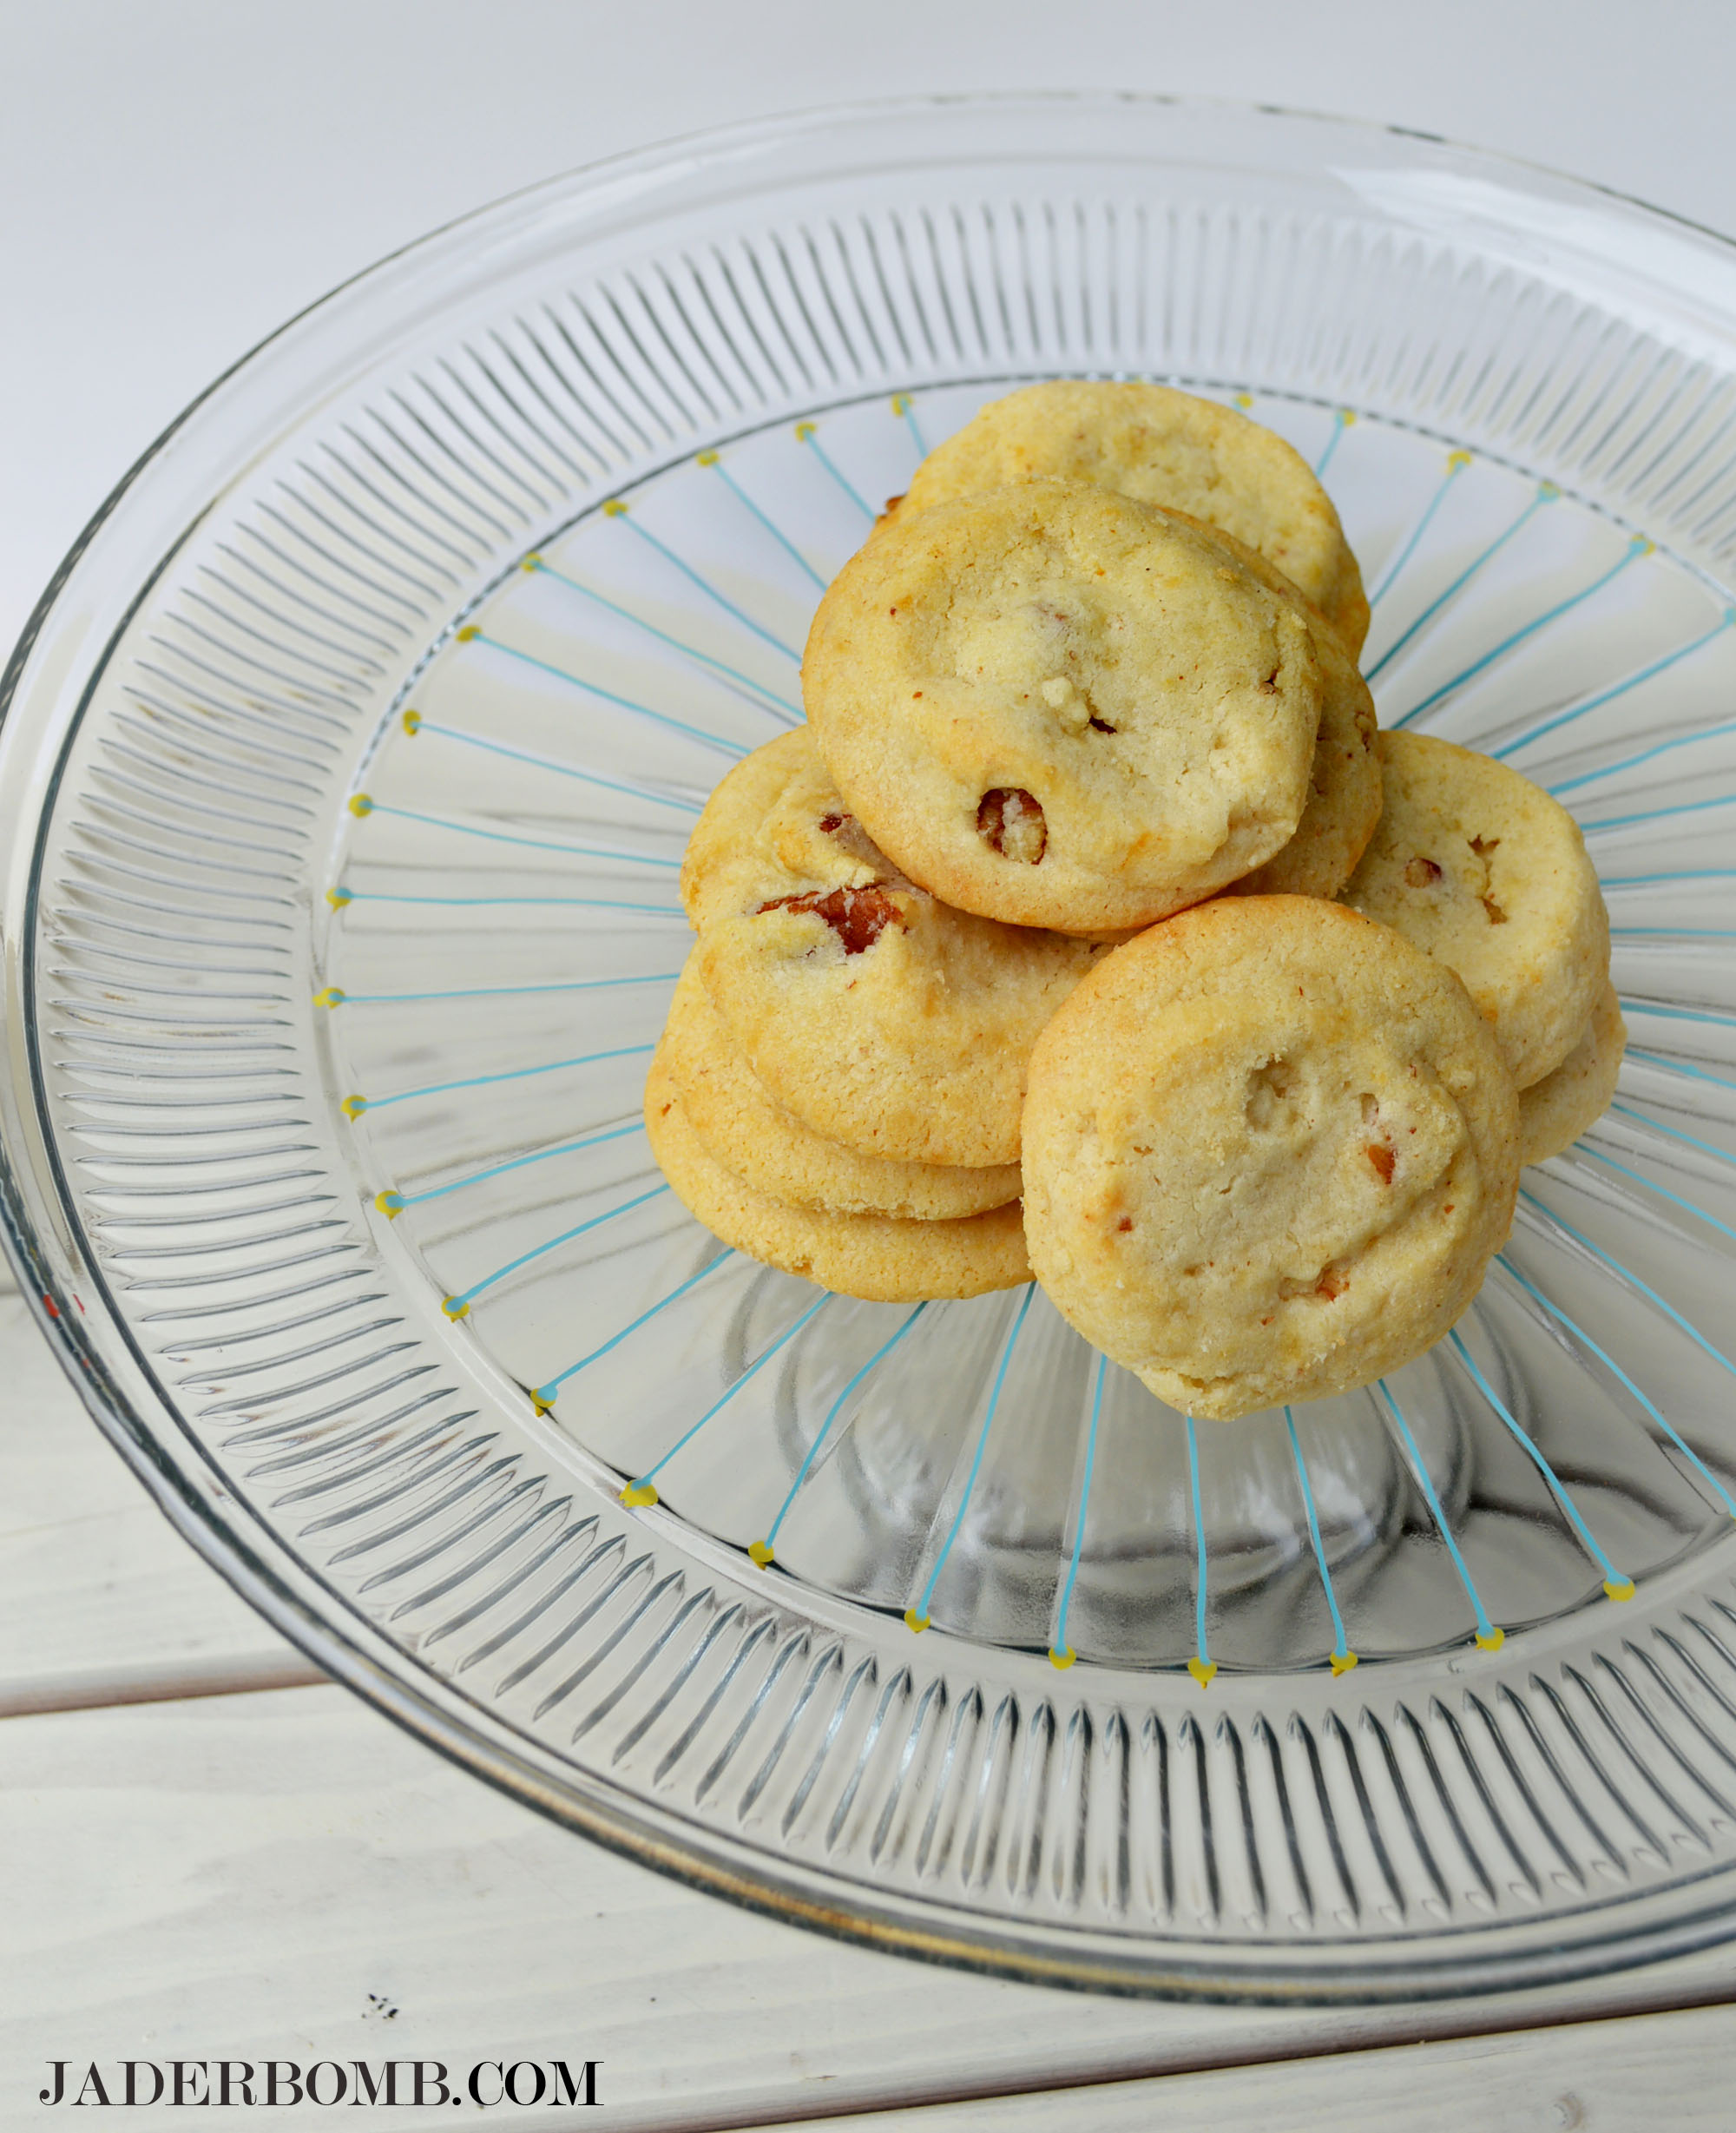
I ate these while I crafted and they were yummy. Want one?

how to decoupage on glass

decoupaged glass that is dishwasher safe

I hope you enjoyed this post. I had a blast playing with these new products. BTW: these decoupaged glasses look cute on anyone! 

Huge glittery hugs—See you in the next post! Visit me on FacebookTwitter,Pinterest, or Instagram!

This is a sponsored post through Blueprint Social and Plaid but all opinions are 100% my own.

For the complete line of Martha Stewart decoupage at Michaels.  Visit Plaid on FacebookTwitter,Pinterest, or their blog. Trust me they post great things daily!

ST_12_months_of_Martha_Logo-1

How to make a Decoupaged Candy Corn Lace Lamp

Decoupaged Lace Lamp

Happy Monday! It’s all about Martha Stewart Crafts decoupage supplies today

When I think of decoupage I always go back to that day in 1st grade when I coated my entire hand with Elmer’s glue. What was I thinking?

The only thing I was missing was painted lace which is why we are using some today for our lamp.

I mean, doesn’t anything look better with lace wrapped around it? Hopefully it won’t turn out like these tights I bought last year. Oh and incase you missed it check out this lace paper I made.

you will need jaderbomb

  Martha Stewart Crafts craft paint in JONQUIL, CARROT and CHESNUT BROWNMartha Stewart Crafts Decoupage White Floral Lace TrimMartha Stewart Crafts durable matte decoupage mediumPaint brush | Lamp | Decoupage brush 

See the entire decoupage line here. I don’t think I will have enough day’s in the week to use all of these awesome products.

lace-lamp-supplies

Today we will turn this boring lamp into an oversized lace candy corn. I know, I know that might seem hard but it’s easy with the materials we have.

You know I have not seen a lace candy corn inspired lamp floating around Pinterest lately so I figured I would give it a go.

lace-lamp-steps

The first thing you want to do is paint your lamp a light background color. Keep it simple because you want the lace to pop and not the lamp shade behind the lace.

how-to-paint-lace

Since a candy corn is bigger on the bottom I tried to mimic that with the lace size. This pack of decoupage lace trim worked perfectly since there were multiple sizes in it.

lamp-lace-painted

how-to-decoupage-lamps

Once your lace is dry it’s time to start applying it to the lamp shade with the decoupage glue. This glue is super smooth and creamy and it’s easy to create a thin even coat with the decoupage brush.

decoupaged-lace-lamp-tutorial

I hope you enjoyed this tutorial and it gives you a ton of inspiration.  I am certain this will look yummy with all of my Fall decor. Maybe I will try to glue lace to my hand later!

Wanna see what else I have done for the 12 months of Martha, check it out here.

jade

marthastewartdisclaimer

Vintage Apothecary

Wanna know what’s better than scouring old antique shops looking for vintage apothecary brown bottles? Making them with a good ole 6-pack of beer in 1 hour.

That is just how I like to roll, yo.

1. I don’t have the time to really dig through boxes of someones trash. Unless I am in GA at my sisters house.

2. I am not paying 20 bucks for a real “vintage” bottle.

you will need

how-to-etch-jaderbomb

See the ingredients are fairy simple.

– Beer bottles (and yes you will now start begging your friends to keep all of their trashy empty bottles now)

– Martha Stewart etching cream

– Martha Stewart oval stickers 

Did you see the glass dome I just made? I used this fabulous brown cream on it.

vintage-bottles-jaderbomb

This bottle is clean in the beginning but we are about to dirty this baby up, or just make it look dirty.

easy-etching-tutorial-jaderbomb

Make sure you lather this cream on the bottle. The thicker,the better. Don’t put a thin coat and expect it to work. Not gonna happen.

Since we are creating a vintage apothecary bottle we need to keep in mind that the “dirty” sections are spaced out. Don’t coat the entire bottle at once. We want to put the cream in different areas.

how-to-make-vintage-glass-jaderbomb

Let your etching cream chill on the bottle for about 15-20 minutes. Rinse it off, then repeat the same steps.

This time put your etching cream in different spots and start overlapping the cream on spots you previously did.

vintage-glass make-vintage-glass-jaderbomb

I had left over daisies from this post so I figured I would put them to use once more.

I’m so cheap.

vintage-bottle-craft-jaderbomb vintage-etched-glass-jaderbomb

make-old-bottles-jaderbomb

I hope you enjoyed this tutorial.
P.S. If your friends don’t drink then that means one thing. It’s time you start throwing some back! If you have not seen my 12 months of Martha make sure to check it out.

See you in the next post!

jade

Huge love to Martha Stewart Home Office with Avery for sponsoring today’s post on Organization – Back to school organization.

Getting Organized

Getting organized can sometimes seem like a major task especially when you have a thousand other things to do. I decided to organize a section in my office for a command center. I believe every house needs one of these. You will be surprised at how relaxed you will feel knowing everything has a spot and you don’t have to search for hours looking for that letter or note from school. Since I have three office spaces in my house things can sometimes get crazy. This main command center is working perfectly so far and I am excited to share with you how I accomplished this.

My best friend Martha Stewart sent me some great things from her home office line from Staples. I had so much fun getting organized and her products makes everything look crisp and clean, which is a huge plus in my book.

{{P.S. Don’t forget to scroll to the bottom, I am doing a GIVEAWAY}}

This is how my desk looks right now.
(Above)
Below is what it looked like just just hours before I got my package in the mail from Martha!
Amazeballs, right!

staying organized

Don’t judge.

getting any space organizedmartha stewart binders

The one thing I was super excited to get was this binder that you can fill with ton’s of great things. The yearly calendar has to be my favorite thing because without that I would not know which way is up and down. Check out some of the cool things you can buy separately for the binder.

*Zipper Pouch
*
Small-Format Paper Dividers
*Project Planner Filler Paper 

getting your notebook organizedDSC_0604

If you are not a binder fan you can get this super chic disk bound notebook  (yes I wrote binders in the picture, I’m human y’all and I made ton’s of mistakes). You can get the same items that go in the binder for this disc bound notebook also. You can also buy larger disks to enlarge your notebook.

*Discbound Expansion Discs, 12/Pack
*
 Discbound 2013 Calendar Insert
*
Discbound Notebook Dividers, Classic, 8-Tab Set
*
 Discbound Planner Pockets, 3/Pack

organize your life

Now we are getting into the pretty stuff! I love a good calendar but desk accessories are my favorite. All these are stack and fit and they all fit together. You can make a tier out of them or use them individually as single containers. Check them all out here. There is so much to choose from.

office supplies that work

I can’t do without a Task Pad. This particular one goes in the disc bound notebook but I like it loose on my desk. I put a magnet on the back so I can stick it on the fridge, which is great for a grocery list.

martha stewart office supplies

There is one thing that makes my family happy and that is when pens, pencils and highlighters are organized and not mixed together. These products really saved us.

martha stewart home office

All of the stack and fit look like this.

cute office supplies

This is a great example of how they fit together.

back to school organization

I love the  Stack+Fit™ Shagreen Inboxes like the one above. It serves as a base and you can stack ton’s of things above it like these trays.

being organized

It’s always good to have a nice candle to bring zen to your room. I love my little moss rock. I got this the last time I was on the show with Martha. I know it’s dead but it serves a purpose believe it or not. Just remember to put things in your space that bring happiness and make you smile. You want to create a space that makes everyone happy.

cute cork boards

 I saved my favorite for the end. I love my cork board and the fantastic shape it comes in. Just one more thing to tie all of your goodies together.

organize your supplies

I will be doing a post soon on my studio but I wanted to share with you a tip on how I store my paint bottles and glitter. This is nice and makes it easy to grab that perfect shade quickly.

martha stewart organize book

Something that could also help you stay organized is this book. I can’t wait to get my entire house organized like the pictures in here.

how to stay organized

Just remember you don’t have to change a whole room to get this. These products will change your whole perspective of getting organized.

a Rafflecopter giveaway


Big ole glittery hugs from my command center to yours,

jade

marthastewartdisclaimer

Huge love to Martha Stewart Home Office with Avery for sponsoring today’s post on Organization – Back to school organization.


I am in love with this easy tutorial on how to paint on glass. I hope you get inspired and make 19 of them, seriously.

12monthsofmartha

HOW TO PAINT ON GLASS

What goes better with a beautiful cake or yummy cookies?
1) A glass dome
2) A etched and painted glass dome

{drum roll  and the sound of a roaring crowd yells)
A painted glass dome!!!

I love fine art but what I love more is making inspiration pieces that go with certain pieces. I love Kandinsky so I dedicated this piece to him and his abstract-ness. If you are not familiar with his work, check out the picture below.
kandinsky

you will needglass-paint-jaderbomb

how-to-paint-glass-jaderbomb.jpg
I purchased this glass dome/ punch dish from Wal-Mart. Seriously it was 11 bucks. That is so cheap I can make a new dome for each holiday. Oh lard.

how-to-paint-on-glass-jaderbomb

1) Get your Martha Stewart glass patterning tape and lay a strip down on wax paper. After you apply the first strip add another one right on top.

how-to-paint-on-glass-jaderbomb

The reason we are putting two pieces on top of each other is to make it sturdy enough to punch through. I am using a one inch circle punch. You can use any size you want but if it’s bigger than one inch you will have to make your strip of tape wider.

how-to-paint-on-glass-jaderbomb

2) Punch a hole right through your tape.
The reason we put wax paper under the tape is so we can peel it off when we are ready to use it. It’s like a homemade sticker.

how-to-paint-on-glass-jaderbomb

3) Take the wax paper off of each circle and placed them on the glass.
I only want to etch the circle shape which is why I am using this part of the punch.

how-to-paint-on-glass-jaderbomb

 4) To create the whimsical boarder around the bottom you will follow the same steps but cut out triangles.
Are you shaking your head at how easy this is so far?

how-to-paint-on-glass-jaderbomb

5) Get a small cotton ball with alcohol and clean the spots you will be etching.
This cleans the oil off of the glass.

how-to-paint-on-glass-jaderbomb.jpg

6)Apply an even coat over every thing then let it sit for 15 minutes, then rinse under running water.

This part is so much fun and did I mention easy! The etching cream comes with a brush that you will use. I dipped the brush into the cream and applied it directly to the glass surface. You want to put enough while making sure you blend it nicely.
P.S. Don’t lather the cream like I did. Epic fail.

HOW TO ETCH

7)I did one layer of dots, cleaned my glass then applied more dots.

how-to-paint-on-glass-jaderbomb

Once you are done grab your glass paint. I used Vanilla Bean, Yellow Jacket, Black Nickel, Geranium, Wedding Cake and Pool .

DIY ETCHED GLASS

8) Start making circles with your glass paint.

LEARN TO PAINT

EASY GLASS PAINTING TUTORIAL

I like to mix one or two colors together while they are wet. Doesn’t everything work better when wet?!

ETCHED GLASS

If you want to add that extra snazziness to your dome you can paint on the bottom.

WHIMSICAL CAKE DOME

I just painted the creases that were already there then topped them off with bright yellow dots.

PAINTED GLASS DISH

HOW TO ETCH GLASS

DIY PAINTED GLASS

DIY PAINTED AND ETCHED GLASS

The one thing I love about this project is you can use whatever colors you want and anyone at any age can do this. It’s like rainbow lights instead of road lights. Good luck sticking things in this dome because I think the bright circus like print on the outside makes things on the inside look yummier.

If you want to check out all of my other posts that I have done for the 12 Months of Martha check them out here.

If you like crafting with glass then you want to check out my easy tutorial on cutting glass. Don’t forget to follow me on instagram, just search JADERBOMB. Also you can look up #12monthsofmartha to see what everyone else in the group is posting. Big huge glittery hugs!
Jade

This is a sponsored post but 100% is my opinion. Panky Promise!

Happy Tuesday Jaderbugs today we will be making a paper bead bracelet.The big suprise will be at the bottom of this post so make sure you read till you get to the end. This month’s box of goodies was a little different than normal. If you are not familiar with the #12monthsofmartha let me tell ya. Each month Martha (well maybe it’s not exactly her but I will pretend it is) sends me a box of goodies for me to review and share on the blog. I also make something fascinating with the goodies. This month she sent her new book. Read more about it here.

12monthsofmartha

martha-stewart-giveaway-jaderbomb

Martha Stewart’s Favorite Crafts for Kids: 175 Projects for Kids of All Ages to Create, Build, Design, Explore, and Share

I had to re-create a craft in the book so I chose the paper bead necklace except I made a Paper Bead Bracelet instead. I will admit right away that making jewelry is not the one thing I am really good at. You know the fancy kind, with beads and clasps and all those little things involved. I will shock you now and say that today’s tutorial was FUN and EASY. Did I mention “wearable”.

Martha, if you are reading this… YOU ROCK
{{ok, this is asking a lot but if you do read this just shoot me a comment and let me know what you think or just text me, hehe}}

diy-paper-bead-bracelet

“Fashion is not something that exists in dresses only. Fashion is in the sky, in the street, fashion has to do with ideas, the way we live, what is happening.”
― Coco Chanel

I am so pleased with the outcome!

diy-paper-bead-bracelet

This is the cover of the book and the bracelet I re-created. Let’s get started!

you will need

 paper trimmer|mod podge|decorative paper|toothpicks|elastic string|pencil

//P.S. You can purchase all of the items I used by clicking on the above links. These are affiliate links so if you click and buy you will help feed me more eggs and grits! Just saying, it’s my favorite.

diy-paper-bead-bracelet

Some of the items I used you might have already so take advantage of that. Oh, I used decorative paper to make my beads but another alternative is using magazine pages. I actually started one and can’t wait to show you.

diy-paper-bead-bracelet

The first thing you will do is take a sheet of decorative paper and place it on top of another one. Use the edge of the one on to to draw your lines, or you can use a ruler. You will be drawing triangles and the bigger the triangle the bigger the bead. Keep that in mind. I like to make around 5 different sizes so it’s a little more unique.

265

This is what the lines will look like on the paper. Depending on the paper some lines may appear lighter or darker.

diy-paper-bead-bracelet

Once you draw your lines then you can cut them. If you don’t have a paper cutter you can use scissors.

diy-paper-bead-bracelet

Your triangles should look like this. Unless you have a shaky hand, haha! Which is why I don’t use scissors to get a strait line!

diy-paper-bead-bracelet

1. Grab a toothpick and place the paper on the bottom of it.
2. Start wrapping the paper around the toothpick.
3. This is what your paper bead should look like once it’s all rolled.

diy-paper-bead-bracelet

Mod Podge the end so it all stays together.  You can even coat the entire bead with mod podge to make sure it is all secure.

diy-paper-bead-bracelet

Your bead should look like this when you are done. As soon as the mod podge is applied take the bead off of the toothpick. You don’t want to leave it because it could dry on the toothpick and we surely don’t want that!

diy-paper-bead-bracelet

diy-paper-bead-bracelet

Start stringing your beads with the elastic string. The good thing about this is you can put as many beads as you want!

diy-paper-bead-bracelet

Now onto the BIG news! I am giving away a copy of the book. WAHOO!

kids-craft-book-including-diy-paper-bead-bracelet

kids book winner martha stewart

 *JANUARY craft HERE
* FEBRUARY craft HERE and HERE
*MARCH craft HERE
*APRIL craft HERE
*MAY craft HERE

Check out some of my other crafty friends doing the 12 months of Martha also!

A  LITTLE TIPSY
A NIGHT OWL
DIY DREAMER
DOLLAR STORE CRAFTS
ECLECTICALLY VINTAGE
YOU ARE MY FAVE
FIREFLIES AND JELLYBEANS
DAMASK LOVE
MODERN DAY MOMS
SEW WOODSY
SOMETHING TURQUOISE
STUDIO DIY
SUGAR AND CLOTH
THE ALISON SHOW

marthastewartdisclaimer