The Simple Secret to Spray Painting Pumpkins!
Today I am super stoked to show you how to turn boring pumpkins into graffiti inspired works of art! There is just something about this time of the year that makes me feel wonderful inside. Let’s get started with our spray painted pumpkins!

Things you will need for this project: Faux Pumpkins (any size will work) and spray paint.
(These are affiliate links: Click on them to purchase all the items I used in one spot! Yo, I am just trying to make life a little easier.)

The first thing you will do is create a clean space to spray paint. I suggest in the back yard so over spray doesn’t get on anything. Plus you will walk away with patches of colorful grass if you do it properly! I think we all need a little color in our yard, right!
I used Rust-Oleum spray paint for this project. I prefer them amongst other spray paints mainly because they spray evenly and let’s not forget that the colors are simply amazing. 
Lately life has been hectic and for some reason I have been feeling the urge to spray paint on a building or wall. Since I can’t just go around doing that I figured blasting pumpkins was my safest route.  First thing I did was lay each pumpkin on a clear piece of paper and spray the top portion of the pumpkin. Whatever you do don’t spray the top and then flip the pumpkin over to do the underneath. This will result in an epic failure! Know why? Because the top of the pumpkin will stick to the paper! Just let the top of all the pumpkins dry then flip over and do the bottom.
Repeat this process until you pumpkins are coated completely. Once this step is done and all of the pumpkins are completely dry we can move onto the destructive part of the process! 
Time to grab all the colors your heart desires and get at it! I started with one color and you want to LIGHTLY tap the nozzle to send out a spritz of paint onto the pumpkin. It’s as if the spray can is spitting onto the pumpkin, haha!
I applied my first “spritz” of color onto all of the pumpkins and then let it dry. Following that you will do the same thing with all of the colors you chose. Now take my advice, you don’t have to use all the colors I used but if you know me, you know I love color.  One tip of advice when doing a project like this. If by any chance you are spraying a certain color and too much comes out don’t sit in the corner and cry like I did. Just grab another color and lightly spray right over it. That is the good thing about this project, you can’t mess up because you can always fix boo-boo’s.
Are you dying over how beautiful and easy these are spray painted pumpkins are? I know I am. I love these because once Halloween is over you can keep them up during Thanksgiving. You can even use more “Fall” colors to change the color palette.
Now you are asking…what do I do with these when I am finished? That is a really good question. You can throw them into a nice vintage bowl and place on your living room table like I did or you can line them up down the middle of your dining room table for a more modern look.
Another fun thing you can do is hot glue them onto a wreath with other faux flowers and voila, you have a one of a kind DIY wreath.
 You can even place them on the top of vintage bottles like I did and make that your centerpiece. The options are endless especially if you have a crazy mind like I do! Remember when I did these Halloween houses?
  I will say one thing I wish I had was a mantle to line these spray painted pumpkins on. However I have good news, my dad will soon be helping me make a faux one so stay tuned.
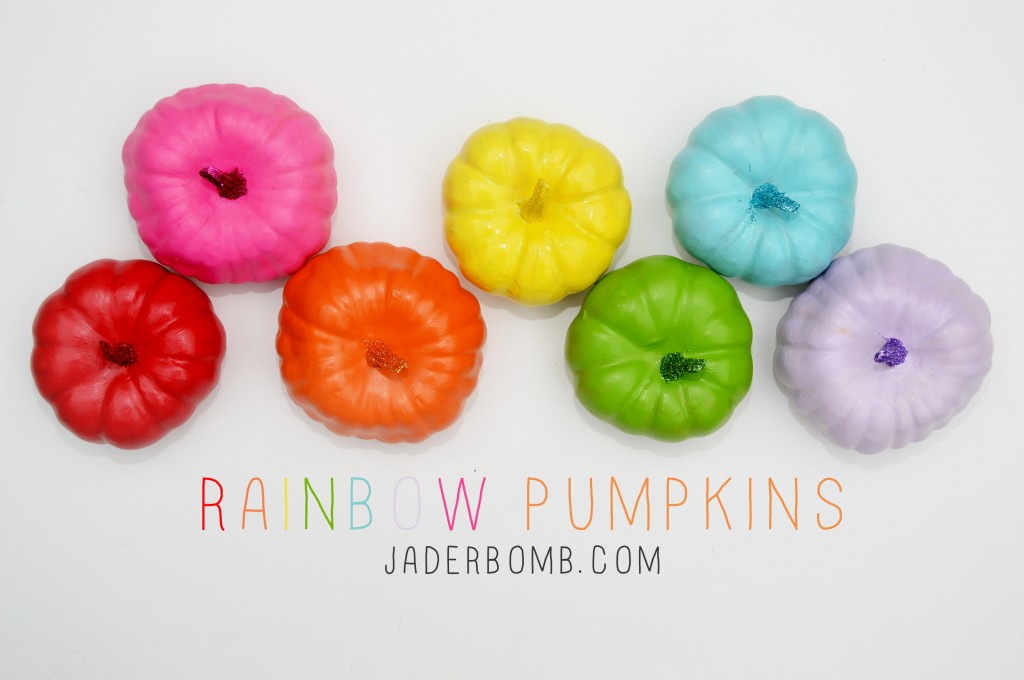
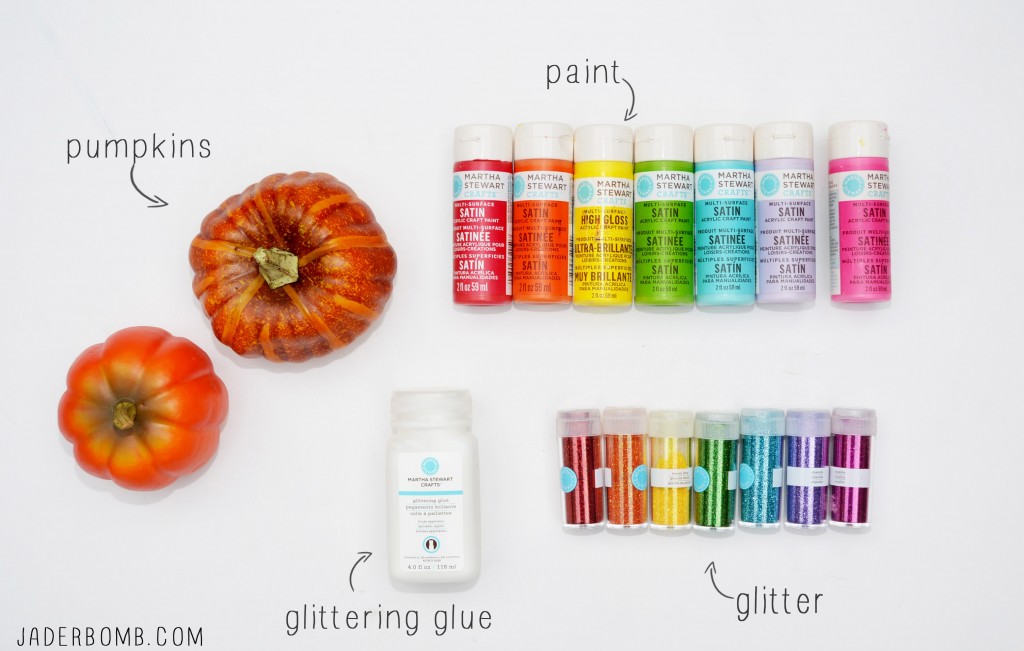
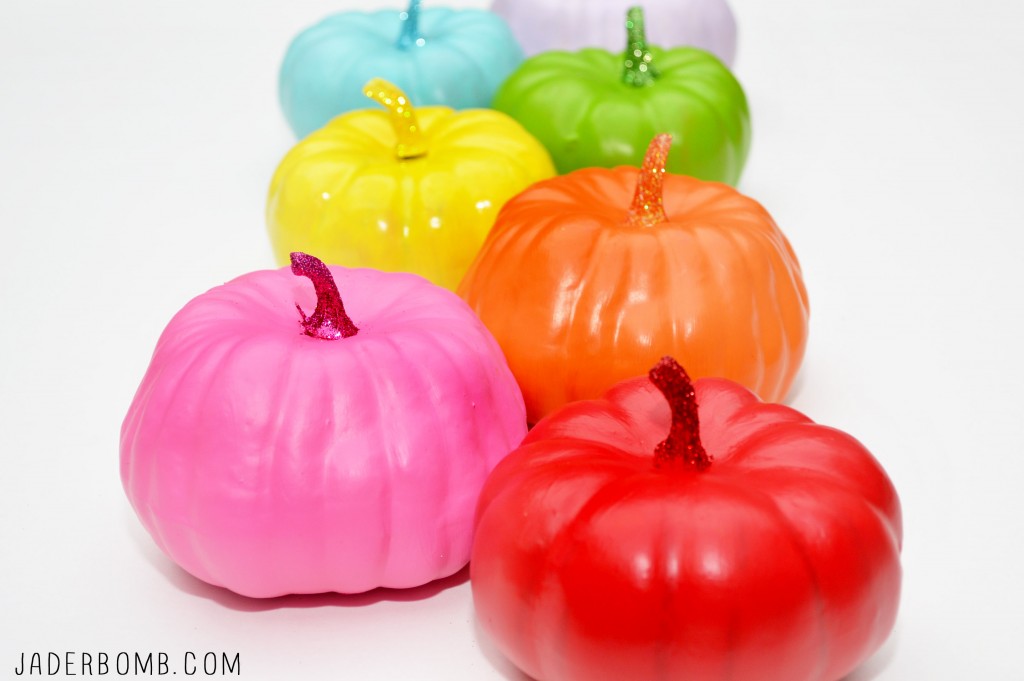
On another note, if you love all things rainbow like I do then you need to check out these pumpkins I made last year!
Currently it is 5 am in the morning and I am just UP… Jamming to sweater weather and feeling excited that it’s my son’s Homecoming weekend. Did I mention his last one? Am I really the mother of a senior? Where does time go is what I want to know.
I hope you enjoyed this project as much as I did! See you in the next post, until then hugs from my computer to yours!
Don’t forget to follow me on all of my social media channels because I love all of you to pieces!!!!
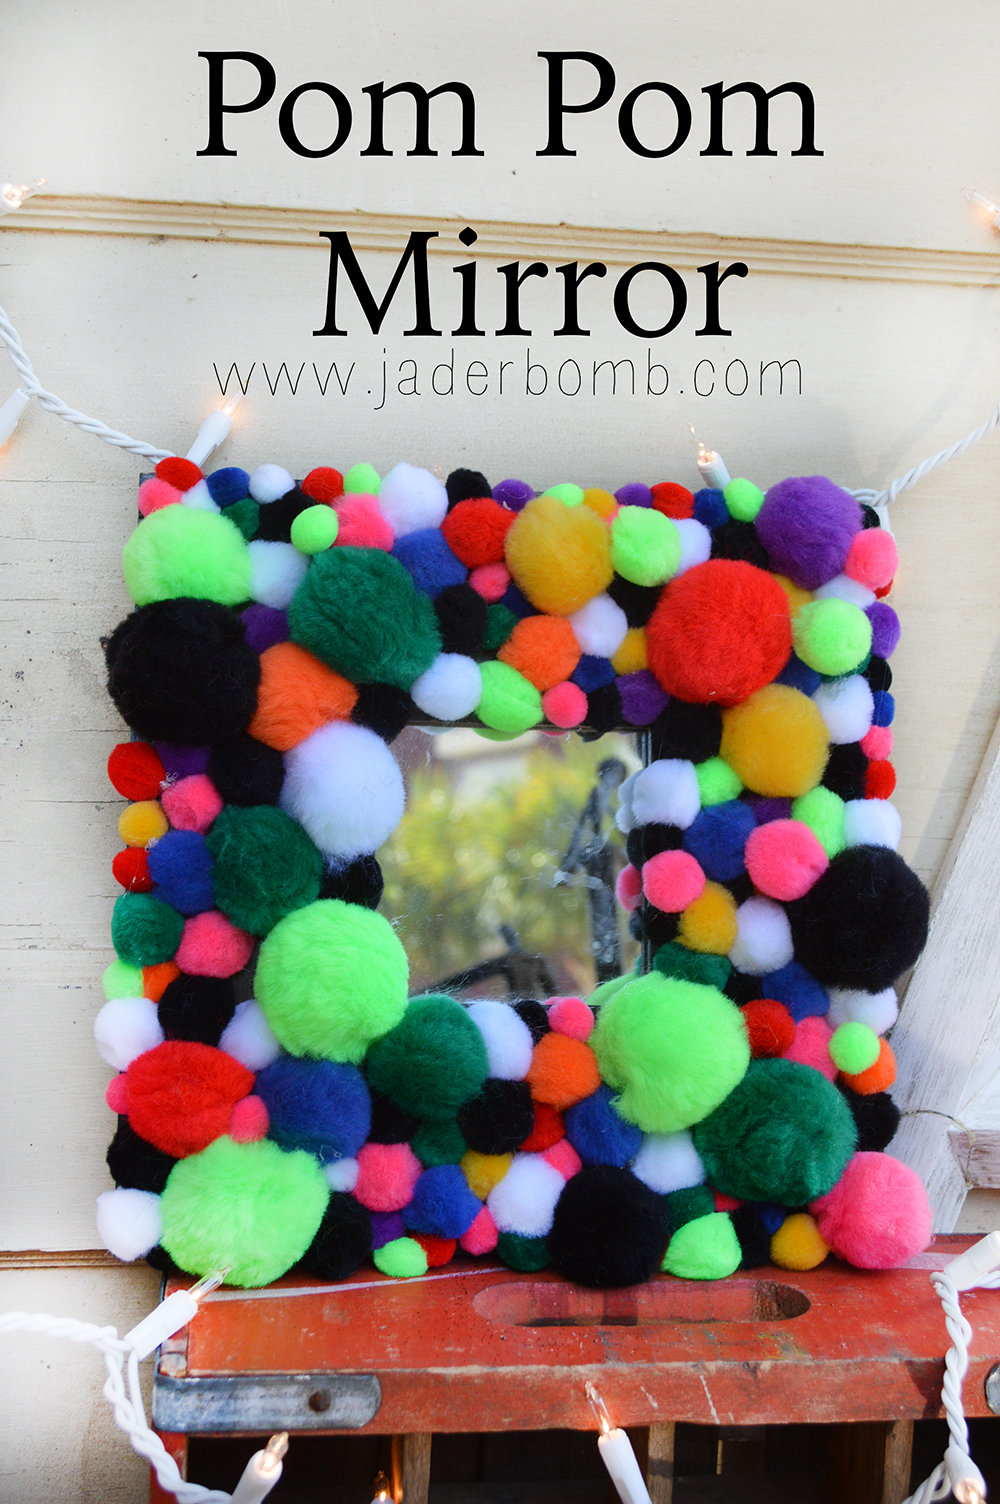
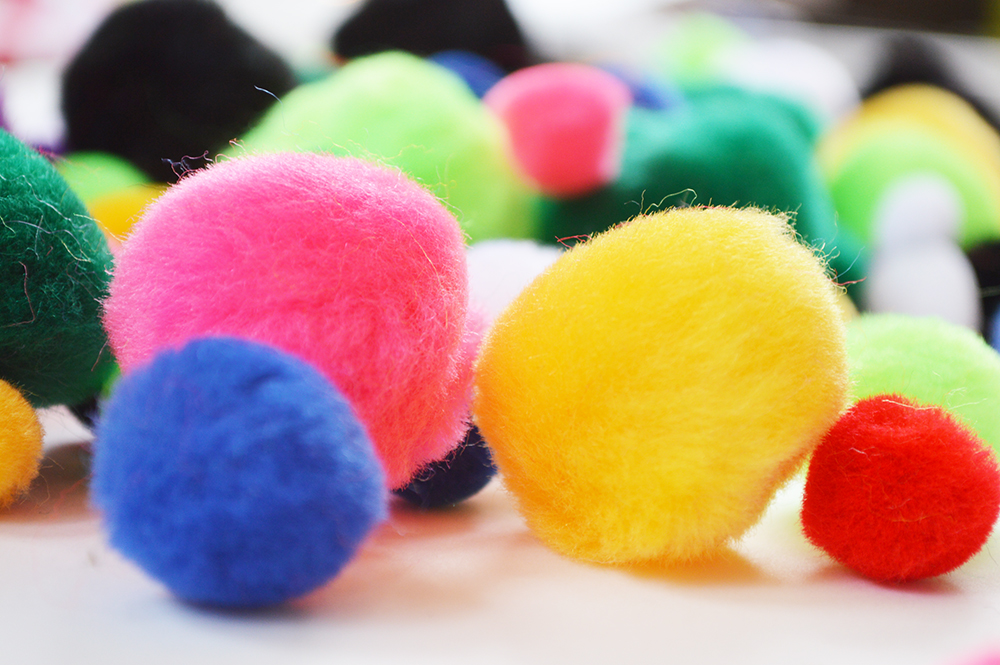
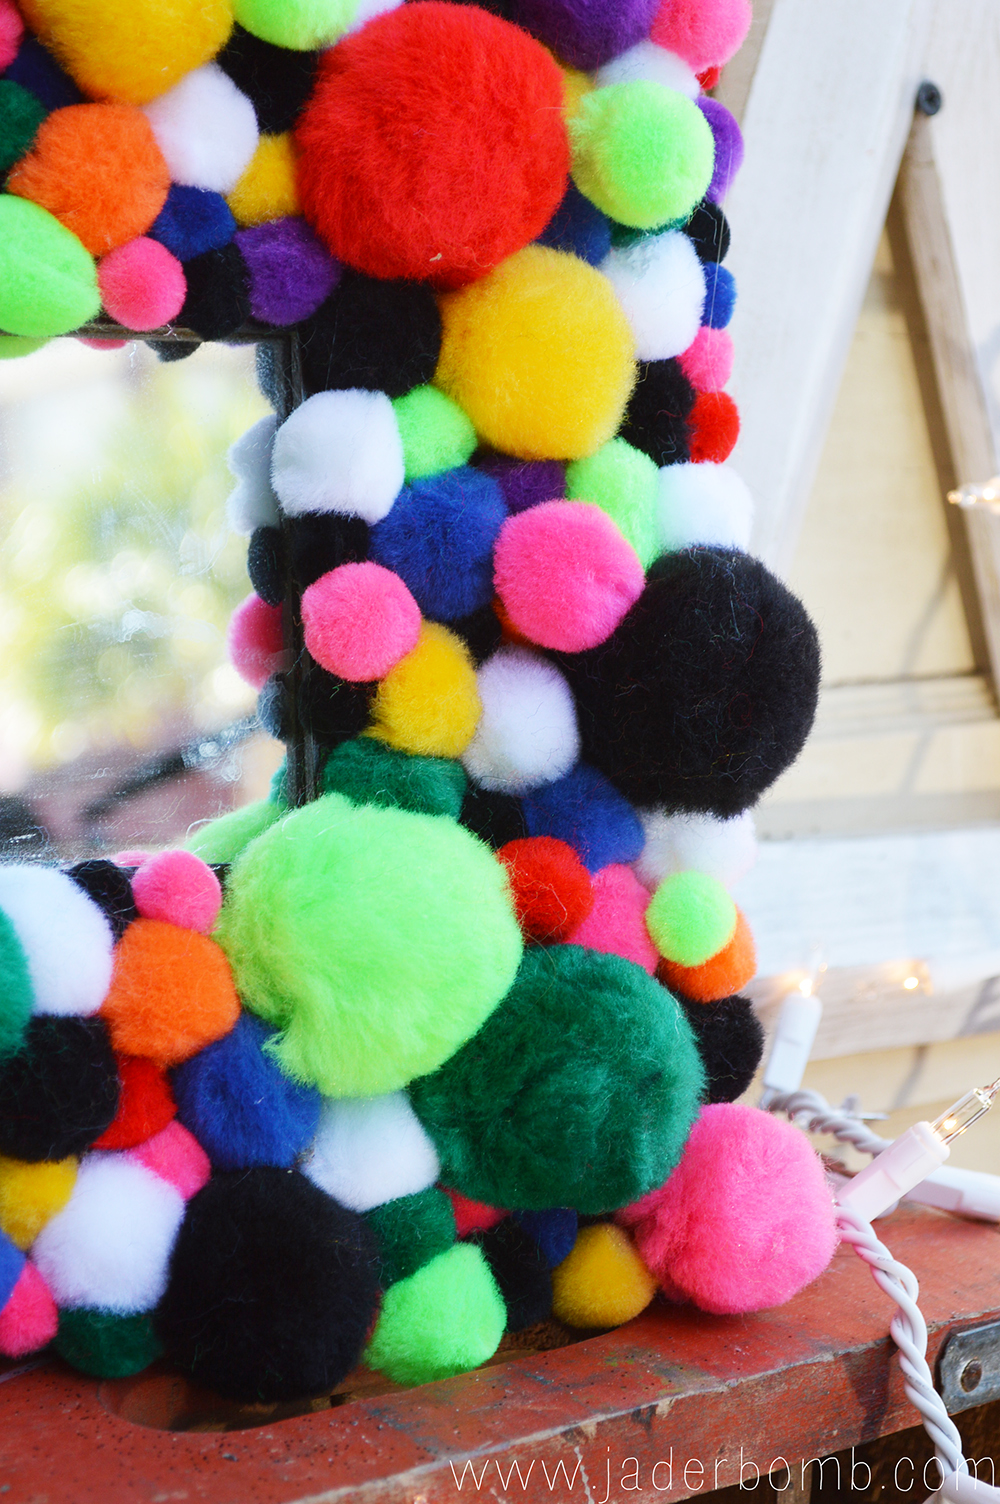

 Howdy Hoo Jaderbugs! I am super stoked to bring to you another fun
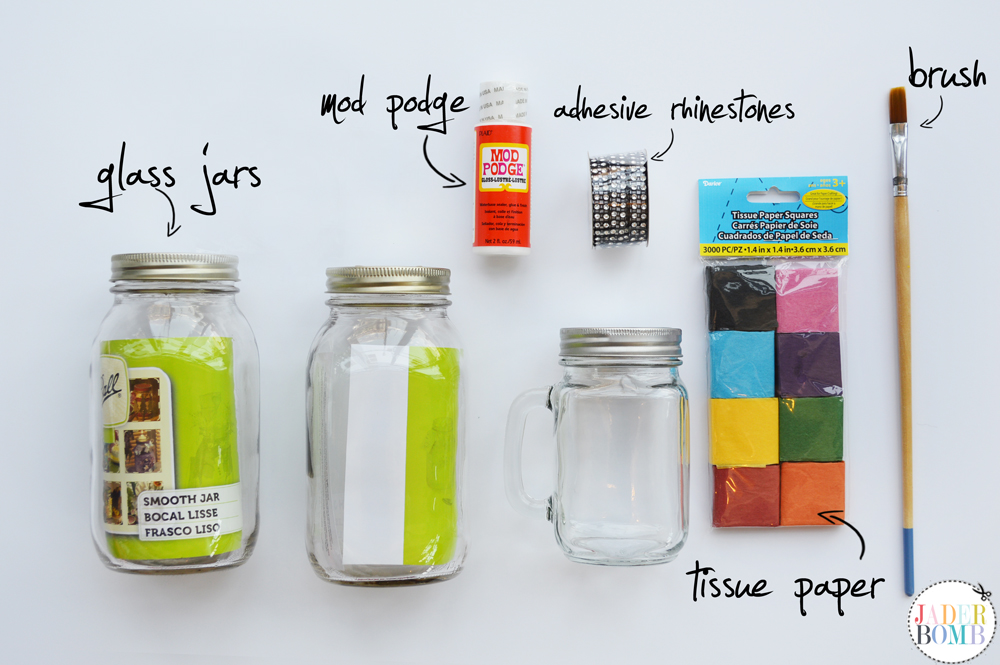
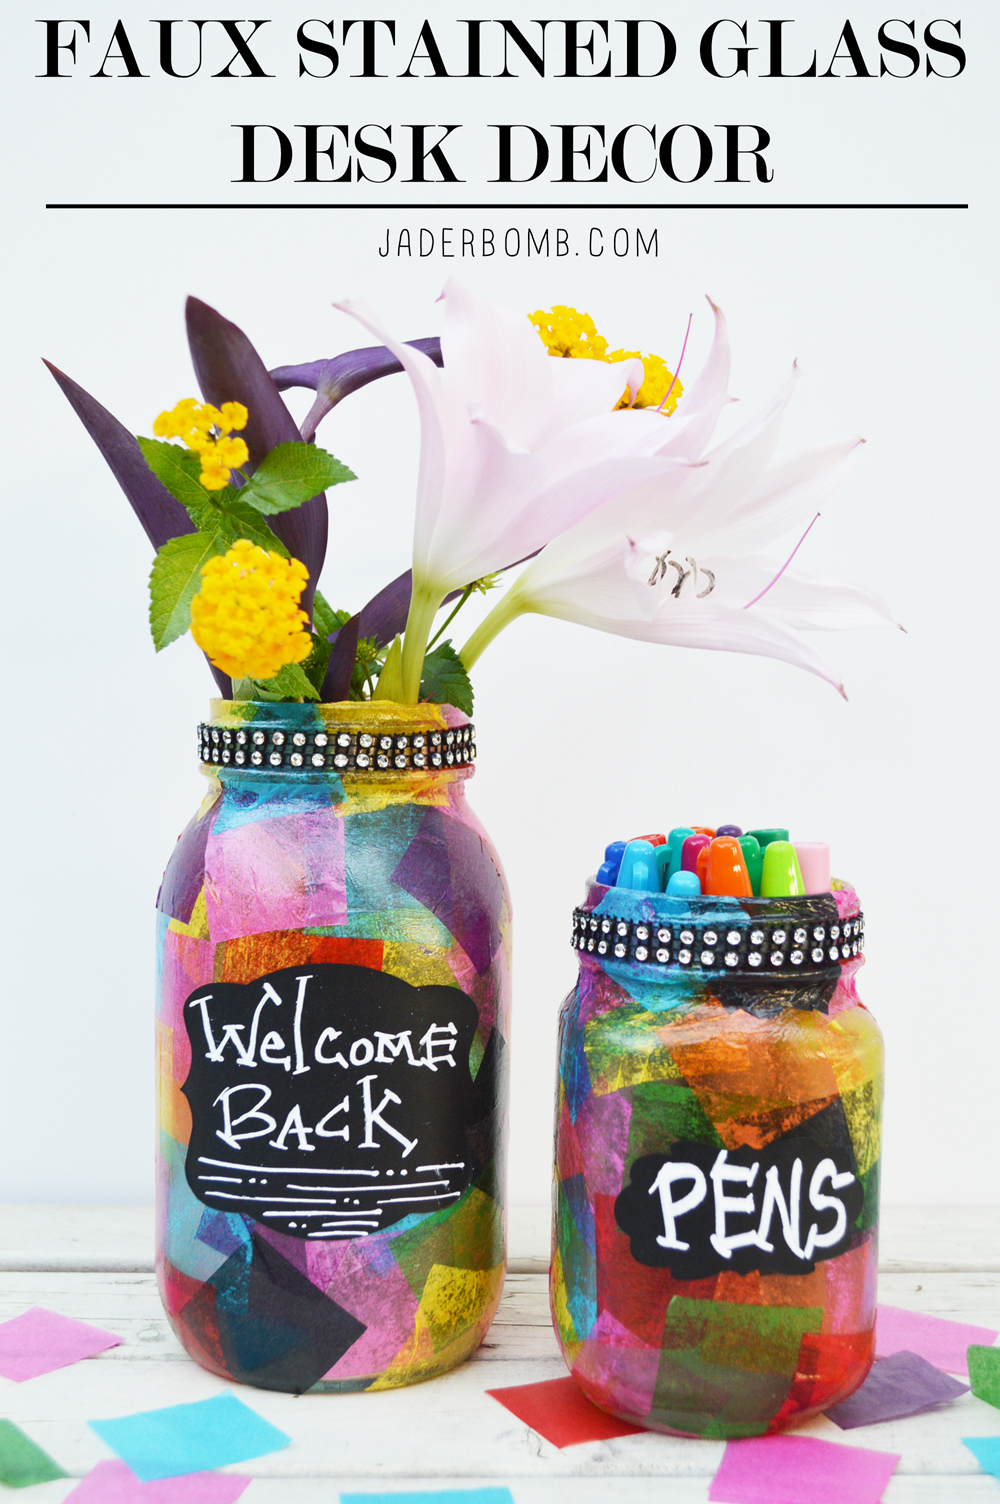
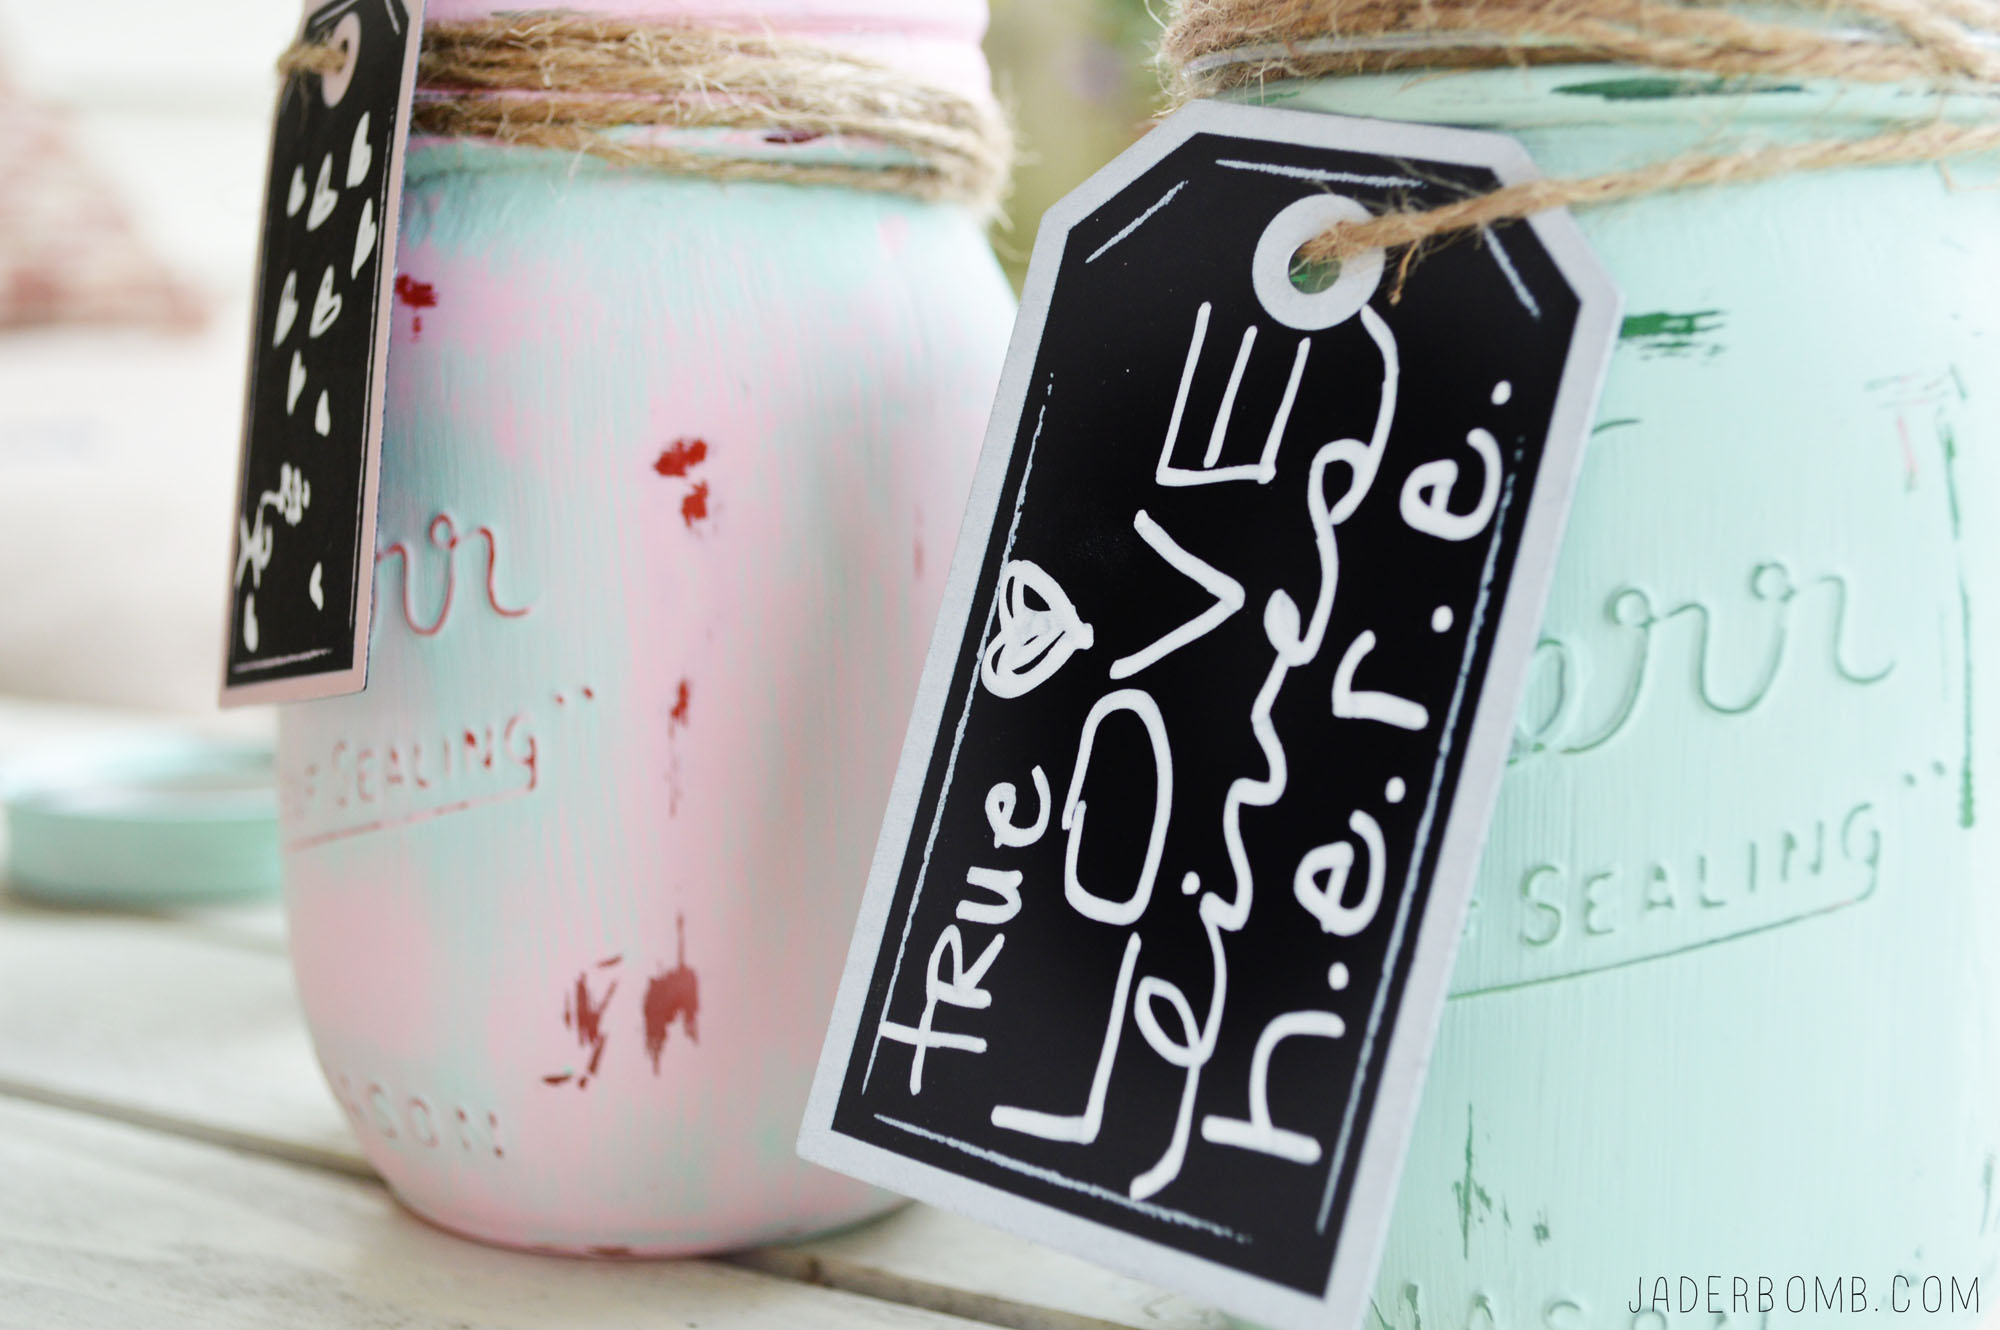
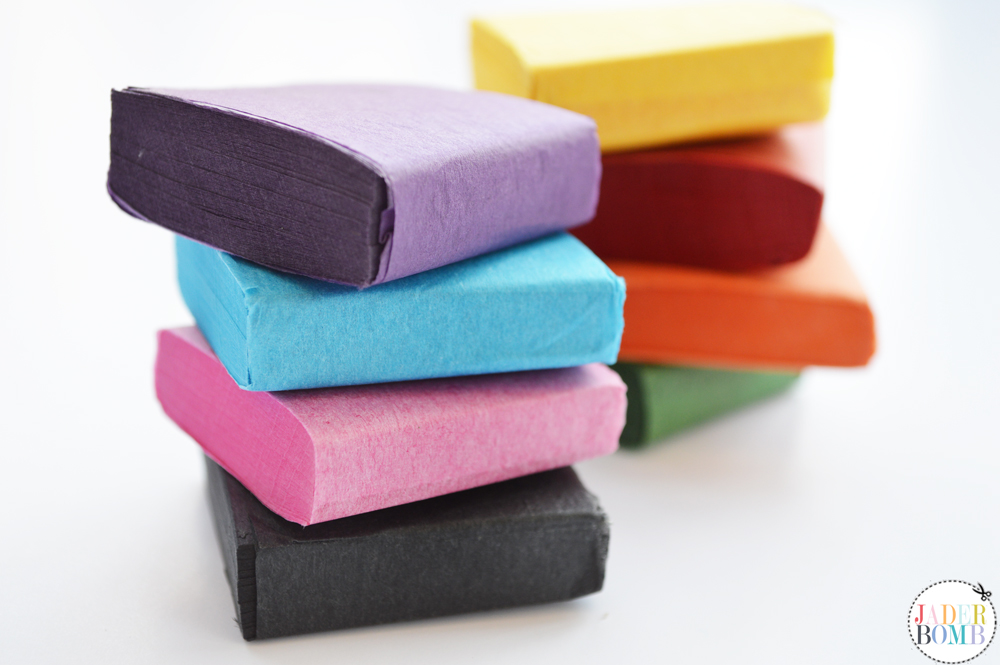 Step 1: Apply Mod Podge directly onto glass.
 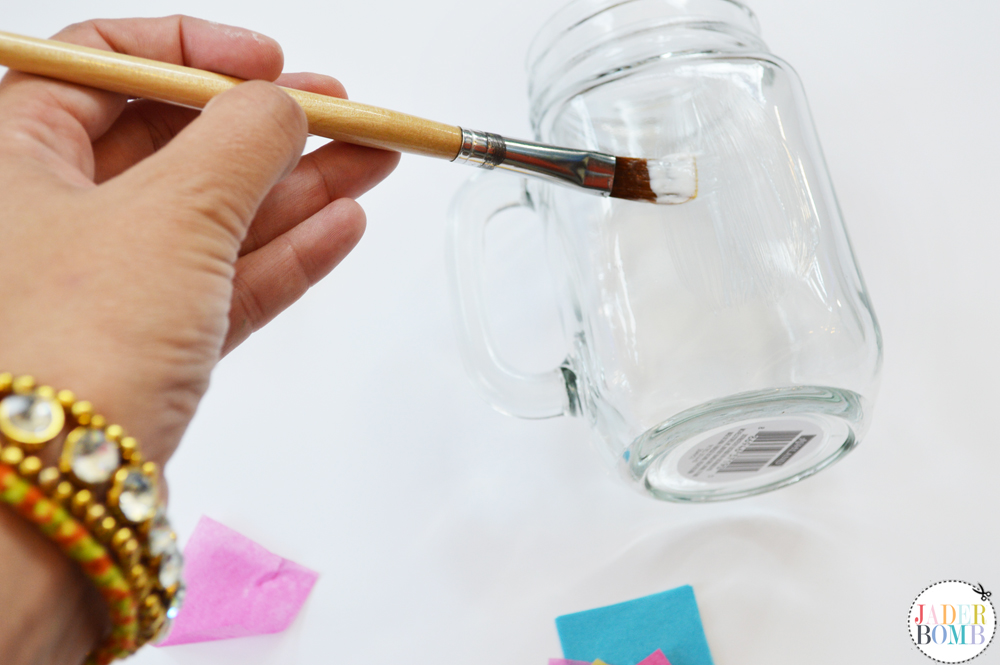 Step 2: Place a piece of tissue paper on top of the Mod Podge then add another layer directly on top of tissue paper.
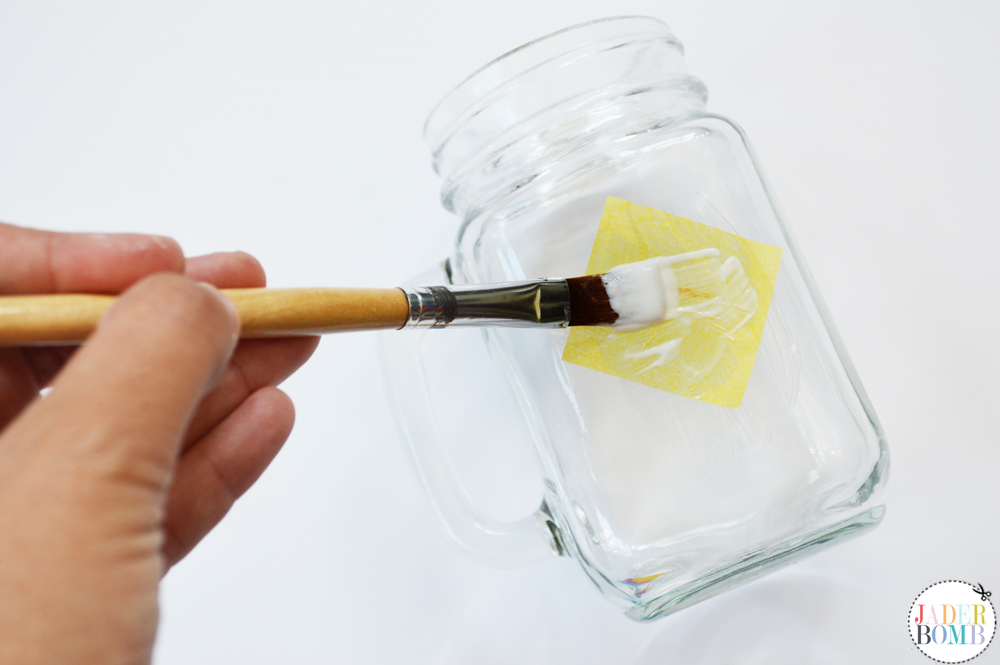 Step 3: Start overlapping other colors on top of each other repeating the same process with Mod Podge. If you notice layering certain colors will create a brand new color. This is my favorite part!
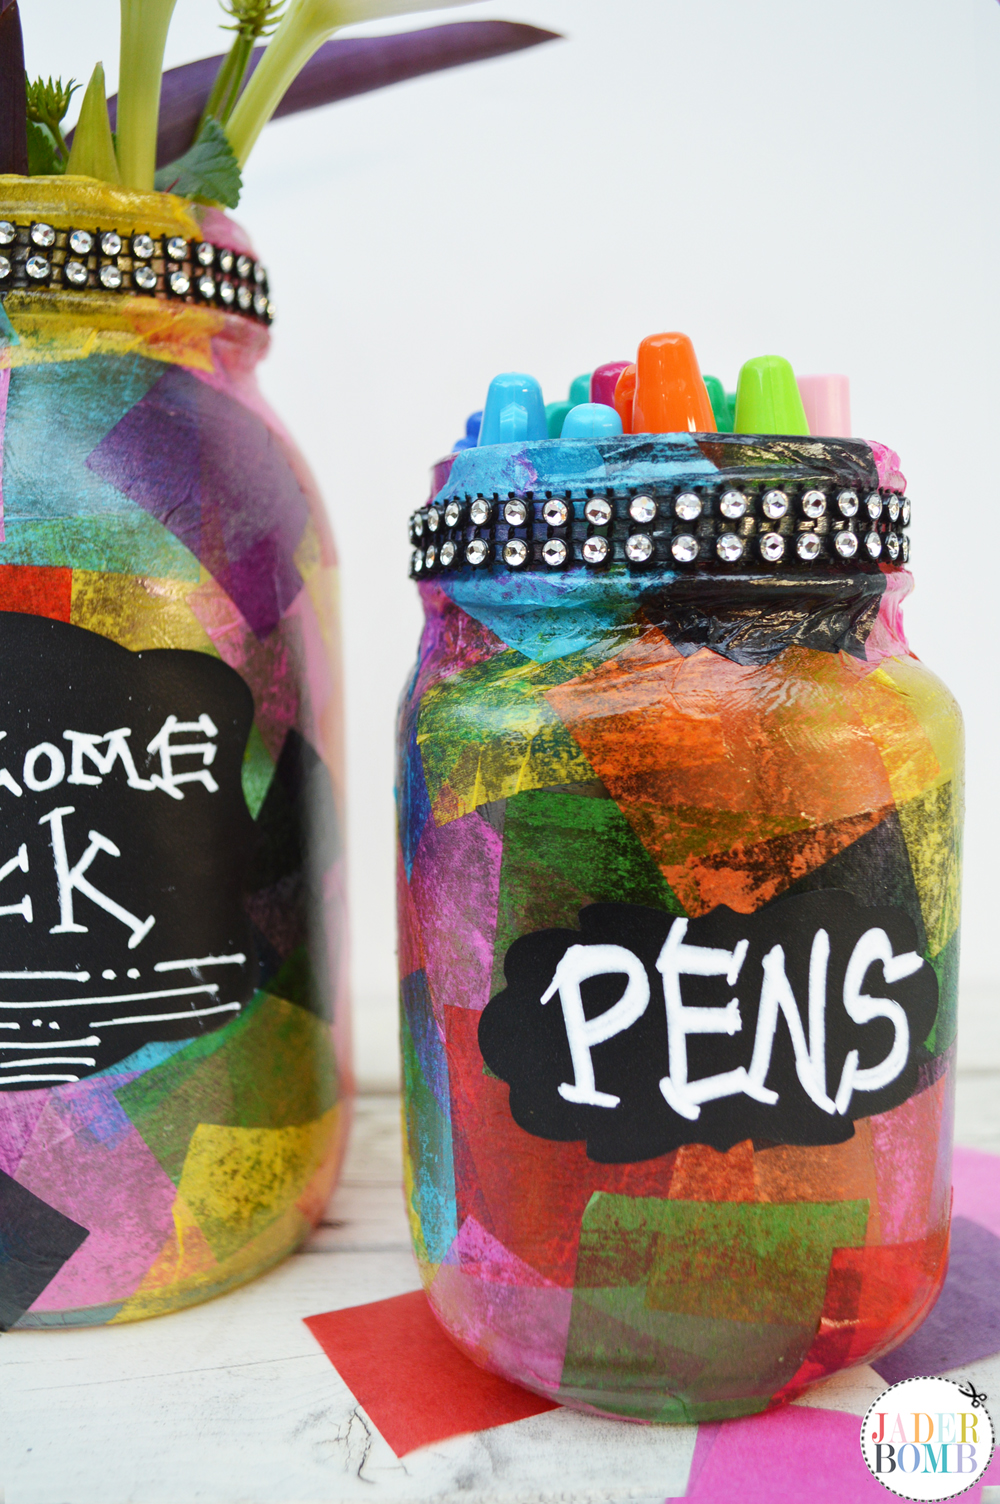
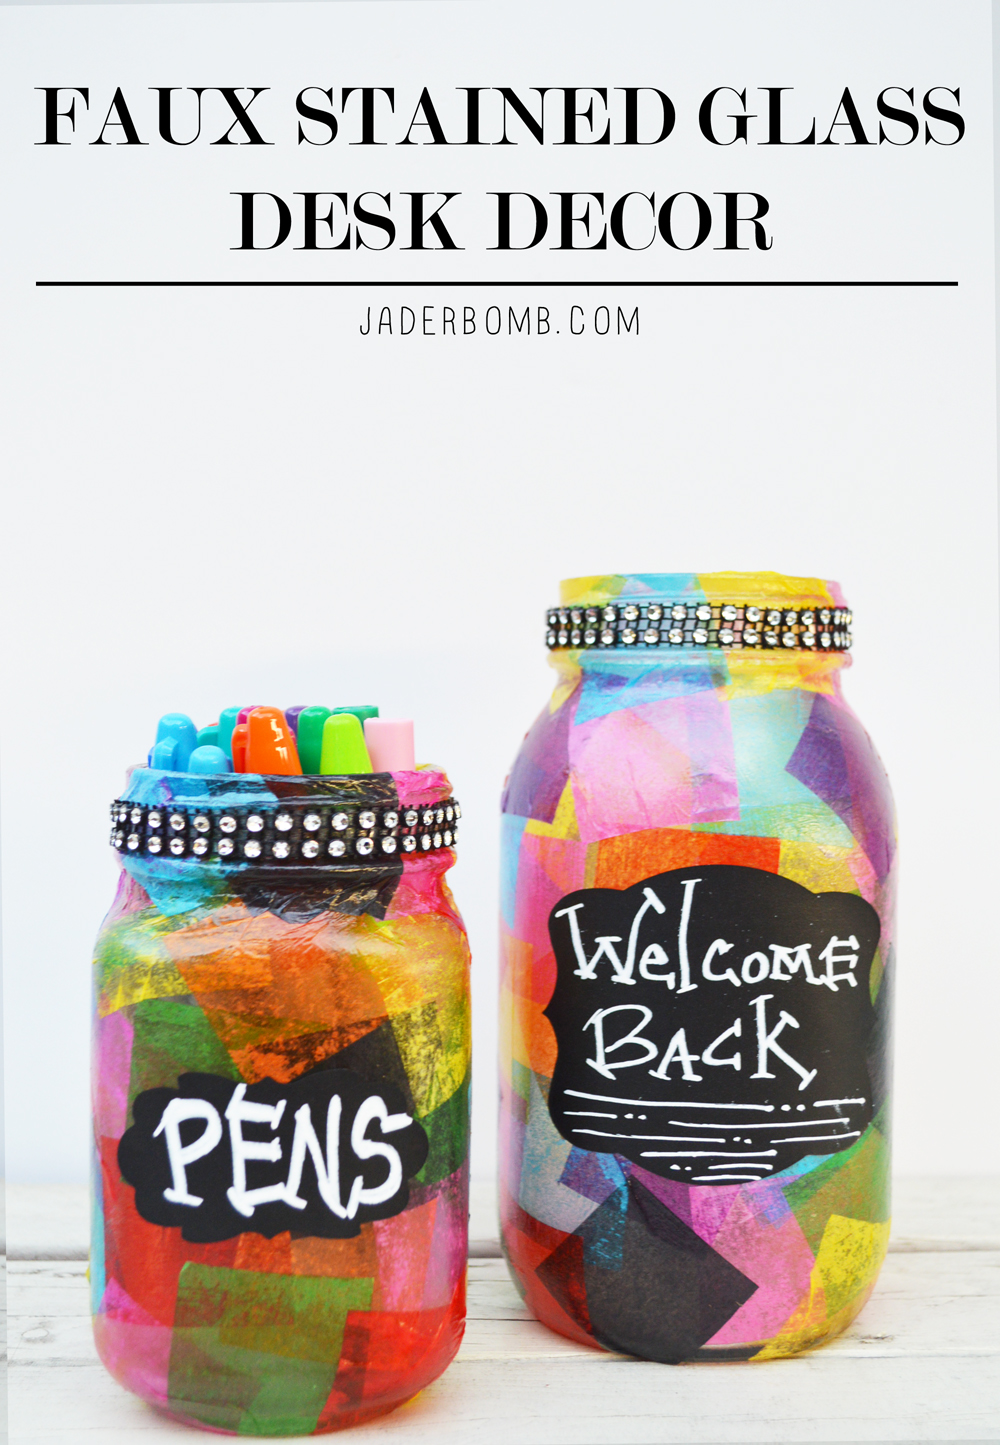
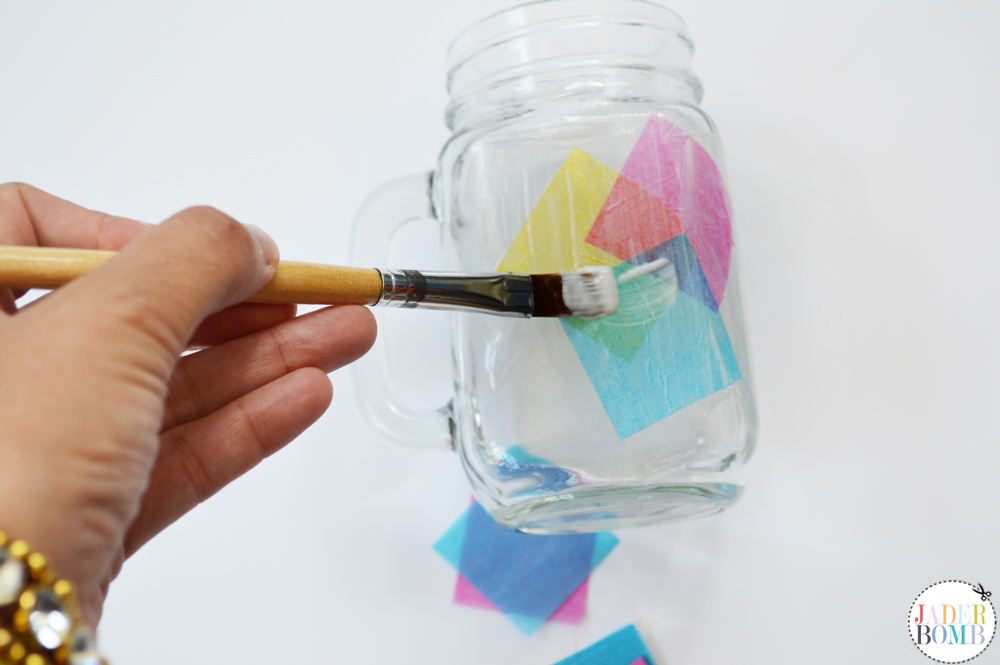 Step 4: Grab your adhesive rhinestones and peel off the back layer of paper.
 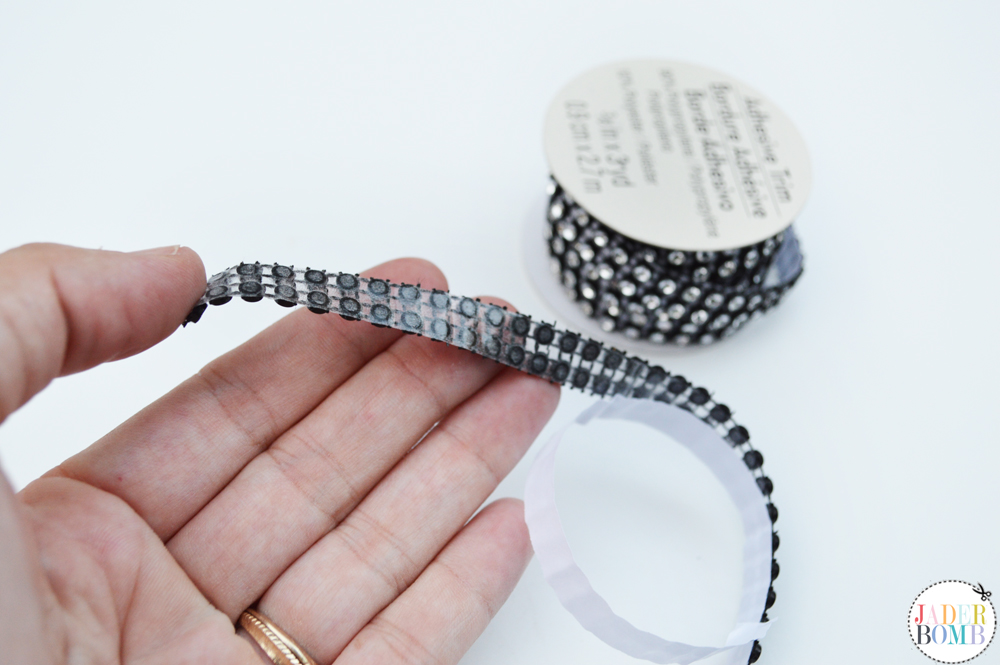 Step 5: Wrap your rhinestones around the top of glass jar.
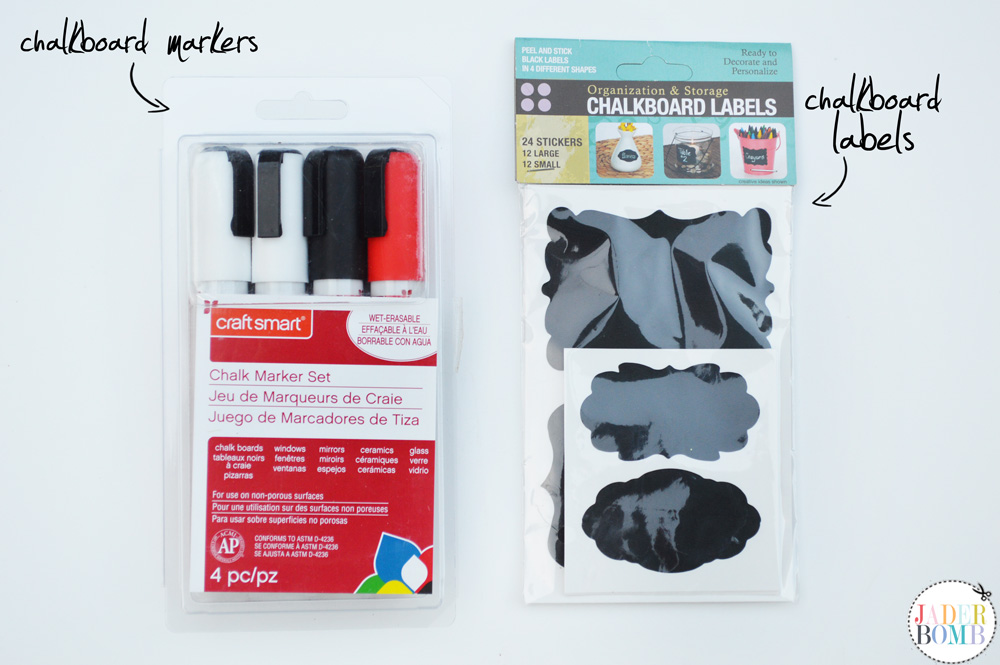
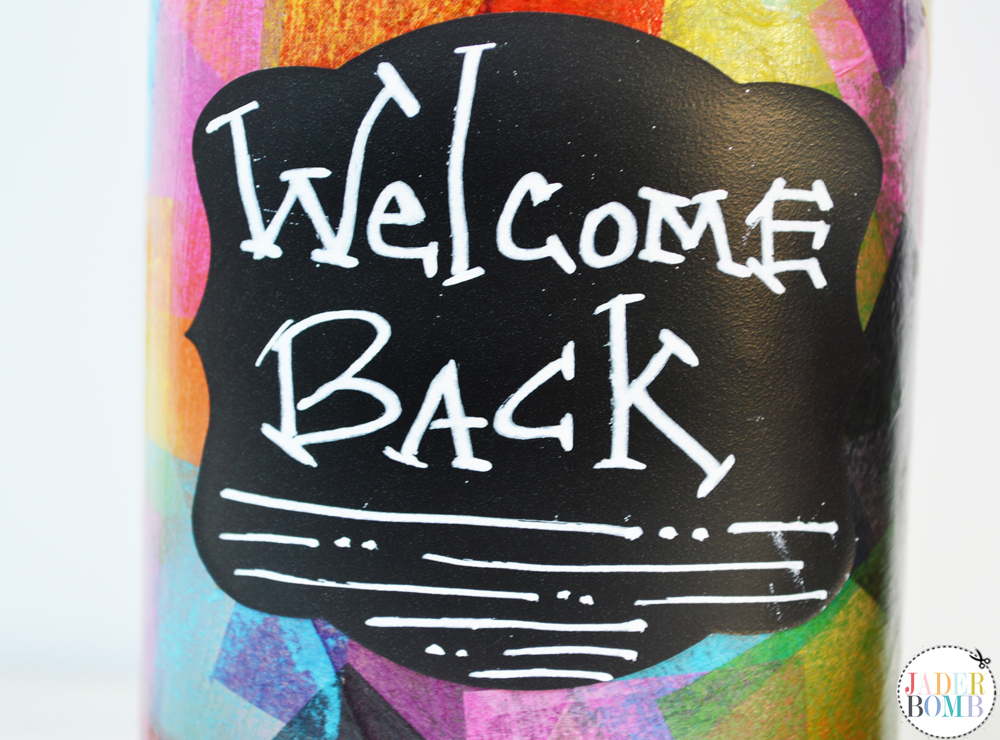
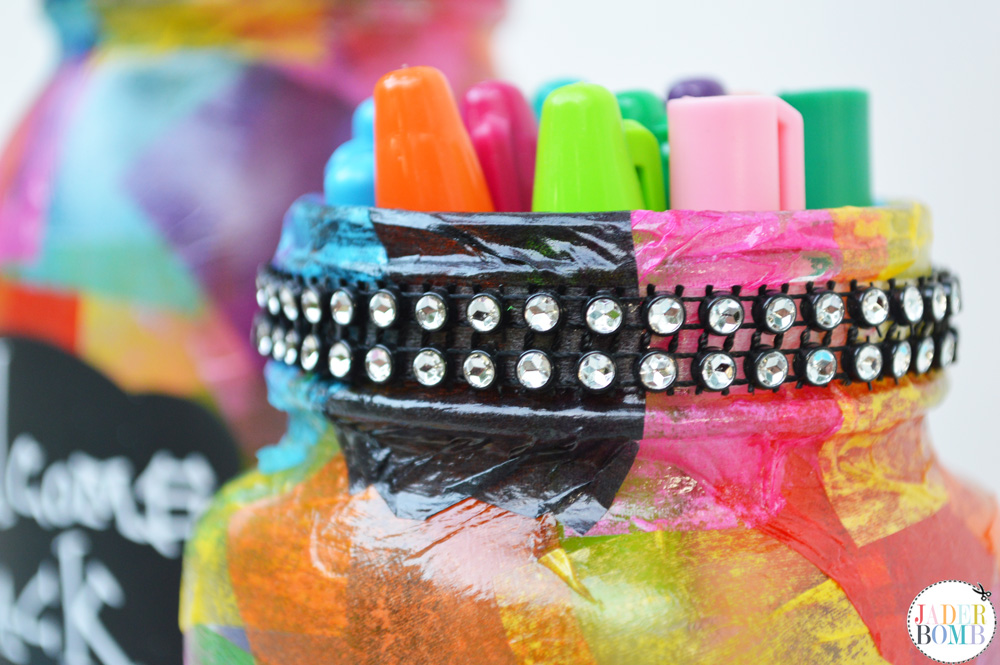 Step 6: Grab a adhesive chalkboard label and place it on your jar.
 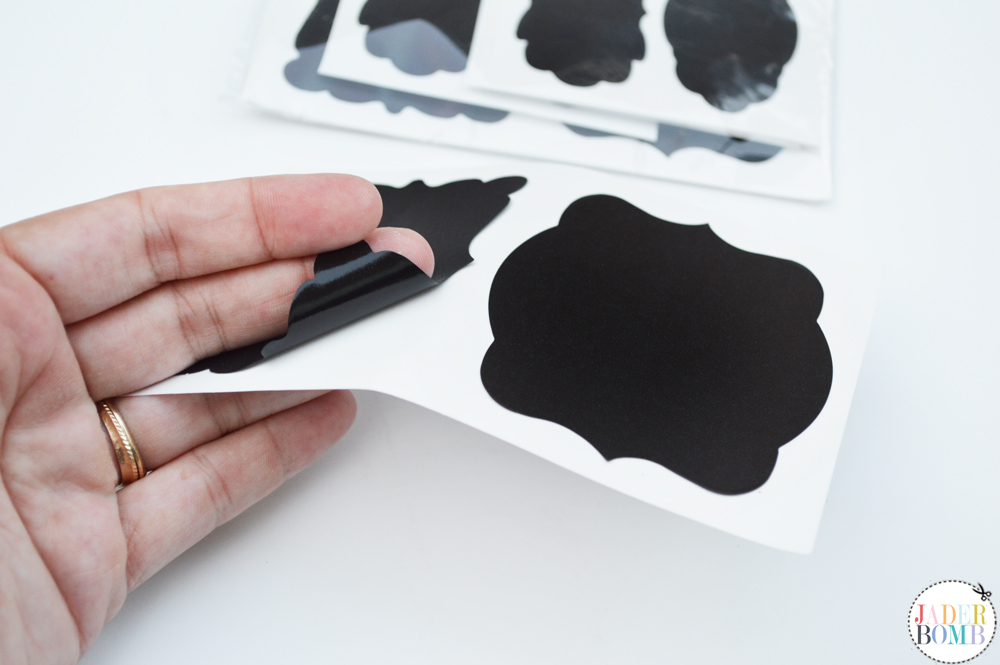 Step 7: ENJOY!
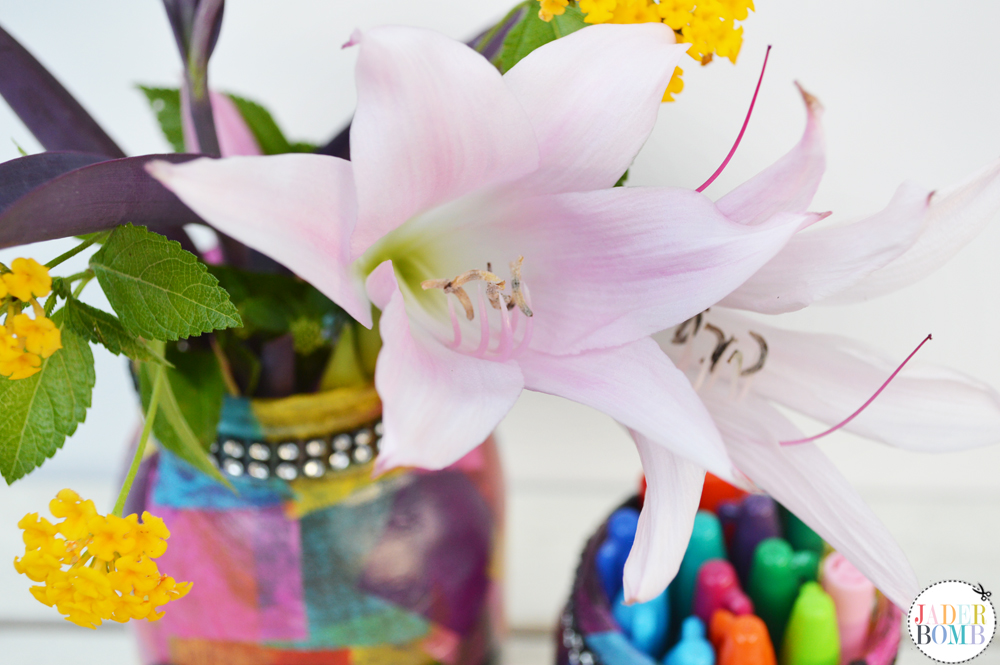


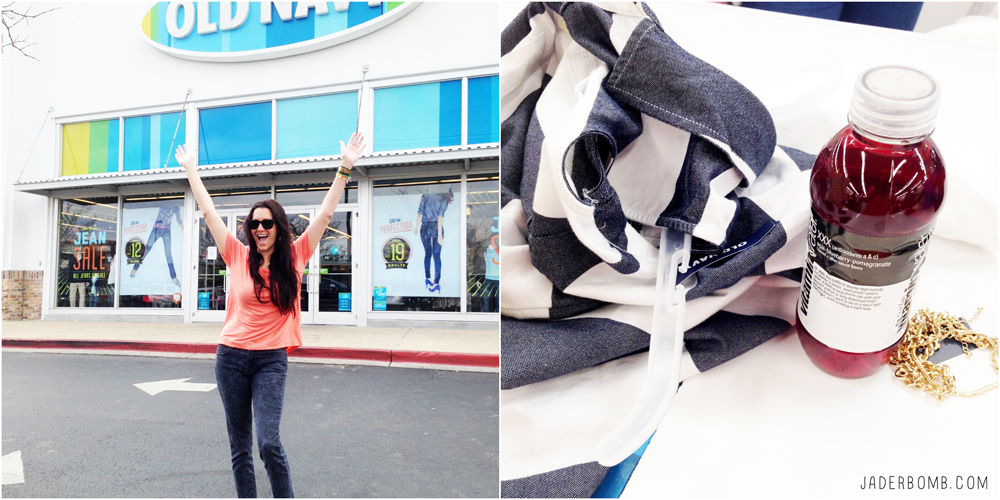
 When I was asked by

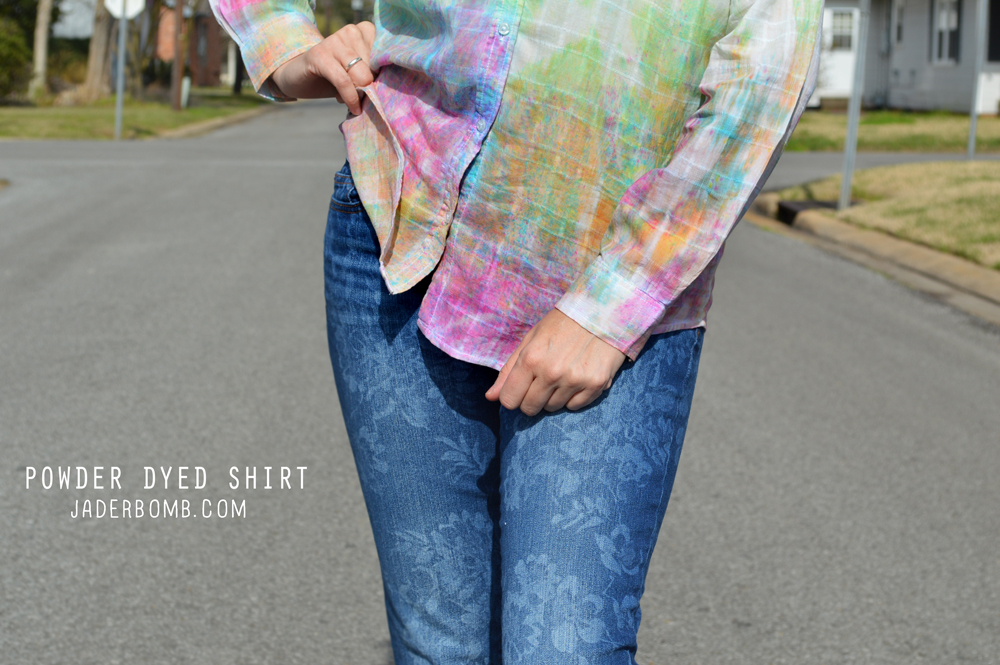
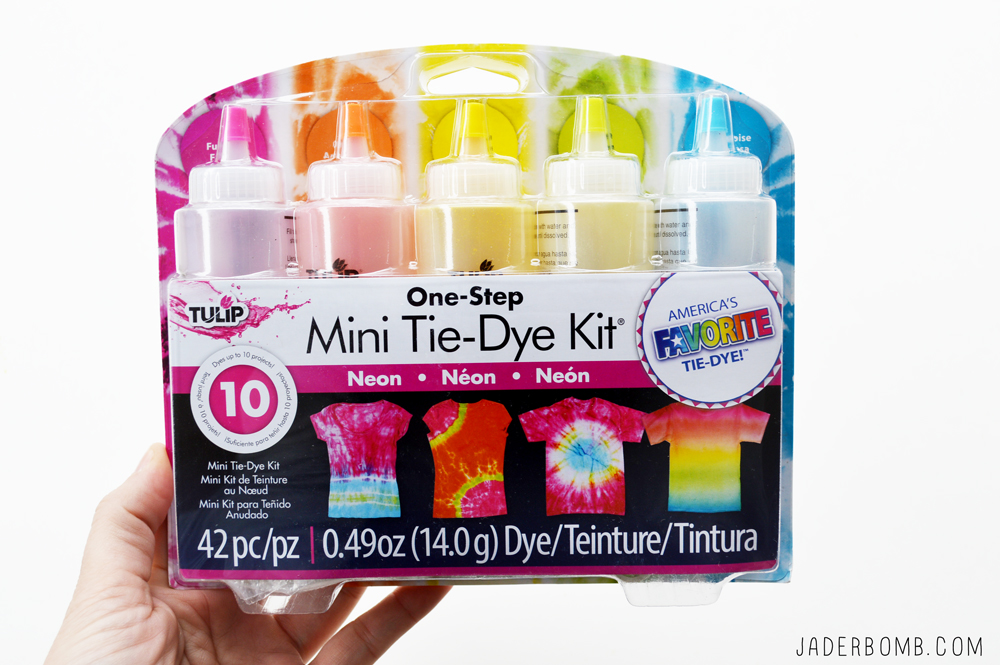 As you can see the bottles have powder inside of them already. We will not fill the bottles with water for this project.
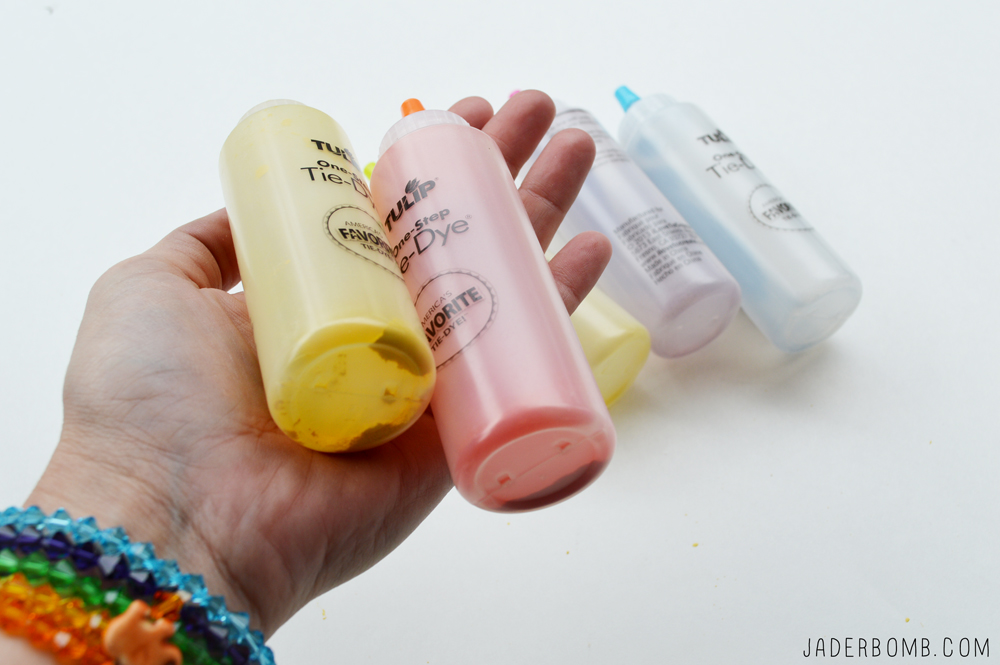

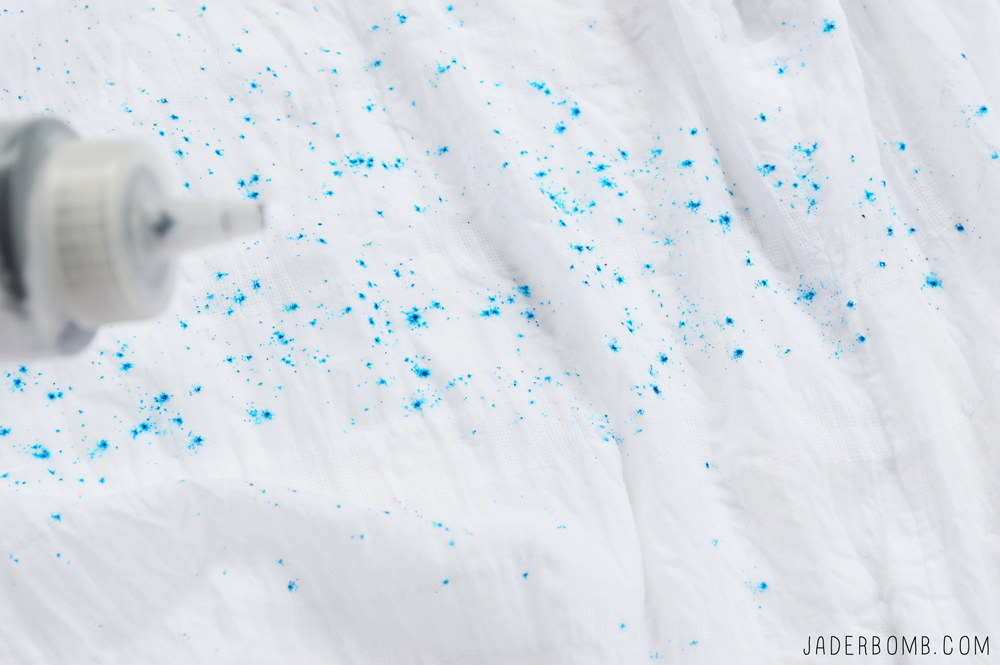
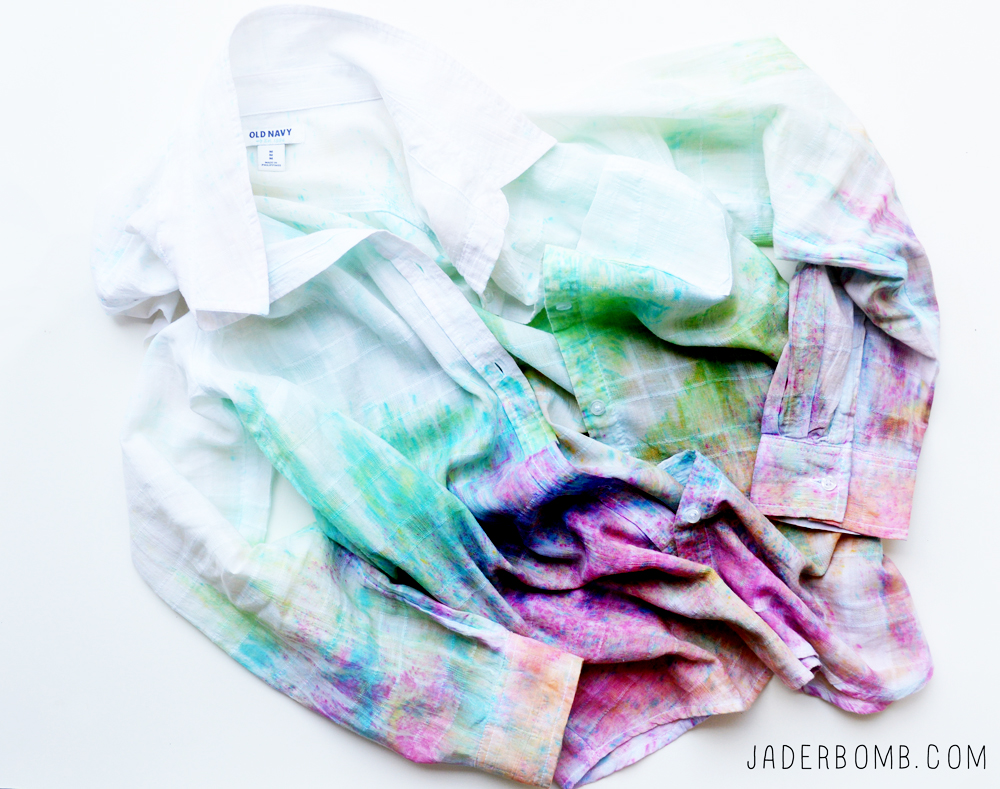
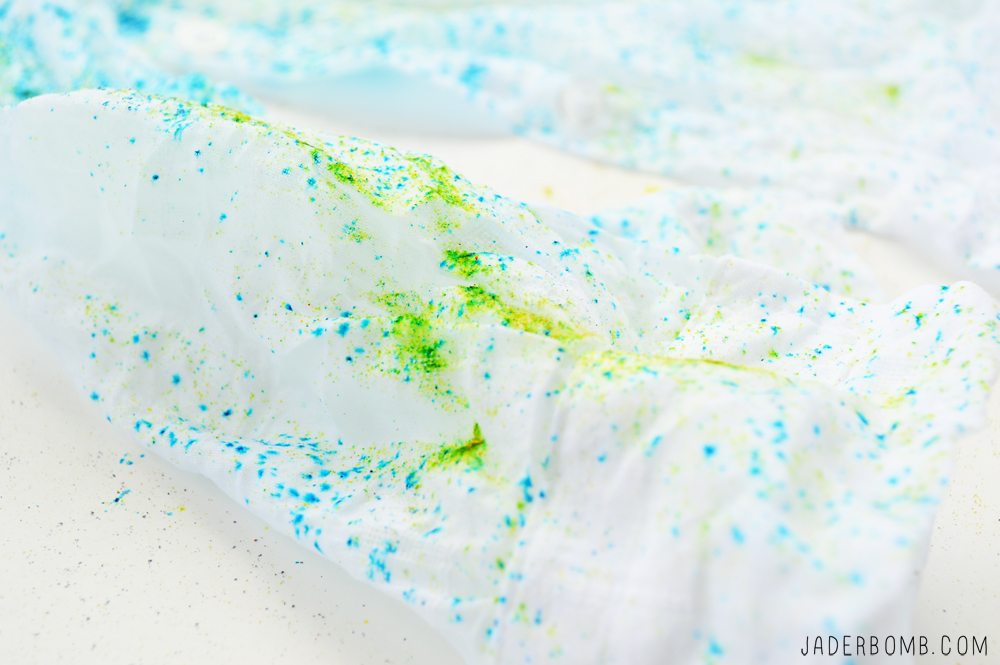 I love how all of the colors start bleeding together. If you know me then you know bright it right!
 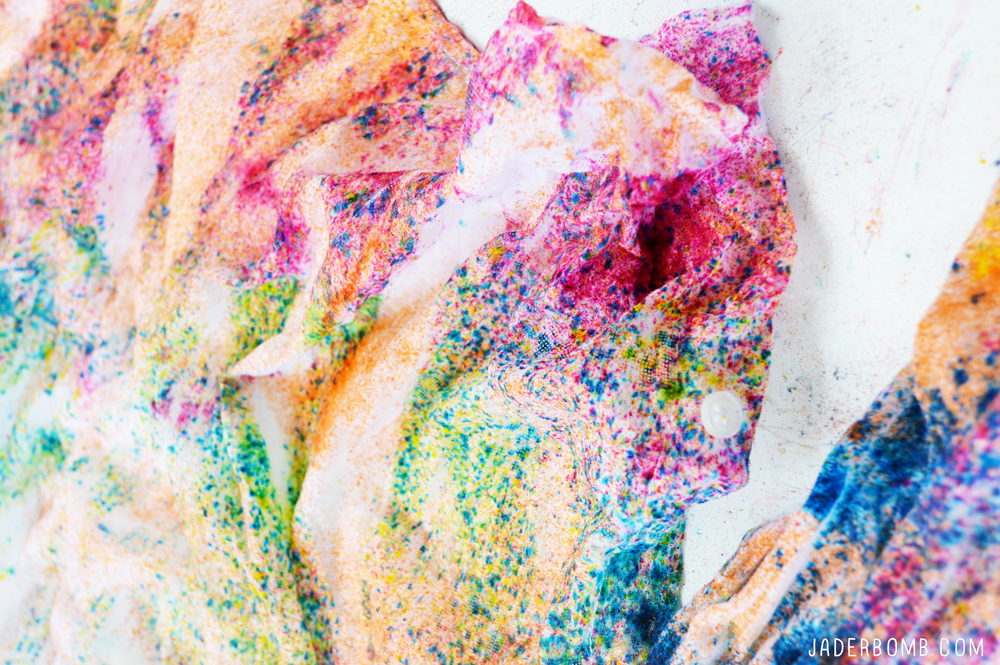 You want to let the powder sit on the wet shirt for a couple of hours. The longer it sits the brighter the colors will be.
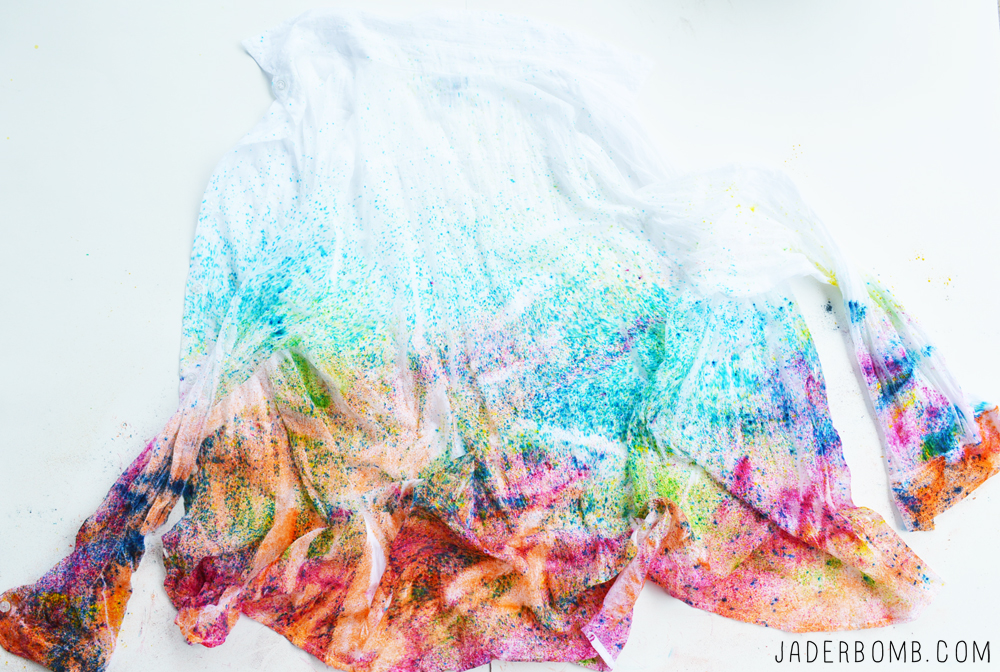
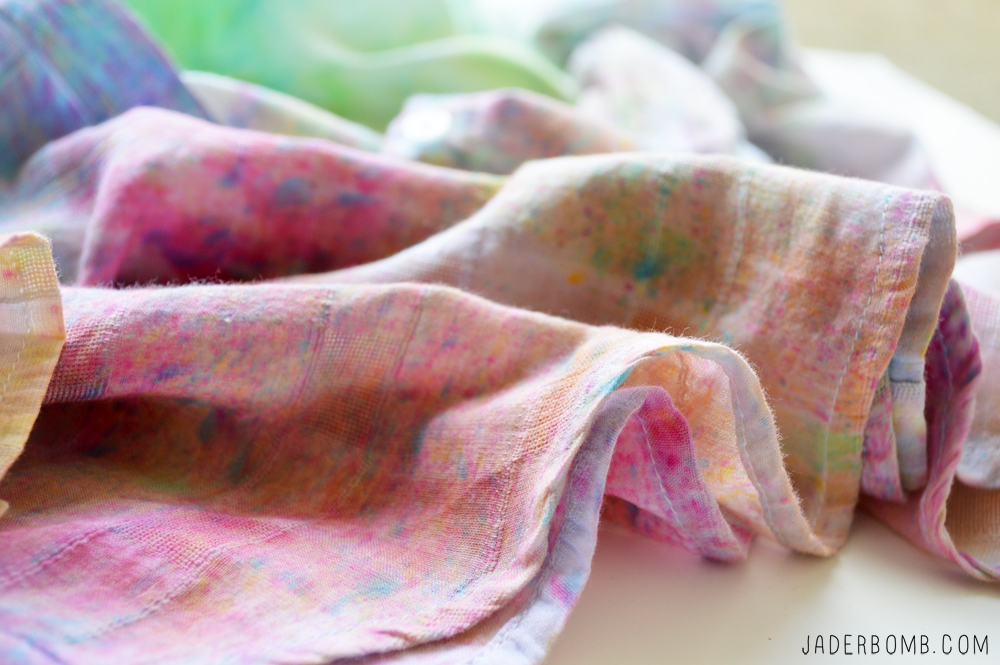
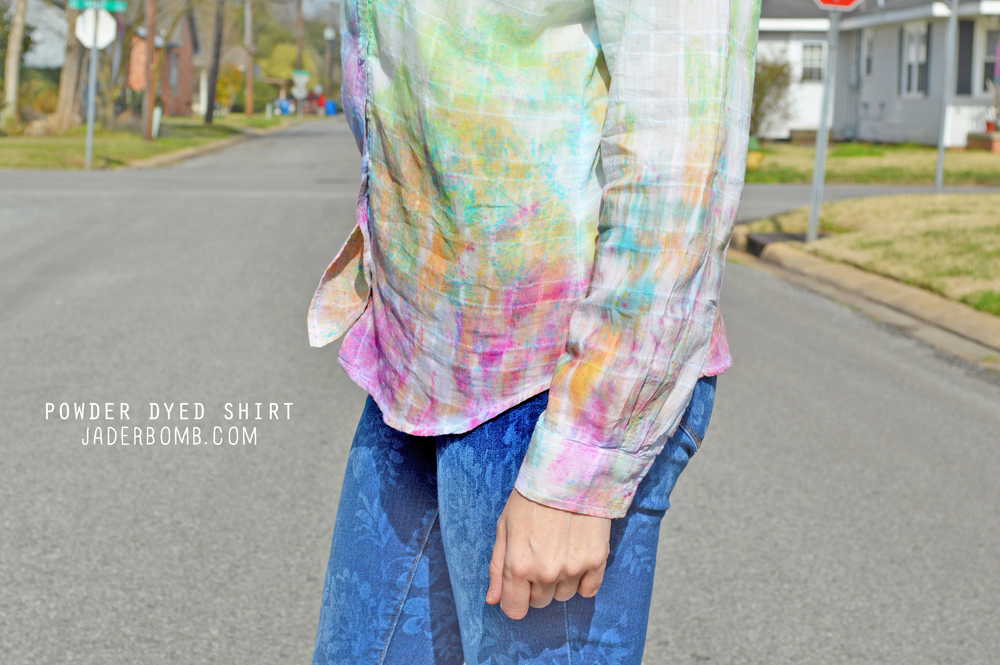
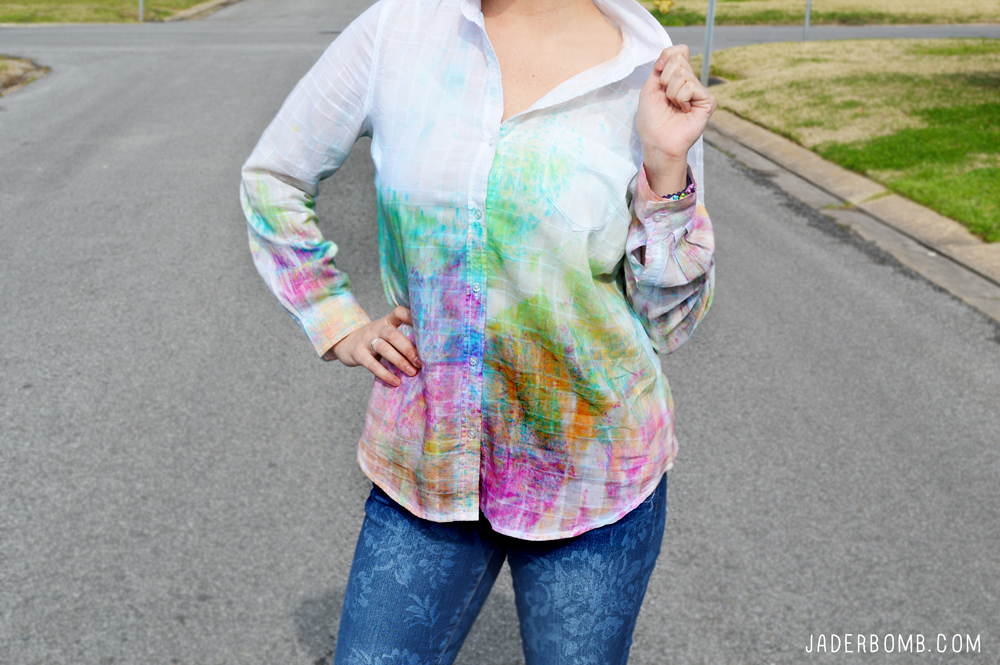
 After a few hours I rinsed my shirt under cool running water then washed it separately. WOWZERS! I am so happy with the way it turned out.