Author Archives: jaderbombllc

About jaderbombllc

I am a Southern DIY blogger and Designer known for fearlessly conquering anything and everything do-it-yourself. I aim to create unique designs by working through my thoughts, dreams, emotions, and tons of glitter! I believe in doing things that make my heart flutter and smile, and I live by my motto, “Life is simple and so should your style.” To learn more about me, visit jaderbomb.com or email me at [email protected]. You can also visit my Etsy shop at jaderbomb.etsy.com. Make sure to check out my FREE PRINTABLES site www.freeprettyprintables.com My biggest accomplishment thus far is being a guest on the Martha Stewart show, yes she smells good. I love my dog Ceaux Ceaux, pens,the smell of Christmas, GOLD, Dr. Pepper and blogging. BTW: I bleed glitter, all shades.

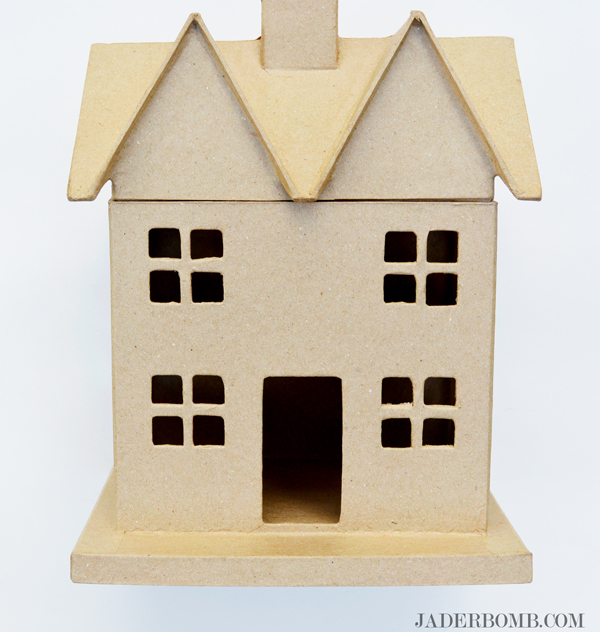
Today is a perfect example of my motto “Why buy when you can DIY”. It’a almost Halloween and I always dress up my house and studio with DIY Halloween Houses. I love today’s craft because you can keep it when the holiday is over or toss them to avoid clutter. I know you are prolly thinking I am crazy for saying I would toss them but I am pretty over the top like that. It’s one of those things that I wouldn’t want to stuff in the attic. After all it’s not like it’s a Glitterville collectible.  With that said, you can purchase these cardboard houses from Hobby Lobby and they are really inexpensive. I think the large house was around $5 and the other two were $2 and $3 dollars. I hope you enjoy them!

P.S. Check out today’s FREE Fall printable on Free Pretty Printables.
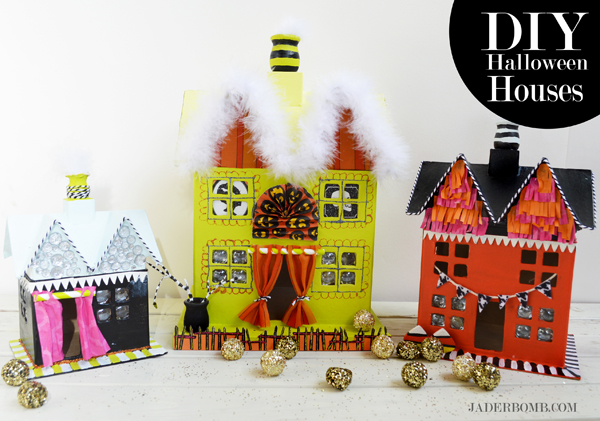
decorated cardboard boxes for halloween

diycardboardhouses

You can purchase these from Hobby Lobby!paintcardboardhouse
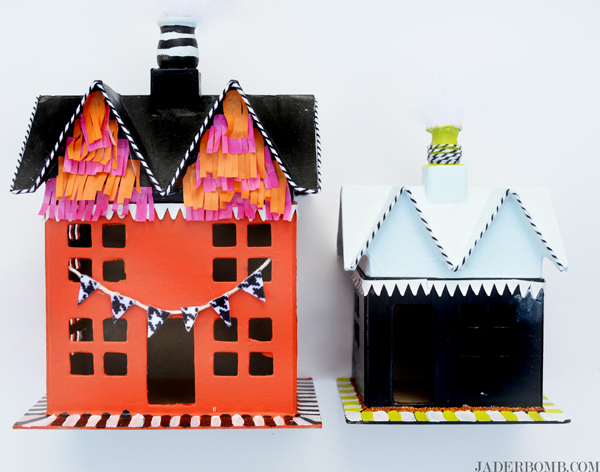
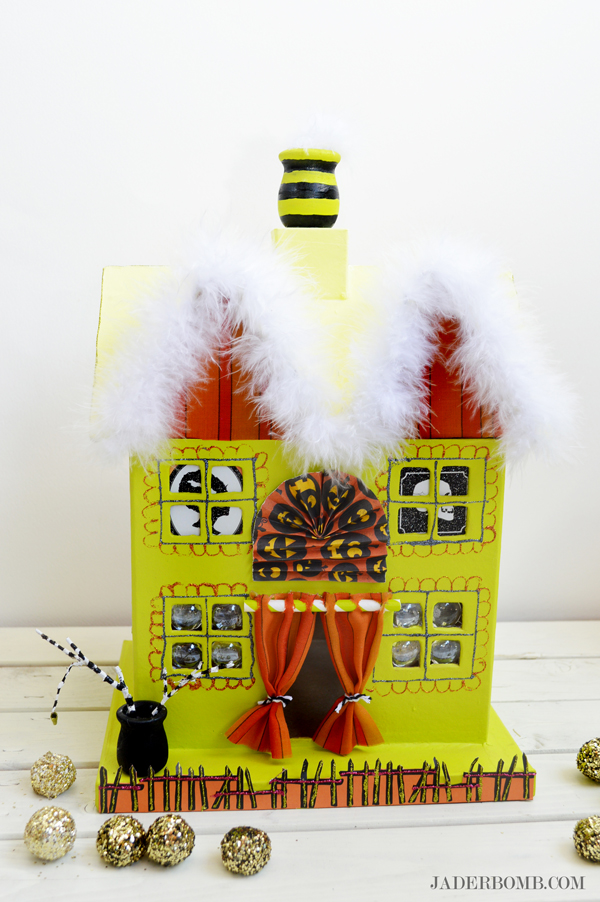
I started by painting the houses with acrylic paint. I lined the roof with baker’s twine and added tissue paper to the front of house. diy halloween house
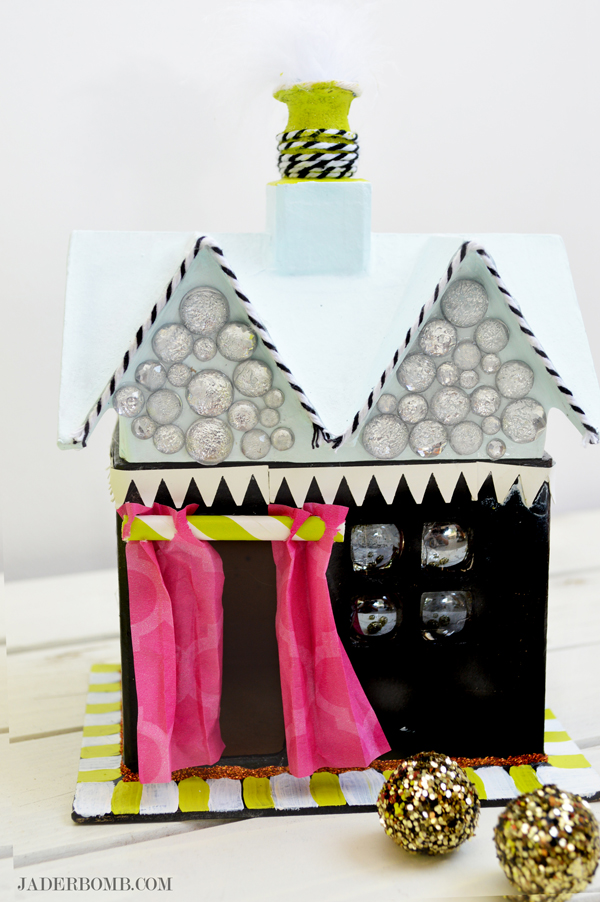
I used glass beads for the windows. For the curtain I used a paper straw and a piece of tissue paper. I let my godchild help me and I am so happy I did. It’s a fun craft that any kid can do and trust me it will keep them busy! halloweenroof
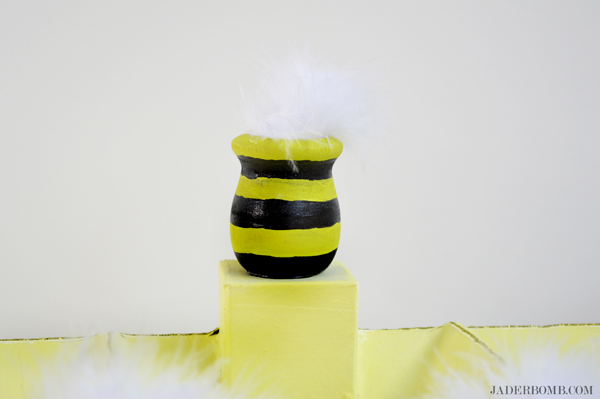
For the roof I used a little wooden planter and stuffed it with a fluffy boa! You can get these from the craft store also. I say use any fun goodies you have at home and be creative. After all that is where the fun comes in. how to decorate cardboard house
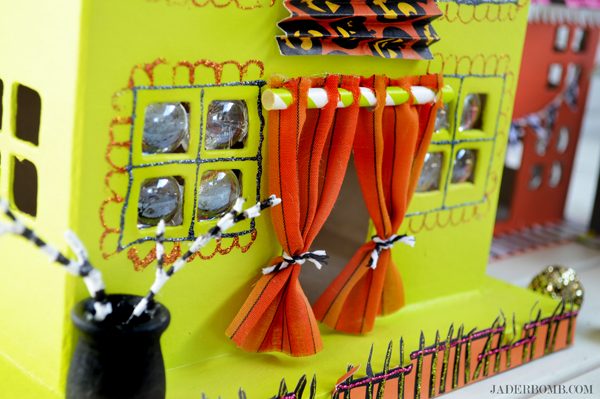
For the fence I cut a strip of Martha Stewart craft paper then added glitter to it. Just have fun with your house! halloween diy houses easy halloween diy houses
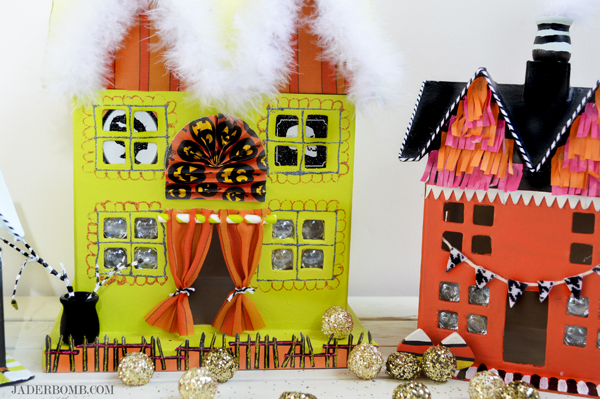
I hope you enjoyed these and you create your own magical houses for the holidays. See you in the next post!

Huge glittery hugs—See you in the next post! Visit me on FacebookTwitter,Pinterest, or Instagram!
chevron-cork coasters

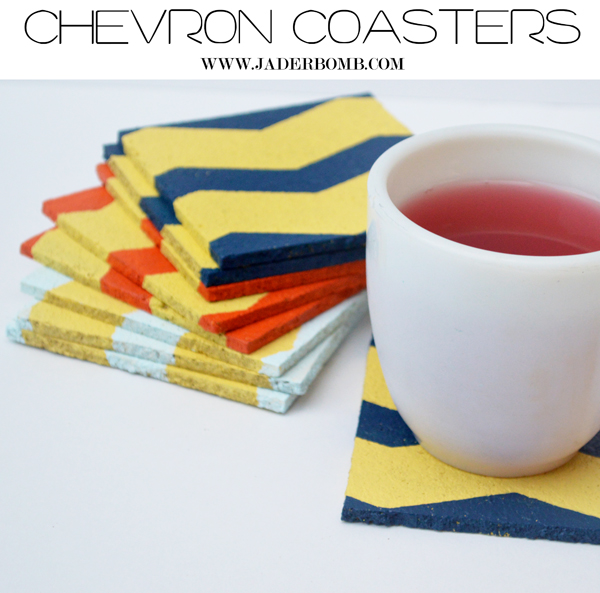
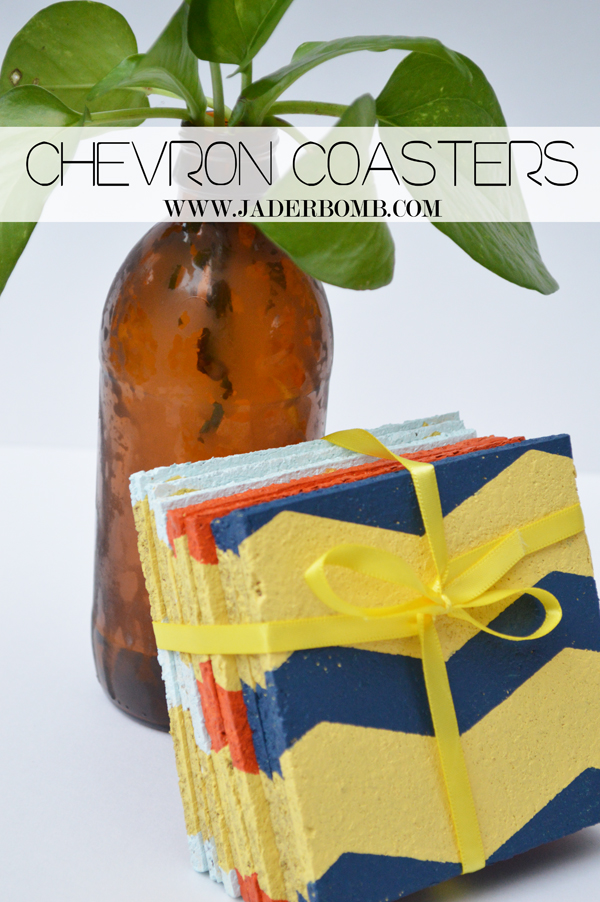
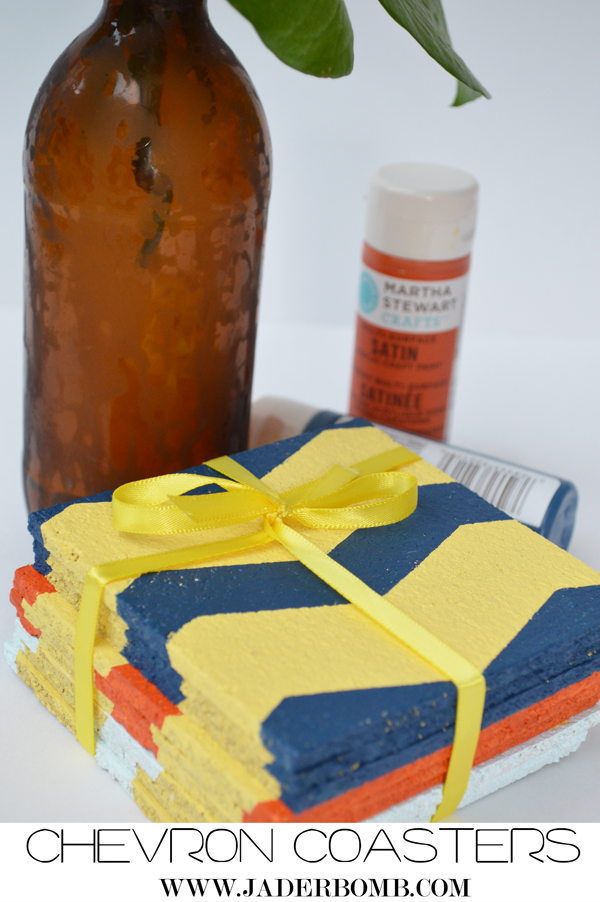
What’s better than corks and chevron? Well maybe a good cold drink, preferably a Margarita. Ya know, my drink might just look better on top of this chevron cork coaster.

What do you think?

I have to admit creating good chevron lines can be a real task is you are tearing little pieces of tape and trying to line them up. You are going to flip when you see this new product that I used for my chevron cork coasters.

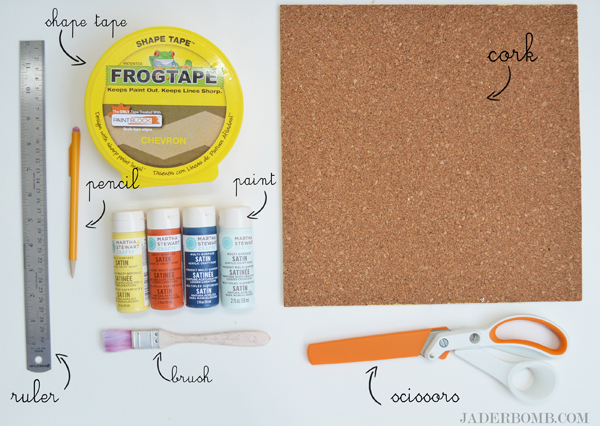
chevron-cork-coaster-supplies

dfgh

*Frog Tape Shape Tape in Chevron 
*Fiskars Amplify Mixed Media Scissors 
*Ruler
*Pencil
*Craft Paint
*Craft Brush
*Cork Sheet
cut chevron cork coasters

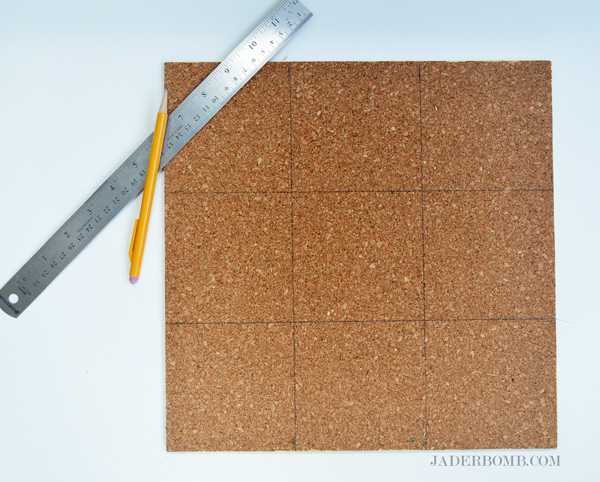
You can purchase the pre cut pieces of cork from any store these days and they are typically 12 x 12.  We are going cut measure out 4 x 4 squares with our pencil and ruler. Use your pencil to join the lines together.
diy chevron cork coasters

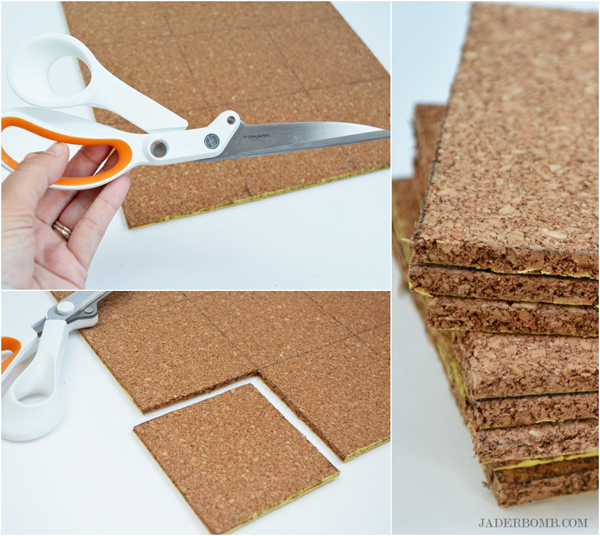
I am in love with these mixed media scissors by Fiskars. Trust me I use ton’s of scissors and these are by far my favorite. They cut through ANYTHING! Follow your pencil lines and cut all of the squares out. These scissors cut a perfect precise line!frog tape chevron tape for coasters

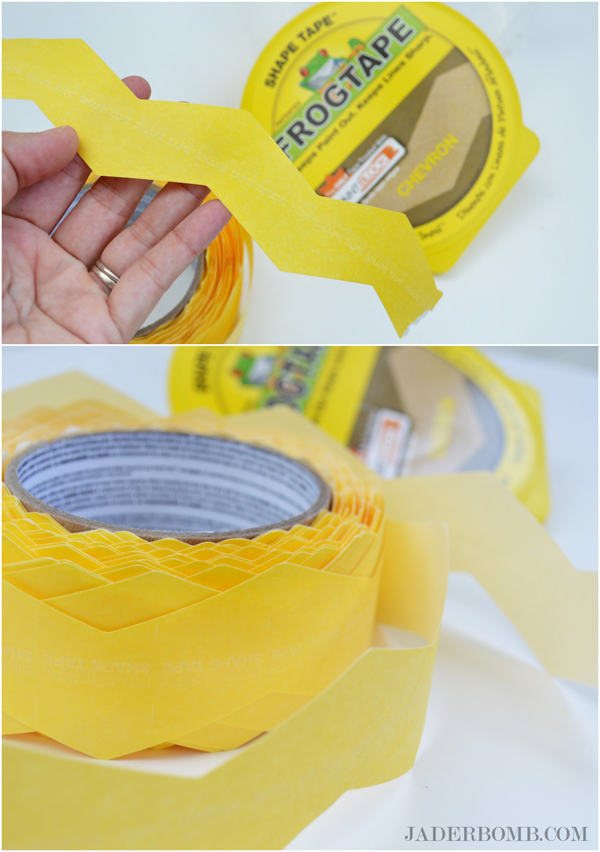
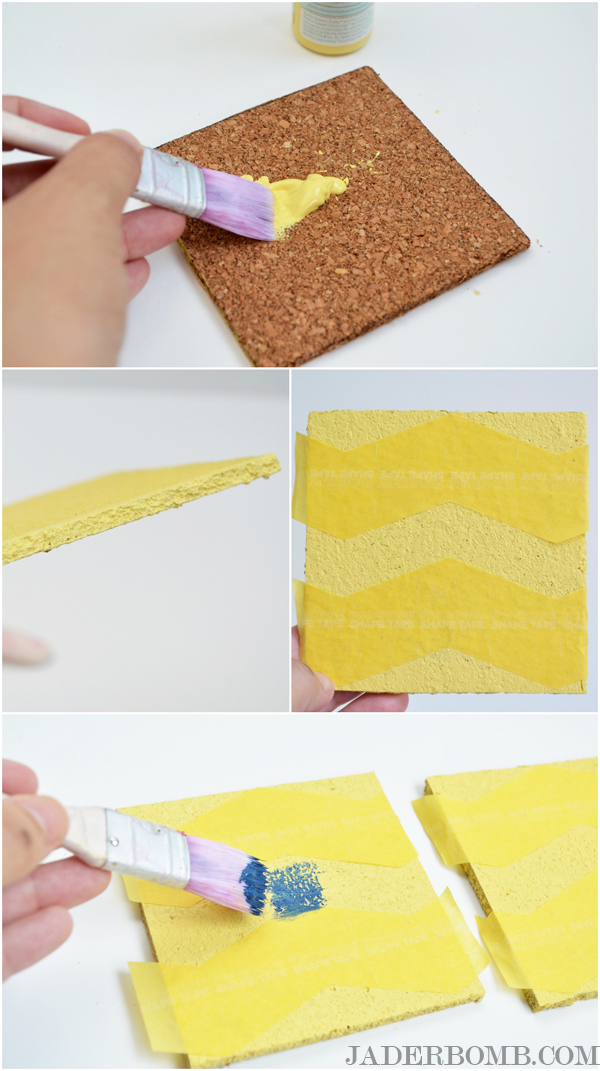
What? You hate cutting small pieces of tape to create chevron lines? No worries my friend, Frog Tape just came out with this “Shape Tape” and I promise it will save your life! You will have a whole new meaning of chevron after you use this. how to paint chevron cork coasters

The first thing you will do is paint your cork squares whatever color you want. Let them dry then place your shape tape on top. Gently press tape down with fingers then paint your cork square another color. Continue doing this with all of your squares until you complete them. Peel off your tape as soon as you are done then let them dry. chevron cork wall art

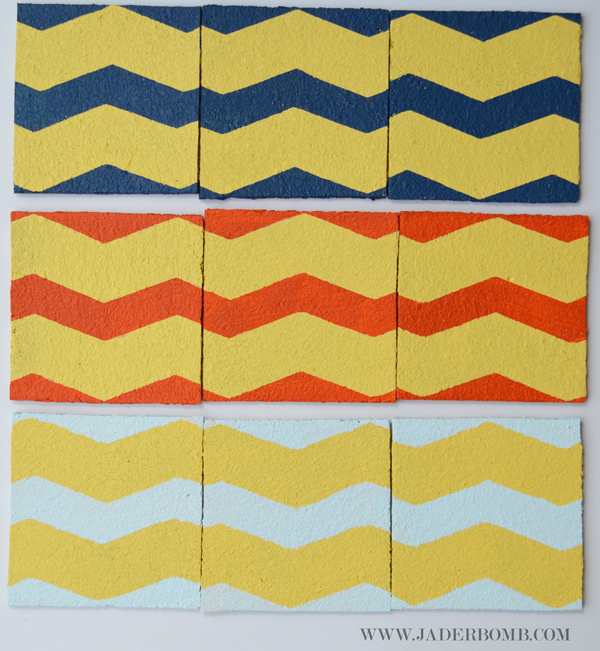
They are really magical. There were a few section’s that I had to touch up only because the cork was raised and paint fell through. For the most part you will end up with perfect chevron lines. If you want you could display your corks on the wall like this.

Instant ART!how to make chevron cork coasters

Beautiful!homemade chevron coastersI hope you enjoyed this tutorial. See you tomorrow!

jade

Huge glittery hugs—See you in the next post! Visit me on FacebookTwitter,Pinterest, or Instagram!


This is a sponsored post and I did receive product but all opinions are 100% my own, pinky promise.

I have to start by saying I am super stoked about the products in this post. You know I am all about DIY and I always need a good drill or circular saw to get those projects completed. Ryobi and Jaderbomb decided to get married at Haven this year.

No worries I will be posting about my experience at Haven this week on the blog.

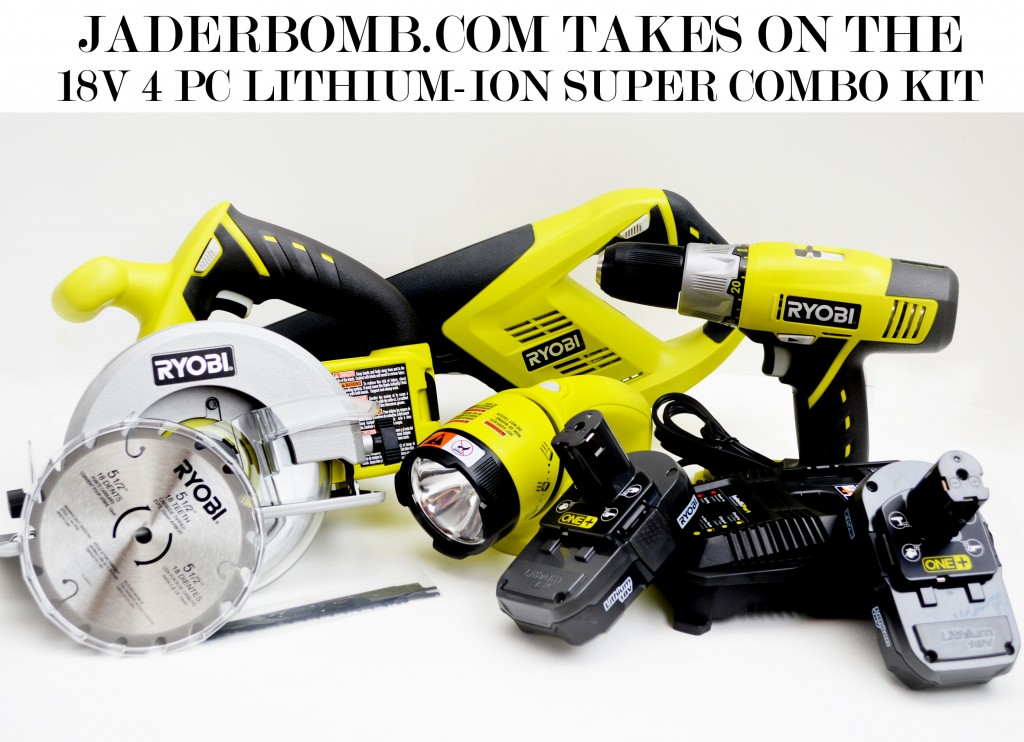
Purpose of this blog post. To show you how sexy my new tools are and to let you know that you will be seeing these babies in some upcoming posts! Just like I told my Ryobi boys, “this shade looks great against my skin tone” so with that said here is a preview of what comes in the SUPER COMBO KIT.

Want one? Click here to see how to make that happen.

RYOBI COMBO KIT

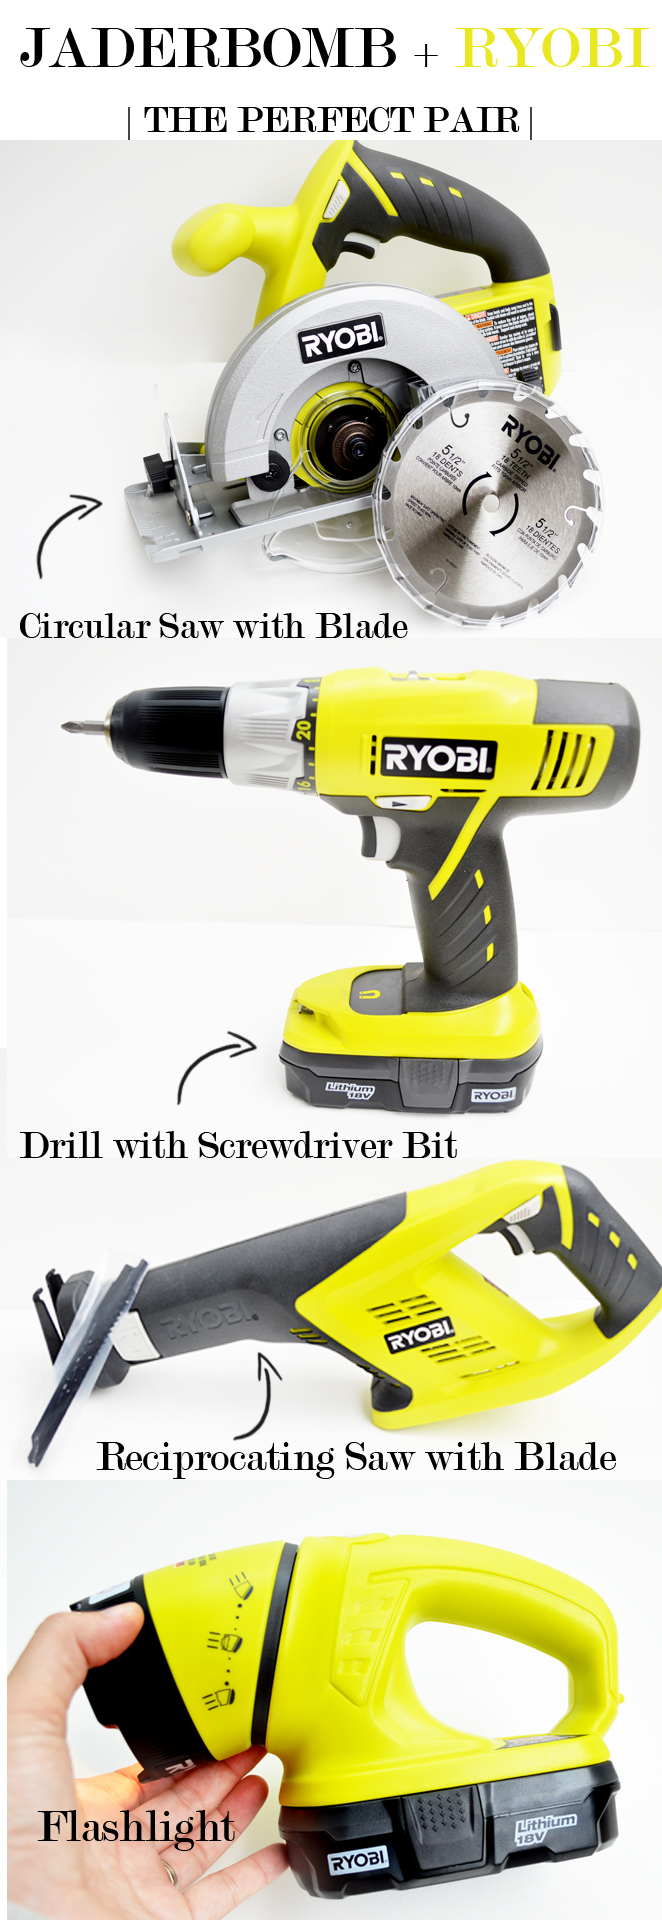
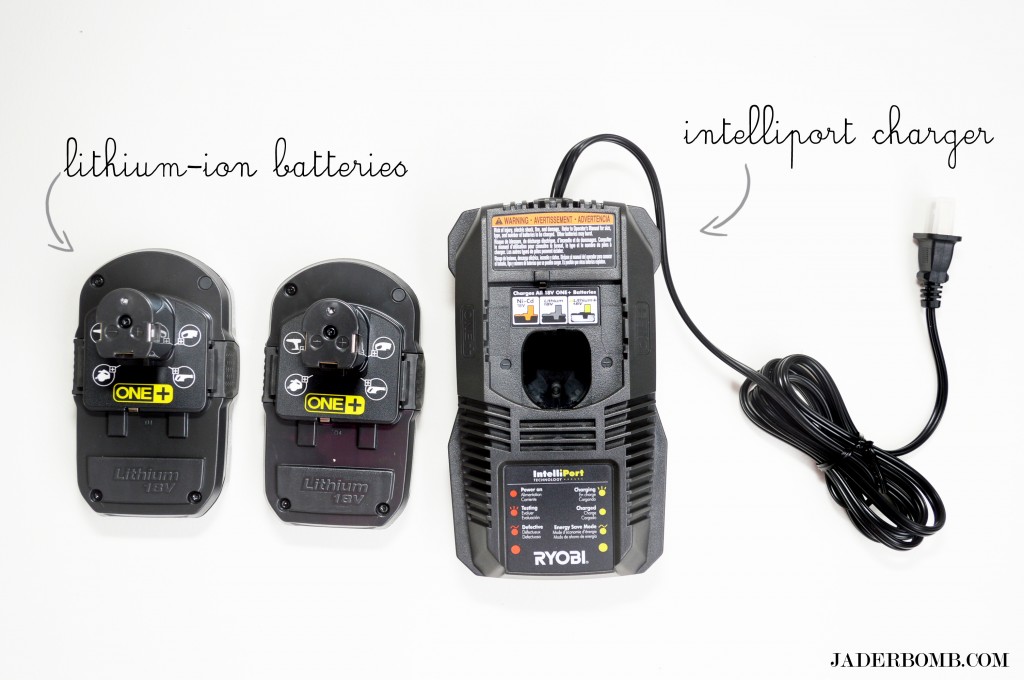
RYOBI® 18V ONE+™ introduces lithium-ion performance at Ni-Cd prices. This kit is powered by new lithium-ion batteries, the very best value in lithium-ion performance. They offer up to 20% more runtime, hold a charge 4X longer and are 45% lighter weight than Ni-Cd batteries. Batteries stored on the IntelliPort™ charger are conditioned for peak performance. The drill includes a 1/2 inch heavy-duty single sleeve, keyless chuck with a 24 position clutch to match your drilling and driving needs. The reciprocating saw is great for demolition and general cutting of a variety of material. The circular saw has a 5-1/2 inch, carbide tipped blade to rip through 2-by material and sheet goods. The work light has a swivel head that directs light where needed.

jaderbomb and eclecticallyvintage

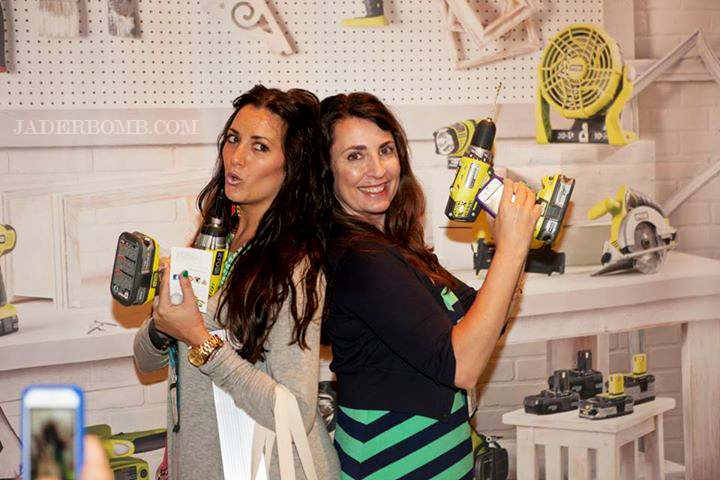
Me and my roomie Kelly from Eclectically Vintage. Every time I look at this picture I just laugh. We were trying to look Charlie’s Angel-ish but I think I failed in that department.

I am not sure what to think when I look at this picture. I can tell ya, I was trying to “blow” the tip of the drill like it was on fire!?!?!? EPIC FAIL.

Moving on.  Check out these great tools!

RYOBI-LITHIUM-COMBO-KIT-JADERBOMB

ryobi-lithium-ion-batteries

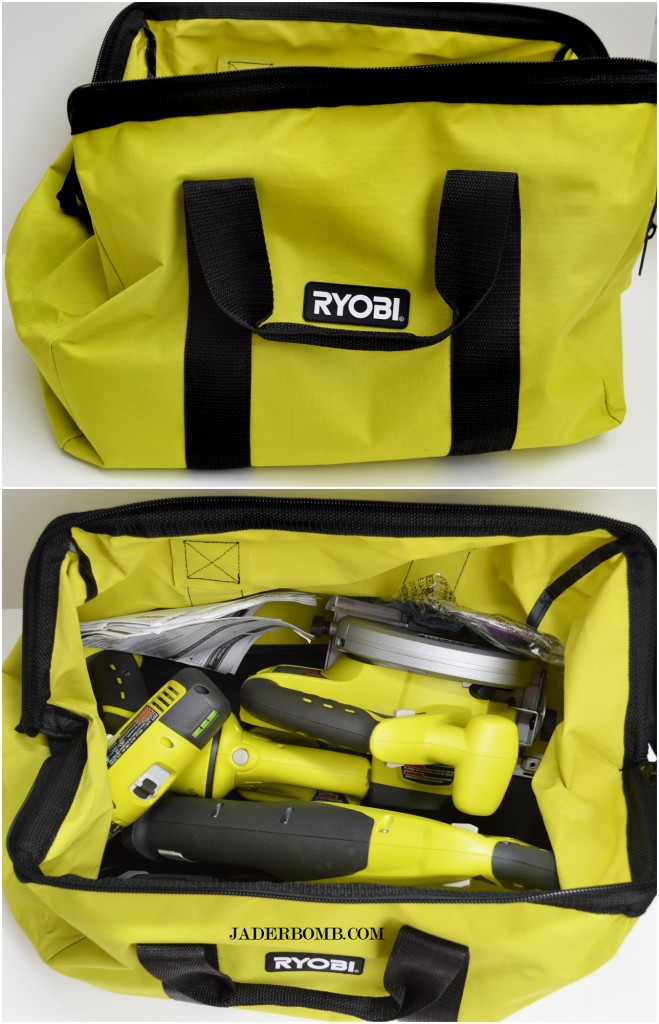
ryobi combo kit bag

Well, there ya have it. I am simply amazed at how well designed these products are and how they perform. This is the real deal kids! My favorite thing about this kit is the bag! Everything fits in the bag, y’all. Marvelous.

Stay tuned you will be seeing these a lot in some up coming diy tutorials.

Huge glittery hugs—See you in the next post! Visit me on FacebookTwitter,Pinterest, or Instagram!
sponsoredpost

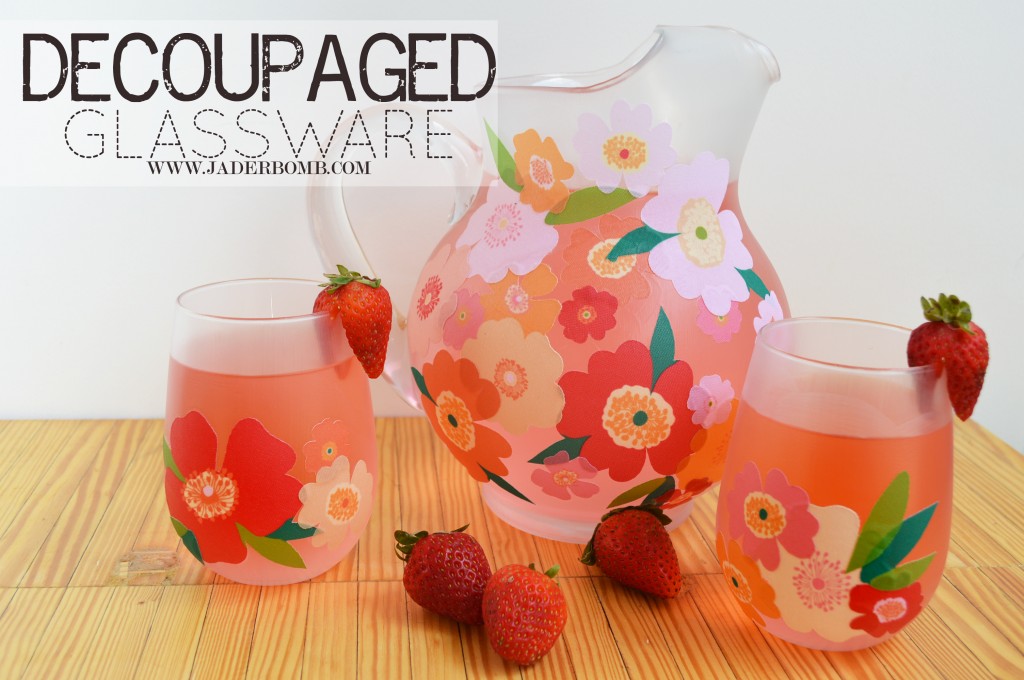
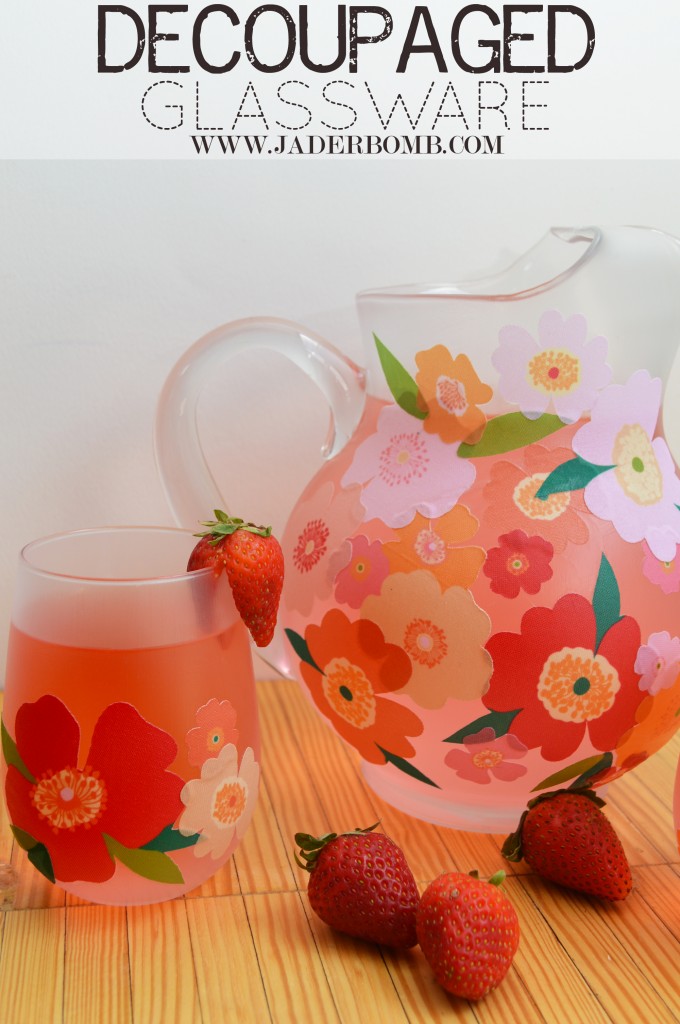
This month the world came to a sudden halt with the launching of this product —> Martha Stewart Decoupage.

Decoupage on glass? Why yes, this will become your next secret addiction.

This is not like your everyday decoupage, y’all. It’ the cream of the crop.

Decoupage on glass

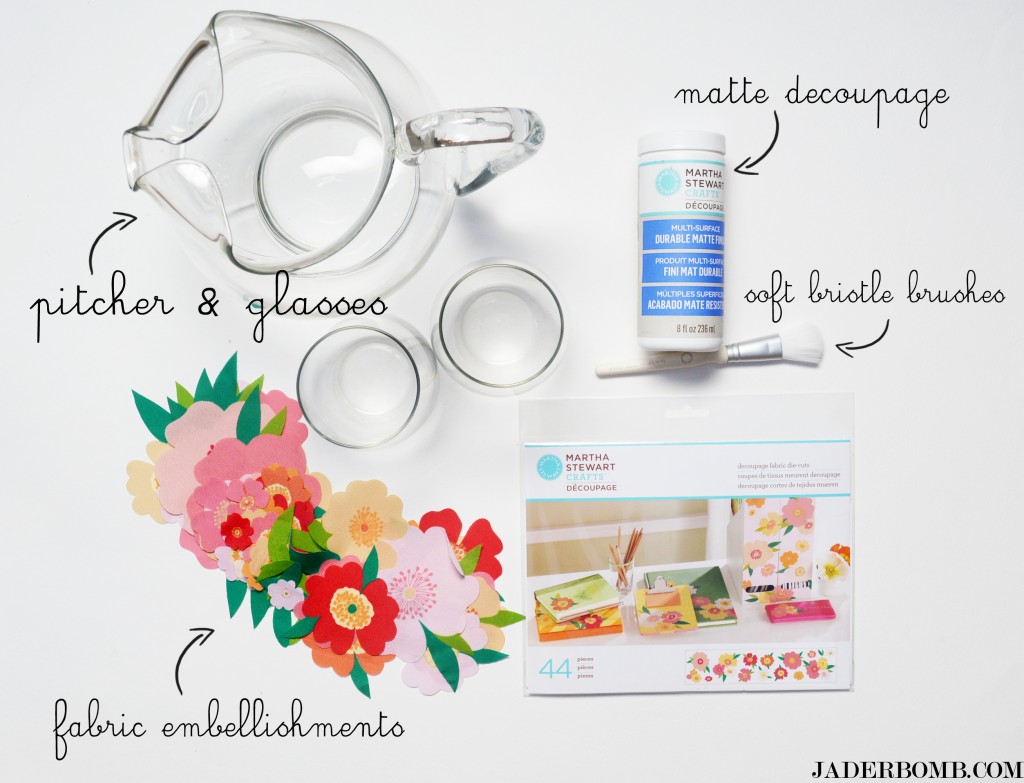
YOUWILLNEED

*Martha Stewart Decoupage Soft Bristle Brushes
*Martha Stewart Decoupage Fabric Appliques
* Martha Stewart Multi Surface Durbable Matte Finish (found at Michaels)
*Alcohol
*Glass Pitcher and Glasses

decoupage-pitcher-supplies

I purchased my pitcher and glasses from Target and they were completely affordable. That is always nice, incase you mess up 3 times.

I have to admit, Martha Stewart consistently impresses me but she really did it with these fabric flower embellishments. Pre-cut, why YES THEY ARE!

decoupaged-pitcher-cups

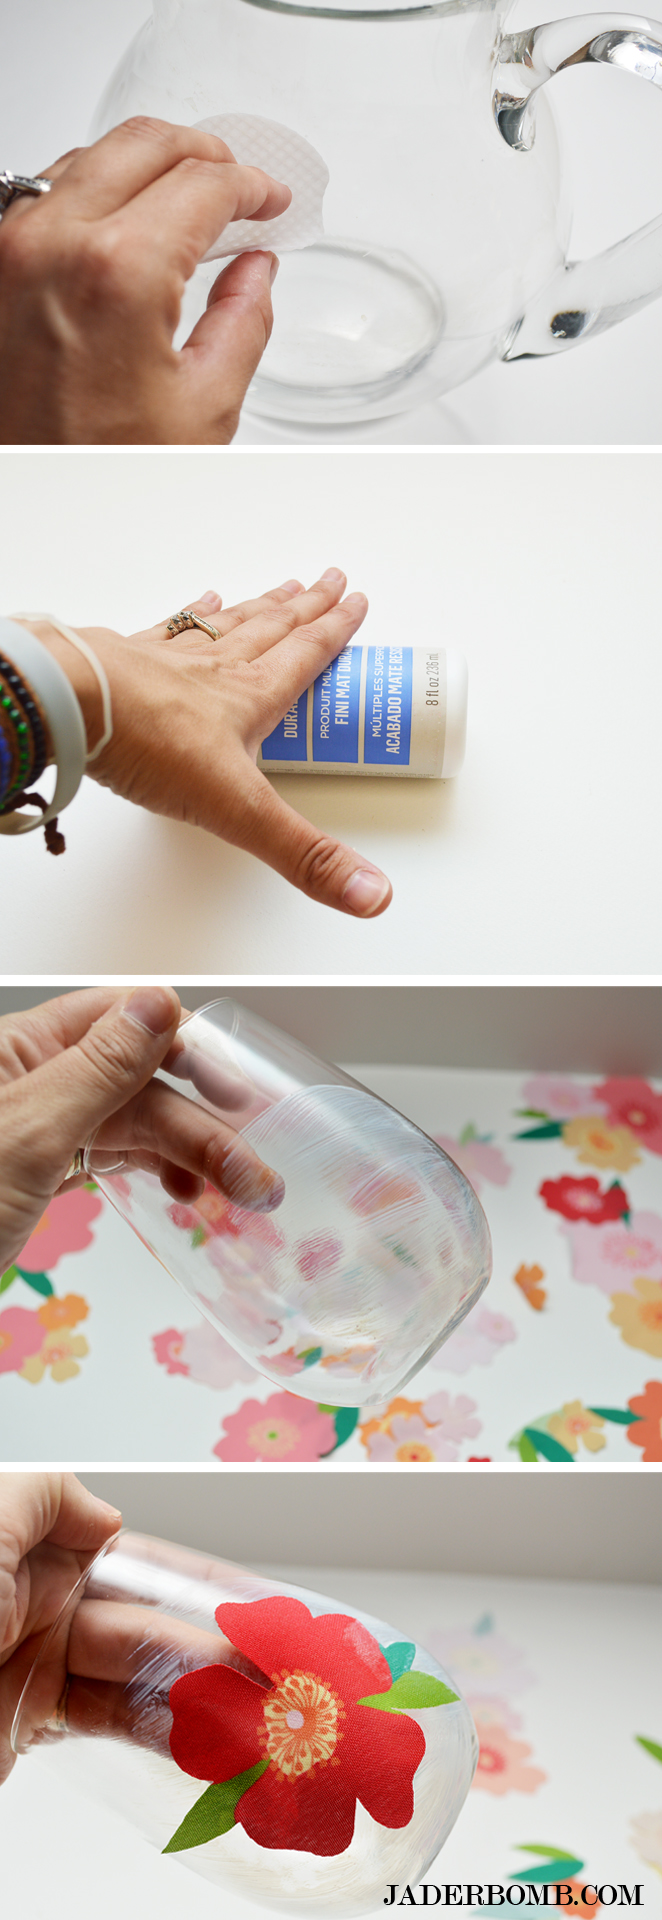
1) The first thing you will do is grab a little rubbing alcohol clean the surface. This will take care of those greasy little fingers that just touched it.  Wear gloves if you feel like touching it.

2) Grab your Durable Matte Finish Decoupage and roll that sucker on a flat table to mix it up. Please, for the sake of all the bubble makers out there don’t shake. We want to keep the bubbles in bubble-land not in the decoupage bottle.

3)Grab your soft bristle brush and apply a thin layer over the section you will be placing your flower. Don’t over do it, we just want to apply where the flower is going to be placed.

4)Quickly grab your flower and place it on top of your thin layer. Brush a light coat of decoupage on top to make sure it’s secure. Apply as many flowers as you want. Make sure you work at a good pace so the decoupage does not dry. The fabric embellishments are easy to put on however if you decide to use paper make sure to rub your finger over them to get any hidden air bubbles out. Set aside and let dry 1-2 hours.

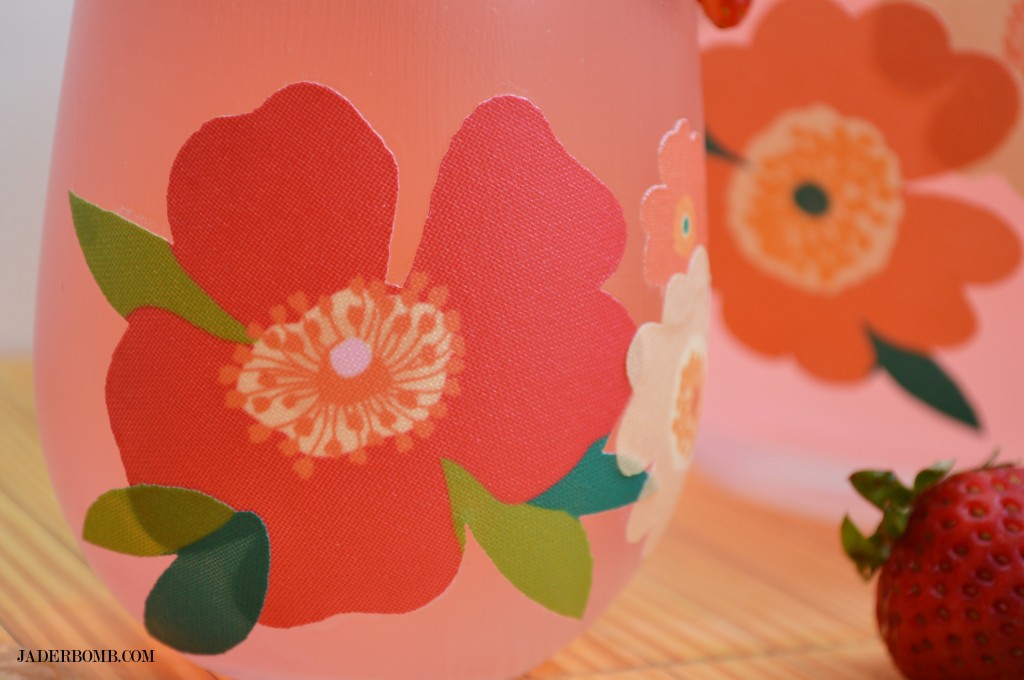
When dry, the Durable Matte Finish Decoupage looks just like frosted glass. I almost flipped in my chair when I went back to look at them. I may have blurted out a few curse words that were purely out of excitement.

5) When you are finished applying your flowers get the 1 1/2 in 3.81 cm soft bristle brush and apply a thin coat over the entire glass. It’s important that you brush in the same direction when applying your final coat.

6) When done let them air dry 2-3 hours.

7) You can put as many layers as you want just make sure you allow drying time in between each layer. 

8) Set this aside for 21 days to cure completely and guess what, this will be dishwasher safe!

flower-decoupage

You can really see in this picture how the decoupage looks like frosted glass. It is beautiful!

decorate with strawberries

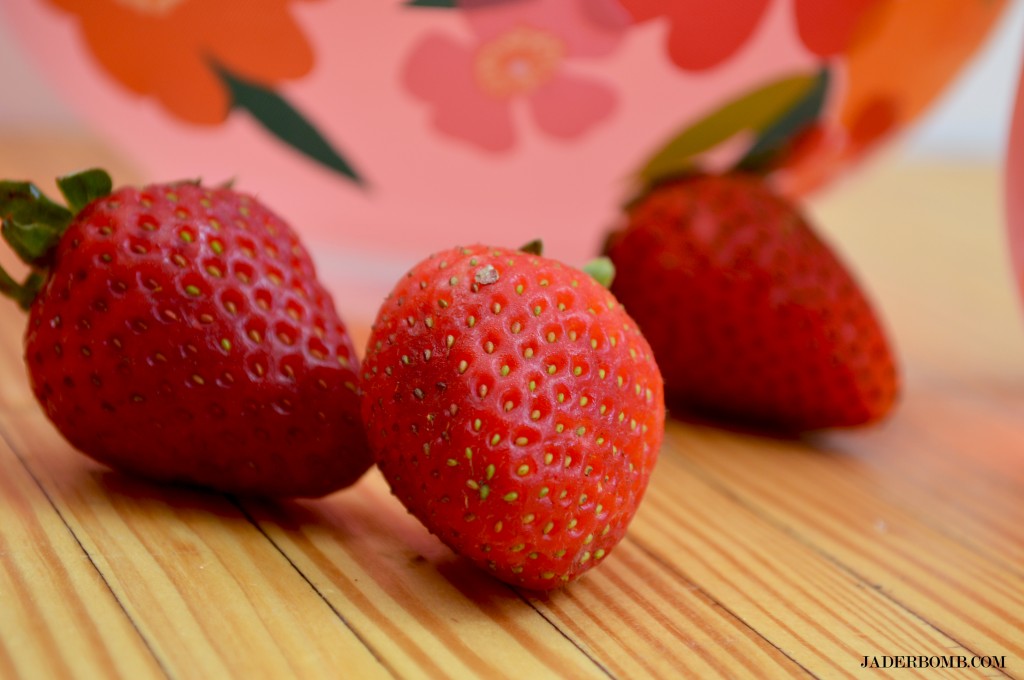
I ate these while I crafted and they were yummy. Want one?

how to decoupage on glass

decoupaged glass that is dishwasher safe

I hope you enjoyed this post. I had a blast playing with these new products. BTW: these decoupaged glasses look cute on anyone! 

Huge glittery hugs—See you in the next post! Visit me on FacebookTwitter,Pinterest, or Instagram!
This is a sponsored post through Blueprint Social and Plaid but all opinions are 100% my own.

For the complete line of Martha Stewart decoupage at Michaels.  Visit Plaid on FacebookTwitter,Pinterest, or their blog. Trust me they post great things daily!

bloglovethursday.jpg

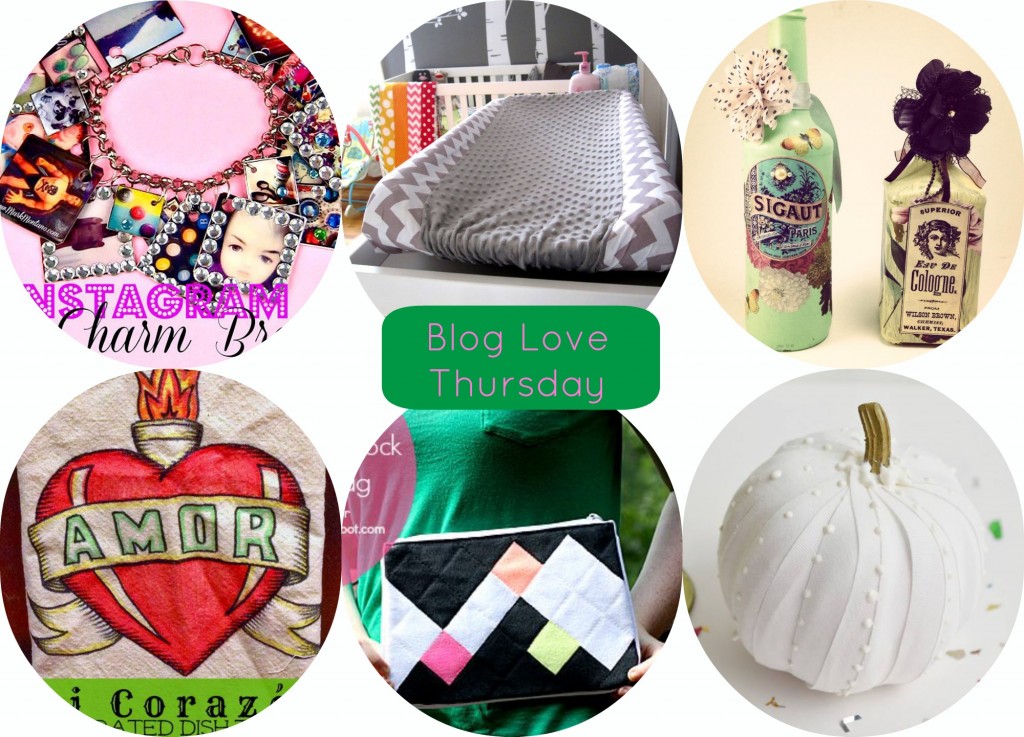
Happy day after hump day! You know what thursday means! BLOG LOVE! My BFF’S Mark, Cathie, Heather, Kathy and Margot are working it this week! I am in love all of these DIY crafts and I am pretty sure you will too. You have to click on the links to see exactly how they made them because they have tips and tricks that will make your crafting easier. Pinky Promise, Y’all!

Mark Montano knows everyone is addicted to instagram so he shows us how to make an instant photo album for our wrist with this instagram charm bracelet. Buddy, Smart.

Cathie Filian shows us how to Sew a Diaper Changer Cover and trust me I wish I was the baby laying on there! She is so talented it’s ridiculous!

Heather Mann of Dollar Store Crafts altered bottles in just the right way! They are shabby chic with a little bit of victorian tied in!

Crafty Chica doodles her way into everyone’s hearts with her illustrated dish towels! Insert heart beating fast right here 

Margot Potter swoons the fashion world with her Neon Colorblock Cosmetic Bag. It’s perfect for the Fall season and totally HIP!

Incase you missed my latest tutorial you can check it out on thewww.ilovetocreate.com blog.

I hope you enjoy everyone’s tutorial’s! Don’t forget to drop by everyone’s blogs and give them MAD love, cause they LOVE back!
See ya next week,
Jade

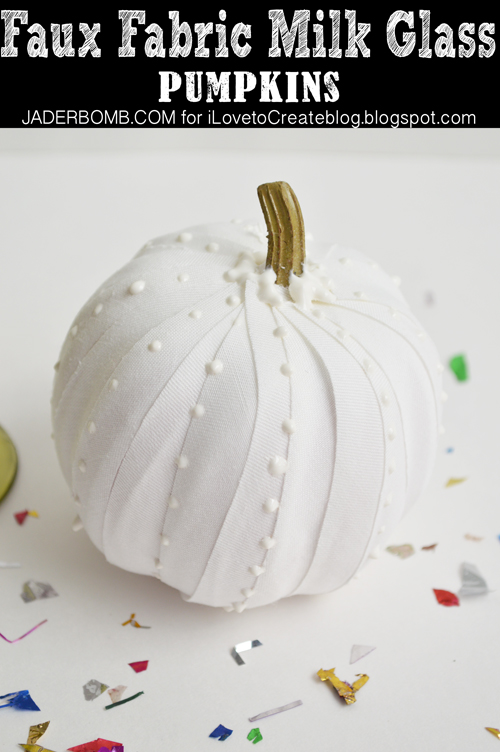
I am not quite sure what I love more white pumpkins, fake pumpkins or a good ole milk glass pumpkin. If you have never heard of a fake milk glass pumpkin then you are in for a real treat. I created some today and they are on the I Love to Create blog. It’s sorta like a “white Fall” instead of a “white Christmas”.

Let’s be real ok. I try my best to think logically when I craft. In other words I think about YOU then ME. 

I know me and Martha are pretty much best friends and all but I am NOT her. With that said I can’t afford to buy 27 real pumpkins and embellish each and every one of them. I have to eat ya know. Which is why I craft with FAKE ones. The kind that you can decorate, store in a huge tupperware then take them out the next year to use all over again. Please tell me I am not the only one who does this. What’s funny is I went in my attic today to look for things I made last year and I couldn’t seem to find anything.

Maybe last year when I was about to put them up I realized it was more work to take down the ladder, walk up the stairs and store them nicely so I just threw them all away. I tend to do cray-cray stuff like that anyways. I will more than likely find what I was looking for when I take down Christams decor.

Milk Glass Pumpkin

All Photos by Jade Harrington / Jaderbomb

Wanna see everything I have created for the I Love to Create blog? Check it out here!

I hope you enjoy this tutorial. Big huge glittery hugs from my fake pumpkins to yours!

Visit me on FacebookTwitter,Pinterest, or Instagram!

jaderbomb love