

Quote of the day:
“When I work 14 hours a day, seven days a week, I get lucky.” -Armand Hammer
Happy Sunday Jaderbugs. I have been seeing a huge increase on color blocking. It’s really huge in the fashion world and I am noticing a lot of home decor being color blocked. I think I have been doing this for years but didn’t realize it. Maybe I just can’t ever decide on a color so I put all the ones I love! Smart idea, not sure. I guess when people come over and they “oohh and ahhh” over things in our house I will take that as I am doing something right or interesting. Sheesh, maybe they don’t know what to say so “oohh and ahhh” is the only thing that can come out of their mouth, haha. (sucka punched)
So, for this particular tutorial I was totally inspired by my friend Meg Allan Cole. She is pretty amazing and anytime I am needing a smile I just head over to ANY of her sites. Here are a few that you have to check out.
*Her You Tube
*Her Blog
She just did a video on color blocking animals. No silly not real ones, haha. Little miniature ones to decorate her tree with. They turned out so flipping cute. Check them out HERE.
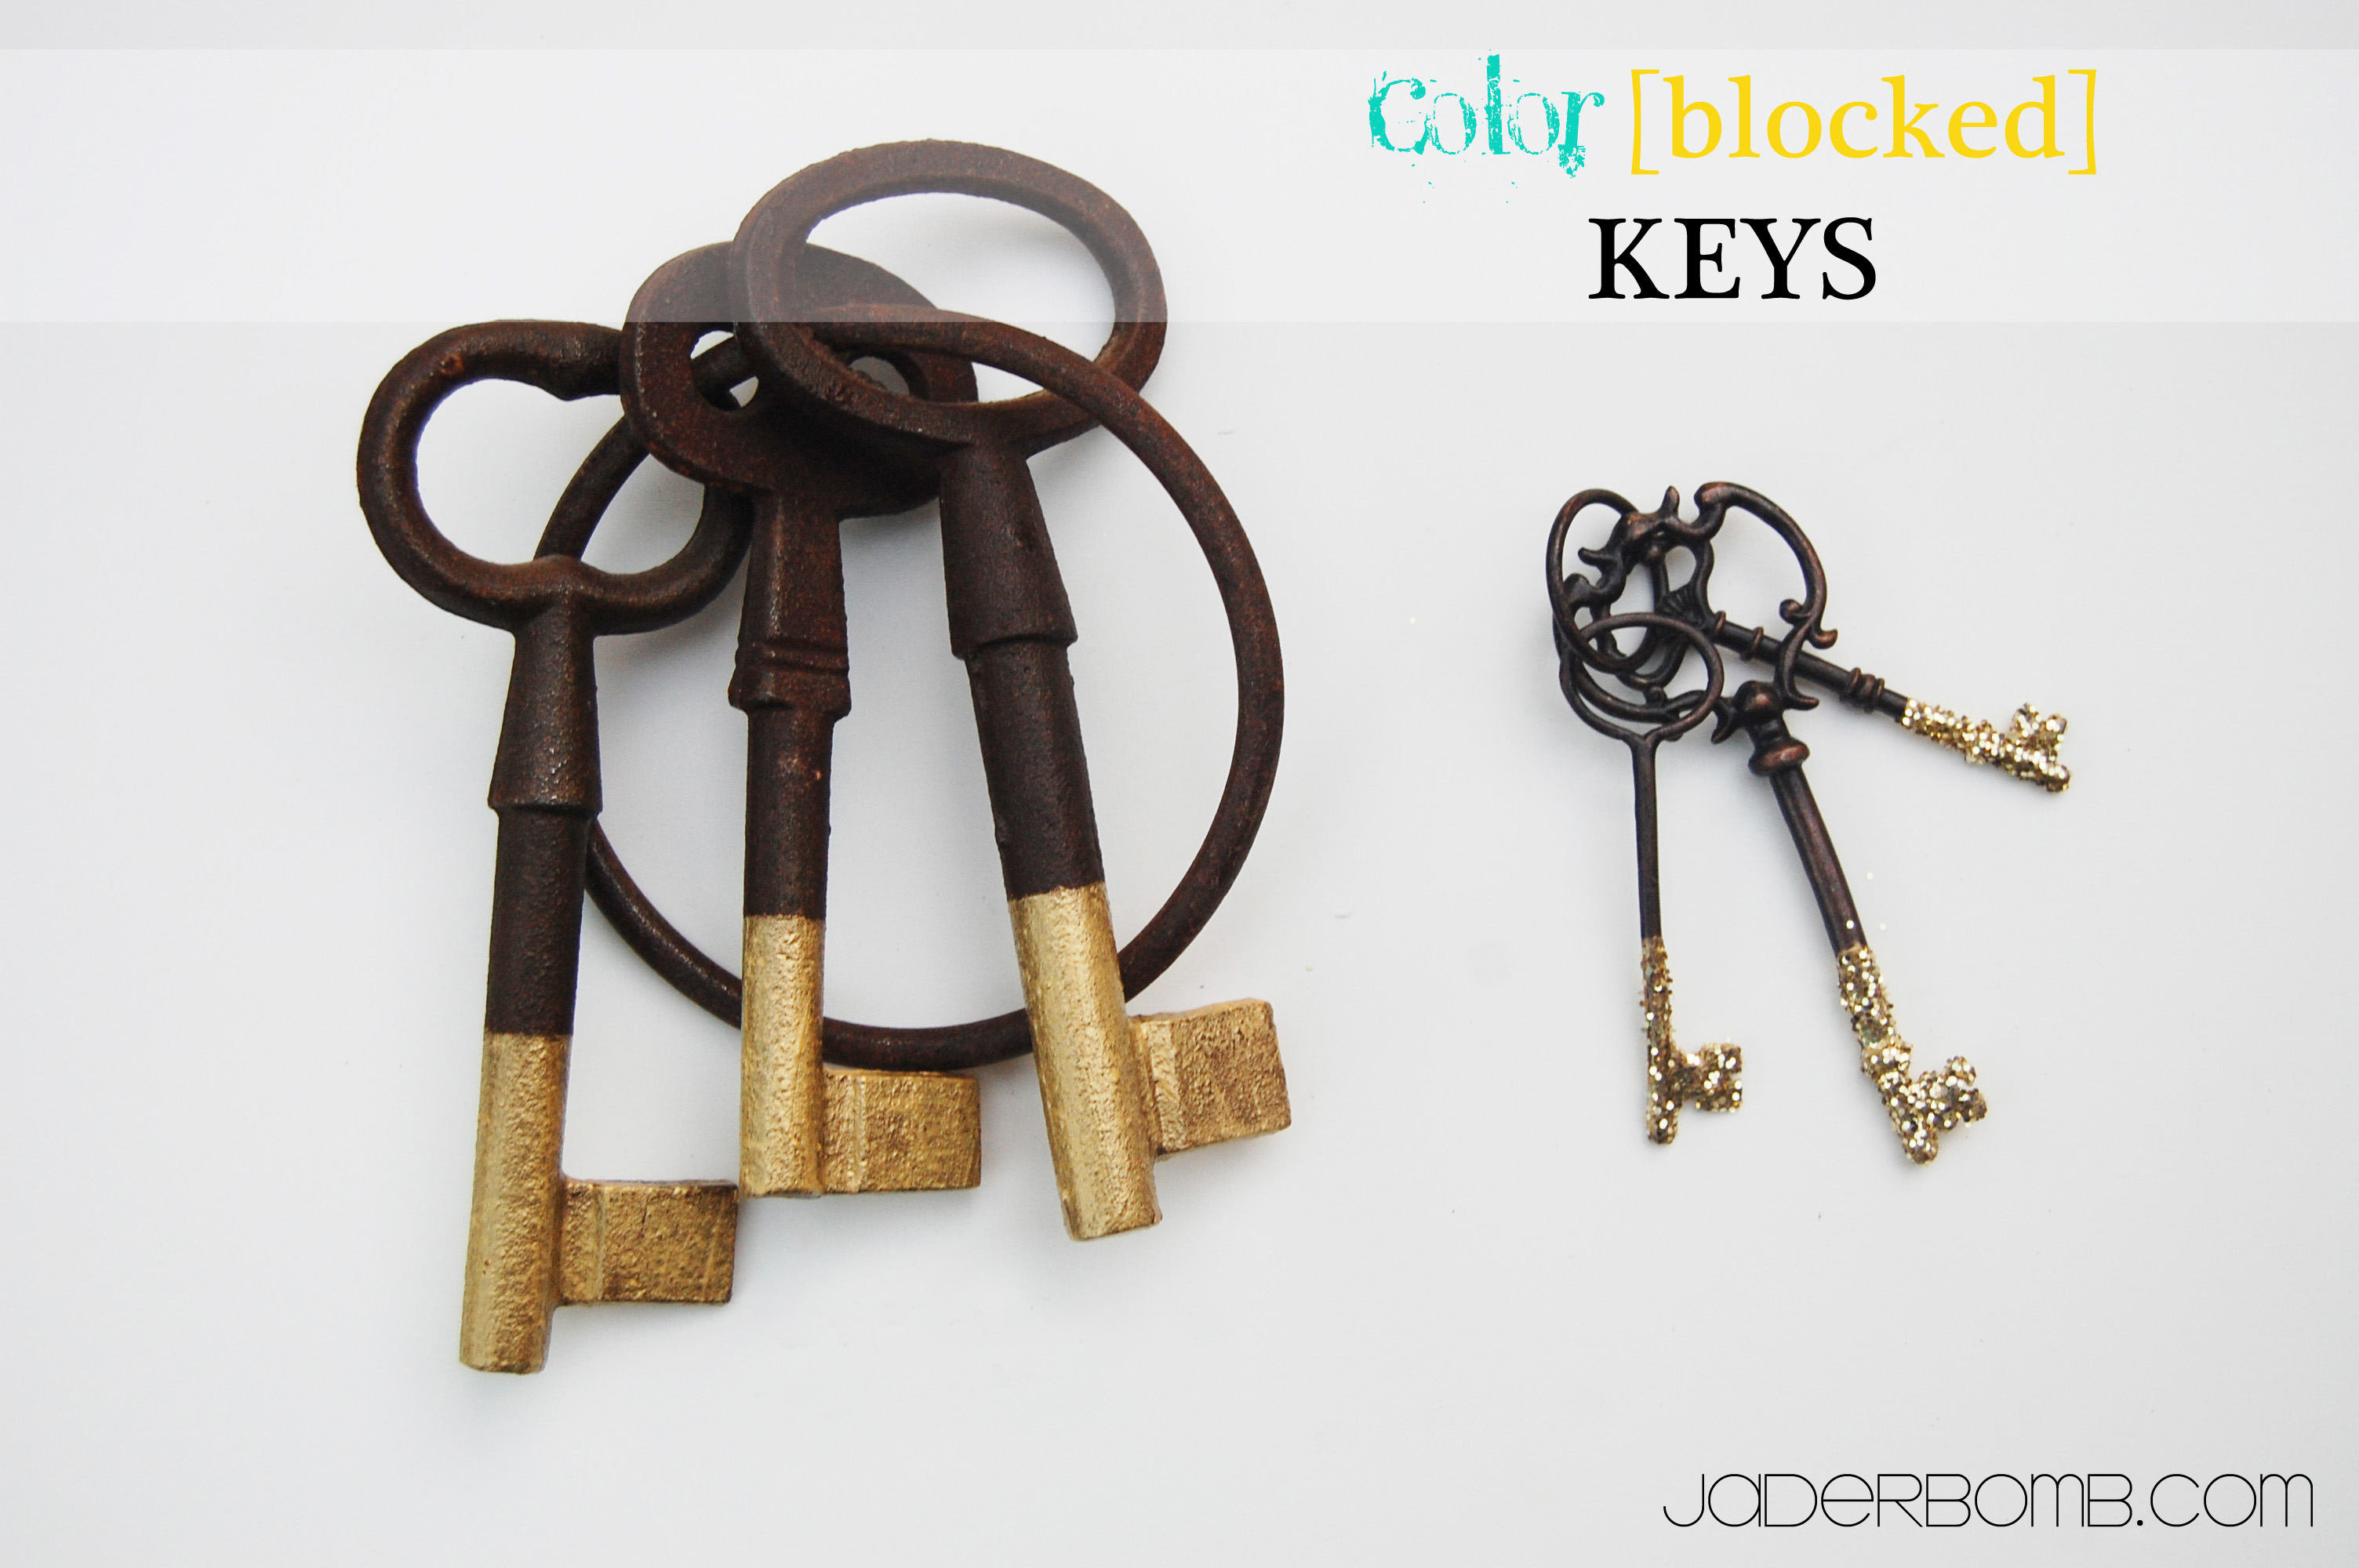
She totally inspired me to do this craft. Ashy bought me these set’s of keys years ago and can you believe they have been hidden for the last year or so. What can I say I go through different decorating phases at a time. I thought it would be perfect to give them a make over and bring them back into the public arena. I think they came out great, what about you?
You can color block anything! The possibilities are really endless. Let’s take a look at the tutorial.
If you are on Pinterest they have a really cool color blocking board by West Elm. Click HERE to follow it.
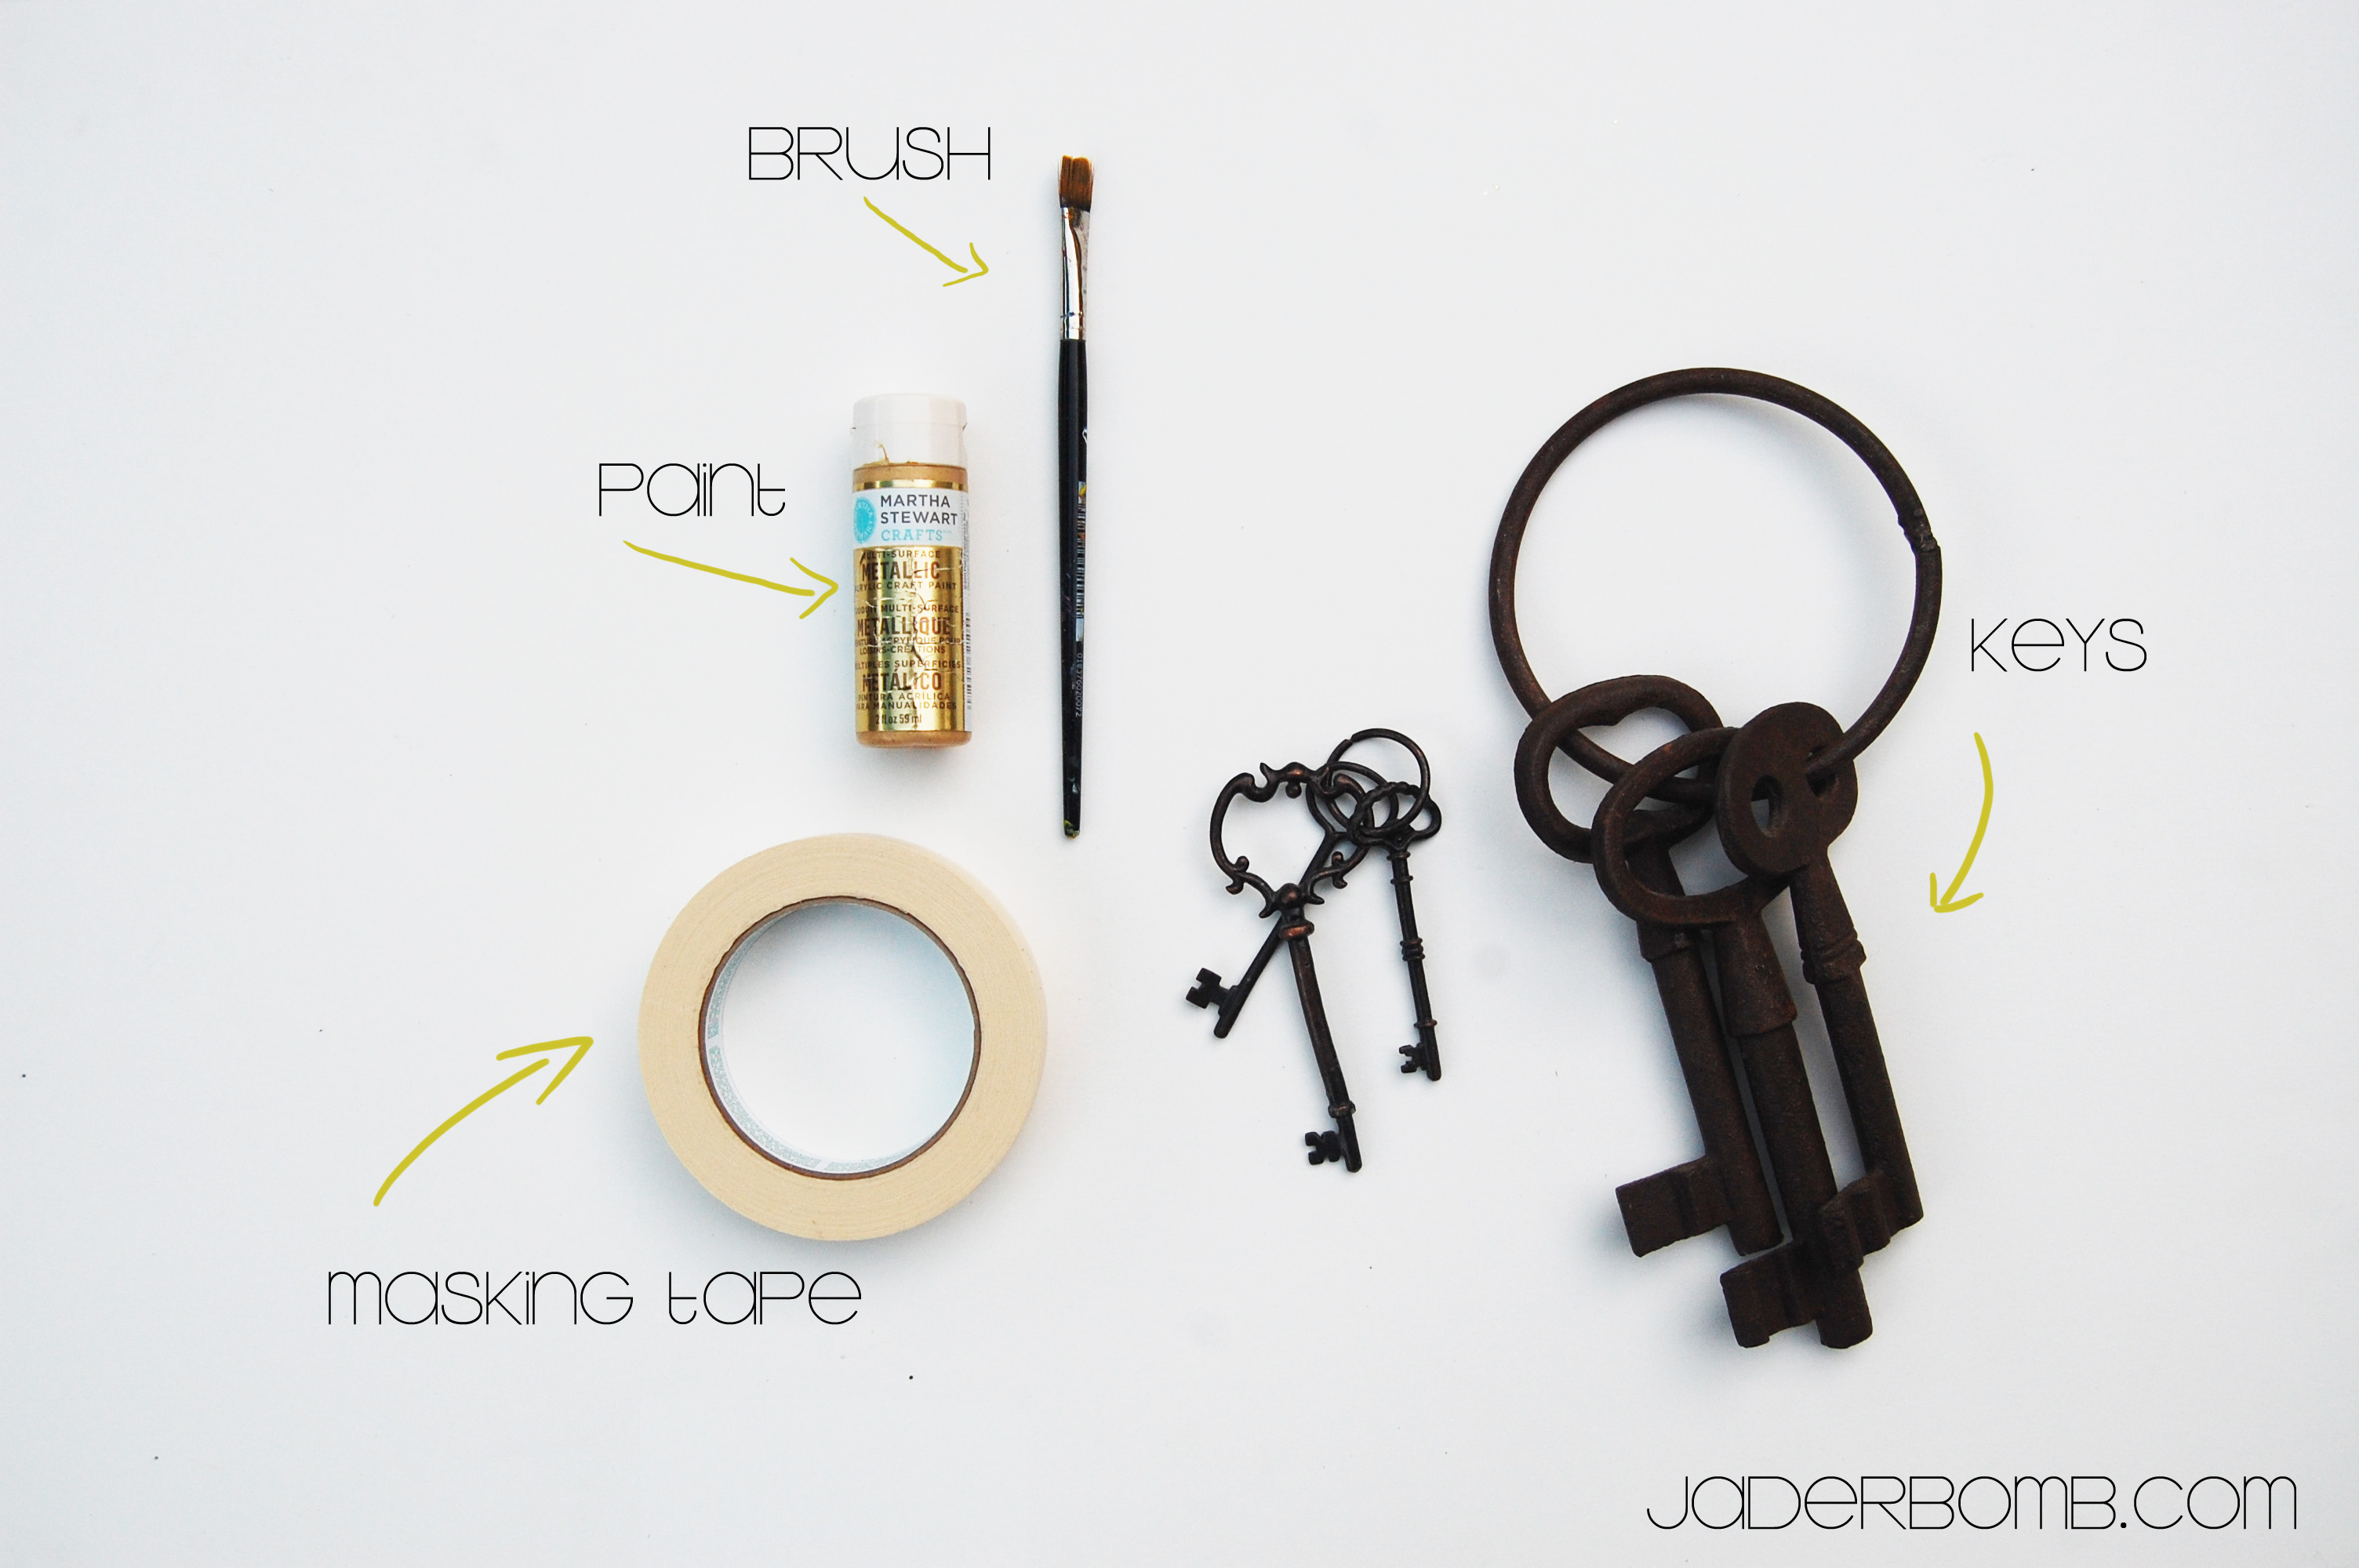
INGREDIENTS
*Brush
*Paint
*Masking tape
*Keys
*Whatever object you are using
(You can order all of the items I used in my tutorial by clicking on the links in the ingredients)
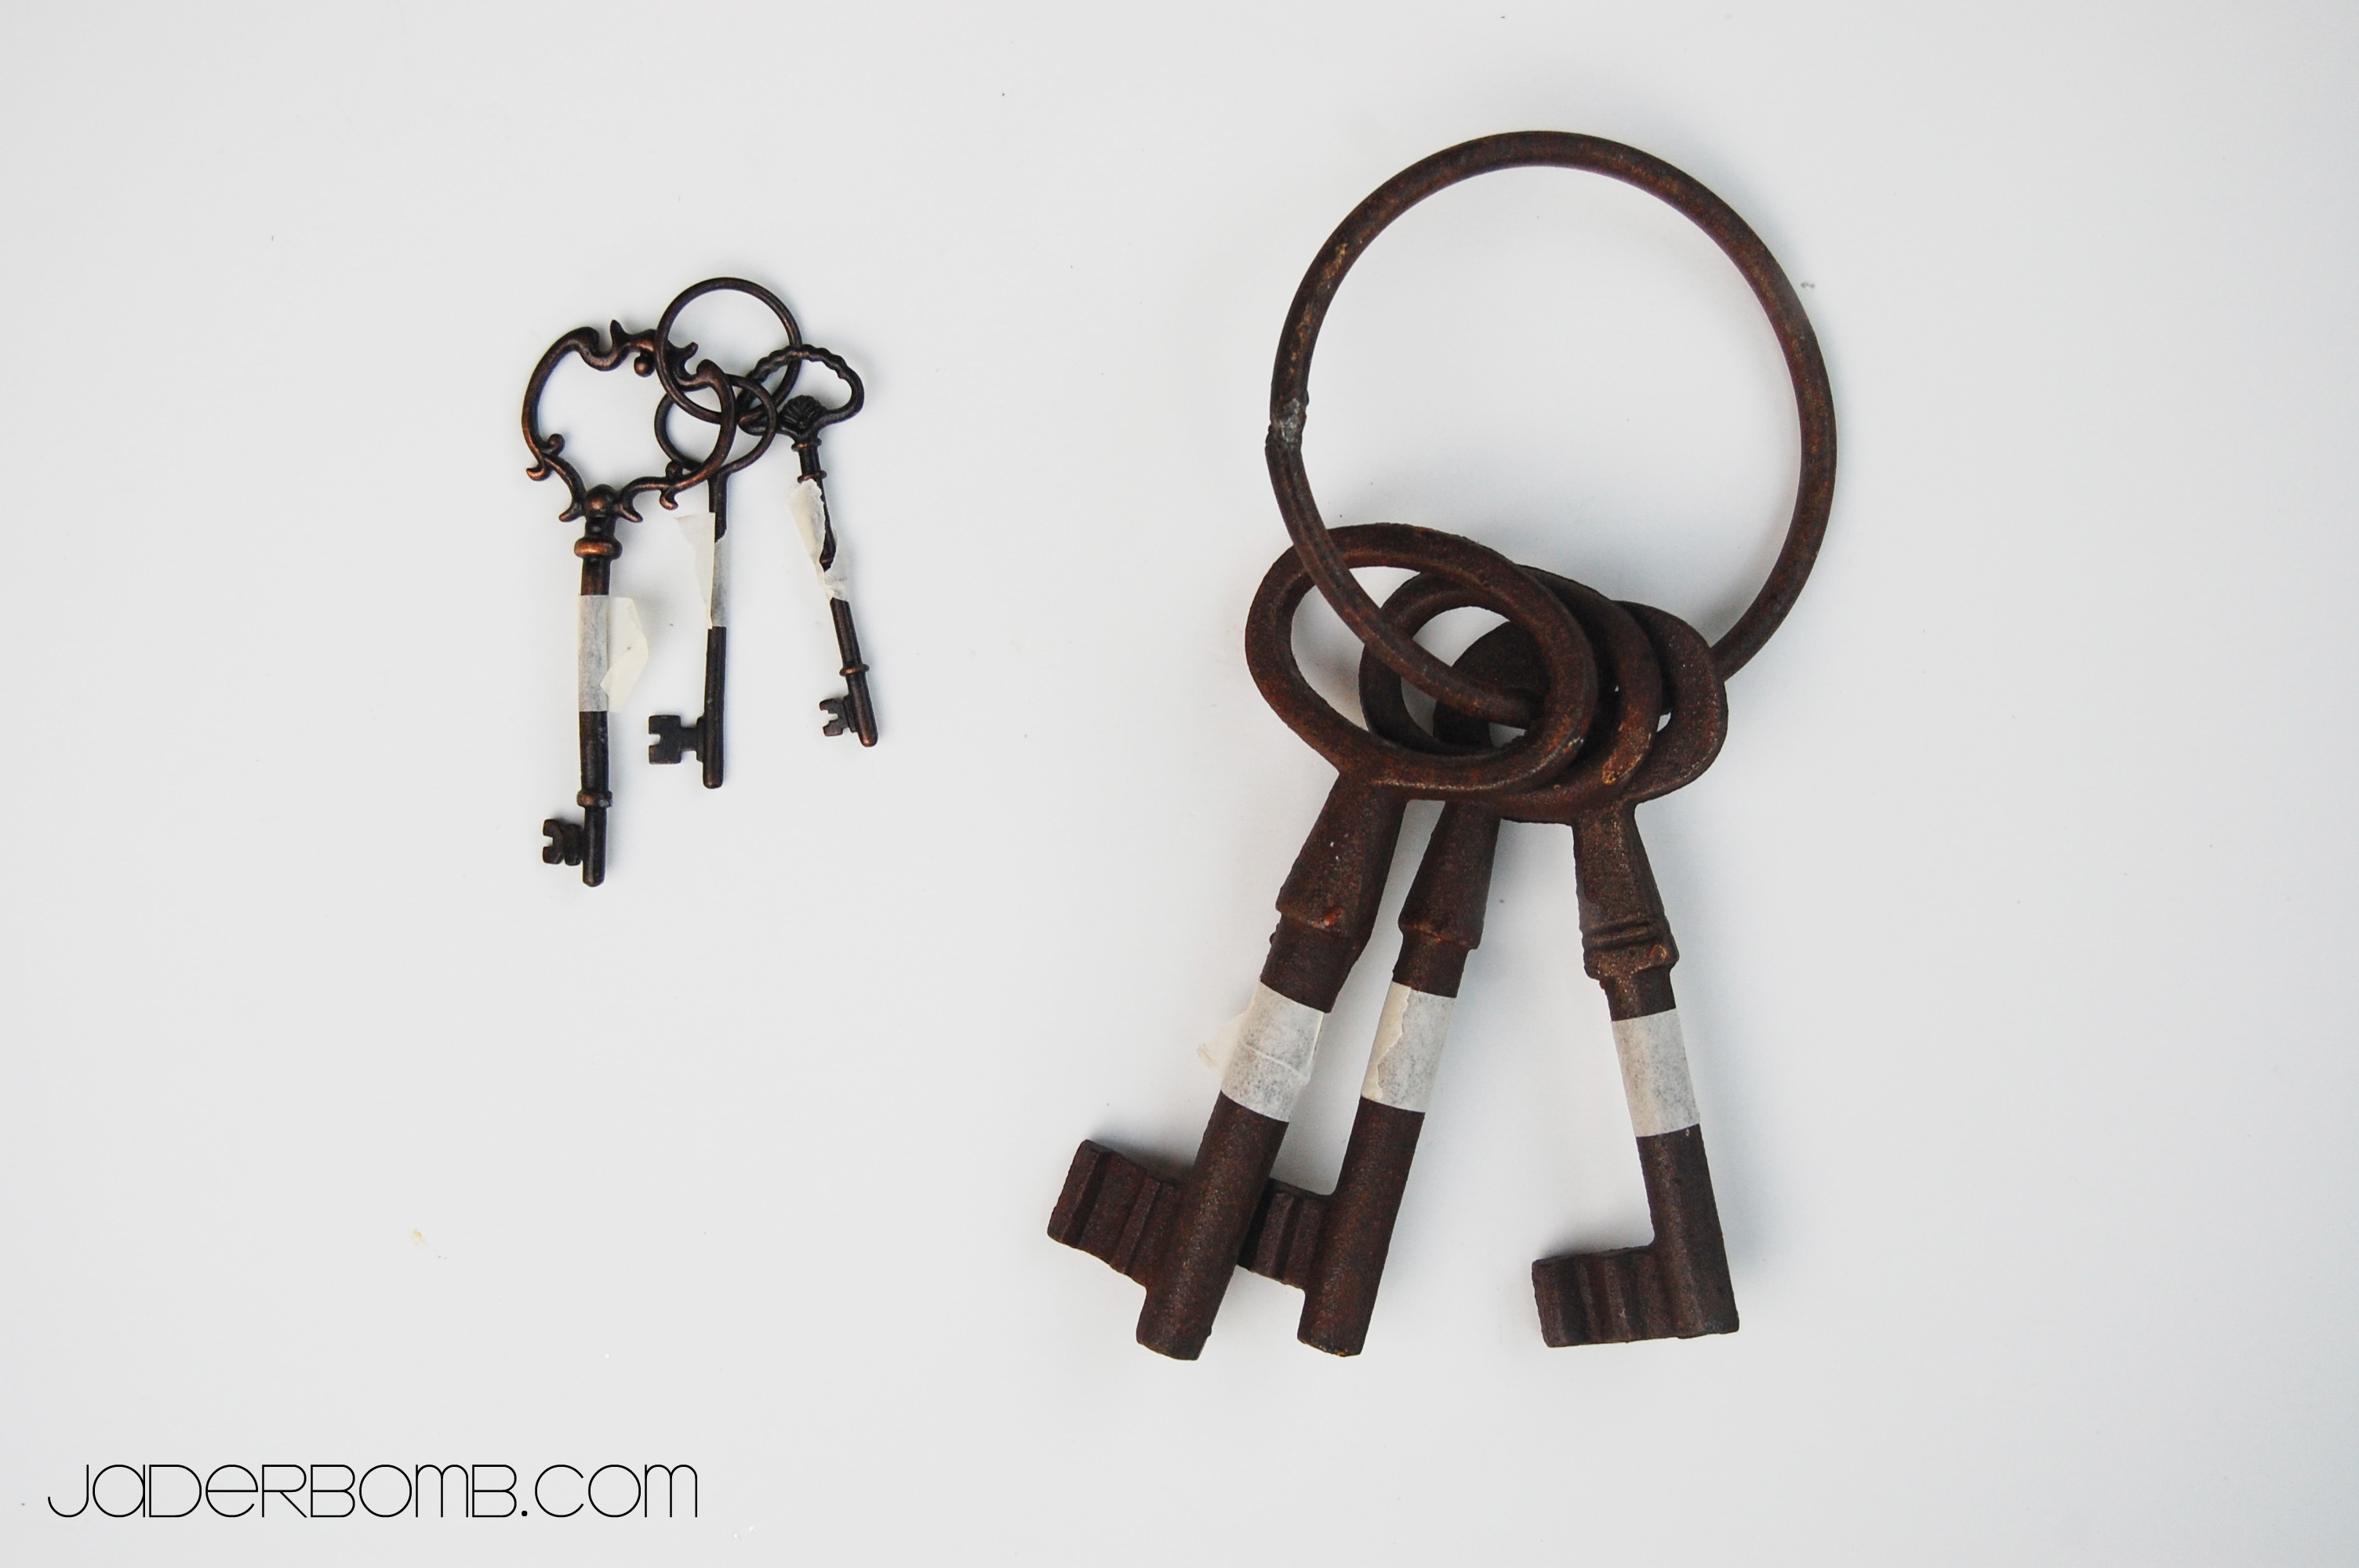
The first thing you will do is tear a piece of masking tape and put it around your object in one spot. You want to create a strong separation of the colors. This will do it for you. Once you do this, start painting. I am only painting one end of my key but if you wanted to do the other end you would wait for the gold to dry, tape it off then paint the other end. It’s really that simple.
You could also put paint into a cup and dip your items.
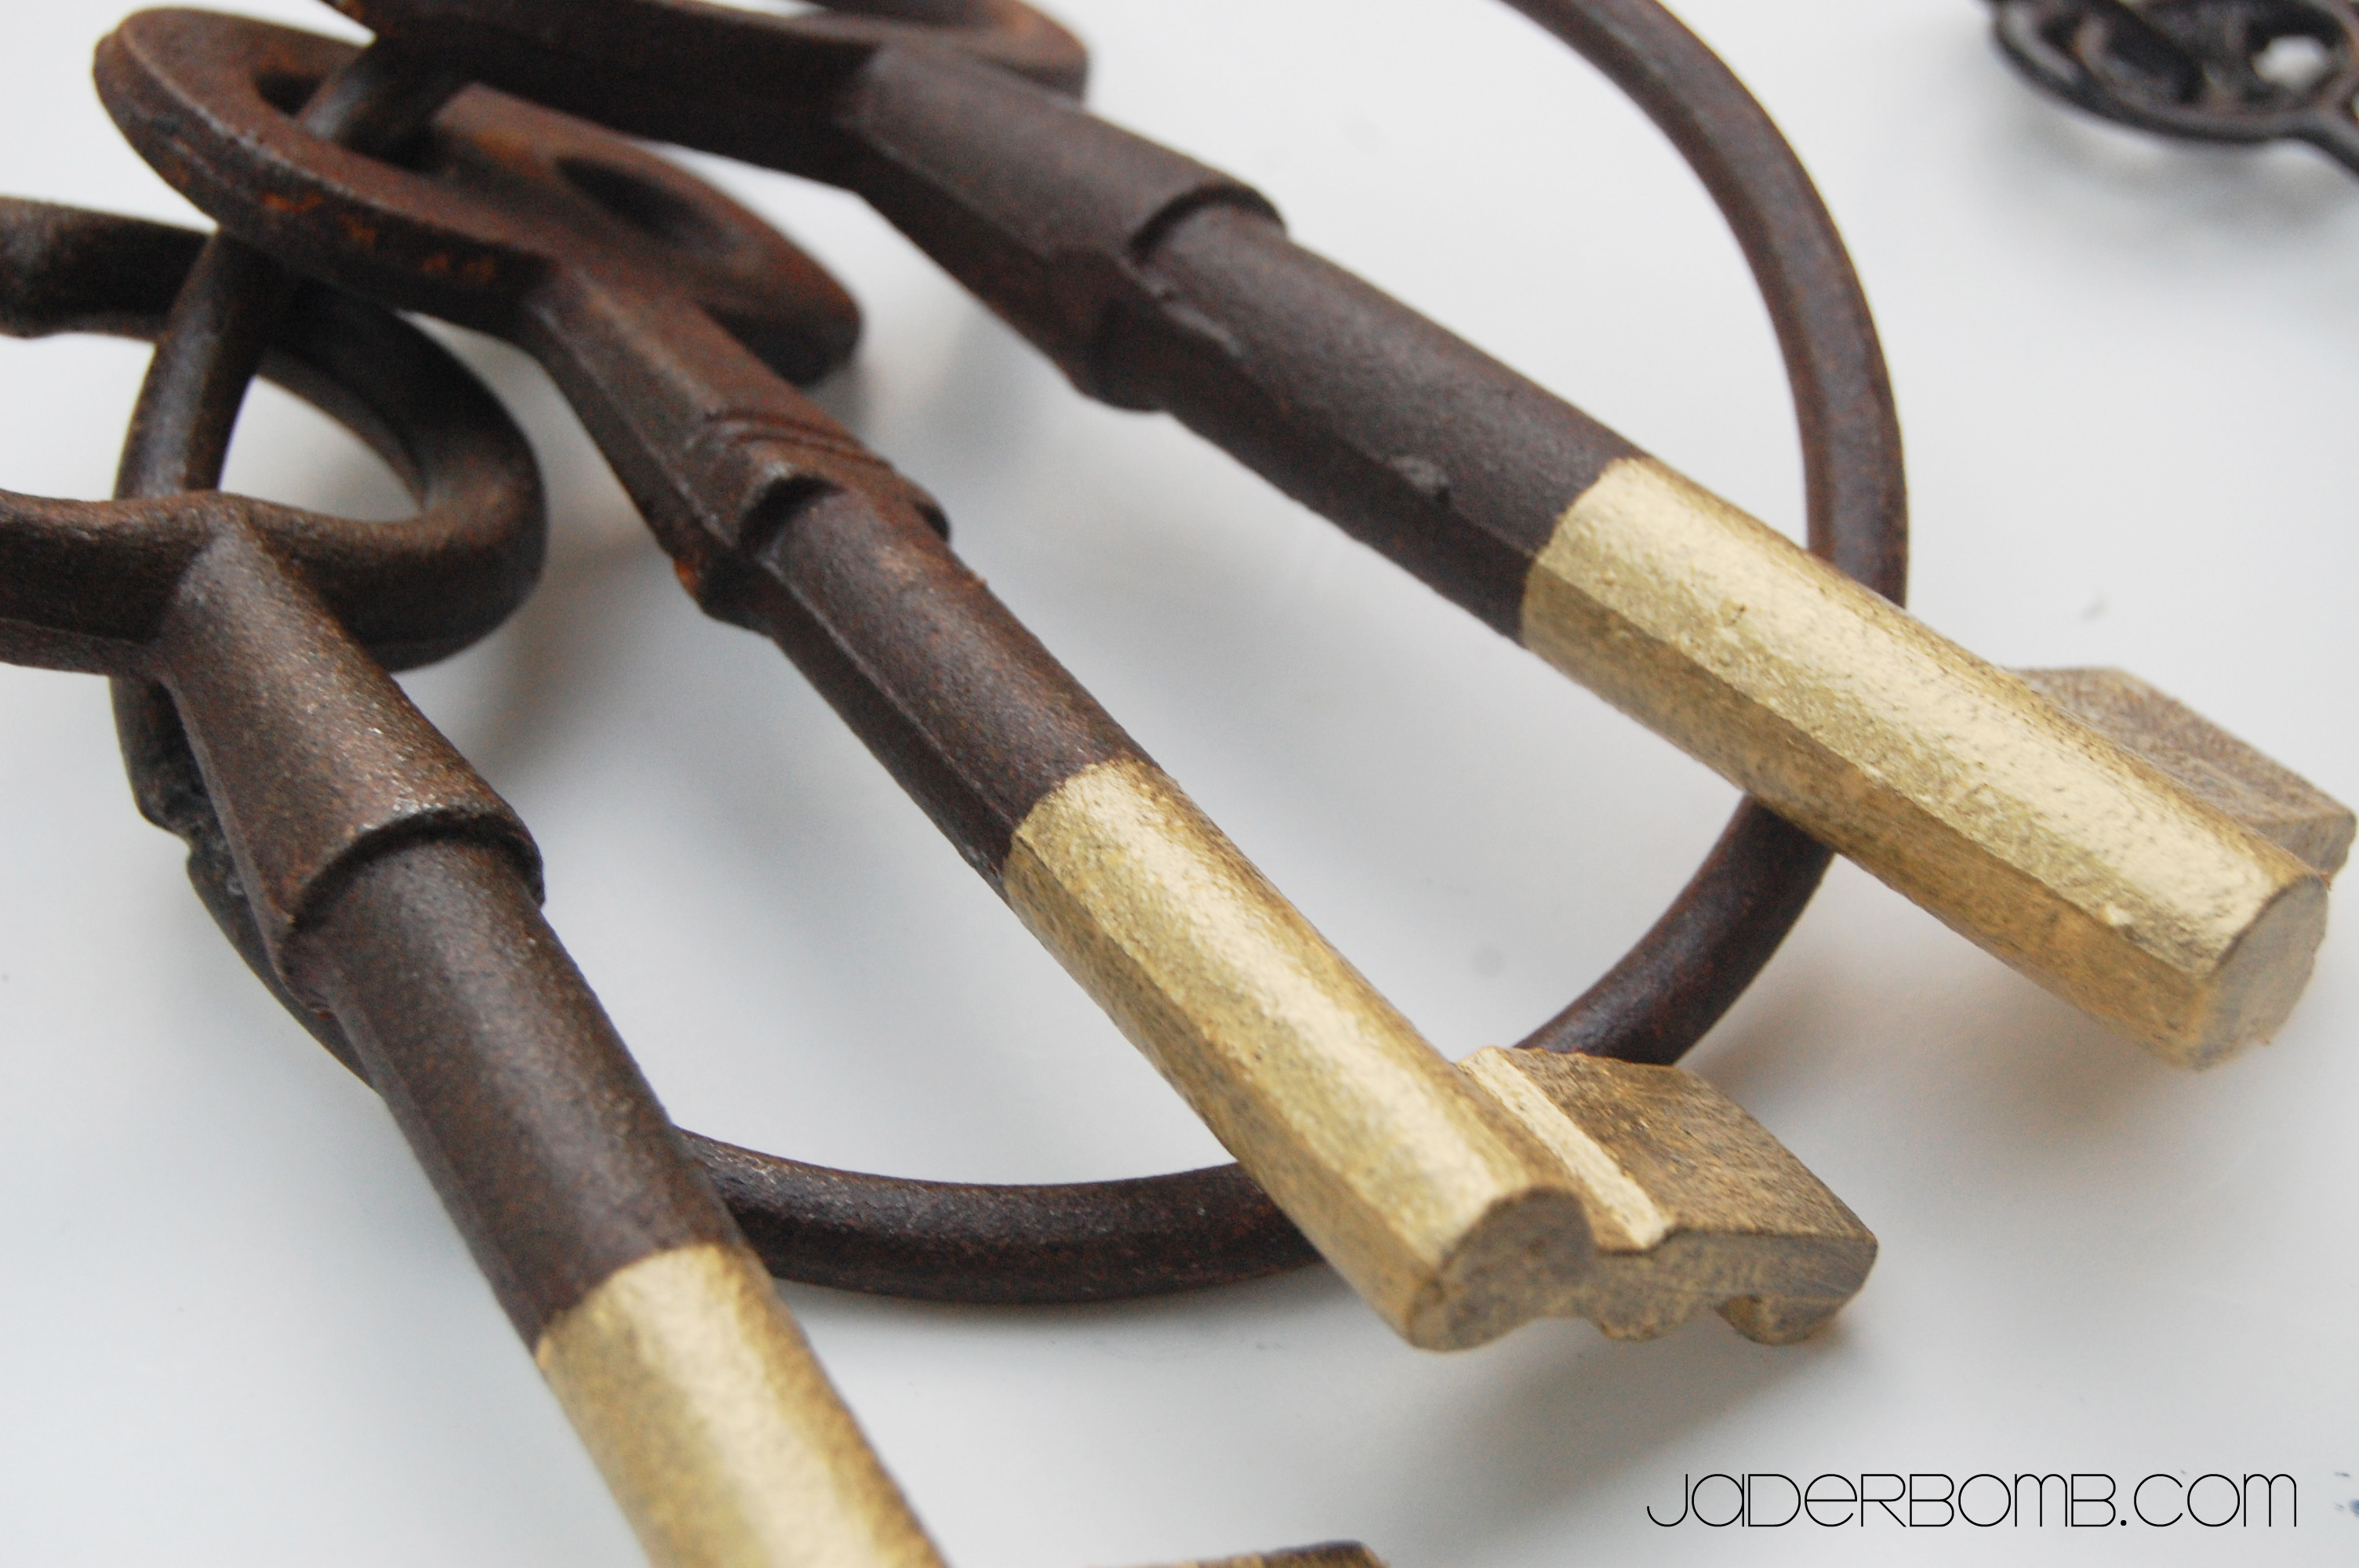
These are my keys now! They have a whole new look to them. I can display them again, yayyyyyy.

I also color blocked these mini keys. I wanted to make them POP so I threw on some fun glitter!

Then hung them from my cook book stand.

I think they came out great! I am already thinking of what colors will be next to the gold. I think HOT pink and Chartreuse!
Don’t forget to check out Meg’s hot spots, you will be happy there I promise! {fine, pinky promise}
THINGS COMING UP THIS WEEK:
*POST ON PUTTING IN OUR MOEN SINK
*INK BLOWN ART TUTORIAL
*VLOGG ON LAST MINUTE MARTHA STEWART CHRISTMAS PRODCUTS (FUN)
*SHABBY CHIC RED TABLE
*HOW TO MAKE AN UGLY CHRISTMAS SWEATER (VLOGG AND TUTORIAL)
Make it a DIY kinda day! See ya in the next post,
Hey There. I found your blog using msn. This is a really well written article.
I’ll be sure to bookmark it and come back to read more
of your useful info. Thanks for the post. I will certainly comeback.