Tag Archives: home decor

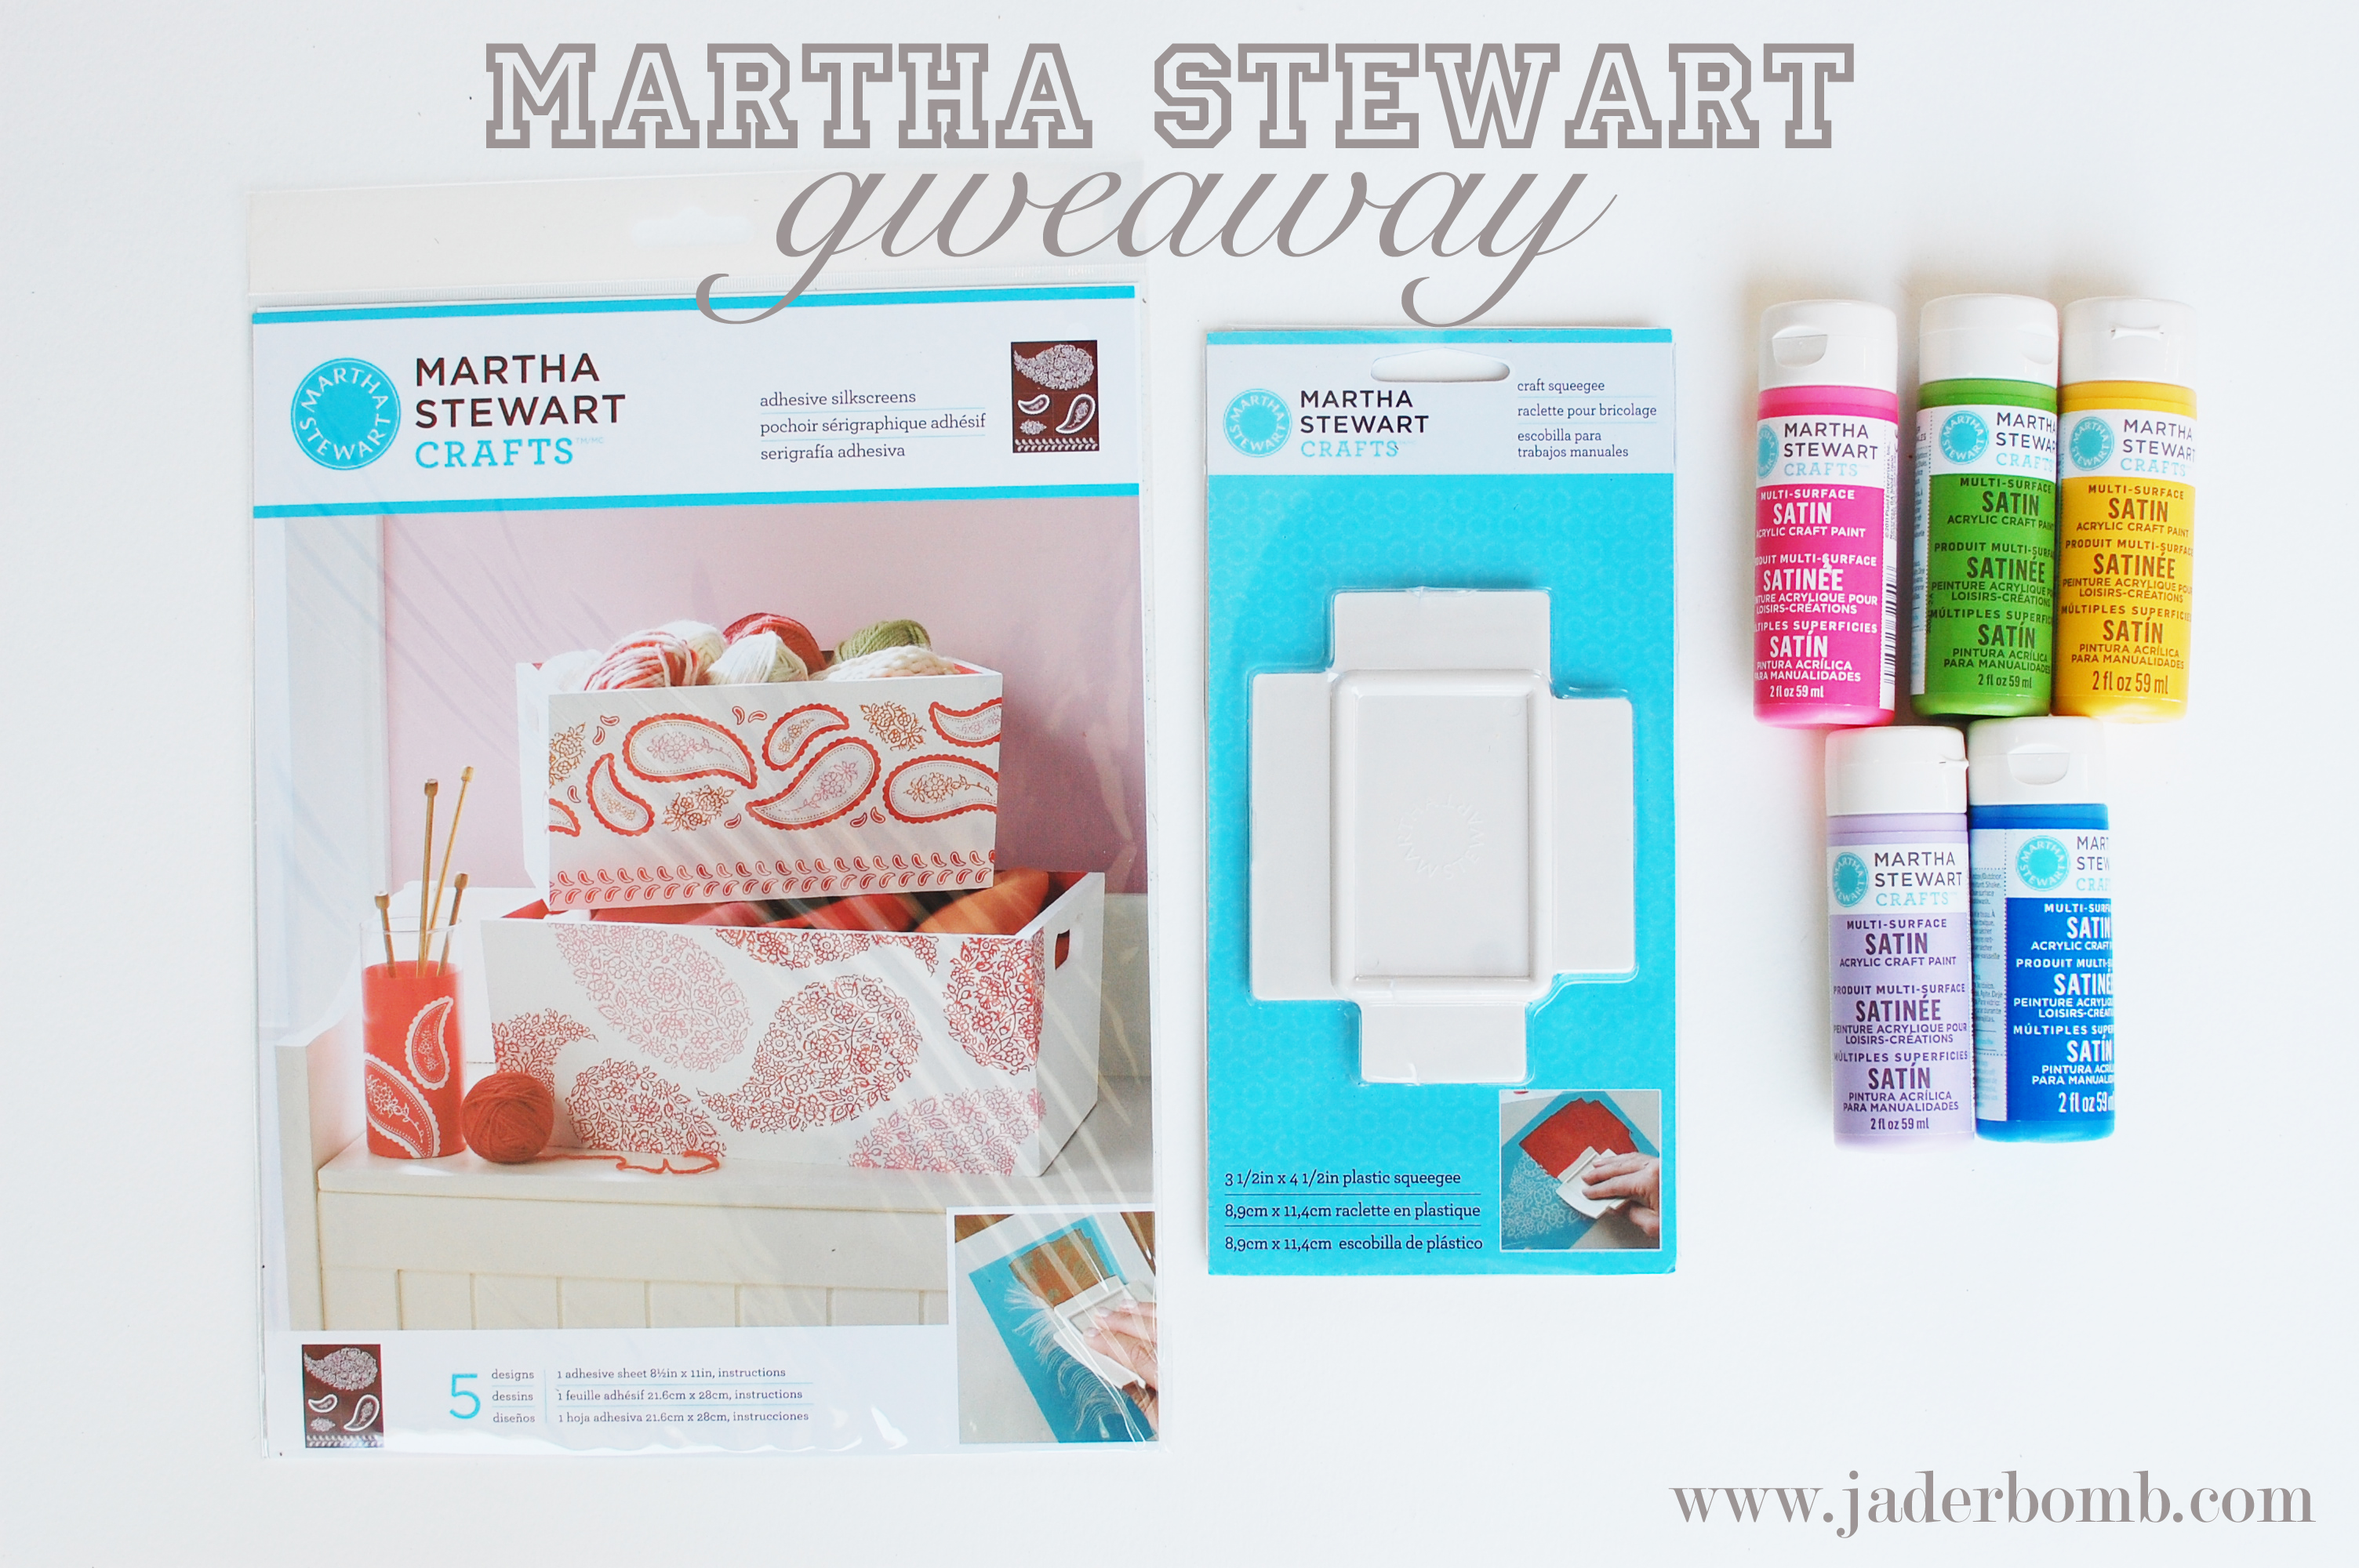
Happy 12 month’s of MARTHA! I am so glad you are here and I know you will love the tutorial I am sharing and the giveaway I am doing!  This month’s box of goodies made me smile from ear to ear. I especially loved the floral paisley adhesive silk screens.  Trust me when you use them you will become addicted. I made some fancy apothecary jars using them. Martha always knows what I love.
Let’s get started. 

Oh, if you are not familiar with the 12 months of Martha let me tell you about it.

I will be sharing a new project each month using Martha Stewart Crafts.
#12monthsofmartha & #marthastewartcrafts <——(this is the hashtag you can use if you repin this or want to see other’s who are a part of this project)

I am super giddy about it and I think you will too. Each month you will get to see new items from the Martha Stewart crafts line that is brand spanking new~

So yes! You will be seeing things that are not yet in the stores…

You can find all of her products at Michael’s Arts and Crafts, Jo-Anns Fabrics & Crafts and Amazon.com.

I’ll be giving away Martha swag monthly – so be sure to subscribe to my email updates… —–> LOOK AT THE TOP RIGHT!

Martha-Stewart-Giveaway-APOTHECARY-jars-jaderbomb

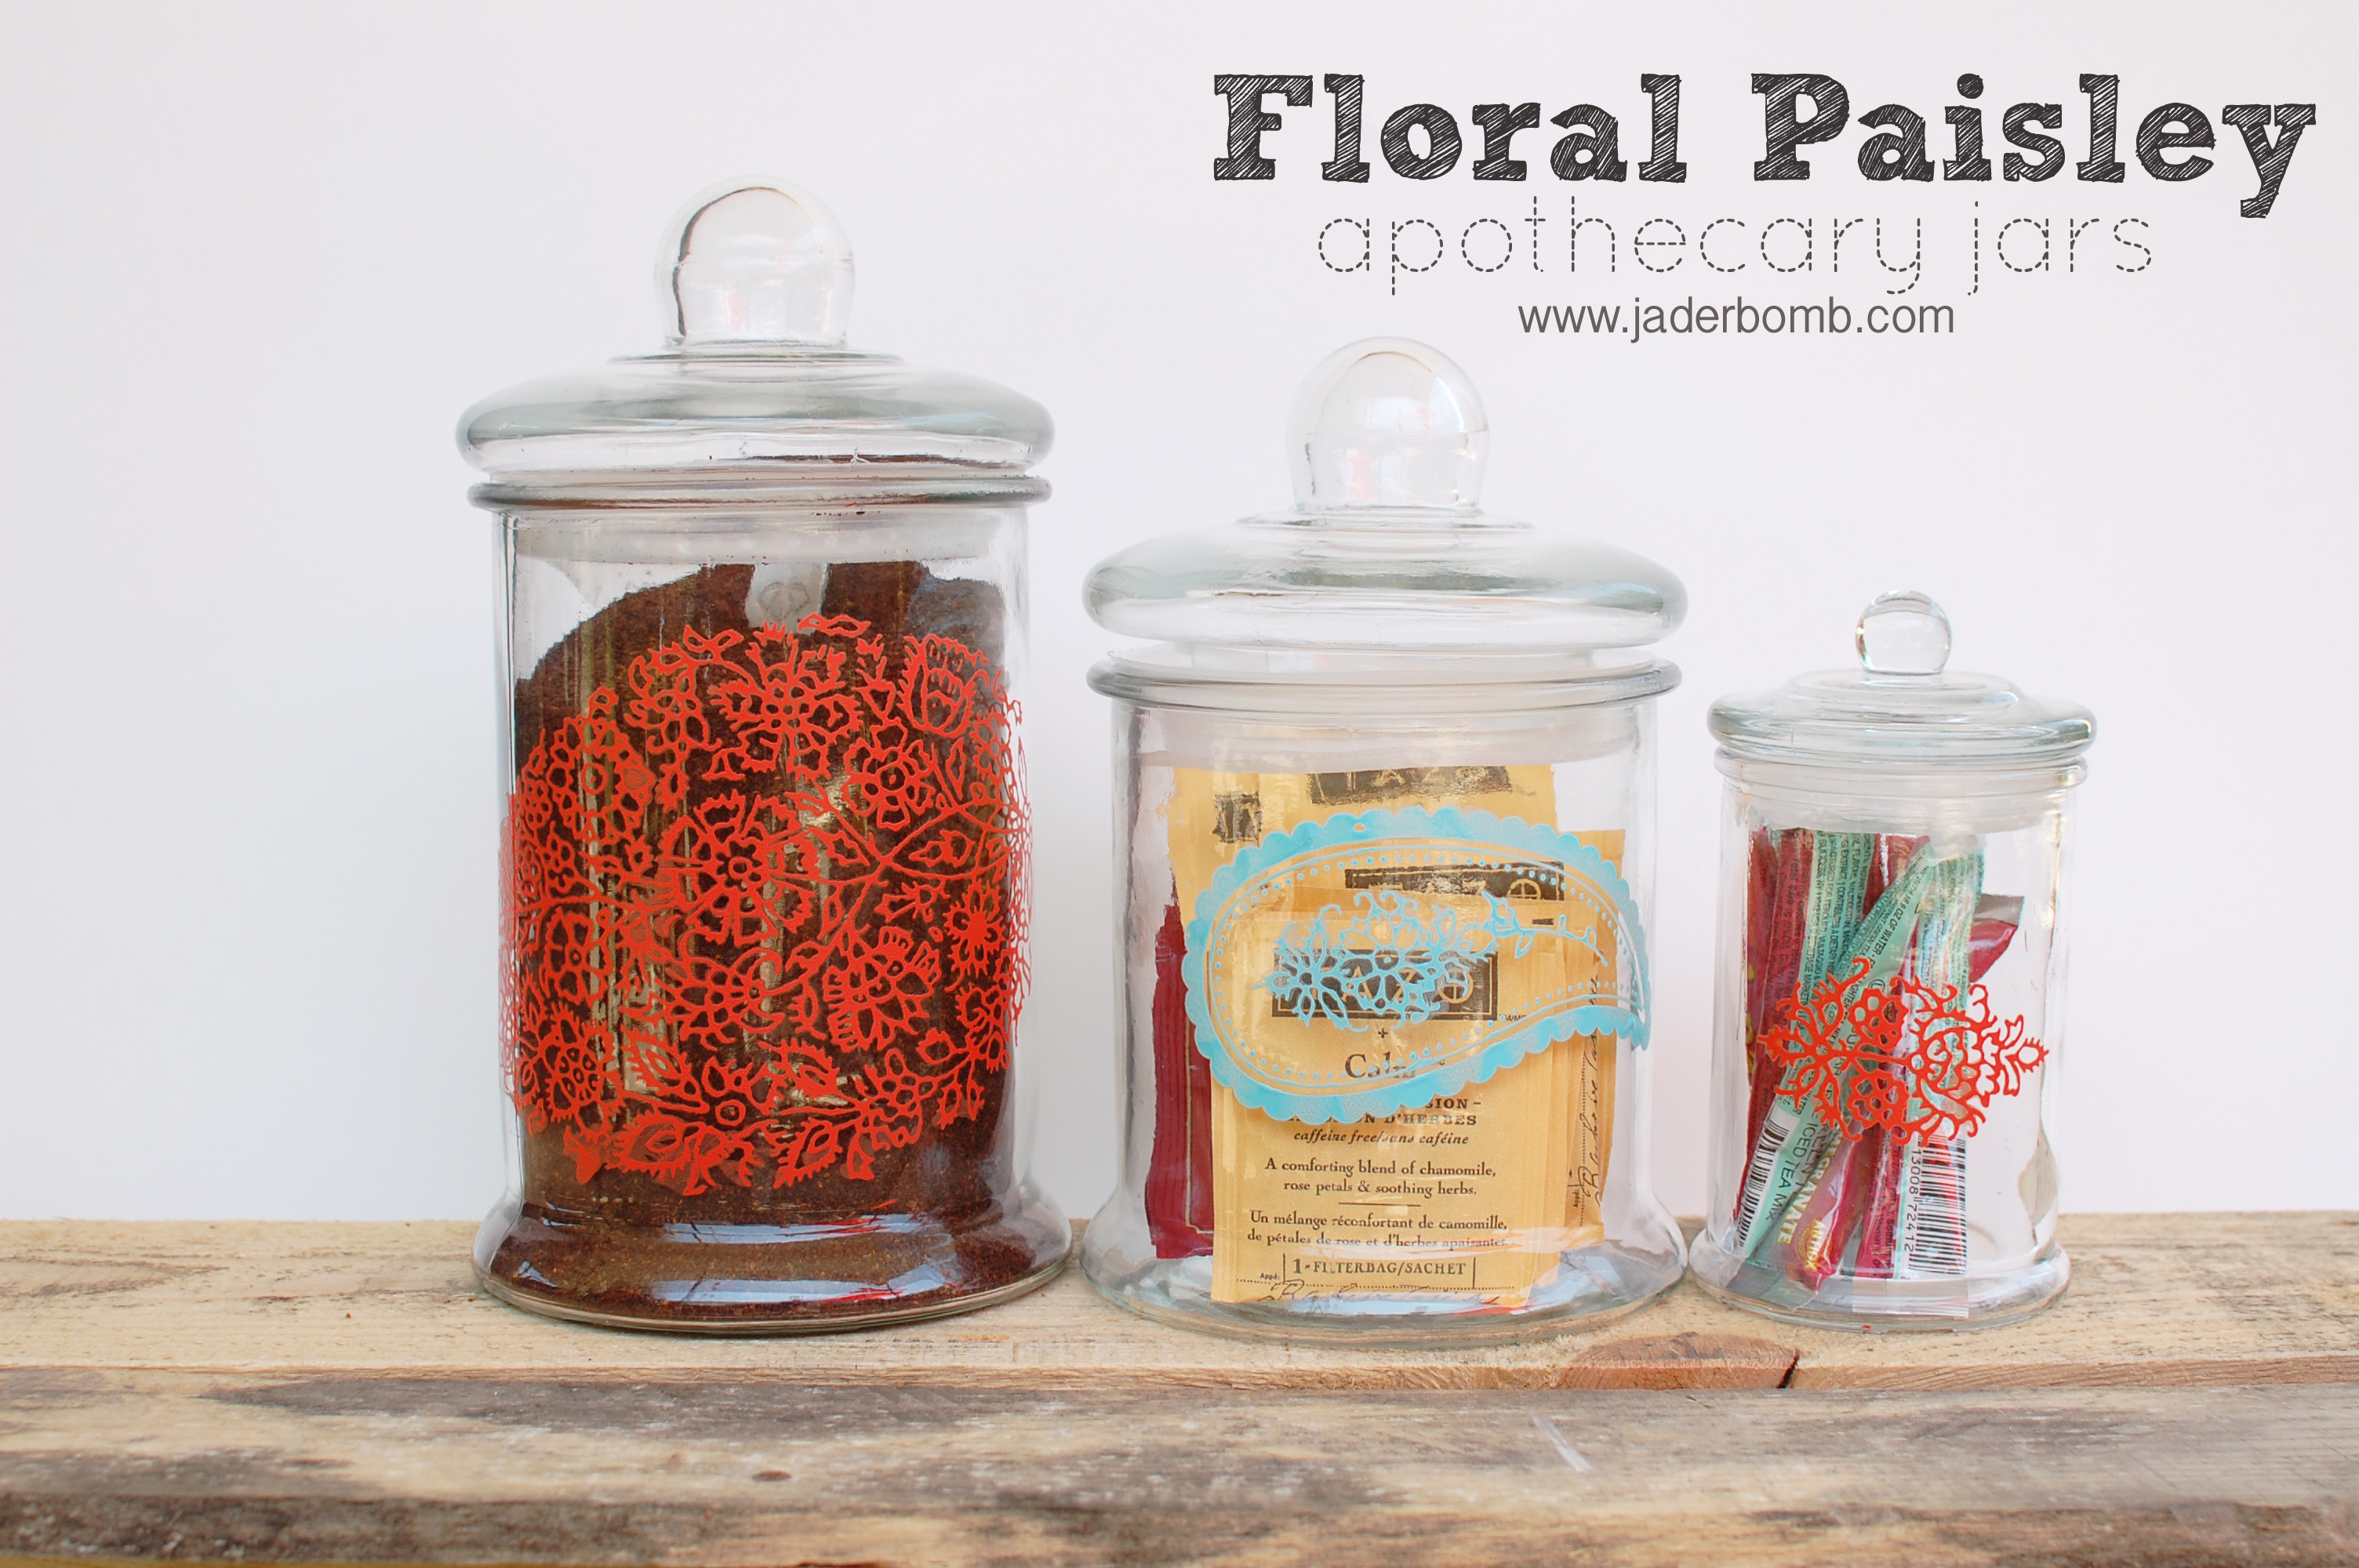
 How simple, cute and elegant are these apothecary jars?! Seriously, these would look great in any room. I made them for my kitchen and I filled them with coffee, tea and pomegranate powder for my water.
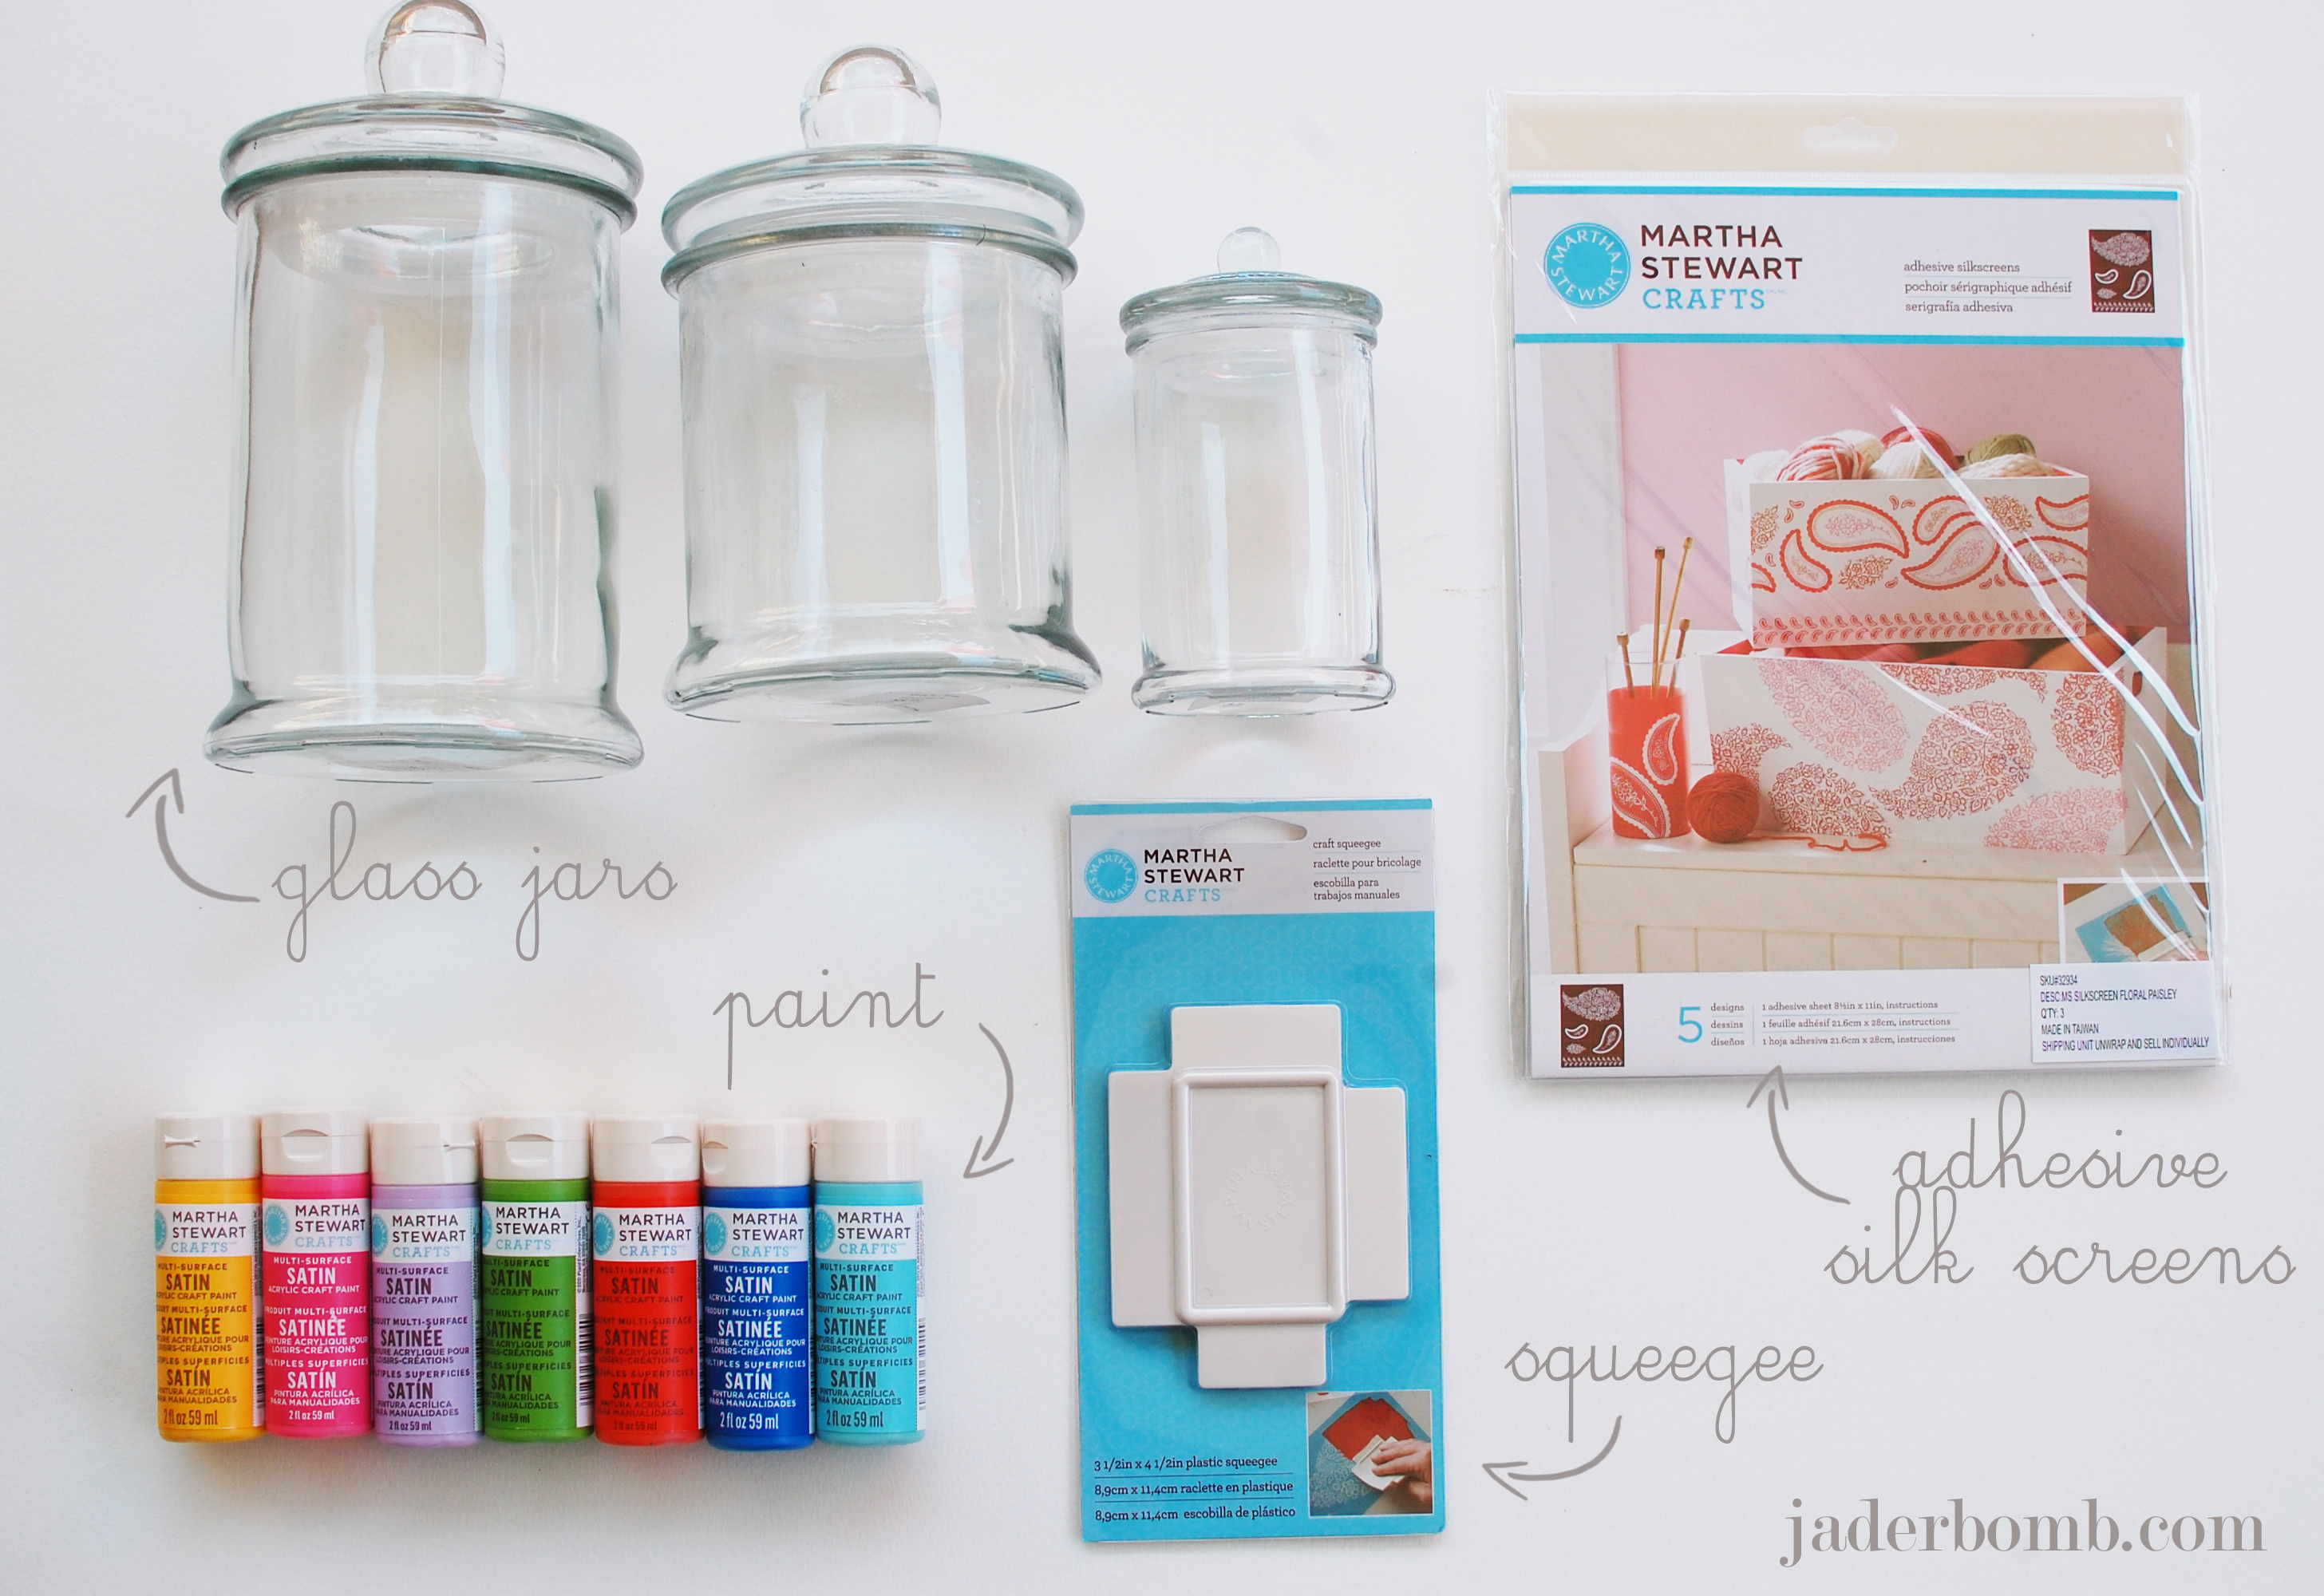
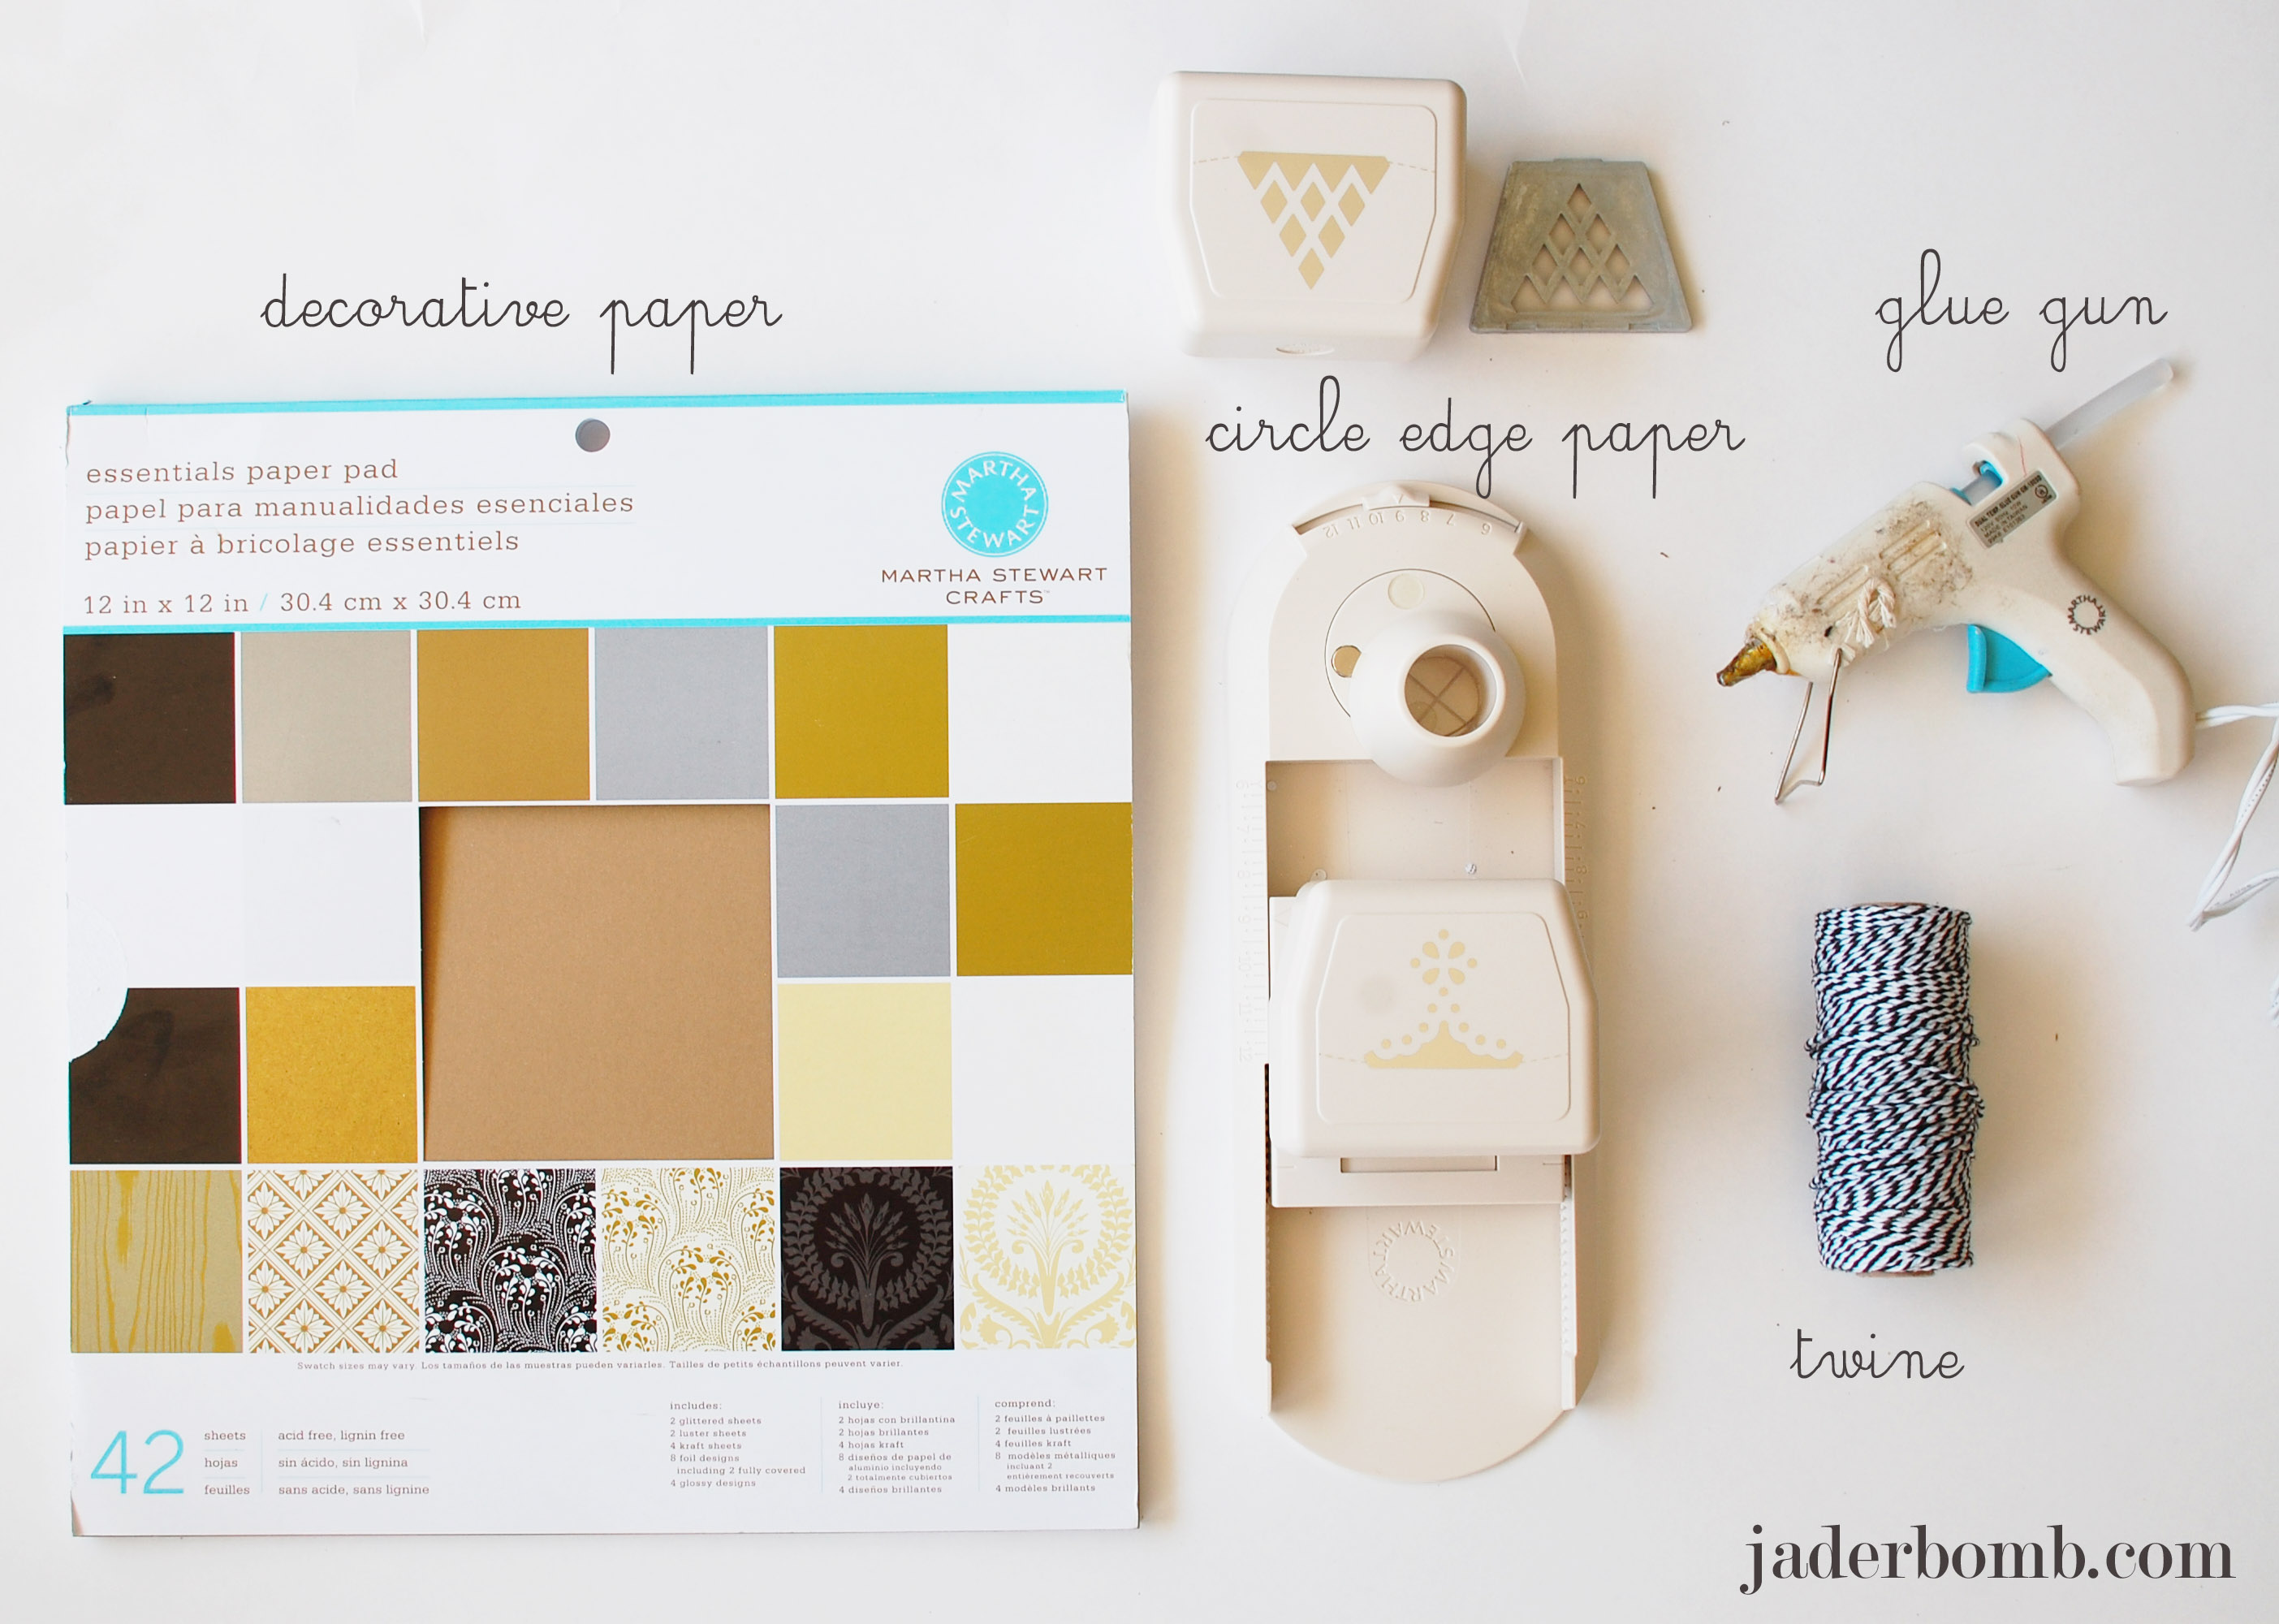
Martha-Stewart-Giveaway-APOTHECARY-jars-jaderbomb

 You will need:

*APOTHECARY JARS
*MARTHA STEWART SATIN CRAFT PAINT
*MARTHA STEWART SQUEEGEE
*MARTHA STEWART FLORAL PAISLEY SILK SCREENS
*LOTSA LOVE

You can purchase all of the above supplies by clicking on the links.

Martha-Stewart-Giveaway-APOTHECARY-jars-jaderbomb

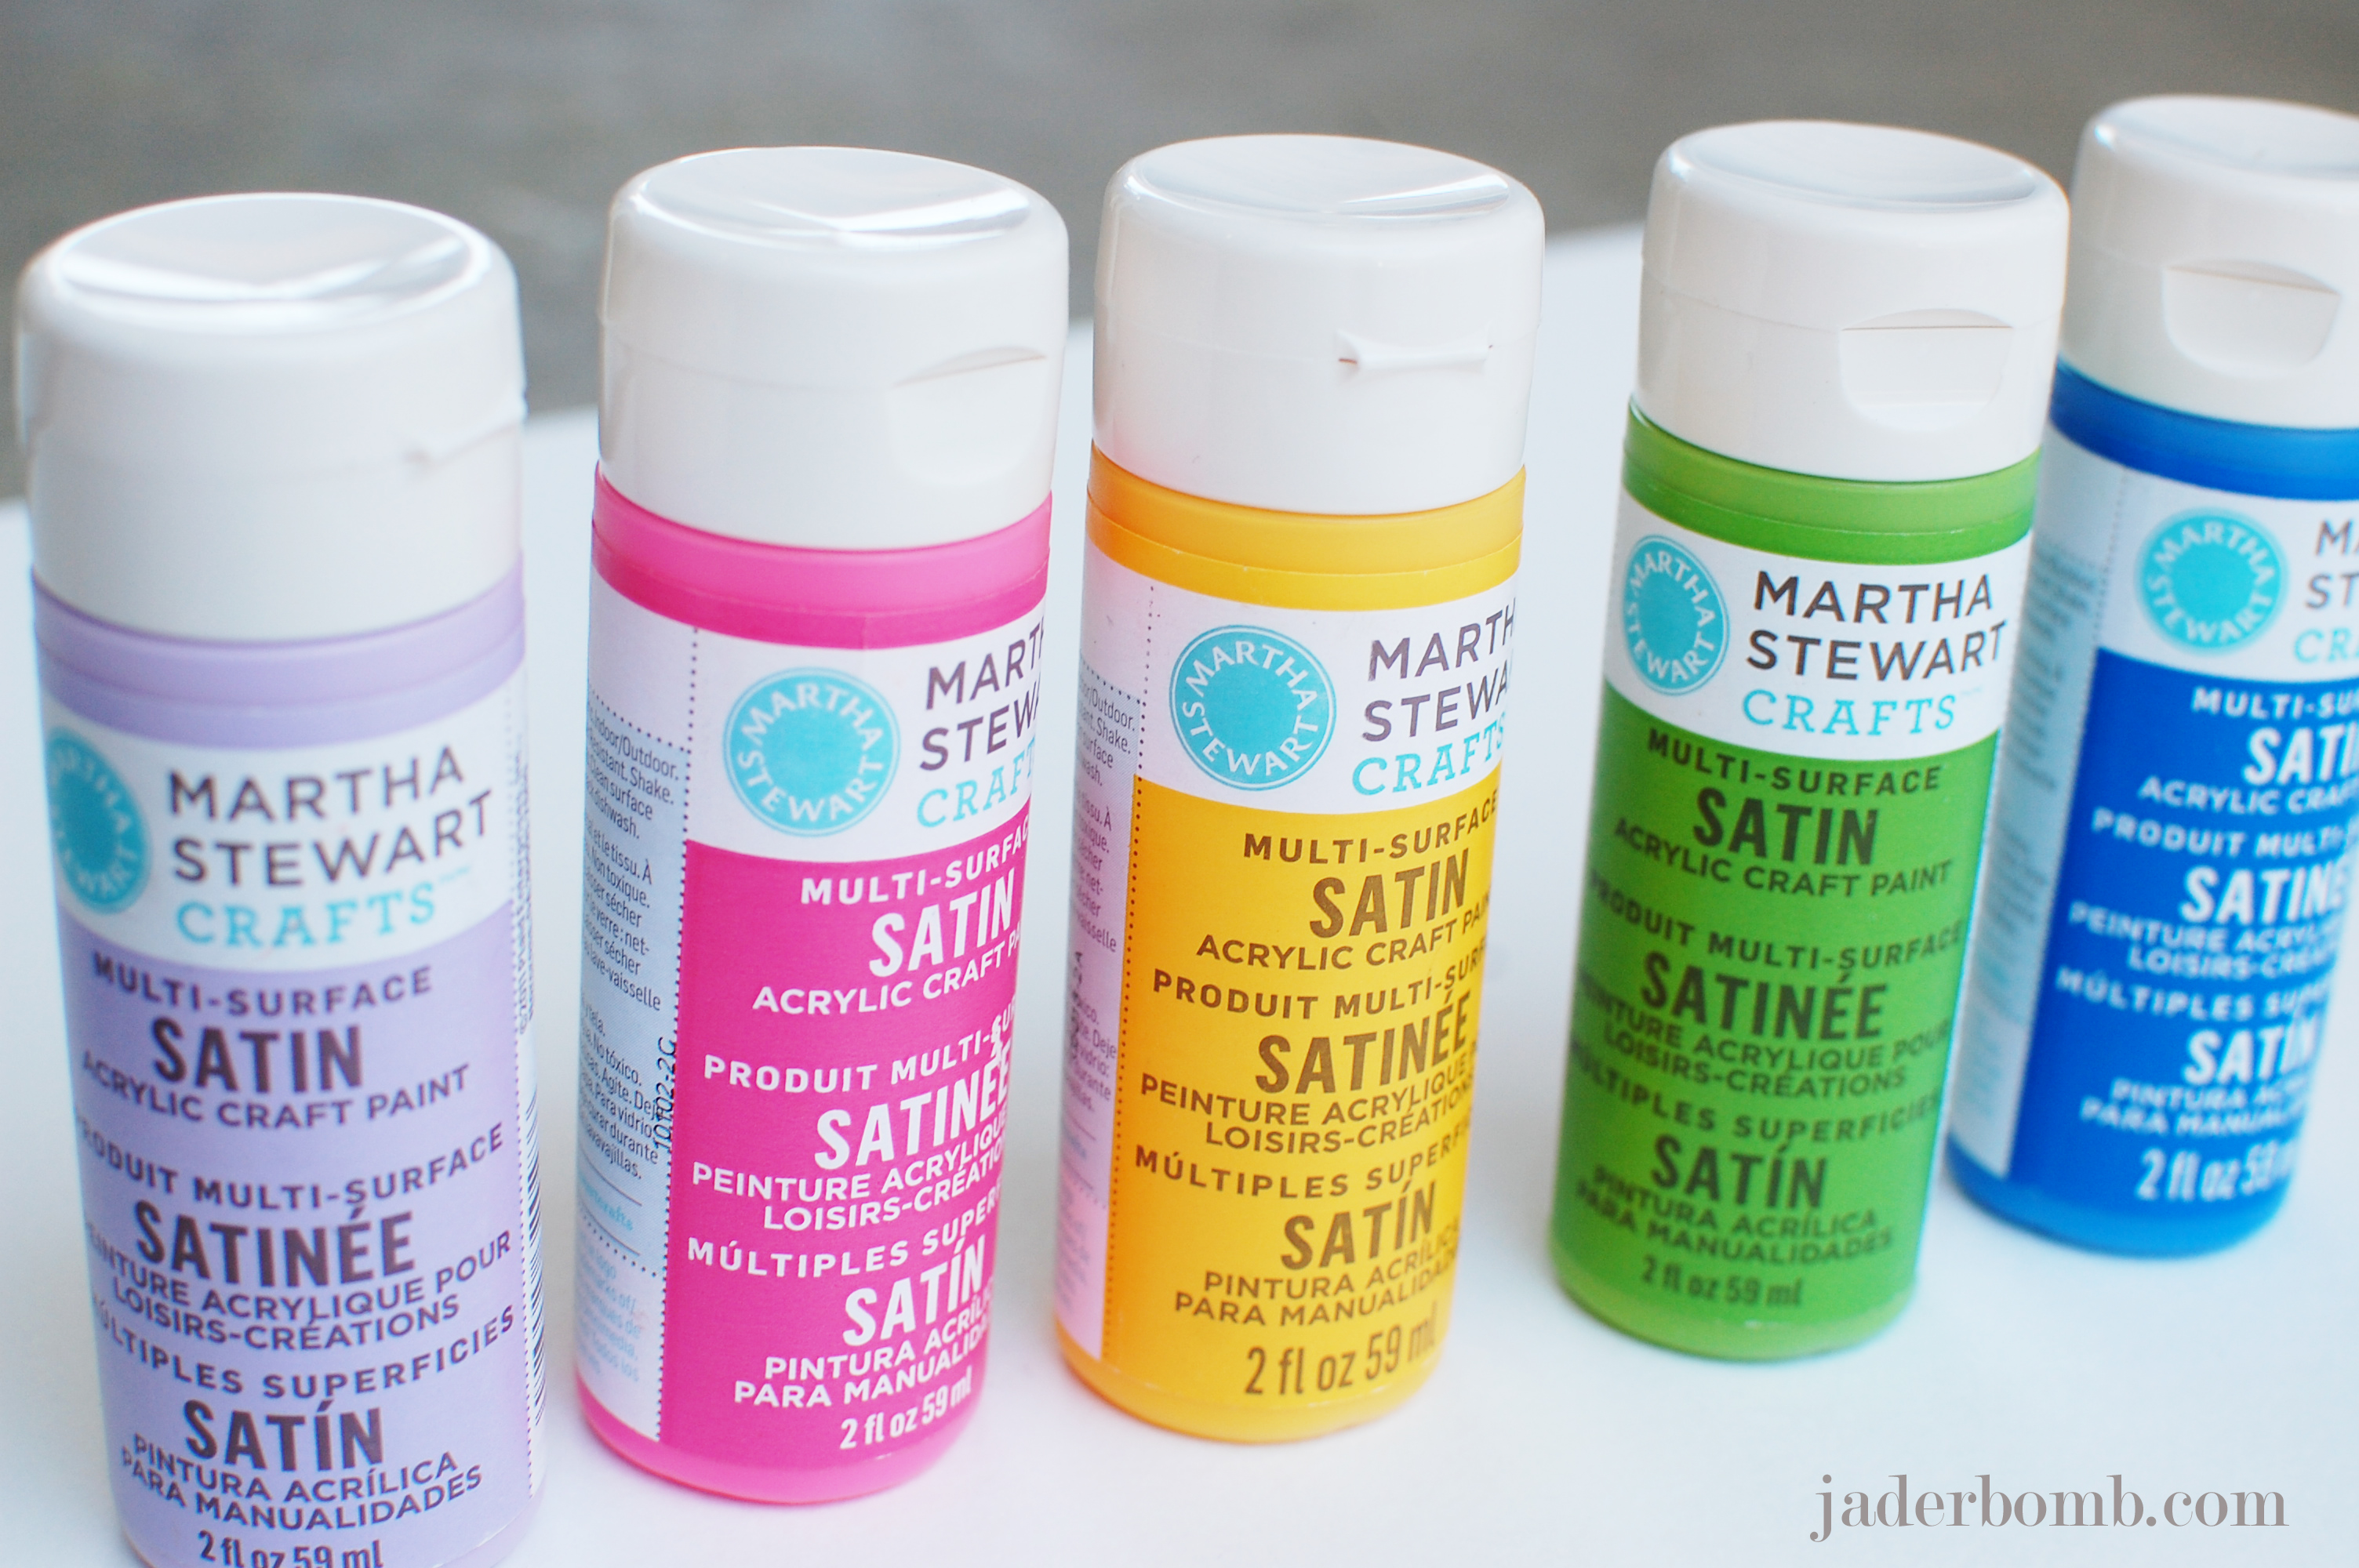
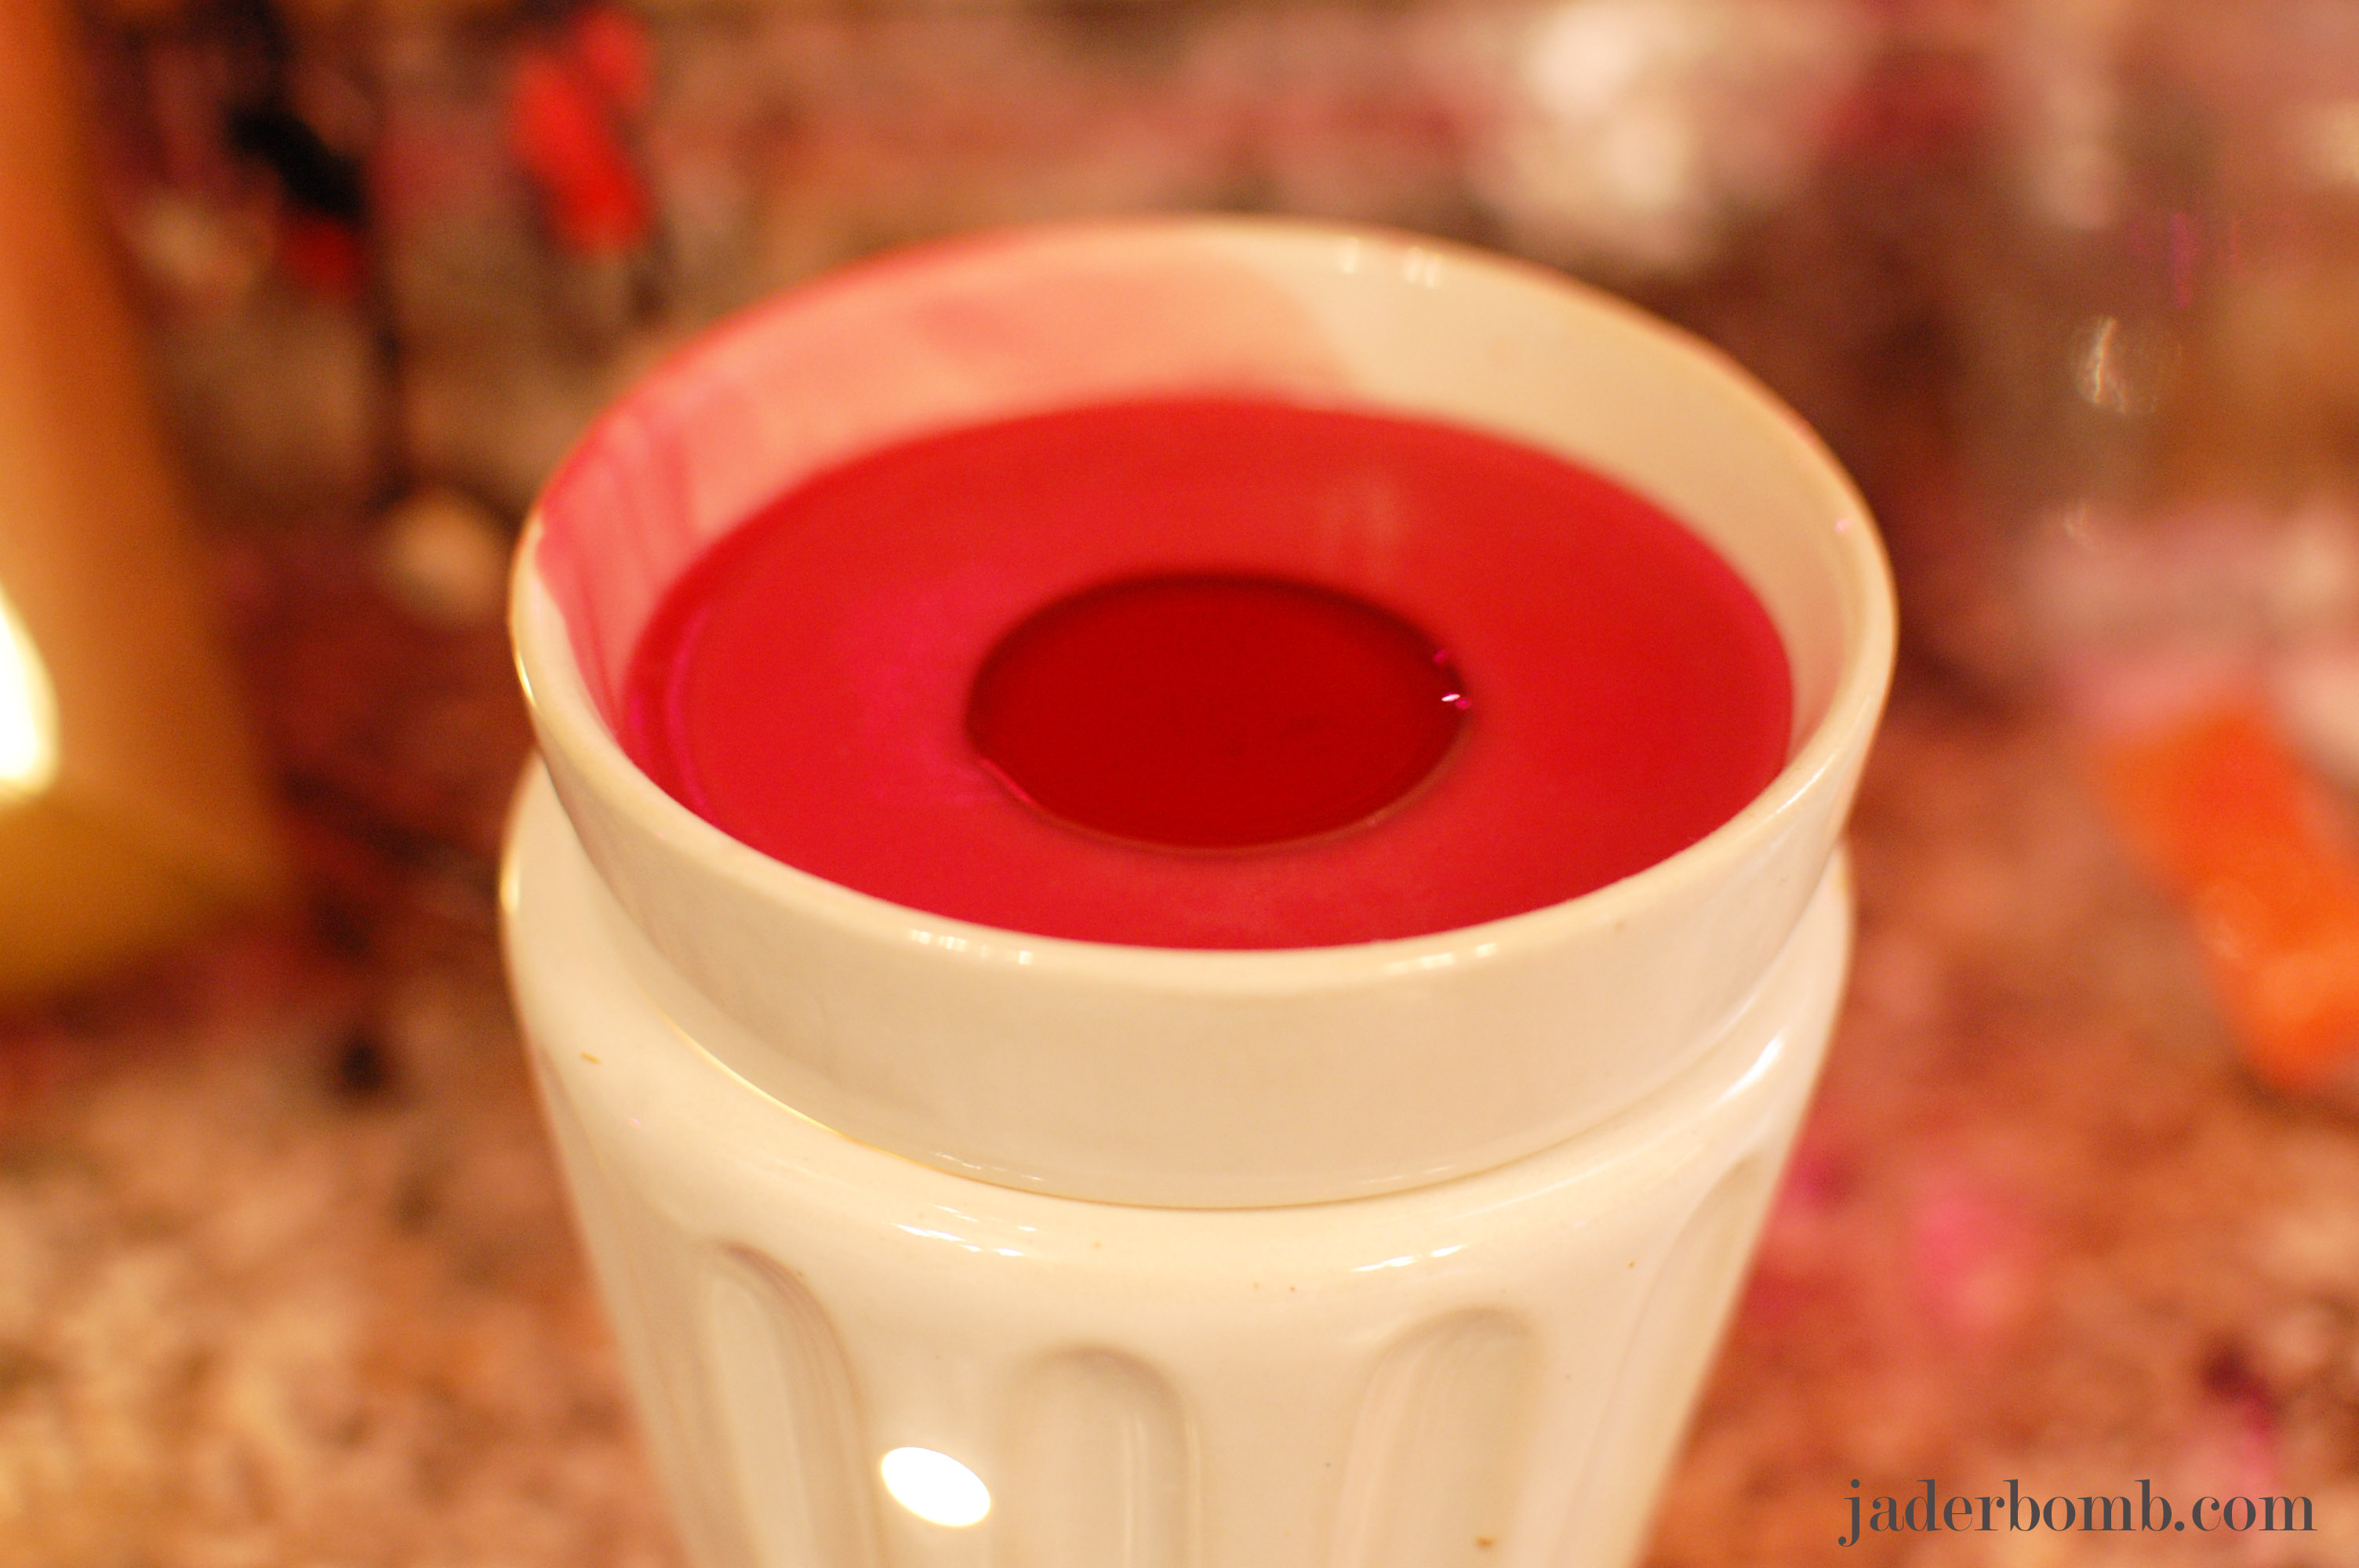
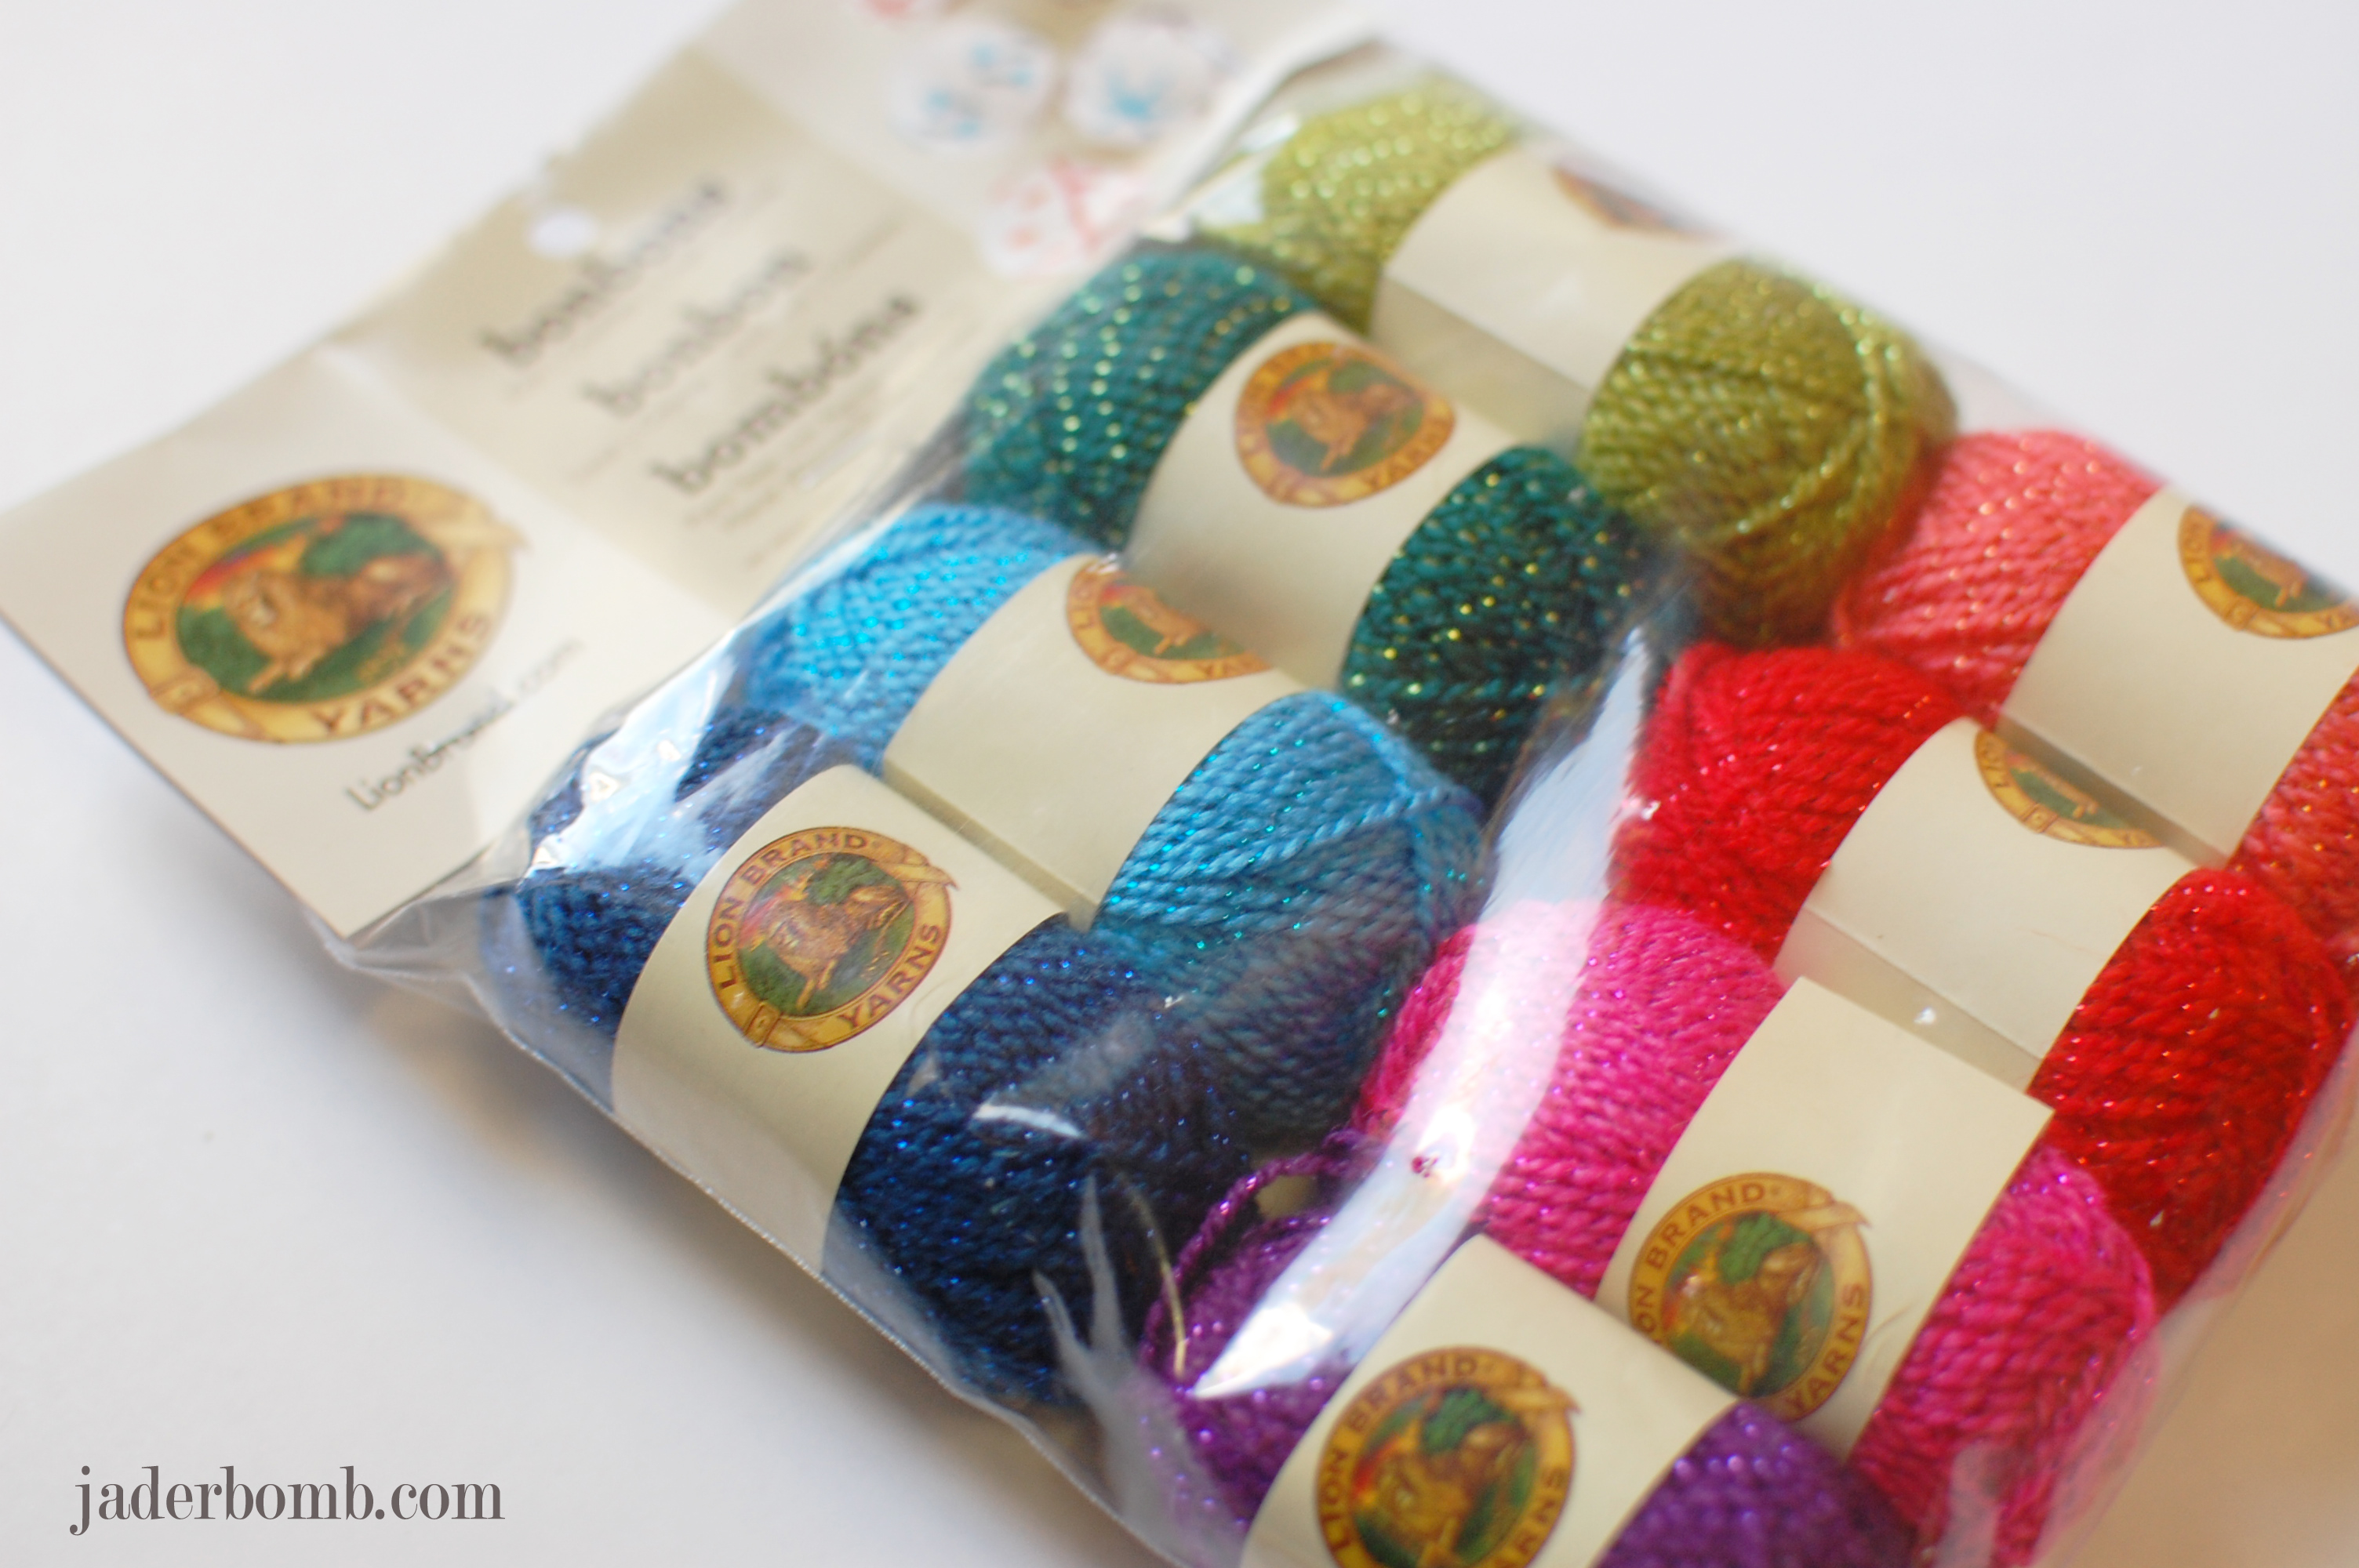
 Don’t you just love these great colors. Someday’s when I feel down I just go in my studio and look through my tubes of paint. They are filled with happiness I tell ya.  For this project I used Geranium and Pool.
(colors of paint)

 Martha-Stewart-Giveaway-APOTHECARY-jars-jaderbomb

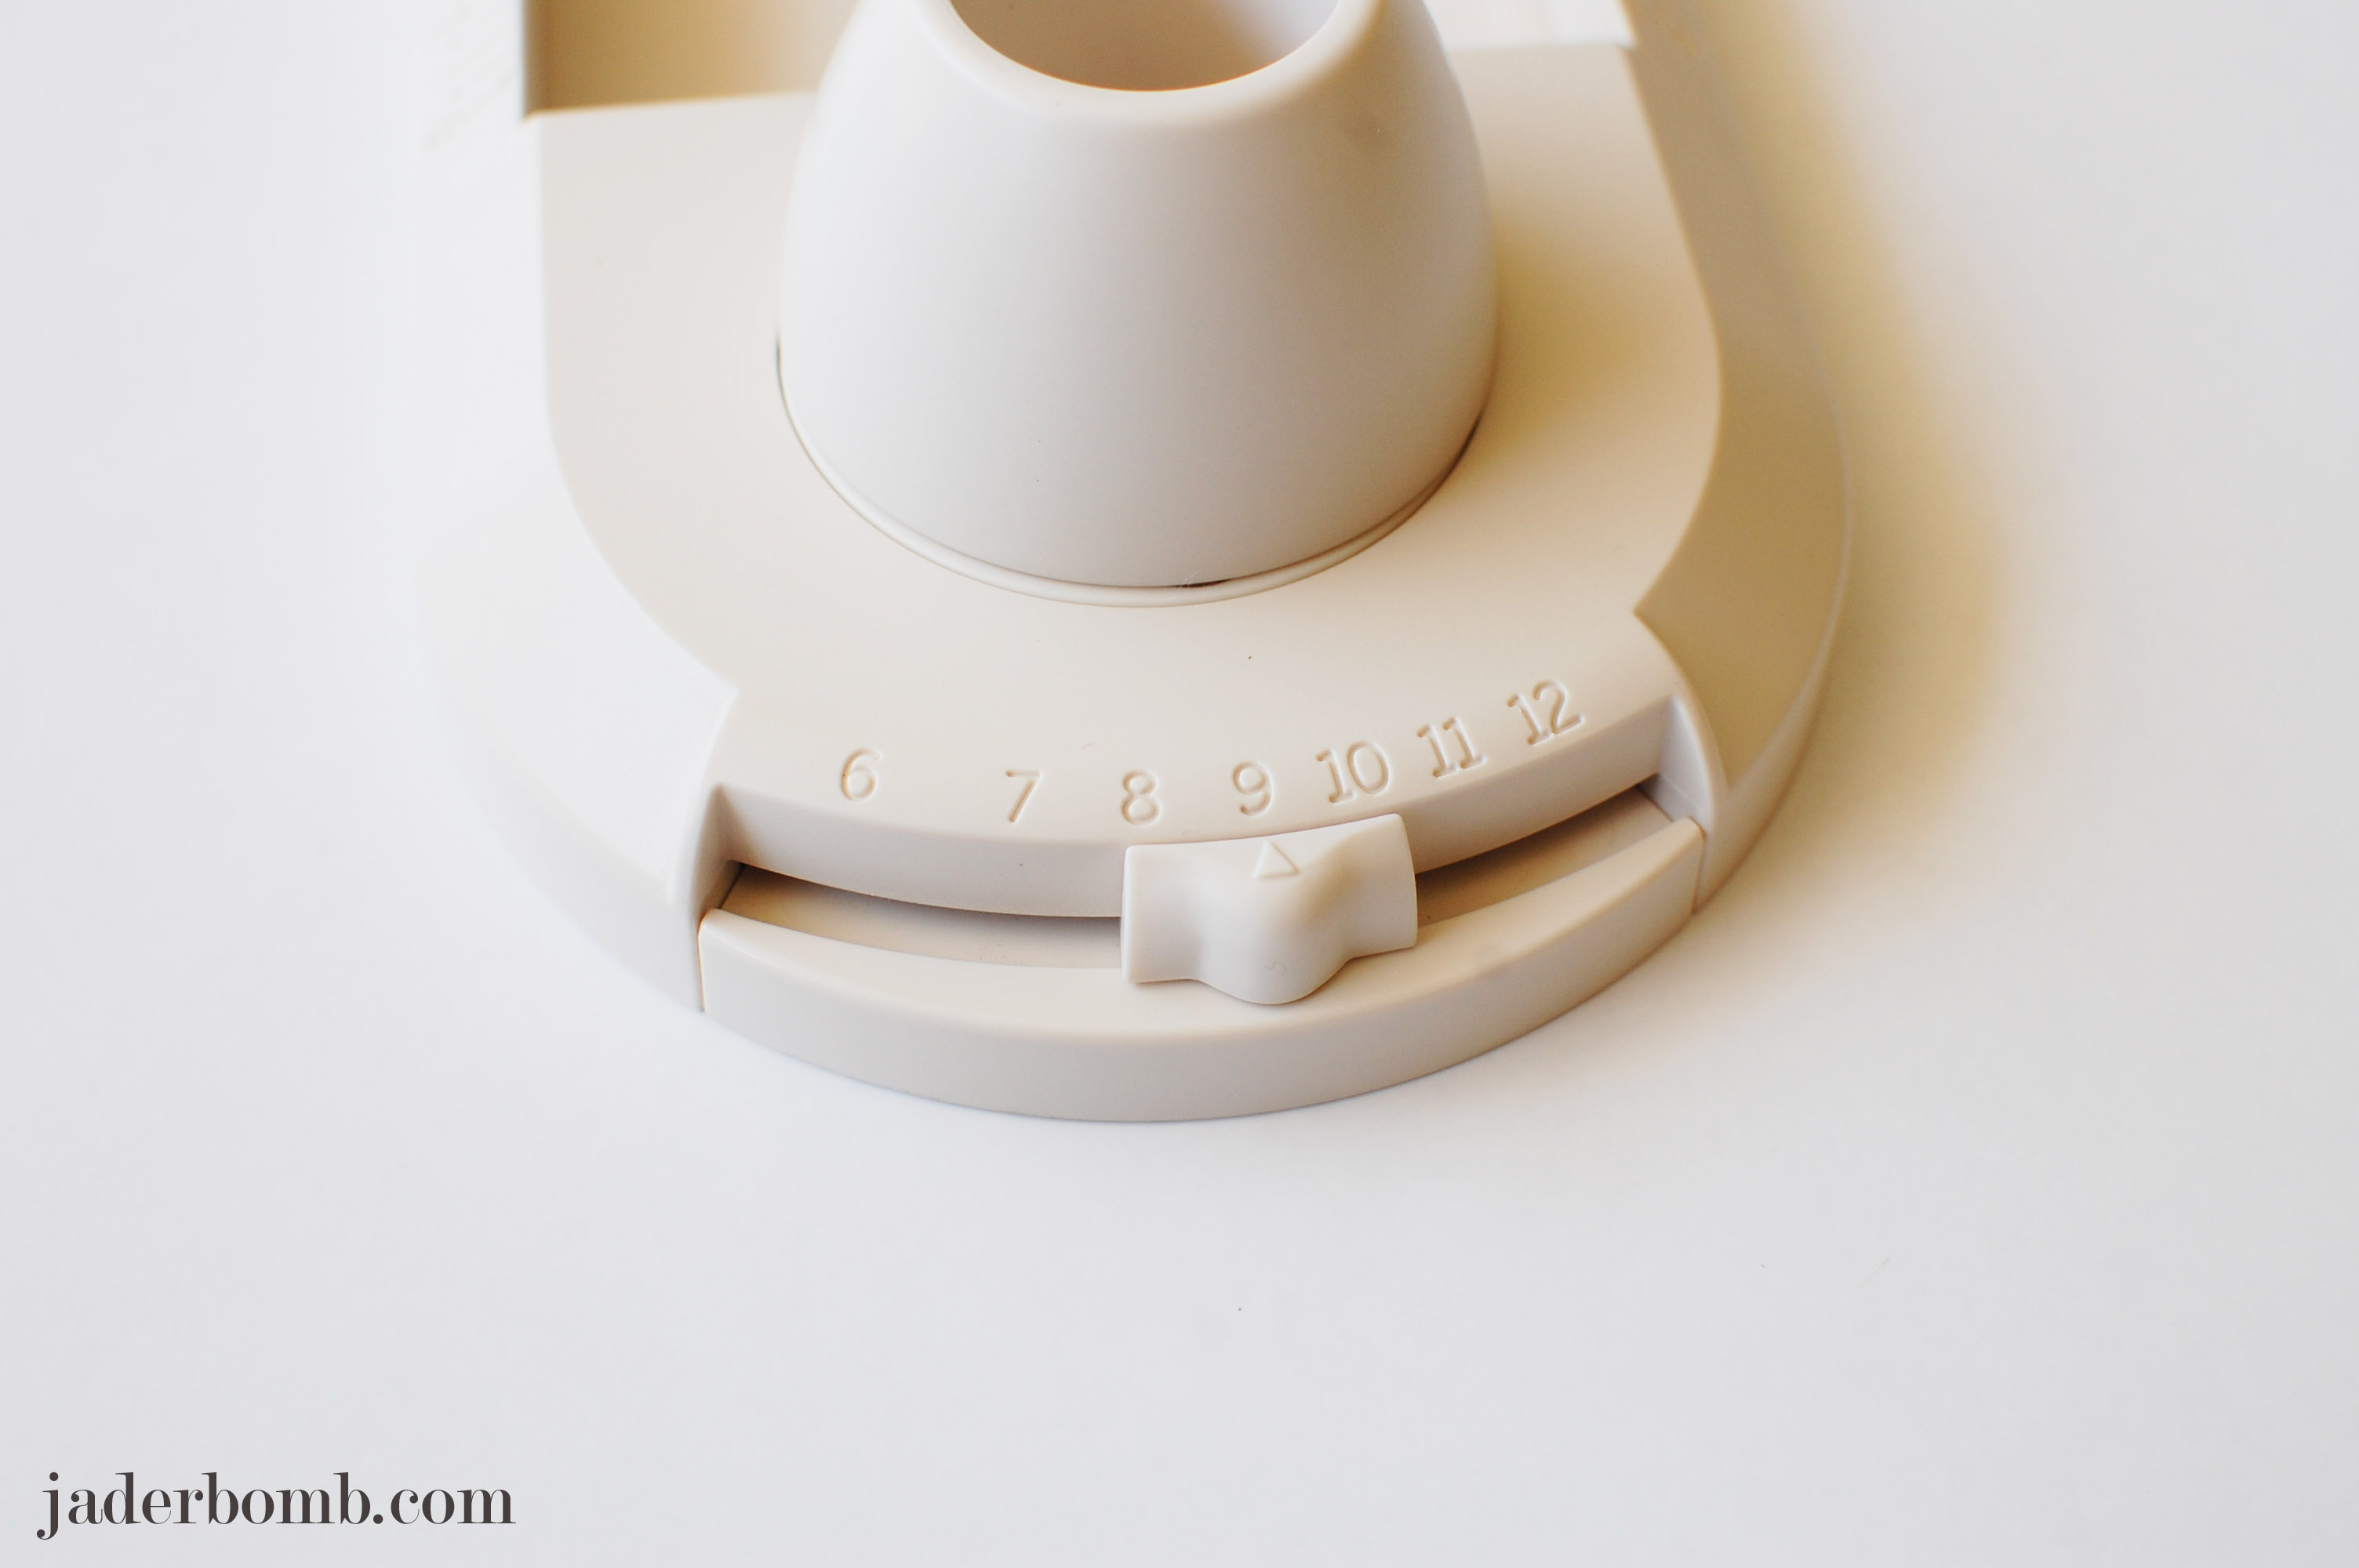
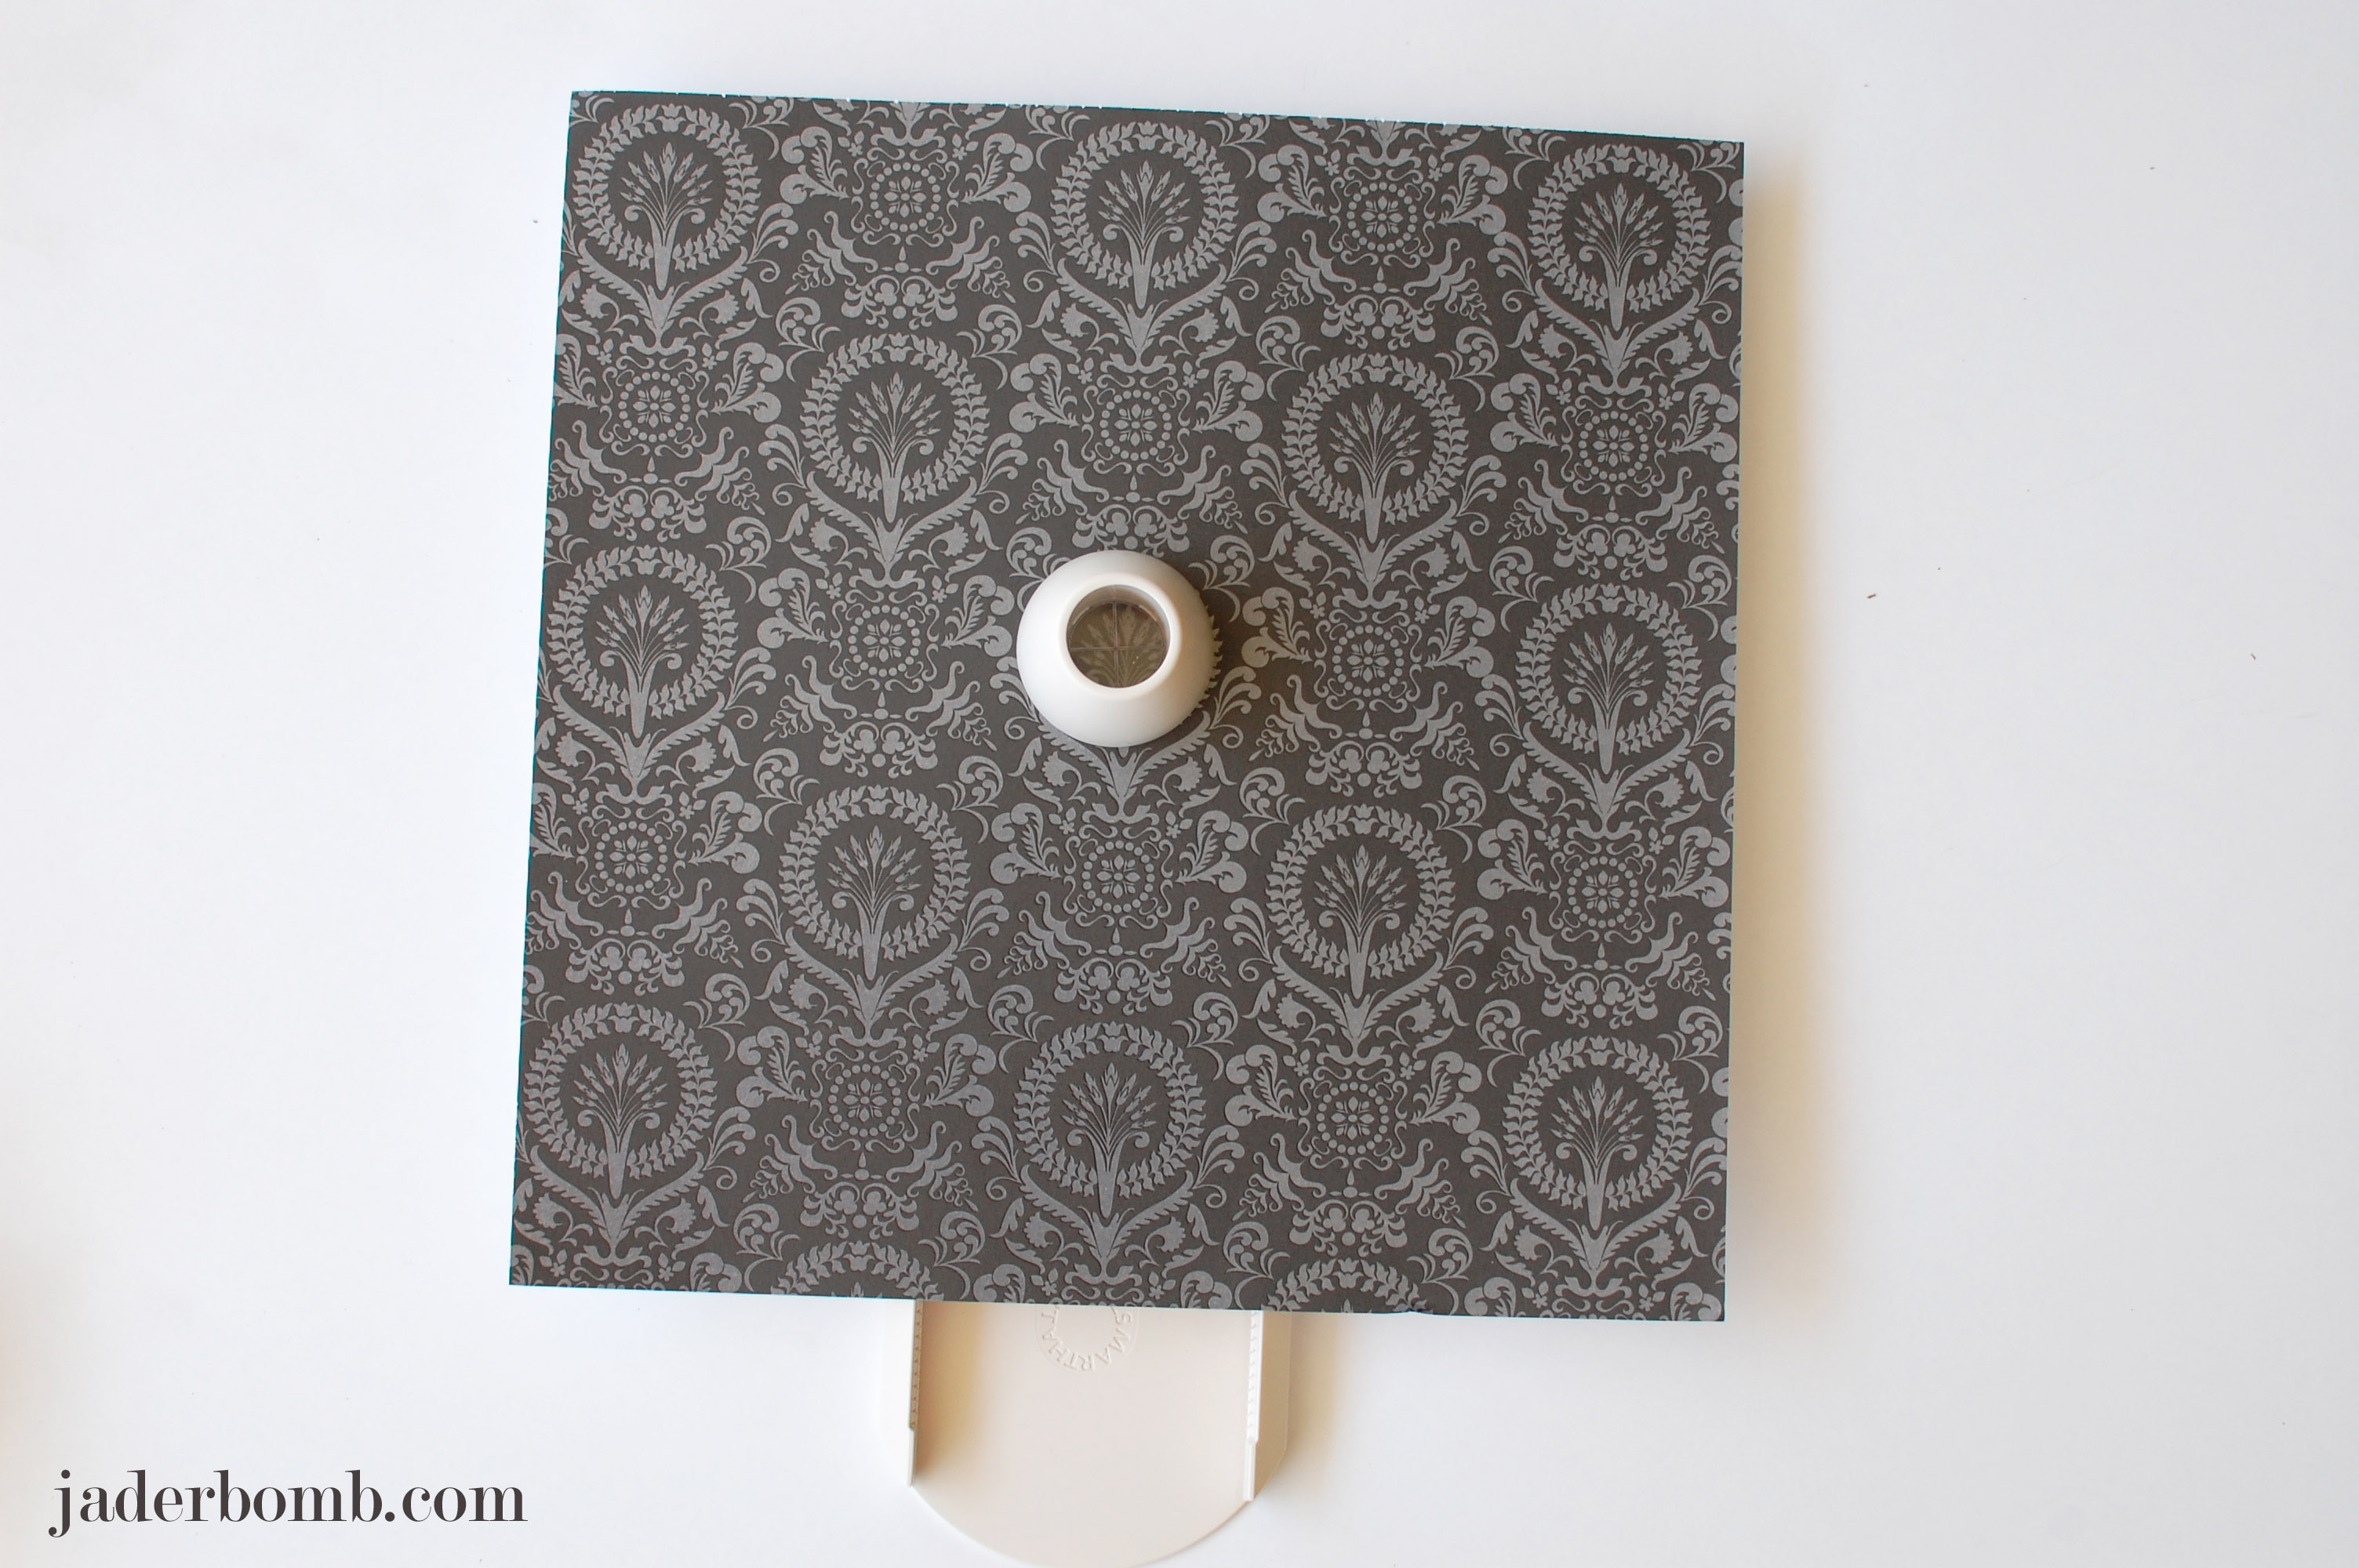
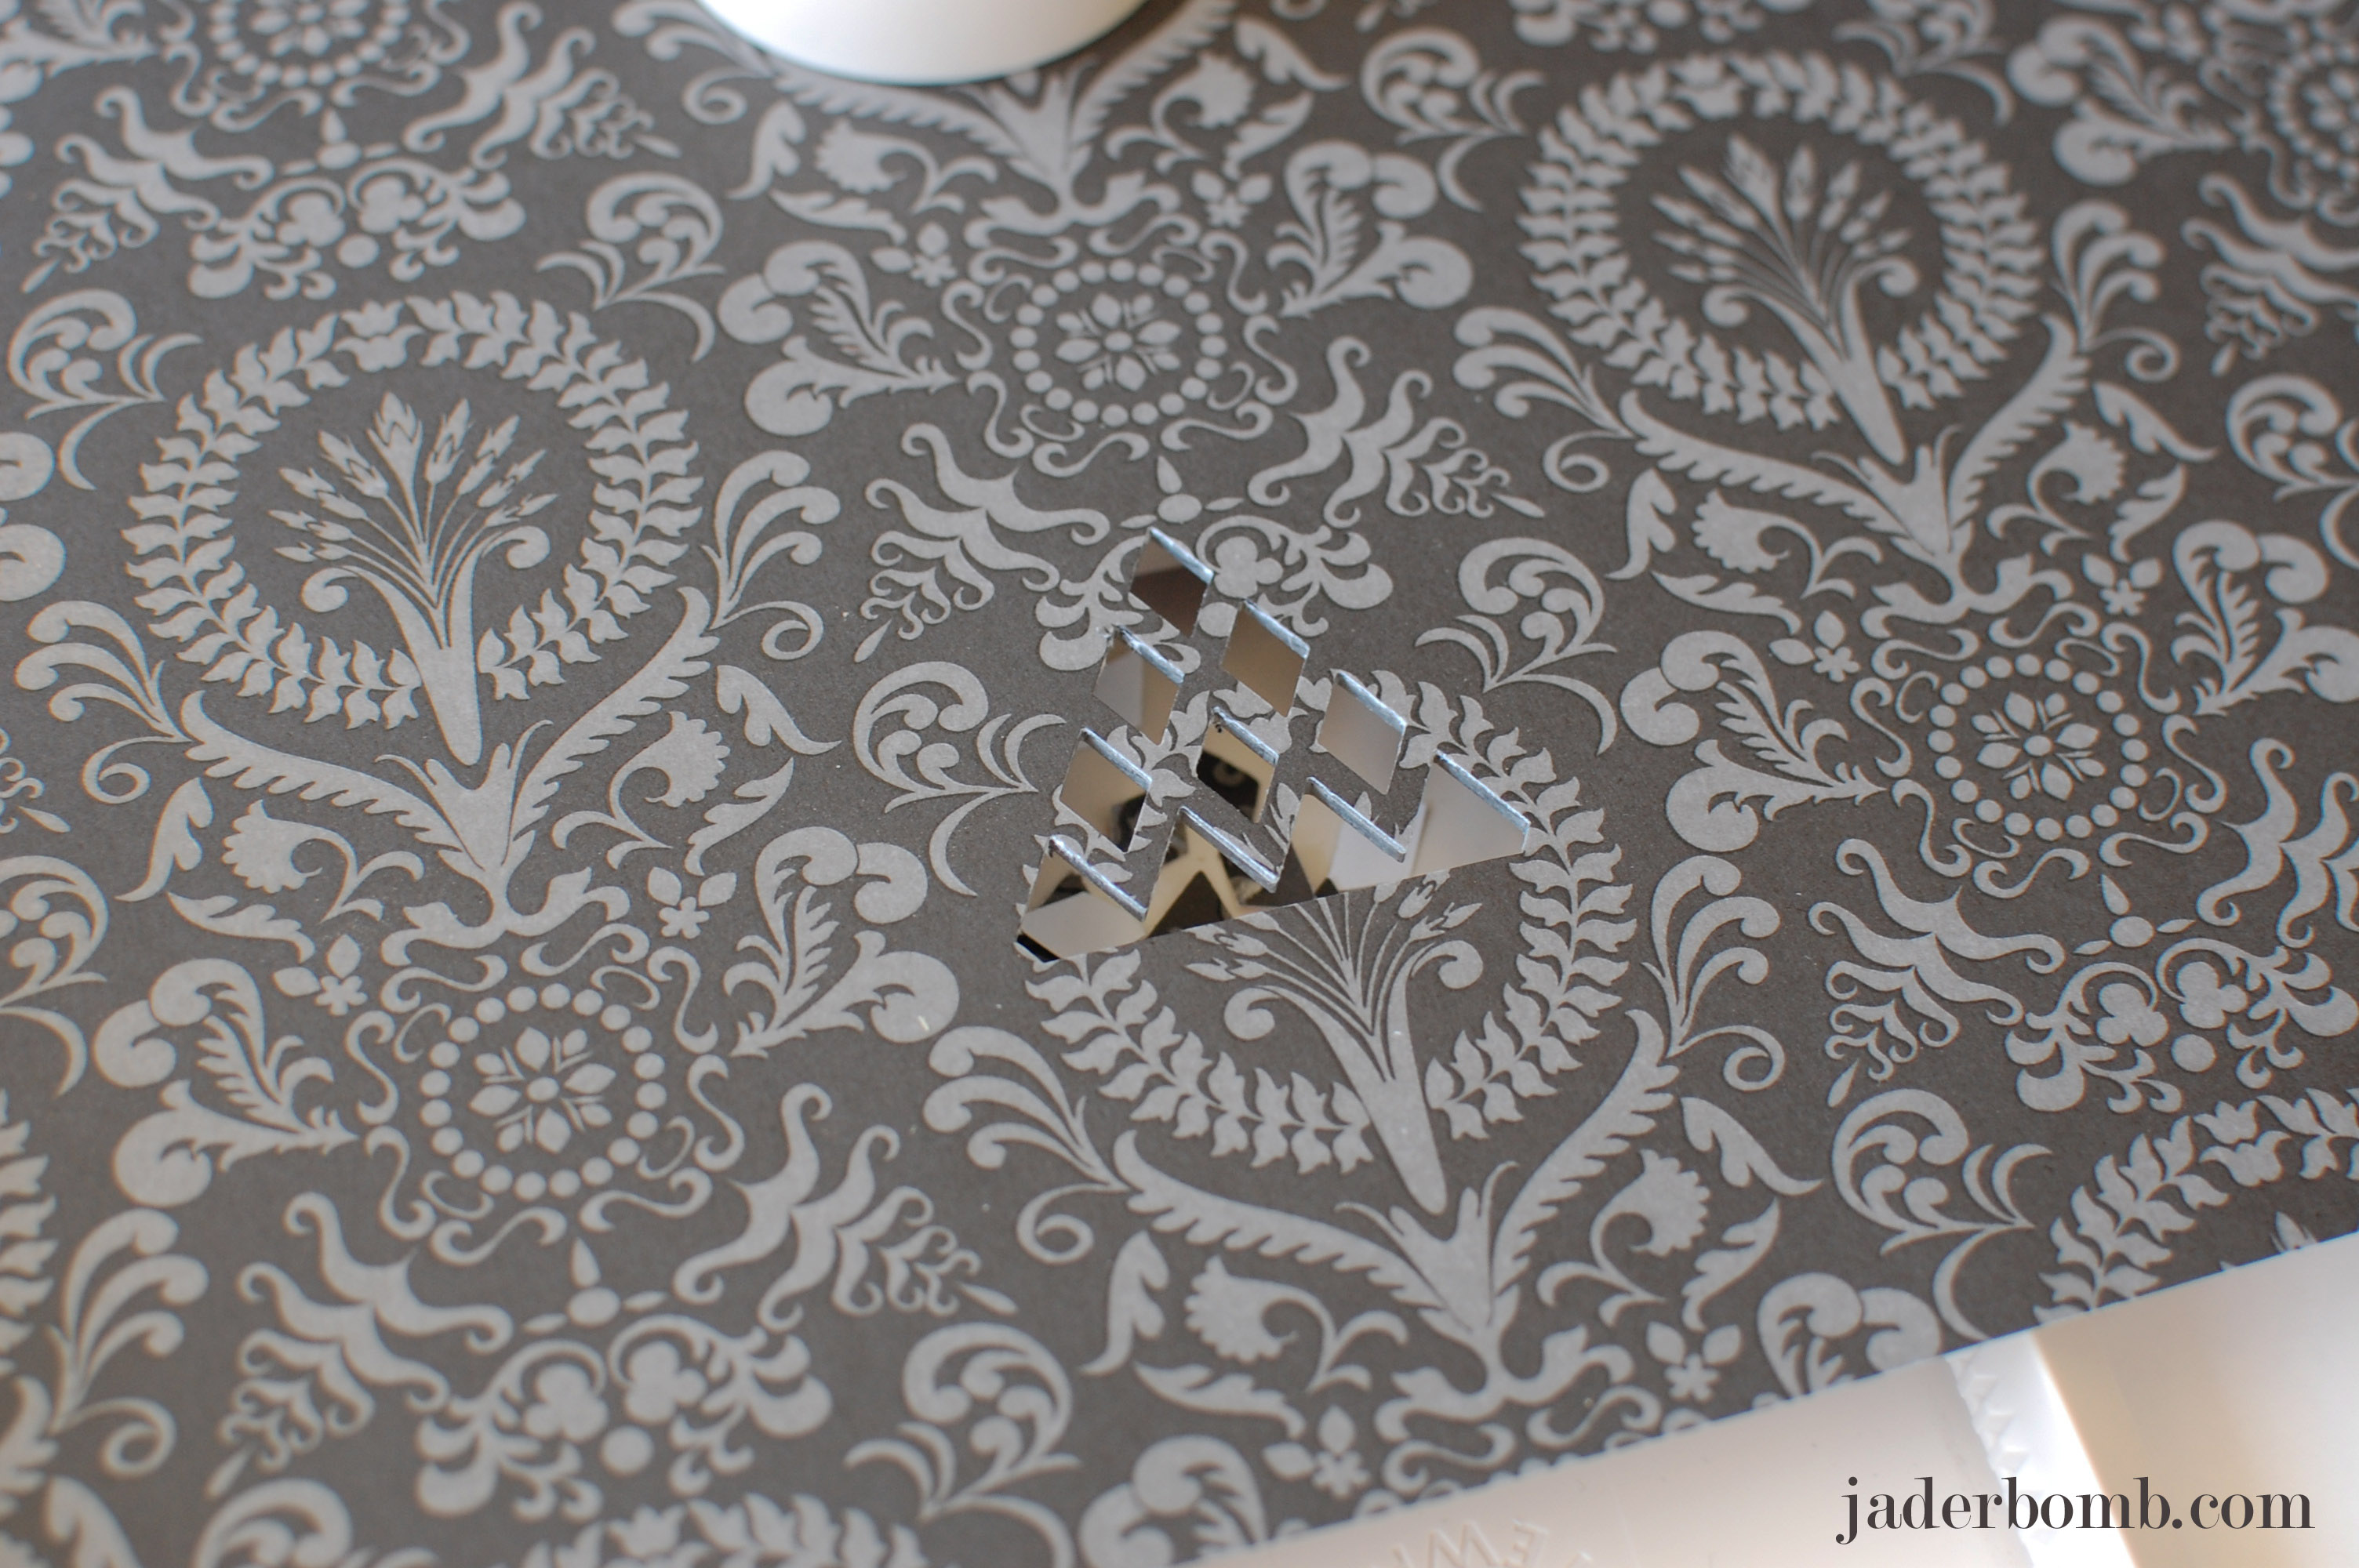
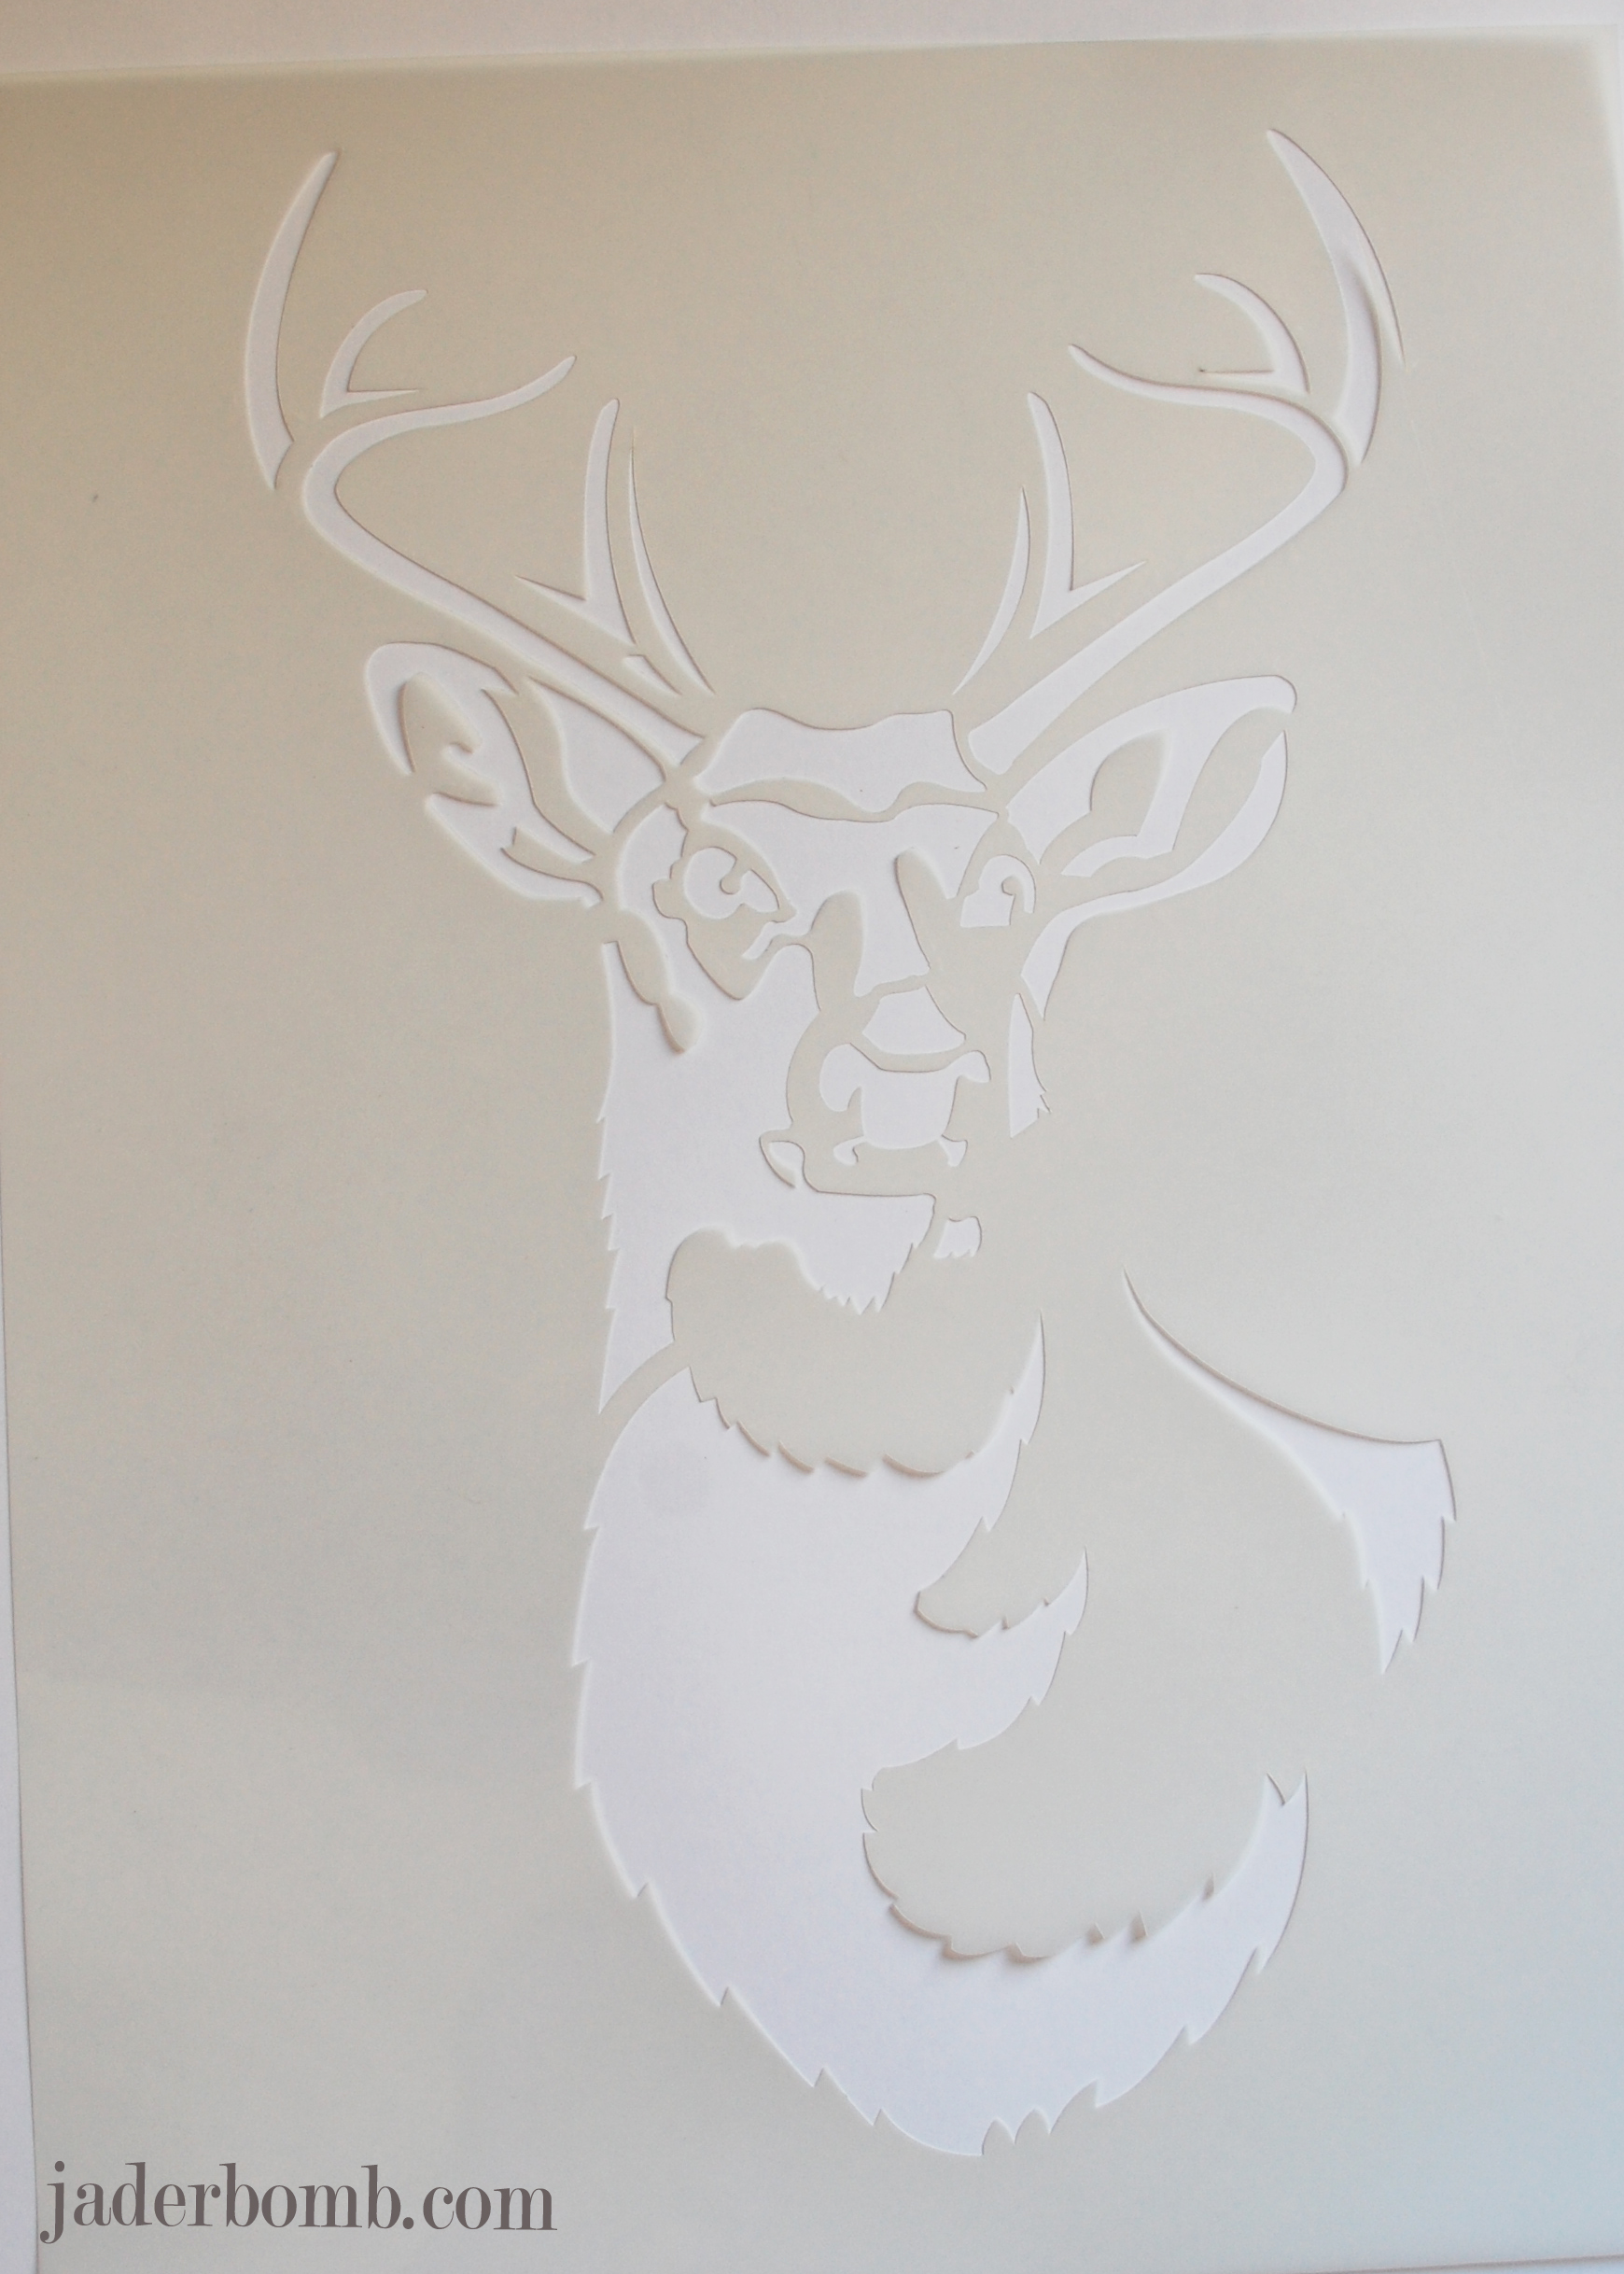
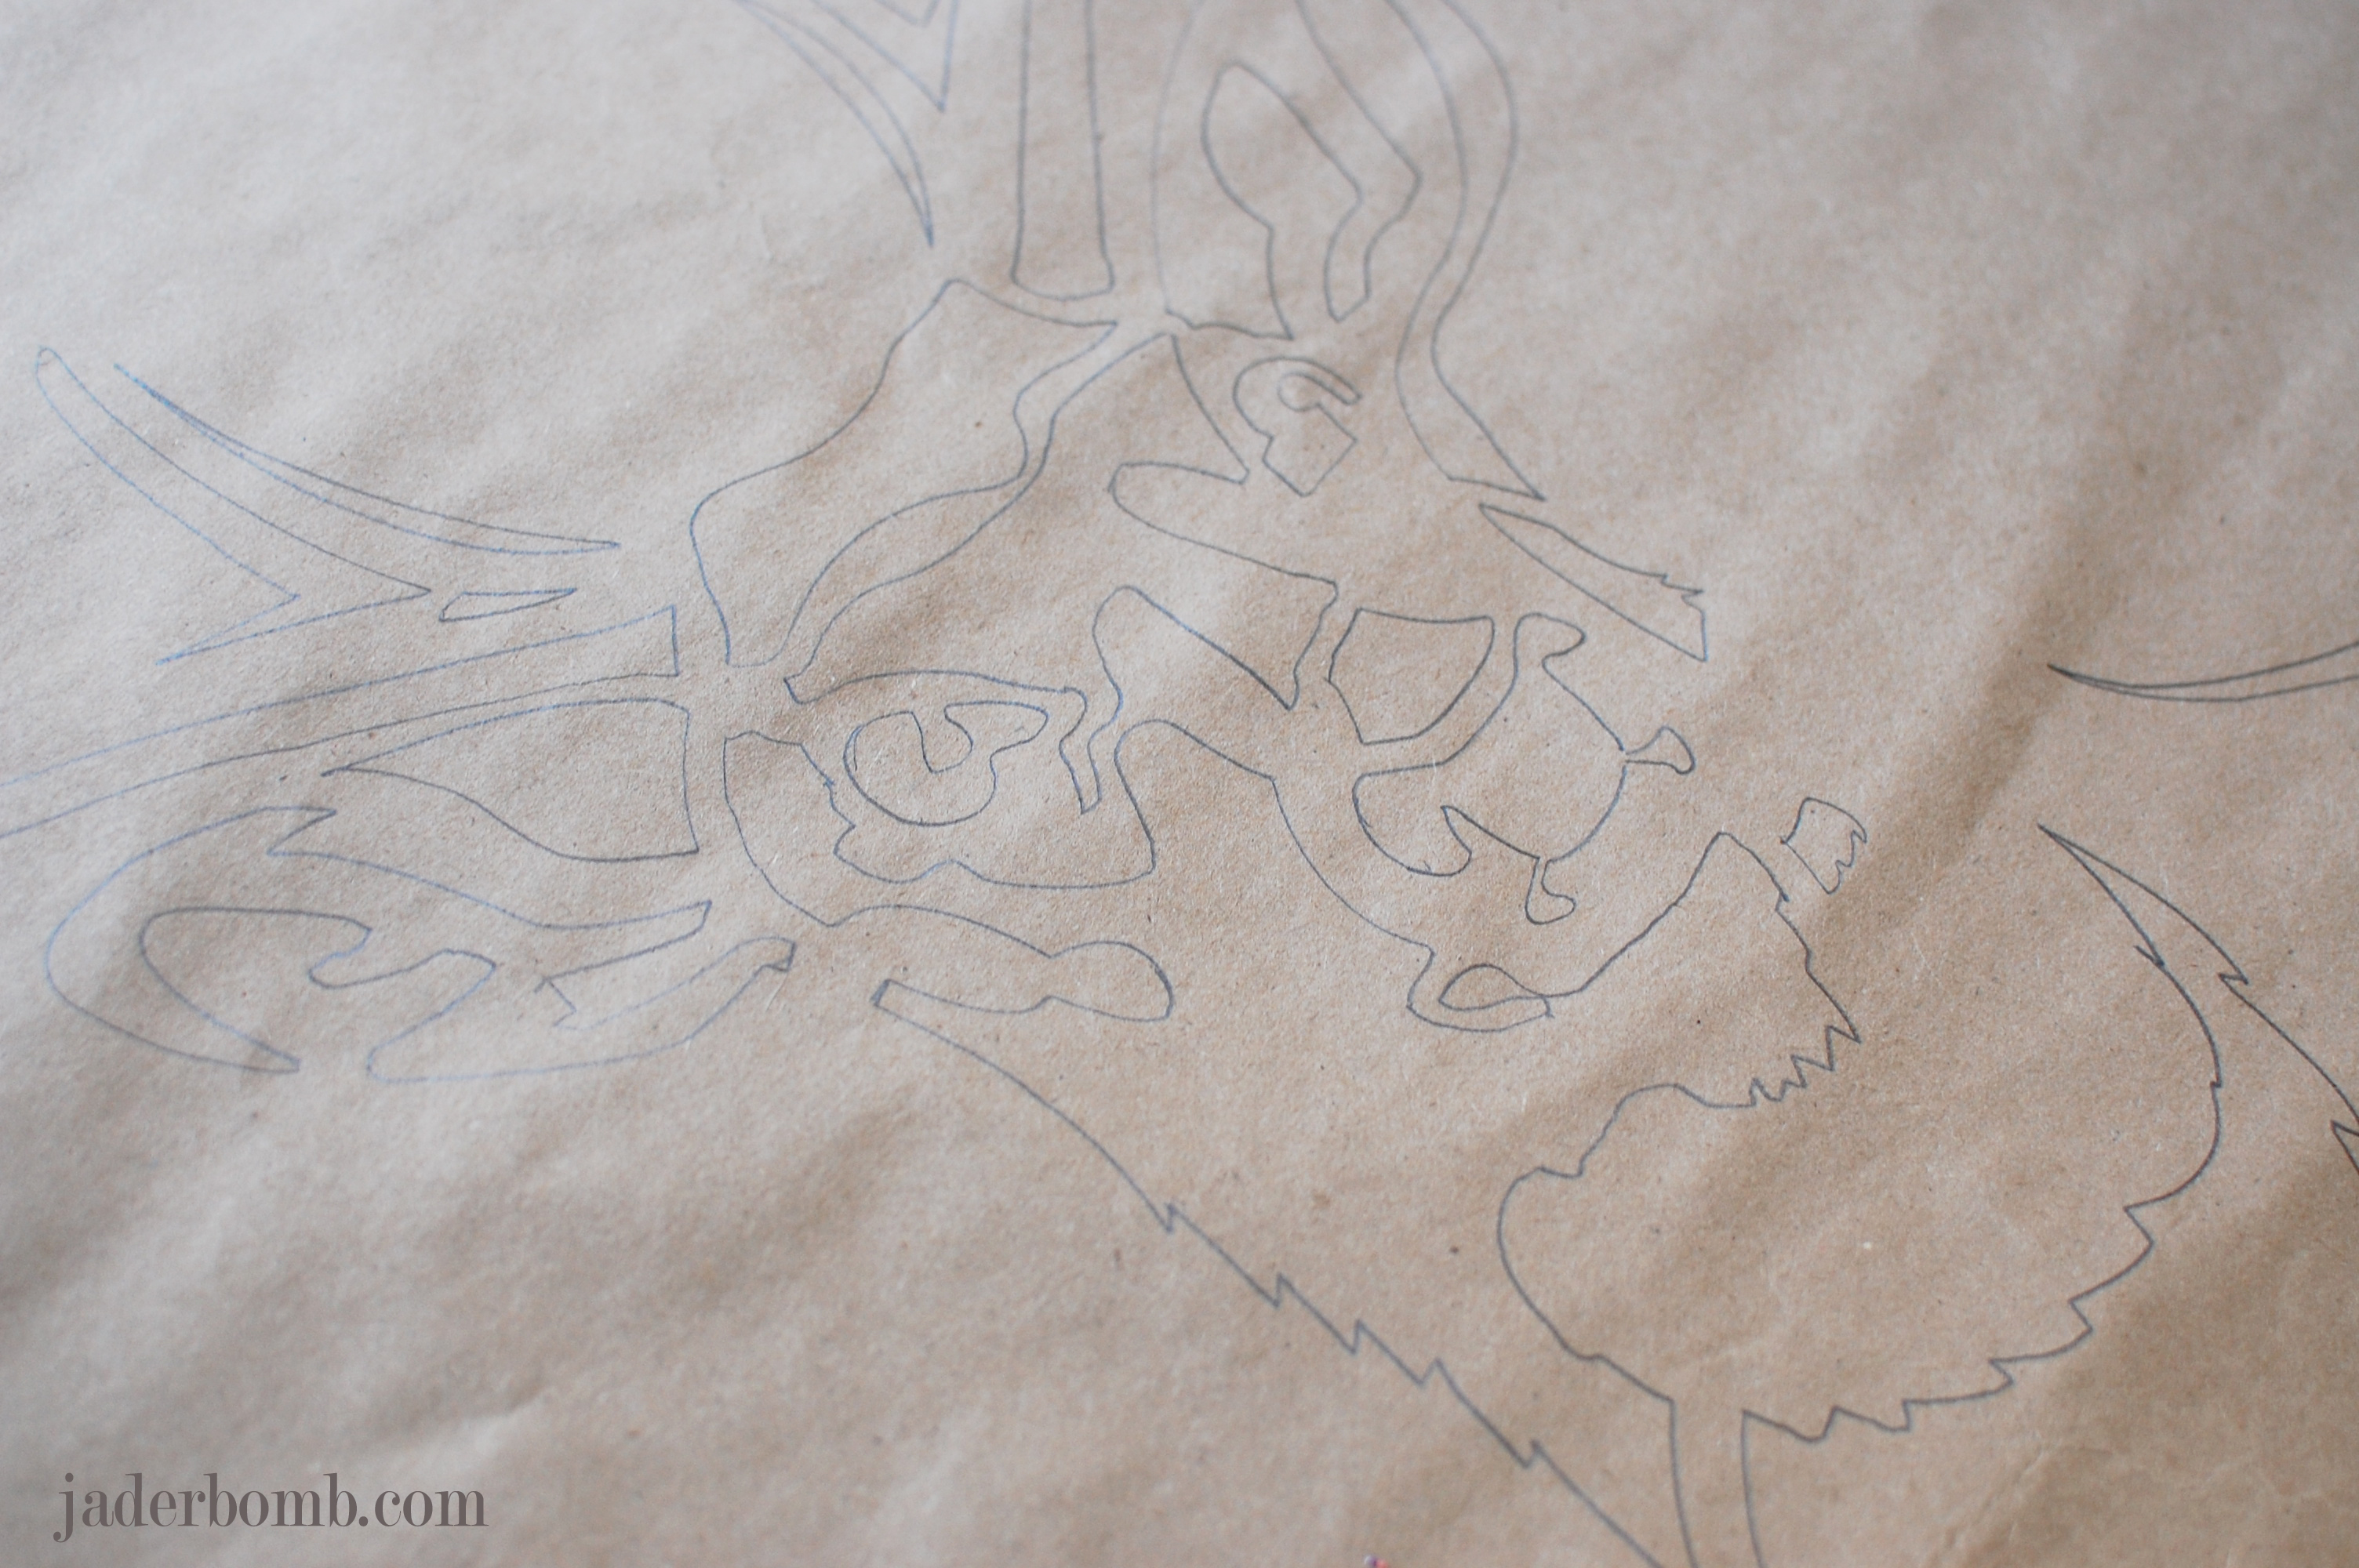
 When you open your pack of silk screens they will look like the picture above, all connected on one sheet.

Martha-Stewart-Giveaway-APOTHECARY-jars-jaderbomb

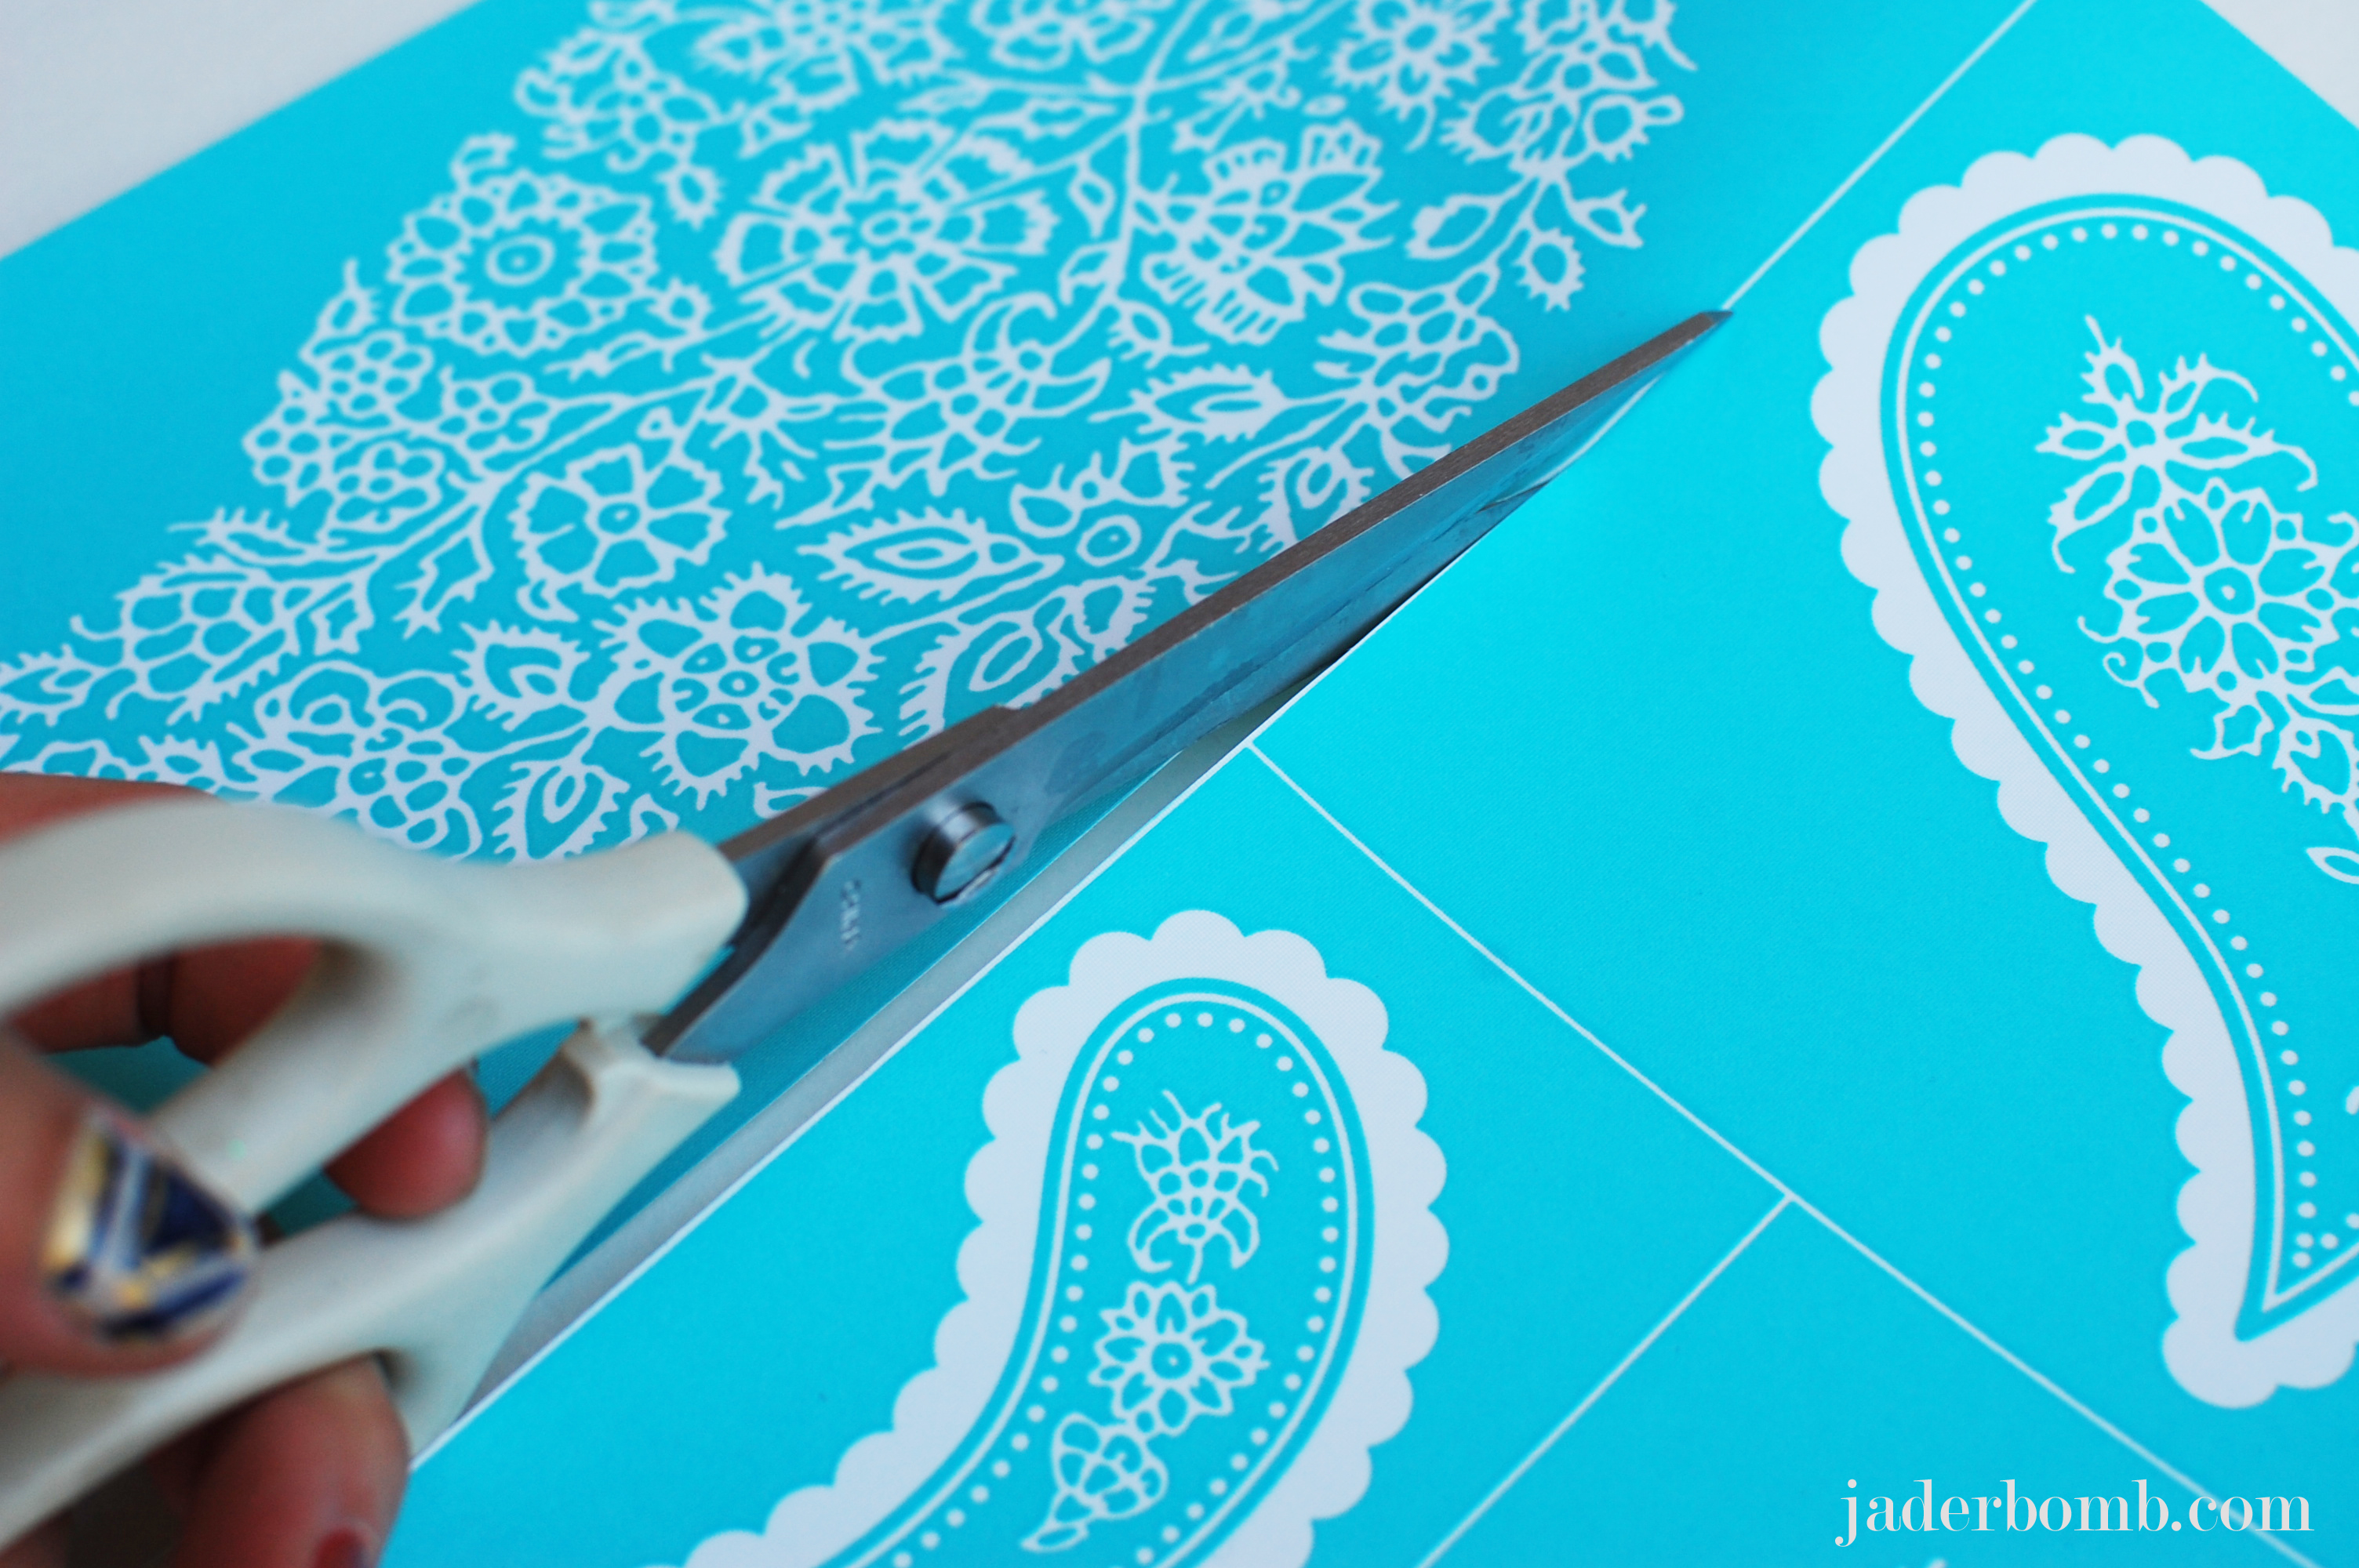
If you notice they have white lines separating each design. You should cut along the line to separate them.

Martha-Stewart-Giveaway-APOTHECARY-jars-jaderbomb

 This is how they will look once you cut them.

Martha-Stewart-Giveaway-APOTHECARY-jars-jaderbomb

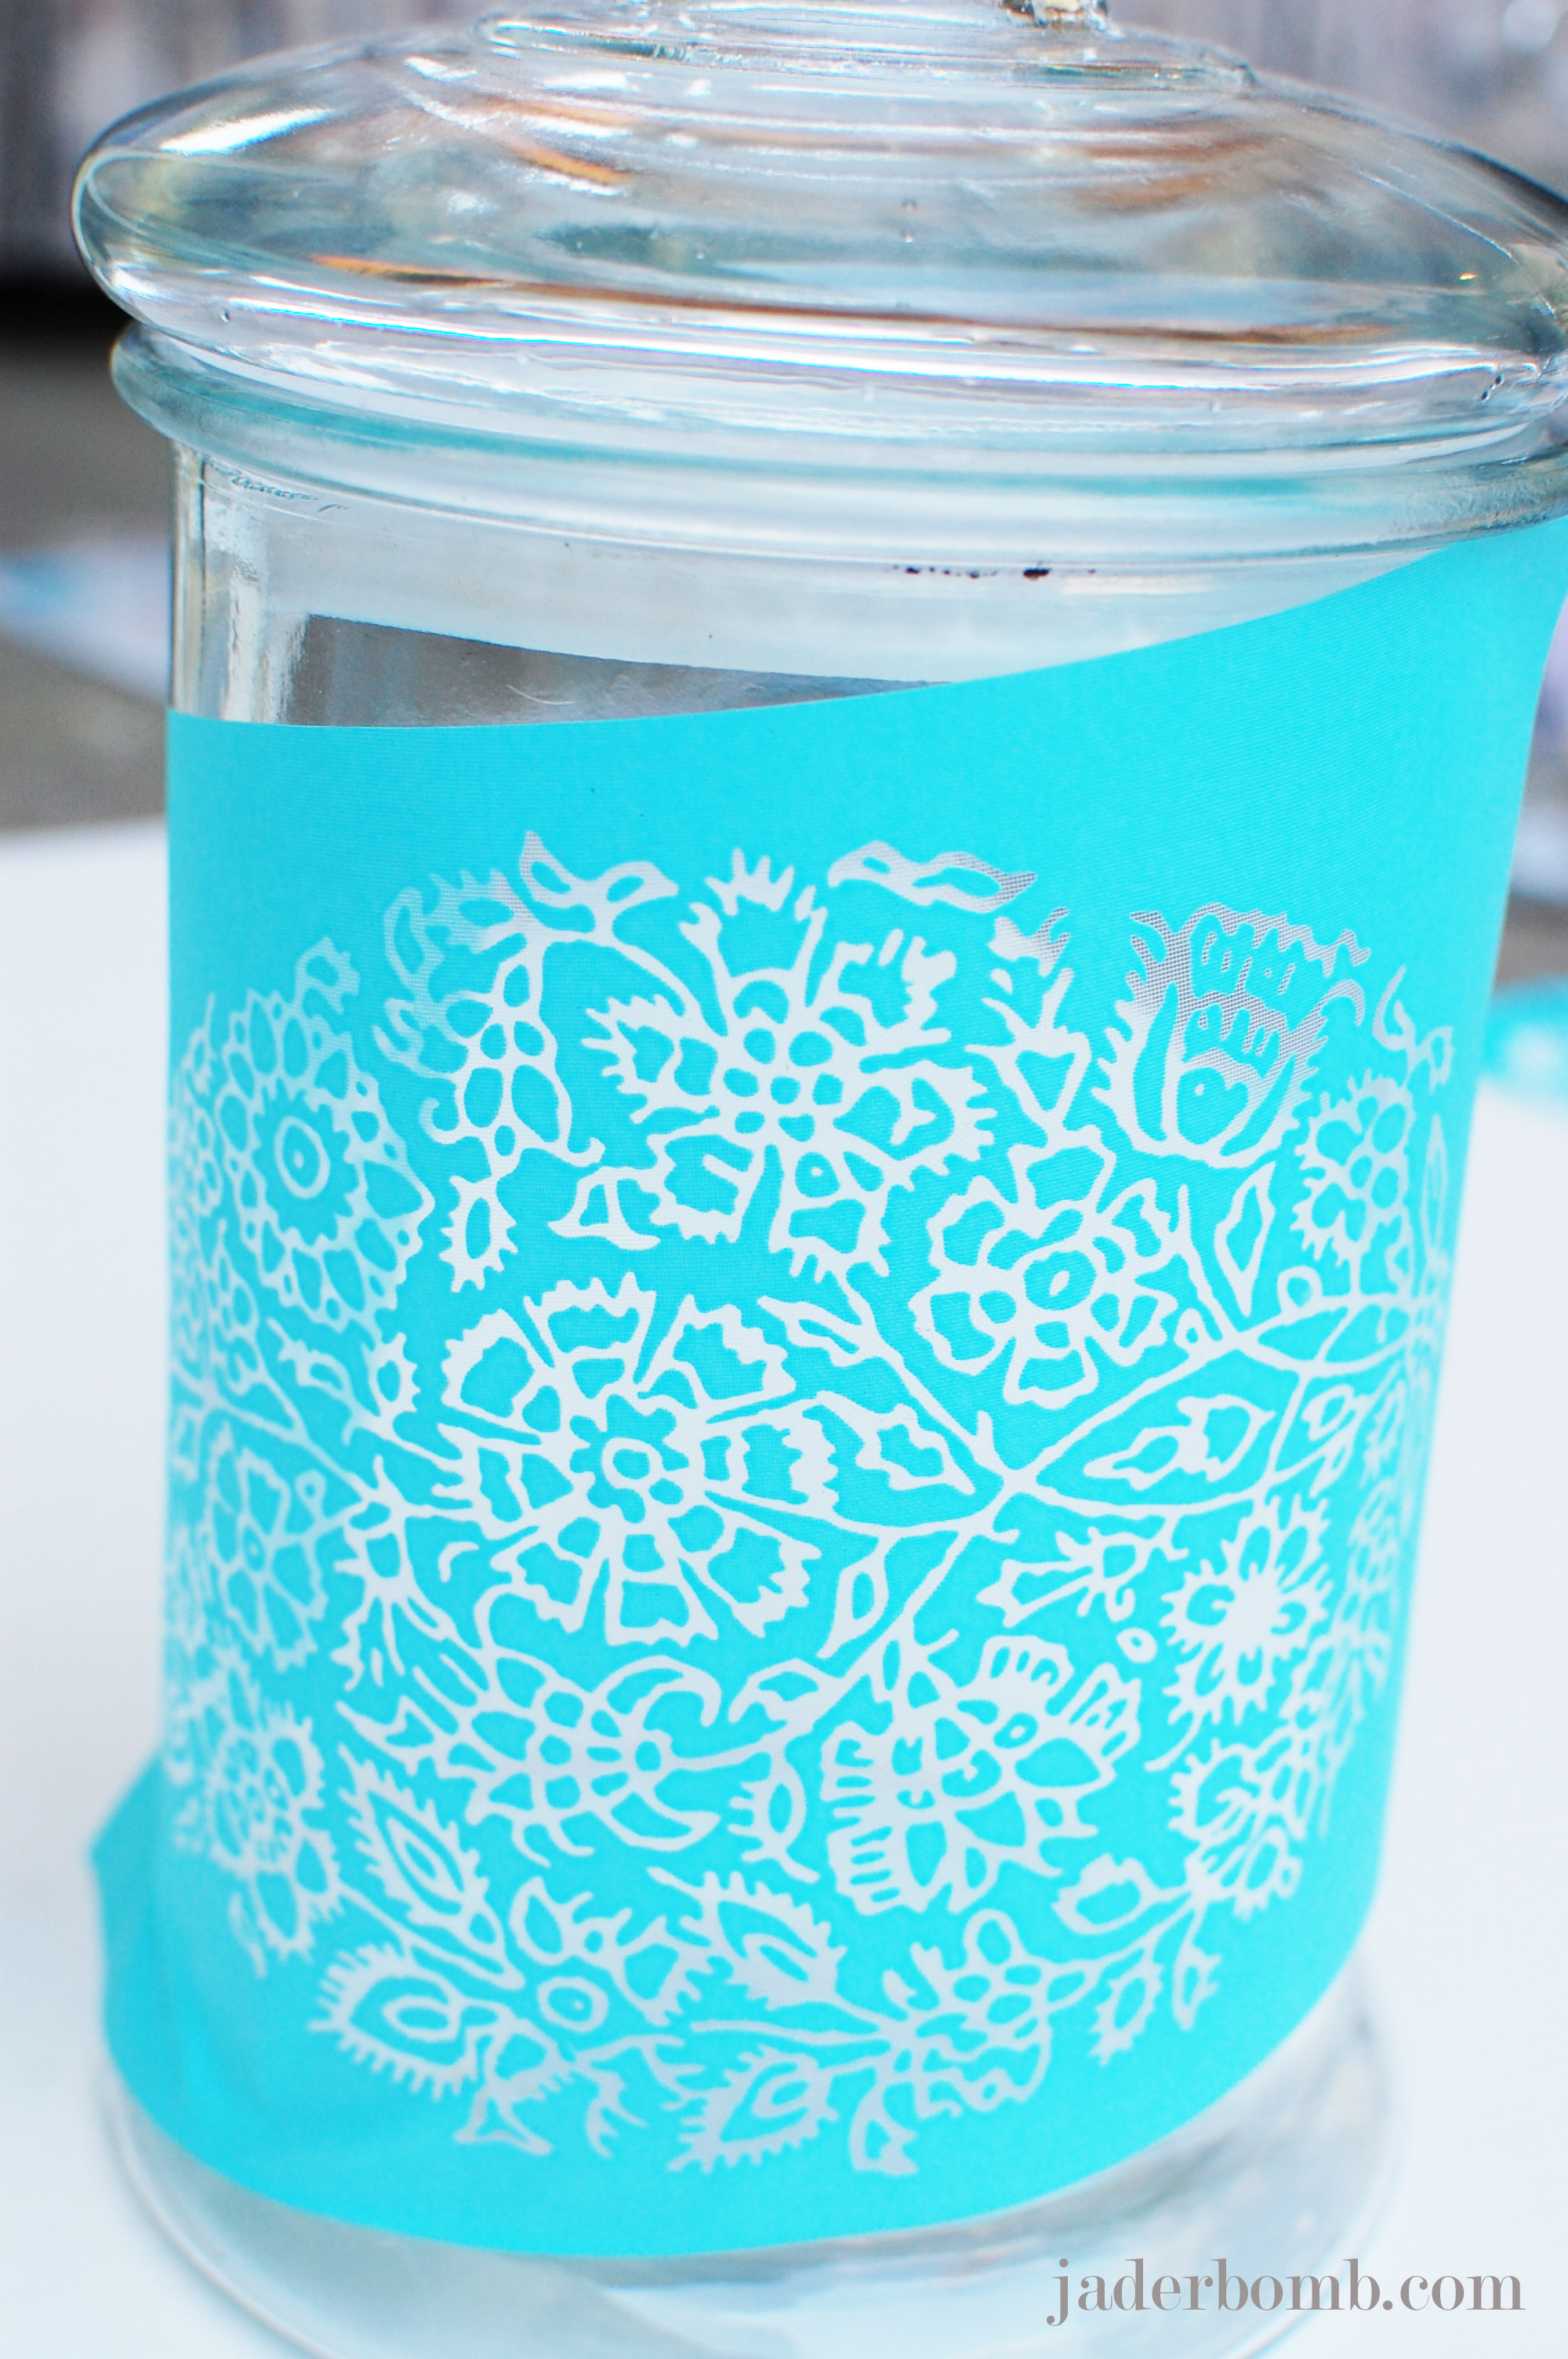
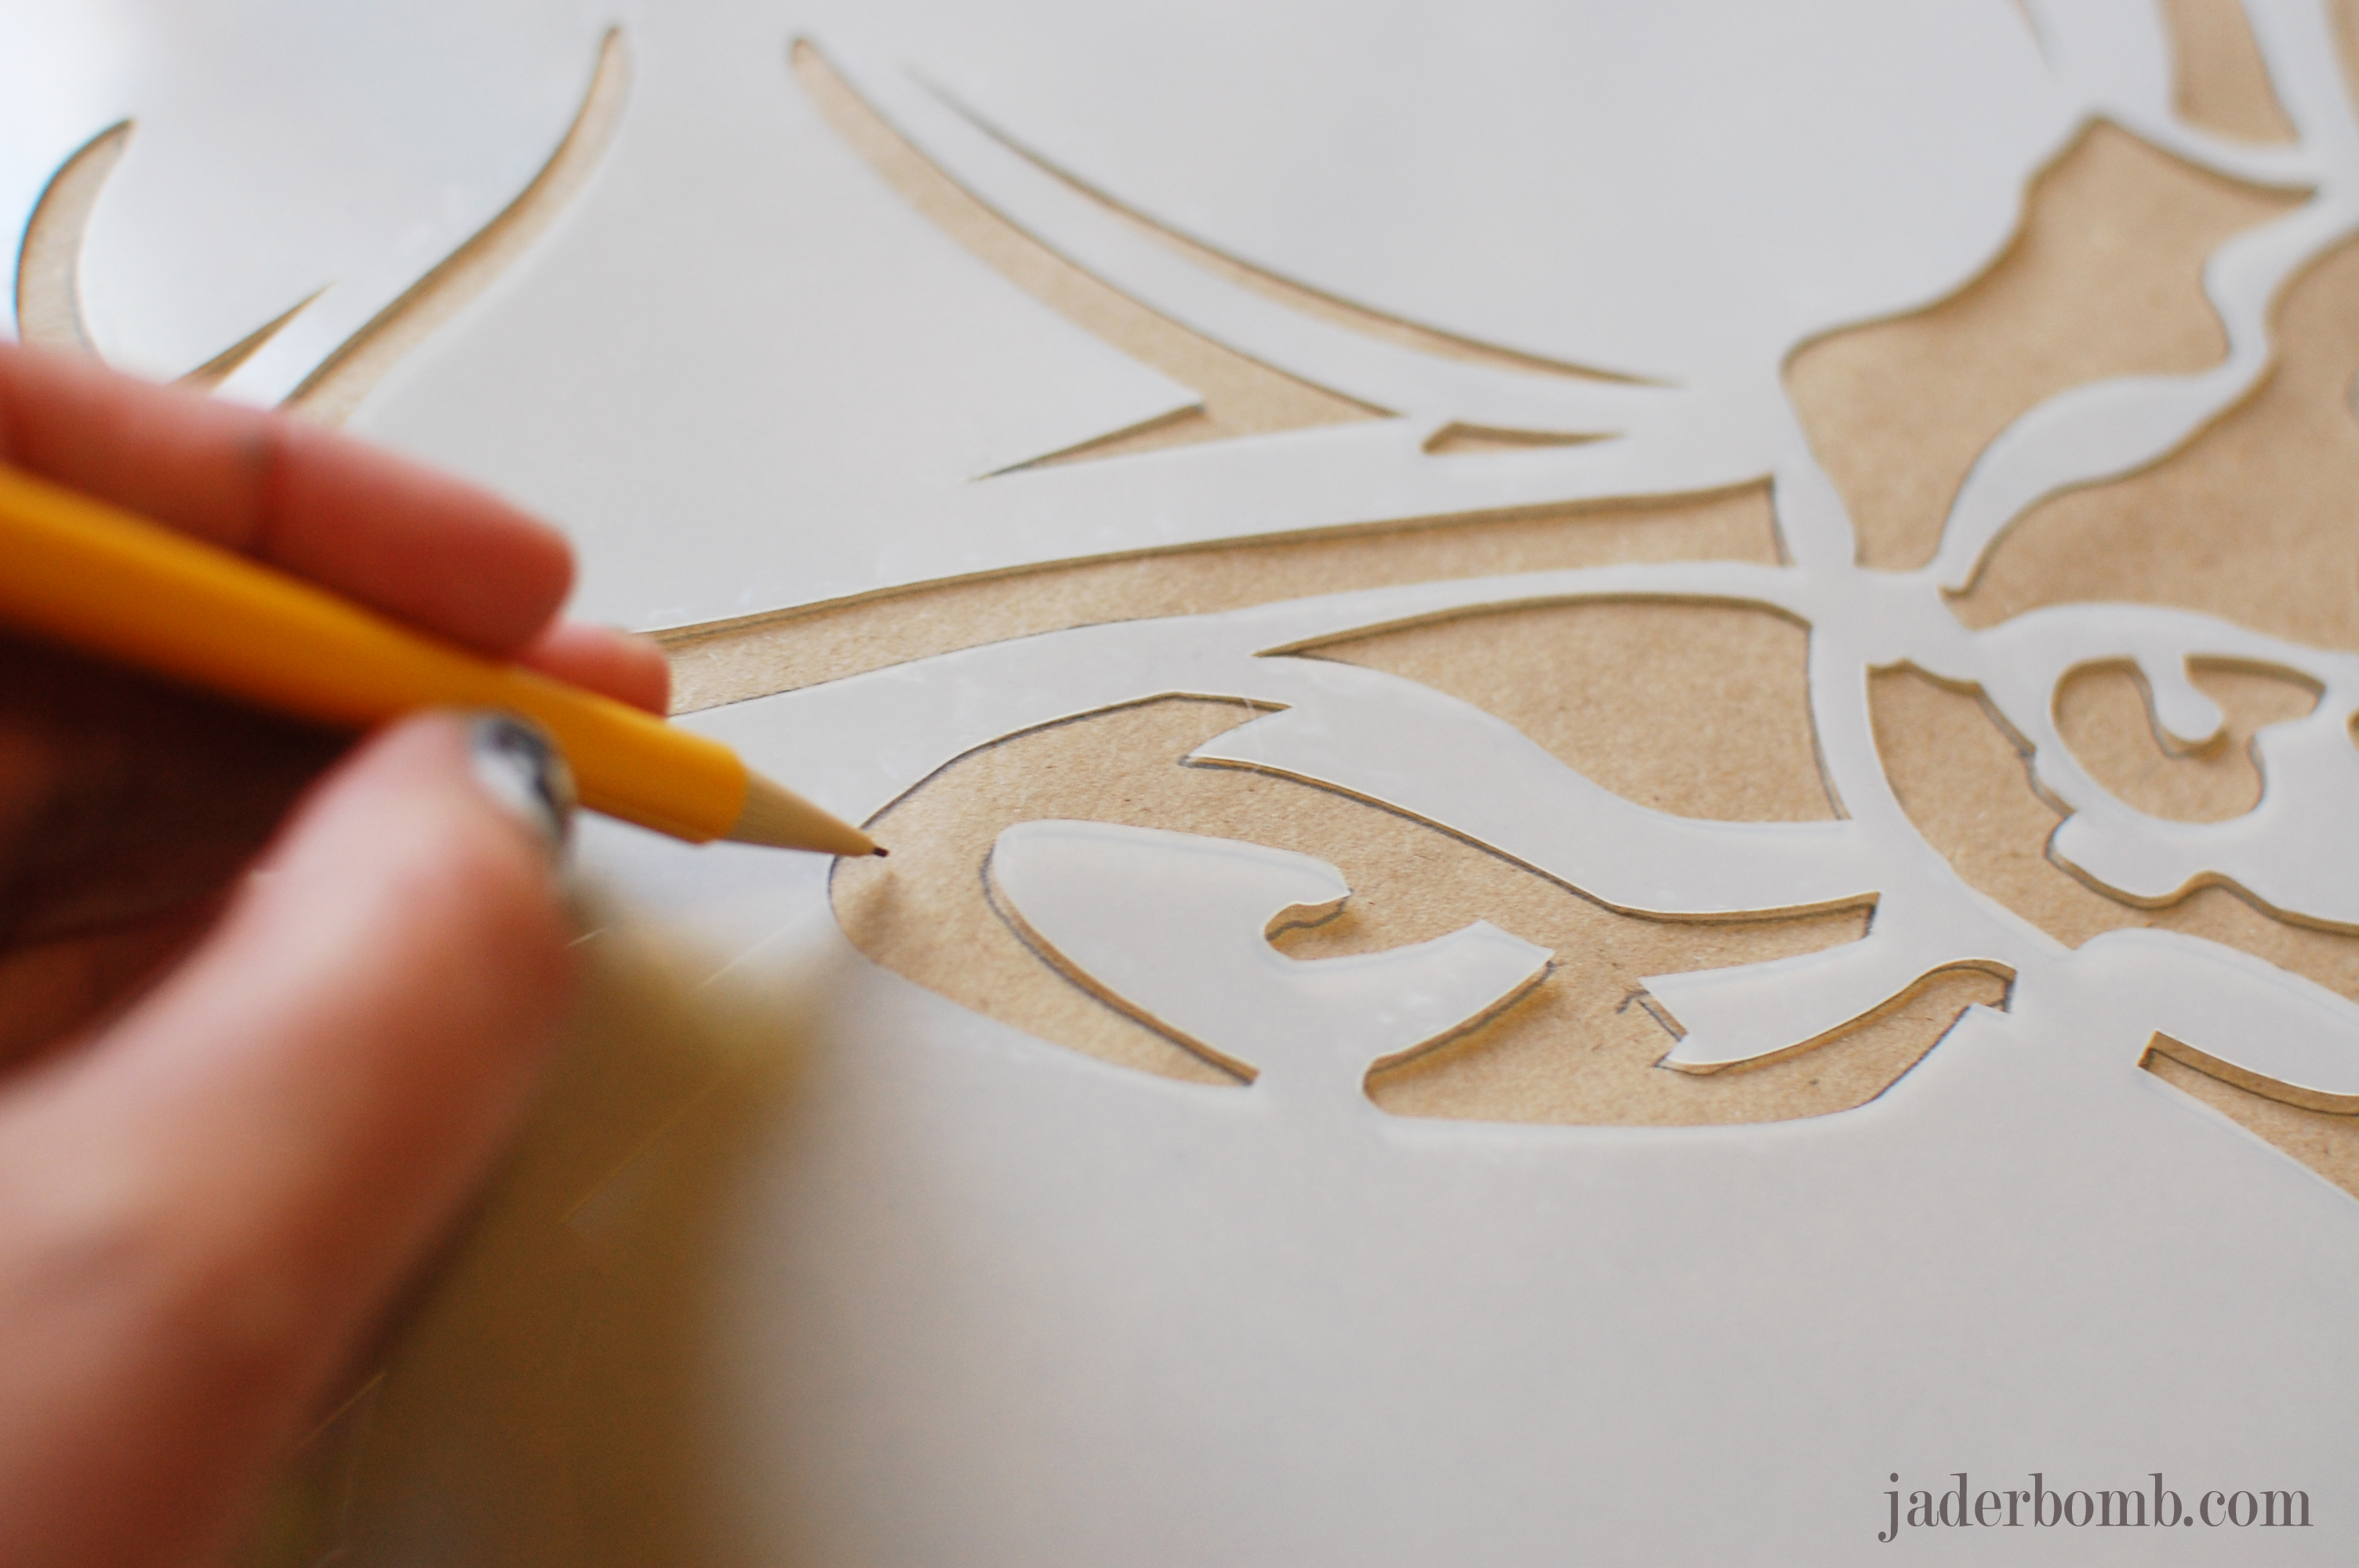
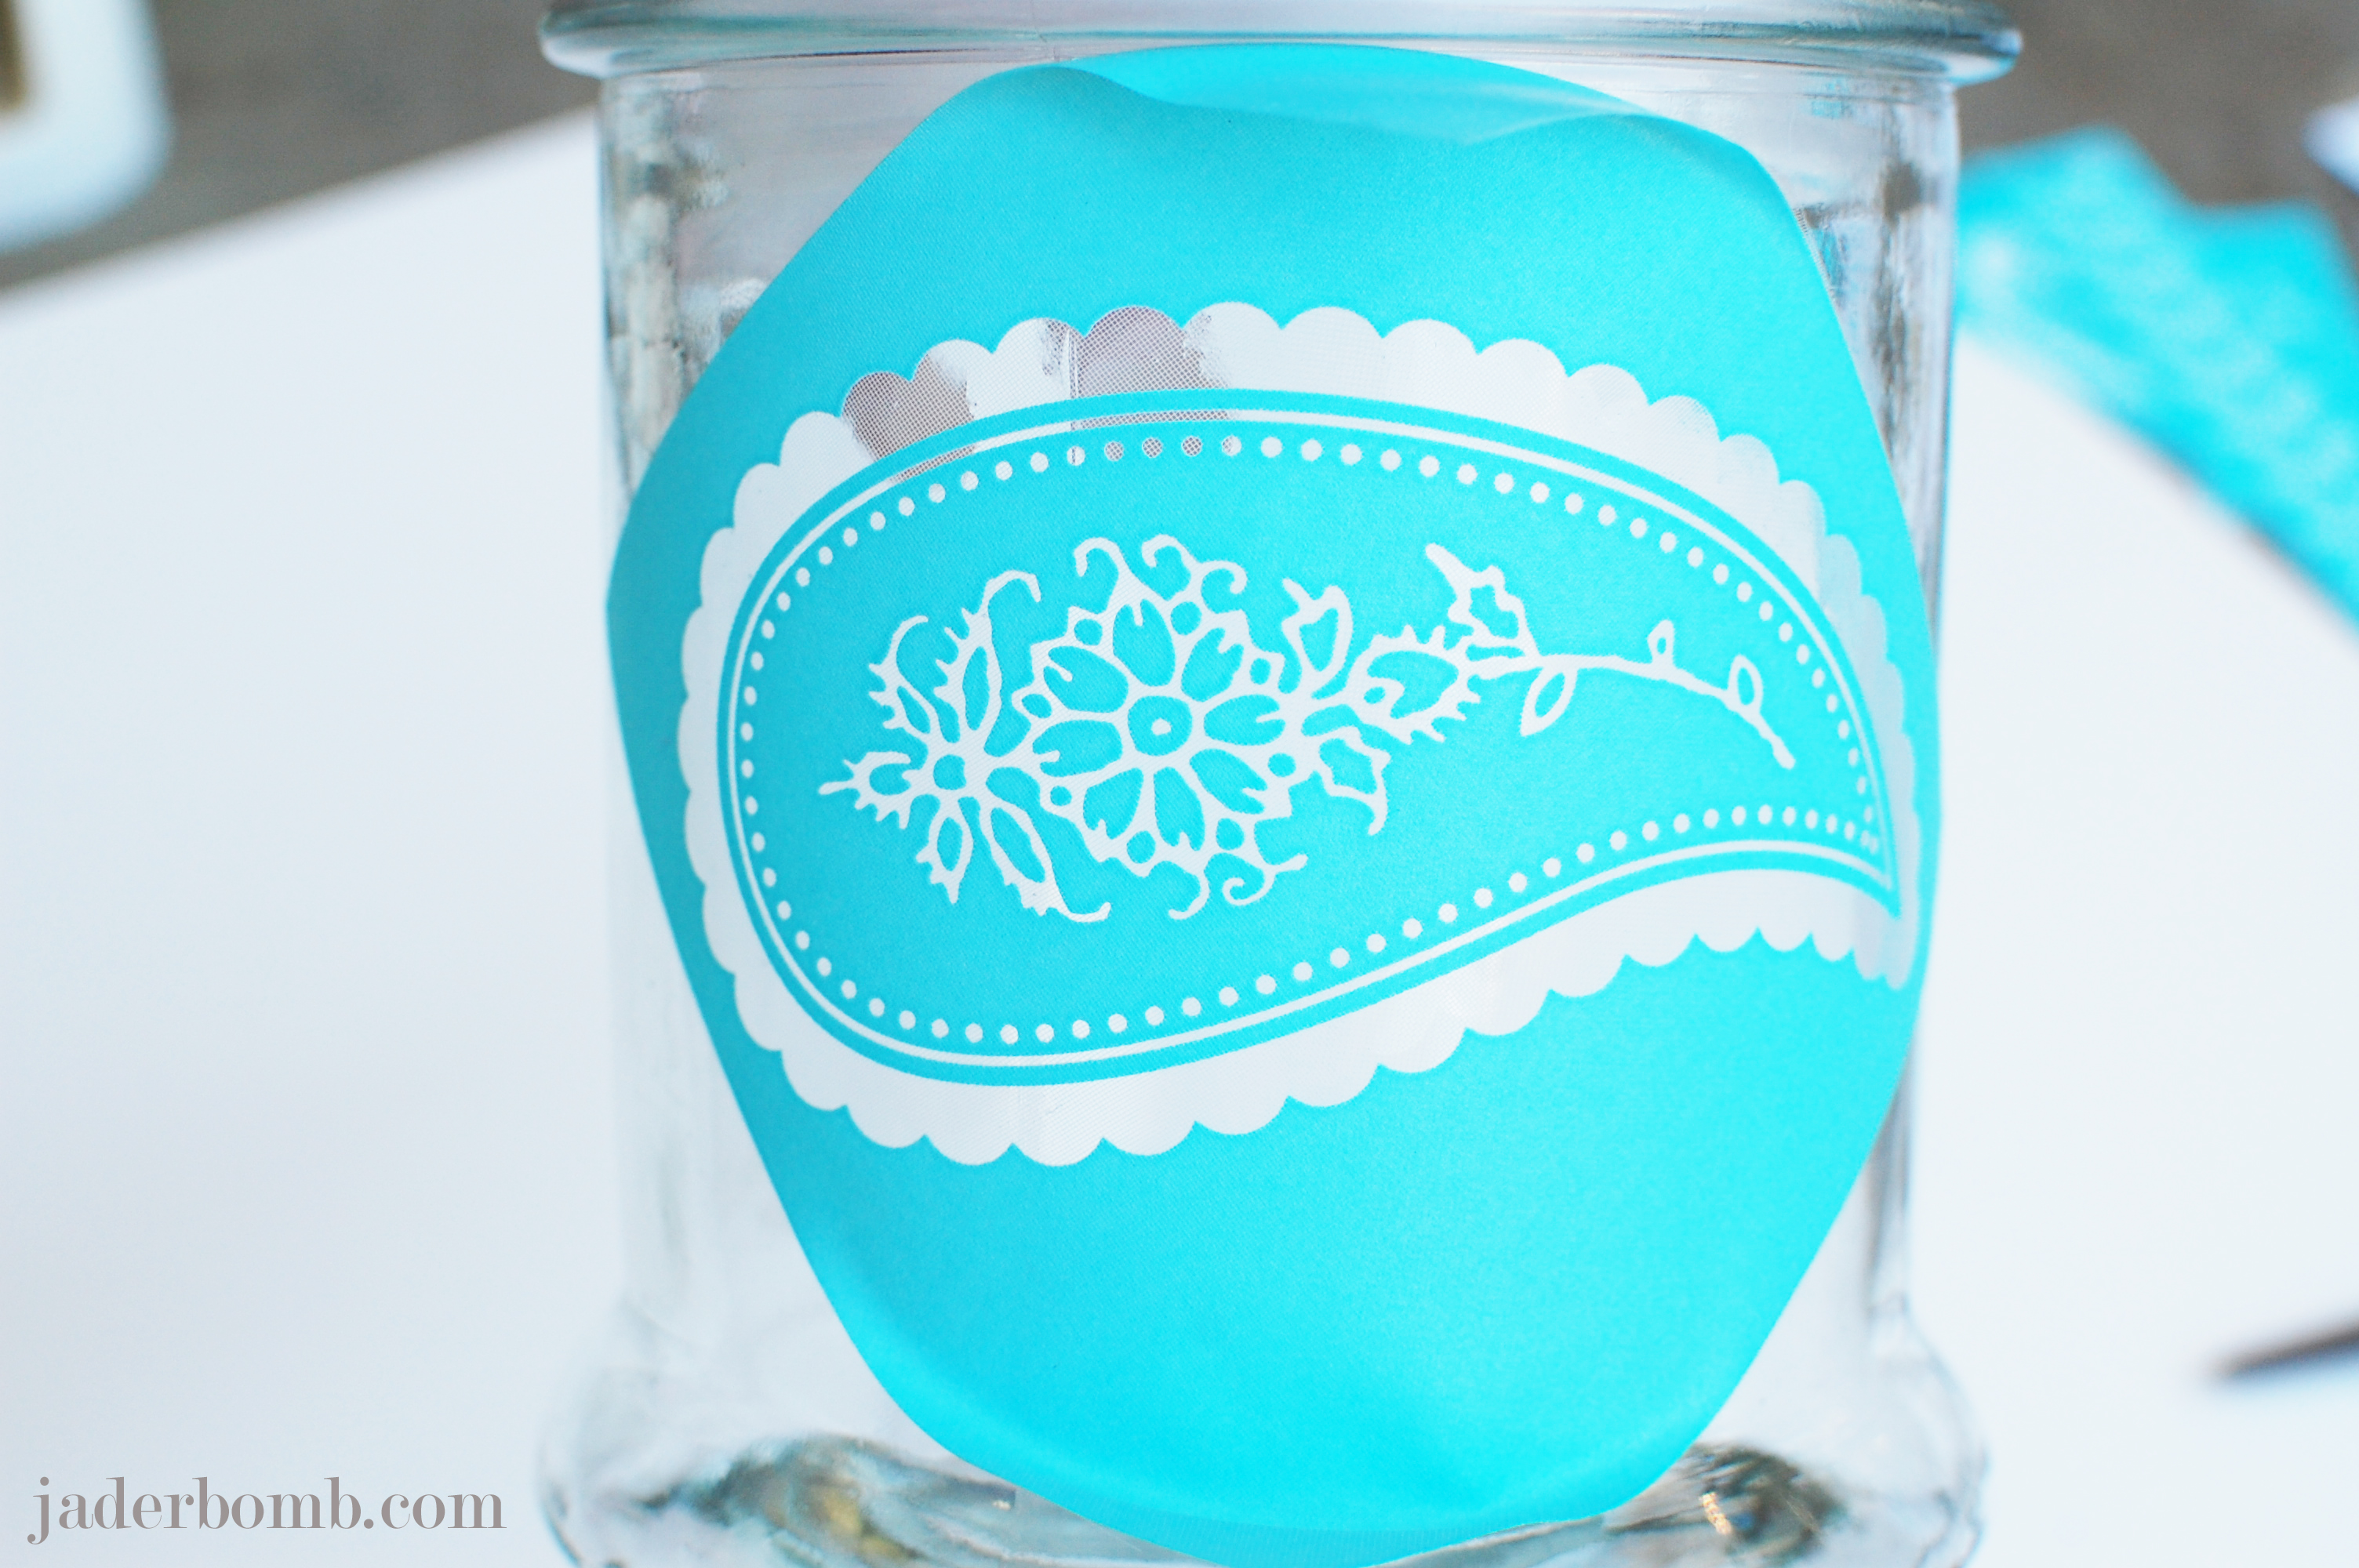
 Find the image you want to use and gently peel the silk screen off of the paper. I like to start on a corner. Plus if it get’s crinkled it will not mess up the actual image. Once you remove the silk screen place it where you want on the glass.

Martha-Stewart-Giveaway-APOTHECARY-jars-jaderbomb

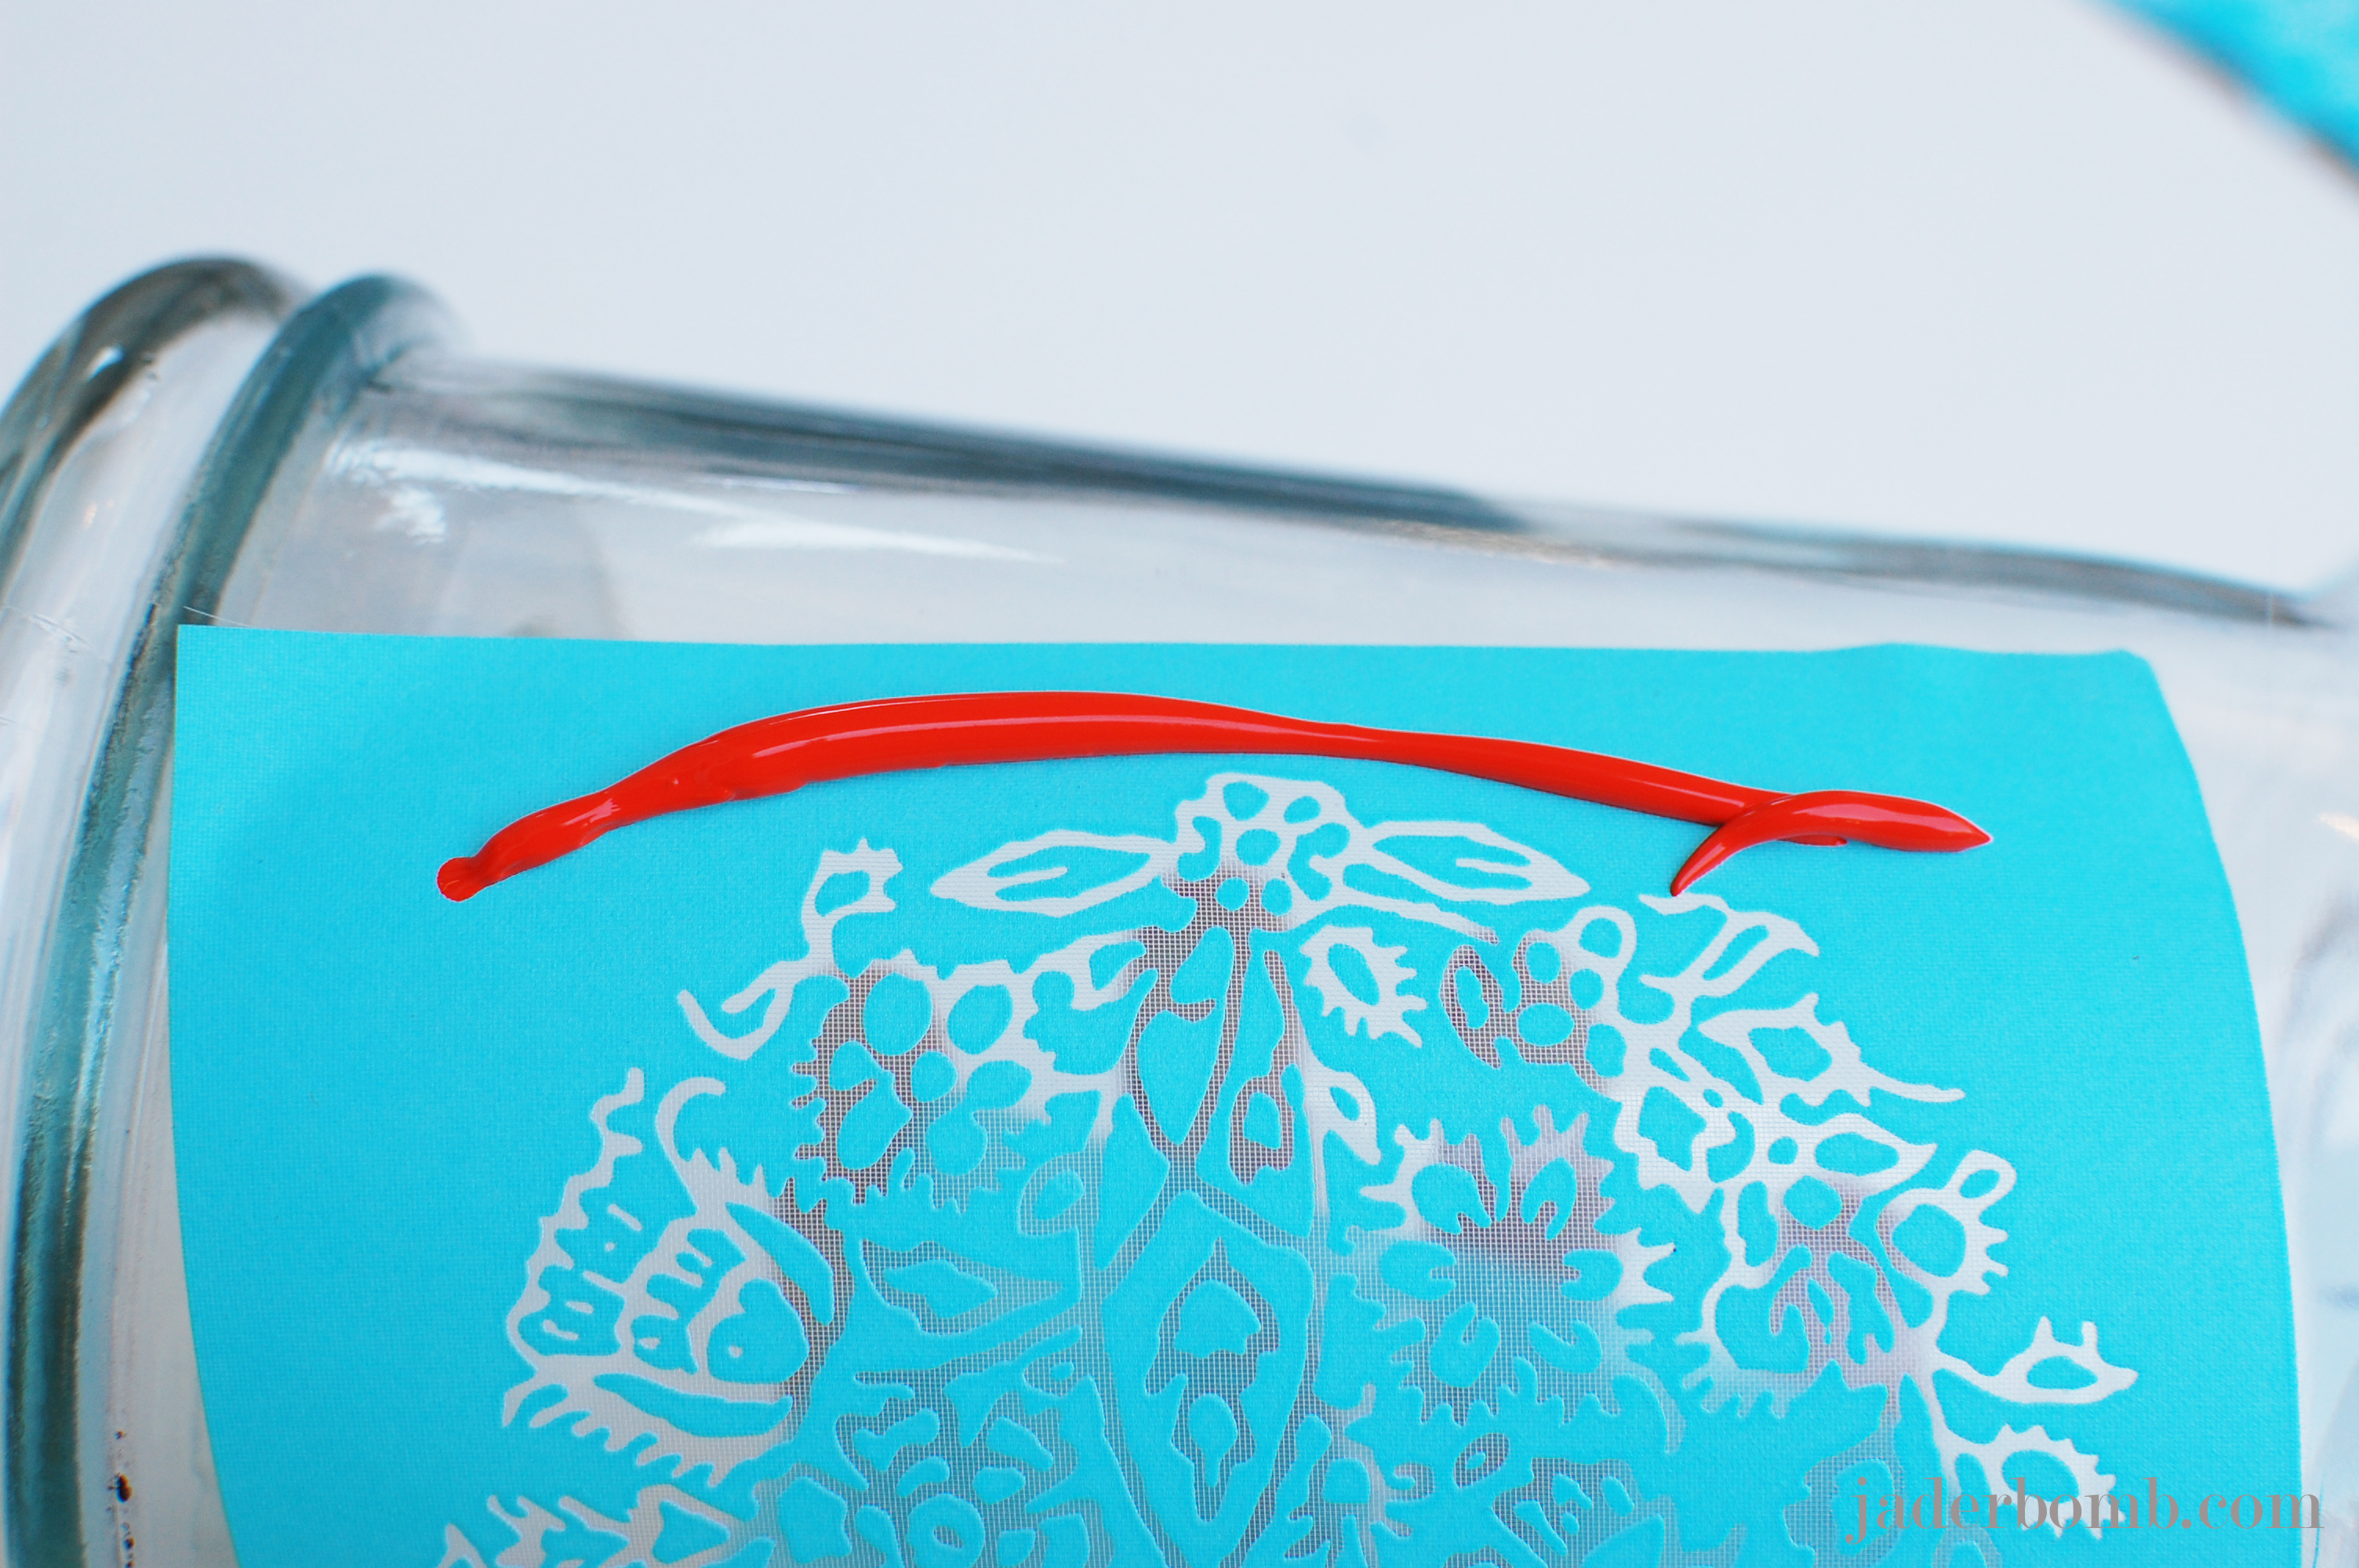
Once you apply your silk screen to the glass add a bead of paint right above the image.


Martha-Stewart-Giveaway-APOTHECARY-jars-jaderbomb

 Get your squeegee and pull the paint down over the image. I suggest going from the top to the bottom in one stroke. It will make the paint consistent and even. Repeat the step if you have to do it in two layers.

Martha-Stewart-Giveaway-APOTHECARY-jars-jaderbomb

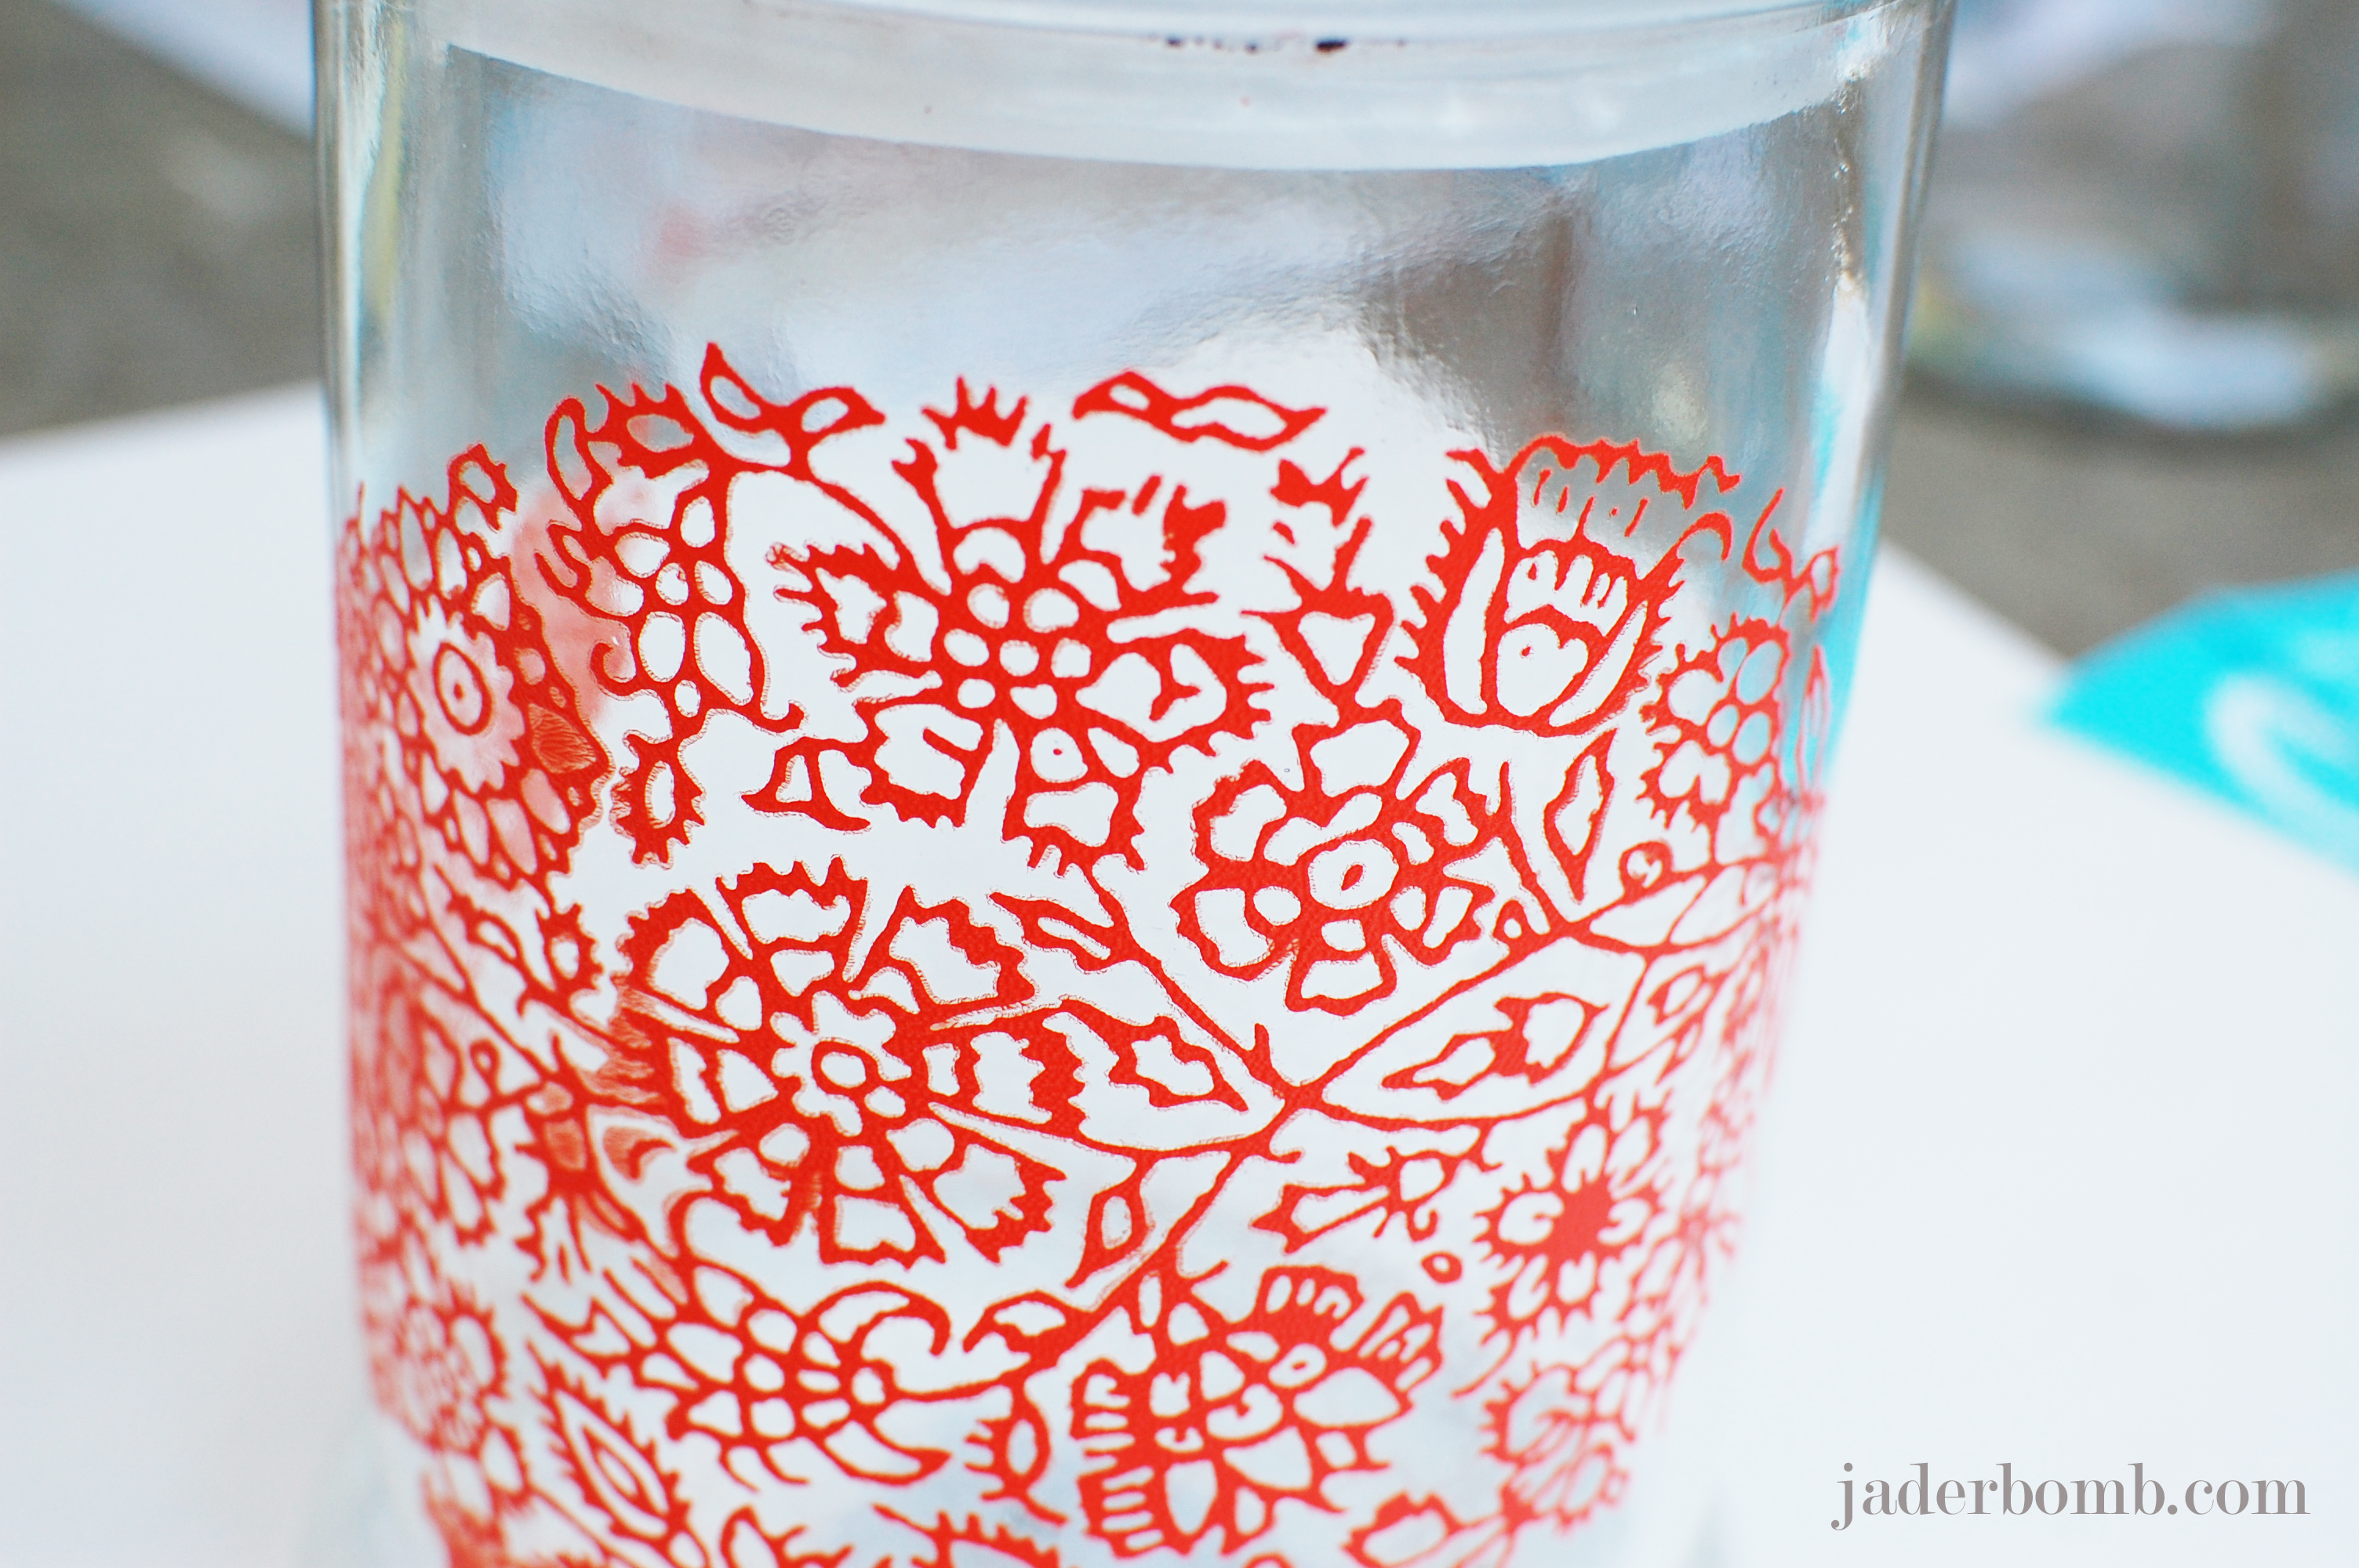
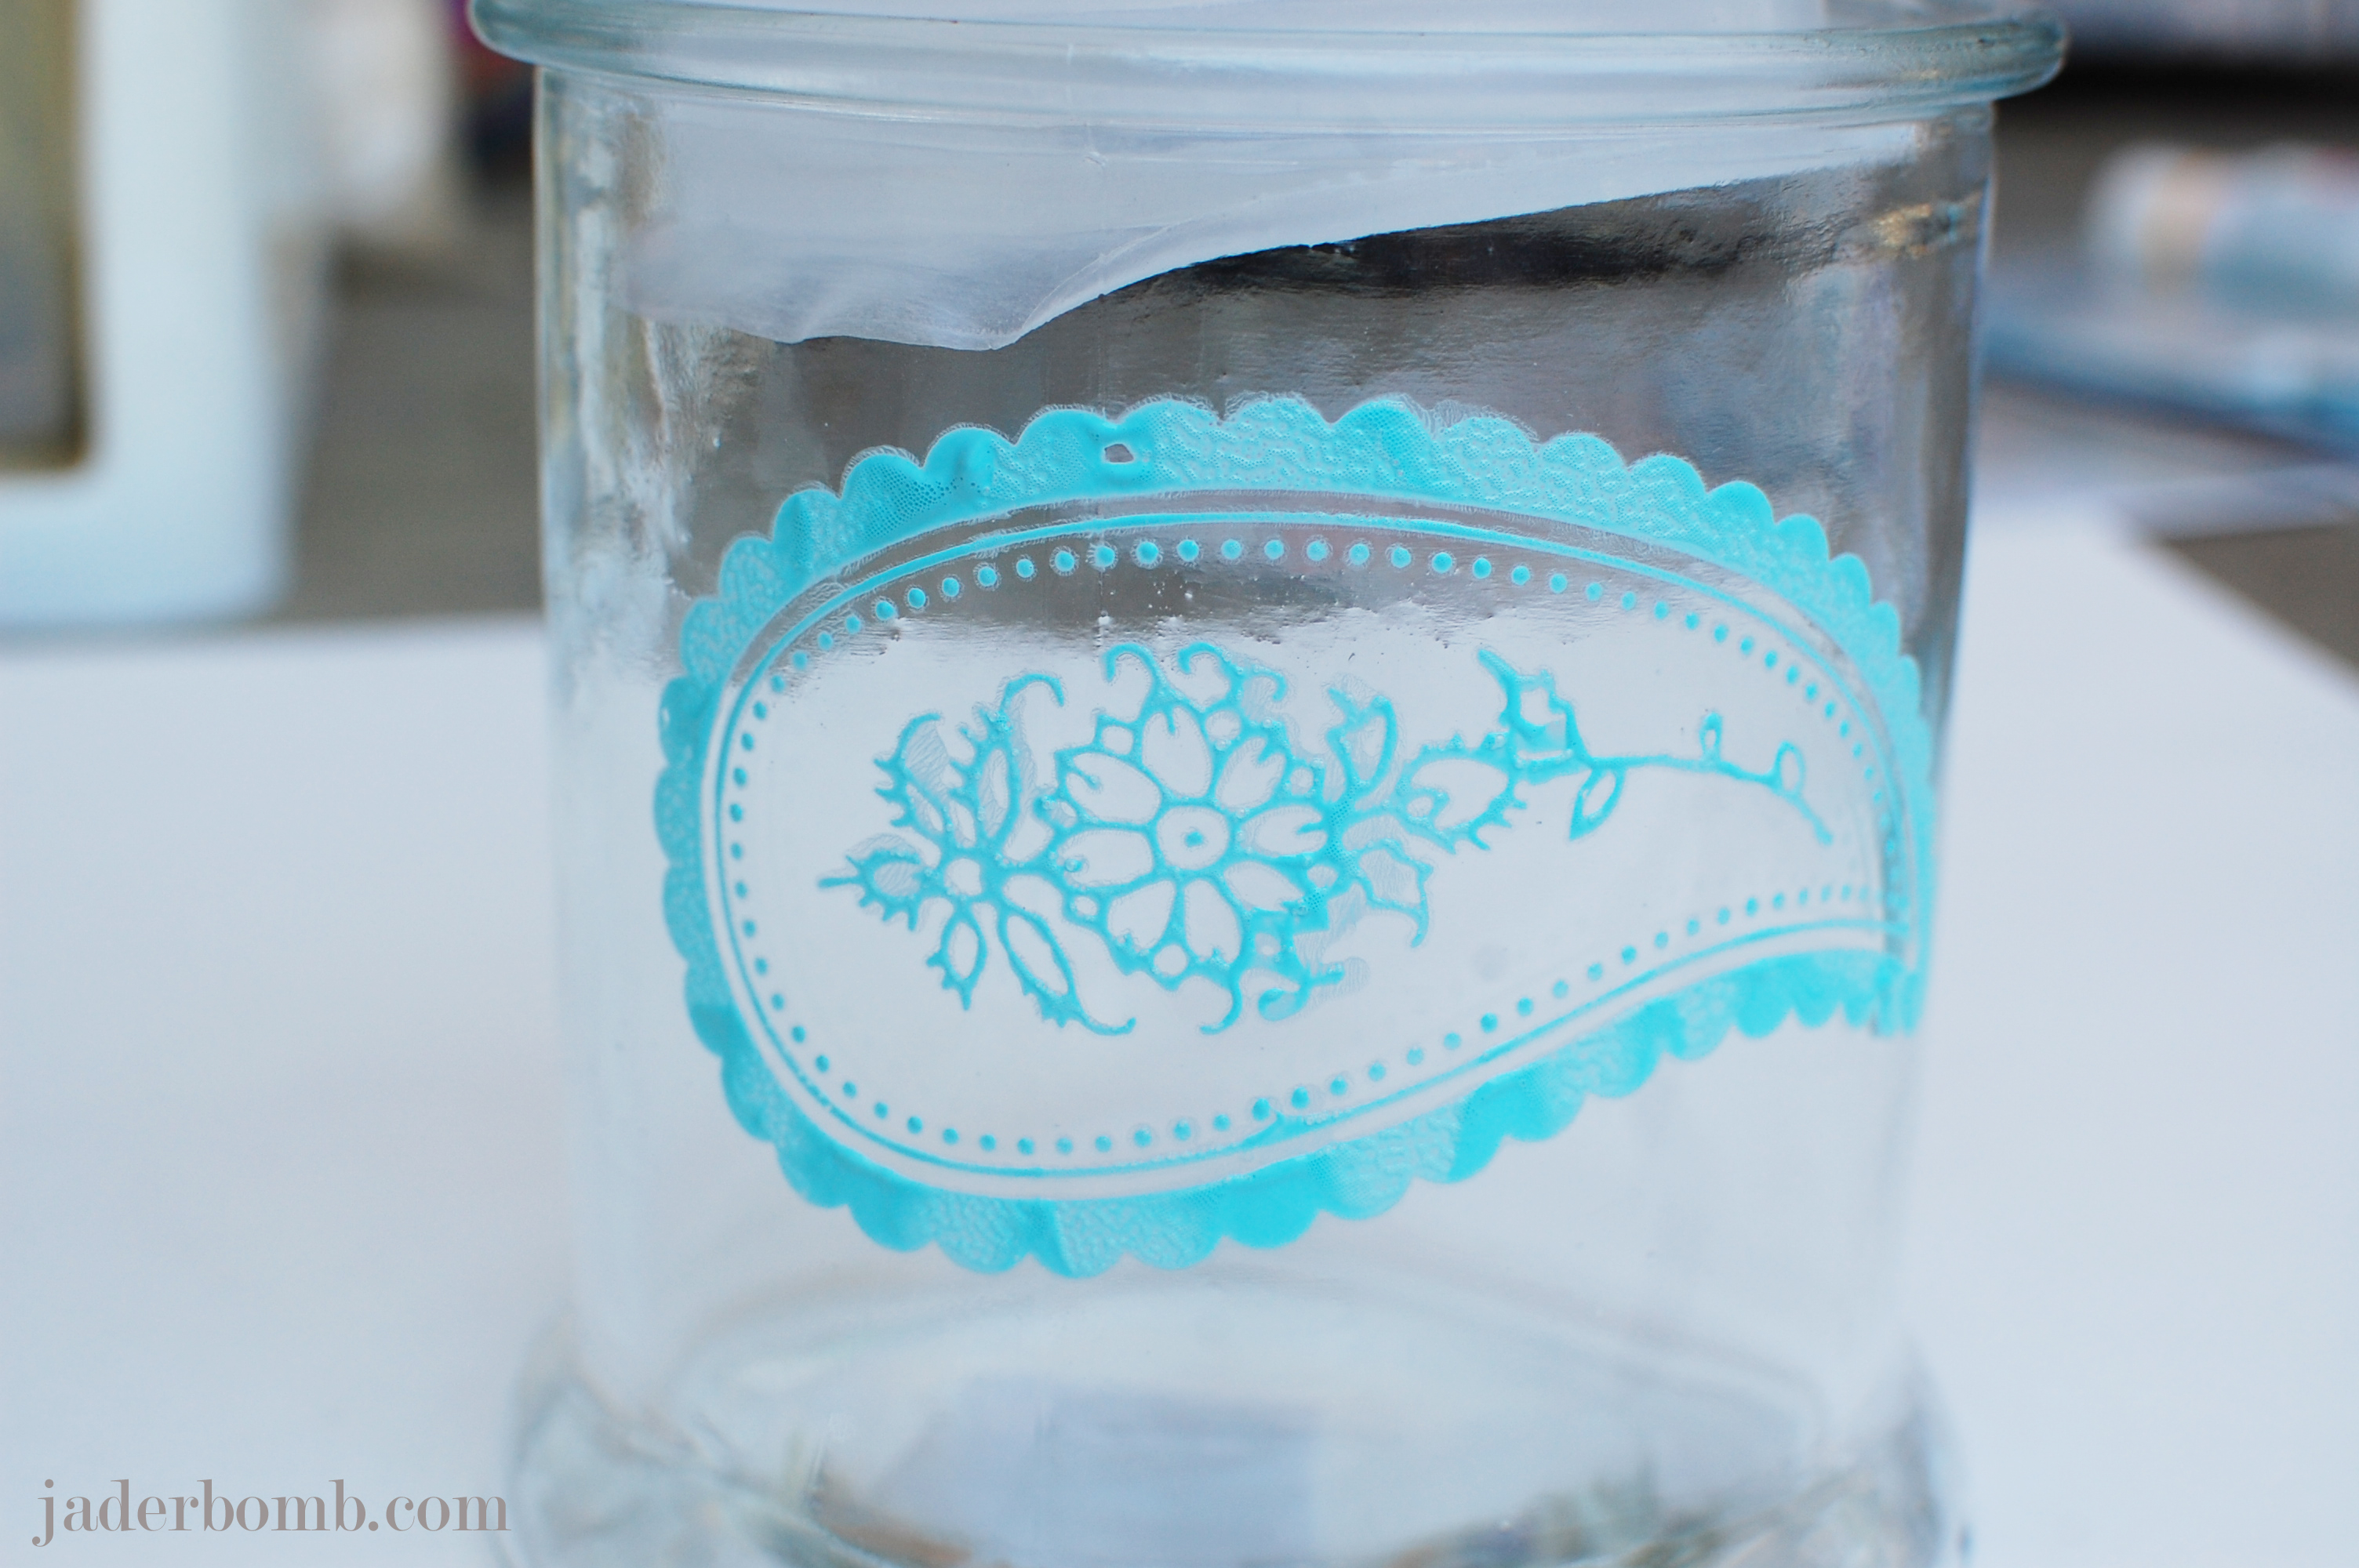
 As soon as you finish, peel the silk screen off of the glass. Very important that you wash it immediately.  If you let the paint dry on the silk screen it will not work properly again. Once you wash it lay it out on a towel to dry.

Martha-Stewart-Giveaway-APOTHECARY-jars-jaderbomb

 Move on to your next jar.

Martha-Stewart-Giveaway-APOTHECARY-jars-jaderbomb

It’s really that simple. I hope you enjoyed this tutorial!  I have some great news… I am doing a GIVEAWAY featuring the supplies I used today… HOW AMAZING.  Please enter by putting your information in the Rafflecopter box below. I am excited to see who will win all of these products. Don’t forget to share this fun giveaway with your friends.

THIS GIVEAWAY WILL END APRIL 12, 2013.

Martha-Stewart-Giveaway-APOTHECARY-jars-jaderbomb

a Rafflecopter giveaway

jaderbomb *JANUARY craft HERE
* FEBRUARY craft HERE and HERE

ST_Martha_Stewart_Crafts_Coupon
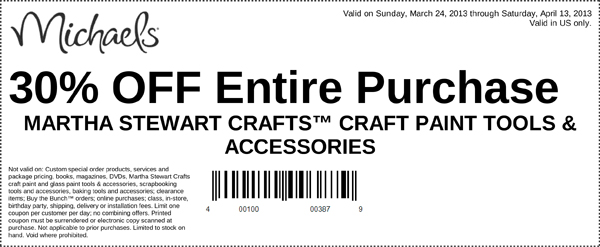
*Click HERE (US) and HERE (CANADA) for a 30% off coupon for any Martha Stewart Craft paint, tools and accessories

Want JADERBOMB delivered right to your inbox?
Just enter your e-mail in the box below!

Enter your email address:

Delivered by FeedBurner

MarthaStewartPost


Today’s post is super sassy and fun! Come on, it’s EGG CANDLES. I will show you how to transform boring eggs in your fridge into a great centerpiece for your table. You can even use them individually if you choose too! Did I mention they smell DELICIOUS!

How-To-Make-Egg-Candles-Jaderbomb

you will need

How-To-Make-Egg-Candles-Jaderbomb

I bought my blocks of wax from Wal-Mart. Completely affordable!

How-To-Make-Egg-Candles-Jaderbomb

Take your ice pick and lightly crack a piece of the egg. Then you can start peeling the egg to create a hole at the top.

How-To-Make-Egg-Candles-Jaderbomb

This is what they will look like when done.

How-To-Make-Egg-Candles-Jaderbomb

Make sure to rinse out the egg completely. We want to get rid of any egg smell.

How-To-Make-Egg-Candles-Jaderbomb

I used my burner to melt my wax. If you have a ceramic dish you can do it in the microwave but please be careful. It can get really hot. If you decide to do it in the microwave make sure you do it for a minute, stir it then continue doing that until it is completely melted.

How-To-Make-Egg-Candles-Jaderbomb

I filled a pretty antique dish with moss that I bought from Hobby Lobby.

How-To-Make-Egg-Candles-Jaderbomb

Next, lay out your eggs in the moss.

How-To-Make-Egg-Candles-Jaderbomb

Gently place your wicks in the eggs.

How-To-Make-Egg-Candles-Jaderbomb

Then start pouring your wax. I used a plastic spoon, it works really good.  Once you fill them all up let them sit for a few hours to harden. Trim the wick with scissors and voila!

How-To-Make-Egg-Candles-Jaderbomb

There you have it. A cute arrangement for any space. Just remember if you make them in different scents that when you light them they might not smell great mixed together. I recommend doing them in one scent if you plan on lighting multiple eggs at a time. I hope you enjoyed this post, see you in the next one Jaderbugs!

craft

jaderbomb

*My good friend ED ROTH has a huge giveaway on his blog, check it out HERE.

*Check out my latest post from the #12monthsofmartha HERE.

*This is FUN news! I am now a contributing editor/blogger for I LOVE TO CREATE! Check out the blog HERE.

*Incase you didn’t know, I started a new site. Check it out HERE!

*Some other fun exciting news, Martha Stewart pinned some of my posts to her Pinterest page!!!

I am so excited to share this post with you today. Do you remember last month when I told you I was doing the 12 months of Martha? Well, we are in the second month and I was super excited about the supplies I received this month. Make sure and add your email in box to the right so you can get everything sent to your email. We wouldn’t want you to miss anything. Plus, I have a giveaway coming up! Today I will show you how to create decor for your home that is affordable and easy. Let’s get started.

martha-stewart-circle-punch-jaderbomb-wall decor

you will need

*Martha Stewart Decorative Paper
*Martha Stewart Circle Punch
*Hot Glue Gun
*Twine or Nails

You can purchase all of the items I used by clicking on the links.

martha-stewart-circle-punch-jaderbomb-wall decor


The twine is optional for hanging purposes.

You can find all of her craft supplies at Michaels Art and Crafts, Jo-Ann Fabric and Crafts and Amazon.


martha-stewart-circle-punch-jaderbomb-wall decor

This is what your circle punch will look like. You can see where the metal plate fits in the sliding part of the punch and the round piece goes on top of the punch.

martha-stewart-circle-punch-jaderbomb-wall decor

This tool is awesome because you can choose the size of the punch before you start. Make sure these numbers line up with the ones in the picture below.

martha-stewart-circle-punch-jaderbomb-wall decor

So if you have the side on 10 this part needs to be on 10 also.

martha-stewart-circle-punch-jaderbomb-wall decor

Start by placing your paper on top of the circle punch then you put the circle magnet on top of the paper. You will know if it’s in the right spot because the magnet will put it in the right spot.

martha-stewart-circle-punch-jaderbomb-wall decor

Take your punch and place it on the top of the removable metal piece that you added in the beginning.  If it’s not in the right spot you will know because the magnet will resist. You barely have to press down on the punch because it cuts as soon as it hits the paper.

martha-stewart-circle-punch-jaderbomb-wall decor

The round magnet that you have on top of the paper will do the rest of the work for you. Once you do your first punch gently turn the round magnet to the left or right. It will move the paper a little bit but will stop when it’s in the next spot it needs to be in. You will feel it stop in the next notch it belongs in. I’m telling you it’s pretty magical!

martha-stewart-circle-punch-jaderbomb-wall decor

Look how pretty it is! I swear each cut is PERFECT.

martha-stewart-circle-punch-jaderbomb-wall decor

Grab your hot glue gun and glue them to each other. You will only need a dab of glue on the edge of one then place another one on top of the glue. Remember we want it to look like a collage.

martha-stewart-circle-punch-jaderbomb-wall decor

This is what it should start to look like.

martha-stewart-circle-punch-jaderbomb-wall decor

I am so pleased with the way this turned out. It’s soft and delicate with an edge. HAHA

 Check out what I made with the Martha Stewart yarn line HERE.

martha-stewart-jaderbomb-12-months-of-martha

Howdy Hoo! Howdy Who? It’s the big night tonight. The Oscar’s! I am sitting here watching them, live tweeting and blogging. Did I mention I ended up getting a Dr. Pepper ( I know, it’s full of sugar that will go to every inch of my body but oh well).  I am also having an important conversation with a Hershey’s easter bunny, we are talking privately in my mouth.  Let’s get on with this amazing and fun tutorial. I have a feeling you will love it.

We will be making feather pencils, color pencils. I am honored to be a part of the 12 months of Martha and this is one of the 3 crafts I will be featuring this week using all Martha Stewart craft items. I am super giddy about it and I think you will too. Each month I will be sharing with you new items from the Martha Stewart crafts line that is brand spanking new.  Today I will be focusing on her yarn with Lion Brand .

You can find all of her products at Michael’s Arts and Crafts, Jo-Anns Fabrics & Crafts and Amazon.com.

how-to-make-feather-pencils-jaderbomb


jaderbomb

*Martha Stewart Yarn
(I am using Gerbera Daisy & Celery)
*Martha Stewart Scissors
*Martha Stewart glue gun
*Feathers
*Colored Pencils
*Jewels 
*Lotsa love 

Don’t forget to click on the links above to order all of the materials I used!


how-to-make-feather-pencils-jaderbombHow beautiful is this picture. Sometimes I get please just viewing my materials.

step-one-jaderbomb

how-to-make-feather-pencils-jaderbomb


how-to-make-feather-pencils-jaderbomb


step-two-jaderbomb


how-to-make-feather-pencils-jaderbomb


step oneMake sure when you get to the very bottom of the pencil you dab a little bit of hot glue to secure the end of the yarn. Once the glue is dry you can cut the yarn.


how-to-make-feather-pencils-jaderbomb


step one


how-to-make-feather-pencils-jaderbombI hope you enjoyed this tutorial! Make sure and check out all of Martha Stewart’s craft’s HERE. Check out other crafts being made by searching for #12monthsofmartha and #marthastewartcrafts on twitter.

See you in the next post!

jaderbomb

martha-stewart-jaderbomb-12-months-of-martha

  Stencils R’ Us… Have you ever wanted to yarn bomb something.  I see trees wrapped in delicious yarn on the internet however I have never seen one in person. Maybe one day! What I will show you today is how to “yarnbomb” an outline of a stencil. My good friend Ed Roth has a stencil line that is UH-MAZING. His company is called Stencil 1. When I received his book and stencils in the mail I remember screaming in my car when I saw this large deer head stencil. My friend Ben was with me when they came in and he tried to secretly take it, epic fail. I originally wanted to take this stencil and trace it on a canvas until I realized that was the “normal” thing to do. There is nothing normal about me…

So, put on your yarn belt because it’s going to be a fun ride.

yarnbomb-stencil1-jaderbomb


I am so happy with the way it came out. I looks like it did in my head, but better. There is something so modern and chic about it. Let’s get started.

yarnbomb-stencil1-jaderbomb

jaderbomb

*Stencil 1 Stencil “Large Antlered Deer 24×24”
*Brown Kraft Paper (this came with the stencil-Recycle)
*Glue
*Pencil
*Lion Brand BonBon Yarn
*Lana Del Ray Paradise Soundtrack to put you in the zone

Click on links above to order from one spot.

yarnbomb-stencil1-jaderbomb

The first thing you will do is lay out your stencil for a little while until it is completely flat. These stencils are made from a sturdy material and the thickness of the stencil is perfect.  Surely worth every penny.

yarnbomb-stencil1-jaderbomb

Tape it to your brown kraft paper and start tracing. Don’t rush this part.

yarnbomb-stencil1-jaderbomb

It will look like this when you are done tracing.

yarnbomb-stencil1-jaderbomb

I got this pack of yarn from Lion Brand Yarns and I felt this was the perfect time to break them out of the package. The quality of the yarn is soft and delicate. There is a hint of shimmer in the yarn which is so smart. For those who love glitter this will give you your fix and those who might not love glitter this is a way to add it to your life without the mess.

yarnbomb-stencil1-jaderbomb

Start by outlining a section of the stencil with your glue.

yarnbomb-stencil1-jaderbomb

Next you will gently place the yarn right on top of the glue. Initially the glue will be white but when it is fully dry it will be translucent.

yarnbomb-stencil1-jaderbomb

See! This is the part where you decorate your deer head in your own way. I wanted to fill some sections in and leave some empty. It sorta represented absence to me.

yarnbomb-stencil1-jaderbomb

I am showing you this picture because I want you to see how the glue looks before it is dry. Don’t let this step freak you out. When you are done set aside and allow to dry completely. You will be left with a fabulous shabby chic art piece.

Ed-Roth-Stencil1-Jaderbomb

I am so proud to call Ed my friend. He is so talented and I promise you will see his name around very soon, in BIG places. This is one of his books. Yes, I said “one” of his books. I was so impressed when I saw the inside because it is a book unlike any I have ever seen. It has stencils in it along with instructions on how to use and take care of your stencils. You can order this book HERE.

Ed-Roth-Stencil1-Jaderbomb

This is just one of the stencils in his book. He has the best retro images I tell ya.

Ed-Roth-Stencil1-Jaderbomb

My favorite part is this folder in the back. He is so smart. So when you use a stencil in the book you place it in the folder when you are done so you will not ever loose it.

Ed-Roth-Stencil1-Jaderbomb

These are other packages of his stencils. You can see all of them HERE.

Ed-Roth-Stencil1-Jaderbomb

I can’t’ wait to show you the other projects I am working on with his stencils.

I hope you enjoyed this tutorial!

jaderbomb

This post is brought to you by Ed Roth’s stencil line Stencil 1. I received product for this post. All opinions expressed are 100% mine. You can check out Stencil 1’s line here.


Have you ever wanted to put up wood ceilings but don’t want to spend the money or you don’t know how t0 do it?  It’s quite simple, especially when they have always been there and you just didn’t know it. {SMH} So, we bought our house about 9 year’s ago and it was an older home. Beautiful and full of detailed pieces. I will admit I never knew it would turn into a fun, memorable 9 year project. I am always the one changing things up and thinking of new ways to improve what we have while saving money. Thankfully with our fathers’ knowledge we have been able to do that. I have to quickly share with you something that just “happened” Monday around 2 pm. I started painting because our kitchen which is usually painted every 7 months, I know I am a creature that appreciated change. We painted over our “beach” blue and made the walls a little less chaotic by applying linen white. Of course our ceiling was painted a golden color and when it was against the linen white it sorta looked like someone had been smoking in the house for 40 years, urghhh. I guess if we smoked I could of left it, haha!

Wanna see what happened NEXT?

How-put-wood-ceilings-in-your-home

I put a picture for you to see the before and after of the wall color. This was the first coat of linen, add 1 more and you get the picture. The picture to the far right is the ceiling. See. Kinda like baby food. We decided to paint the ceiling also which meant we had to remove the big vent over our stove. People, when we did this I guess all of the moisture from cooking everyday stayed in our sheetrock. It looked like a bad stain around it. The good thing is we never saw it thanks to the vent.

Ok. on the the good stuff.

How-put-wood-ceilings-in-your-home

Once we removed the vent we saw a “lil” bit of wood. Did I mention this was a MONDAY afternoon? After struggling with the thought of “I wonder if the wood is in good shape”, and ” What if we run across problems”…..we decided to do it.
I did ask my angel deck TWICE and they gave me the ok. It was pretty cool how easy it was to take the sheetrock off. These pictures look a little “hazy” because it was so dusty in the kitchen.

150897_535897039777796_1095986984_n

How gorgeous is this! I am so happy we went through with it because it was FREE. Thanks to the original owners. I bet they are happy looking down on us. Knowing that we can appreciate all of their hard work they did. My dad loved it so much. He used to be a carpenter many years ago and he said “Baby, they don’t make houses like this anymore.”

I think I responded with “Oh, I know honey boo boo child.”


314283_536032593097574_373172467_n

Obviously we are not nearly finished even though it looks like it. We still have a lot more to do and don’t you worry, I will share every step with you. Stay tuned this week to see the post on my Moen sink.

Have you ever started a project when it was not planned at all?

jaderbomb