Tag Archives: kids

Quote of the day:
“Never doubt that a small group of committed people can change the world: Indeed, it is the only thing that ever has.” -Margaret Mead

Howdy Hoo Jaderbugs! I am super excited to share with you some super popular food posts from last years Holiday season. I can’t wait to show you the DIY projects I have been working on for this upcoming week because they are some great gift ideas also!

No.1

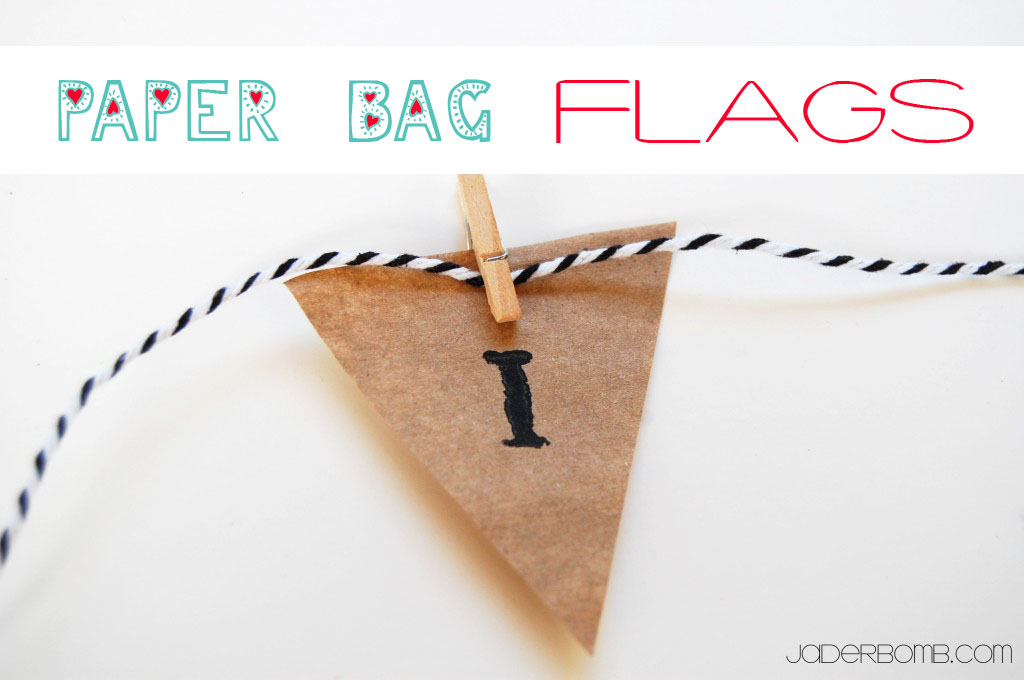
Today I will start off with this super moist delicious cake. Every time I make this my heart get’s excited. Did I mention that my family tears.it.up? Click HERE to see how I made the mini flag bunting for the cake.
{Click HERE to get this Devil’s cake recipe}


No.2

The next thing I will show you are my famous red velvet cake balls. Me and seester made these last year for Christmas and let me just tell you we had a blast. The thing I love the most about these cake balls is that you can get your kids involved. If you decide to make them, make like 100 of them because the person eating all of them will never feel like they ate “ALL” of them.

{{haha}}
{Click HERE to get these red velvet cake balls recipe}


No.3

Now these yummy suckers will turn you into a
Popcorn Snatcher Monster.”
I am serious. When you finish making these and let them sit for about 15 minutes…they have this warm, chewy, sweet goodness to them. It’s actually quite delicate in your mouth. I love that you control how “PEPPERMINTY” you want it!
{Click HERE for the Peppermint Puffs recipe}


No.4

Sometimes we spend so much time looking for “special” recipes that we pass up the really SIMPLE (awesome) ones!
This recipe is the perfect recipe to WHIP up in a JIFFY.
{Click HERE for the Peppermint Puffs recipe}


No.5

I am so proud of these because they totally happened by accident. Well I sorta was playing around but I locked this recipe in to “jaderbomb” because you “might” see this somewhere later on….
I made sure that is was very easy to make so enjoy!
{Click HERE for the Nutella Pankcake Balls recipe}


 Well Jaderbugs, I hope you enjoyed all of my great recipes from last year! Stay tuned for many new ones this month. The first “GOOEY” one will be up sometime tomorrow!

See ya in the next post!

Make it a DIY kinda day,

Quote of the day:
“When rungs were missing, I learned to jump.” -William Warfield

Today I found myself stuck in YouTube. Looking at some of my old Halloween favorites. It’s kinda crazy to think a movie can take you back in time. I remember watching Practical Magic, circa 1998 over and over. Hocus Pocus is an all time favorite. I am especially happy right now with ABC Family playing the 13 nights of Halloween. We cook egg sandwiches at night and all watch tv in the kitchen. Kinda like a country cozy moment. It’s sometimes odd to think that I watch the same shows with my own family now. Lil one loves when we all watch movies together!

So earlier today when I STARTED this post I put in Julie and Julia. Almost two hours later I realized I didn’t type anything but I sure finished that dang movie! I remember when Martha Stewart’s The Family Room wrote a post about me.  They compared my “Martha Countdown” to Julie and Julia but with glitter and a glue gun. . Maybe that is why I feel so happy when I watch that movie.

This here is my vision of what a “Charlie Brown” chevron pumpkin would look like. See, when I think of Charlie Brown not only do I think of a chevron pumpkin but I also think of PRIMARY colors. There ya have it Jaderbugs!

My video inspiration comes from this AMAZING video that Sesame Street made. It says it all plus it has a good beat! Enjoy
{{tipyrooo: play the video while sifting through the post, it’s sure to make you tap your foot}}

INGREDIENTS:

*Mod Podge
*Craft Brush
*Tissue Paper
*Pumpkin

P.S. You can click on any of the links (up above) to order these ingredients.

Let’s get started making our chevron pumpkin!

The first thing I do is brush on a little Mod Podge then start placing my tissue squares on top of it. After the tissue is applied I pass my brush over it again, with a little Mod Podge. Remember, if you don’t have the pre cut squares you can use ANY tissue paper you have. I just keep these babies stocked in my studio because they really come in handy. You can get them from Michael’s or any craft store.

Keep in mind that video I posted. When you place the blue tissue over the yellow you will get shades of green. Red and Yellow will give you orange. You could keep going with the colors and get some really beautiful shades like I did HERE.

I went all the way around the top of the pumpkin first with the blue. I continued down with the yellow then red. Notice how I placed the yellow pieces of tissue paper. It’s important you get an organic chevron shape. Be creative too! If you don’t want to do the design have fun with it and make it your own. You will be surprised when you see all of the amazing colors the tissue make once you start layering them.

Gotta run, see ya in the next post!

{p.s.  stay tuned for my string pumpkin and homemade washi tape this week}


Quote of the Day:
“We have two lives…the life we learn with and the life we live after that.” -Bernard Malamud

Video Inspiration for this post! Last night Beetle Juice played on ABC Family and I felt like having a party in the house. Nothing screams PAR-TAY Honey Boo Boo like PAR-TAY banners. Right now they have the 13 nights of HALLOWEEN so make sure and check out all of the classic movies playing. I suggest playing the video while you read the rest of the post, it’s sure to get you DANCING!

So, Washi Tape is pretty cool because you can use it for so many things. It’s really affordable until you become a washi tape addict then things can maybe get expensive. Sometimes at Michaels Arts and Crafts you can buy a pack of 3 or four for around 2.50. It might sound expensive but this stuff really last’s a long time. Once you start to get a collection then you can really get funky with your crafts.

INGREDIENTS:

*Washi Tape
*Scissors
*Baker’s Twine

(If you click on any of the above links you can order all of my ingredients)

What I really love more than washi tape is baker’s twine. There is something about this two toned string that makes me levitate and dance. I think when you add the black and white baker’s twine to things it adds a pop of color and it becomes a little magical to the eye.

The first thing you will do is lay out your baker’s twine on a flat surface.

Cut a piece of washi tape. I always like to cut a little more than I need. In the end we will be cutting these strips, plus it’s good to have some longer than other.

Lay your piece of washi tape on your flat surface and place your baker’s twine right on top of it. You want to make sure and place your baker’s twine is right in the middle.

Here is another angle for ya.

Fold it over so each side sticks to each other. Once you are happy with that you can cut it strait across or like I did below. It kinda adds a little “carnival” in your life!

I am really pleased with they way they turned out. Make sure you squeeze the washi tape around the baker’s twine so it is secure.

I hope you enjoyed this tutorial. Remember they make washi tape in every design you could think of. Here is a great site to order from. It’s Wishy Washi Tape . You will really enjoy this shop.


Quote of the day:
“All clouds are not rain clouds” – Latin Proverb

Video inspirations for this printable. I like these clown much more. Enjoy the video!

Click HERE for the full size PDF

You can print this out and use it for scrap booking, frame it with a picture in it, use if for Halloween decor or use it as a gift. There is so much to do with it. I am loving the diamonds all over and the font!

Happy Sunday
I made this scary carnival print for ya. There is something about clowns that freak me out. Maybe it’s the fact that you just DON’T know who or what is under all of that white paint.

The other day me and my dad were out and about and ran across this man, that we both know.

Dad : “JJ well look who it is”
Jade: “Yeah doobie the clown”
Dad : “HUH”
Jade: “Yeah, remember for my 2nd or 3rd birthday you hired him to be a clown at my party”
Dad : “LAUGHING OUT LOUD”
Jade: “(slapped him on arm and rolling my eyes) “STOP while I am trying not to laugh myself”
Dad: “YOU REMEMBER THAT JJ
Jade: “Just a little, haha. It sorta traumatized me”
Dad: (put’s arm around me and says: I’m sorry, we thought you would enjoy it)
Jade: Giving dooby the clown a hug because at this point he right in front of me.

Good news is he wasn’t in a clown suit. He’s a principle now. I am not scared of him anymore.

So the point is, clowns are not that scary if they are family friends. I still get freaked the freak out when I see a clown anywhere else. Maybe I will over come my fear and dress up as a clown this year.

Did anything ever scare you when you were little?

Quote of the day:
Time you enjoy wasting isn’t wasted time”

————————————————————-

Here is my video inspiration for this post. Make sure you press play while you enjoy the post.

FYI: this is my FAVORITE movie EVA!

Check baby Check baby 1.2.3.4.
Check baby Check baby 1.2.3.

I had so much fun creating this project in my head. See I had these mini blue jeans from my son when he was LIL. I didn’t want to throw them away or stuff them into a box  so I decided to let my creative brain decide for me. I thought they best way to incorporate them into my daily life was to make them into a fashionable blue jean purse.

Let’s get started. I’m just warning you, this craft is super easy so put your crafty seat belt on.

I know, I know. You are prolly thinking “Hey Jaderbomb, where is your “ingredient” list”. If you don’t know what that means it’s the picture of things you will need to make this project. I will tell you why I don’t have one. Well, because I didn’t plan on posting this. I think I THOUGHT it wasn’t going to come out like it did in my head. I guess I fooled myself.

You will need:
*blue jeans
(whatever size you want)
Obviously the bigger the jeans, the bigger the purse
*an old purse strap
*snaps
*gold chain
*needles
*thread
**sewing machine works the best**

The first thing you will do is cut the pants where you want the bottom of the purse to end. When you are done cutting pin them like I did below. This will secure the material for you.

Remember, the longer you cut the deeper the inside of the purse. I am loving this project so much I think I will make a few HOBO bags (with new jeans of course cause we don’t want any honey boo boo smells) and sell them on my ETSY and STORE ENVY shop. What cha think! I think it will save you the time and it’s great Christmas gifts!

Just a little closer look at how I put the pin through the blue jeans.

Five years ago I would of totally hand sewed this, or found someone to do it for me…
Can you believe Ashy just taught me to sew last year! I mean let’s just say this. I always knew how to do basic things but now I can sew by myself like a big girl! haha

You want to sew the bottom of the blue jeans slowly. I made two passes just to make sure it was secure. Make sure if you are using a sewing machine for the first time that you take the pins out before you sew in that spot.  If you look at the picture below I wait until I am ABOUT to sew the pin until I take it out of my material.

When you are done with sewing you might need to take a lil break. You just did some major sewing. I am gonna take a break right now.

OK! I’m back!

Now is the time to embellish your new purse. I started by passing a piece of gold chain through the belt loops.

If you don’t like chains, you can actually put a real belt (sheesh that would of been cute, why didn’t I think of that), some fabric or nothing at all.

I have a ton of purses that have removable straps so I just stole one off of a purse and clipped it onto the belt loops. I am really loving the way the leather and blue jean look together.

In the picture below you will see those two gold snaps that I added. I found when I put things in the purse it kinda opened more  and I didn’t like that. I don’t want my goodies falling out now!
I used some SNAP FASTENERS for this. You can buy these at any craft store. I bought mine from Michaels Art’s and Crafts.

Another close up. This is what the snap looks like from the back. If you are not a fan of GOLD you can get SILVER snap fasteners also.

I hope you enjoyed this craft! It was so much fun. You could tie dye your purse, put tons of beads on it, make a strap with fabric, stencil it and so much more! I wanted a clean one, this time.

Stay tuned because I will be putting some in my Etsy shop for you to purchase! Can’t wait to see you in the next post!
Have you seen my BOOK PAGE CURTAINS? If not you have to check them out. So cuh-yute.

Find me here!

 Quote of the day: “Do a common thing in an uncommon way.” -Booker T. Washington

Today we will be making paper bag flags out of….. paper bags! I love finding things that can be re-purposed into something completely opposite of what it really is! The good thing about this tutorial is it’s easy and you can get as creative as you want by decorating them.

Let’s get started!

paperbagflags

Ingredients:

*Scissors
*Brown Paper Bag
*Bakers Twine
*Rubber Stamps
*Black Paint
*Mini Clothespins

The first thing you will need to do is cut triangles out of the brown paper bag. (woop woop, this bag was fuh-ree)

Tadahh! This is what mini triangles look like next to each other. I always get brown paper bags instead of plastic so you can imagine how many brown paper bags I own…

I like to use a paint brush on my rubber stamp because it has a different texture to it. Plus, it’s a little darker. Make sure you ONLY paint on the letter. You could also Mod Podge a smaller triangle in the middle using scrapbook paper. I buy my scrapbook paper here.

I think I am the only person that get’s {super duper} excited when I see bakers twine. Do you? What is your favorite color?

You can stamp whatever you want on your mini triangles. You can also cut them small or LARGE. It just depends on the space you are putting them in. When you are done with everything I like to lay everything out like this.

Last thing is to grab your mini clothespins {that you bought from my shop} and pin the twine to the mini triangle.

There you have it, Paper Bag Flags!

See how cute they look once you put them up. You can be completely creative with this and cut out fabric or scrapbook paper to do the same thing. This is a a great “COUNTDOWN” for kids. You could do this for the whole month of December and they could take down each number a day! How cute!

Huge Glittery Hugs, Jade