Author Archives: jaderbombllc

About jaderbombllc

I am a Southern DIY blogger and Designer known for fearlessly conquering anything and everything do-it-yourself. I aim to create unique designs by working through my thoughts, dreams, emotions, and tons of glitter! I believe in doing things that make my heart flutter and smile, and I live by my motto, “Life is simple and so should your style.” To learn more about me, visit jaderbomb.com or email me at jade@jaderbomb.com. You can also visit my Etsy shop at jaderbomb.etsy.com. Make sure to check out my FREE PRINTABLES site www.freeprettyprintables.com My biggest accomplishment thus far is being a guest on the Martha Stewart show, yes she smells good. I love my dog Ceaux Ceaux, pens,the smell of Christmas, GOLD, Dr. Pepper and blogging. BTW: I bleed glitter, all shades.

Happy Monday Jaderbugs!!! Lately I have been on a pom pom phase and I am honestly not quite sure why. So today I will be showing you how to make a Pom Pom Mirror.

Maybe it’s because when I pull out the craft supplies I used as a kid it makes me feel super giddy inside. The other night I posted a picture of some pom pom’s and asked my followers what was the first thing they thought of when they looked at them.  I was quite shocked at the responses and I just have to share them with you.  Here are some!
* Star Trek….tribbles
* Pom-poms on the back of ankle socks … “Booties”
* Sesame Street
* Will Farrell eating cotton balls in elf
* I spilled my craft supplies again
* Clowns
* Getting me a pair of white Keds and hot gluing these to them
* Kindergarten
* Craft projects
* Popples! Now that’s ole school!

These are just SOME of the responses and I loved all of them! This DIY is super easy and anyone can do them. Let’s get started!

Pom Pom Mirror

You need a few ingredients for this DIY.
* Colorful Pom Poms
* Old Mirror
* Hot Glue Gun
colorful pom poms

The good news is at the craft stores you can buy these pons pons in bags of rainbow colors or you can get plain colors, depending on the look and style you are going with! pom pom mirror

Are you freaking in love yet. Now I totally get that not EVERYONE will love this but I do and that is all that matters. You could do one with all white pom pons and you would be surprised at how soft and elegant it would look!

On another note, kids love pom poms and I promise you kids will LOVE doing this DIY!diy mirror

diy rainbow mirror

I hope you enjoyed this quick and easy tutorial. Stay tuned, tomorrow I will be sharing a super unique tutorial for you. All I will say is there will be LEATHER!!!

See you in the next post!
XOXO, Jaderbomb

Wow! I am actually sitting here writing my first blog post of 2015. I am not sure where to begin with this post. 2014 was the HARDEST year of my life. Now, I know what you are thinking… How bad could it have been? BAD, but GOOD. Those two words sound kinda crazy put together but I will say that things get bad before they get good!  I have been blogging here in my little glittery home for a few years now.  So many great things have happened to me since I started this blog and I will FOREVER be grateful for them.  I have met so many wonderful people on this internet journey.  Some friends – believe it or not – I have NEVER met yet.  It’s funny how I sit here everyday writing things, creating things, crafting, exploring and finding ways to connect with YOU. I feel it’s what I was meant to do.

10553422_906569452710551_2462812761830668420_n

When I first started this online home of mine I really had NO idea what I was doing. I didn’t have money to hire a web developer, I didn’t have a photographer to take “professional” looking photos.  I didn’t have a “team” behind me (except my dog Ceaux Ceaux) but what I did have was PASSION and EXCITEMENT. Those two things can’t be bought and honestly if you don’t have that in this huge internet world you won’t go far.

You are probably wondering how I can say that… Well, I say that because someone across the world reading my blog post can truly tell if I’m being real and sincere.  I promised myself that on this journey I would NOT CHANGE WHO I AM to fit the mold of other DIY bloggers.  I am a BRIGHT, CRAZYYYYY, WHIMSICAL SOUL and I want everyone reading my blog to KNOW that.  So thank you, YES YOU READING THIS RIGHT NOW for coming back for more of my wacky crafts and crazy stories. Let’s move on to what brings me to write this post.
10407287_927724247261738_366813788310418492_n
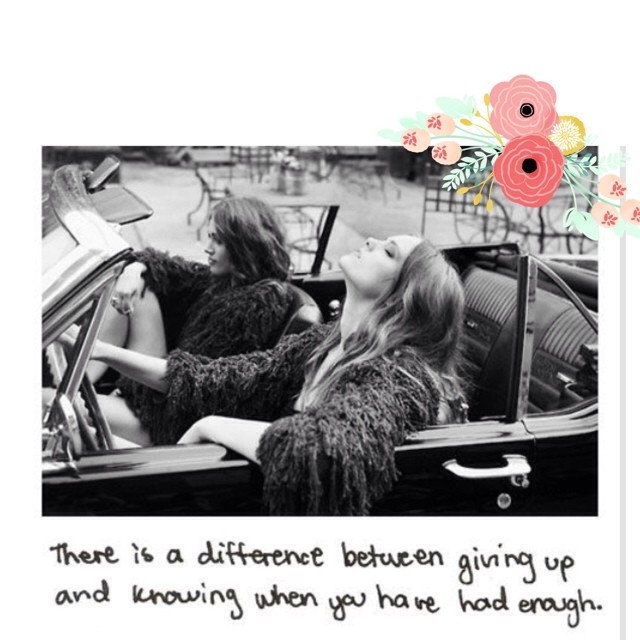
Boy oh boy this is SO true.  I told you earlier that 2014 was freaking CRAY CRAY for me and lemme tell you I meant it.  I wasn’t happy with myself for a while… If you knew me then you would wonder how could that be.  I had the “perfect” life. But then again everyone on the outside always sees that right!!! LOL

I had been in a relationship for 10 years and they were indeed GREAT. I wouldn’t change those 10 years for ANYTHING. They truly made me into who I am today my precious souls.  In 2013 I decided I wanted to end the relationship I was in and I knew in my FREAKING GUT it was what needed to happen in order for me to move onto the next level of my life.  Did I have ANY idea what this all looked like once it started to unravel?  F NO. I mean really, who does!  If you do then god bless you!  I can look back now and laugh at the fact that I didn’t think it was going to be all that hard.  Let’s just say it was.  Most people I know have hit hard times in their lives and they are “THAT STINKING CLOSE” to the LIGHT but fear inside of them and sometimes negative sources in their life cause them to go backwards and fall back into pure comfort.  Did I ever hit that huge big wall of FEAR, oh yes.  But, nothing that came in my path could completely erase the vision I had in my head of what my soul really wanted.

535957_928367593864070_9050922296621867257_n

Why was 2014 FREAKING HARD you wonder.  Well because what I knew for 10 years was all slowly going away, and lets face it- us humans don’t do well with change, even if its to better ourselves.

My FRIENDS… (minus a few good ones) all stopped talking to me.  Shit, I guess they thought I was nuts and sided with my ex.  I mean, this is just me purely guessing because honestly I have not talked to some of my friends for over a year now.  Yes, these were friends I had been having for 8 or more years.  You wonder sometimes how a person who claims to be your friend erases you out if their lives over A DECISION I MADE BECAUSE I WASN’T HAPPY ANYMORE.  I don’t know about you but my purpose while I am on EARTH is not to dictate how others should live their life.  Aren’t friends “supposed” to support their friends during the HAPPY times and the SAD and DIFFICULT times?  I know right now you are like “how could anyone not be friends with you because of a decision YOU made”…  My only conclusion is they were NOT STRONG ENOUGH and GOD didn’t want them carrying over onto the next journey in my life.  Heck, I am pretty ok with that plus I just say prayers for them that if they ever go through ROUGH and DIFFICULT times that they never have to loose people who they value so much.  I even lost people in my family and I am truly sad for them at this point.  They face their own demons and that’s their karma to deal with.  This portion of 2014 I am finally ok with. Ending that if you are reading this (you know who you are) I am still sending you glittery wishes and prayers of happiness!!!!

My BLOG… 2014 was the year I didn’t give a you know what about my blog. NO!  Not on purpose, I love it here. I actually LONGED for it. But days went by where I had no idea what to write, what to create, or even how to craft.  Days turned into weeks, then months.  I remember one day I finally sat at my computer (which was a HUGE step) and I looked to see the last time I posted something on my blog and my eyes prolly looked like they jumped out of my face.  It was over ONE month.  If you have been following me or know me you KNOW this is SUPER BAD.  I usually post every other day and if I am not writing out blog posts, I am crafting, journaling, editing pictures, editing videos and LOVING LIFE.  I remember thinking how could that be possible that it was a month since my last blog post. Then I realized this…. (see below).

My DEPRESSION... Of course I have been in situations before where I was sad or feeling down but real life, true depression is NO joke. I can actually recall times where people around me said they were depressed and I would tell them “just go do something you love or that makes you happy then you will feel better”…Um no – that is not how that works.  It’s REAL, TESTING and VERY ALIVE.  There were times that I just could not handle anything and it felt like I would NEVER know what it feels like to be ME again.  I thought Jade was DEAD.  This might be why my blog was not a priority for me.  The only thing that I was alive for was my son and everything that fell below that was dead.

So those three things made 2014 super rad (just kidding)! But guess what!!!!!!

1653299_734546216579543_861059805_n

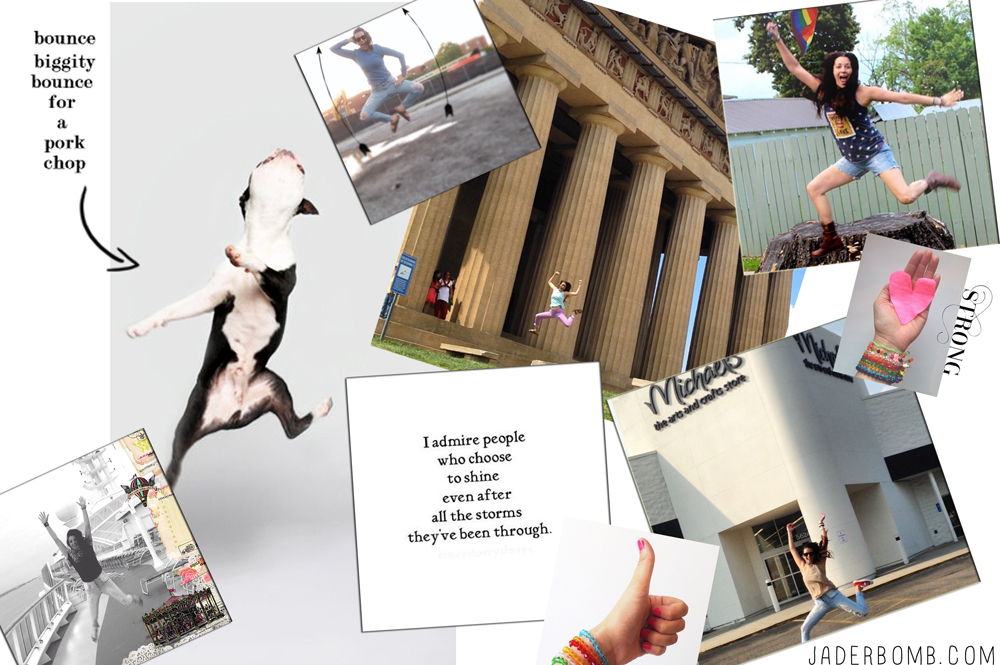
Jade is ALIVE more than EVER and thankfully months before 2014 ended I found her. I now know what true friends are and I know what LOVE is.  I am IN LOVE with my soul mate and have never been more happy (1901).  I am full of glittery love and I am ready to share it all with you in 2015.  I have realized so much about ME in this and I have grown to understand so much about life.  I am not SAD that I went through all of this because I believe in my universe and my glittery path.  I trust the stars and my gut.  I trust change.  I trust fear and I know that fear is temporary. Which brings me to the next part I want to share with you (yep you need to scroll down a little more, and if you are STILL here reading this, man I want to give you a huge hug that is like an explosion of rainbows).

1

This year the word I picked to describe me is PHENOMENAL!!!!!!!  Yes y’all I am so stupid phenomenal it’s crazy!  I am human and have made plenty of mistakes in my life but the only person in the end that can change my vision of myself is ME and I know that my past does NOT DEFINE MY FUTURE!  I love all of my JADERBUGS so much and I hope you are ready for some rad things to happen on here!  I will be changing some things about my blog and I can’t wait for you to see.  So what is YOUR word that describes YOU!  Make a vision board and plaster it all over so you can be reminded daily of how amazing you are.

PAIN IS TEMPORARY. TRUST ME. Screen Shot 2015-01-02 at 6.00.42 PM

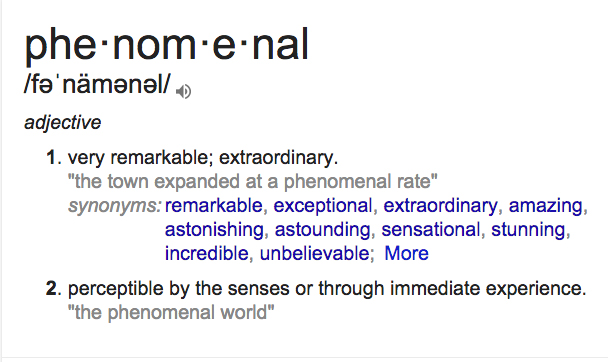
I also want to share a few songs that got me THROUGH the hard times! Some of these songs played on repeat for weeks and are engraved into my soul now.  I am a big believer when it comes to music.  If you are going through hard times- message me, connect with me, because I am always here for you especially if NO ONE ELSE IS!

Hope this post wasn’t too sappy…I share SO MUCH with you and I just wanted to share a little bit of REALITY with you because I know I am not the only one that has ever went through things!!! Until my next blog post, xoxo JADE


Today is the day before the NEW YEAR! I am all about being organized and aren’t we all a little unorganized around this time of the year. I gathered up my top 20 Free Printable Calendars – 2015 and put them in one hot spot, my blog. The best part is you can print them from any computer and dress up your space while organizing your life. All you have to do is click on the highlighted link below the picture and BAM, it’s all in YO hands at that point.

My favorite thing to do is download one month from each set and really have fun with your year. ENJOY and SHARE! Another fun thing you can do is print a set out and give to a friend or family member. Super fun and much better than a store bought calendar. Also keep in mind someone special created these for us to have so if you choose a calendar make sure to follow that blogger and give them some love! HAPPY NEW YEAR!

20 Free Printable Calendars - 2015

2015calendar

Hand Lettered Calendar by Chantelemma

Enchanted-Prints-2015-Calendars-Motivational

Inspirational Quotes Calendar by Elegance Enchantment

Hexagon Calendar

Hexagon 2015 Calendar by My Name Is Snicker Doodle

Free-Printable-2015-Calendar

Mini Printable Calendar by Clean and Scentsible

2015_Printable_Calendar

Full Year Printable Calendar by Lia Griffith

2015printcalendar-5

Whimsical Black and White Free Calendar by Lemon Thistle

Black-and-Gold-Calendars-by-Paperelli-1024x800

Black and White Striped Calendar by PapeRelli

cal2

Customizable Instagram Calendar by Going Home to Roost

214

Flower Sketches Calendar by Linda Jacoby

AKA-DESIGN-2015-PLANNER

Blog Planner and Editorial Calendar by AKA Design

Free_Printable_Calendar_2015_Long(2)

Chalkboard Calender by Botanical Paper Works

dodec-2015-calendar-apieceofrainbow-21

3-D Calendar by A Piece of Rainbow

printtemp-seasonscalendar-big

Seasonal Printable Calendar by Love v/s Design

Free-printable-2015-calendar-downloads

Gray and White Striped Calendar by I Heart Naptime

2015_planner

Free Calendar and Planner by the Handmade Home

MissTiina-Colorful-2015-Calendar

Colorful Free Printable Calendar by Miss Tina

january-2015-calendar-printable

Fun Free Calendar by Shining Mom

2015-free-printable-calendars-01

Seasonal Calendar by Motherhood Trade

FREE-2015-Calendars-from-The-Organised-Housewife

Monthly Calendar with To-Do List by The Organised Housewife

il_570xN.667888556_dvgw

Printable Daily Calendar by Every Day Enchanting

Big huge hugs from my house to yours!!!!! XOXO, Jade

*You can connect with me on all my social media sites!
PINTEREST | FACEBOOK | GOOGLE + | TWITTER | INSTAGRAM

in other news

*You can find my crazy self at CHA next week! I am super excited to see all ofmy crafty friends!!!

*Make sure to come back later this week to find out where I went a few weeks ago. Trust me you don’t want to miss this one!

I decided to make some New Years Eve Glittered Tealights. Holy Cow. Is it really almost New Years Eve? The only thing that tickles my fancy is Amazon Eve so there ya have it. Yep she is pretty dam awesome and we will touch on that later this week. Is it just me or does anyone else feel like Christmas comes as fast as the tooth fairy. I do have to give it to the tooth fairy because any parent that can snatch a tooth in a bag under a pillow without waking up that child pretty much deserves a gold metal. I did figure out a trick after a few years of waking my son up. Well it was a trick until it was NOT a trick. Anyways, just tie a little string on the end of the bag and let it hang down the side of the bed. You can tug that baby when they are fast asleep and voila. Now the real tricky part is putting the money back UNDER the dam pillow. Come on people there has to be some super duper tricks out there you can share with us! Not that I need it because my son is almost 15 and if that lil boy looses a tooth the only money he will see is the money he will work for to get it fixed, hehe!

I ran into Michaels the other day and they had these little flameless candles on sale for around .50 cents a pack. Being the HOARDER   crafter I am I picked up way too many packs.  These things always come in handy so there ya go.

Yep, I just made that project title up but what else was I supposed to name it. You would think I would be “perfect” by now but after editing my pics I realized I should of named them “tea lights” and not candles. Good news, these will look cute in your house bad news the title is staying because I am way too tired to edit it again! You can also put these cute safe tea lights in here. I think these would make any event super festive and what better holiday to use them for than New Years! Let’s get started.

New Years Eve Glittered Candles

You will need: Flameless Tealights | Glittered Ribbon | Scissors | Duck Brand Double Stick Roller

You can order the items I used in this post by clicking on the links above! YO. They are indeed affiliate links so what that means is when you order from ME and not a HUGE store you are helping me buy more sausage to cook at night and glitter, and I thank you.

glittered ribbon tutorial

Now if you are crazy candle person like me then these might not fill the void but they are safe and you can really set the mood of a room with them. Yes, that means you can drink all you want and not worry about blowing them out! flameless candles diy

I got my glittered ribbon at T.J. Maxx! I know! They have a little section of crafts and I snatched a big bag of every color a while back. I really don’t know the name of them but any ribbon will work for this. These are really thin which is why I was able to wrap two different colors around the tea lights. I bet a large piece would look nice as well.

You can also use wash tape around them if you don’t want to use ribbon. The ones I am using have fabric on the back so if you know the brand please leave me a comment! I’d kill a mosquito to get more.
glittered candles tutorial

These double stick adhesive rollers from the Duck Brand are almost better than Cap’n Crunch Peanut Butter cereal. ALMOST. They really make like easy and they are convenient. Check out all of these projects I made for Duck Tape.

Step One: Turn your ribbon over and roll the tape along the back of it. You barely have to apply pressure, just a tip. duck brand double stick tape

Step Two: I measured “about” how much ribbon I would need to go around the tea light then cut multiple pieces. Once you have the tape on the back you can start wrapping the pieces around the tea light. how to glitter a candle

It’s really that simple. You just created beautiful and bright tea lights to dress up any party you plan to throw. Not having a party, that’s cool too because you can put them all over your house for your personal pleasure. Either way these are really affordable and I promise they will make you cheery and smile. ALOT. easy flameless candle crafts

how to make glittered decorations

Make sure to SPREAD the love y’all! I hope everyone had a great Christmas and don’t forget to be safe on New Years! Big stinking huge glittery hugs from my computer to yours

xoxo Jaderbomb

in other news

*You can connect with me on all my social media sites!
PINTEREST | FACEBOOK | GOOGLE + | TWITTER | INSTAGRAM

*You can find my crazy self at CHA next week! I am super excited to see all of my crafty friends!!!
*Make sure to come back later this week to find out where I went a few weeks ago. Trust me you don’t want to miss this one!


Get your black light’s out cause are about to have a party with these Neon Tree Ornaments! Remember when I made this neon pumpkin! It was a HIT… So I figured I would make another NEON HIT with these cute neon ornaments.

Let me tell you before I start that this was an accidental project. I found these neon “things” one day when I was shopping in Michaels. I thought they were really cool and figured they would look good in a vase in my my studio. Then one day I looked at them and realized they looked like mini trees. BAM! That is how a project usually happens for me. Right brain for sho! Just thought I would share that with ya franssss!

Let’s get started.
neon tree ornaments
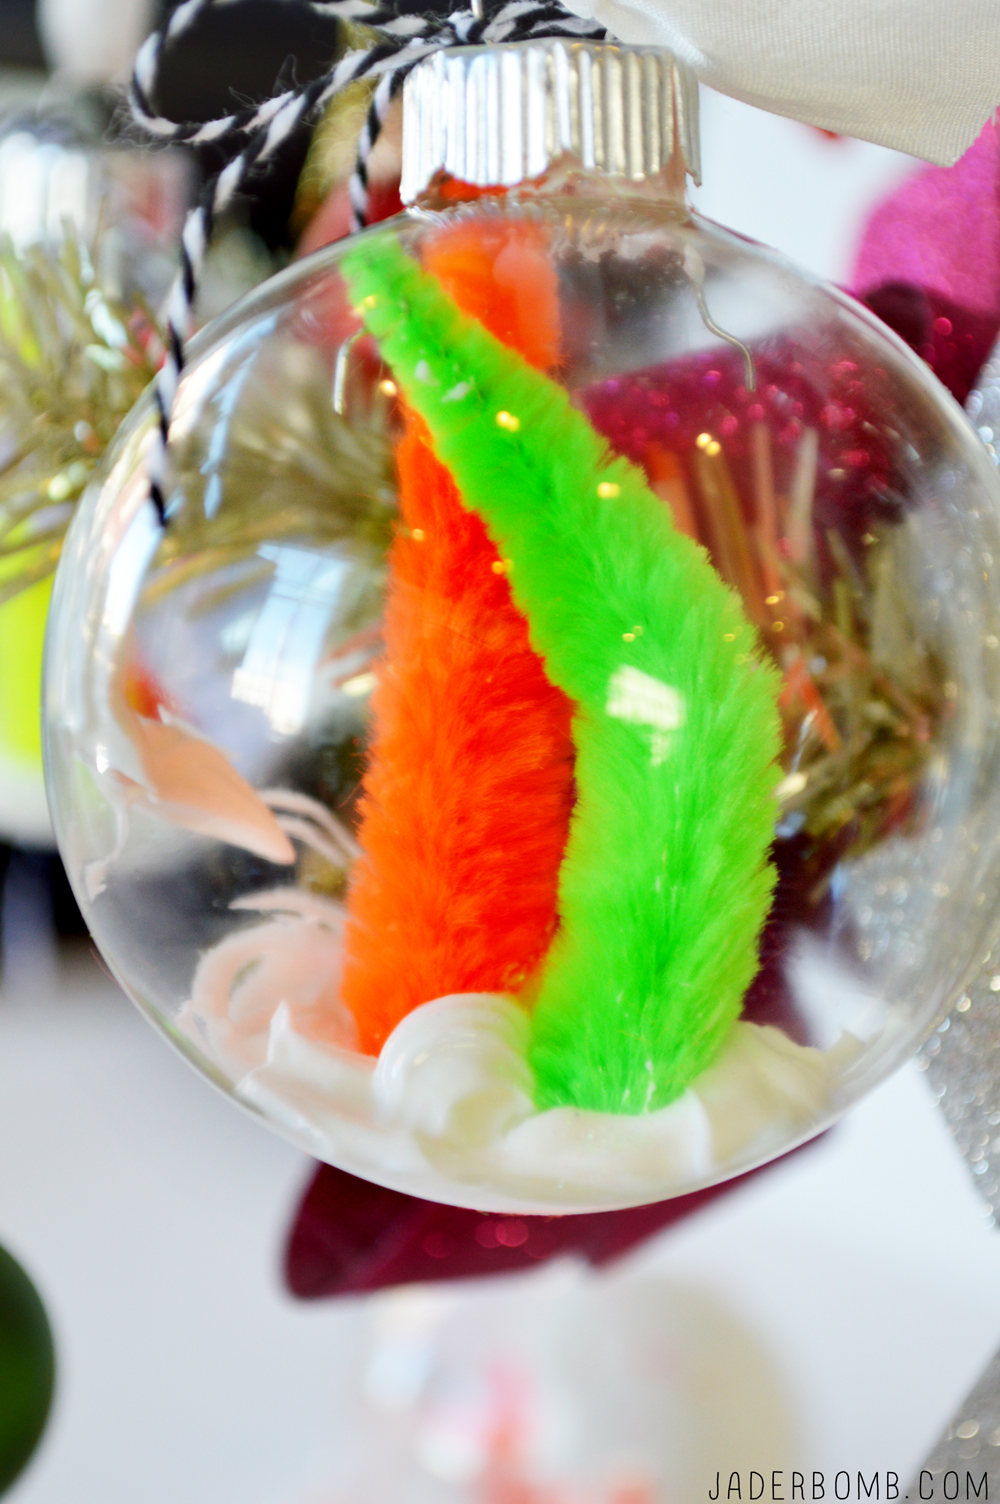
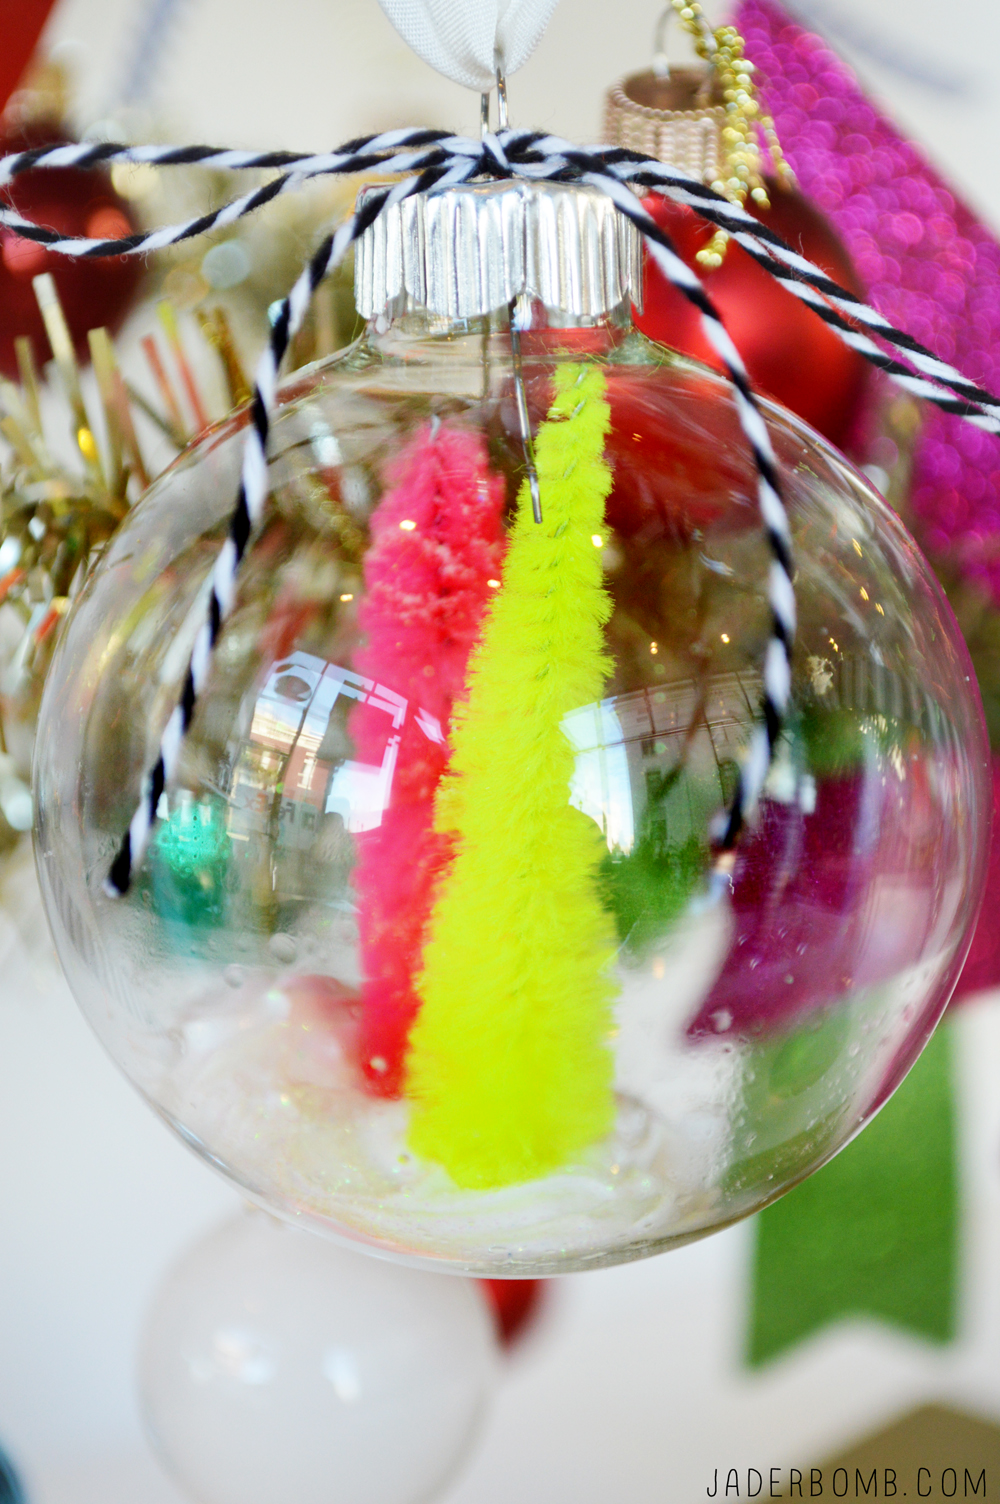
You will need: Neon Fluffy Pipe Cleaners (I got these from Michaels) | Scissors | Mod Podge Collage Clay in White | Brush | Shiny Glitter | Pliers | Clear Ornaments
neon tree suppliesdiy christmas crafts
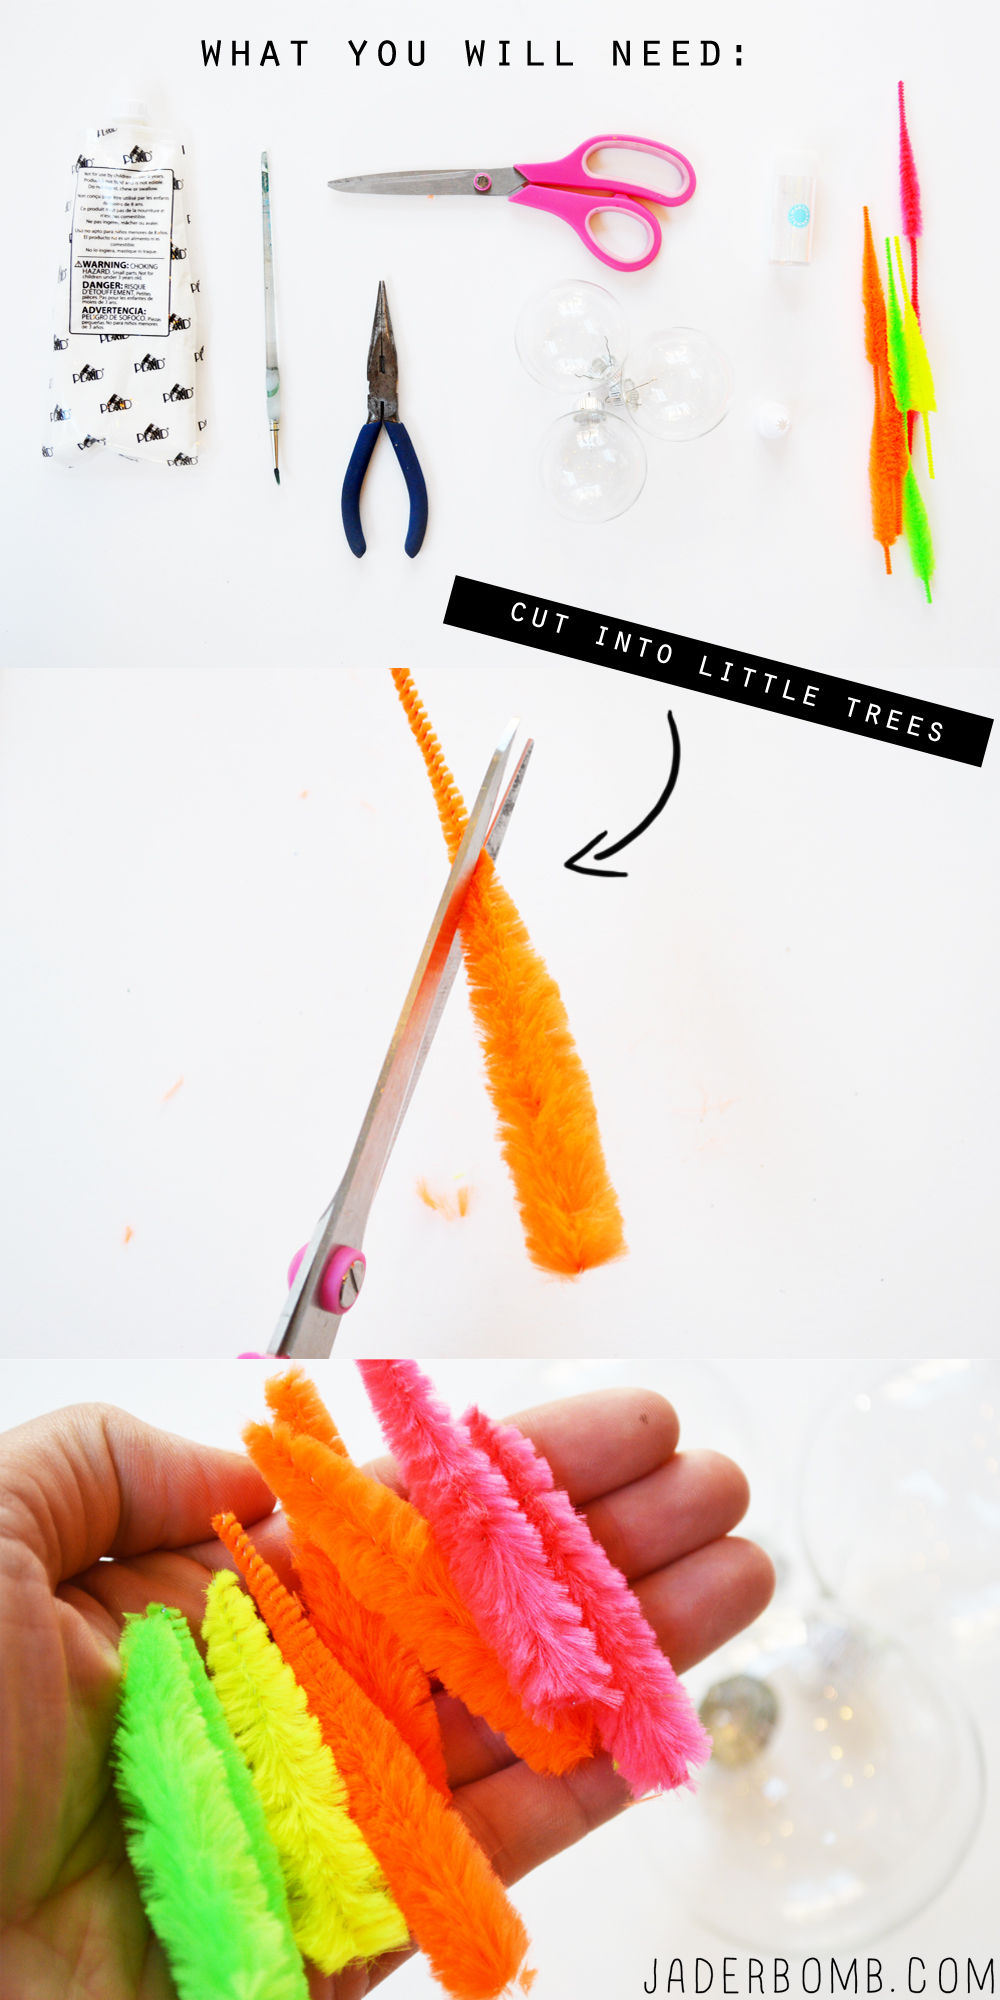
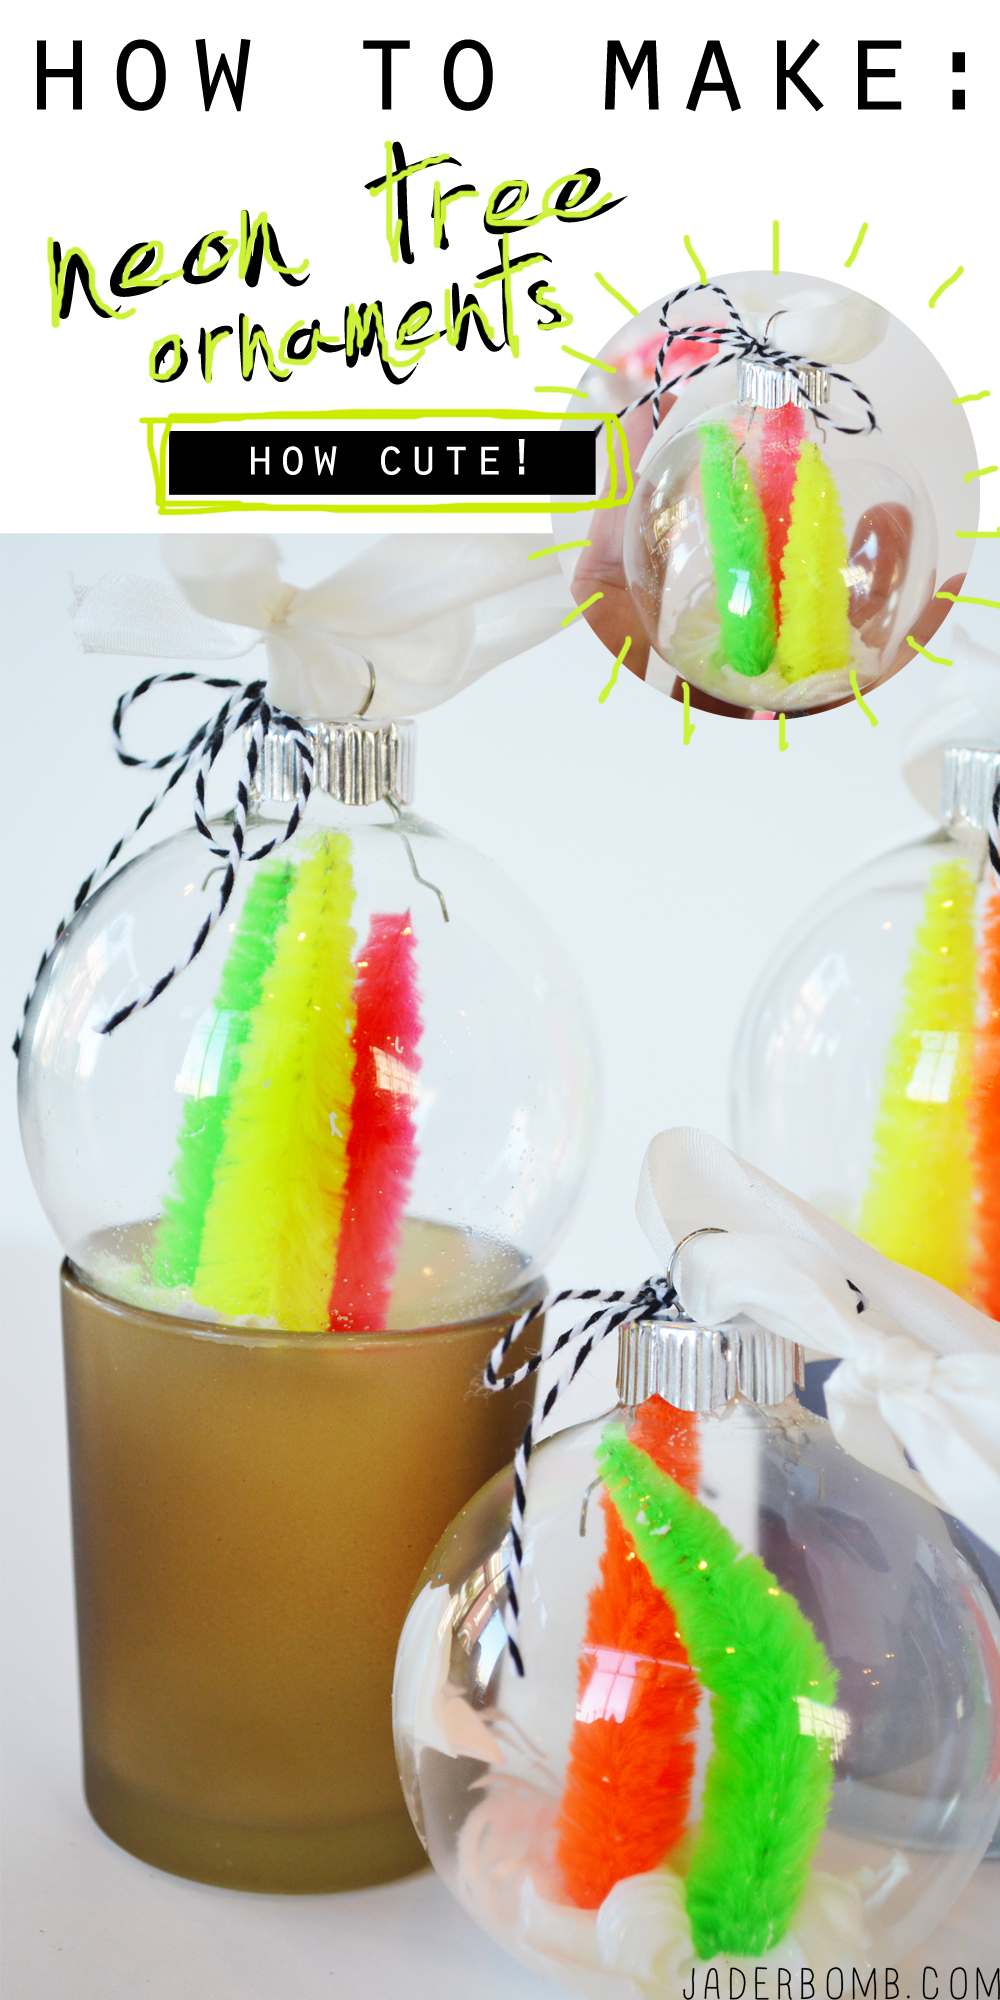
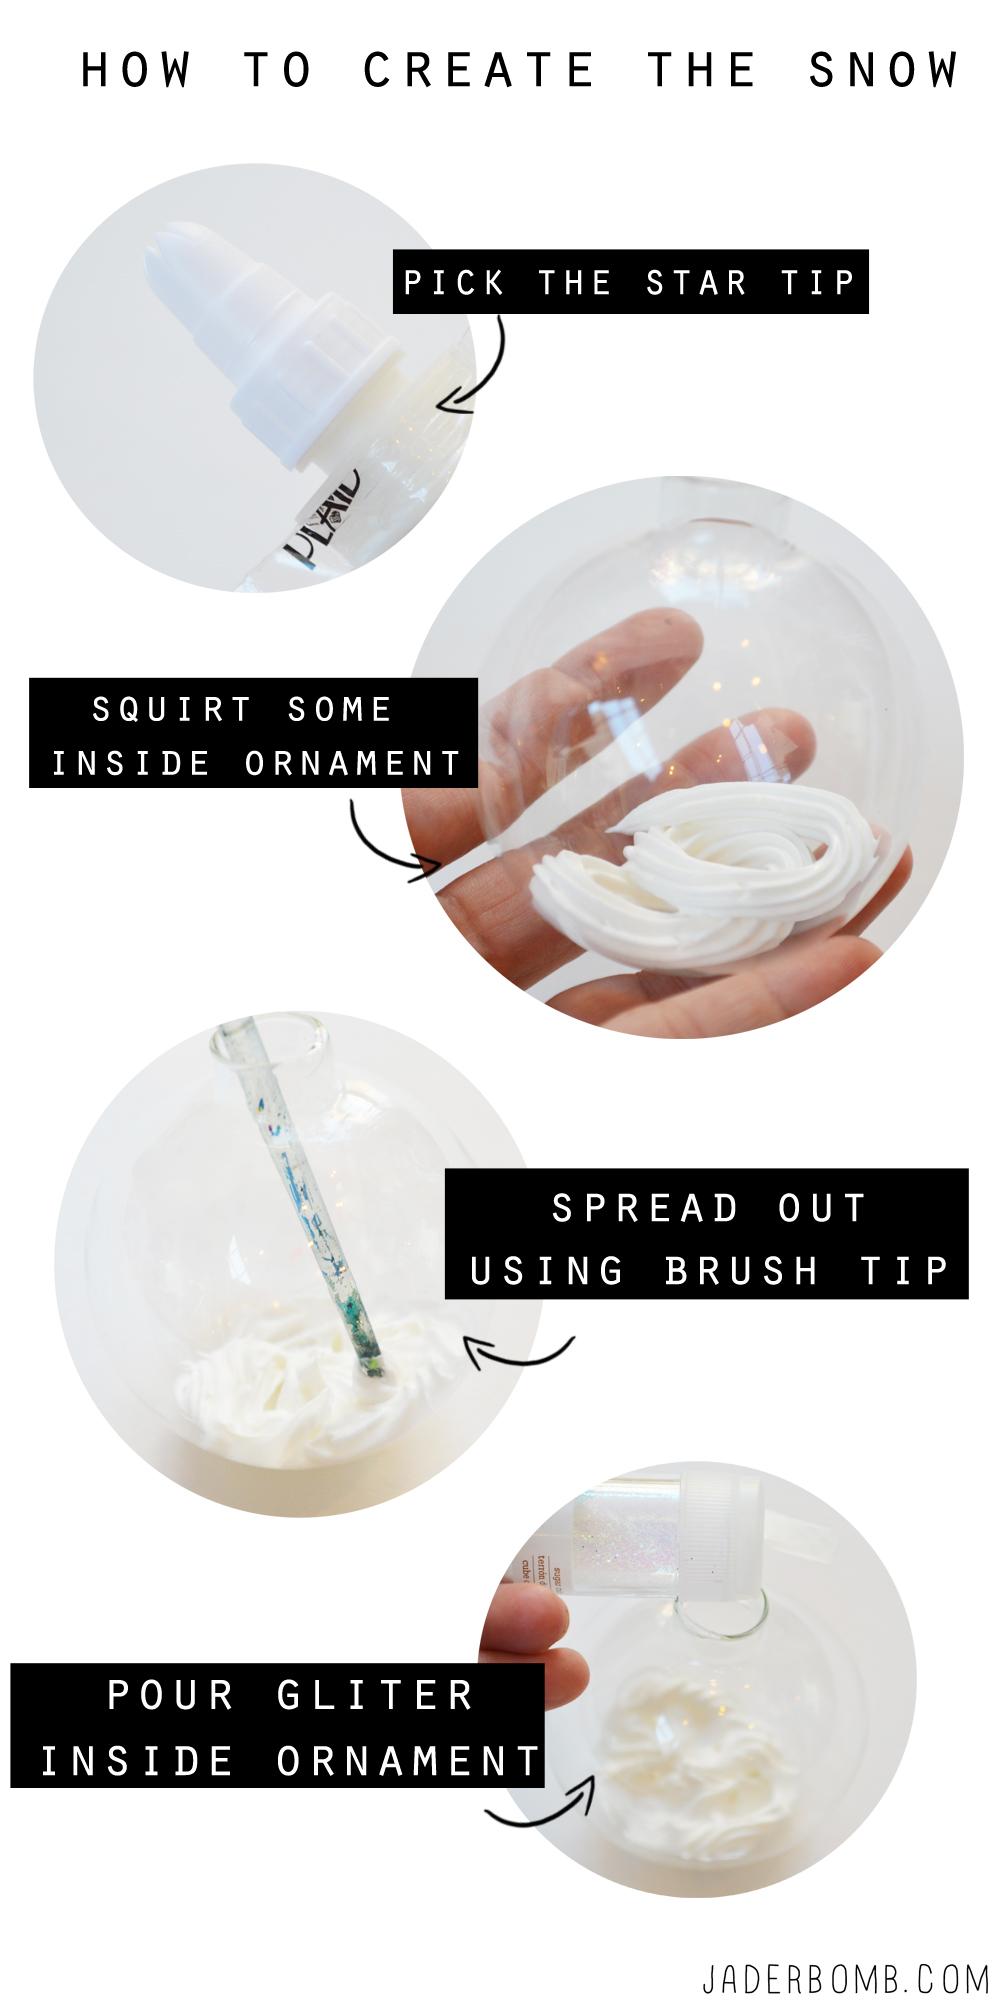
After you spread out your collage clay inside of your ornament grab your pliers and carefully place your mini neon trees inside. They will sit right in the middle of that white gooey pile of collage clay and once it’s dry your trees are good to go.

I love collage clay! If you have never used it I suggest getting your hands dirty and grab some from your local craft store. This stuff here is literally like icing on top of the cake. You can spread this stuff out on any surface, drop in glitter, jewels, trinkets then VOILA! Let it sit for a hot minute (that means a few hours) and everything is secured in place.

Is your brain going nuts now? I can’t stop thinking about all the things I can do with this!orange tree ornamentsneon christmas decorations diy christmas ornamtents neon colorfu;l ornaments
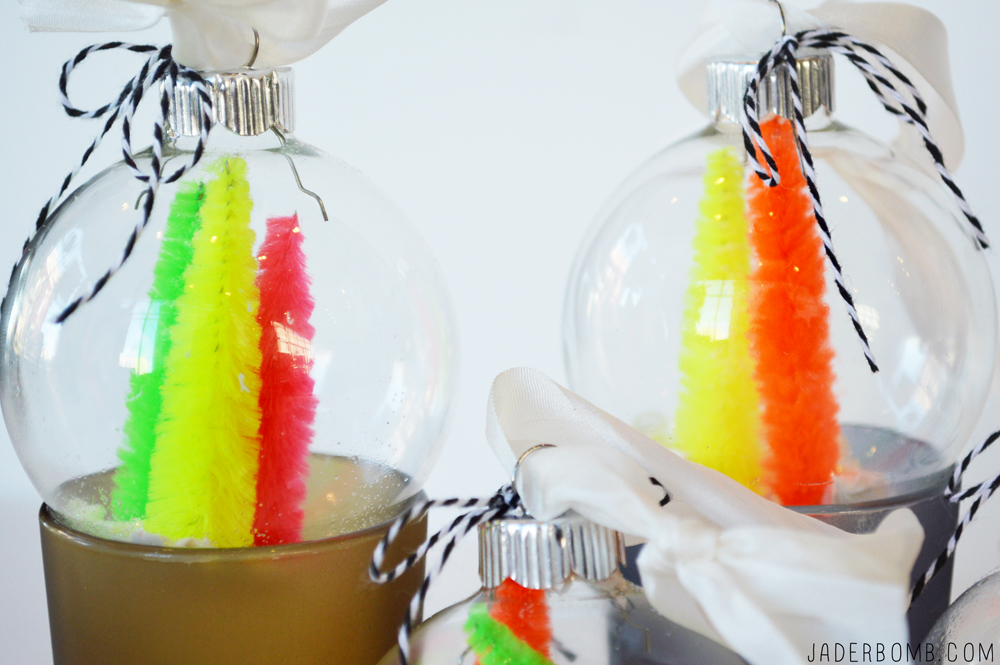
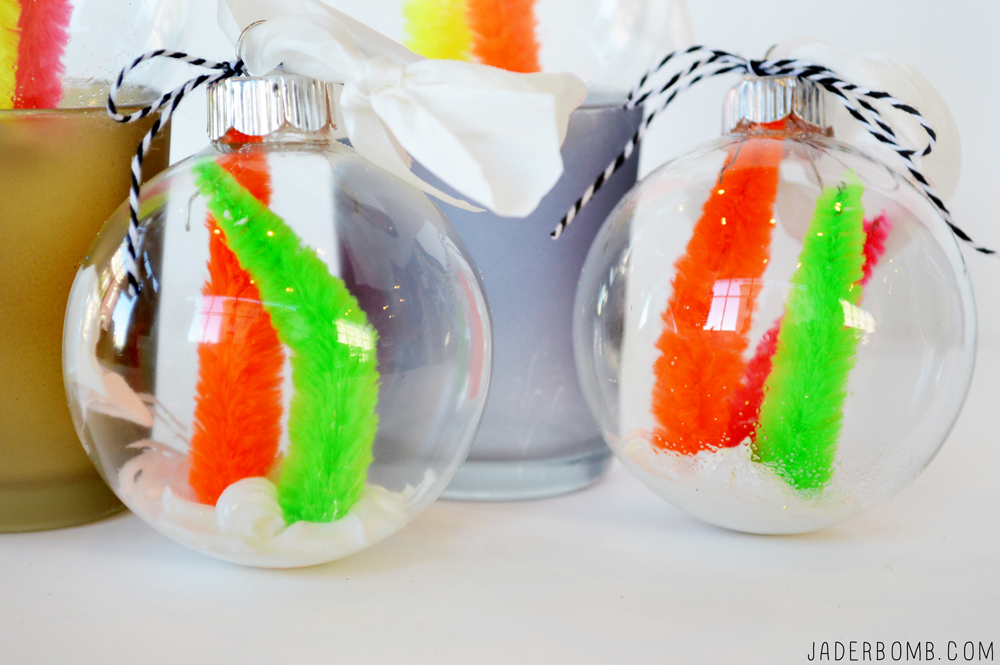
I hope you enjoyed this tutorial from the bottom of my little ole heart! Huge glittery hugs from my computer screen all the way to YOU! xoxo, JADE

in other newsI will be in Anaheim CA for the Craft and Hobby Association conference in January! I am super exited and all I will tell you is I will be doing some make -n- takes at a certain book and an appearance! I can’t wait to see all of my virtual friends there so make sure to look for the glittery girl giving out glitter bomb wishes!! xoxo

Remember when I did demos for Plaid, check out this video (don’t mind my thick accent) HEHE

Rainbow Bottle Brush Trees are the trendiest thing on the planet right now. I mean I don’t know about you but I would much rather share this with you than talk about ebola or the elections. YAY or NAY.

AMEN.

A while back I was stalking checking out crafty bloggers and I ran across some light pink bottle brush trees used as a “prop” and I thought to myself I can do that! But we all know I can’t stick to just one color and for sure they have to be bright and bold.

I am still trying to figure out my “style” in crafts, decorating and the way I dress. All I will say is BRIGHT, whimsical and CHUNKY make me super duper happy so I bring those same qualities out in my crafting. Hopefully many of you appreciate it and for those that it doesn’t, gosh I am sad for you … Let’s get started!

Rainbow Bottle Brush Trees

You will need: White Bottle Brush Trees | Tulip Tie-Dye

Don’t forget, you can order all of these supplies by clicking on the links above! These are affiliate links so by doing this you are helping me buy more glitter and fairy dust! *Mucho LOVEdyed bottle brush tree
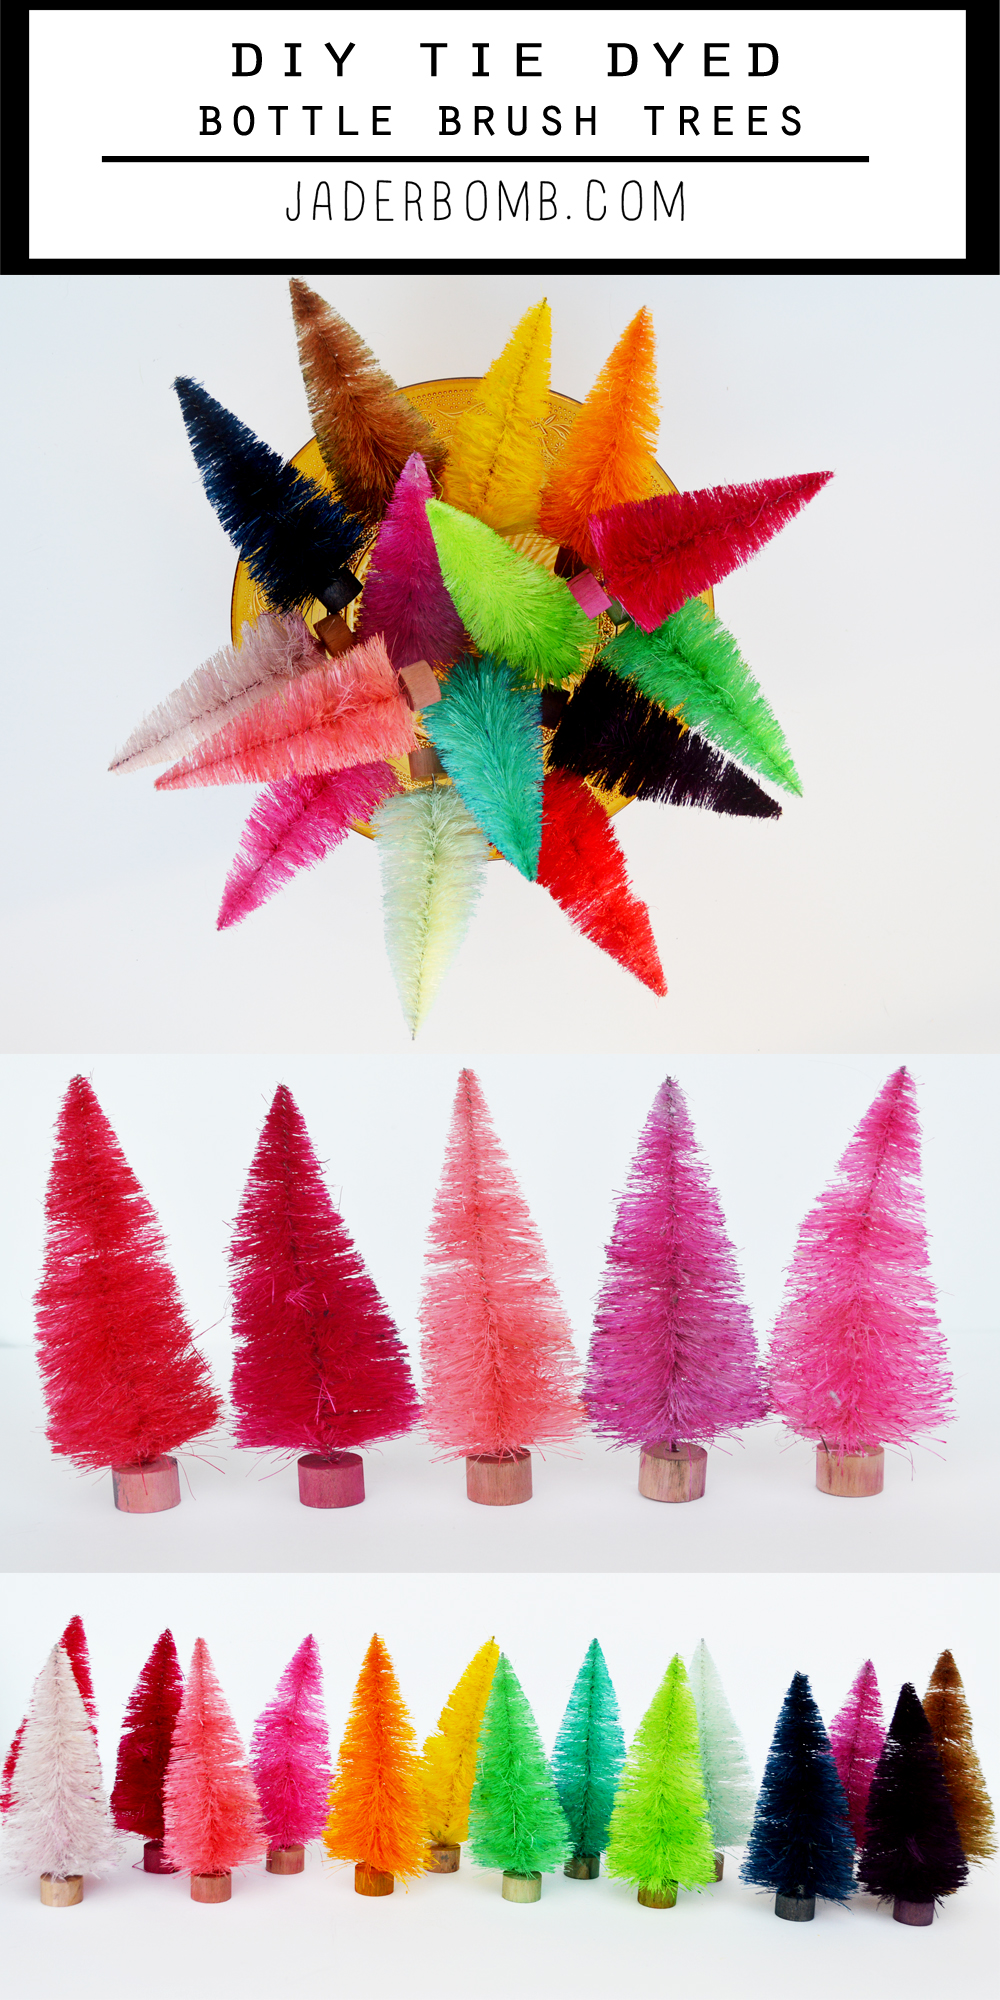
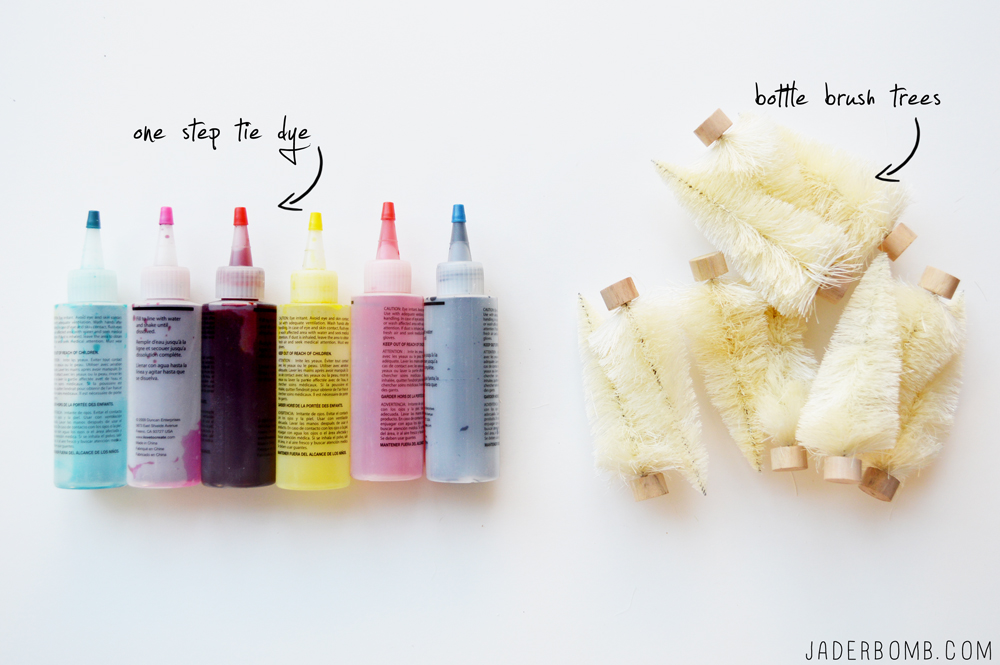
I am a HUGE fan of Tulip tie-dye (and I work for them) so go figure I am using it to give these trees a lil color. Check out all of my crafts that I used Tulip Tie-Dye in!bottle brush trees
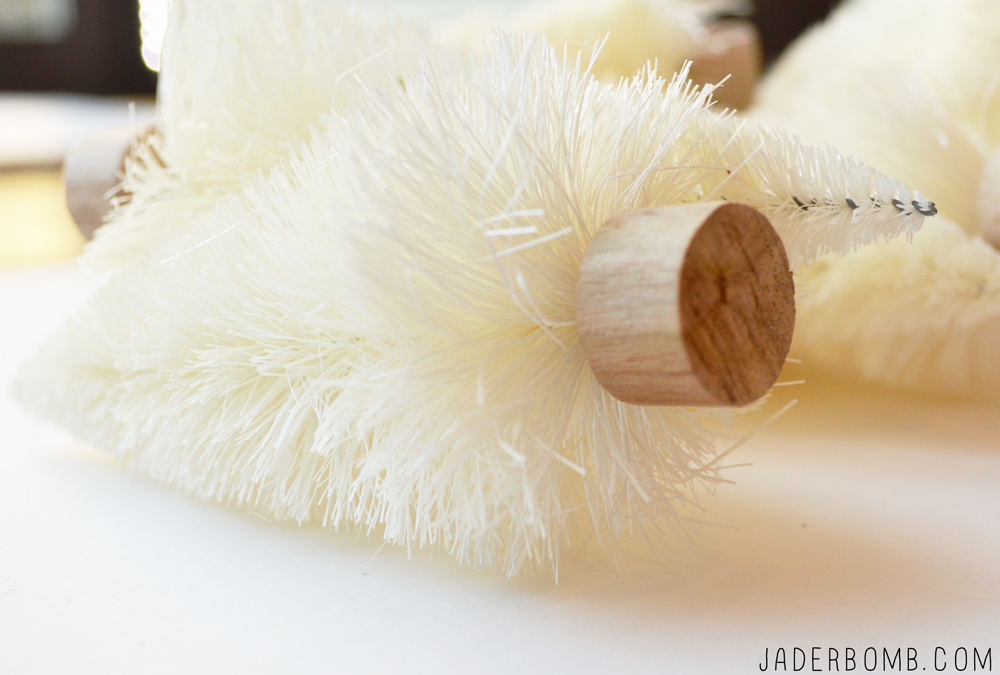
I got my white trees from Michaels. They are from the Tim Holtz collection. SWOON. how to dye water
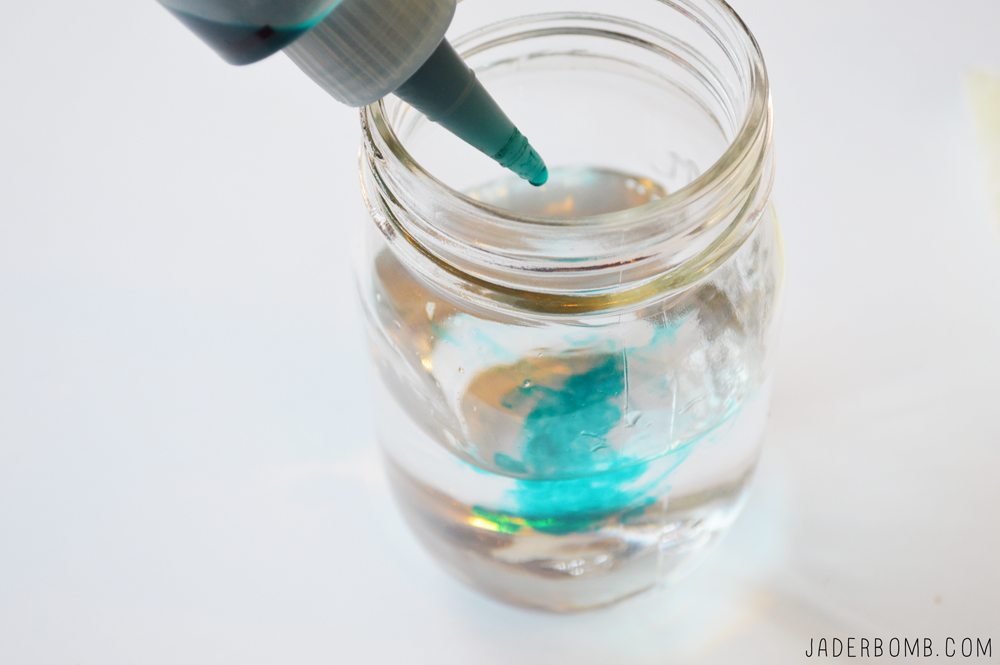
Step 1: Put some water in a container then add your tulip dye. I had some left over in the bottle but you can also pour the powder directly in the water. how to dye bottle brush trees
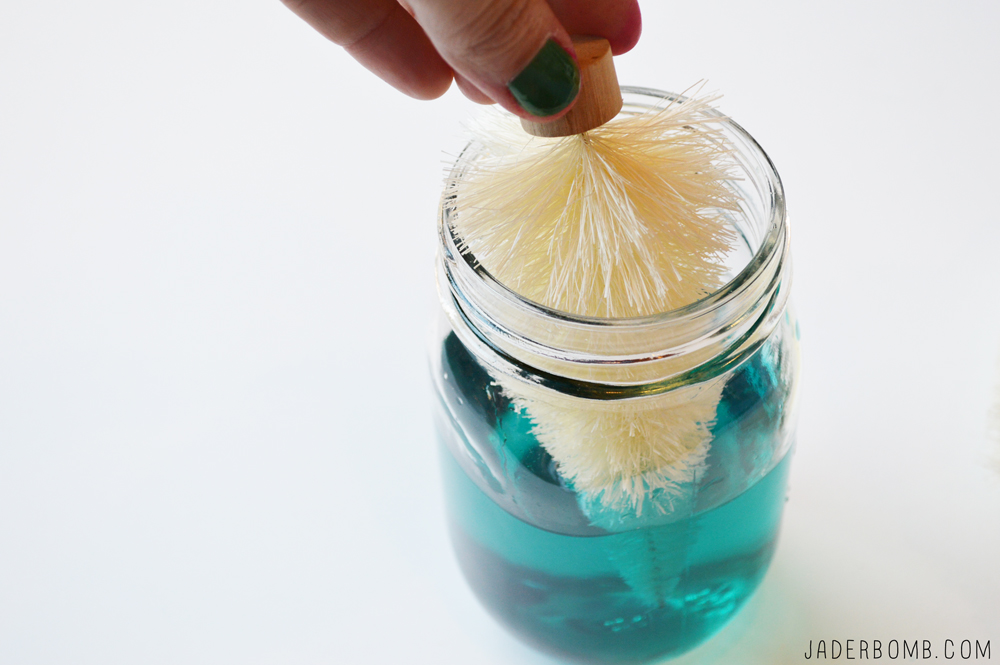
Step 2: Place the tree in the colored water by holding onto the base of the tree. Place on a flat surface so they can dry completely. dyed bottle brush trees
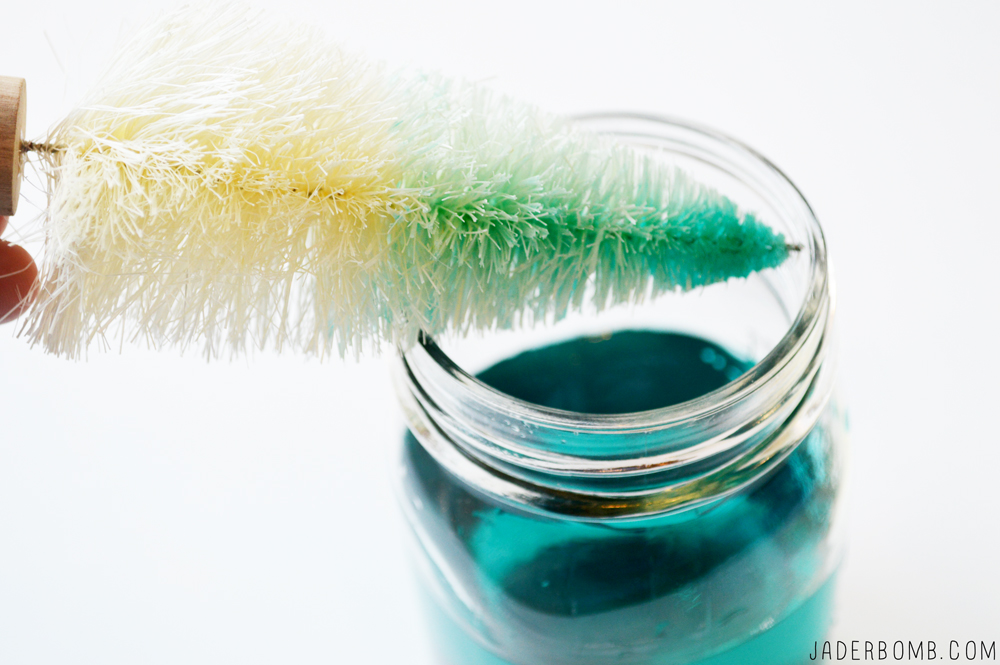
Step 3: FALL IN LOVE.

When you are done with the first color pour the water out (or pour back into the plastic bottle it came in) and start again with your next color.

After the first 4 solid colors I started mixing some shades to get different colors.

Here is a tip. If you like light colors just add a little dye. Don’t worry if you do this and feel they need to be a little darker just add more dye and re-dip your brush. All’s I will say is this shit is addicting.

1 2 3 
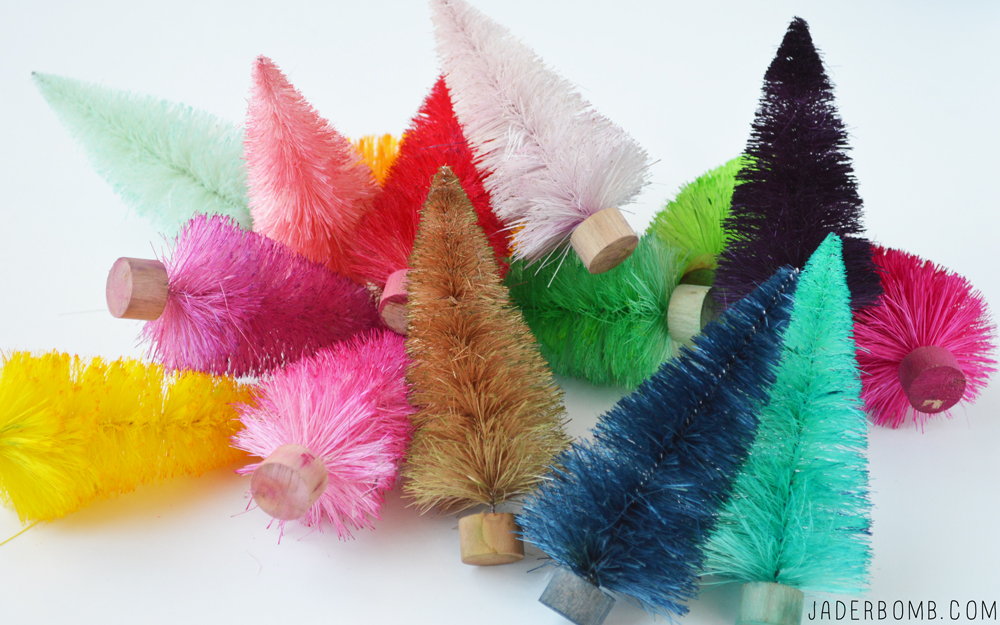
You can also do some ombre trees. 4 I had to do a tree for my buddy Jen at Something Turquoise. Here’s to you friend. 5
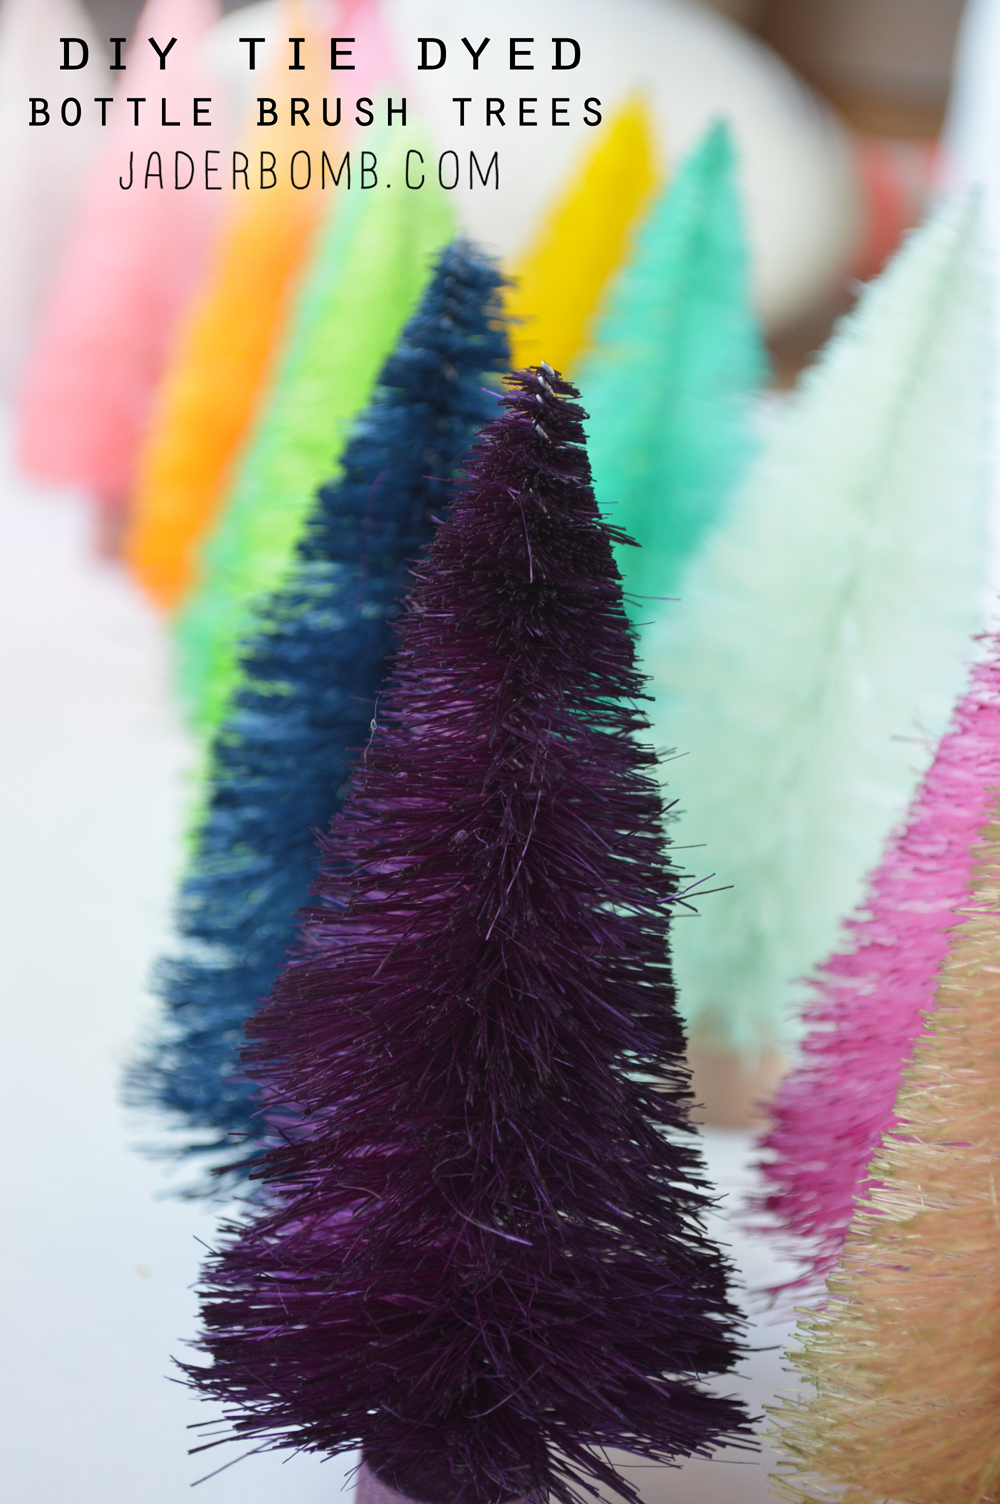
I hope you enjoyed this tutorial! Come back in a few days to see how to bleach out green bottle brush trees! I kinda am obsessed y’all.

Don’t forget to connect on social media! Make sure to use use the hashtag #JADERBOMB on Instagram or Twitter or Facebook so I can keep track of all your awesome creations! HAVE A GLITTERY DAY!
, Jade