Tag Archives: DIY lampshade

Martha Stewart Countdown #48 Decorative Paper Lanterns

Happy Maniac Monday Jaderbugs! It’s a good ole Monday and I am super excited to share this craft with you. The first time I saw it, it reminded me of fish scales. I guess because it sorta has that texture to it. I LOVE LOVE LOVE texture. I still can’t believe all of the things you can do with a lil tissue paper. I mean, it’s not JUST for stuffing a bag with! It’s truly amazing!

Tools And Materials

Tissue-paper disks in assorted colors

Double-sided tape

14-, 16-, or 18-inch-diameter paper lanterns
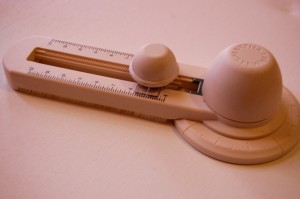

I used the Martha Stewart Large Circle Cutter.
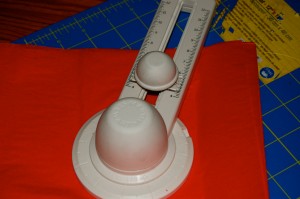
Place your tissue paper down on your protected surface and turn that baby! Remember not to go too fast because you are dealing with very thin paper and it can tear very easily.
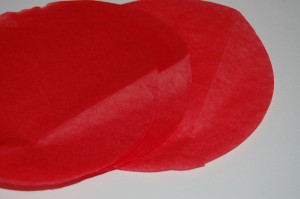
This is what your circles should look like! OR you can get Tissue-paper circles, 5 inches, in Pastel and Primary, $6 for 480; hyglossproducts.com. This might make your life easier!
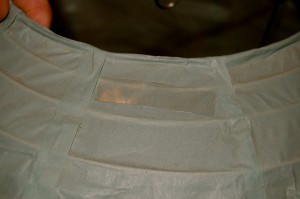
Take your double stick tape and place a little piece on your lantern. Wire-frame spherical paper lanterns, from $3.25 each; pearlriver.com.
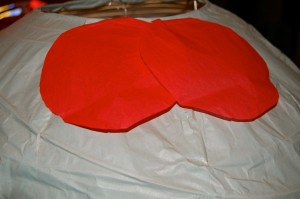
Starting at the bottom of the lantern, use small squares of tape to begin attaching tissue-paper disks around the hole, overlapping them. Working toward the top, continue sticking and overlapping disks to cover the lantern.
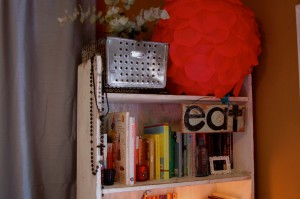
I hope this big red ball makes you smile from ear to ear. I mean, I can do this for every single holiday and it’s totally affordable.

Big Red Balls, your jaderbomb

Check out Martha’s original craft HERE

(me on the show!)
Just in case you are not aware of my countdown I am doing right now you can click HERE to read all about it!!!
Make sure you click on the Martha countdown tab on my blog to see the crafts I have already done!
And I will put a link on my website which is www.jaderbomb.com!!!!
AND IF YOU DECIDE TO DO ANY OF THE CRAFTS, SHOOT ME AN EMAIL AND I WILL ATTACH  IT TO THE POST WITH A LINK THAT GOES STRAIT TO YOUR BLOG!  IF YOU DON’T HAVE A BLOG JUST EMAIL IT TO ME AND I WILL PUT IT UP!!!!
JADE@JADERBOMB.COM
Thanks to Martha Stewart crafts for sponsoring me with craft supplies!

Shabby Chic Lampshade

~First things you will need before you start this project are a pair of scissors, felt, lampshade (new or old) and a small hot glue gun. Are you excited yet!!! I AM~

Once you find the lampshade you want to work with then you can start to make it shabby chic~I like to use old dingy lampshades because it feels nice to bring it back to life, however you can use a new one if you choose to. You will be applying felt on the lampshade so you want to make sure you have enough felt before you start.

I just used the 9×12 sheets from Hobby Lobby, or you can get them at your local craft store. They are usually really cheap, I paid $.29 per sheet and used about 10 sheets. Before you start cutting the felt plug your hot glue gun in.
Below is the lampshade I am using today.

I cut squares approximately 1 1/2″ x 2 1/2″. All I did was fold the sheet in half then cut at the crease. As you can see below I have 4 different sizes all done by continuously folding in half and cutting.I continued this process until my squares were around that size. Remember, the smaller you go the fuller the lamp will look.

When you are ready for gluing you will need to get one of your squares and fold it in half. (thanks paige for being my hand model) LOL

Next you will gently take your hot glue gun and squeeze the glue onto the crease you just created.

Once you have your glue on the crease, quickly fold your square in half again. This will make it a lot smaller so do not worry if your square has shrunk a lot!

You will directly place the felt onto the lampshade without letting go of the fold you just made. Your first piece will take the most time because you need to hold it down with your fingers until the glue is completely dry. (please be careful, glue can really burn you :)

Once your first piece is glued on, you can now start adding the other pieces of felt using the same technique as the first. The only difference now is that you will not have to hold the piece of felt down as long. Don’t be discouraged after you put your first one on! I promise after you put your 3rd or 4th piece on you will start to see the way it’s supposed to look~

GOOD LUCK~~ Please post pictures when you are done and I will do a follow up blog with all the ones that were sent to me~~~ I can’t wait to see your magnificent lampshade~

MY VERY OWN SHABBY CHIC FELT LAMPSHADE~
P.S. This would be a great Christmas gift~

CLICK HERE TO WATCH VIDEO

(me on the show!)


 Just in case you are not aware of my countdown I am doing right now you can click HERE to read all about it!!!
 Make sure you click on the Martha countdown tab on my blog to see the crafts I have already done!
And I will put a link on my website which is www.jaderbomb.com!!!!
AND IF YOU DECIDE TO DO ANY OF THE CRAFTS, SHOOT ME AN EMAIL AND I WILL ATTACH  IT TO THE POST WITH A LINK THAT GOES STRAIT TO YOUR BLOG! OR IF YOU DON’T HAVE A BLOG JUST EMAIL IT TO ME AND I WILL STILL PUT IT UP!!!!
JADE@JADERBOMB.COM
Thanks to Martha Stewart crafts for sponsoring me with craft supplies!