Tag Archives: halloween crafts

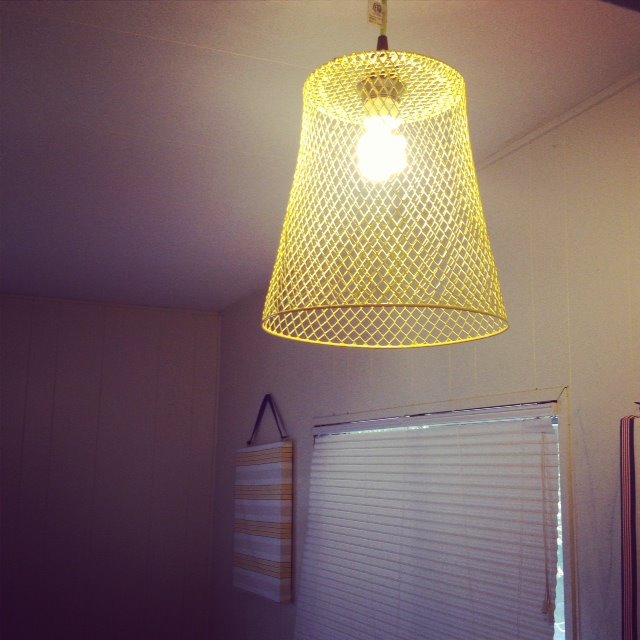
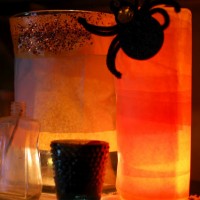
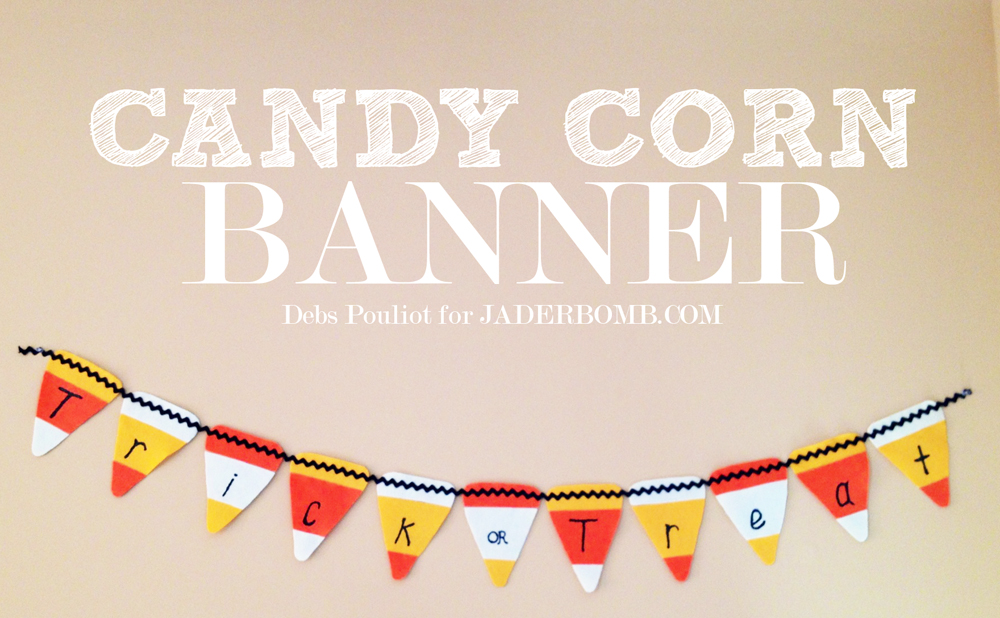
Happy Sunday Y’all! I took a break today and my friend Deb’s will show you how she made her “Candy Corn Banner”. It’s super cute and I know you will just swoon over it. I am super excited today because Martha Stewart featured my candy corn lamp on her website.

Candy Corn Banner

you will need

1/4 yd of yellow felt
1/4 yd of orange felt
1/4 yd of white or off white felt (I used off white)
2 yds black medium ric rac or other ribbon
1 small bottle of black dimensional fabric paint
Fabric scissors and paper scissors
2 pieces of cardboard (can use a cereal box or manilla folder)
Pen or marker tape
Candy Corn Template Candy Corn Template


CANDY CORN SUPPLIES

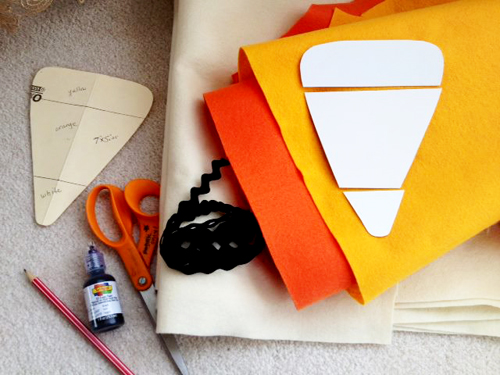
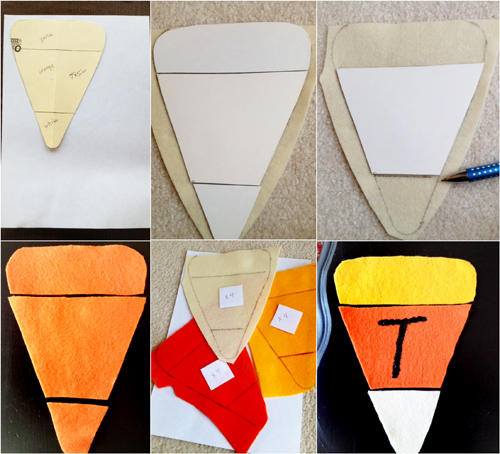
  1. Print the candy corn template to be about 7″x5.25″
  2. Trace and cut out two candy corn shapes on cardboard (cardboard is sturdier to draw around over the felt). Leave one template whole and cut the other into thirds as shown in the pic.
  3. Trace around cut templates on felt until you have four felt candy corns in each color for a total of twelve (Even though my banner was only 11 pieces I used an extra candy corn to write “or” on).
  4. Lay out the shapes alternating colors as shown to form the candy corns.
  5. Use tape to attach candy corns together from the back (you can also sew them together with a zigzag stitch).]
  6. Glue or sew on the ric rac along the tops, connecting them all side by side to create the banner.
  7. Write T-r-i-c-k- or T-r-e-a-t with the dimensional paint, let dry and then display on wall or in doorway.
  8. Note: you can also make these from card stock or if you want to display your banner outdoors, you can use vinyl/waterproof fabric.

DIY CANDY CORN BANNER FALL

I got the felt from Joann’s. It was reg $4.99 per yd on sale for 40% off and I only purchased 1/4 yd of each colour (felt squares may cost a bit more). Since I already had the dimensional paint and tape, the entire project cost less than $5! I hope you enjoyed my craft! You never know, you might see more of me on here! XOXO, DEBS

Check out these Fall and Halloween tutorials.


It’s a wonderful day today because it’s all about “do it yourself “. Crafty peeps put on your glitterey seat belts because my friends Mark, Margo, Cathie, Heather and Kathy have some great tutorials for you! You can click on the links below each picture to get to their site. We have been doing this every week for almost 4 months now. I look forward to each week because it feels so good support other crafters like myself.

We are a tight bunch and if you mess with us we will pull out our glittery tools and bedazzle you. Don’t forget this is a linky party so link up your favorite DIY tutorials at the bottom. Every thursday this will take place!

Oh! If you have a minute check out their Facebook pages, blogs, you tube channels and whatever else you can find to give them to love.

do it yourself jaderbomb.jpg

1079662_584813768226963_879993483_n

Mark Montano poked my heart today with his crafty high tops. I need these in gold please. I can’t wait for you to see how easy they are to make.  I have this secret passion for spikes. Could you imagine if someone messed with you while wearing these? OUCH!

908218_10201379133776193_31795233_nKathy Cano-Murillo puffed up my heart with these fun fabric postcards. Can you imagine someone’s face if they got this in the mail. They could frame it after! How fun would it be to pick your fabric based off of your your trip.

1148269_10151532967895807_1750612897_n

Heather Mann transformed my heart from “trashy” to “wham bam thank ya ma’am” with this waste basket light fixture. It’s so easy to make and would look great in a kid’s room or a dorm room. Great idea!

1082231_10151839237102429_2134284179_n

Cathie Filian spooks out heart’s with this fabulous Halloween sweater. I need these in 3 different colors, thank you… Did I mention Halloween is my favorite holiday asides from Christmas. What is your favorite holiday?

1232468_10151871862972774_33786315_n

Margot Potter stamped my heart with this crystal embelloshed bangle bracelet for ImpressArt. Christmas is right around the corner, I’m just saying… I know a lot of people who would love this. 

chevron-pillows-jaderbomb

Last but not least if you did not see my latest tutorial for the I love to create blog. I am so happy with these chevron ombre pillow cases. 

Happy hugs on this spectacular Friday. Yippeee Halloween is near, well not really but YAY! See ya in the next post.

jade


Quote of the day:

“Lose not courage, lose not faith, go forward.”

How much fun are these spooky book page curtains! I have to say I never every thought I would make curtains for my kitchen using pages from a book. But, why not?If it’s temporary until Halloween is over then we need to bring the spirit indoors!Let’s get going so I can show you how I made them!

INGREDIENTS:

*Book
*Adhesive Spray
(I love this one)
*Masking tape z
(Do you realize all that you can do with this tape?)
*Black spray paint
(you do NOT have to buy the most expense one either!
*Mod Podge
(I wish I could eat this stuff.)
*Brush
(not used a spoon for the Mod Podge)
*Martha Stewart Halloween Punch

The first thing you need to do is tear pages out of a book. I am using the FIRST twilight book because it will NEVER get old reading those pages. (I know I know I’m a sap)

Spray the edge of your book pages with adhesive spray.

Then stick another book page on top. Just like this! (below, haha)

This is what it will start to look like once you get rolling! Hint: Once my sheet got large enough I would bring it in the house and place it on top of the window to see how much bigger it needed to be. I could of measured it and done it the “correct” way but that’s no fun! Notice the edges are punched with my Martha Stewart HALLOWEEN puncher!

Once you have the correct size and you are done sticking pages together it’s time to break out the MOD PODGE! This is where you insert a BIG wahoooo.

When your Mod Podge is completely dry lightly add strips of masking tape on top of your book pages. (see below)
You don’t want to press too hard because it will tear the pages when you peel if off. Spray your pages with black spray paint. I didn’t spray a super thick coat because I wanted a washed, vintage look. You could spray it till it’s completely black if you want that look.

Keep in mind you can spray with whatever color you like.

When the spray paint is dry peel off the tape~ Be careful. I ripped a couple of my pages because my tape was pressed really good to them. (craft fail)

Thank goodness this was a scary Halloween look otherwise I would have “tossed” this project into the trash.

When I was completely done with all of the steps I put it up in my kitchen like the picture below. I drew where I needed to cut with a piece of chalk.
I then took it down and VOILA! A spooky HALLOWEEN curtain! What I love the MOST about these curtains is how they look with light coming through them. It really makes our kitchen feel spooky.

The great thing about this project is it’s practically FREE. It’s easy for anyone do to AND when the spooky holiday is over you can toss it without feeling bad. Although I might just keep mine up and stencil letters on it for THANKSGIVING. Yes, I love them that much.

See ya in the next post Jaderbugs!


Quote of the day: 
"Decide that you want it more than you are afraid of it" -Bill Cosby


Heller and HAPPY “hump” day

YEP! It’s that time. Time to start showing you the tutorials of some things in my FALL kitchen decor. If you didn’t see my FALL decor I did in my kitchen click HERE to check it out!

I always have fun making displays in our house, it’s like making a p-nut butter n nutella sandwich. It just mandatory. Let’s get it popping Jaderbugs

INGREDIENTS for this CRAFT:

*candle holder (I am using one I already had)
*masking tape
*Martha Stewart satin craft paint
*Martha Stewart stencils
*Martha Stewart craft brush
*Martha Stewart adhesive spray

and LOTSA LOVE…

You can use whatever stencils you prefer for this project. I wanted to use some sorta blossom to represent fall. These stencils are the best because they have an adhesive back to them which makes it so much easier to apply to different surfaces.

First thing you will do is tape off the spots where you do NOT want paint. I am doing horizontal stripes on my candle holder.

After you tape it off paint the sections that are showing. I’m using “BROWN CHICKEN BROWN COWWWW” red. That’s not really the color but it should be! (say that saying about 4 times in a row)

This is what it will look like when you are done painting. Let it dry. When it is completely dry gently peel off the masking tape.

Grab the stencil you like, spray the back with adhesive spray and STICK it down! Even thought the back has a little adhesive to it already I like to add more so it “really stays!

Get a brush and lightly pounce the stencil with paint. You could use a foam pouncer for this but I like the texture from a brush.

When you are done filling in your stencil BOOM BAM WOW! Your done! Of course “LET IT DRY” before you start decorating with it.

I hope you had a B to the LAST with this project. I can’t wait to see you in the next post!

What colors would you use for this project?

IN OTHER NEWS:

This Friday I will be Co-Hosting a twitter chat with MOEN. If you are not following them on Twitter hurry and follow them HERE. Follow me on twitter HERE.
So don’t forget to put it in your calendar!

This coming Saturday is going to be a fun one! It’s Saturday Social! It’s a linky party that I will be Co-Hosting and you will be able to link up your social media outlets.  I will be hosting a Twitter party so see ya there! (more info on this later this week)

Glowing Hurricane Glasses Tutorial

Good day my little Jaderbugs! It’s a wonderful day in the neighborhood, won’t you be my neighbor {please hehe}…
I remember when I was little I loved Mr. Rogers. I LOVED that he changed his cardigan every 5 minutes. Looking back now, that sucker was very fashionable. Plus, you can never go wrong with a cardigan.  So the days are getting closer till I get to see Martha! I keep pinching myself because this just can’t be happening to lil ole me! BUT IT IS, and I am so thankful to my UNIVERSE.
Matthew 21:22 
And all things, whatever you make request for in prayer, having faith, you will get.

With faith, love, and passion anything’s possible.  God rewards you and you will know when it’s just simply your time. 

This craft we are doing today was really easy.  The one thing I loved the most about it is you can mix and match with any color tissue paper.  They give off the best lighting once complete. {{can we say affordable also, that’s always a plus}. After all it’s about using what you have and loving it. There is nothing in this world like crafting. It is the best feeling in the world when you can create something with your bare hands. Nothing like it I tell ya. 
I can’t even go a day with out looking at {{everything}} in my path and thinking what I could do to “jaderbomb” it. 
So grab a coke {or water, or pepsi or whatever} and stay a while.  I don’t mind. Shoot’s bring your friends! 

p.s. These are all the ingredients I used.
p.s. You want to start off by folding your tissue paper in half then cut with your scissors.
p.s. After you cut your tissue paper you want to make a fold about 1″ from the bottom. Do another piece and slip it into the first fold. Just continue until you are happy with the look!
p.s. On the left is what it should look like prior to wrapping around your glassware.  Then you want to take whatever “glass” object you are using and lay it flat on top of the tissue paper.
p.s. Tape down that first piece and start rolling. (hint: if you use two sheets in some spots it will make it look darker)
p.s. The one on the left I simply brushed on a little mod podge then sprinkled Martha’s vintage leaf glitter on it and it officially has been jaderbombed. The one on the right I made it look ombre which is so pretty while lit. I just embellished it with that fancy little spider.
p.s. Look how cute this baby is! Has a great jewel on it’s head! So festive!
Sending you all the vintage leaf glitter to sparkle your house up with,
jaderbomb

Just in case you are not aware of my countdown I am doing right now you can click HERE to read all about it!!!

Make sure you click on the Martha countdown tab on my blog to see the crafts I have already done!
And I will put a link on my website which is www.jaderbomb.com!!!!