Tag Archives: diy

Yes. Today I will be showing you exactly how my brain thinks! It really funny because every single thing I look at  I think to myself, “I wonder how I could spice this up“. Is that normal? Does anyone else out there do this. Let me clarify it’s not every 10th object I do this to. It’s EVERY single thing my eyes land on Jaderbugs. {{For example I am thinking right now how to decorate my laptop}}. SEE.

I hope everyone out there had a great day SUN-day. A friend of mine sent me a HUGE box of “blue” bottles because she knows I collect them. They are SOOO PRETTY! I can’t wait to do fun crafts with them. They were SKYY Vodka bottles. I said “WOW, that was prolly lot’s of “FUN” nights”.

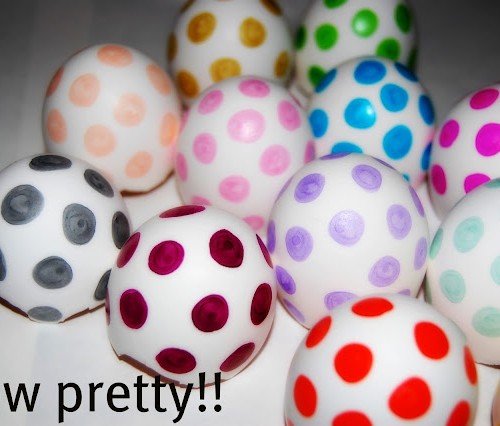
I told you it was ALOT

Let’s get started on the craft we are working on today!

INGREDIENTS

You can get these magnet sheets at Wal-Mart in the craft section. They are maybe 2 bucks! Of course I used Martha Stewart scissors and glitter. It is the BEST!

Start cutting out triangles. You can cut one and make a template if you want. I just eyeballed it because I wanted them to be different sizes!

SEE! Triangles!

After you cut out all of your triangles, peel the paper off of the sticky side and sprinkle glitter all over it!

Who woulda ever “thunk” to decorate a lil ole coffee pot!

Sorry if my “stainless” steel looks a little discolored, this sucker is worked to the BONE!

I think this is the cutest thing ever! Not sure many MEN will love this (haha) good luck ladies!!!!
I hope you enjoyed this craft and don’t forget to come back tomorrow for another fun craft! I will give you a hint {{gold}}!!!

Close your eyes and pretend we are sitting on a porch drinking glittered coffee,

Good day my little jaderbugs~!!!!
It is Sunday and I am super duper excited!!! I have had a great week and I have alot of crafts coming up that you will LOVE LOVE LOVE!!!! Fa Reel!!!
Can you believe WOMAN’S DAY magazine LIKED this craft on Pinterest!!! Check it our here!
This craft is SUPER fun and SURE to catch anyone’s eye!
For the warp, cut 1-inch-wide loops from the bodies of one or two tees removing the hem and stopping at the sleeves.
You’ll need a total of 11 loops (to start off with). For the weft, cut at least 50 loops from the remaining shirts. Save the unused sleeves for the basket project.
-Stretch one warp loop over the hula hoop, as shown above in the second picture. Add and secure a second loop, perpendicular to the first (above, third picture).  Repeat, filling in the spaces, until all 11 loops are in place (above, fourth picture)
-Push together two warp loops at the top of the hula hoop. This creates an odd number (10) of warp spokes in your wheel, which allows the over-under pattern of the weft to alternate with each new row.
-Now that you have 10 loops grab an extra t-shirt loop wrap it around the double spoke and loop it back through itself. Begin weaving the t-shirt loop over and under the warp spokes, forming a tight spiral.
 Treat both parts of each warp spoke as a single unit, weaving over or under the two together. As you work, push the weft material (t-shirt) loop toward the center of the hoop and keep it just snug. If you pull the weft tight, the rug will develop lumps or bends. When you reach the end of the piece of weft, add a new loop by threading it through the end of the first and back through itself.
Keep repeating this process till you are happy with the size.
It might take a little practice until you get comfortable with it.
Remember, in order to get this “cone” shape you will need to make it tight. So when you are weaving over and under your original 10 loops make sure it’s snug as a bug.
It’s really more important that you make it snug when you first start till about halfway. When you are about halfway through it start making it looser and looser. This will form our SHAPE.
When you are done you will ut the warp spokes off the hoop one at a time and then tie them into a know. This will prevent out cover from unraveling. GOOD LUCK!!!

Wanna visit me? Come on!!!

ETSY,PINTEREST,FACBOOK,

GOOGLE+,TWEET ME

Hey my little Jaderbugs!!!
I hope everyone is having a great weekend! This craft is so amazing because it’s practically “free”. Well sorta. If your like me then you ALWAYS “collect” paint samples. You just never know when you will need them {{winky eye}}.
Let’s get started!
There you have it JADERBUGS!
Don’t forget about my giveaway I am doing on my blog right now. It is open until Sunday! Click here to sign up for the FREE Mother’s Day BUD VASE!
Seriously. How cute is this.  I know you can’t see it but when the light is ON it lights up in the coolest way. It’s almost like a “cheap” tiffany lamp{{{heheheheh}}}
Sending you load’s of free time to go get “free” paint samples,

Wanna visit me? Come on!!!
ETSY,PINTEREST,FACBOOK,GOOGLE+,TWEET ME

Hey y’all!! Happy GOOD FRIDAY!!!
I am not quite sure how I am actually typing right now because I ate SO much crawfish today my fingers are FULL….I could just feel my stomach expanding as I slowly swallowed each and every yummy crawfish!

It’s almost Easter time and you know my motto “it’s never too late to get it done”… If you want to spice up some plastic eggs for your Easter table then get this craft done ASAP! Just don’t accidentally EAT one!!! ((haha))

You want to start by getting some PERFECT PLASTIC  eggs. I think these babies are around 2 dollors a bag!

I used four main ingredients for this project.
1.Mod Podge  (I get this from Michael’s Arts and Crafts) I brush the Mod Podge on the egg then sprinkle glitter so it dries on there!
2. Martha Stewart Glitter  (Just incase you have NEVER used this glitter now is the time! You will fall in love)
3.  Martha Stewart glitter glue set
4.  Martha Stewart brushes

These nuggets are amazing!

 I tell ya, these look so good I just want to take a bite out of one!

I hope everyone is STILL enjoying this wonderful FRIDAY night! Enjoy your “EASTER” weekend and come back tomorrow for MORE EASTER fun!

Giving you a BIG hug through the computer,

This post is brought to you Plaid’s Martha Stewart line of paint and stencils. I received product for this post. All opinions expressed are 100% mine. You can check out Plaid’s full Martha Stewart product line here

Easter Egg Banner Tutorial

Howdy my little JaderBugs~!! How are ya! Sorry I been kinda out lately but I had a death in my family and didn’t really have time to blog much.  But I am back and running!!!

  I didn’t want to do the typical egg craft that I see all over so here goes MY EGG CRAFT!!! I think it’s absolutely precious because it’s very crisp and clean looking but has the spunk that I adore.  I used my favorite markers of ALL time, my BIC markers.  Check out my post I put up a while back when BIC sponsored me for a craft party!   So exciting I tell ya~
Also, if you have not seen my {bloopers} video check it out, it’s super funny!!!
INGREDIENTS:

I hope you enjoyed this fun “egg” tutorial. Many more to come now that things are starting to get back to normal.

I love ya, mean it!

This post is brought to you by BIC Mark It’s. I received product for this post. All opinions expressed are 100% mine. You can check out BICS full line of products here:

BIC-MARKIT


DIY: Kate Spade inspired CONFETTI CANVAS

So the other day I started looking online for a new iphone case. I wanted a really bright, shiny gold one. You know, like the real “gaudy” gold!!! {{teehee}}

In the process I ran across this:

 I fell in LOVE right away. While staring off into space deciding if I wanted this one  or if I wanted a COMPLETE gold one I noticed a big sheet of gold shiny paper just sitting there. I totally forgot I bought it and I though it would be cool to make some art using the gold paper. How cool would it be to have a BIG oversized Kate Spade Iphone case!! Wanna see what I decided to do!

Is it not so pretty!! Let’s make it now!

Get canvases. I got mine from Hobby Lobby.

This shiny sheet of gold paper is from Hobby Lobby. I am not sure of the name but it’s where are the project paper is. I think it was around 5 bucks for a sheet but the sheet is large!!!!

I used my Martha Stewart punches and you can get them at Michael’s Art’s and Crafts.

1-inch Craft Punch
Pointed Circle 1in Punch

Get your hot glue gun and start glueing them down where you like them. I used Martha’s dual temperature glue gun.

Jaderbugs! This is what it will look like. I had a blast doing this.. If only I could find a gold confetti bed spread!
Happy Mardi Gras!!!
Sending you gold confetti and money to buy everything Kate Spade,