Tag Archives: confetti

Don’t let fear of change cause you to hesitate. Toss someconfetti in the air & CELEBRATE! Good things are coming!

Everyday should be a CELEBRATION, a Confetti Bottle Celebration!  Who cares what you celebrate as long as you are making memories and having a freaking blast! This year I am making it the best year ever! You know how that is, you have a bad year and then you make it a GOAL to make the next year fabulous! Let’s face it, we have ton’s of holidays and birthdays to get happy about and I have the best diy project for you today.

I won’t beat around the bush because that’s not who I am. Sometimes you have to do something “last minute” as a gift and why not make it a FUN bottle of wine! I am totally into making someone smile and feel super duper good! This project is great for kids, trust me… I asked my inner child and she LOVED it! You only need a few materials to succeed at this craft! Let’s get started gang…

You will need:
♥ Wine Bottle
Confetti (any kind)
Mod Podge
Craft Brush

P.S. Not sure of different ways to decorate Easter eggs yet? Check these out!

confetti tutorial

Now, if you have never dressed up a wine bottle like this no worries because it’s kinda like coloring for the first time. Somehow once you get started it will all seem like something you have done in a past lift, hahaha!

Step 1: Coat a section of the bottle with Mod Podge
Step 2: Pat a handful of Confetti on that section
Step 3: Move on to another section

Easy HUH!

You might have to do these steps a few times because some of the confetti will fall off but once you start adding multiple layers it will come to LIFE!

I am totally in LOVE with this bottle. I got the confetti that had EVERY STINKING HOLIDAY in it. You know what that mean??? That I can do 10 of these babies and have them laying around for that last minute gift grab.

fun confetti crafts

When you have it coated with confetti enough, brush on one more layer of Mod Podge directly on top of the confetti. This will seal it all together.

To cap it off I put a cupcake liner on the top of the bottle and tied it with some silk ribbon.

new years bottle diy

new years bottleNow if you get cray cray and decide to drink strait out of the bottle be careful not to eat any confetti!

Happy Celebrating! HUGE HUGS from my computer to yours! xoxo, Jade

See you in the next post! Visit me on FacebookTwitter,Pinterest, or Instagram! Make sure to follow Ceaux Ceaux Facebook and blog

Howdy HOO! It’s Confetti Monday and I am totally feeling it! I’m not sure if it’s the weather-even though the weather is beautiful today, it’s been so up and down I never know what I will be waking up to! I will say seeing all of my rad friends tackling that freaking blizzard in NY I really do not have much to complain about over her in Louisiana.

My Friend Garrison made me laugh this morning when she posted this on FB…

→→→So my car windows are frozen and it took quite a gentle hand to open the door. Then the car would not start. Finally got it started and still can’t shut the door cuz the window may shatter. So I’m dressed for work, sitting in a frozen car with the seat warmer on freaking out cuz I am late… this is a first.

On the bright side-I cleaned up my studio. It was much needed, trust me! I should of taken before and after photos because it was a HOT MESS! Michaels Craft Store had faith that I could tidy up and wanted me to show you the space I create in. Click on this link to see my FULL studio tour. Come see all of my crafts I created for Michaels as one of their Michaels Makers!

Feel free to share in the comments ways you STAY organized because I am always looking for new ways!!leather polka dot pillowI couldn’t wait to share with you my latest DIY tutorial that I created for the “I Love to Create Blog” – It’s a ball of fun! Plus, you won’t believe what I used to make the faux confetti marks!
a

c

CLICK HERE TO SEE FULL TUTORIAL
Enjoy and have a GREAT weekend!HASHTAG LOGO

Don’t forget to connect on social media! Make sure to use use the hashtag #JADERBOMB on Instagram or Twitter or Facebook so I can keep track of all your awesome creations! HAVE A GLITTERY DAY! ♥, Jade

DIY-PHOTO-CREDIT-

Photography: Jaderbomb// DIY tutorial by: Jaderbomb // Model: Kelly – Friend // Craft Supplies: Tulip

Howdy Hoo Jaderbugs! It’s one of those days. I am sitting here not sure “what” to do when I have “all” of the time in the world. Well not really all of the time in the world but let’s face it…when there is a major Hurricane going on and you can’t leave your house for a couple of days it kinda puts you in a cray cray mood. I apologize if at ANY point I don’t make any sense.  I really have not made anything today so I figured it would be a great time to go back and take a look at some of my  FALL crafts that I did last year. I always enjoy doing this because sometimes I forget what I have done. It’s funny because I have changed so much from ONE year ago. From my techniques, pictures, editing, settings and tons of other things. I remember when I did ALL of these crafts. It was in the MIDDLE of my 100 days of Martha countdown. Maybe that is why I didn’t have the “best” pictures like I do now. I was stuck in my studio crafting like a FOOL late at night with NO natural light. But all together you can still get the idea of the craft! I hope you have fun with these and get ton’s of inspiration. Stay tuned later on for a Halloween throwback post! That one will be FUN.
BOTTOM-LINE.
On the bright side. We still have electricity. That my dear is a HUGE +.

Let’s all take a trip down FALL lane.

I had so much fun doing this craft. I think it’s perfect for the fall holidays. It has a soft glow to it when the light is on and the pretty green makes it feel “fall-ish”.
Click HERE to see the full tutorial.

One thing that I like to share on my blog is ways to SAVE moolah! Yeah, you could absolutely go out and buy tons of glittered candles, or you can make your own for half of the price. On the bright side. You can pick out your own glitter colors.

Click HERE to see the full tutorial.

I know this looks a little “Halloween-ish” but if you visually take off the spider we can throw it in the FALL category. You can use any color tissue paper and it’s actually great for any occasion.

Click HERE to see the full tutorial.

I remember doing these and thinking to myself how amazing they were. When I think of Fall I think of butterflies. I imagine them zooming all around the pretty fall flowers. This craft is a hit for adults and children. You can dress up a wall with these, put them on a gift box, hang them from fishing string or just glue them onto a picture frame.

 Click HERE to see the full tutorial.

Yes! You too can make homemade confetti using your Martha Stewart punches. I think this year I will make a pile of different punches. You could even put these in little bags for your sock drawer, hang them in your car or give them as a gift! Anyone will love these.

Click HERE for the full tutorial.

Last but not least. When I think of FALL I think of these smells: pumpkins, cinnamon, harvest, leaves and cloves. What better way to enhance the air you breathe! You can even create a design on the pumpkin with the cloves!

Click HERE for the full tutorial.

Click here to order the materials I used for the crafts:

Martha Stewart Crafts Knife
Martha Stewart Crafts Paper
Martha Stewart Glitter
Martha Stewart craft punch


I hope you had fun looking back on some cool crafts I did last year! Make sure and come back later for your  FREE FLEUR DE LIS PRINTABLE!
Hurricane Isaac is OVER and Jaderbomb is back.

See ya in the next post,


Happy CONFETTI DAY. Wait. It’s just Sunday (minus the sun here in Louisiana). I wonder if there is an actual confetti day…
That would be UH-MAZING. Just think how cool it would be if there was edible confetti, besides the kind you put on your cakes or cupcakes {{even tho that kind is YUMMYLICIOUS}}

The other day I found a bag of glycerin cubes in my studio. Notice I said “FOUND”. Typically when you “FIND” something that means it always existed but you just have too much S$*# you don’t  know it exists. That would be me. Remember, I told you years ago I am an organized hoarder. It was perfectly placed in it’s location and NOT hidden. Just in a cabinet I somehow forgot was there. Who forget’s a cabinet? ME. (insert a big TOO MUCH TO DO FACE)

Let’s start making some SOAP jaderbugs

INGREDIENTS:

This soap was so fun to make, lil one even had a blast doing it! I bought my bag of glycerin soap from HObby Lobby. If you are not familiar with the glycerin I am talking about check it out here. You could prolly buy it at ANY craft store.  The extra bags of goodies are optional. Just depends if you want that in your soap. The orange exfolient helps gets dead skin cells or your precious skin, I LOVE THIS STUFF!

If you notice I have colored cubes of glycerin in the ingredients picture. All you have to do is melt some cubes, add whatever coloring you want to it (by the way there is soap dye and it’s super cheap), pour it in a mold, let it harden up (about a few hours), pop it out of mold and cut into little cubes. THAT’S ALL! P.S. all of the ingredients are from Hobby Lobby!

This is what the bag looks like. It’s a 5lb bag for 19.99.  You can actually order it online if you don’t have this store near you! If you decide to order some you can use their 40% off coupon right now! That means you will pay 11.94 + tax for this bag!
WHAT A DEAL!

Put some colored cubes into a glass container, add whatever oils you want to it and heat it up in the microwave. I like to do it for 30 second’s then stir. If you don’t have TON’S of cubes then that will be enough time. If it’s not all melted just pop it in for 30 more seconds! VOILA!

Excuse my redonkulously dirty piece of glass. I promise, this baby is only used to make soap (thank goodness)…
Pour your first color into your mold. Let it sit for about 7 minutes in the freezer.

Before I popped mine in the freezer I added dried lavender on the top of hot soap. I love texture in my soap and this my friend is a “good” texture!

Right before you take your first color out of the freezer start melting your next. Remember, you don’t want your first layer to be completely frozen! You want it to be a little oozy. Pour your second color right on the top! HOW PRETTY ARE THESE COLORS!!!!!! Don’t forget to add your scent to each layer!

Right after you pour your second color, add a lot of different colored cubes to the top. They will melt a little where they are touching the hot glycerin but what’s left on top will stay just like this! I like to put TON’S of cubes on top! If you notice I left some long to change the texture of the “confetti” look! Don’t forget to pop it into freezer after this step!

Remember how I told you when you pour your second color to make sure your first color was NOT completely dry? This is why! It gives it a tie dye effect!

I hope you are about to get in your car and get your ingredients to make confetti soap! Be creative! Use the colors you LOVE the most!

Don’t forget to get your 40% off coupon HERE! You can print it out if you don’t want to order online!!! It’s good till July 21st!

Until next time Jaderbugs,
Make it a DIY kinda day!

DIY: Kate Spade inspired CONFETTI CANVAS

So the other day I started looking online for a new iphone case. I wanted a really bright, shiny gold one. You know, like the real “gaudy” gold!!! {{teehee}}

In the process I ran across this:

 I fell in LOVE right away. While staring off into space deciding if I wanted this one  or if I wanted a COMPLETE gold one I noticed a big sheet of gold shiny paper just sitting there. I totally forgot I bought it and I though it would be cool to make some art using the gold paper. How cool would it be to have a BIG oversized Kate Spade Iphone case!! Wanna see what I decided to do!

Is it not so pretty!! Let’s make it now!

Get canvases. I got mine from Hobby Lobby.

This shiny sheet of gold paper is from Hobby Lobby. I am not sure of the name but it’s where are the project paper is. I think it was around 5 bucks for a sheet but the sheet is large!!!!

I used my Martha Stewart punches and you can get them at Michael’s Art’s and Crafts.

1-inch Craft Punch
Pointed Circle 1in Punch

Get your hot glue gun and start glueing them down where you like them. I used Martha’s dual temperature glue gun.

Jaderbugs! This is what it will look like. I had a blast doing this.. If only I could find a gold confetti bed spread!
Happy Mardi Gras!!!
Sending you gold confetti and money to buy everything Kate Spade,

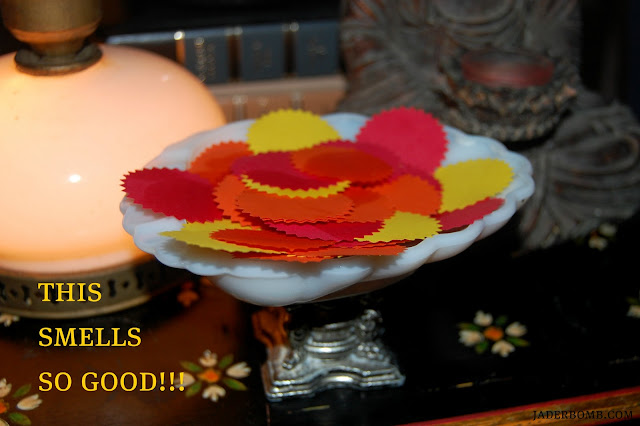
Homemade Scented Confetti

Happy Saturday my little Jaderbugs! I hope your weekend is going GREAT! I have lots of crafting to do  ALL day Sunday because I have missed a couple of days and I need to catch up! I know all of you forgive me though {{praying hands}}.  The last couple of days have been “surreal”and BUSY! SO much to do and SO little time. Let me know if there is a special craft you would like to see me do! You can write a comment below ANY of my posts’ to tell me! 


This is one of the gifts I got in the mail!!! {{thanks Martha}}
 PUNCH ALL OVER THE PAGE
I can’t even explain how awesome this tool is! Let me just tell you the best thing about it. On all four corners they have little magnets. Why is this awesome? WELLLL because you don’t have to “guess” where to place the top! The awesome fantastic magnet’s do all the work! AND, you can use the WHOLE sheet of paper not just the edges! 


~For best results press top of punch evenly with both hands. 
~Align the flat corner of base to flat corner of top to punch.  The magnets will connect.  
~Use this punch in the center, on the edge, or anywhere on the page! Punch multiple times in a row or grid to achieve a patterned effect.  


Just in case you are not aware of my countdown I am doing right now you can click HERE to read all about it!!!

Make sure you click on the Martha countdown tab on my blog to see the crafts I have already done!
And I will put a link on my website which is www.jaderbomb.com!!!!

AND IF YOU DECIDE TO DO ANY OF THE CRAFTS, SHOOT ME AN EMAIL AND I WILL ATTACH  IT TO THE POST WITH A LINK THAT GOES STRAIT TO YOUR BLOG! OR IF YOU DON’T HAVE A BLOG JUST EMAIL IT TO ME AND I WILL STILL PUT IT UP!!!!
JADE@JADERBOMB.COM


Don’t forget to tune into HSN’S 24-hour Craft Day!!!! It is Monday, 9/26/2011 and it’s
 full of MARTHA STEWART’S latest crafting tools, paint, and many more exciting new 
products!  
Get a sneak peak NOW!!!!

Click HERE