
Who’s ready to make a Recycled Planter! Yo Jaderbugs it’s been a hot minute since I posted something here but like always sometimes life takes over and our priorities get shifted a little. I am sure some of you can relate to that. I have some exciting projects I am starting this week and I can’t wait to share them with you! How have you been???? How’s life treating ya?!?!
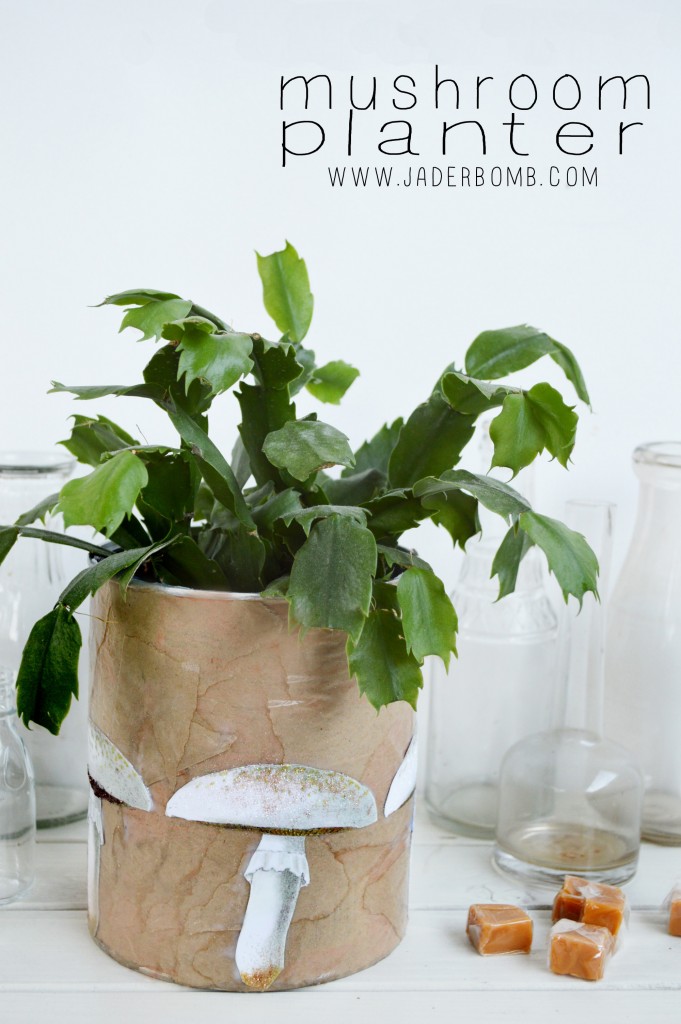
I am excited to show you this Mushroom Planter I did a few years ago for the Graphics Fairy. It’s really easy and practically anyone can do this project. Now if you like planters then you have to see this one I made with Cupcake Liners!
I wonder if everyone out there eats mushrooms…I personally never could get my mouth to adjust to the taste and texture but then again I used to hate pickles and somehow the universe changed my tastebuds and now I can’t eat enough of them. No, I am not preggers, haha! We have this little bistro in the lobby of our building and usually everyday around 3 I walk over to get my daily pickle from them. I prolly should just go buy a big gallon bucket of them and keep in the fridge at the studio but for some reason I think they taste better from them. Plus I like supporting the bistro so a pickle here a pickle there adds up, hehe!
Now for this project you can do so many things with it. You can put a plant in it like I did or use the tub to hold anything your heart desires. It’s practically free to make (((sorta))) so in the end you an make tons of them! I don’t know about you but I am ready to started!

Empty Tub | Glitter | Brown Paper Bag | Mod Podge | Craft Brush | Scissors | Mushroom Printable
YO! You can seriously order all of the products I used in ONE hot spot by clicking on the links (above)….Yeppers these are affiliate links so by shopping from here you helping a sista out! 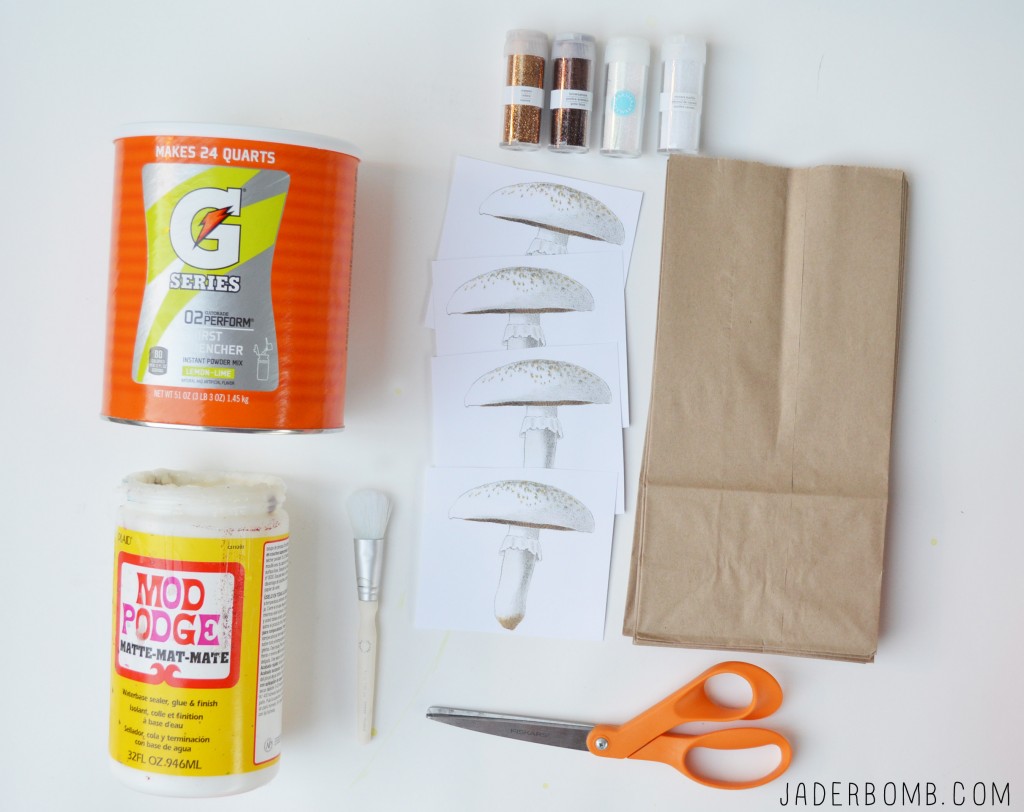
The first thing you will do is download this rad mushroom printable. Now look, if you are not into mushrooms you can find any image on this site that makes your heart happy! I simply like the look of mushrooms, just not in my mouth!
Once you print it out on durable paper (like card stock) carefully cut it out. You can use any scissors that you have but craft scissors work the best.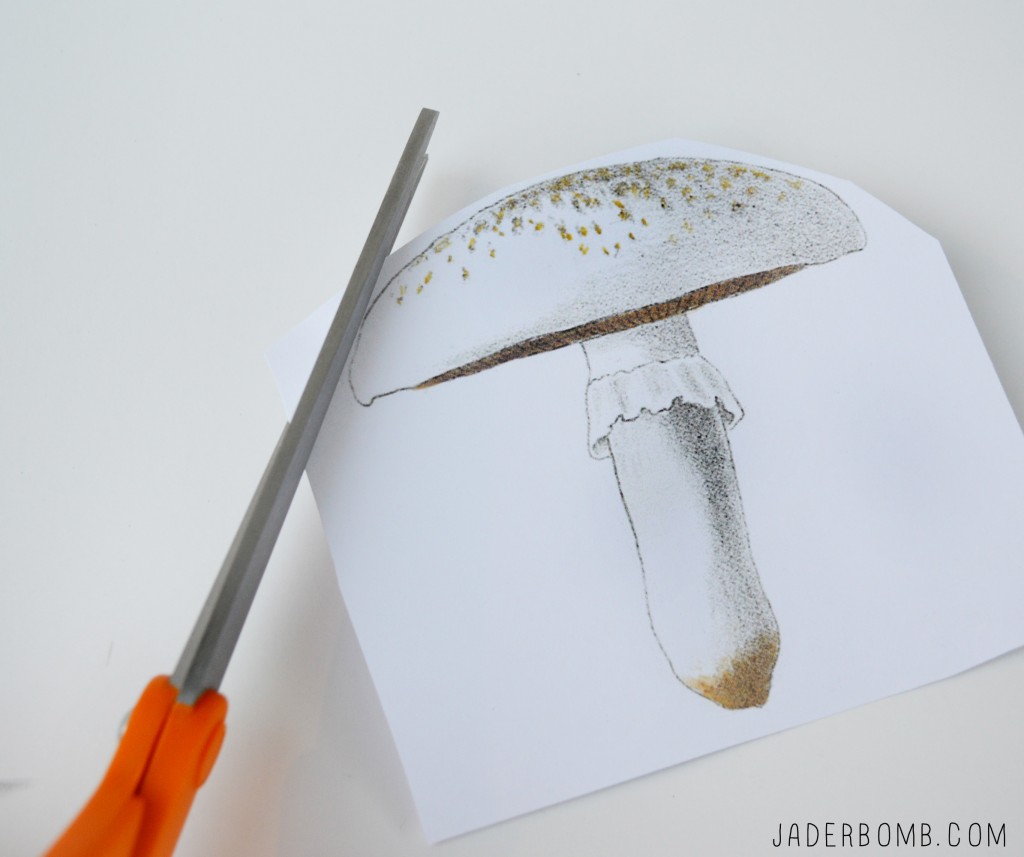
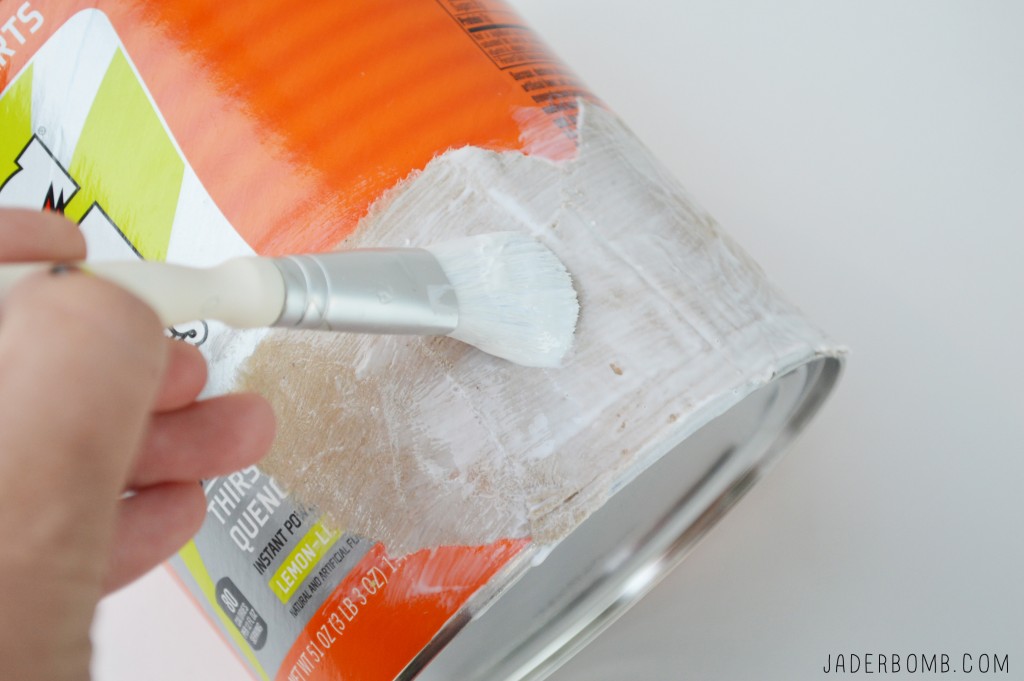
Next thing you will do is tear pieces of brown paper bags with your hands. You do not want to cut these pieces with scissors because we want the edges to look “torn”. Got it, great! 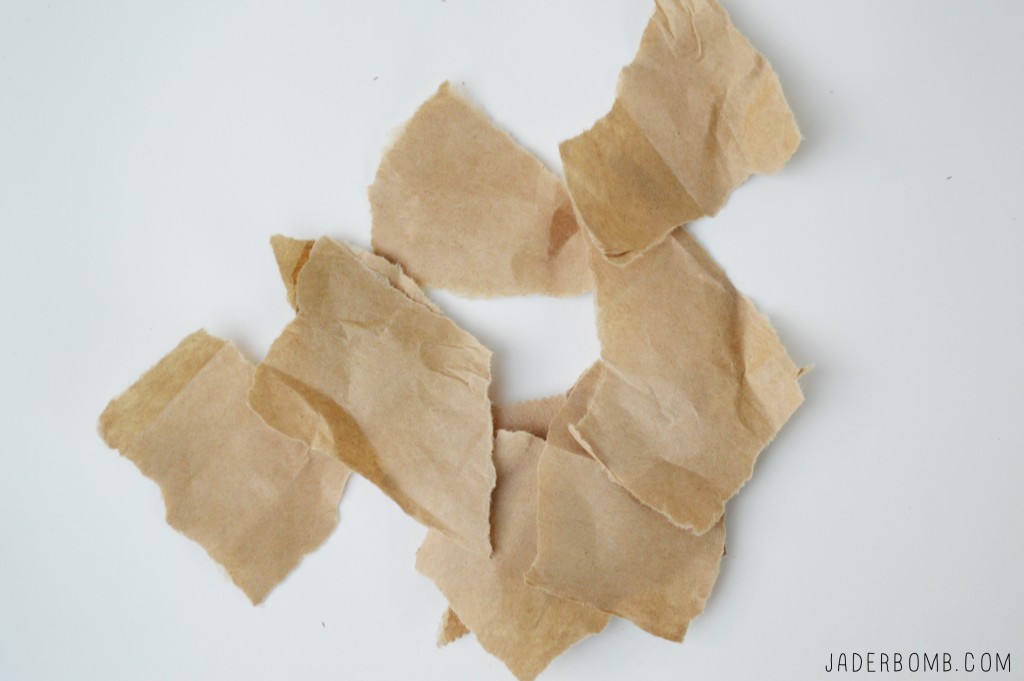
Once you have way too many pieces of brown torn paper bag pieces it’s time to glue these babies onto our hideous tub. Now, I used a gatorade tub but by all means you can use anything you want! If you plan on putting a plant in it just make sure the inside is durable and that you can puncture a few holes on the bottom so the water can drain.
Dip that brush in the Mod Podge, brush some on the tub, put paper bag tear out on top of glue then seal with another coat of Mod Podge. Wham Bam that’s it!
If you have never used Mod Podge I’ll tell you that it will look super white when applying initially. Don’t you worry little ones this stuff will dry clear and win over your heart in 20 minutes. Yep, this little container of white glue is majorly addicting. There is your warning. Bam.
When you are finished with your brown paper bag layer then it’s time to glue our Mushroom onto the container. You will use the same process as the paper bags. Don’t forget to sprinkle the glitter of your choice onto the mushroom while the glue is still wet. Heller, we always need some sparkle in our lives. I used an iridescent glitter so the colors will change depending on the angle you are looking.
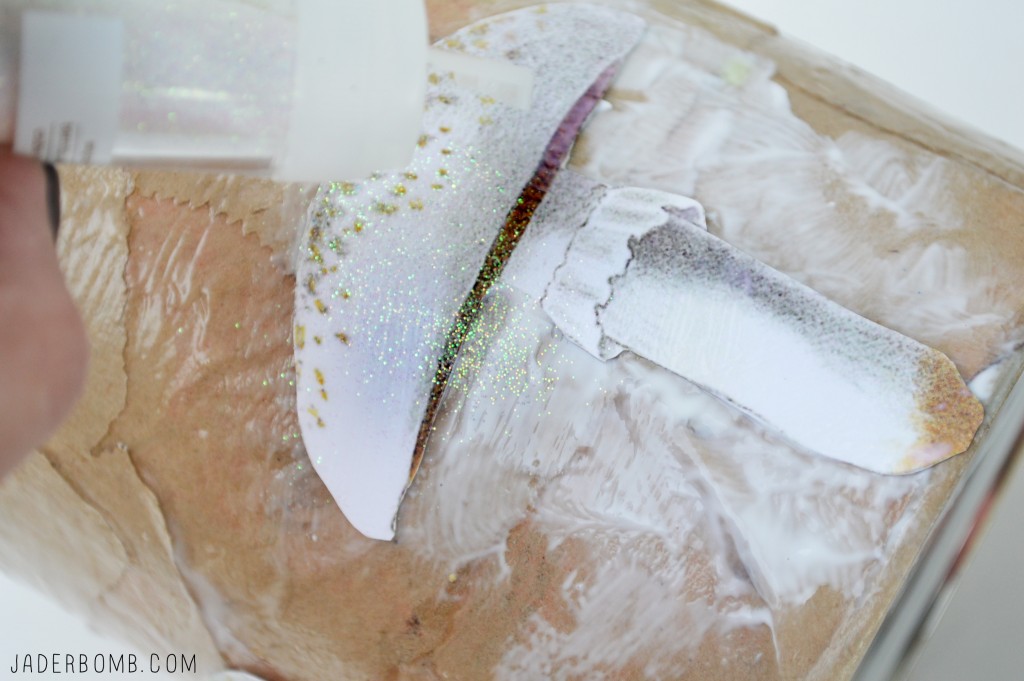
Let this ball of beauty sit for a few hours and then you are ready to stuff it with whatever you want. Now if you don’t want some orange showing through then just add more brown paper bags but I kinda like the hint of color coming through in some spots. Another option is painting the tub the color of your choice before applying the paper bag.
I planted a Christmas Cactus in mine and I LOVE IT! This also makes a great gift to give someone, right! Thanks for hanging out with me on this wonderful Monday morning! See ya on the flip side Jaderbugs! 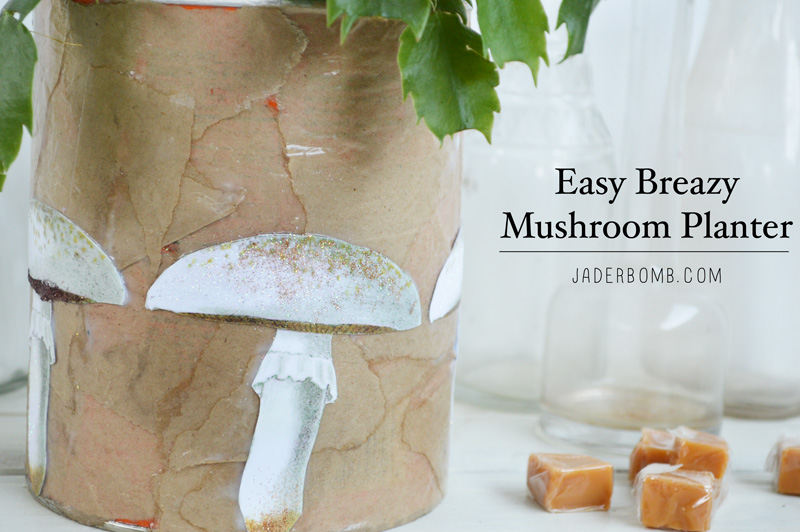
*You can connect with me on all my social media sites!
PINTEREST | FACEBOOK | GOOGLE | TWITTER | INSTAGRAM

*Check out my 20 FREE printable Calendars for 2016
*I started a new painting and I know you will LOVE it
*Learn how to paint your own mugs at HOME


